USER MANUAL
Before using, please read the operating instructions carefully to
ensure proper application and achieve satisfactory results.
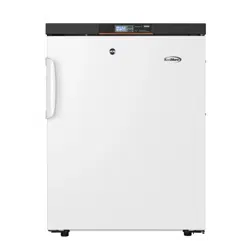
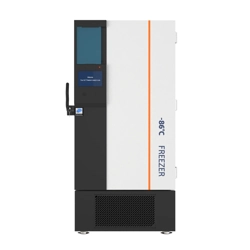
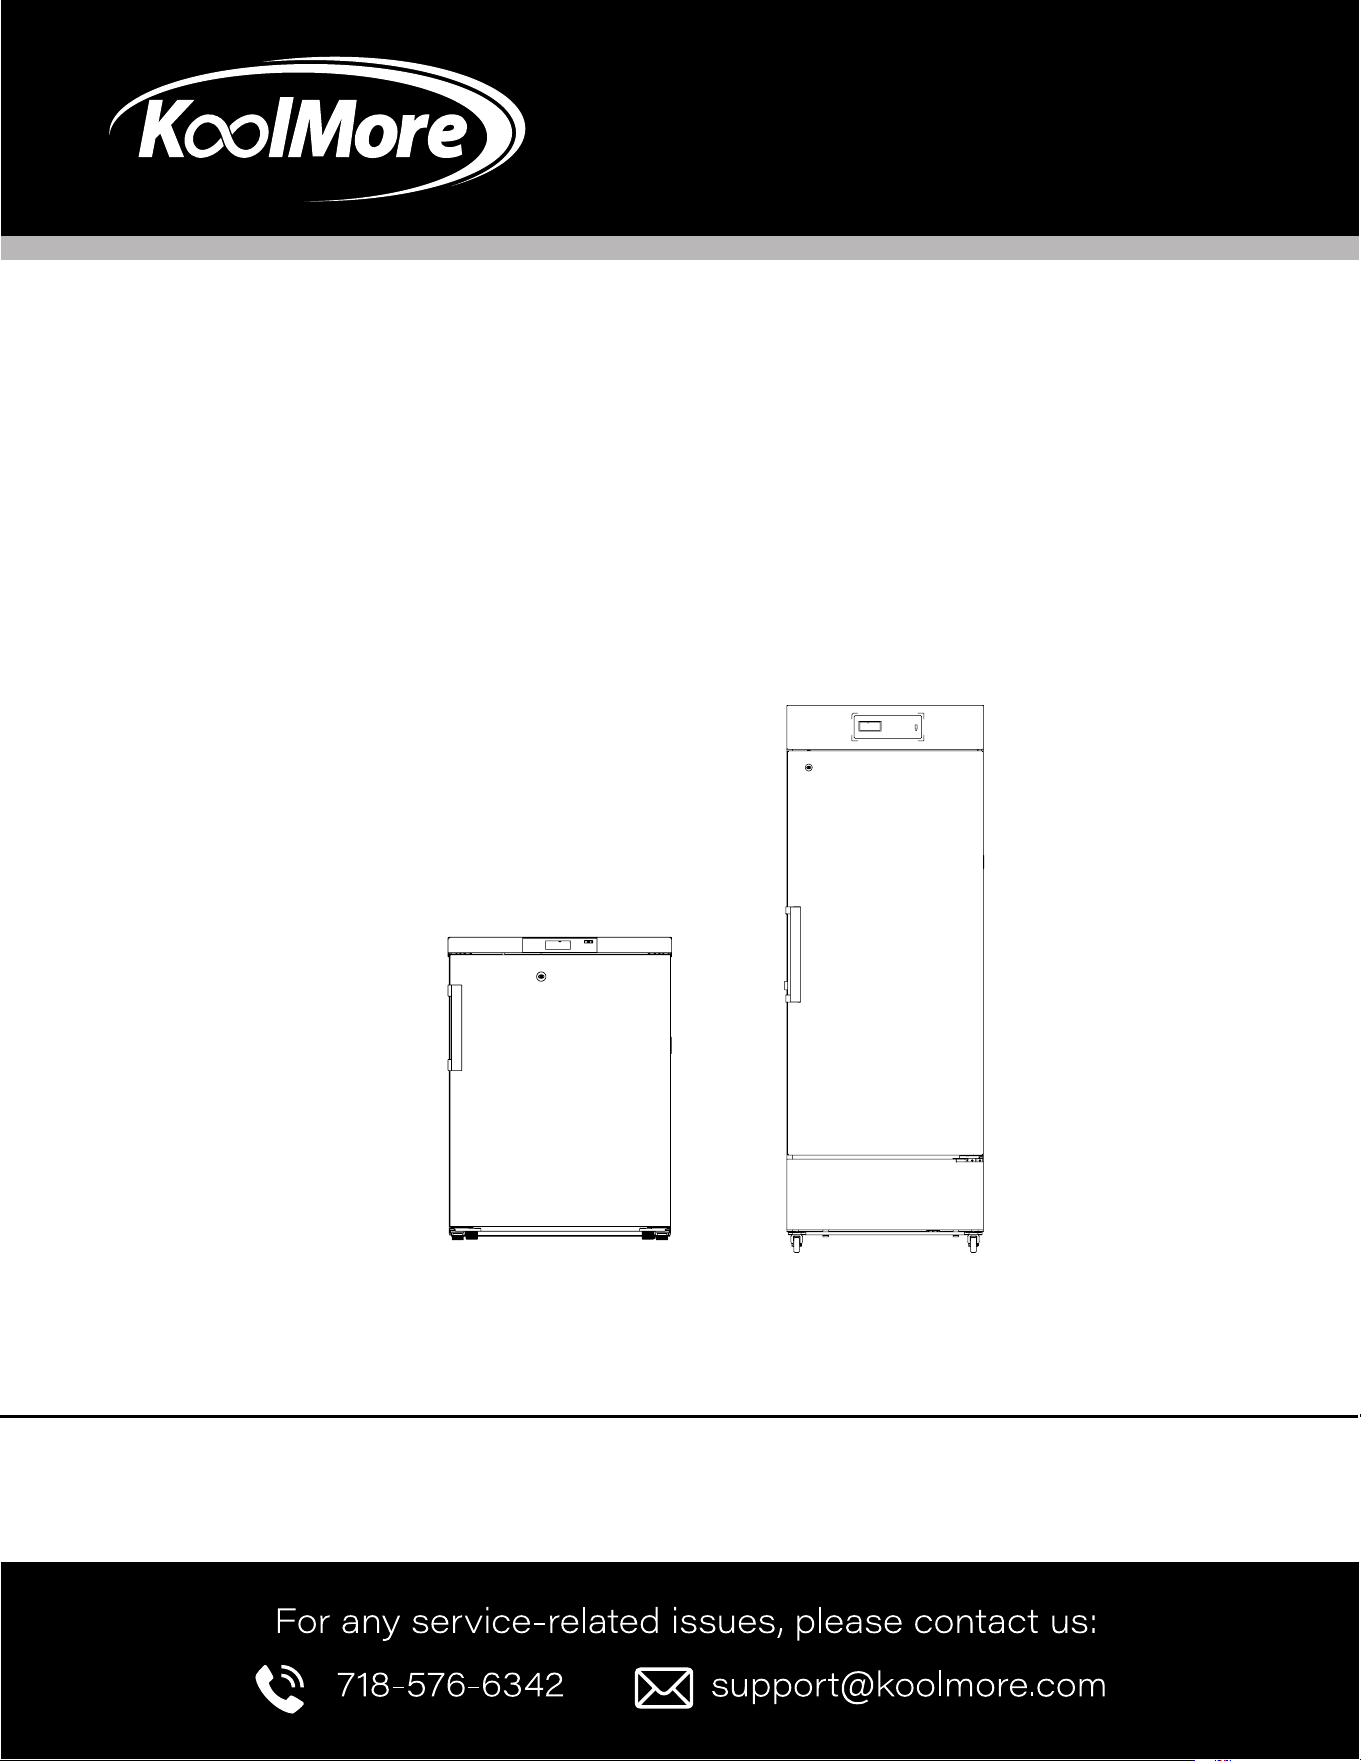
KoolMore Medical Freezer
Models: KM-PHF-4C | KM-PHF-10C
MEDICAL FREEZER
23.62
24.02
32.09
46.46
27.56
27.71
75.59
50.79

Stay informed with the latest information
for your KoolMore Appliance.
If you need any assistance or have questions, our customer
support team is here to help.

3
Contents
Product Features ........................................................... 4
Safety ........................................................................... 5
Installation .................................................................... 8
Operation .................................................................... 11
Maintenance ............................................................ 17
Troubleshooting ......................................................... 19
Warranty ..................................................................... 20

4
This product is mainly intended to keep drugs, vaccines, and reagents. It is applicable to hospitals, ep-
idemic prevention stations, universities, scientic research institutes, and electronic chemical industry
enterprise labs.
Product Functions
Accurate Temperature Control | Data Traceability
• Computer temperature control, with a display accuracy of 0.1°C
• The temperature in the biomedical freezer is uniform and controllable, the temperature range is
adjustable to -13°F / -40°F, and the temperature control is accurate.
• Standard USB port and traceable temperature data; query and save temperature data at any time
Ecient Refrigeration | Effective Thermal Insulation
• High quality compressor and optimized refrigeration system provide strong refrigeration capacity,
safety, and reliability
• High-performance thermal insulation layer has the good thermal insulation effect
• Multi-layer 3D seal design effectively reduces refrigerating capacity loss and frosting
Multiple Alarms | Safety and Stability
• Perfect acoustic and optical alarm function, allowing high- and low-temperature alarms, power off
alarm, sensor fault alarm, etc., with alarm values adjustable on demand
• Design of safety door lock improves the safety level of sample management
User-Friendly Design
It can display the temperature inside the biomedical freezer and ambient temperature, and allows
setting the high and low temperature alarm values and the biomedical freezer temperature highs and
lows as required, with the function of fault inquiry and mute
Remote alarm function ensures real-time controllability and safe and stable operation of the equip-
ment.
Product Features

5
• Please use a power socket with a grounding wire to prevent electric shock.
• If the power socket is not grounded, the grounding wire must be installed by a professional electrician.
• This biomedical freezer must be rmly placed on a solid, at surface, and proper care must be taken to prevent it from
tipping over.
• If the oor is not level or the biomedical freezer is placed in an improper location, it may tip over and cause injury.
• If the power cord needs to be extended, the cross-sectional area of the extension cord should be at least 14 AWG, and
the length should not exceed 10 feet. Otherwise, it may cause a re or electric shock.
• Only professional technicians or maintenance personnel for after-sales support can disassemble and assemble the
biomedical freezer. Otherwise, it may cause electric shock, leading to re or injury.
• Please use the special power supply indicated on the nameplate of the biomedical freezer; otherwise, it may cause a
re or electric shock.
• If the applied voltage is lower than 103V or higher than 126V, an automatic voltage stabilizer of more than 4000W
suitable for motor load needs to be installed for assistance.
• The power cord of this biomedical freezer is equipped with a three-prong (grounded) plug to match a standard three-
prong (grounded) outlet of 10A. Do not remove the grounding pin of the power cord under any circumstances. Make
sure that the power plug and the outlet are connected rmly and reliably; otherwise, it may cause a re.
• When the plug is removed from the power socket, it should be held tightly, and the wire of the plug shall not be pulled.
If the wire is pulled, electric shock or re due to a short circuit may be caused.
• If the biomedical freezer is not operating properly, unplug the power plug. Continued operation under abnormal condi-
tions may cause electric shock or re.
• Before any repair or maintenance of the biomedical freezer, always disconnect the biomedical freezer from the power
supply to prevent electric shocks or personal injuries.
• Make sure that the drugs or suspended particles inside and around the biomedical freezer will not be inhaled during
repairs and maintenance, as it may cause harm to human health.
• When storing toxic, harmful, or radioactive substances, please use the biomedical freezer in a safe area. Improper use
may cause harm to health or the environment.
• Disconnect the power plug when the biomedical freezer is not in use for a long period, so as to prevent electric shock,
electric leakage, or re due to the deterioration of the power cord.
• If the biomedical freezer is to be stored unused in an unsupervised area for a long period, ensure that children do not
have access to the biomedical freezer. The door to the biomedical freezer shall be accomplished by the appropriate
personnel. Doors shall be removed to prevent accidents such as suffocation.
• Connect to remote alarm port and USB port: SELV 30Vdc 2A Max.
• The equipment power disconnection is a plug. Place the equipment in a location where it is easy to disconnect the
power.
• Never store corrosive substances such as acids or alkalis in the biomedical freezer. Otherwise, these substances may
cause damage to internal components or electrical parts of the biomedical freezer.
• Never store ammable, explosive, or volatile substances in the biomedical freezer or use ammable sprays near the
biomedical freezer; otherwise, it may cause an explosion or re.
• Do not leave the plastic packing bags in a place where they can be reached by small children as this may result in
suffocation accidents.
Safety

6
• Do not climb on the biomedical freezer or put any objects on the biomedical freezer; otherwise, the biomedical freezer
may fall and cause injuries or damage to the biomedical freezer.
• Do not use the biomedical freezer outdoors. Exposure to rain may cause an electric leakage or electric shock.
• Do not place the biomedical freezer in a humid location or a place where the biomedical freezer is likely to be
splashed with water. Otherwise, electric leakage or electric shock will be caused due to degradation of insulation.
• Do not pour water directly onto the biomedical freezer; otherwise, it may cause an electric shock or a short circuit.
• Never disassemble, repair, or modify the biomedical freezer yourself. Otherwise, it may cause re or personal injury
due to improper operation.
• Do not connect the grounding wire to a gas pipe, power supply pipe, telephone line, or lightning rod when grounding
the biomedical freezer. The above grounding may cause electric shock or other hazards.
• Do not touch any electrical parts such as the power plug or operate any switch with a wet hand; otherwise, it may
cause an electric shock.
• Do not put water containers or heavy objects on the biomedical freezer. Falling objects may cause personal injuries,
and spilled water may cause degradation of insulation, resulting in an electric leakage or electric shock.
• Do not insert metal objects such as iron nails and wires into any vent, gap, or air outlet of the biomedical freezer. This
may cause electric shocks or injuries by accidental contact of these objects with moving parts.
• It is not allowed to tie, drag, pull, wind, or bind the power cord or damage it when moving the plug. Damaged power
cords or plugs may cause re or electric shock.
• Using a power cord with a loose plug is not allowed, because it may cause re or electric shock.
• It is not allowed to put glass bottles or canned items in the biomedical freezer, which may be frozen and cracked,
causing injury to personnel.
• Keep the biomedical freezer clear of obstructions around it to ensure smooth ventilation.
• When it needs to be restarted after being unplugged or after a power interruption, check the settings of the biomedical
freezer. Changes in settings may defeat the stored items.
• If the biomedical freezer is unplugged or the power to the biomedical freezer is interrupted, do not restart the biomedi-
cal freezer for at least 5 minutes to avoid damage to the compressor or system.
• The lter screen should be checked in time and cleaned. Dust-laden lter screens can cause a temperature rise or
failure in the biomedical freezer.
• If the power plug has dust, it needs to be cleaned in time. Improper connection or a plug lled with dust may cause
heating or ignition.
• After the power is cut off or the power switch is off, the setpoint should be checked when the power switch is restart-
ed; otherwise, the stored items may be damaged due to setting changes.
• Wear gloves during maintenance to avoid personal injuries caused by touching sharp edges or corners.
• The stored items should not be contacted directly by hand. Direct contact with the frozen items or the inner wall of the
biomedical freezer may cause frostbite.
• Hold the handle to close the chamber door so that the door does not pinch ngers.
• Tilt the biomedical freezer for 30° when handling or moving it.
• Be careful not to trip over the biomedical freezer when handling it, to prevent damage to the biomedical freezer or
personal injuries.
• Do not use door handles to lift or carry equipment to prevent damage to the biomedical freezer or personal injuries.
• Do not damage the refrigeration circuit.
• Do not use electrical appliances inside the storage compartment of the biomedical freezer unless they are of the type
recommended by the manufacturer.
• If the equipment is used in a manner not specied by the manufacturer, the protection provided by the equipment may
be impaired.

7
Precautions for Use
• When the biomedical freezer is running, the left and right side walls of the biomedical freezer may
be heated, which is not a fault. In order to prevent condensation around the biomedical freezer
housing, the space is lled.
• Before putting items into the equipment, conrm that the temperature in the storage chamber has
reached the set temperature, and then load items in batches. Do not put in items for more than
1/3 of the volume of the chamber at a time to prevent its temperature from rising too much.
• The equipment temperature display is the temperature at the temperature sensor in the storage
chamber. When the equipment is initially running, the displayed temperature is somewhat different
from the actual temperature at the center of the equipment. However, as the equipment operates
to a stable state, the displayed temperature will gradually approach the actual temperature.
• The equipment chamber is designed with a testing hole so that the items inside the chamber can
be led out for testing. After the testing line is pulled out, it is necessary to plug the testing hole
again with thermal insulation material; otherwise, the temperature inside the biomedical freezer
may not reach the set temperature and cause condensation around the outside of the hole (appli-
cable to biomedical freezers with testing holes).
• Please use diluted neutral cleaner to clean the equipment. Do not use brushes, acid, gasoline,
soap powder, polish, or hot water to clean this equipment, otherwise it may damage the painted
surface and plastic rubber parts. Special care must be taken not to use volatile solvents such as
gasoline to wipe plastic and rubber parts.
• When the biomedical freezer is not in use for a long period, cut off the power supply and turn off
the battery switch.
• If the biomedical freezer is not started again for a long time, a low battery level may occur. After
the battery switch is placed at "ON", the battery can be charged, and the biomedical freezer can
run continuously for about one week to charge the battery (applicable to models with batteries).
• Please minimize the times of opening the door during each access to the items, so as not to
cause great uctuations in the temperature and humidity in the chamber.
• After the door is opened, the temperature in the biomedical freezer will rise sharply in a short time,
which is normal, and it will return to the set temperature after the door is closed.
• After the biomedical freezer has been running for a period of time, a layer of frost may form on the
inner wall, caused by sharp tools such as an ice pick, knife, or screwdriver. The inner wall shall not
be scratched or damaged, or the biomedical freezer will fail.
• Before defrosting, the frozen items in the biomedical freezer shall be taken out and placed in an
appropriate suitable format for storage, so as not to damage the items due to an increase in tem-
perature.
• There are many refrigeration coils in the biomedical freezer. The frost that forms on these coils
should be removed by sharp tools such as an ice pick, knife, or screwdriver. The inner wall shall
not be scratched or damaged, or the biomedical freezer will fail.

8
Installation
• Protect the Pharmacy Refrigerator during transport. As shown in the photo, please move it using a
cushioned handcart.
• Remove all packing materials and the bottom cushion before placing the refrigerator in its desig-
nated location.
• After moving it to the appropriate location, wait for 2 hours before powering it on.
• he unit’s door must be able to open fully as shown.
W×D≥54.3 inches × 54.5 inches (MD-25/40L308)
W×D≥48.0 inches × 47.4 inches (MD-25/40L106)
Installation Environment
• Temperature Requirements: The ideal ambient temperature for the biomedical freezer is between
64.4°F and 77°F. It can operate in temperatures ranging from 50°F to 89.6°F. If necessary, use an
air conditioning system to maintain the appropriate temperature.
• Humidity Requirements: Keep the ambient humidity below 80% RH. If the operating temperature is
89.6°F, ensure the humidity does not exceed 60% RH.
Dust and Pollution: Install the freezer in an area with minimal dust (Pollution degree: 2). Avoid
locations with signicant dust exposure.
• Vibration and Movement: Avoid placing the freezer in areas where it could be subject to mechani-
cal rocking or vibration.
• Protection Rating: The freezer has an IPX0 rating, which means it is not protected against water;
avoid exposure to moisture.
• Altitude: The freezer should be installed at altitudes below 6,561 feet (2,000 meters).

9
• Voltage Requirements: Ensure the input voltage is within 115V ±10%. If the voltage is unstable,
consider using a voltage stabilizer rated for over 4000W.
• Location Considerations: The freezer must be installed indoors in a temperature-controlled en-
vironment. Do not install it outdoors or in areas where it might be exposed to rain, as this could
cause electric shock or malfunction.
Installation Site
• Space Requirements: Install the biomedical freezer in a well-ventilated, open space. Avoid plac-
ing it in narrow or conned areas. Ensure the surrounding area allows for easy access and main-
tenance. The door of the room should be large enough to accommodate the freezer, enabling
smooth operation and servicing.
• Ground Requirements: The installation surface must be solid, at, and non-combustible, capable
of supporting the weight of the freezer during operation.
• Ventilation: Ensure there is adequate ventilation and avoid direct sunlight on the freezer.
• Power Supply: Each freezer must have its own dedicated power outlet. The outlet should support
a minimum of 10A current. Make sure the power cord is securely plugged in and not pinched or
twisted.
• Voltage Stability: Before use, verify that the working voltage is stable. If your location has unstable
voltage, use a voltage stabilizer rated at 4000W or more to protect the freezer.
• Grounding: The freezer must be properly grounded. If the outlet has a grounding wire, ensure it is
correctly connected. If the outlet is not grounded, have a qualied technician install proper ground-
ing.
Warning:
• Grounding Safety: Do not connect the grounding wire to a gas pipe, water pipe, telephone line, or
lightning rod. Doing so could cause electric shock.
• Power Cord Accessibility: Ensure the power plug is easily accessible after installation to allow for
quick disconnection in an emergency. Do not block the freezer’s vent with any objects.
Caution:
Since ambient temperature has a signicant impact on the equipment, it may not operate properly if
the environmental requirements are not met. Please ensure the environment is suitable before using
the equipment. The equipment has an intermittent operation working system.
Preparations Before Use
Remove Packaging:
Remove all transport packaging materials and belts.
Check Contents:
Count the accompanying accessories. Cross-check the items in the box against the packing list. If
there are any discrepancies, contact after-sales service promptly.
Ensure Proper Clearance:
The freezer must have at least 12 inches (30 cm) of clearance around it for proper ventilation and
heat dissipation.
Adjust Supporting Feet:

10
Rotate the horizontal supporting feet clockwise with a wrench or manually to extend them downward,
ensuring they rest on the ground and stabilize the freezer.
Install Back Bracket:
Remove the back bracket from the biomedical freezer and secure it to the back plate with screws.
(Note: It’s advisable to contact service personnel to x the freezer to the building structure through
the back bracket before use.)
Attach the Handle:
Align the handle with the hole on the right side of the door. Fix the door handle to the door with an
electric screwdriver, then fasten the handle trim cover to the upper and lower ends of the handle.
Warning:
Place the plastic packing bags out of reach of children to prevent suffocation accidents.
First Power-Up
Follow these steps when using the equipment for the rst time:
Allow Settling Time:
After placing and leveling the equipment, leave it for more than 24 hours before powering it on to
ensure normal operation.
Connect to Power:
Plug the power cord into a dedicated outlet with the appropriate specications, ensuring no load is
applied during this time.
Set Temperature and Test:
Set the desired temperature, but do not place anything in the empty freezer initially. Power on and
start up the unit, monitoring whether the operating temperature reaches the required level. Observe
the normal startup and shutdown of the equipment for more than 24 hours to conrm that the freezer
is functioning properly.
Load Items Gradually:
Load items in batches, not exceeding 1/3 of the chamber volume at a time. Ensure that the unit is
shut down and operates normally after being switched on and off for more than 8 hours before plac-
ing the next batch of items.
Minimize Door Opening:
Avoid opening the door during the cooling process as much as possible, as this will cause the tem-
perature to rise.

11
Operation After Power-Off
The set temperature is retained by the equipment. After recovery from a power failure, the equipment
will resume operation with the previous settings.
Warning:
Restarting the Freezer: If the biomedical freezer is unplugged or if the power is interrupted, do not re-
start the freezer for at least 5 minutes to avoid damaging the compressor or system.
Warning:
Long-Term Inactivity: If the freezer will not be used for an extended period, unplug the power cord and
turn off the battery switch (if applicable). This helps prevent electric shock, electric leakage, and dete-
rioration of the power cord. If the freezer will be stored unused in an unsupervised area for a long time,
ensure children do not have access, and make sure the doors are fully closed.
Maintenance and Management
Regular Checks: Assign a responsible person to regularly check the operation and record tempera-
tures (recommended every 2-4 hours). If there is a failure or shutdown, the temperature inside the
freezer will rise. If the issue cannot be resolved quickly, transfer stored items to a suitable location to
prevent damage.
Conrm Temperature Range: This freezer is designed for biomedical use. Ensure that the storage
conditions match the temperature requirements of the items. Avoid opening the door frequently to
maintain a consistent internal temperature and protect stored items.
Temperature Display: The temperature and humidity readings may differ between the display and the
actual chamber conditions. This is normal and expected.
Important Usage Guidelines
Avoid Frequent Door Openings: Because the freezer is designed for storage, it’s essential to minimize
the frequency of door openings. Repeated opening and closing will cause the internal temperature to
rise and put stress on the compressor, potentially leading to longer cooling times.
Do Not Damage the Refrigeration Circuit: Never damage the refrigeration system as it could lead to a
malfunction.
Use Only Approved Appliances: Only use electrical appliances within the freezer’s storage compart-
ment if they are approved by the manufacturer.
Defrosting Precautions: If defrosting is needed, do not use mechanical methods or tools that aren’t
approved by the manufacturer to accelerate the process.
Operation
12
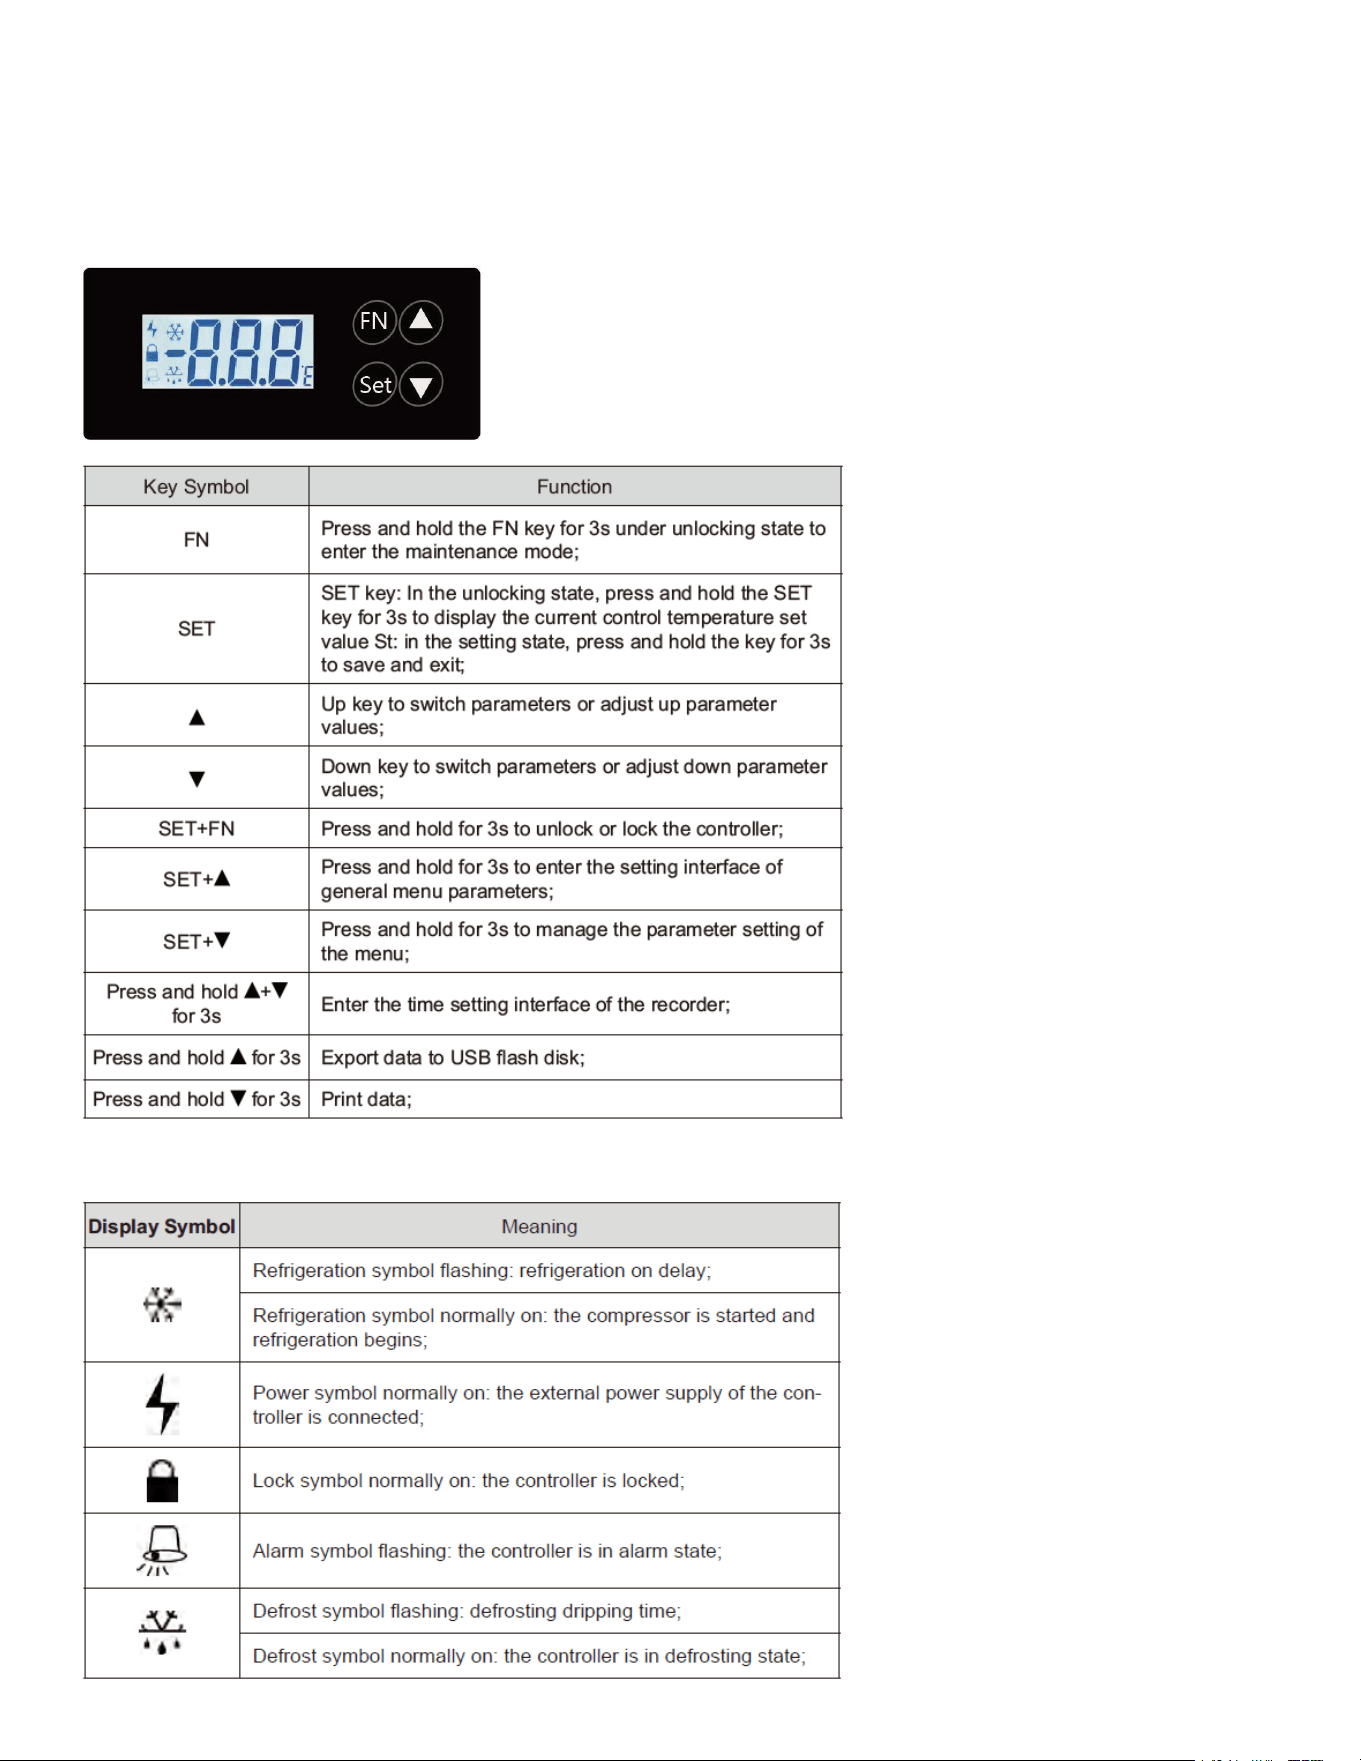
Operating Instructions
Display Meaning

13
Controller Parameters and Operation
Normal Operation: The controller displays and controls the measured temperature of the biomedical
freezer.
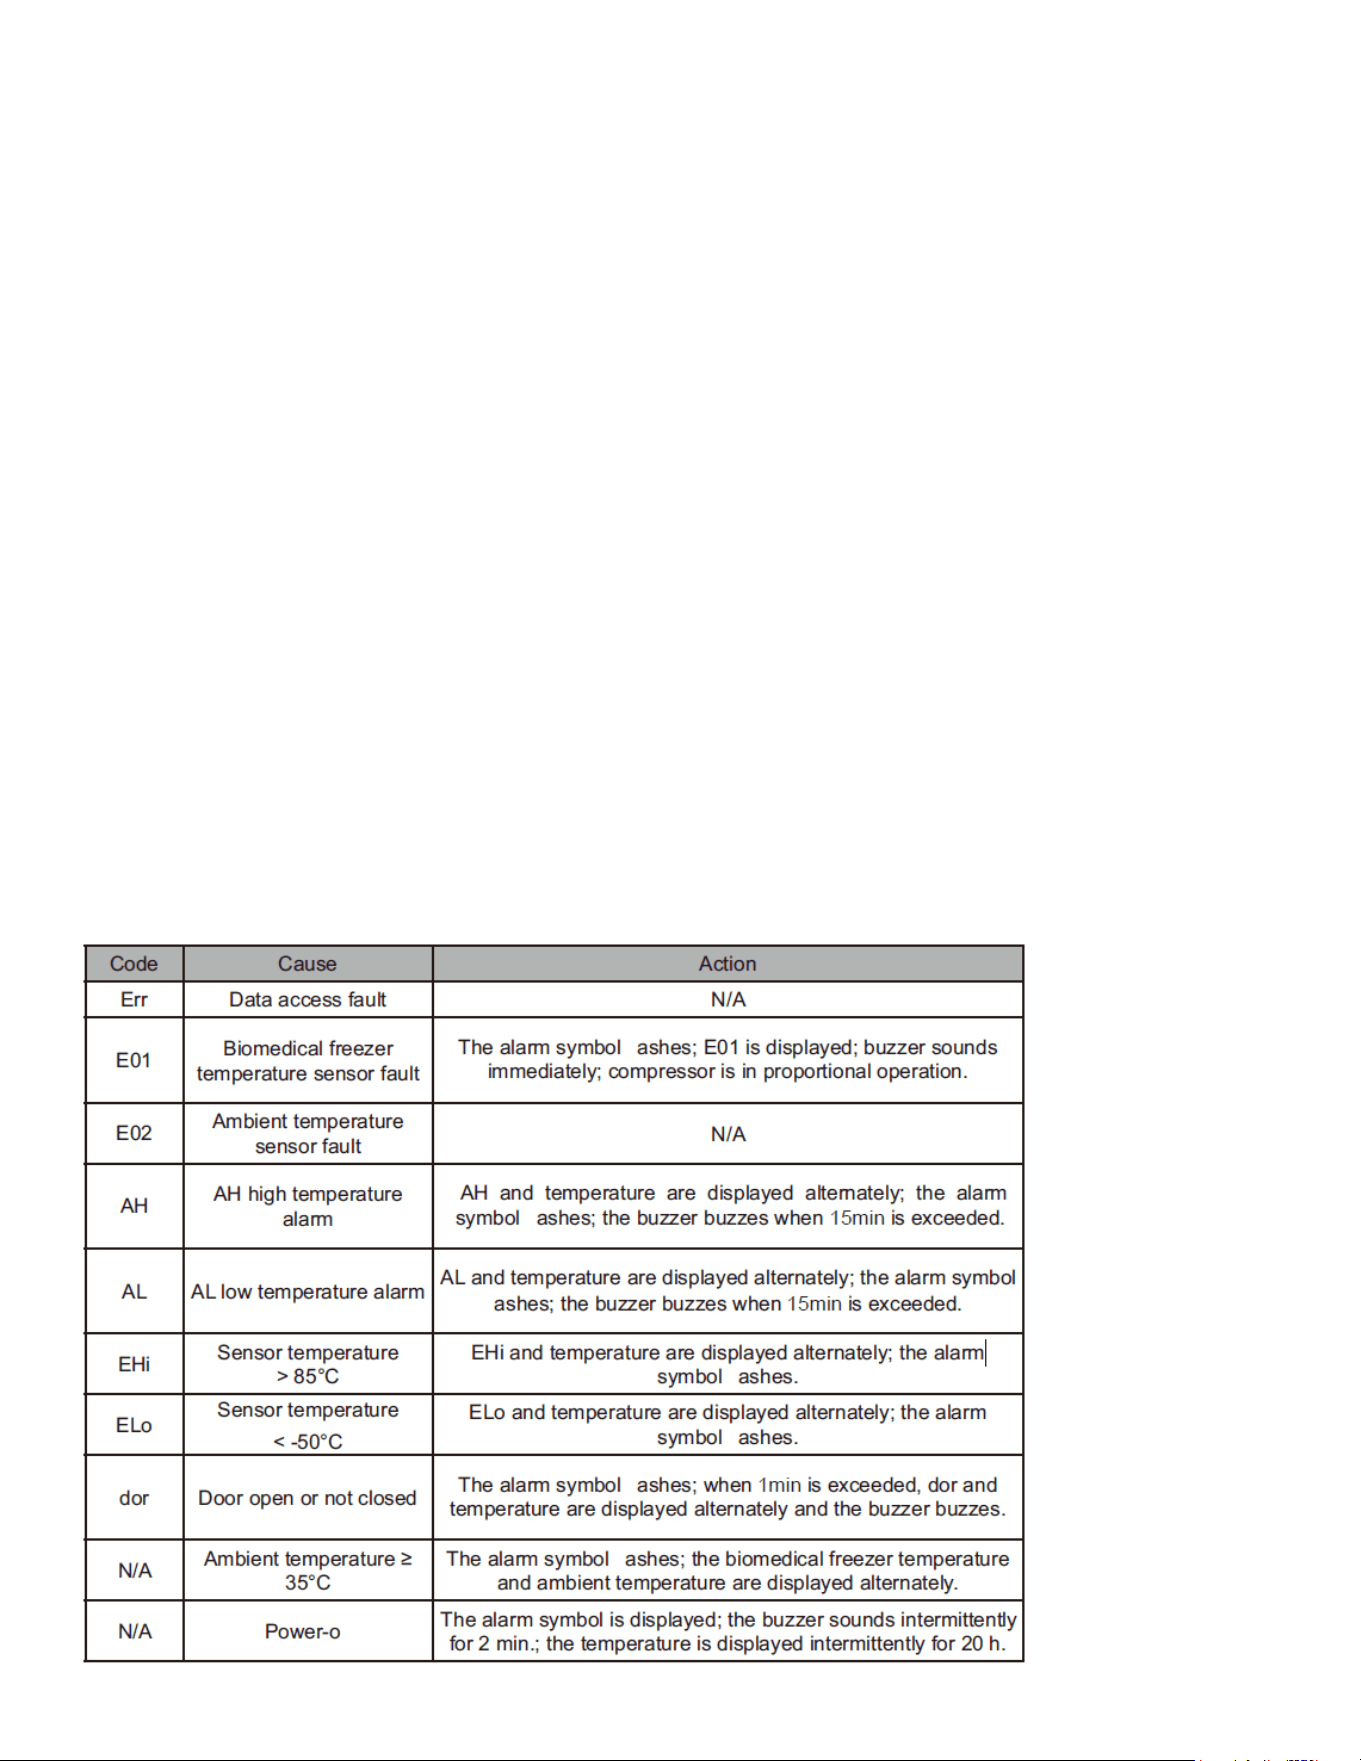
Error Codes:
If the temperature sensor fails, the display will show "E01".
If the temperature exceeds 185°F (85°C), it will show "EHi".
If the temperature drops below -58°F (-50°C), it will show "ELo".
Control Temperature Setting
Unlocking:
In the unlocked state, press and hold the SET key for more than 3 seconds. The display screen will
show the current control temperature set value (St).
Adjusting Temperature:
Use the UP key to increase the temperature value.
Use the DOWN key to decrease the temperature value.
Conrming Changes:
Press and hold the SET key for more than 3 seconds to conrm the new parameter value. The screen
will ash for 2 seconds if there is any change, then store the modied value and exit. If no changes
are made, it will exit directly.
Setting of General Menu Parameters
Accessing Menu Parameters:
In the normal operation state, after unlocking, press the SET key and the ▲ key together for more than
3 seconds. The LCD screen will display the parameter code "H".
Navigating Parameters:
Use the UP and DOWN keys to scroll through the parameters (H, L, Mod).
Conrming a Parameter:
Press the SET key to select the parameter, and its value will be displayed.
Modifying a Parameter:
Use the UP or DOWN keys to increase or decrease the value of the selected parameter.
Temporary Return:
Press the SET key to temporarily store the modied parameter value and return to the parameter dis-
play screen.
Finalizing Changes:
If other parameters need modication, repeat steps b-e. Press and hold the SET key for more than 3
seconds to store the modied parameter values and exit the parameter setting mode.

14
Management of Menu Parameter Settings
Accessing Parameter Settings:
In the normal operation state, after unlocking, press the SET key and the ▲ key together for more than
3 seconds. The LCD screen will display the parameter code "PAS".
Entering the Password:
Press the SET key to enter the password setting.
Use the UP and DOWN keys to scroll the number to "-15".
Conrming the Password:
Press the SET key to conrm the password. If the password is incorrect, the parameter setting pro-
gram will exit.
Navigating Parameters:
Use the UP and DOWN keys to scroll through the parameter names.
Displaying Parameter Values:
Press the SET key to display the corresponding parameter values.
Modifying Parameters:
Use the UP or DOWN keys to increase or decrease the value of the selected parameter.
Storing and Returning:
Press the SET key to temporarily store the modied parameter value and return to the parameter dis-
play screen.
Repeating for Other Parameters:
Repeat steps e-g if you need to modify other parameters.
Finalizing Changes:
Press and hold the SET key for more than 3 seconds to store all modied parameter values and exit
the parameter setting mode.
Note: If there is no key operation within 10 seconds, the controller will automatically exit the parame-
ter setting state, and parameters will not be saved.
If no key is pressed for 3 minutes, the controller will lock, and the buzzer will buzz for 0.5 seconds.
Press SET and FN simultaneously for 3 seconds to unlock or lock the controller. When locked, the
controller cannot be operated, and unlocking is required to continue.
Time Setting
Entering Time Setting Mode:
The display will show "yer". Use the UP and DOWN keys to select parameters for year (yer), month
(mth), day (day), hour (HH), and minute (MM).
Adjusting Time Parameters:
After selecting the desired parameter to set, press "SET" to adjust it. Use the UP and DOWN keys to
modify the value.

15
Saving and Exiting:
Once all adjustments are made, press and hold "SET" for 3 seconds to save and exit. If no key is
pressed for 10 seconds during the adjustment, the system will exit automatically, and changes will
not be saved.
Additional Notes:
The main control panel will buzz for 0.5 seconds when a USB ash drive is inserted or removed.
If the recorder is not connected or is malfunctioning, the display will show "nDR", and the time cannot
be set.
Exporting Data
Manual Export:
Accessing Data Export Interface:
In the normal operation state, after unlocking, press and hold the UP key for 3 seconds to enter the
data export interface.
Checking Connections:
If the recorder is not connected, "nDR" will be displayed.
If the USB ash drive is not connected, "nUS" will be displayed.
Selecting and Conrming Data:
Use the UP and DOWN keys to select M1M12 (representing the current time of data export, pushed
forward by 112 months).
Press and hold the SET key for 3 seconds to conrm the data export.
During Export:
If there is a large amount of data, the interface will show "ULD" until the export is completed. If there
is no key operation for 3 seconds, the interface will exit without saving.
Manual Data Printing (Reserved)
Entering Data Print Interface:
In the normal operation state, after unlocking, press and hold the down key for 3 seconds to enter the
data print interface.
Selecting Print Time:
Use the UP and DOWN keys to select dt1dt7. These represent the current printing time, which is
pushed forward by 17 days.
Conrming Printing:
Press and hold the SET key for 3 seconds to conrm the printing. If there is no key operation for 10
seconds, the interface will exit without saving.
16
Warehousing Mode
Accessing Warehousing Mode:
In the power-off operation state, after unlocking, press the SET key and DOWN key for more than 3
seconds at the same time. The LCD screen will display the parameter code “PAS”.
Entering the Password:
Press the SET key to enter the password setting.
Use the UP and DOWN keys to scroll the number to “22”.
Conrming Password:
Press the SET key to conrm the password. If the password is incorrect, the warehousing mode set-
ting program will exit.
Activating Warehousing Mode:
If the password is correct, it will enter warehousing mode, and the power supply of the temperature
controller will be turned off.
These actions must be completed during the buzzer alarm period (about 2 minutes) after a power fail-
ure.
Low Power Mode:
After entering warehousing mode, the current consumption of the entire temperature controller will be
lower than 5uA.
Alarm Description

17
Warning:
• To prevent electric shock or injury, disconnect the power supply before performing any repairs or
maintenance on the equipment.
• Ensure that any drugs or suspended particles from the surrounding environment are not inhaled
during equipment maintenance, as this could be harmful to human health.
• Conrm that the grounding connection is secure.
• Ensure that all maintenance parts are properly installed.
• Verify that all safety signs are in place and correctly positioned.
• Ensure that all protective parts are installed and secure.
• Make sure the product is in normal working condition.
Caution:
• Do not spill water directly on the chamber body, as it may damage the electrical insulation and
metal parts.
• Avoid using hot water, corrosive cleaners, or organic solvents to clean the chamber body.
• Do not place heavy objects on top of the equipment, as this may deform it under pressure.
Cleaning of Biomedical Freezer
Regular Cleaning:
The biomedical freezer should be cleaned once a month. Regular cleaning helps maintain its appear-
ance and functionality.
Cleaning the Exterior:
Wipe the dust from the freezer’s shell, inner chamber, and all accessories with a dry cloth. If the freez-
er is particularly dirty, use a cloth dampened with a neutral detergent to remove the dirt, then dry with
a clean cloth.
Avoid Water Damage:
Do not pour water on or into the freezer’s shell or inner chamber. Water exposure may damage the
electrical insulation and the freezer itself.
Lubrication:
Clean the condenser and other mechanical parts to ensure they are free of debris and do not require
lubrication.
Frost Removal:
Clean any frost or ice from the inner walls and the condenser lter screen once a month.
Defrosting Inside Biomedical Freezer
Frost buildup can cause gaps between the freezer and the door sealing strip, leading to poor refriger-
ation. The inner door should be defrosted using the ice shovel provided with the freezer. Follow these
Maintenance

18
steps for natural defrosting:
Turn Off Auxiliary Cooling Device:
Shut down the auxiliary cooling device, if any.
Remove Items:
Transfer all items from the freezer to an appropriate storage area.
Power Off:
Turn off the power switch.
Open the Doors:
Open both the outer and inner doors to allow the freezer to defrost naturally over time.
Dry the Water:
Use a dry cloth to absorb any accumulated water at the bottom of the freezer.
Clean the Interior:
After defrosting, clean the inner door and freezer chamber, then restart the device.
Return Items:
Place the items back inside the fully cooled freezer.
Restart Cooling Device:
If there is an auxiliary cooling device, restart it.
Caution:
Do not use a knife, screwdriver, or any sharp tool to defrost, as this could damage the freezer.
Equipment Out of Service
Long-Term Storage:
If the freezer will be unused and stored in an unsupervised area for an extended period, ensure that
children do not have access and that the doors are securely closed.
Scrapping:
If the freezer needs to be scrapped, have it dismantled by professionals to prevent accidents such as
suffocation. All doors must be removed before disposal.
Optional Parts
Temperature Recorder
Installation:
Refer to the Temperature Recorder Instructions provided with the device for proper use.
Caution: Please ensure the temperature recorder is installed by a professional technician or after-sales
personnel.
Warning: Always unplug the freezer before installing the temperature recorder to avoid electric shock
or re.
19
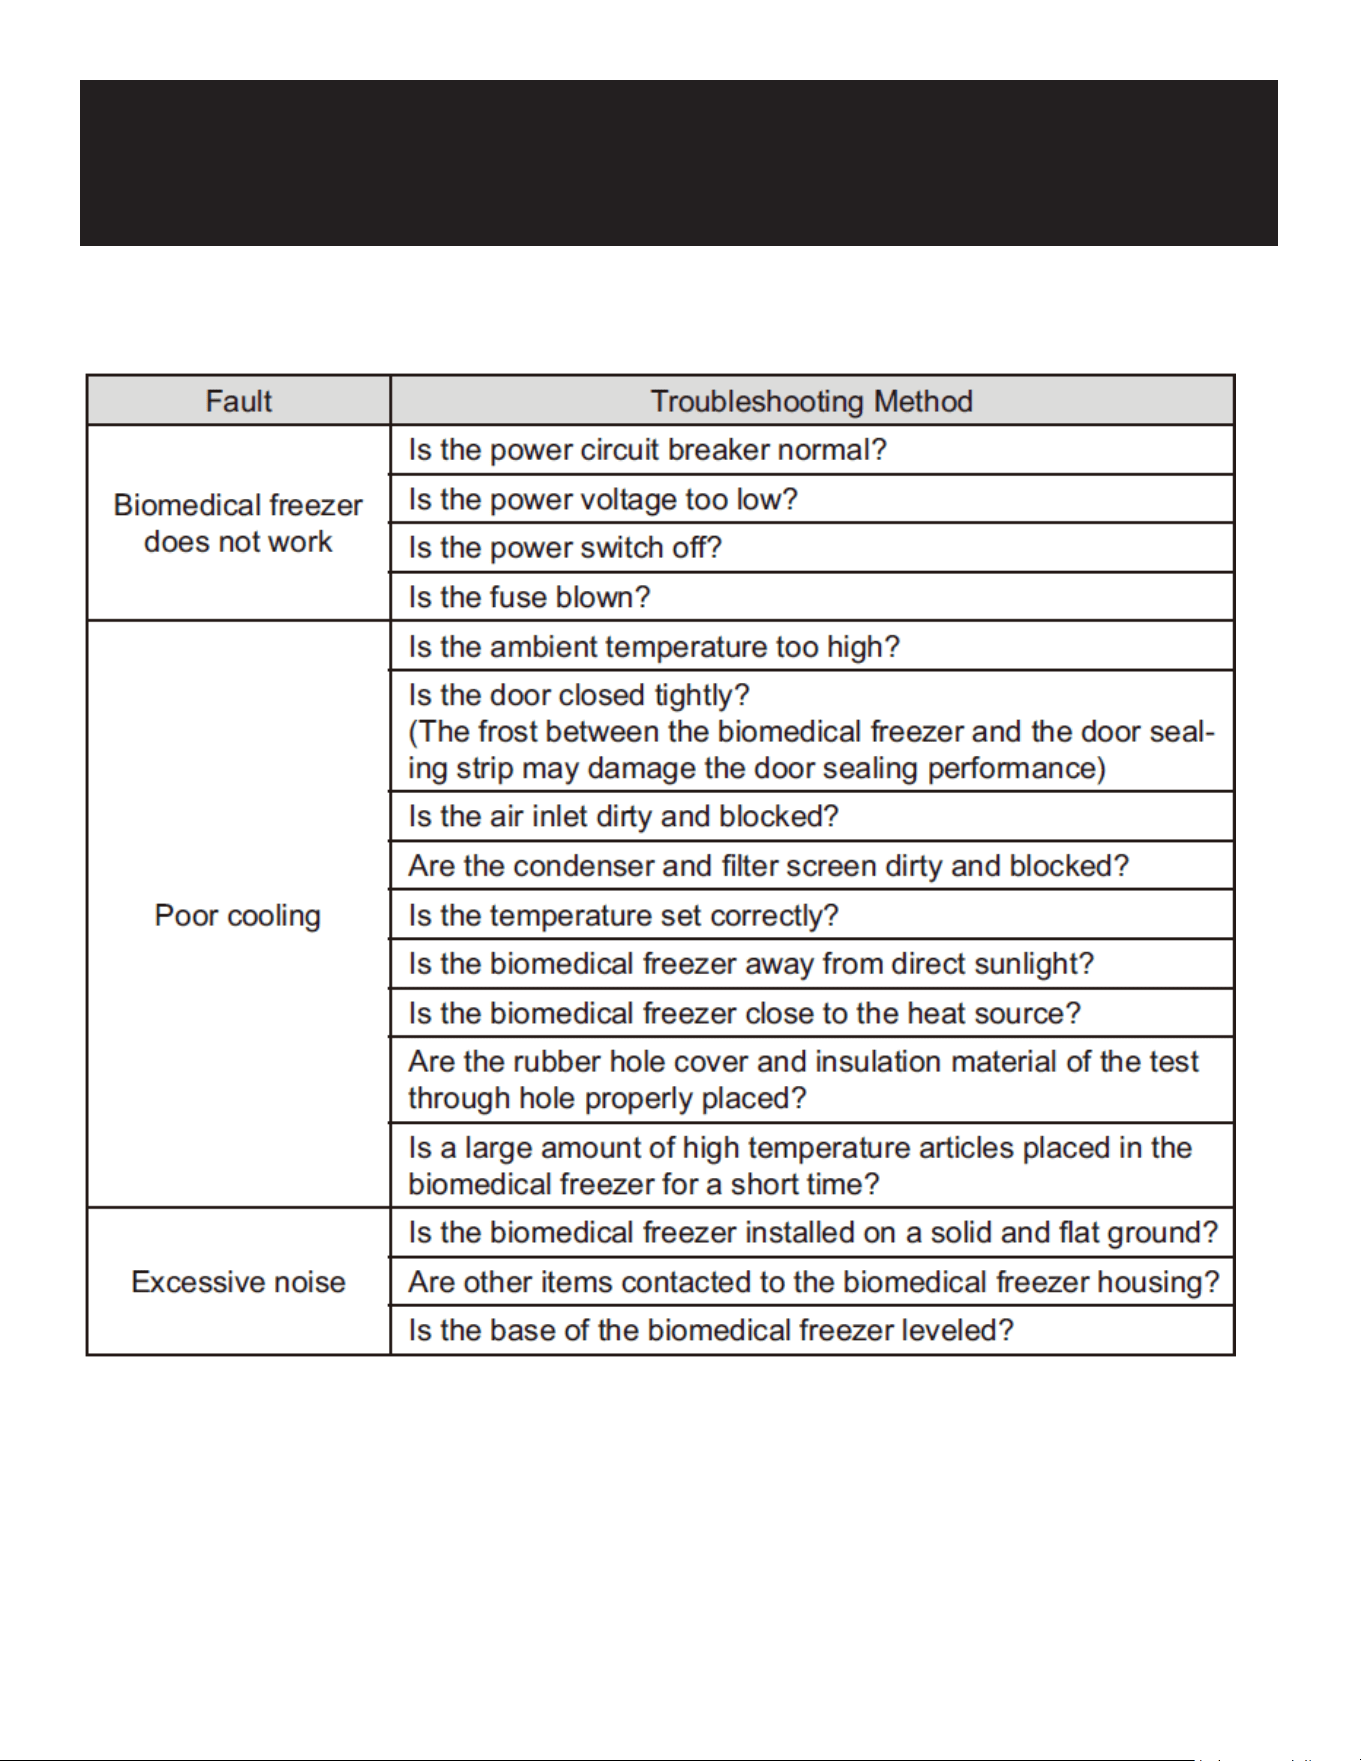
Troubleshooting
Note: If the fault cannot be eliminated after the above items are checked, or the fault is
different from the above list, please contact customer service personnel.

20
WARRANTY
LIMITED WARRANTY
Koolmore Supply, Inc. extends a limited warranty to the original purchaser, guaranteeing that this Koolmore
product is free from manufacturing defects in material or workmanship for one year from the date of
purchase.
Should you discover any such defect within the warranty period, Koolmore Supply, Inc., reserves the right to
repair or replace the product without charge, or to cover the cost of replacement parts and repair labor needed
to correct defects present at the time of purchase or resulting from regular usage, when the appliance has been
installed, operated, and maintained as per the instructions provided.
At its sole discretion, Koolmore Supply Inc. may decide to replace the product. In such an event, your replace-
ment appliance will carry the warranty for the remaining term of the original unit's warranty period.
This warranty is valid exclusively to the original purchaser of the product and only applicable within the United
States. The warranty commences from the date of original consumer purchase. Proof of the original purchase
date will be required to obtain service under this warranty.
Under this limited warranty, your sole and exclusive remedy will be product repair, as outlined above. All
services must be provided by a Koolmore-designated service company.
To claim warranty or request repair service:
Email support@koolmore.com. Please include your name, address, phone number, warranty repair request,
and a copy of your proof of purchase receipt. Alternatively, visit koolmore.com and use the contact us page. A
Koolmore customer service representative will promptly arrange service for your appliance.
We thank you for choosing Koolmore.
WARRANTY EXCLUSIONS
This limited warranty will not cover:
1. Failure of the product to perform during power failures or interruptions,
or due to inadequate electrical service.
2. Damage incurred during transportation or handling.
3. Damage caused by accidents, vermin, lightning, winds, re, oods, or acts of God.
4. Damage resulting from accidents, alterations, misuse, abuse, improper installation, repair, or maintenance.
This includes using any external device that alters or converts the voltage or frequency of
electricity.
5. Unauthorized product modications, repairs by unauthorized centers, or use of non-approved
replacement parts.
6. Abnormal cleaning and maintenance not aligned with the user's manual.
7. Use of incompatible accessories or components.
8. Any costs associated with repairs or replacements under these excluded circumstances shall be the
responsibility of the consumer.