
USER MANUAL
Before using, please read the operating instructions carefully to
ensure proper application and achieve satisfactory results.
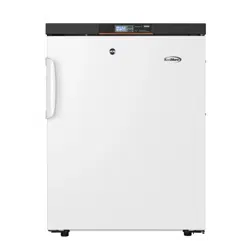
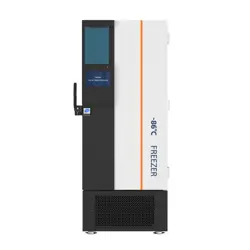
KoolMore Undercounter Ultra Low
Temp Stackable Medical Freezer
Models: KM-PHF-4CUL
MEDICAL FREEZER

Stay informed with the latest information
for your KoolMore Appliance.
If you need any assistance or have questions, our customer
support team is here to help.

3
Contents
Product Features ........................................................... 4
Safety ........................................................................... 5
Installation .................................................................... 9
Operation .................................................................... 11
Maintenance ............................................................ 14
Troubleshooting ......................................................... 16
Warranty ..................................................................... 17

4
This product is mainly intended to keep drugs, vaccines, and reagents. It is applicable to hospitals, ep-
idemic prevention stations, universities, scientic research institutes, and electronic chemical industry
enterprise labs.
Product Functions
Accurate Temperature Control | Data Traceability
• Computer temperature control, with a display accuracy of 0.1°C
• The temperature in the biomedical freezer is uniform and controllable, the temperature range is
adjustable to -13°F / -40°F, and the temperature control is accurate.
• Standard USB port and traceable temperature data; query and save temperature data at any time
Ecient Refrigeration | Effective Thermal Insulation
• High quality compressor and optimized refrigeration system provide strong refrigeration capacity,
safety, and reliability
• High-performance thermal insulation layer has the good thermal insulation effect
• Multi-layer 3D seal design effectively reduces refrigerating capacity loss and frosting
Multiple Alarms | Safety and Stability
• Perfect acoustic and optical alarm function, allowing high- and low-temperature alarms, power off
alarm, sensor fault alarm, etc., with alarm values adjustable on demand
• Design of safety door lock improves the safety level of sample management
User-Friendly Design
It can display the temperature inside the biomedical freezer and ambient temperature, and allows
setting the high and low temperature alarm values and the biomedical freezer temperature highs and
lows as required, with the function of fault inquiry and mute
Remote alarm function ensures real-time controllability and safe and stable operation of the equip-
ment.
Product Features

5
General Safety
• Remove the packaging base at the bottom of the product before using it.
• When moving the product, ensure the bottom does not touch the power cord.
• Lock the front wheel brake after placing the product in its designated location.
• Allow the product to stand for 24 hours before turning it on for the rst time.
Electrical Safety
• Use the special power supply specied on the product’s label to prevent re or electric shock.
• The power cord has a three-prong plug. Do not remove the grounding pin, and ensure the outlet is
grounded.
• When unplugging, hold the plug, not the cord, to avoid electric shock or re.
• If the freezer is not working correctly, unplug it immediately to prevent electric shock or re.
• Always disconnect the power before repairing or maintaining the freezer.
• Use grounded power outlets to prevent electric shocks.
Operational Safety
• When rst powering on the product, wait until it reaches the correct temperature before adding
items. Add items in small batches, not exceeding one-third of the freezer’s capacity.
• Keep all ventilation openings clear of obstructions.
• Do not use unauthorized devices to speed up the defrosting process.
• Do not damage the refrigerant circuit.
• Place the product on a solid, at surface to prevent tipping or malfunction.
Chemical and Material Safety
• Store toxic, harmful, or radioactive substances safely in the freezer. Improper use can harm health
or the environment.
• If storing the freezer unused for a long period, ensure children cannot access it. Dispose of the
freezer properly to prevent suffocation hazards.
• If using CO2 or liquid nitrogen, ensure good ventilation at the installation site.
• Avoid placing the freezer where it can get wet or in a humid environment to prevent electric shock
or re.
• Do not store ammable gases near the freezer. If leakage occurs, ventilate the area and avoid
unplugging the freezer.
Child Safety
• Do not leave packing materials in areas accessible to children to avoid suffocation.
Do not let children climb on or play near the freezer to prevent accidents.
Safety
6
Miscellaneous
• Do not use the freezer outdoors as exposure to rain may cause electric shocks.
• Do not place the freezer where it can be splashed with water or in very humid areas to avoid elec-
trical hazards.
• Do not pour water directly onto the freezer. This could cause an electric shock or short circuit
• Never try to disassemble, repair, or modify the freezer yourself. This could lead to injury or improp-
er operation.
• Do not connect the grounding wire to gas pipes, water pipes, telephone lines, or lightning rods.
These methods can cause electric shocks or other hazards.
• Avoid touching electrical parts like plugs or switches with wet hands, as this can cause electric
shock.
• Do not place water containers or heavy objects on the freezer. If they fall, they can cause injuries
or lead to electric leakage.
• Never insert metal objects like nails or wires into any part of the freezer. This could cause electric
shocks or injuries.
• Do not drag, pull, or twist the power cord. Damaged cords can lead to electric shock or re.
• Avoid using the freezer with a loose plug, as it could cause re or electric shock.
• Do not store glass bottles or canned items in the freezer, as they may freeze, crack, and cause inju-
ry.
Refrigerants and foaming materials used in the freezer are ammable. Dispose of the appliance prop-
erly by keeping it away from re and following environmental guidelines.
Important: It’s the consumer’s responsibility to comply with local and federal regulations when dispos-
ing of the freezer. Cut off the pipes and drain the refrigerant before disposing of the unit.
Symbols to Note:
indicate safety warnings.
“Prevent re, stay away from re sources” suggests keeping the unit away from anything
ammable.
“Cyclopentane blowing” indicates the use of cyclopentane, a ammable substance.
Power Supply Warning: This product uses a voltage of 220-240V/50Hz. If the voltage is outside this
range, a stabilizer may be required.
Usage Warning: This product requires a low-voltage air circuit breaker and an earth leakage protection
device.
Warning: Use a special power socket with proper grounding. The power cord must not be extended
without appropriate measures. If needed, use copper-core conductors.
Warning: Do not store ammable, explosive, or corrosive materials in the freezer.
Warning: Keep keys out of reach of children to avoid accidental access.
Warning: Do not connect the neutral wire and ground wire together. This could cause electrical acci-
dents.

7
Warning: Do not bundle or press the power cord under heavy objects or near heat sources.
Warning: If the freezer loses power or is unplugged, check the settings before restarting to avoid
damaging the stored items.
Warning: If the freezer is unplugged, wait at least 5 minutes before restarting it to prevent damage to
the compressor.
Warning: Regularly check and clean the lter screen to prevent temperature rise or failure.
Warning: If the plug is dusty, clean it regularly. A dirty plug can cause overheating or ignition.
Warning: After a power cut, check stored items before restarting the freezer. They may be damaged
due to temperature changes.
Warning: Wear gloves during maintenance to avoid injury from sharp edges or cold surfaces.
Warning: Do not handle stored items directly without gloves, as it may cause frostbite.
Warning: Close the door by the handle to avoid pinching your ngers.
Warning: Tilt the freezer 45° when moving or handling it.
Warning: Be cautious when moving the freezer to avoid tripping and causing injury.
Warning: Do not use the door handles for lifting the freezer, as it may cause injury or damage.
Warning: Do not use electrical appliances inside the freezer unless they are recommended by the
manufacturer.
Precautions for Use
• When the freezer is running, the contact area between the front of the freezer and the outer door
may feel warm. This is normal and helps prevent condensation.
• Before placing items in the freezer, make sure the temperature inside is set to the desired level.
Add items in small batches, ensuring each batch doesn’t exceed one-third of the freezer’s volume.
This helps maintain a stable temperature.
• The temperature displayed on the equipment may differ slightly from the actual temperature
inside the storage area. This is normal, and over time, the displayed temperature will match the
actual temperature.
• There is an inspection hole on the equipment’s enclosure to measure internal temperatures. If you
remove the plug, make sure to reinsert it with thermal insulation material to prevent inaccurate
readings and condensation.
• Clean the equipment with a mild detergent. Avoid using brushes, acids, gasoline, soap powder,
or polish, as these can damage the paint and rubber parts. Keep the unit away from harmful sub-
stances like gasoline.
• If you won’t be using the freezer for a long time, turn off the power and disconnect the battery to
avoid it running out of charge. Once the power is off, it can take about a week to recharge (if appli-
cable to your model).
• Try to minimize how often you open the door and keep the door open for as little time as possible.

8
This helps maintain the internal temperature.
• After the door is opened, the temperature inside may rise sharply for a short time but will return to
normal after the door is closed.
• If the freezer has been running for a long period, a thin layer of frost may form on the inner walls.
This is normal. If the frost layer is too thick (more than 1/4 inch), defrost the freezer.
• Before defrosting, remove items from the freezer and wrap them in ice packs or place them in
another suitable environment to keep them cold during defrosting.
• Frost may form on the inner shelf coils and sides of the inner wall. This can be carefully removed
with a soft tool, such as a plastic scraper or a non-metallic object. Avoid scratching the inner walls
during this process.

9
Installation
Installation Environment
• Ambient temperature: 50°F to 90°F; ideal temperature: 64°F to 77°F. An air conditioning system
should be used if necessary.
• Ambient humidity: Below 80% RH. The humidity should be less than 60% RH if the maximum oper-
ating temperature is 90°F.
• Avoid exposure to large amounts of dust.
• Avoid mechanical swinging or vibration.
• Altitude of working position of ULT freezer: Lower than 6561 feet.
• Input voltage: Within 115V ±10%.
• The ULT freezer is sensitive to ambient temperature. If installed in an environment other than the
above, the ULT freezer cannot operate normally. Please use it after improving the environment.
Do not install the ULT freezer outdoors. Exposure to rain may cause electric leakage or electric
shock.
• Over-voltage level: 1, IPXO, Pollution level 2.
Installation Site
• Space and Accessibility: The freezer should not be installed in a narrow or enclosed space. Ensure
that the door of the room where the freezer is placed is large enough for easy access. This pre-
vents maintenance diculties and reduces the risk of equipment failure.
• Surface Stability: The ground where the freezer is installed must be at, solid, and made of
non-combustible materials to support the weight and prevent tipping during operation.
• Ventilation and Lighting: Choose a location with good ventilation, free from direct sunlight, to en-
sure the freezer operates eciently.
• Power Supply Considerations: Each freezer must be powered by an independent power socket. En-
sure that the power socket can handle a current of 16A and that the plug ts securely. The power
cord should not be twisted or pressed.
• Voltage Stability: Check the power voltage before use. If the area has unstable voltage, a voltage
stabilizer that handles more than 4000W is recommended. Ensure the installation environment
meets the required voltage conditions.
• Grounding: The freezer must be grounded securely. If the power cord socket does not have a
ground wire, a professional engineer should install a grounding wire to ensure safety.
WARNING
• Do not connect the grounding wire to a gas pipe, water pipe, telephone line, or lightning rod when
grounding the ULT freezer, otherwise it may cause an electric shock.
• The power plug must be accessible after installation to facilitate timely unplugging of the power
cord in case of an emergency. Do not block the vent of the ULT freezer.
• Since the ambient temperature has a large impact on the equipment, the equipment may not
operate normally if the above environmental requirements cannot be met. Please improve the
environment before using the equipment, and please note that the equipment has an intermittent
operation system.

10
Preparations before Use
1. Remove all transport packaging materials and belts.
2. Count the accompanying accessories. Check the items in the box against the contents of the
packing list. If there is any discrepancy, please contact after-sales service personnel in time.
3. The placement conditions shall be such that clearances of at least 12 inches (30 cm) are reserved
around the ULT freezer for ventilation and heat dissipation.
4. Rotate the horizontal supporting feet clockwise with a wrench or manually to extend downwards
so that they are supported on the ground to ensure that the ULT freezer does not move when used.
5. Open the outer door by more than 90°, take out the rack from the bottom of the freezer, remove the
rack protective lm, and place the rack one by one on the rack support strip.
WARNING: Place the plastic packing bag in a place not accessible to children to avoid suffocation
accidents.
Initial Start
Follow these steps when using the equipment for the rst time:
1. After the equipment is placed, leveled, and aligned, it shall be left to stand for more than 24 hours
before it is powered on to ensure normal operation.
2. Connect the power cord to a dedicated socket of appropriate specications under no-load condi-
tions.
3. After the power supply is turned on, turn on the power switch of the equipment rst; if the equip-
ment is equipped with a battery, turn on the battery switch again (at the bottom of the rear side of
the freezer).
4. Set the required temperature. Do not put anything in the ULT freezer, power on and start up, and
check whether the operating temperature of the equipment reaches the set temperature, observe
the normal startup status of the ULT freezer within more than 24 hours, and demonstrate that the
performance of the ULT freezer is normal.
5. When loading items, avoid exceeding 1/3 of the freezer volume at a time. Ensure that the equip-
ment is shut down and operates normally after being switched on and off for more than 3 hours
before placing the items in the ULT freezer.
6. Remember to keep doors closed during the cooling process whenever possible; otherwise, the
temperature may rise.

11
Operation
Operation after Power-off
The set value is memorized by the equipment. After recovery from a power failure, the equipment will
resume operation with the setting parameters before the power failure.
WARNING: If the ULT freezer is unplugged or the power to the ULT freezer is interrupted, do not restart
the ULT freezer for at least 5 minutes to avoid damage to the compressor or system.
WARNING: When the ULT freezer is not in use for a long period, unplug the power plug and turn off
the battery switch (applicable to ULT freezers with batteries) to prevent electric shock, electric leak-
age, or re due to the deterioration of the power cord.
If the ULT freezer is to be stored unused in an unsupervised area for a long period, ensure that chil-
dren do not have access to the ULT freezer and that doors cannot be closed completely.
Important Notes
• The product should be managed by a specially-assigned person to check the operation and make
records every day (it is recommended to record the inspection once every 2–4 hours). In case of
failure or shutdown, the temperature in the ULT freezer will rise. If it cannot be repaired in a short
time, the articles shall be transferred to other places that meet the temperature requirements for
storage to avoid damage to the articles.
• This product is a ULT freezer. Please conrm in advance that the temperature required for the
stored articles is consistent with the temperature range of the ULT freezer to avoid damage to the
stored articles due to mismatch of the temperature range.
• Due to the inertia of refrigeration, the temperature and humidity displayed on this product may
differ from the actual temperature and humidity inside the freezer, which is normal.
Prohibited Actions
• Since all ULT freezers are storage equipment, it is strictly prohibited to put too many relatively hot
items at one time, which will cause the compressor to stop for a long time. The temperature will
drop slowly and affect the service life of the compressor. The items must be put in batches to
allow the temperature to decrease by steps until the required temperature is reached!
• Do not damage the refrigeration circuit.
• Do not use electrical appliances without production permits inside the ULT freezer.
• No mechanical tools or other means without the manufacturer’s permission shall be used to ac-
celerate the defrosting process.
12
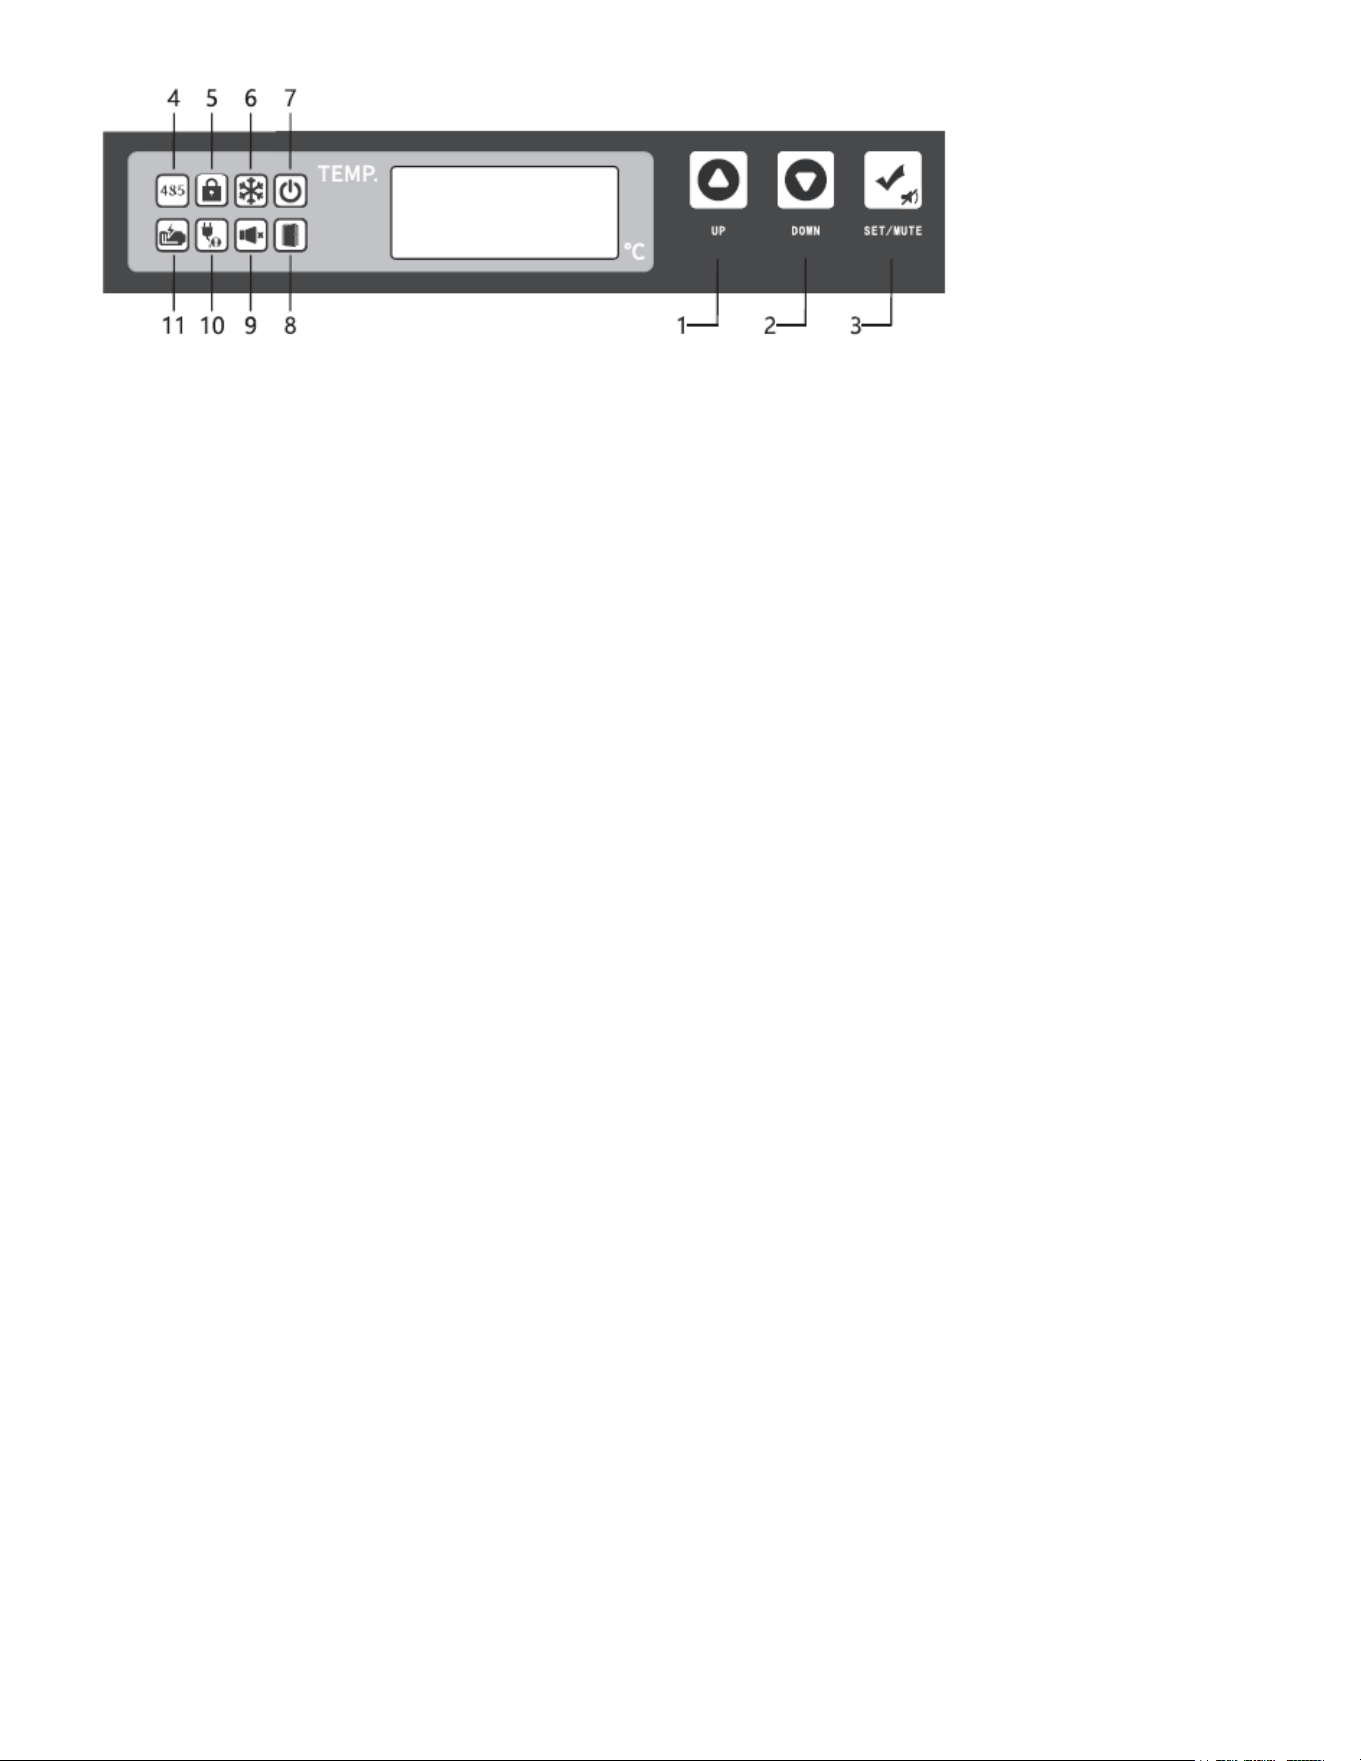
Description of Buttons and Icons
Button 1: Up
Button 2: Down
Button 3: Setup/Mute
Icon 4: 485 communication
Icon 5: Button locking
Icon 6: Compressor startup
Icon 7: Power-on
Icon 8: Door opening
Icon 9: Alarm silence
Icon 10: Abnormal power supply
Icon 11: Low battery level (all icons are shown above)
Operation Instructions
Check the ambient temperature
• In the lock status of the keypad, press the “Setting/ Mute Multi-function Key” to display the ambi-
ent temperature on the LED segment display. Wait for 5 seconds without any keypad operation or
press the "Up" or "Down" keys to return to the normal display.
• In the unlock status of the keypad, press the “Setting/ Mute Multi-function Key” to display the am-
bient temperature on the LED segment display. Wait for 5 seconds without any keypad operation
to return to the normal display.
Mute the alarm
• When the alarm sounds, you can press the “Setting/ Mute Multi-function Key” to mute the alarm. It
will then enter the status for checking the ambient temperature.
• When the alarm is muted, you can press the “Setting/ Mute Multi-function Key” to restore the
alarm sound; then it will enter the status for checking the ambient temperature.
• In the unlock status of the keypad and the status for checking the ambient temperature, you can
press the “Setting/ Mute Multi-function Key” to mute or restore the alarm sound.
Function of keypad lock
• When the button is not locked, if there is no button operation for 60 seconds or if the Up and Down
buttons are pressed at the same time for 3 seconds (the buzzer sounds twice when both sides are
locked), the button is locked. In the button locked state, the ambient temperature and the alarm
can be viewed; the rest of the button functions are locked, and the buzzer sounds twice during
13
operation.
• After pressing the Up and Down buttons at the same time for 3 seconds, the digital tube will dis-
play “0000”. Adjust the password to “5” through the Up and Down buttons. After the password is
correct, return to the normal display, and the buzzer will sound once.
Parameter Setting
When the button is not locked, press and hold the Setting/Mute button for 3 seconds, and the digital
tube displays “PS1”. Press the Setting/Mute button to switch the menu and corresponding parame-
ters, and press the Up and Down buttons to select the menu or adjust the parameters. Save the pa-
rameters after no button operation for 60 seconds by pressing and holding the Setting/Mute button
for 3 seconds, and exit with the buzzer sounding once.
Export of USB Temperature Data
When the USB ash disk is connected to the USB port, the buzzer will buzz once, and the digital tube
will display the code “on” for data upload. PDF les with the data of the current and the last months
will be generated and imported into the USB ash drive. After the data transmission is completed, the
buzzer will buzz once, the digital tube will display “End” and return to normal display after 6 seconds.
Alarm Description
Menu Menu Description Setting Range Default Unit
Set Temperature setting -112°F to 104°F -112°F °F
H Upper deviation of high temperature alarm 0.0–18.0°F; 0: Cancel the alarm 18.0°F °F
L Lower deviation of low temperature alarm 0.0–18.0°F; 0: Cancel the alarm 0.0°F °F
n Set current date - year -- -- --
t Set current date - month -- -- --
d Set current date - day -- -- --
H Set current time - hour -- -- --
M Set current time - minute -- -- --
PT Printing interval 0–240 20 min
tH1 High ambient temperature alarm value 20.0–176.0°F -- °F
PS1 User menu password setting 0–9999 -- --
b1 Hardware version -- -- --
b2 Software version -- -- --
S/N Alarm Code Meaning
1 H1 Alarm for high temperature inside the freezer
2 L1 Alarm for low temperature inside the freezer
3 H2 High ambient temperature alarm
4 H3 Alarm for high condenser temperature
5 A Power failure alarm
6 bL Low battery alarm
7 E1–E4 Sensor fault alarm
8 Er USB data recorder fault alarm

14
Maintenance
WARNING
• To prevent electric shocks or injuries, disconnect the power supply before any repair or mainte-
nance of the equipment.
• Ensure that drugs or suspended particles from the surrounding environment are not inhaled during
equipment maintenance. This could be harmful to human health.
CAUTION
• Do not spill water directly on the freezer body to avoid reducing insulation performance or damag-
ing electrical components and rusting metal parts.
• Do not use hot water, corrosive cleaners, or organic solvents to clean the freezer body.
• Avoid placing heavy objects on top of the equipment to prevent deformation due to pressure.
Cleaning of ULT Freezer
• The ULT freezer should be cleaned once a month. Regular cleaning keeps the ULT freezer looking
like new.
• Wipe the dust off the ULT freezer’s shell, inner chamber, and all accessories with a dry cloth. If the
ULT freezer is dirty, use a cleaning cloth soaked with a neutral detergent to remove dirt, and then
wipe off the residual detergent with a wet cloth. Finish by wiping with a dry cloth.
• Do not pour water onto the ULT freezer shell or into the ULT freezer. This could damage the electri-
cal insulation, leading to a failure.
• Ensure that the compressor and other mechanical parts are completely sealed and do not require
lubrication.
• Clean the frost or ice on the inner wall and the condenser lter screen once a month.
Cleaning of Condenser Filter Screen
• The lter screen should be cleaned once a month under normal use. If the lter screen becomes
blocked, the refrigeration effect of the freezer will be reduced, and the service life of the product
will be shortened. Clean the lter screen as follows:
1. Remove the front bottom hood and the lter screen.
2. Clean the lter screen with water.
3. Blow off the excess water with compressed air.
4. After the lter screen has dried, put it back in its original position and reinstall the hood.
Note: The conguration of different product models may vary. Refer to the specic physical object for
guidance.
Inner Wall Defrosting
Frosting may cause a gap between the ULT freezer and the door sealing strip, resulting in poor refrig-
eration. The inner door should be defrosted with an ice shovel attached to the ULT freezer. The follow-
ing steps are required for defrosting:
1. Shut down the auxiliary cooling device if any.
15
2. Remove items from the ULT freezer and transfer them to an environment suitable for storage.
3. Turn off the power switch.
4. Open the outer and inner doors to allow the ULT freezer to open naturally for a period of time for
defrosting.
5. Dry the accumulated water at the bottom of the ULT freezer with a piece of dry cloth.
6. After cleaning the ULT freezer and inner door, restart the ULT freezer.
7. Put the items back into the fully cooled ULT freezer.
8. If there is an auxiliary cooling device, restart the device.
CAUTION: Do not use a knife, screwdriver, or any other tool with a sharp edge to defrost.
Equipment Out of Service
Out of service: If the ULT freezer is to be stored unused in an unsupervised area for a long period, en-
sure that children do not have access to the ULT freezer and that doors cannot be closed completely.
Scrap: The scrapping disposal of the ULT freezer shall be carried out by corresponding professionals.
To prevent suffocation, the ULT freezer doors must be removed.
Optional Accessories
Temperature Recorder
Please refer to the Temperature Recorder Instructions provided by the temperature recorder for use.
CAUTION: Please install the temperature recorder by professional technicians or after-sales
personnel.
WARNING: Please cut off the power supply before installing the temperature recorder; other-
wise, electric shock or re may occur.
Freezer Rack and Box
When the freezer stores small specications of materials, freezer rack and box can make more e-
cient use of space. The height of the rack may need to be properly adjusted.
16
Troubleshooting
Any product may fail. Please observe the operation of the equipment during use. If there is any ab-
normality, please check and handle it according to the table below. If the problem cannot be solved,
inform our Customer Service Center in time, and we will do our best to help you and avoid any loss.
Fault Troubleshooting Method
ULT freezer does
not work
Is the power circuit breaker normal?
Is the power voltage too low?
Is the power switch off?
Is the fuse blown?
Poor cooling Is the ambient temperature too high?
Is the inner door closed tightly?
Is the outer door closed tightly? (The frost
between the ULT freezer and the door sealing
strip may damage the door sealing performance)
Is the air inlet dirty and blocked?
Are the condenser and lter screen dirty and
blocked?
Is the temperature set correctly?
Is the ULT freezer away from direct sunlight?
Is the ULT freezer close to the heat source?
Are the rubber hole cover and insulation material
of the test through hole properly placed?
Are a large amount of high temperature articles
placed in the ULT freezer for a short time?
Excessive noise Is the ULT freezer installed on a solid and at
ground?
Are other items contacting the ULT freezer
housing?
Is the base of the ULT freezer leveled?

17
WARRANTY
LIMITED WARRANTY
Koolmore Supply, Inc. extends a limited warranty to the original purchaser, guaranteeing that this Koolmore
product is free from manufacturing defects in material or workmanship for one year from the date of
purchase.
Should you discover any such defect within the warranty period, Koolmore Supply, Inc., reserves the right to
repair or replace the product without charge, or to cover the cost of replacement parts and repair labor needed
to correct defects present at the time of purchase or resulting from regular usage, when the appliance has been
installed, operated, and maintained as per the instructions provided.
At its sole discretion, Koolmore Supply Inc. may decide to replace the product. In such an event, your replace-
ment appliance will carry the warranty for the remaining term of the original unit's warranty period.
This warranty is valid exclusively to the original purchaser of the product and only applicable within the United
States. The warranty commences from the date of original consumer purchase. Proof of the original purchase
date will be required to obtain service under this warranty.
Under this limited warranty, your sole and exclusive remedy will be product repair, as outlined above. All
services must be provided by a Koolmore-designated service company.
To claim warranty or request repair service:
Email support@koolmore.com. Please include your name, address, phone number, warranty repair request,
and a copy of your proof of purchase receipt. Alternatively, visit koolmore.com and use the contact us page. A
Koolmore customer service representative will promptly arrange service for your appliance.
We thank you for choosing Koolmore.
WARRANTY EXCLUSIONS
This limited warranty will not cover:
1. Failure of the product to perform during power failures or interruptions,
or due to inadequate electrical service.
2. Damage incurred during transportation or handling.
3. Damage caused by accidents, vermin, lightning, winds, re, oods, or acts of God.
4. Damage resulting from accidents, alterations, misuse, abuse, improper installation, repair, or maintenance.
This includes using any external device that alters or converts the voltage or frequency of
electricity.
5. Unauthorized product modications, repairs by unauthorized centers, or use of non-approved
replacement parts.
6. Abnormal cleaning and maintenance not aligned with the user's manual.
7. Use of incompatible accessories or components.
8. Any costs associated with repairs or replacements under these excluded circumstances shall be the
responsibility of the consumer.