SPCAE HEATER
Thanks for choosing MORENTO!
Don't hesitate to contact us. Get in touch with our friendly customer
support team if you have any questions
Contact:[email protected]
Model:AT-SH40-WF
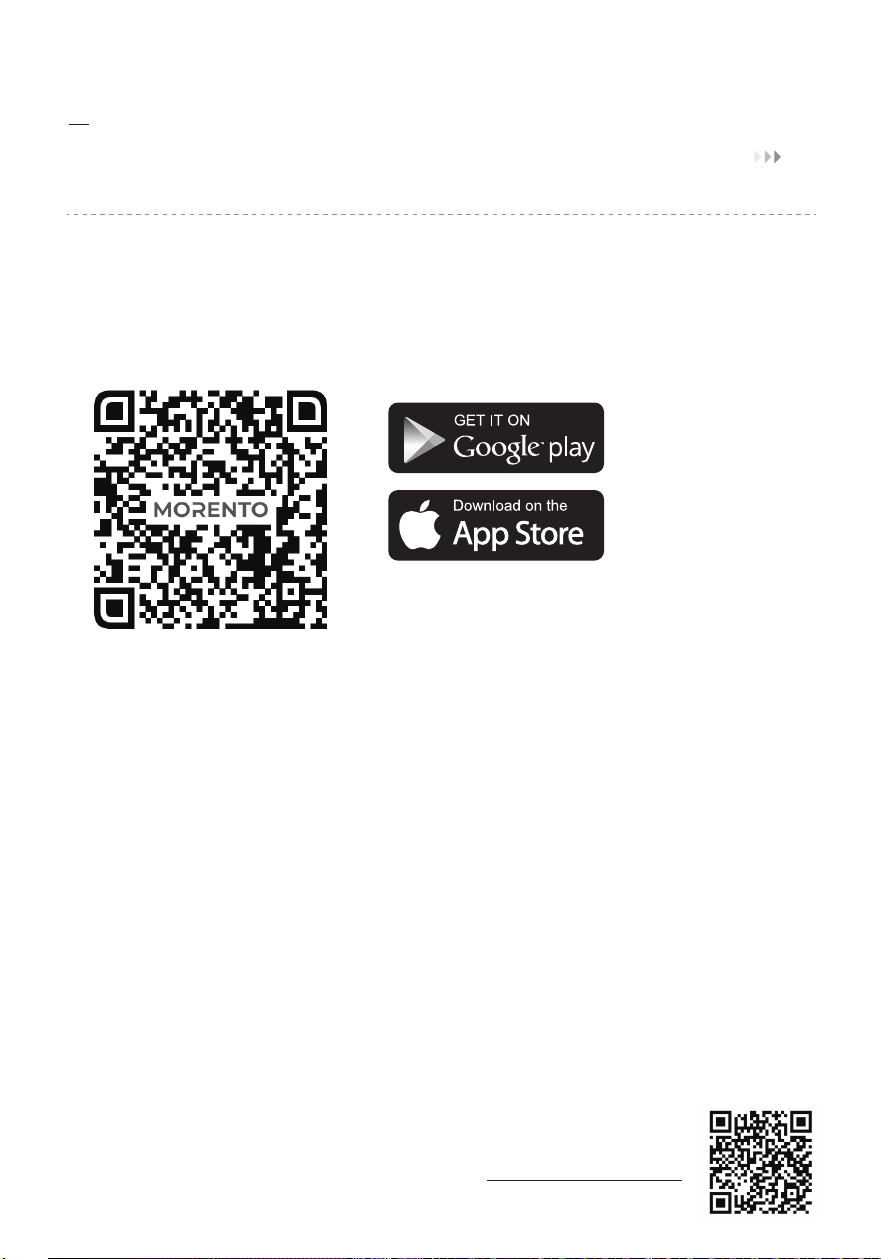
Scan the QR code to download the APP

CONTENTS
04
03
USING YOUR HEATER HOW TO DOWNLOAD THE APP AND
CONNECT THE SPACE HEATER
09
06
01
READ AND SAVE THESE
SAFETY INSTRUCTIONS
02
KNOWING YOUR HEATER
0401
05 06
TROUBLESHOOTING
11
13
07
08
WARRANTY
15
15
09
CUSTOMER SUPPORT
16
EN
EXCEPTION CLAUSES
CLEANING AND MAINTENANCE

04
01
LIRE ET CONSERVER CES
CONSIGNES DE SÉCURITÉ
COMMENT TÉLÉCHARGER L'APPLICATION
ET CONNECTER LE CHAUFFAGE
D'APPARTEMENT
02
CONNAÎTRE VOTRE APPAREIL DE
CHAUFFAGE
03
05
UTILISATION DE VOTRE APPAREIL
DE CHAUFFAGE
21
26
23
17
28
06
DÉPANNAGE
30
CONTENU
FR
NETTOYAGE ET ENTRETIEN
WARNING:
When using electrical appliances, basic precautions should always be followed to reduce
the risk of fire, electric shock, and injury to persons, including the following:
1. Read all in instructions before using this heater. Use this heater only as described in this
manual. Any other use not recommended by the manufacturer may cause fire, electric shock,
or injury to persons.
2. This heater is hot when in use. To avoid burns, do not let bare skin touch hot surfaces.
3. Use the handle to move this heater.
4. Extreme caution is necessary when any heater is used by or near children or invalids and
whenever the heater is left operating and unattended.
5. Do not insert or allow foreign objects to enter any ventilation or exhaust opening as this
may cause an electric shock or fire, or damage the heater.
6. The output of this heater may vary and its temperature may become hot enough to burn
exposed skin. Use of this heater is not recommended for persons with a high sensitivity to
heat or an inability to react to avoid burns.
7. Do not attempt to modify or repair the product by yourself. Doing so could void the
warranty and cause damage or personal injury. Only a repair technician may disassemble or
repair this product.
8. If the machine is not working as it should, has received a sharp blow, has been dropped,
damaged, left outdoors, or dropped into water, do not use and contact Customer Support.
9. There may be a trace of smoke or odor when the unit is first operated. This indicates that
a drop of oil fell on the heating coil during the manufacturing process. It will quickly evaporate
and should not re-occur.
10. Do not use outdoors. For household use only.
11. Place the heater on a firm, flat, and level surface free from obstructions and at least 3
feet (1 meter) away from any wall or combustible materials.
12. Do not use in a bathroom, laundry areas and other similar moist indoor areas.
General safety
Electricity safety
01
READ AND SAVE THESE SAFETY INSTRUCTIONS
01
1. Always unplug heater when not in use.
2. Always plug heaters directly into a wall outlet/receptacle.
3. To disconnect heater, turn controls to off, then remove plug from outlet.
EN
02
4. Do not operate any heater with a damaged cord or plug or after the heater malfunctions,
has been dropped or damaged in any manner. Discard heater, or return to authorized service
facility for examination or repair.
5. Do not run cord under carpeting. Do not cover cord with throw rugs, runners, or similar
coverings, Do not route cord under furniture or appliances. Arrange cord away from traffic
area and where it will not be tripped over.
6. Do not use an extension cord or power strip.
7. Do not plug in a loose or dusty outlet.
8. A plug or cord which becomes hot to the touch or becomes distorted in shape may be a
result of a worn electrical prior to further use of the heater. Plugging the heater into a worn
outlet / receptacle may result in overheating of the power cord or fire.
9. This appliance has a polarized plug (one prong is wider than the other). To reduce the risk
of electric shock, this plug is intended to fit in a polarized outlet only one way. If the plug does
not fit fully in the outlet, reverse the plug. If it still does not fit, contact a qualified electrician.
Do not attempt to rig this safety feature.
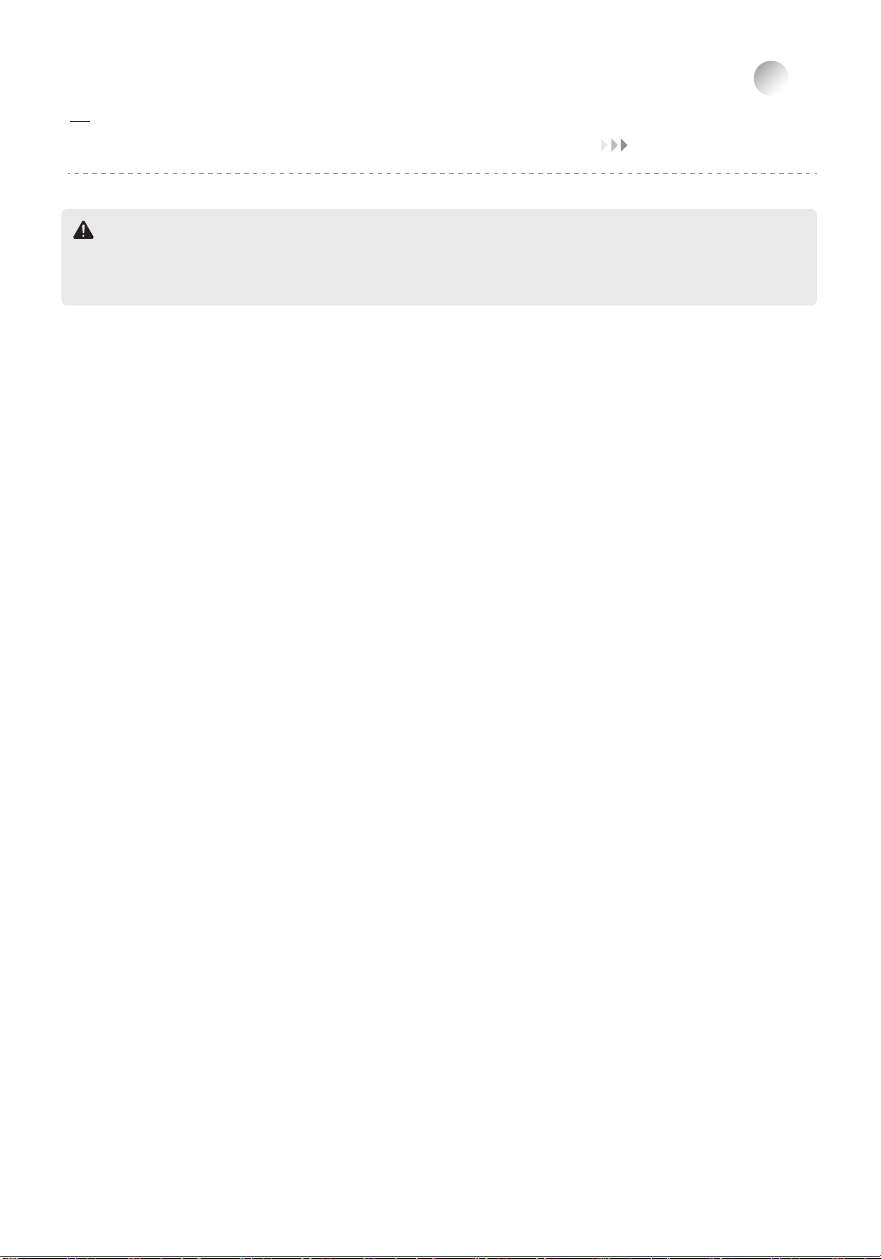
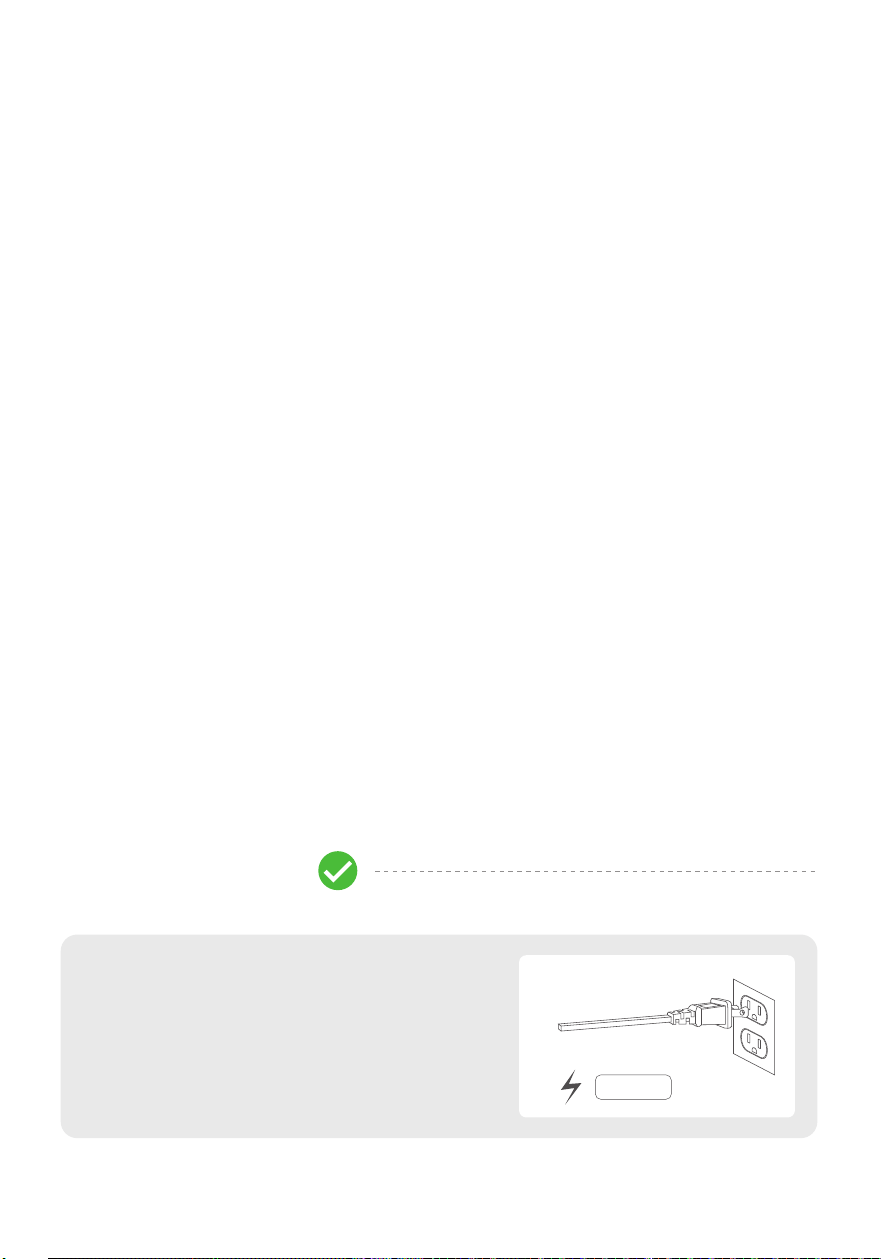
Do
·Only plug the heater directly into a
120V/60Hz wall outlet.
Power strip / extension cord / shared outlet
can cause overloading and result in a short
circuit, fire or electric shock.
·Check the plug and outlet regularly and
keep them clean.
Most dust is flammable and dust buildup
can cause a short circuit, fire or electric
shock.
15A /120V
Heater safety: Do' and Don't
·Check the plug regularly and contact
Customer Support if it's bent or damaged.
Any bent or damaged plug can cause a short
circuit, fire or electric shock.

03
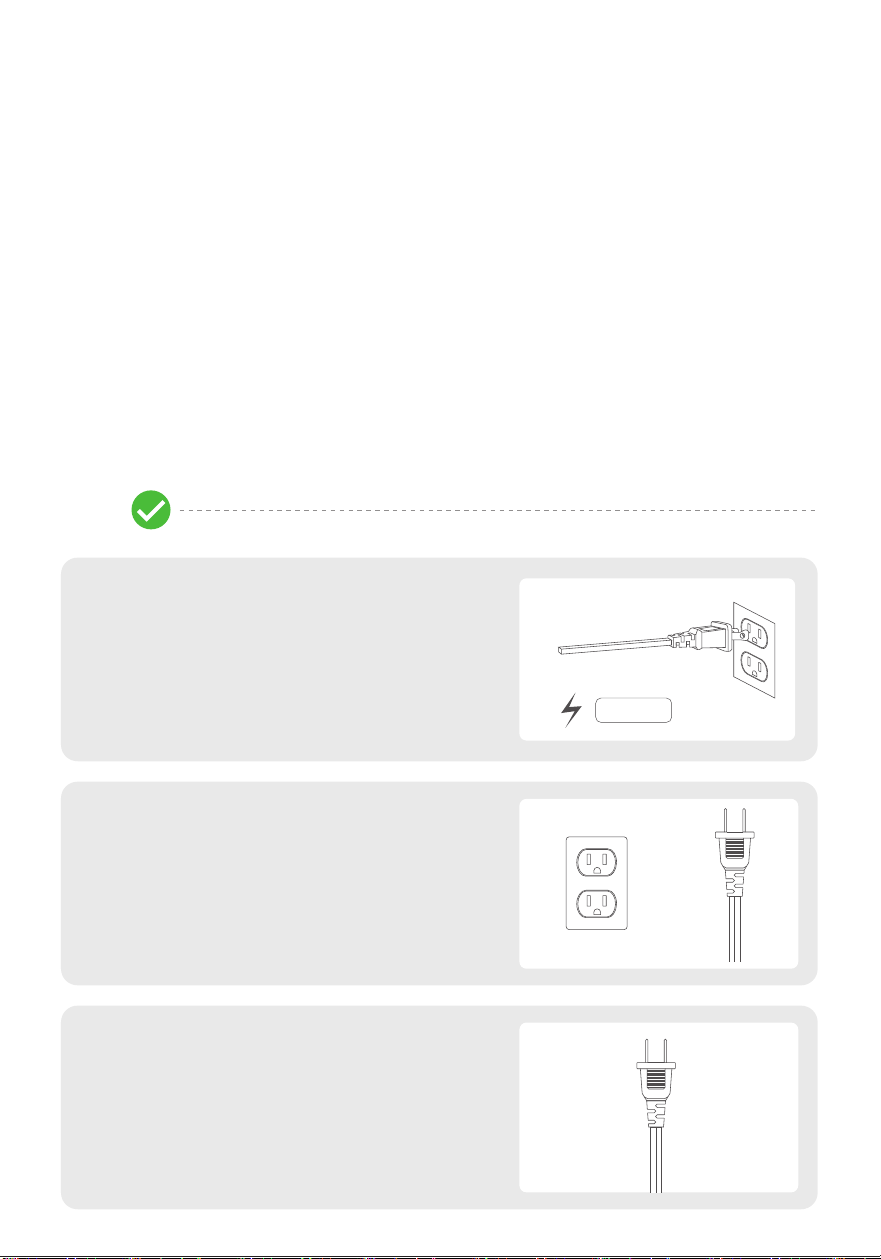
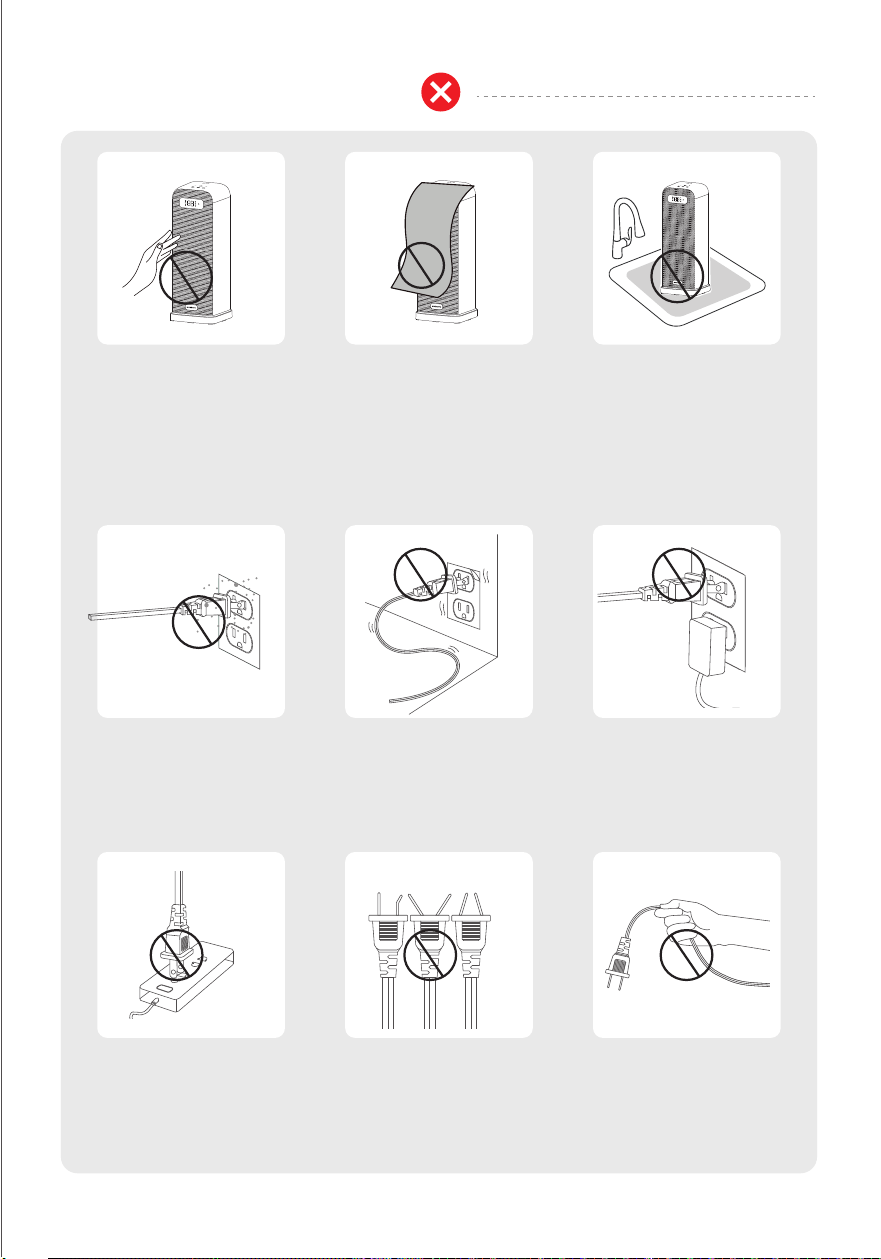
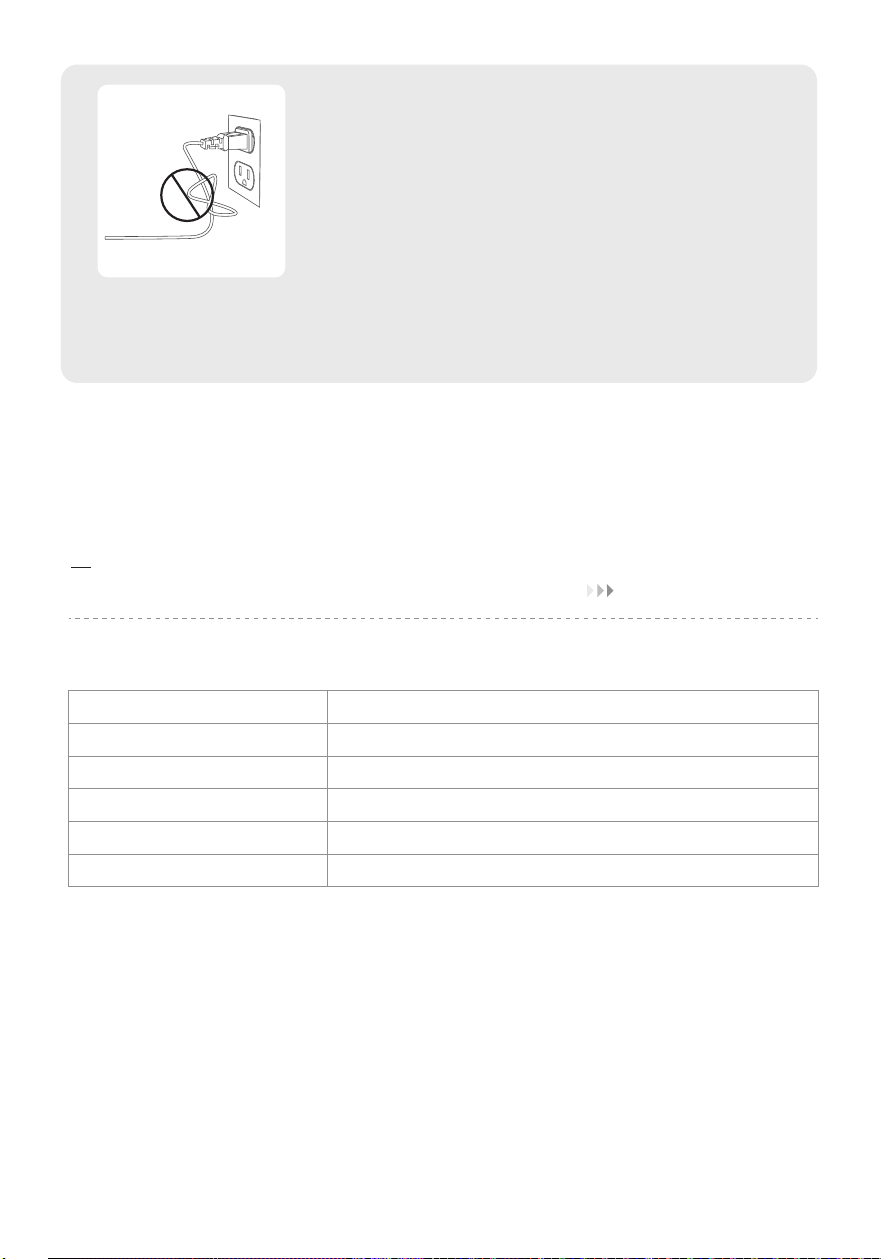
Don't
·Unplug by pulling on the plug only
Pulling the plug out by the cord stresses
the wire and can break connections
causing a short circuit, fire or electric
shock.
·Ask an qualified electrician to fix the
outlet if it's loose.
Loose outlets can disrupt currents and
can cause a short circuit, fire or electric
shock.
Do not cover the heater
to avoid overheating.
Do not use in a bathroom,
laundry areas and other
similar moist indoor areas.
Do not touch the metal
protection net to avoid
burns.
Do not plug in a loose
outlet.
Do not share the outlet
with other appliances.
Do not use a dusty plug
or plug into a dusty
outlet.
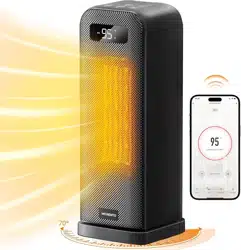
02KNOWING YOUR HEATER
04
Do not touch the metal
protection net to avoid
burns.
Do not unplug by pulling
on the cord.
Do not use an extension
cord or power strip.
Do not coil the power
cord when in use.
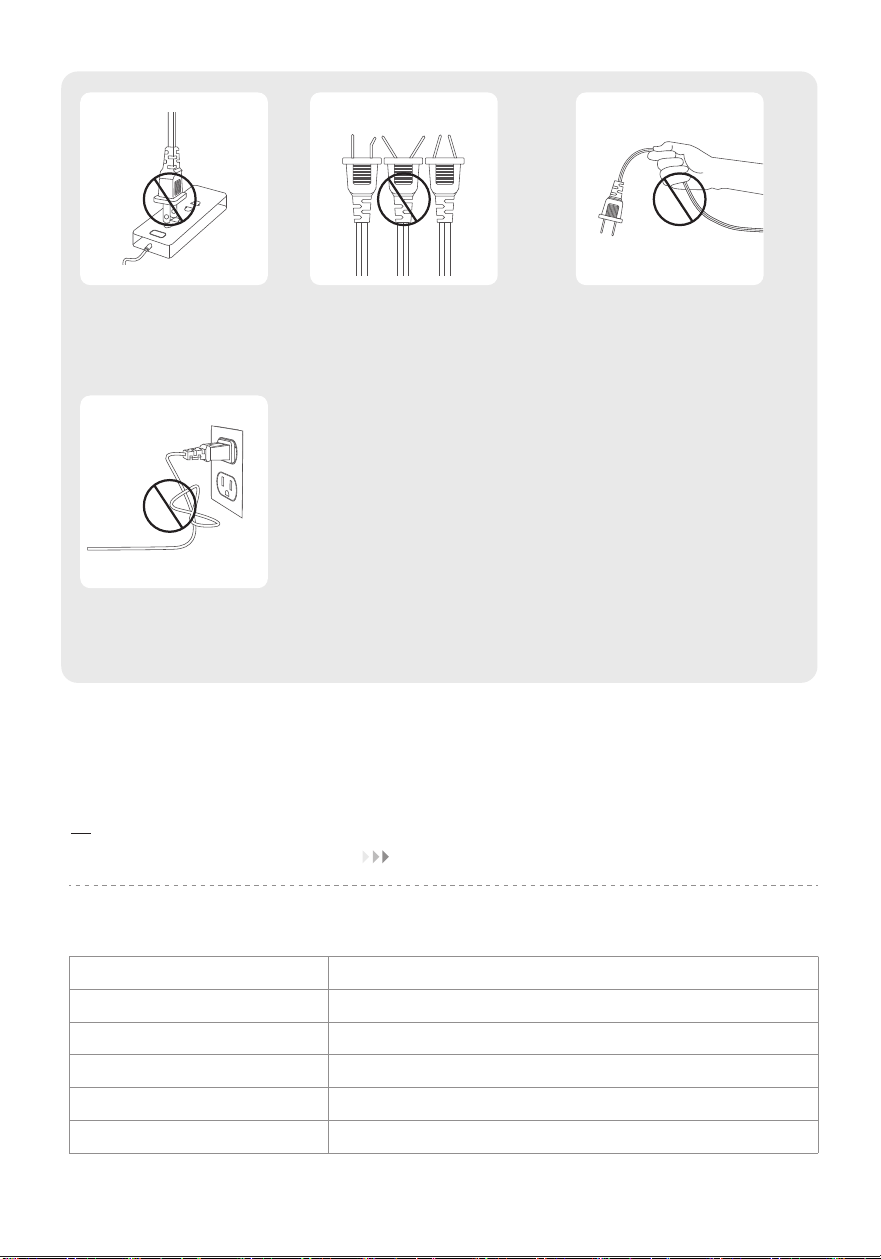
Spcifications
Model
Power Supply
Rated Power
Noise Level
Product Dimensions
Weight
AT-SH40-WF
AC 120V/60Hz
1500W
23-36db
174* 174 * 432 mm / 6.85 * 6.85 * 17 in
2 kg / 4.4 lb
05
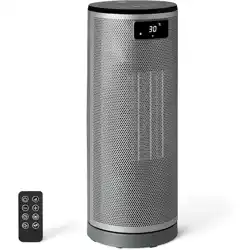
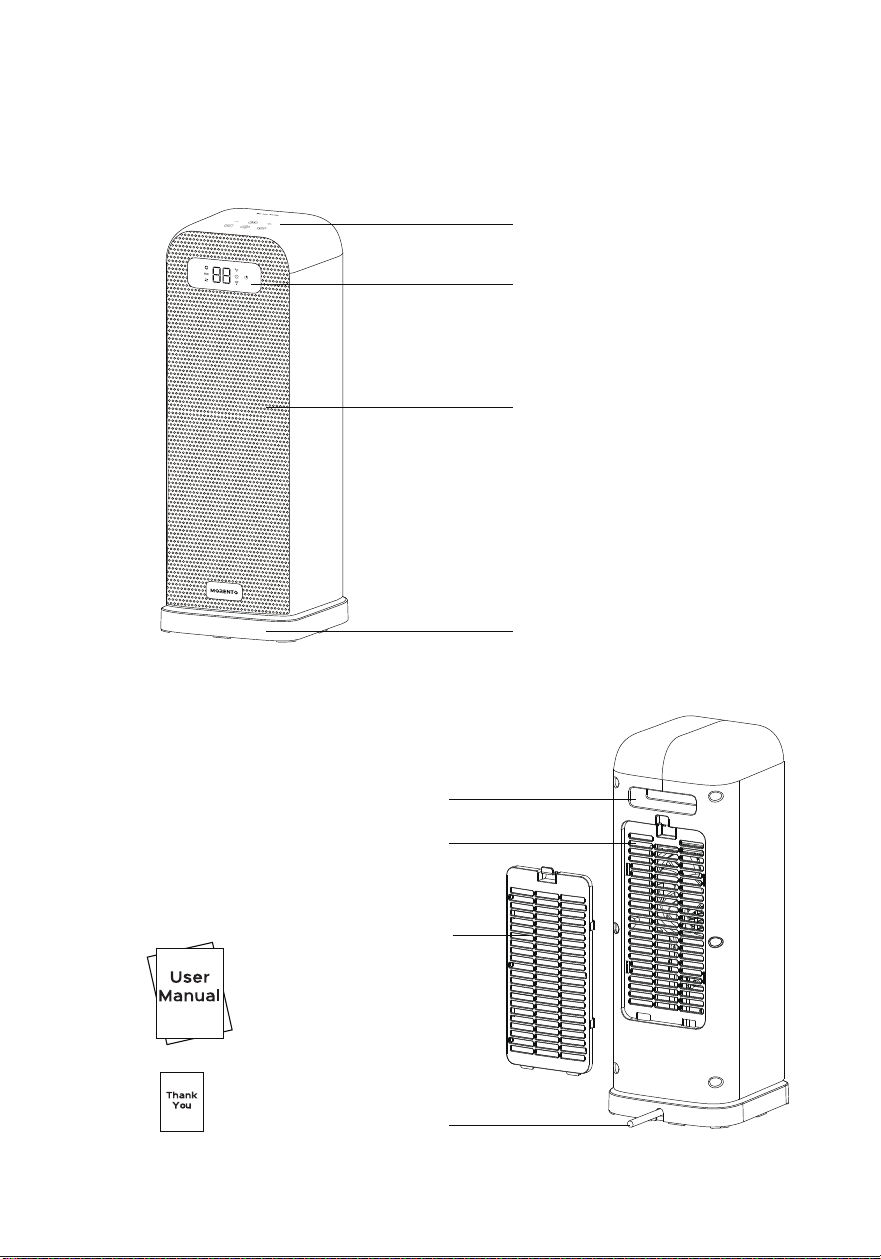
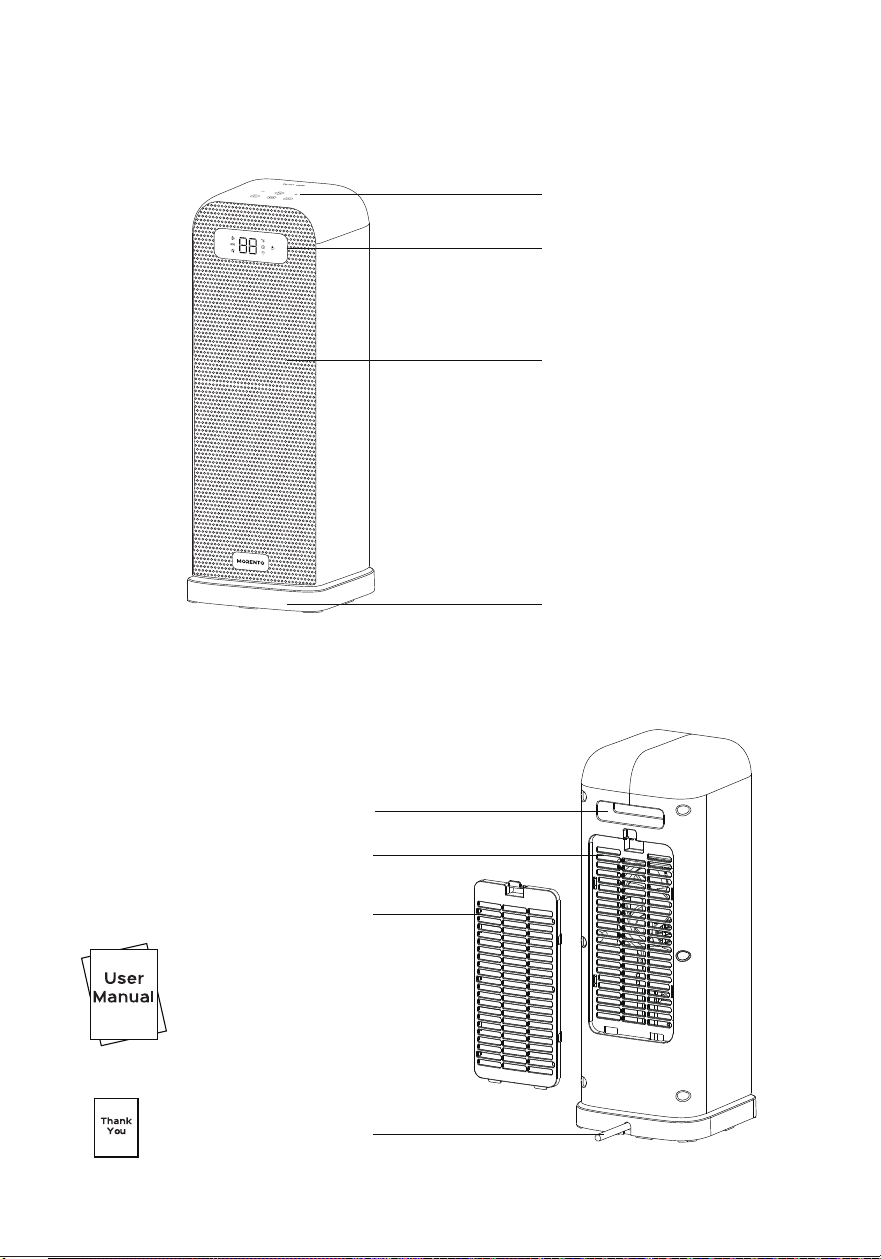
Package Contents
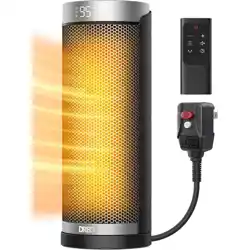
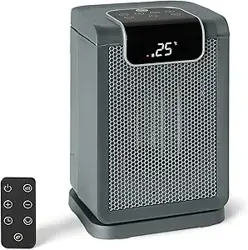
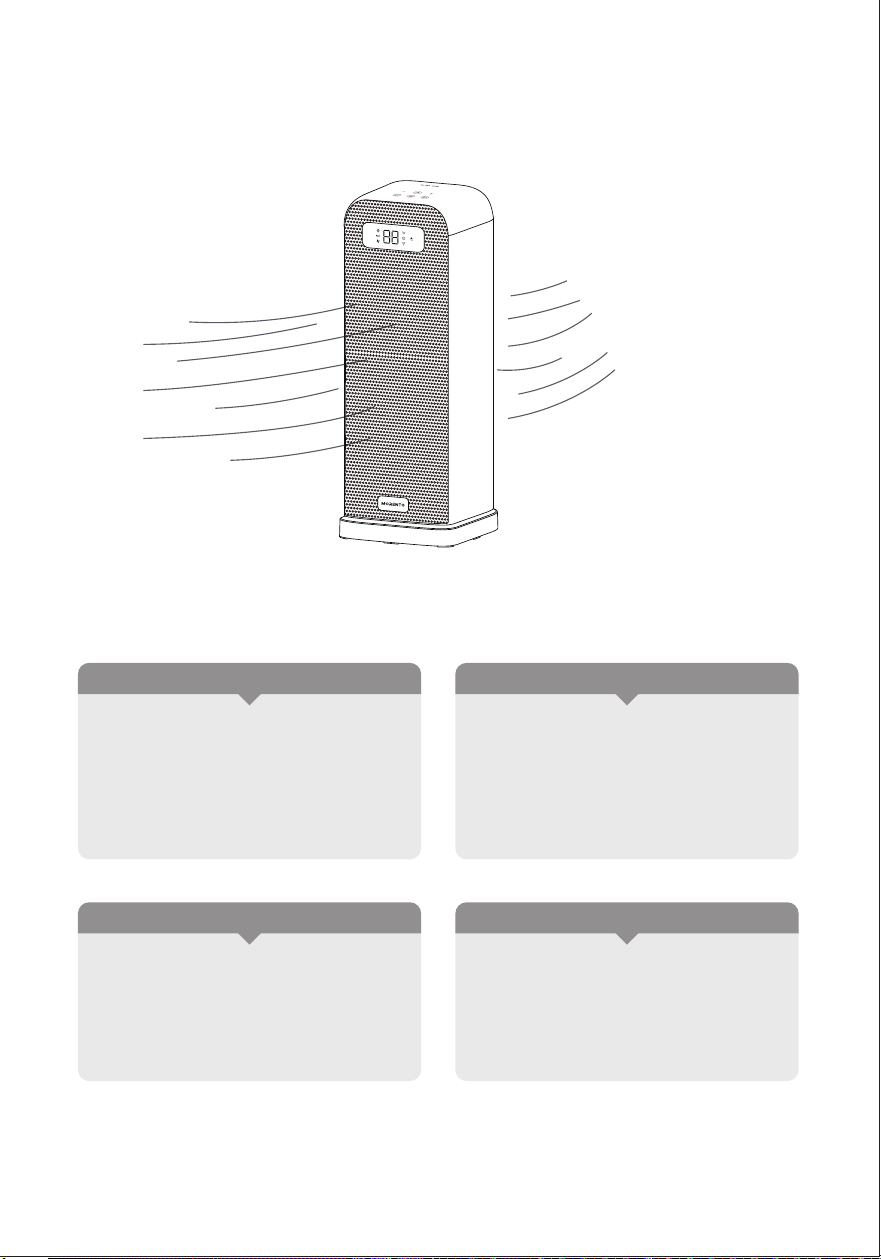
Control Panel
LED Display
Air Outlet
Base
Handle
Air Inlet
Dust Filter
Power & Plug
06
03
USING YOUR HEATER
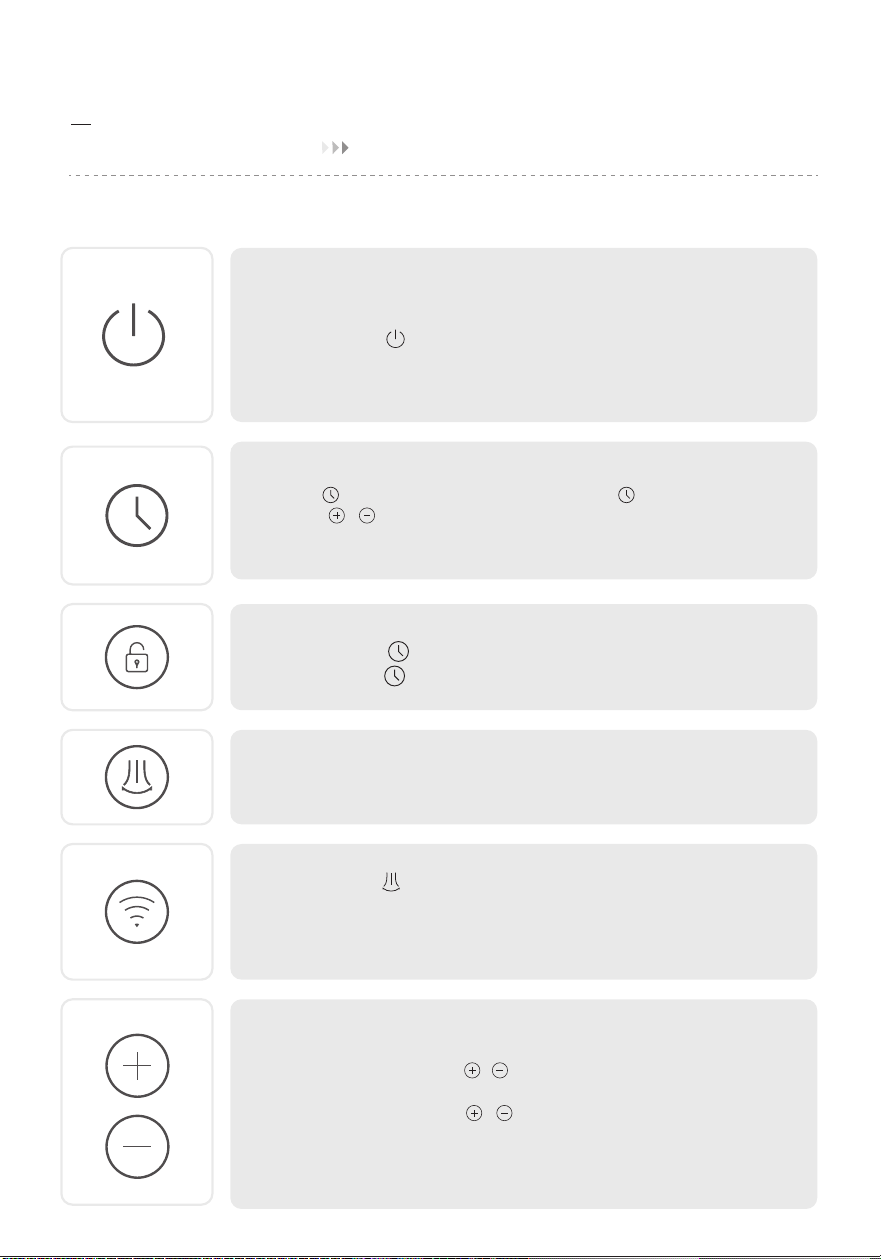
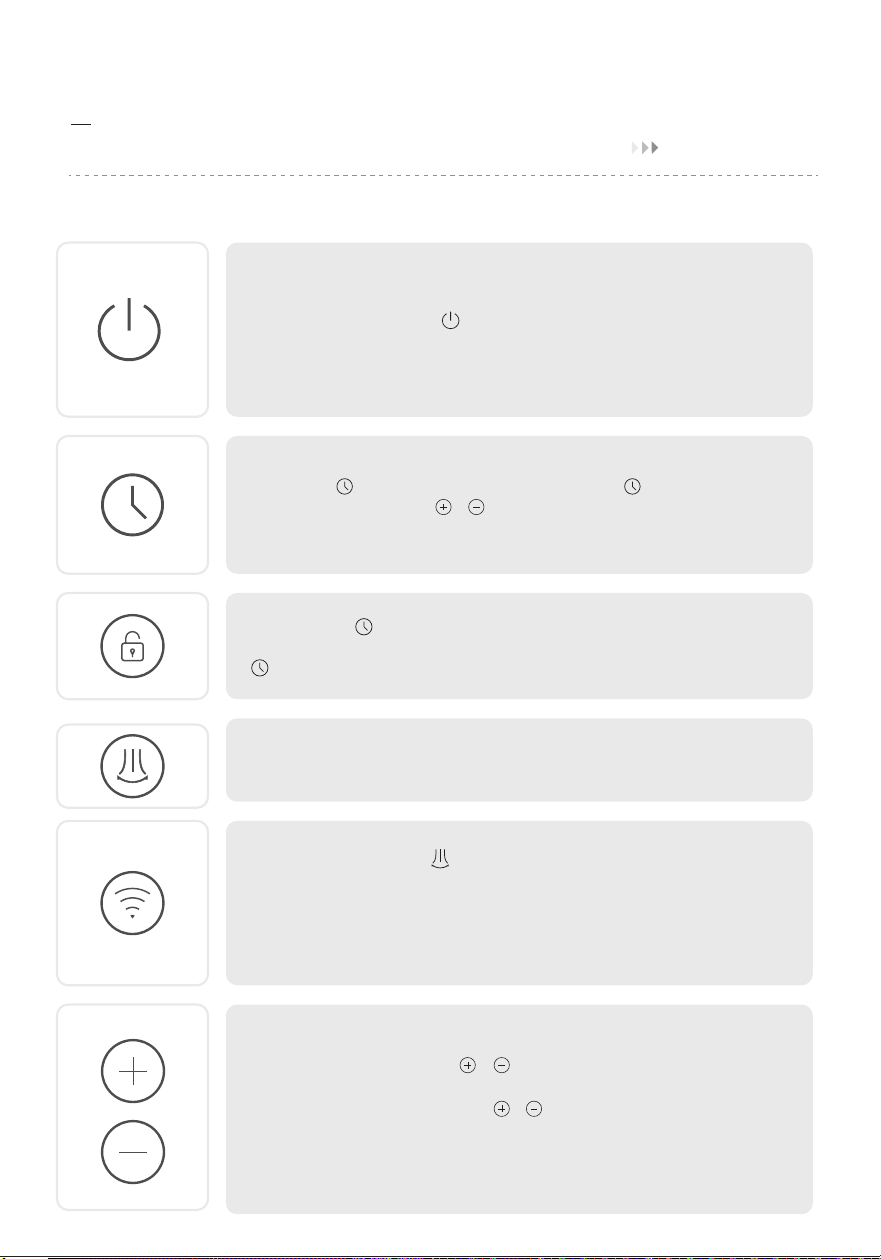
Control Panel
Power on/off button
- Touch to turn the heater on or off.
- When the heater is plugged into the electric outlet, the LED display
power indicator will light in red.
- Once turn off, a 30-second countdown will show up on the LED
display as the fan will continue to run for 30 seconds to blow out
the remaining heat.
Oscillation button
-Touch to turn on or off oscillation.
Auto-off timer button(0-12h)
-Touch to set the timer function , display will light up, and
touch ( / ) to set a timer(0-12h). After the timer ends, the
heater will turn off automatically.
- To cancel, set the timer to 0 hour.
Plus and minus buttons ( temperature level / timer)
- To set the temperature level or set the timer.
- In ECO mode, touch ( / )to adjust the set temperature
(41-95℉).
- In Timer mode, touch( / )to adjust the timer(0-12h).
Note: In ECO mode, the heater will turn off automatically when the
set temperature has been reached. If your heater turns off frequently,
please raise the temperature, or switch to Power Heat mode.
Wifi button
Press and hold for 3 seconds to enter the Wifi reset.
Wifi indicator
Not connected or connecting to Wifi:The ”pattern“ will blink rapidly.
Successfully connected and online:The ”pattern“ will remain lit.
Child lock button
Press and hold for 3 seconds to enter the child lock function,
press and hold for 3 seconds again to disable the child lock
function.
07
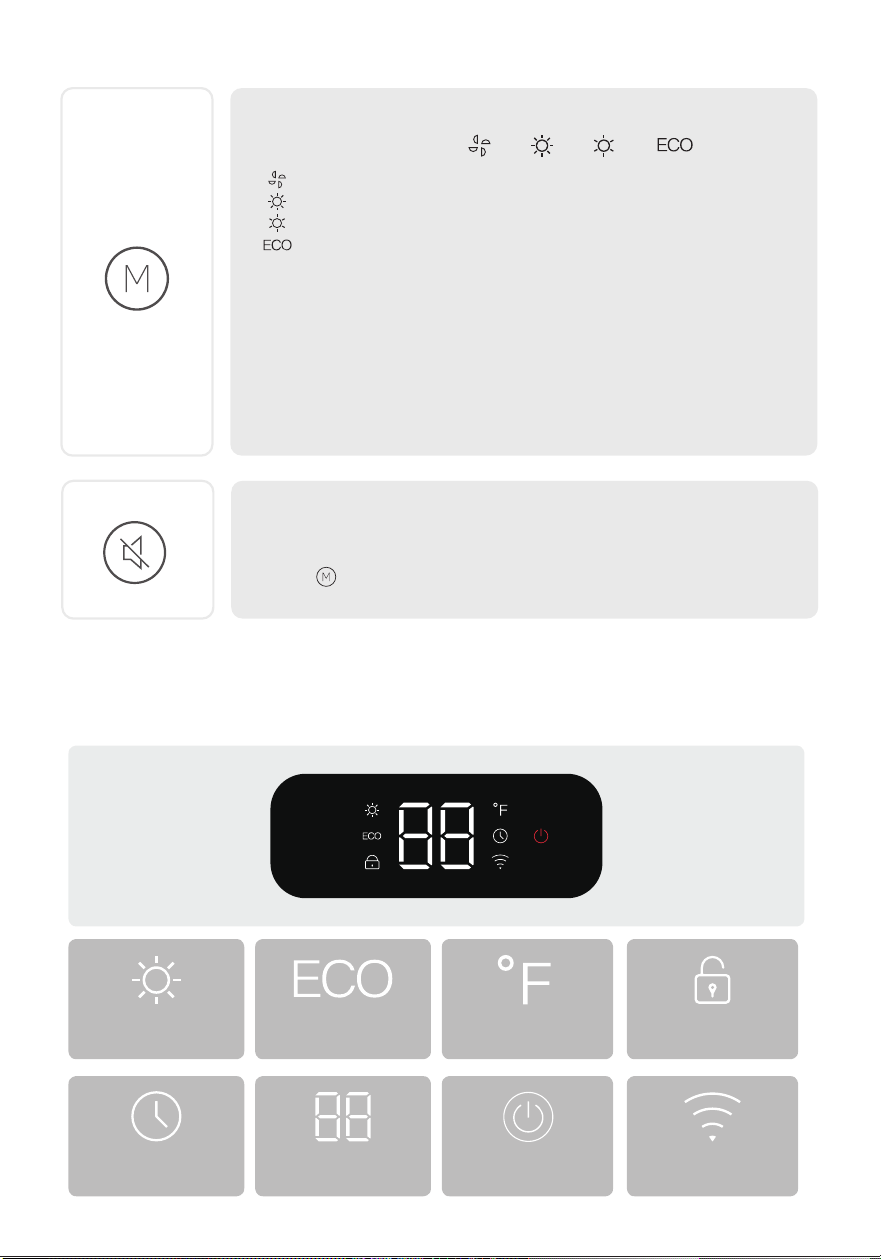
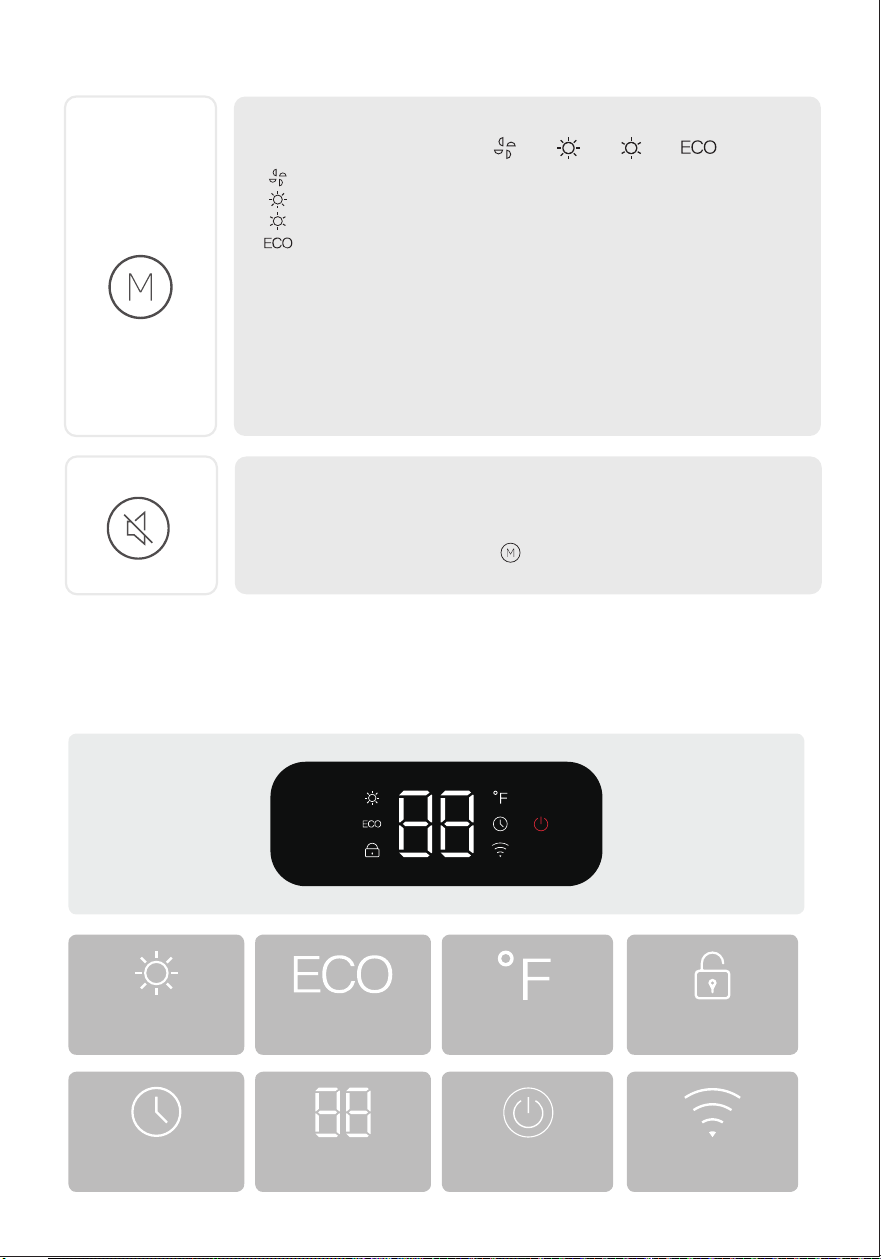
Mode settings button
- Touch to cycle through -> -> ->
LED Display
( )Fan only,and the LED display show “ - - ”
( )High Power Heat (1500W)
( )Low Power Heat (900W)
( )The heater will automatically select its optimal heating
power, depending on the difference between the set temperature
(41-95℉)and ambient temperature.
ECO mode Temperature Child lock
High power heat(H2)
Low power heat(H1)
Mute/Unmute
To turn on/off the button sounds, long press the Mode settings
button on the panel for 3 seconds.
Note:
- When the ambient temperature reaches the set temperature, the
heater will turn off automatically in 30 seconds.
- When the ambient temperature drops below the set temperature,
the heater will operate on low or high power (900W or 1500W),
depending on the difference between the two temperatures.
Timer
Set temperature
timer hour
Plugged in Wifi indicator
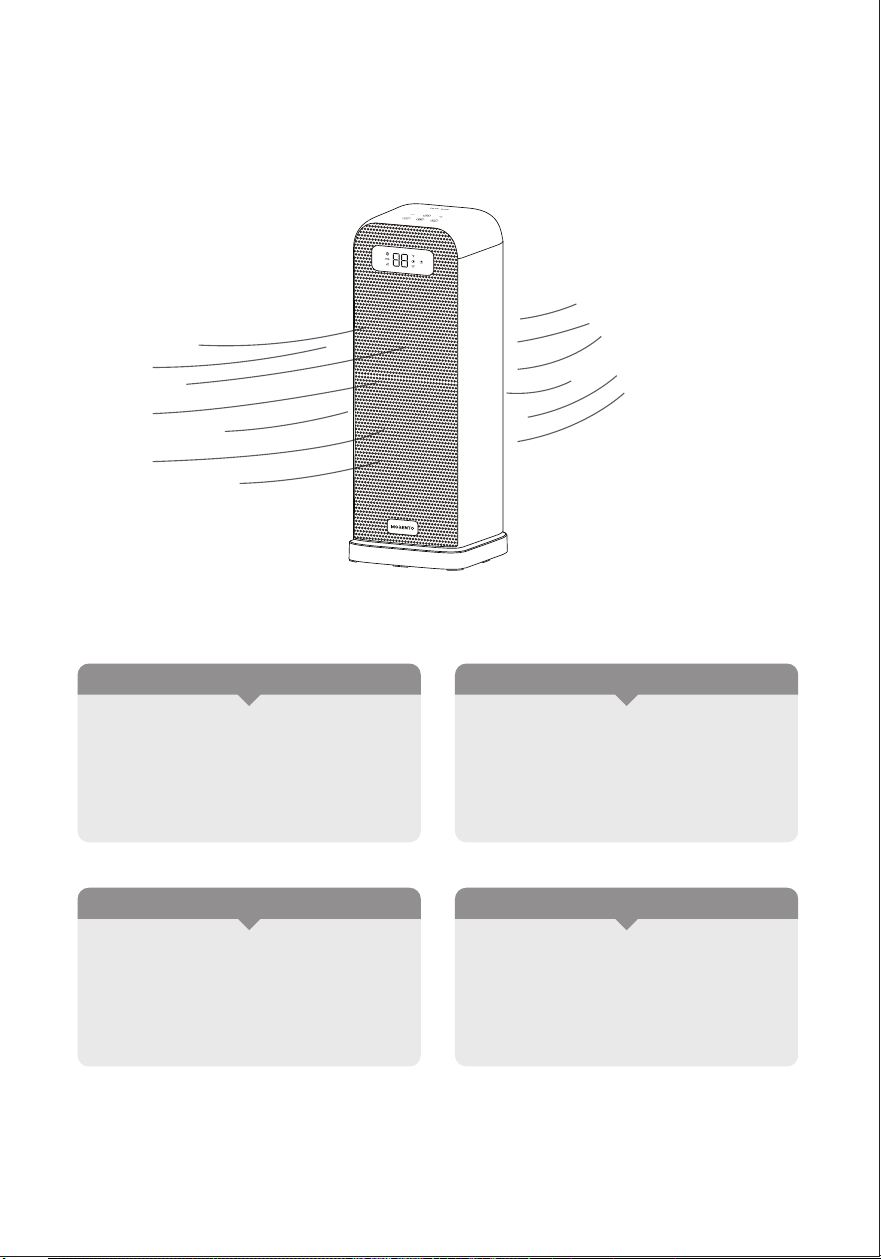
More Features
The heater will remember its last
settings (temperatures, working
modes, oscillation status when the
heater turn on (The heater should
be plugged into the electric outlet.)
Memory Function
24-Hour Auto Off
The heater will shut off automatically
after continuously running for 24
hours.
Tip-Over Protection
When the heater is tipped over, it
will shut off automatically
Overheat Protection
When the heater overheats, it will
shut off automatically
08
04
HOW TO DOWNLOAD THE APP AND CONNECT THE SPACE HEATER
09
Havaworks App Setup
Note: The "Havaworks" App is continually being improved and may change over time. If there
are any differences, follow the in-app instructions.
1.To download the “Havaworks" App, scan the QR code or search “Havaworks” in the Apple
App Store or Google Play Store.
Google Play: "Google Play and the Google Play logo are trademarks of
Google LLC."
Apple:"App Store and the Apple logo are registered trademarks of Apple Inc.
Note: For Android users, choose "Allow" to use "Havaworks”
Note: You must create your own “Havaworks" account to use third-party services and products.
These will not work with a guest account. with a "Havaworks" account, you can also allow your
family and friends to control your space heater.
3. Follow the in-app instructions to set up your space heater.Note: Your phone must have
Location turned on while your phone is connecting to your space heater. This is required to
establish the Bluetooth" connection. You can tum Location off after your space heater is
finished connecting to the “Havaworks" App.
WiFi Connection
• To disconnect Wi-Fi, press and hold the power button for about 5seconds, until the device
makes a "beep beep beep" sound, This will restore the space heater's default settings and
disconnect it from the "Havaworks" App.
• To reconnect, please follow the instructions in the “Havaworks" App for
adding a device.
• Or scan the QR code to add a device
2. Open the "Havaworks" App. log in or sign up.

10
Havaworks App Troubleshooting
My space heater isn't connecting to the “Havaworks” app.
• During the setup process, you must be on a secure 2.4GHz Wi-Fi network. Confirm that the
network is working correctly.
• Make sure the Wi-Fi password you entered is correct.
• There should be no spaces at the beginning or end of the password.
• Test the password by connecting a different electronic device to the router.
• If you're manually typing in the SSID and password, double check that both are entered
correctly.
• Try moving your space heater closer to the router. Your phone should be as close as possible
to your space heater.
• Your router may need to be at a higher location, away from obstructions.
• Make sure your space heater and router are away from appliances (such as microwave
ovens,refrigerators, electronic devices, etc.) to avoid signal interference.
• If you're using a VPN, make sure it's turned off while setting up your space heater.
• Disable portal authentication for your Wi-Fi network. lf portal authentication is enabled,the
space heater will not be able to access your Wi-Fi network, and setup will fail.
Note: Portal authentication means that you need to sign in to your Wi-Fi network through
a web page before you can use the Internet.
My space heater is offline.
• Make sure the space heater is plugged in and has power, then refresh the menu by swiping
down on the screen.
• Make sure your router is connected to the internet and your phone's network connection is
working.
• Delete the offline space heater from the “Havaworks” app. Swipe left (i0S) or tap and hold
(Android), then tap Delete, Reconfigure the space heater with the “Havaworks” app.
Note: Power outages, internet outages, or changing Wi-Fi routers may cause the space heater
to go offline. If your problem is not listed, please contact Customer Support.
05
CLEANING AND MAINTENANCE
Cleaning and maintenance
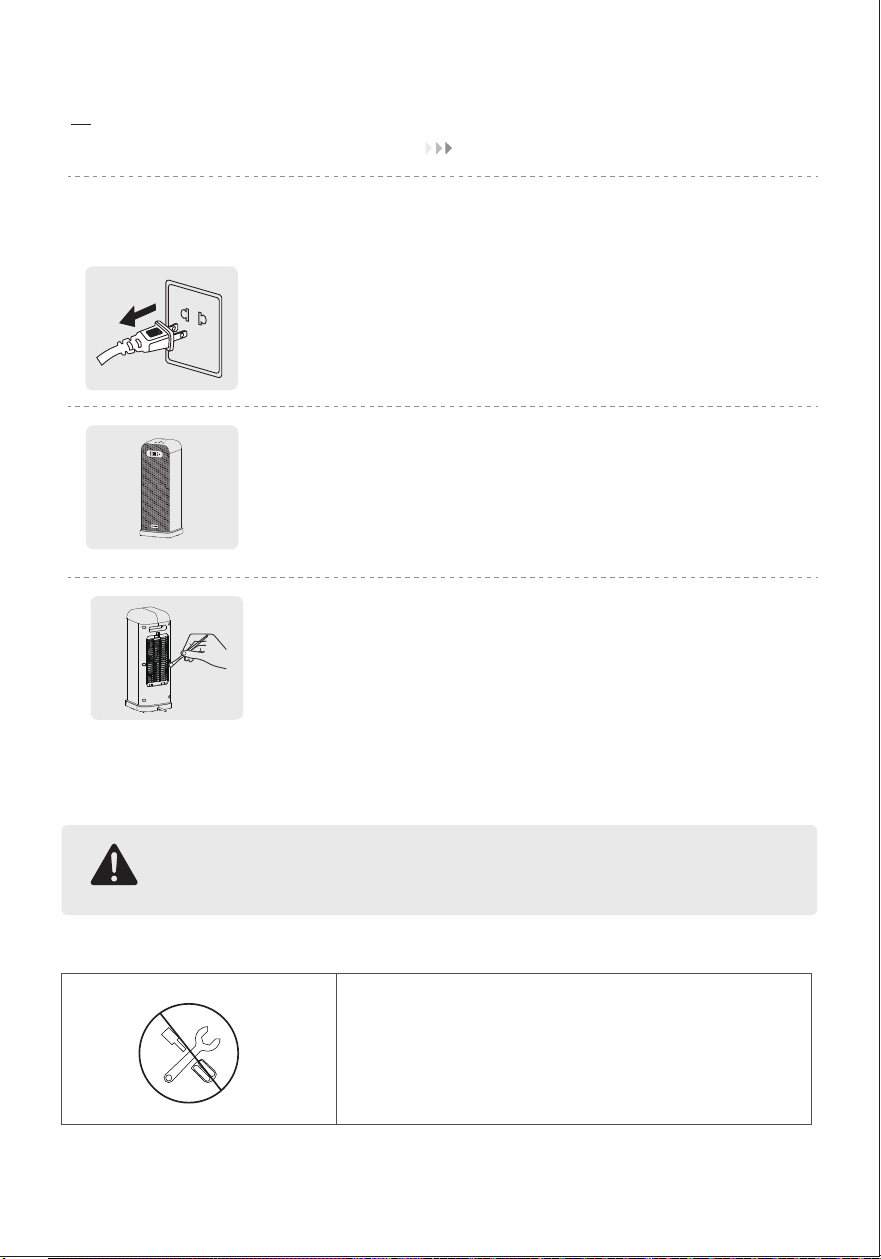
Always turn off and unplug before cleaning.
Outer surface
Use a soft, dry cloth to gently wipe clean the outer surface
Air inlet
Use a soft, dry cloth or a cotton-tipped swab to remove
any dust from the air inlet.
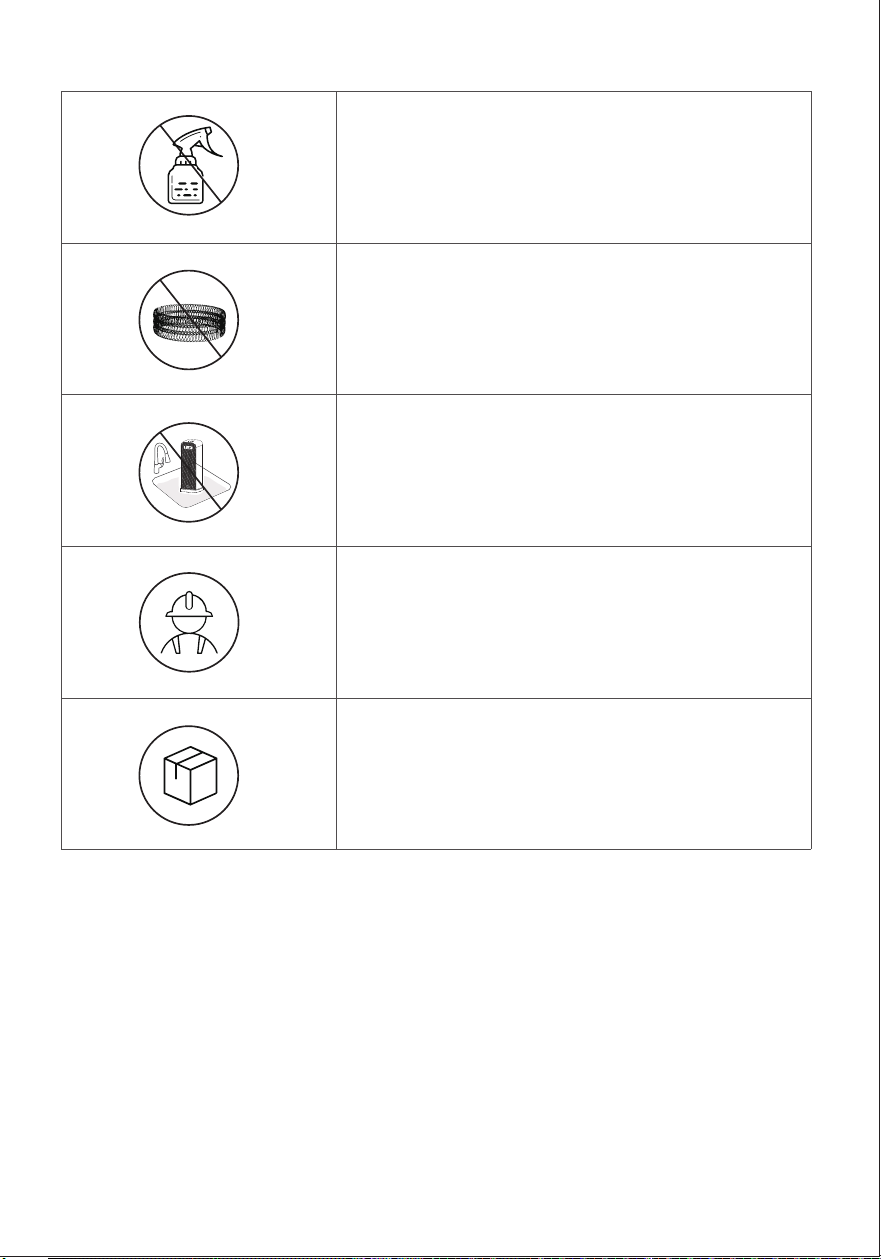
Attention
Do not unscrew the unit.
11
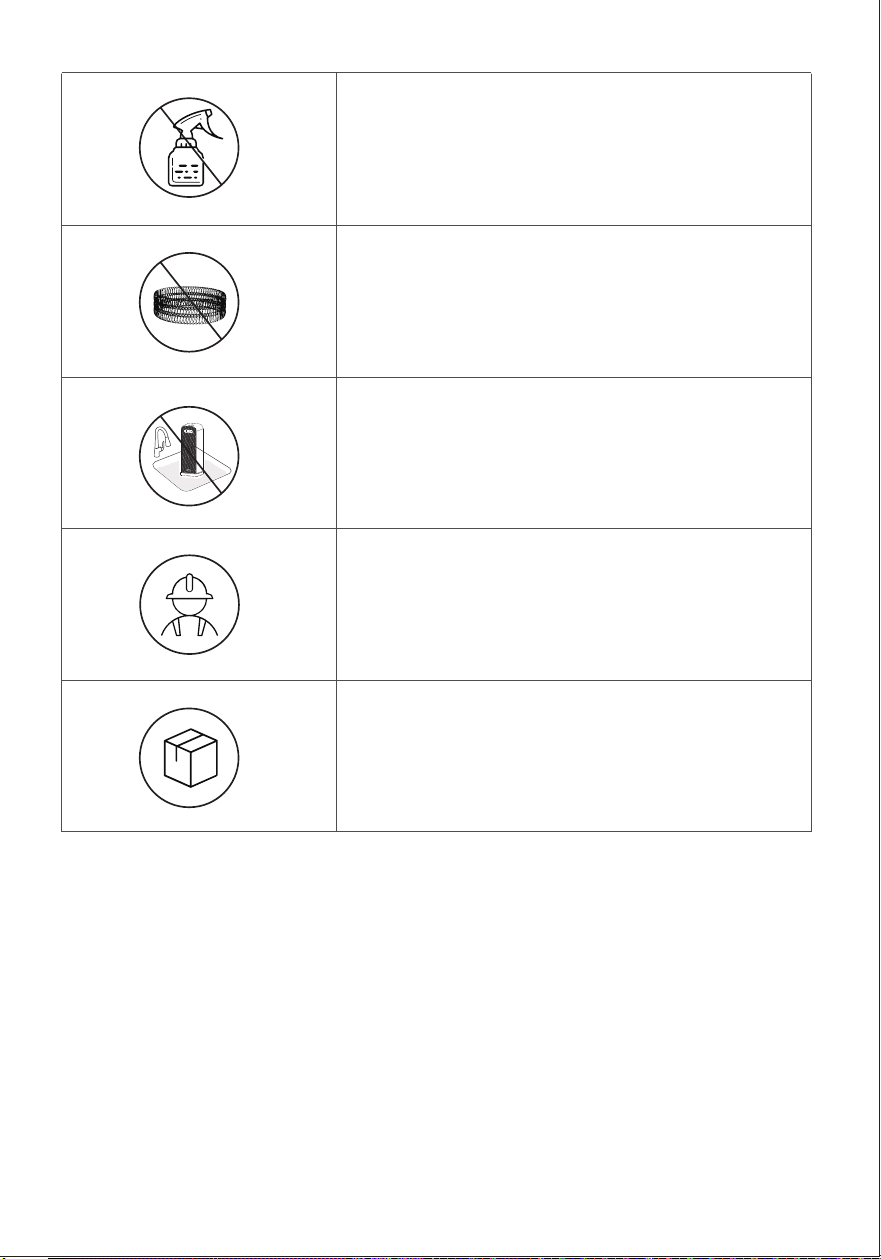
Do not use cleaning agents.
Do not use abrasive scrubbers.
Except for cleaning, any servicing should
be performed by an authorized service
representative.
Store in a cool, dry area and keep the cable
out of high-traffic areas to avoid tripping
hazards.
Fire or electrical shock hazard.
Do not immerse the main unit in water.
Never allow water to get inside the heater.
12
06
TROUBLESHOOTING
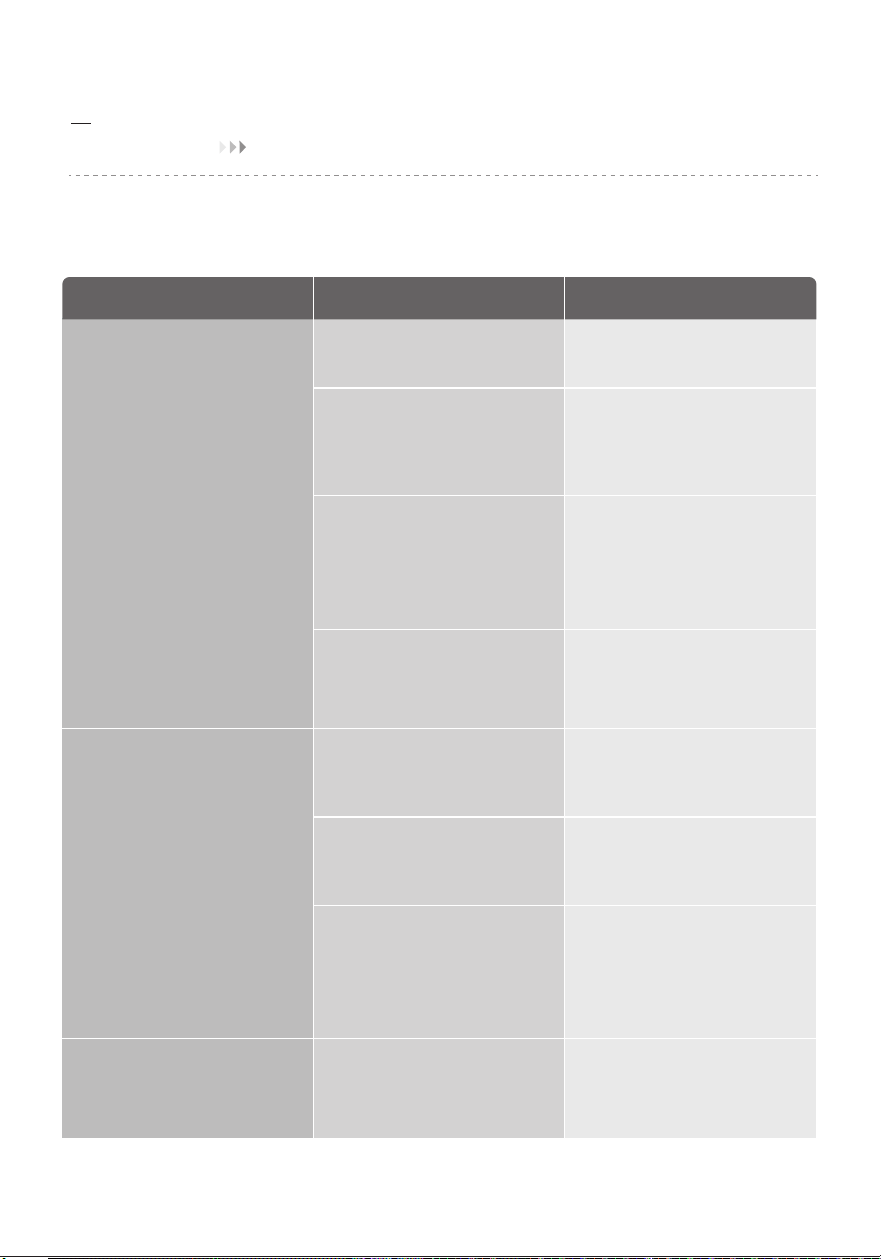
If your problem is not listed or still persists, contact our Customer Support
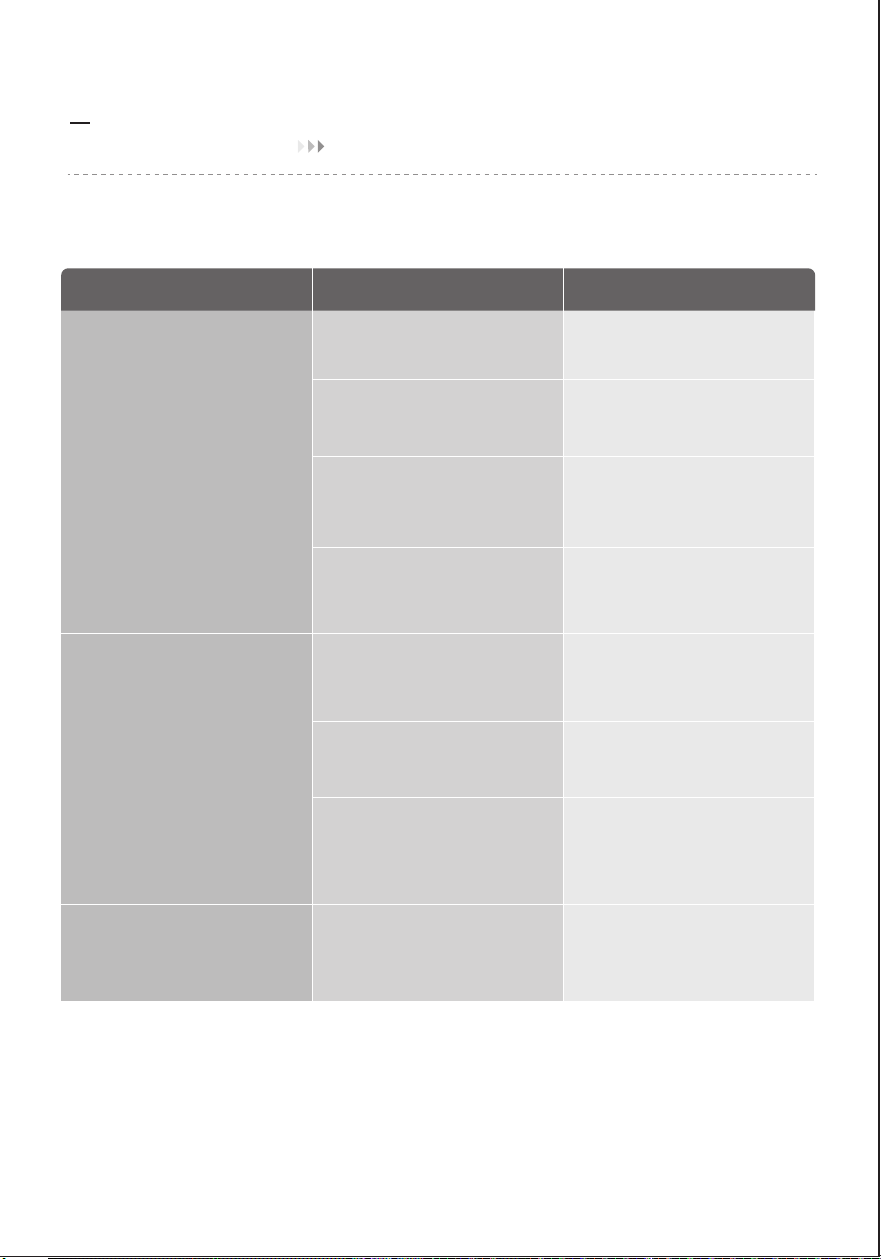
Problem Possible Causes Solution
Heater does not start
The heater suddenly stops
during heating
Abnormal sound of fan
Pow cord is not properly
plugged in.
The temperature exceeds the
threshold of the thermal cutoff.
Turn off and unplug the unit.
Allow it to cool and plug into
the electrical outlet again
Place it on a flat, level and
stable surface.
This is normal. If your heater
turns off frequently, please raise
the temperature, or switch to
Power Heat mode.
The heater is tipped over.
In ECO mode, the heater will
turn off automatically in 30
seconds when the set
temperature has been reached.
Foreign matter in contact with
fan.
Remove foreign matter
Connect the plug to a powered
electrical outlet.
Unplug and allow it to cool.
Remove any objects on or near
the heater.
Ensure that your circuit breaker
or fuse is working properly.
Ensure that your heater is placed
on a flat and even surface.
Ensure that the temperature is
set to be higher than the ambient
temperature.
Overheat protection has
been activated.
No power is passing through
the unit.
The set temperature is lower
than the ambient temperature.
13

Fcc Radiation Exposure Statement•
·Reorient or relocate the receiving antenna.
·Increase the separation between the equipment and receiver.
·Connect the equipment into an outlet on a circuit different from that to which the receiver
is connected.
This equipment complies with FCC radiation exposure limits set forth for an uncontrolled
environment. End users must follow the specific operating instructions for satisfying RF
exposure compliance. To maintain compliance with FCC RF exposure compliance requirements,
please follow operation instructions as documented in this manual.
This transmitter must not be co-located or operating in conjunction with any other antenna or
transmitter. This equipment should be installed and operated with a minimum distance of 20
cm between the radiator and your body.
·Consult the dealer or an experienced radio/TV technician for help.
FCC Caution: Any changes or modifications not expressly approved by the party responsible
for compliance could void the user’s authority to operate this equipment.
This device complies with Part 15 of the FCC Rules. Operation is subject to the following two
conditions:
1. This device may not cause harmful interference, and
2. This device must accept any interference received, including interference that may cause
undesired operation.
Interference Statement-part 15
Federal Communication Commission
•
NOTE:
This equipment has been tested and found to comply with the limits for a Class B digital
device, pursuant to Part 15 of the FCC Rules. These limits are designed to provide reasonable
protection against harmful interference in a residential installation. This equipment generates,
uses and can radiate radio frequency energy and, if not installed and used in accordance with
the instructions, may cause harmful interference to radio communications. However, there is
no guarantee that interference will not occur in a particular installation.If this equipment does
cause harmful interference to radio or television reception, which can be determined by turning
the equipment off and on, the user is encouraged to try to correct the interference by one or
more of the following measures:
14
1. Damage to the product due to improper use or misuse of the product
2. The alteration,change,maintenance product with other equipment without abiding by
theinstruction manual of manufacturer;
3. After verification,if the defect of the product is directly caused by corrosive gas;
4. After verification,if the defects are due to improper operation during the transportation of
the product;
5. After verification,if the problem or dispute is caused by the quality specification or the
performance of the parts and components that were produced by other manufacturers;
6. In case of operation,repair or maintenance of the unit without abiding by instruction manual
or related regulations;
7. If the damage is caused by natural calamities,incorrect environment use of force majeure.
Manufacturer will bear no responsibilities when personal injury or
property loss is caused by the following reasons:
07
EXCEPTION CLAUSES
Fcc Sdoc Supplier’s Declaration Of Conformity
The product delivered to the original purchaser is warranted to be free from material and
workmanship defects.The manufacturer warrants this product,under normal conditions of use,
for a time period of one year from the date of the original purchase.The manufacturer
guarantees,subject to verification of the defect or malfunction and proof of purchase,that any
repairs,or furnish of an equal product, will be done without charge,at our option during the
given warranty period.
Terms & Policy
•
MORENTO hereby declares that this equipment is in compliance with the FCC requirements.
The declaration of conformity may be consulted in the support section of our website,
accessible from [email protected]
08
WARRANTY
15

If you have any questions or concerns about your new product please contact our helpful
Customer Support Team.
·Please have your order invoice and order ID ready before contacting Customer Support.
We are proud of our exquisite customer support service,treating everyone like they're
part of our family.
For more information,please visit our website Contact us anytime!
·The product is modified from its original state.
·The product was not used in accordance with the instruction given in the user manual.
·There are damages or defects due to accident,abuse,misuse,or improper maintenance.
·There are damages or defects due to servicing or repairs done by unauthorized service
providers.
·There are damages or defects due to commercial or rental use, or other uses for which
the product is not suitable for.
·There are damages or defects that exceeds the total cost of the product.
The product comes with no other express warranty.
The warranty becomes void under the following circumstances:
09CUSTOMER SUPPORT
16
AVERTISSEMENT :
Lors de l'utilisation d'appareils électriques, des précautions de base doivent toujours être
prises, afin de réduire les risques d'incendie, de choc électrique et de blessures, notamment
les suivantes :
1. Lire toutes les instructions avant d'utiliser cet appareil de chauffage. Utiliser cet appareil
de chauffage uniquement de la manière décrite dans ce manuel. Toute autre utilisation non
recommandée par le fabricant peut provoquer un incendie, un choc électrique ou des blessures.
2. Cet appareil de chauffage est chaud lorsqu'il est utilisé. Pour éviter les brûlures, ne pas
laisser la peau nue toucher les surfaces chaudes.
3. Utiliser la poignée pour déplacer l'appareil de chauffage.
4. Il convient d'être extrêmement prudent lorsqu'un appareil de chauffage est utilisé par ou à
proximité d'enfants ou d'invalides, et lorsque l'appareil est laissé en fonctionnement sans
surveillance.
5. Ne pas insérer ou laisser pénétrer d'objets étrangers dans les orifices de ventilation ou
d'évacuation, car cela pourrait provoquer un choc électrique ou un incendie, ou endommager
l'appareil de chauffage.
6. La puissance de cet appareil de chauffage peut varier et sa température peut devenir
suffisamment élevée pour brûler la peau exposée. L'utilisation de cet appareil de chauffage
n'est pas recommandée aux personnes très sensibles à la chaleur ou incapables de réagir,
afin d'éviter les brûlures.
7. Ne pas essayer de modifier ou de réparer le produit vous-même. Cela pourrait annuler la
garantie et provoquer des dommages ou des blessures. Seul un technicien réparateur est
habilité à démonter ou à réparer ce produit.
8. Si l'appareil ne fonctionne pas comme il le devrait, s'il a reçu un coup violent, s'il est tombé,
s'il a été endommagé, s'il est resté à l'extérieur ou s'il est tombé dans l'eau, ne l'utilisez pas et
contactez le Service d'Assistance à la Clientèle.
9. Il peut y avoir une trace de fumée ou une odeur lorsque l'appareil est mis en marche pour la
première fois. Cela indique qu'une goutte d'huile est tombée sur le serpentin de chauffage
pendant le processus de fabrication. Elle s'évaporera rapidement et ne devrait pas se reproduire.
10. Ne pas utiliser à l'extérieur. Réservé à un usage domestique.
11. Placer l'appareil de chauffage sur une surface ferme, plane et horizontale, exempte
d'obstacles et éloignée d'au moins 1 mètre (3 pieds) de tout mur ou matériau combustible.
12. Ne pas utiliser dans une salle de bain, une buanderie ou tout autre endroit humide à
l'intérieur.
Sécurité générale
01
LIRE ET CONSERVER CES CONSIGNES DE SÉCURITÉ
17
FR
Ce qu'il faut faire
·Brancher l'appareil uniquement directement
sur une prise murale de 120V/60Hz.
Une barrette d'alimentation, une rallonge ou une
prise partagée peut provoquer une surcharge et
entraîner un court-circuit, un incendie ou un choc
électrique.
15A /120V
Sécurité de l'appareil de chauffage:Ce qu'il faut faire et ne pas faire
Sécurité électrique
18
1. Toujours débrancher l'appareil de chauffage lorsqu'il n'est pas utilisé.
2. Toujours brancher l'appareil de chauffage directement sur une prise murale/prise de courant.
3. Pour débrancher l'appareil de chauffage, mettre les commandes sur Arrêt, puis retirer la
fiche de la prise.
4. Ne pas faire fonctionner un appareil de chauffage dont le cordon ou la fiche est
endommagé(e), ou si l'appareil fonctionne mal, est tombé ou a été endommagé de quelque
manière que ce soit. Mettre l'appareil de chauffage au rebut ou le renvoyer à un centre de
service agréé pour examen ou réparation.
5. Ne pas faire passer le cordon sous la moquette. Ne pas couvrir le cordon avec des tapis
de sol, des patins ou des revêtements similaires. Ne pas faire passer le cordon sous des
meubles ou des appareils. Placer le cordon à l'écart des zones de circulation et à un endroit
où l'on ne risque pas de trébucher dessus.
6. Ne pas utiliser de rallonge ou de barrette d'alimentation.
7. Ne pas brancher dans une prise de courant mal fixée ou poussiéreuse.
8. Une fiche ou un cordon qui devient chaud au toucher ou dont la forme se déforme peut
être le résultat d'une usure électrique avant l'utilisation ultérieure de l'appareil de chauffage.
Le fait de brancher l'appareil de chauffage dans une prise de courant usée peut entraîner une
surchauffe du cordon d'alimentation ou un incendie.
9. Cet appareil est équipé d'une fiche polarisée (une broche est plus large que l'autre). Pour
réduire le risque de choc électrique, cette fiche est conçue pour s'insérer dans une prise
polarisée dans un seul sens. Si la fiche ne s'insère pas complètement dans la prise, inversez-la.
Si elle ne s'insère toujours pas, contacter un électricien qualifié. Ne pas essayer d'endommager
ce dispositif de sécurité.

·Vérifier régulièrement la fiche et la prise et
veiller à ce qu'elles soient propres.
La plupart des poussières sont inflammables
et l'accumulation de poussière peut provoquer
un court-circuit, un incendie ou un choc
électrique.
·Vérifier régulièrement la fiche et contacter
le Service d'Assistance à la Clientèle si elle
est tordue ou endommagée.
Toute fiche tordue ou endommagée peut
provoquer un court-circuit, un incendie ou un
choc électrique.
·Débrancher l'appareil de chauffage en
tirant sur la fiche uniquement.
Le fait de tirer la fiche par le cordon soumet
le fil à des contraintes et peut rompre les
connexions, ce qui peut provoquer un
court-circuit, un incendie ou un choc électrique.
·Demander à un électricien qualifié de
réparer la prise si elle est mal fixée.
Les prises mal fixées peuvent perturber les
courants et provoquer un court-circuit, un
incendie ou un choc électrique.
19
Ce qu'il ne faut pas faire
Ne pas couvrir l'appareil
de chauffage, afin d'éviter
toute surchauffe.
Ne pas utiliser l'appareil de
chauffage dans une salle de
bain, une buanderie ou tout
autre endroit humide à
l'intérieur.
Ne pas toucher le filet
de protection métallique,
afin d'éviter les brûlures.
Ne pas brancher l'appareil
de chauffage dans une
prise de courant mal fixée.
Ne pas partager la prise
avec d'autres appareils.
Ne pas utiliser de fiche
poussiéreuse ou ne pas
brancher dans une prise
poussiéreuse.
Ne pas utiliser de fiche
tordue ou endommagée.
Ne pas débrancher en
tirant sur le cordon.
Ne pas utiliser de rallonge
ou de barrette
d'alimentation.
20
02CONNAÎTRE VOTRE APPAREIL DE CHAUFFAGE
Spécifications
Modèle
Alimentation Électrique
Puissance Nominale
Niveau de Bruit
Dimensions du Produit
Poids
AT-SH40-WF
AC 120V/60Hz
1500W
23-36db
174* 174 * 432 mm / 6,85 * 6,85 * 17 po
2 kg / 4.4 lb
Ne pas enrouler le cordon
d'alimentation lorsqu'il est
utilisé.
21
22
Contenu du Paquet
Panneau de Commande
Affichage LED
Sortie d'Air
Base
Poignée
Arrivée d'Air
Filtre à poussière
Alimentation et
Fiche
23
03
UTILISATION DE VOTRE APPAREIL DE CHAUFFAGE
Panneau de Commande
Bouton Wi-Fi
Appuyez et maintenez pendant 3 secondes pour accéder à la
réinitialisation WiFi.
Indicateur Wi-Fi
Non connecté ou en cours de connexion au Wi-Fi: le «pattern»
clignote rapidement.
Connexion et connexion réussies: le «pattern» reste allumé.
Bouton de verrouillage enfant
Appuyez sur et maintenez-le enfoncé pendant 3 secondes pour
accéder à la fonction de verrouillage enfant. Appuyez à nouveau sur
et maintenez-le enfoncé pendant 3 secondes pour
désactiver la fonction de verrouillage enfant.
Bouton marche/arrêt
- Toucher ce bouton pour allumer ou éteindre l'appareil de chauffage.
- Lorsque l'appareil de chauffage est branché sur une prise électrique,
le voyant d'alimentation sur l'écran LED s'allumera en rouge.
- Une fois l'appareil de chauffage éteint, un compte à rebours de 30
secondes s'affichera sur l'écran LED, tandis que le ventilateur
continuera de fonctionner pendant 30 secondes pour évacuer la
chaleur résiduelle.
Bouton de minuteur d'arrêt automatique (0-12h)
- Toucher pour régler la fonction minuteur, sur l'écran
s'allumera, et toucher( / ) pour régler un minuteur(0-12h).
À la fin du minuteur, l'appareil de chauffage s'éteindra automatiquement.
- Pour annuler, régler le minuteur sur 0 heure.
Bouton d'oscillation
- Toucher ce bouton pour activer ou désactiver l'oscillation.
Boutons plus et moins (niveau de température / minuteur)
- Pour régler le niveau de température ou le minuteur.
- En mode ECO, toucher ( / ) pour ajuster la température
programmée (41-95℉).
- En mode minuteur, toucher ( / ) pour ajuster le minuteur
(0-12h).
Remarque : En mode ECO, l'appareil de chauffage s'éteindra automatiquement
lorsque la température programmée est atteinte. Si votre appareil de chauffage
s'éteint fréquemment, veuillez augmenter la température ou passer en mode
Power Heat.
24
Affichage LED
Bouton de réglage du mode
- Toucher pour faire défiler -> -> ->
( )Ventilateur uniquement et l'écran LED affiche « - - »
( )Chauffag à Haute Puissance (1500W)
( )Chauffage à Faible Puissance (900W)
( )L'appareil de chauffage sélectionnera automatiquement sa
puissance de chauffage optimale, en fonction de la différence entre
la température programmée (41-95℉) et la température ambiante.
Remarque :
- Lorsque la température ambiante atteint la température programmée,
l'appareil de chauffage s'éteindra automatiquement au bout de 30 secondes.
- Lorsque la température ambiante descend en dessous de la température
programmée, l'appareil de chauffage fonctionnera à faible ou haute puissance
(900W ou 1500W), en fonction de la différence entre les deux températures.
Couper/Réactiver le son
Pour activer/désactiver le son des boutons, appuyer longuement sur
le bouton de réglage du mode sur le panneau pendant 3 secondes.
Indicateur Wi-Fi
Chauffage à haute puissance
(H2)
Chauffage à faiblepuissance
(H1)
Mode ECO Température Minuteur
Réglage de la température
heure du minuteur
Branché
Minuteur
25
Plus de Fonctionnalités
Fonction Mémoire
L'appareil de chauffage se souviendra
de ses derniers réglages (températures,
modes de fonctionnement, état de
l'oscillation) lorsqu'il est allumé.
(L'appareil de chauffage doit être
branché sur une prise électrique.)
Arrêt Automatique de 24 Heures
L'appareil de chauffage s'éteindra
automatiquement après 24 heures
de fonctionnement continu.
Protection Contre le Basculement
En cas de basculement, l'appareil de
chauffage s'éteindra automatiquement.
Protection Contre la Surchauffe
En cas de surchauffe, l'appareil de
chauffage s'éteindra automatiquement.
26
04
COMMENT TÉLÉCHARGER L'APPLICATION ET CONNECTER LE
CHAUFFAGE D'APPARTEMENT
Configuration de l'application Havaworks
Remarque: l'application «Havaworks» est continuellement améliorée et peut changer au fil du
temps. En cas de différences, suivez les instructions de l'application.
Google Play: «Google Play et le logo Google Play sont des marques
commerciales de Google LLC.»
Apple: «App Store et le logo Apple sont des marques déposées
d'Apple Inc.»
Remarque: pour les utilisateurs d'Android, choisissez «Autoriser» pour utiliser «Havaworks»
Remarque: vous devez créer votre propre compte «Havaworks» pour utiliser des services et
produits tiers. Ceux-ci ne fonctionneront pas avec un compte invité. avec un compte
« Havaworks », vous pouvez également autoriser votre famille et vos amis à contrôler votre
radiateur d'appoint.
3. Suivez les instructions de l'application pour configurer votre radiateur d'appoint.
Remarque: la localisation doit être activée sur votre téléphone lorsque celui-ci se connecte à
votre radiateur d'appoint. Cela est nécessaire pour établir la connexion Bluetooth. Vous pouvez
désactiver la localisation une fois que votre radiateur d'appoint a terminé de se connecter à
l'application « Havaworks ».
Connexion Wi-Fi
• Pour déconnecter le Wi-Fi, appuyez sur le bouton d'alimentation et maintenez-le enfoncé
pendant environ 5secondes, jusqu'à ce que l'appareil émette un «bip bip bip». Cela restaurera
les paramètres par défaut du radiateur d'appoint et le déconnectera de l'application
«Havaworks».
• Pour vous reconnecter, veuillez suivre les instructions de l'application
« Havaworks » pour ajouter un appareil.
• Ou scannez le code QR pour ajouter un appareil
2. Ouvrez l'application «Havaworks». Connectez-vous ou inscrivez-vous.
1. Pour télécharger l'application «Havaworks», scannez le code QR ou recherchez «Havaworks» dans l'App
Store d'Apple ou le Google Play Store.

27
Dépannage de l'application Havaworks
Mon radiateur d'appoint ne se connecte pas à l'application « Havaworks ».
• Mon radiateur d'appoint ne se connecte pas à l'application « Havaworks ».
• Pendant le processus de configuration, vous devez être sur un réseau Wi-Fi sécurisé de 2,4
GHz. Confirmez que le réseau fonctionne correctement.
• Assurez-vous que le mot de passe Wi-Fi que vous avez saisi est correct.
• Il ne doit y avoir aucun espace au début ou à la fin du mot de passe.
• Testez le mot de passe en connectant un autre appareil électronique au routeur.
• Si vous saisissez manuellement le SSID et le mot de passe, vérifiez que les deux sont
correctement saisis.
• Essayez de rapprocher votre radiateur d'appoint du routeur. Votre téléphone doit être aussi
proche que possible de votre radiateur d'appoint.
• Votre routeur peut avoir besoin d'être placé à un endroit plus élevé, loin des obstacles.
• Assurez-vous que votre radiateur d'appoint et votre routeur sont éloignés des appareils
(tels que les fours à micro-ondes, les réfrigérateurs, les appareils électroniques) appareils,
etc.) pour éviter les interférences de signal.
• Si vous utilisez un VPN, assurez-vous qu'il est désactivé lors de la configuration de votre
radiateur d'appoint.
• Désactivez l'authentification du portail pour votre réseau Wi-Fi. Si l'authentification du portail
est activée, le radiateur d'appoint ne pourra pas accéder à votre réseau Wi-Fi et la
configuration échouera.
Remarque: l'authentification du portail signifie que vous devez vous connecter à votre réseau
Wi-Fi via une page Web avant de pouvoir utiliser Internet.
• Assurez-vous que le radiateur d'appoint est branché et alimenté, puis actualisez le menu en
faisant glisser l'écran vers le bas.
• Assurez-vous que votre routeur est connecté à Internet et que la connexion réseau de votre
téléphone fonctionne.
• Supprimez le radiateur d'appoint hors ligne de l'application «Havaworks». Balayez vers la
gauche (i0S) ou appuyez longuement (Android), puis appuyez sur Supprimer, reconfigurez le
radiateur d'appoint avec l'application «Havaworks».
Remarque: les pannes de courant, les pannes d'Internet ou le changement de routeur Wi-Fi
peuvent entraîner la mise hors ligne du radiateur d'appoint. Si votre problème n'est pas
répertorié, veuillez contacter le support client.
Mon radiateur d'appoint est hors ligne.

28
Attention
Ne pas dévisser l'appareil.
05
NETTOYAGE ET ENTRETIEN
Nettoyage et entretien
Toujours éteindre et débrancher l'appareil de chauffage
avant de le nettoyer.
Surface extérieure
Utiliser un chiffon doux et sec pour nettoyer délicatement
la surface extérieure.
Arrivée d'air
Utiliser un chiffon doux et sec ou un coton-tige pour enlever
la poussière de l'arrivée d'air.
29
Ne pas utiliser d'agents de nettoyage.
Ne pas utiliser d'éponges abrasives.
À l'exception du nettoyage, tout entretien doit
être effectué par un représentant de service
autorisé.
Conserver l'appareil dans un endroit frais et sec
et maintenir le câble hors des zones à forte
circulation, afin d'éviter tout risque de trébuchement.
Risque d'incendie ou de choc électrique.
Ne pas immerger l'unité principale dans l'eau.
Ne jamais laisser de l'eau pénétrer à l'intérieur
de l'appareil de chauffage.
06
DÉPANNAGE
Si votre problème n'est pas répertorié ou s'il persiste toujours, contactez
notre Service d'Assistance à la Clientèle.
Problème Causes Possibles Solution
L'appareil de chauffage
ne démarre pas
L'appareil de chauffage
s'arrête soudainement
pendant le chauffage
Bruit anormal du ventilateur
Le cordon d'alimentation n'est
pas correctement branché.
La température dépasse le
seuil de la coupure thermique.
Éteindre et débrancher l'appareil.
Laisser refroidir et rebrancher à
la prise électrique.
Placer l'appareil sur une surface
plane, horizontale et stable.
C'est normal. Si votre appareil
de chauffage s'éteint
fréquemment, veuillez augmenter
la température ou passer en
mode Power Heat.
L'appareil de chauffage est
renversé.
En mode ECO, l'appareil de
chauffage s'éteindra
automatiquement au bout de
30 secondes lorsque la
température programmée est
atteinte.
Objet étranger en contact
avec le ventilateur.
Éliminer les objets étrangers
Brancher la fiche sur une prise
électrique alimentée.
Débrancher l'appareil et laisser
refroidir.
Retirer tout objet se trouvant sur
ou à proximité de l'appareil de
chauffage.
Assurez-vous que votre disjoncteur
ou votre fusible fonctionne
correctement.
Assurez-vous que votre appareil
de chauffage est placé sur une
surface plane et régulière.
S'assurer que la température
programmée est supérieure à la
température ambiante.
La protection contre la
surchauffe a été activée.
L'appareil n'est pas alimenté
en électricité.
La température programmée
est inférieure à la température
ambiante.
30