使用說明書
RO座檯式冷熱淨飲機
TWP-W2265THK(W)
請在使用淨飲機前仔細閱讀使用說明書 , 並妥善保管。
目錄
1. 安全說明-------------------------------------------------
1-1 安全說明----------------------------------------------
1-2 包裝清單----------------------------------------------
2. 產品介紹-------------------------------------------------
2-1 部件名稱----------------------------------------------
2-2 操作面板----------------------------------------------
2-3 電路原理圖---------------------------------------------
2-4 使用說明----------------------------------------------
2-5 日常保養----------------------------------------------
3. 故障自檢-------------------------------------------------
4. 濾芯介紹-------------------------------------------------
4-1 濾芯簡介----------------------------------------------
4-2 濾芯更換----------------------------------------------
5. 技術參數-------------------------------------------------
5-1 基本參數----------------------------------------------
所使用的是可回收的包裝材料,建議將塑膠、紙和紙板分開,交給回收公司,電器
和電子設備的廢物應分開收集。如果將來需要處理這臺設備,不要把它和
其他家庭垃圾一起扔掉。
1
1
5
5
5
6
8
11
9
11
12
12
12
14
14
1
1. 安全說明
1-1 安全說明
請仔細閱讀並遵循所有說明。
這些說明是預防用戶嚴重受傷或死亡風險以及任何財產損失。
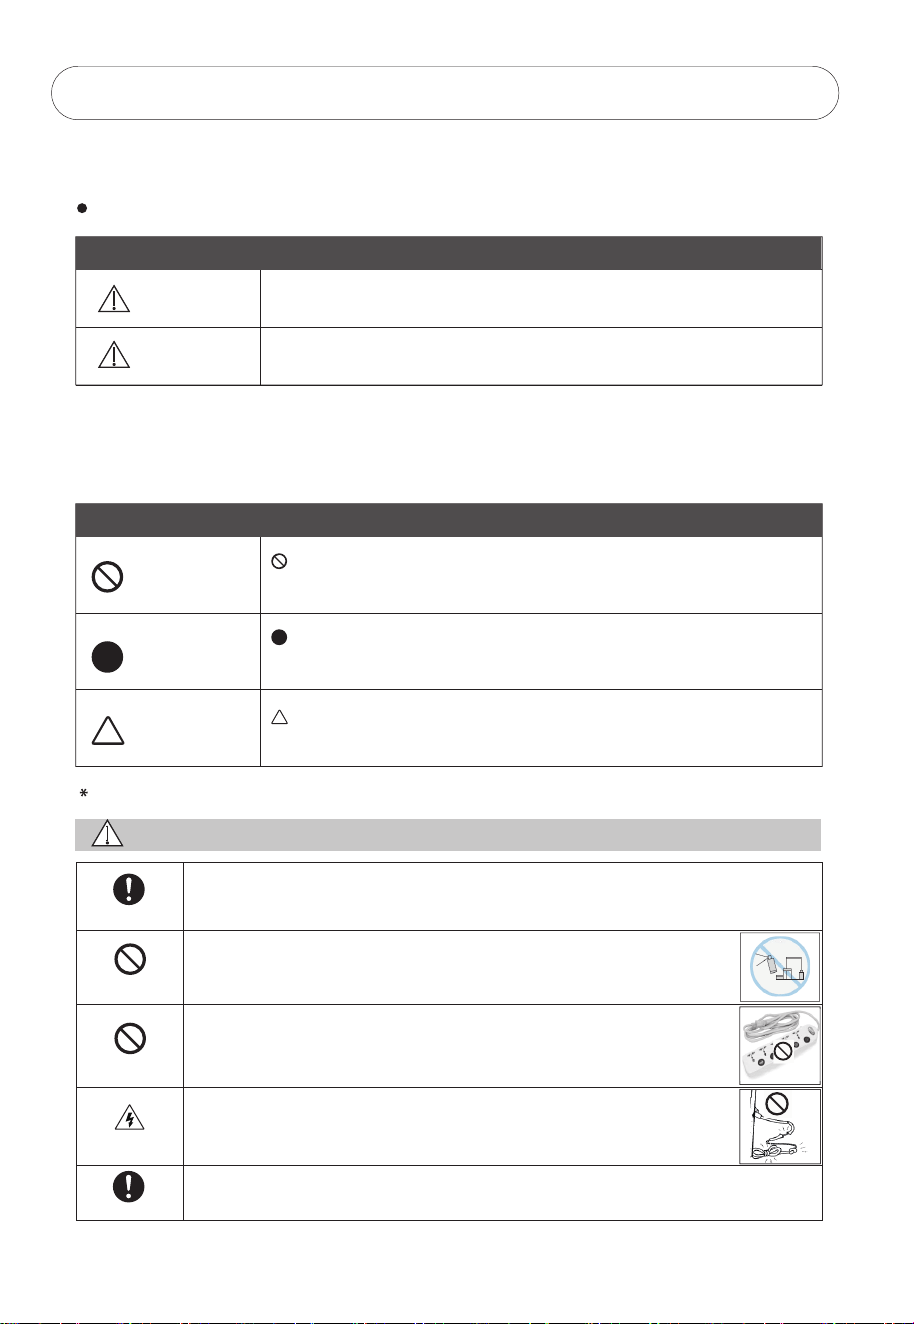
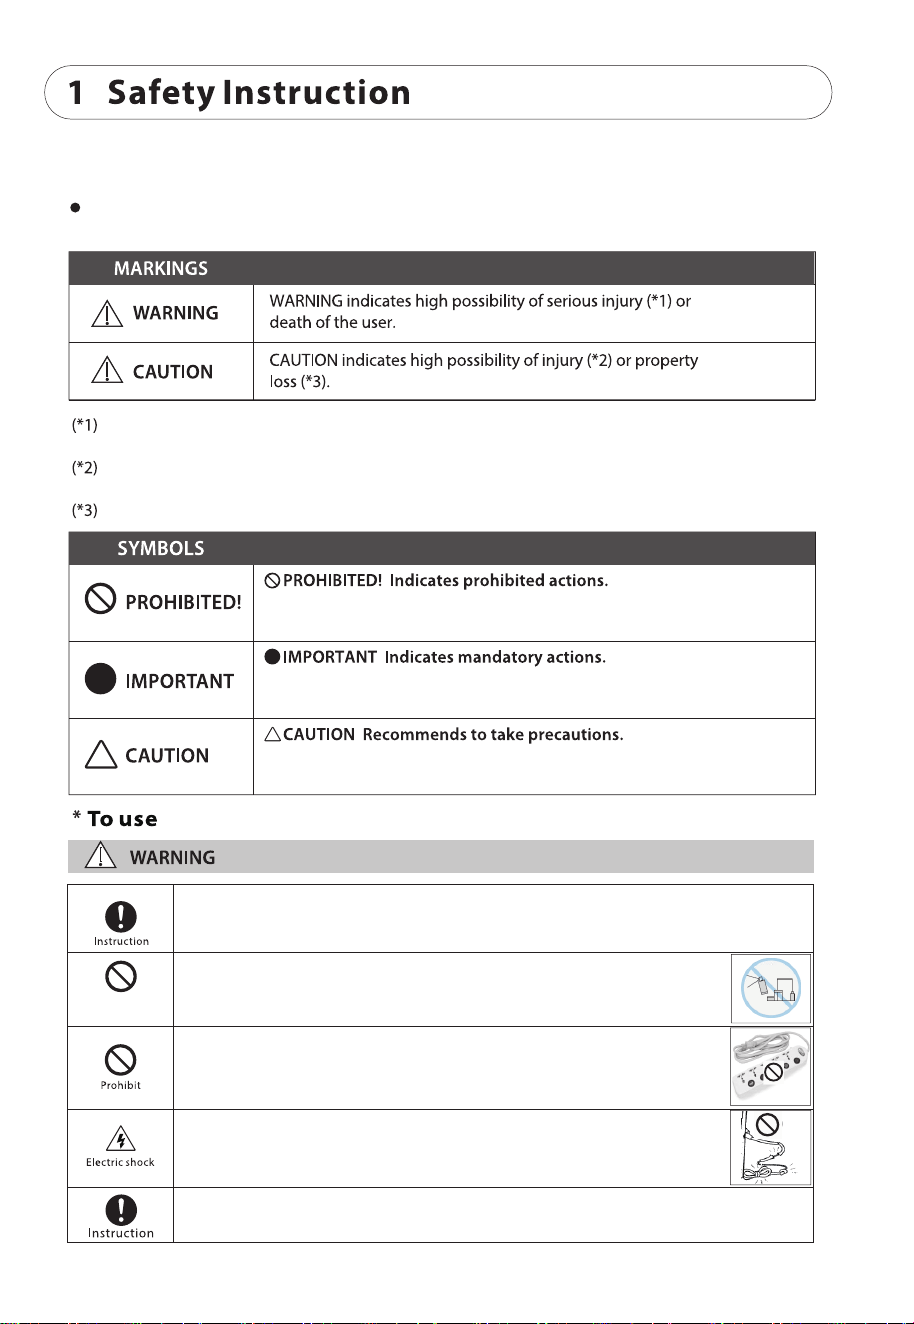
標記
警告
注意
“警告“表示極有可能導致用戶嚴重損傷(*1)或死亡。
“注意”表示極有可能造成傷害(* 2)或財產損失(* 3)。
(* 1)嚴重傷害——需要住院、長時間治療、失明、燙傷和凍傷的皮膚傷害、電擊、骨折或中毒。
(* 2)傷害-不需要住院或長時間治療的傷害、皮膚灼傷或電擊。
(* 3)財產損失-房屋、傢俱、家畜或寵物的延伸損失。
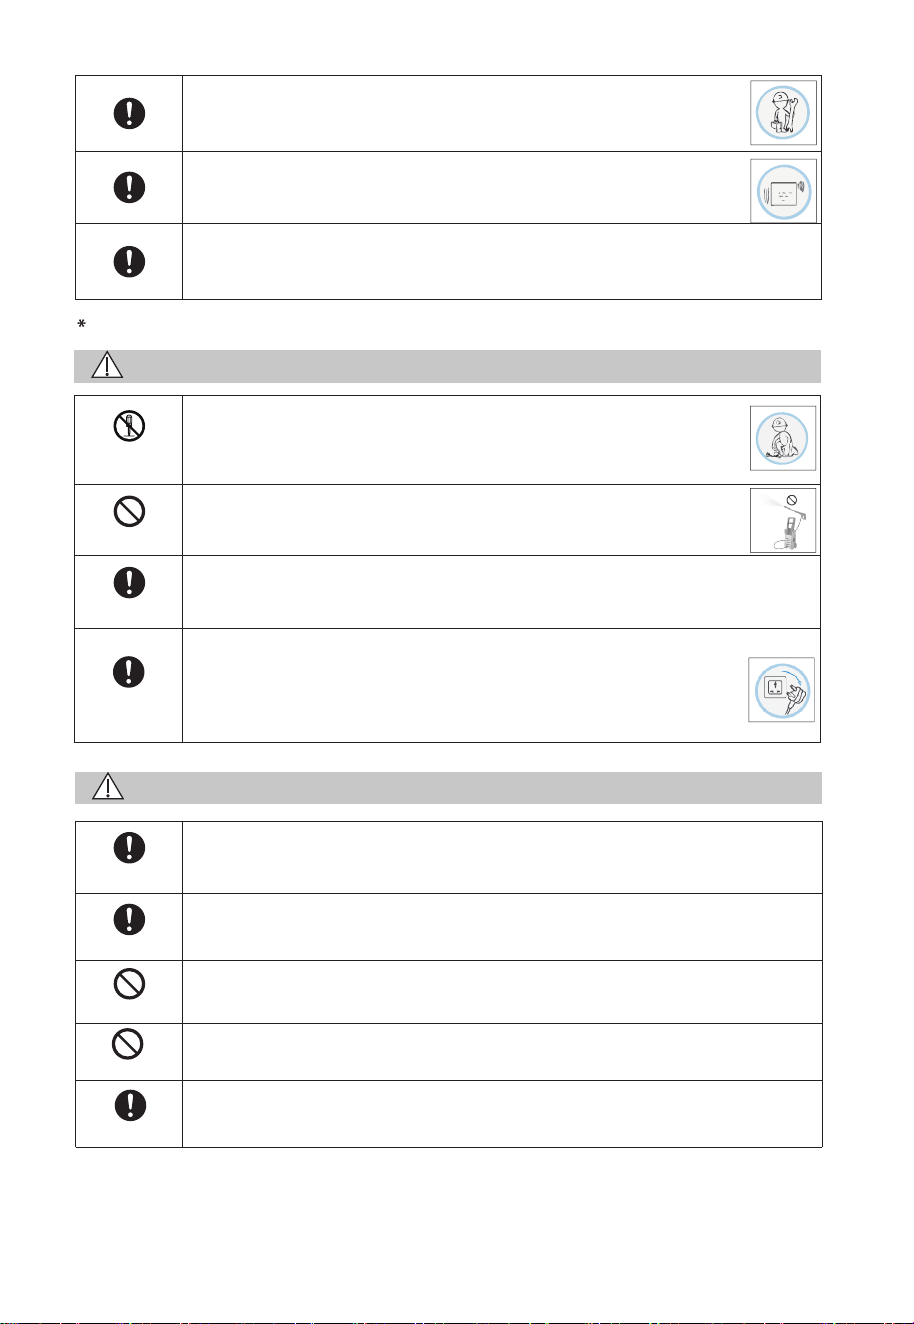
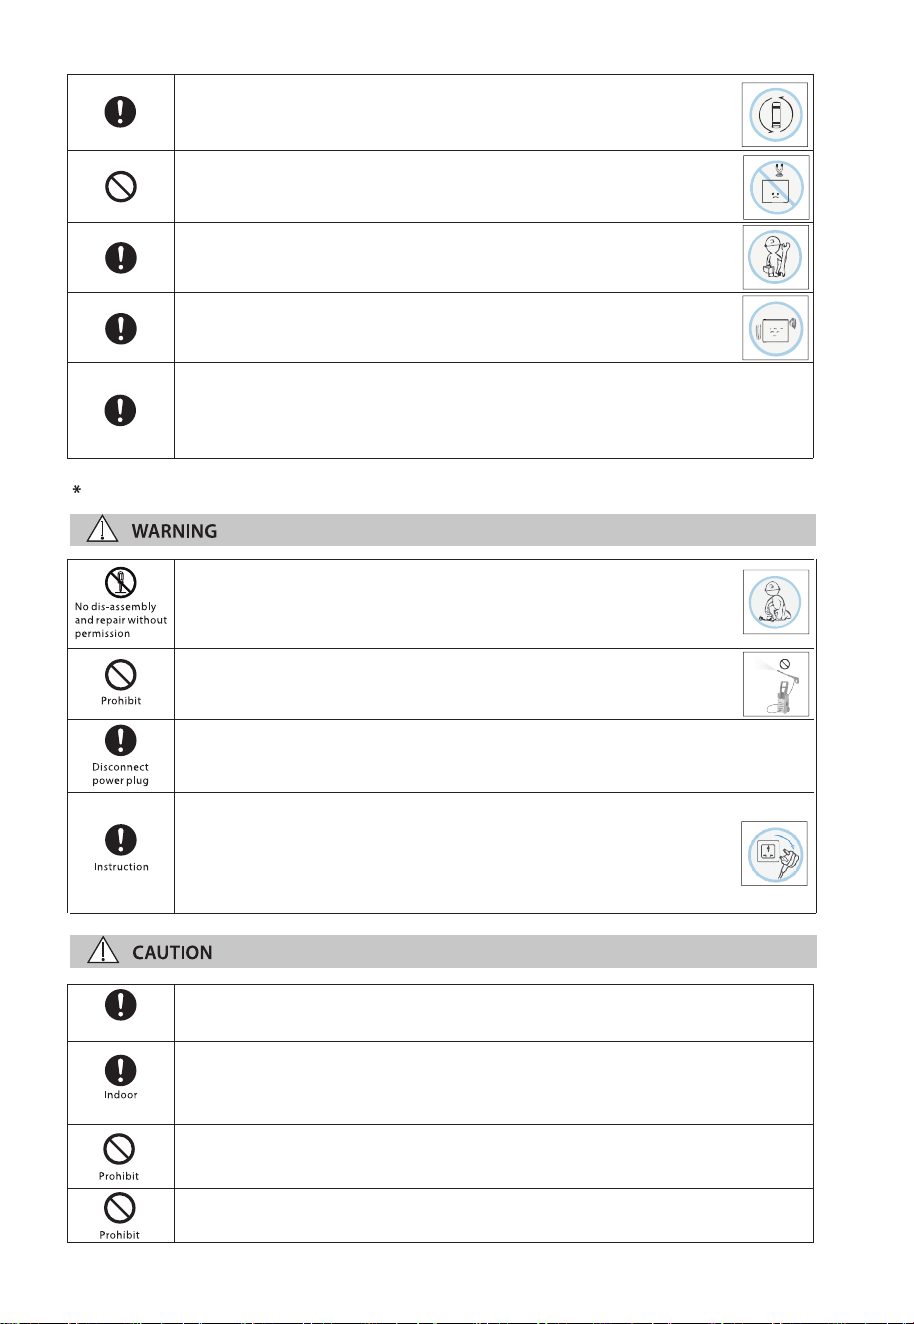
禁止
強制
注意
“禁止”表示禁止的行為。
詳細的說明將用數字或文字標明在圓圈的內部或符號周圍。
“強制”表示強制的行為。
詳細的說明將用數字或文字標明在圓圈的內部或符號周圍。
“注意”建議採取的預防措施。
詳細的說明將用數字或文字寫在三角形的內部或符號周圍。
使用
警告
使用說明
遠離易燃材料
禁止
電擊
使用說明
在使用淨飲機前必須按照本手冊正確組裝和安裝,以免損壞淨飲機造成危險。
請勿在淨飲機附近使用易燃物品,可能會引起爆炸或火災。
請勿使用電源延長線,可能引起觸電或火災。
請勿使用損壞的電源線、電源插頭或鬆動的電源插座,可能導致
觸電、故障、火災或人身傷害。
把淨飲機放在穩固的水平面上 , 以免導致其掉落或翻滾。
符號
2
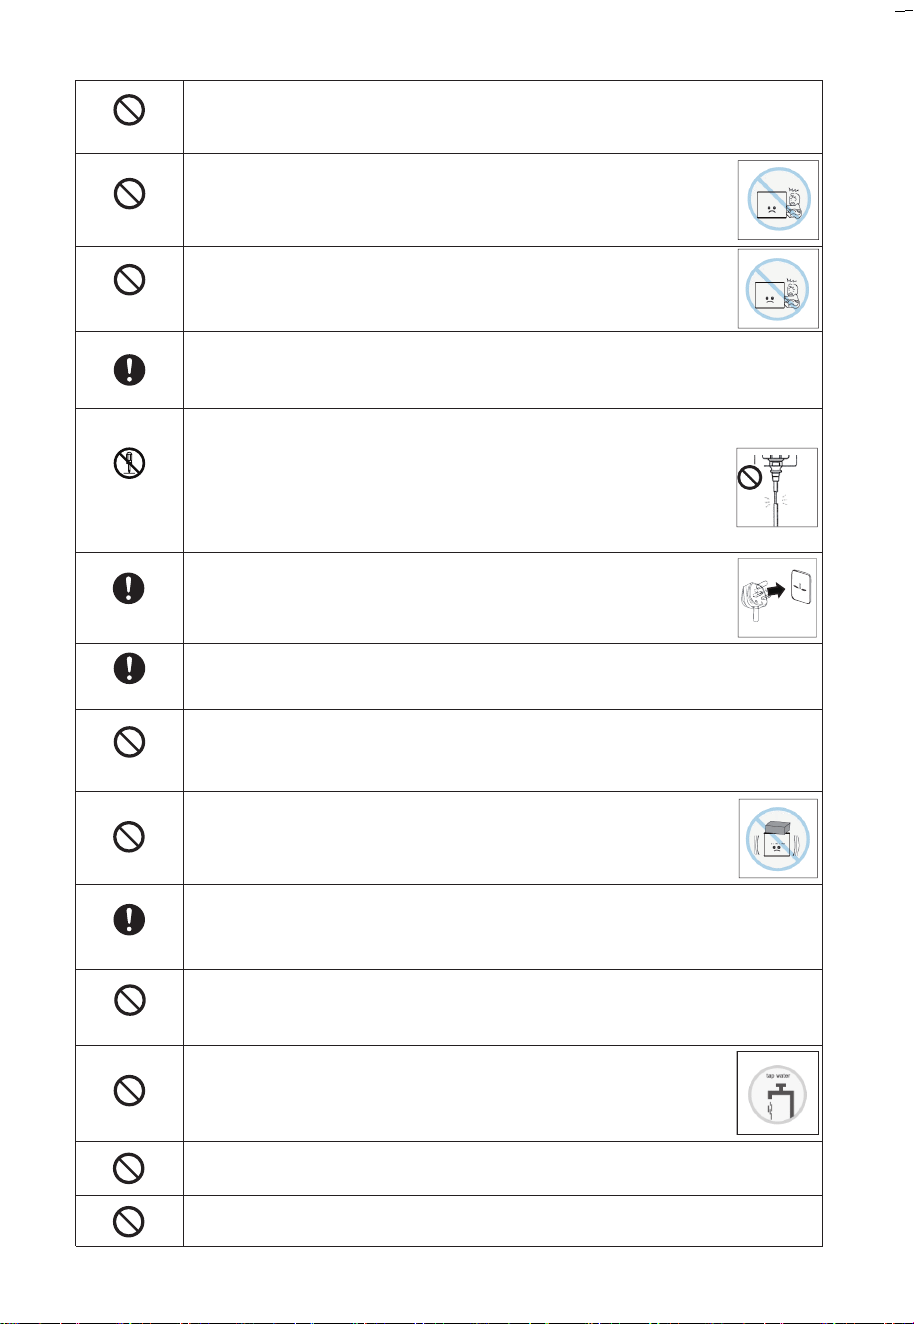
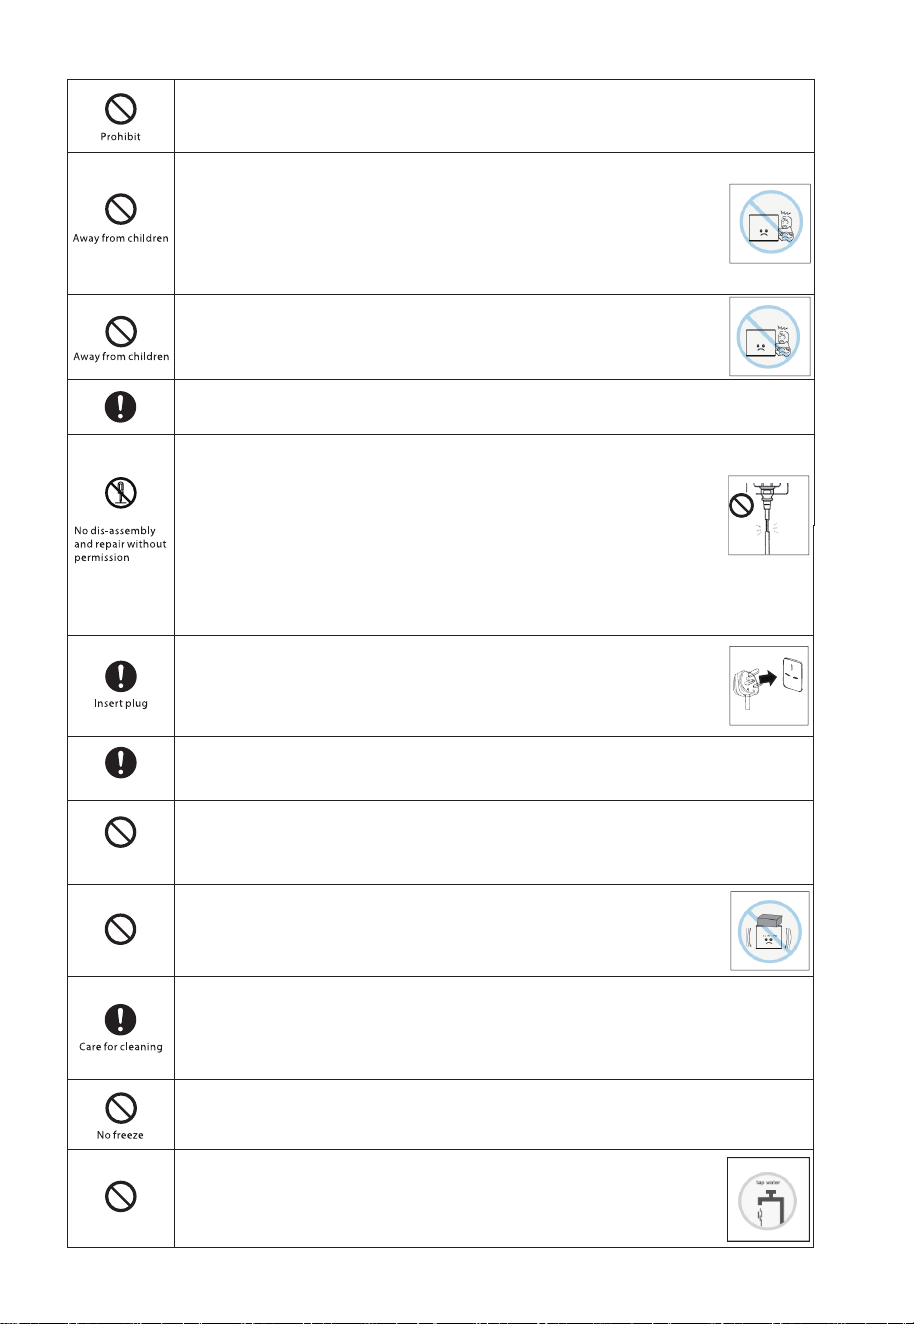
嚴禁將電線、插頭或淨飲機的任何其他部分浸泡在水或其他液體中,以免
引起觸電或火災。
為避免因操作失誤而導致危險 , 不建議兒童及有精神缺陷的人士
使用 , 除非在監護人的監督下正確使用,否則可能引起觸電、損壞
或故障。
禁止
遠離兒童
遠離兒童
為避免導致觸電、損壞或故障,兒童應受到監督,以確保他們不
玩弄淨飲機。
使用額定電壓220-240V的插座 , 嚴禁與其他電器同時使用萬用插座,以免
引起火災或觸電。
未經允許不得
拆卸和修理
插入插頭
擦拭灰塵
禁止修改
清潔保養
防止凍結
請勿損壞電源線。
請勿損壞、切割、加工電源線或彎曲、拉扯、扭曲、捆綁電源線。
此外,不要猛拉電源線、在電源線上放重物或夾緊電源線。
否則可能導致電源線破損 , 發生火災或觸電。如果電源線破損 ,
必須由製造商或其服務代理人或具有類似資質的人員更換。
將電源插頭安全地插入底座,並讓電源線向下擺放。如果電線向上
或插頭未完全插入,可能會因漏電或發熱而引起火災。
擦拭電源線插頭上堆積的灰塵或污垢。
積聚的灰塵可能引起火災、觸電、短路等事故。
為避免導致火災、觸電、故障或人身傷害,不得自行拆卸、改造、改裝、
修理淨飲機。如需維修,請與相應供應商聯繫。
不要在淨飲機上放置任何東西,以免引起火災、電擊或傷害。
用濕軟布加入稀釋的中性洗滌劑清潔淨飲機,請勿使用殺蟲劑、稀釋劑、
汽油、氯氣或酸性洗劑,以免引起裂紋、觸電、火災或產生有害氣體。
防止凍結 , 否則可能導致漏電或故障。當環境溫度低至0℃時 , RO濾芯有
機會會損壞。
為避免損害健康或引起麻煩 , 淨飲機只適用於含有已知成份的自
來水 , 請勿在水箱中加入不適用的水源。
如果淨飲機中的水有可能結冰時,則禁止給淨飲機接通電源。
必須使用有可靠接地的裝置進行電源連接。
3
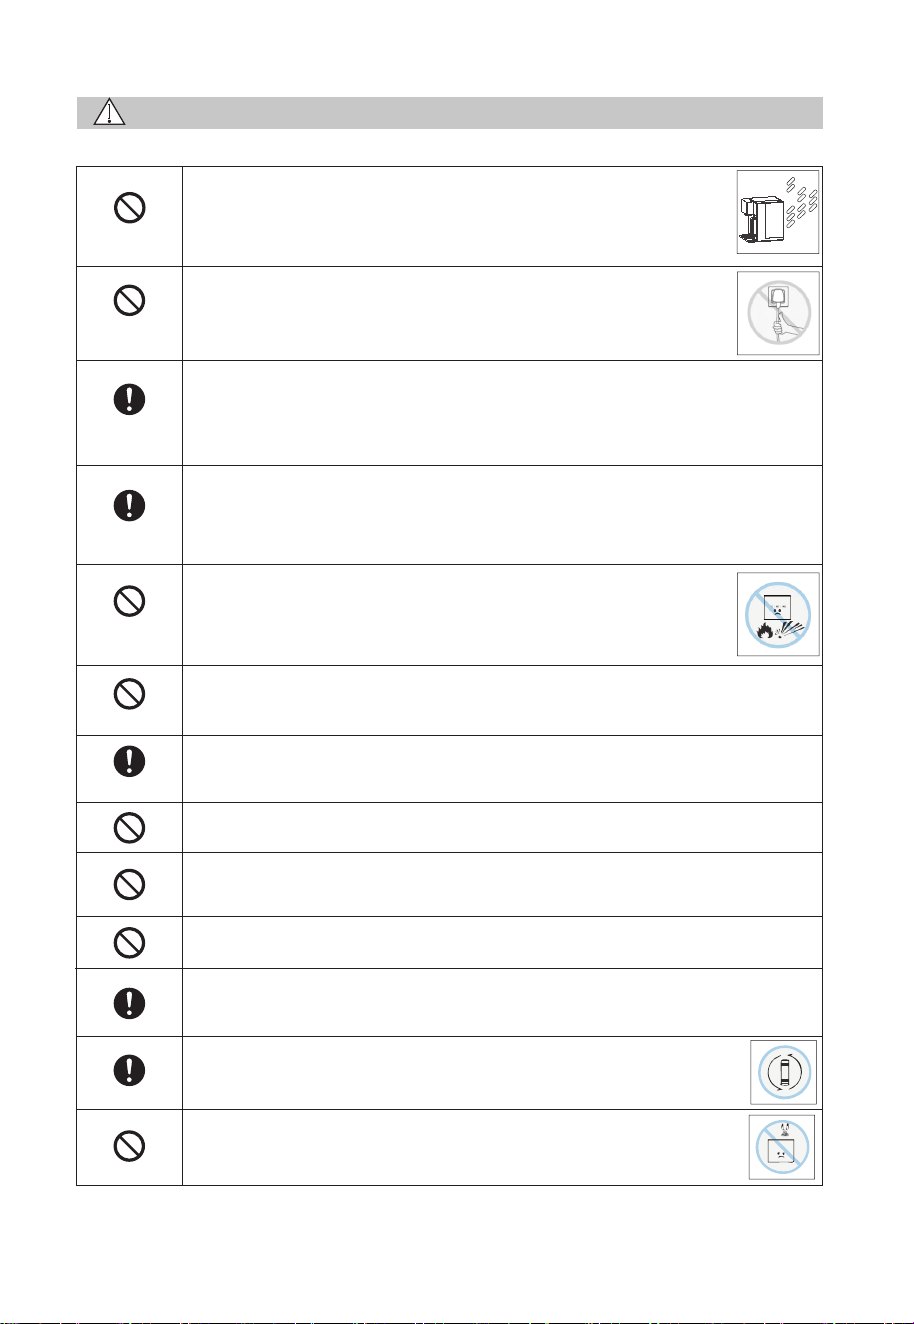
注意
禁止
不可用力拉
適用場景
應用範圍
遠離明火
禁止
請勿淋水
請勿在戶外使用。
把淨飲機放在乾燥的地方,避免陽光直射以免引起火災或故障。
機身可能會改變顏色、變形、滋生苔蘚和真菌。
為避免造成觸電、故障和人身傷害,在切斷電源時,不要用力拉
扯電源線,用手抓住電源插頭並拔出。
只適用於室內使用。
本設備用於家庭和類似應用,如商店、辦公室和其他工作環境中的員工
廚房區域、農場的房子、客戶在酒店、汽車旅館等住宅類型場景以及提供
住宿和早餐類型的場景。
使用溫度範圍爲4℃~ 38℃ ,請勿在使用溫度範圍外使用淨飲機。
當水溫較低時,水箱制水時間會有所延長。
本產品僅適用於海拔1500米以下地區使用。
請勿將淨飲機靠近火源,以免損壞其而引起火災。
不要在淨飲機上放置任何物品 , 也不要傾斜、搖、推其而造成人身傷害、
漏水、觸電、火災等。
嚴禁用水沖洗機身,以免絕緣材料惡化,引起觸電或火災。
為避免引起火災或機器損壞 , 必須遠離火源30厘米以上。
為避免漏水及細菌粘附,除替換過期的濾芯或長時間停止使用外,不要
重設濾芯。
請勿將熱水器的熱水管連接到進水口 , 濾芯在38℃以上會損壞。
如有漏水,請移開水箱,並儘快拔掉電源線插頭。
漏水可能導致其他損害,請與當地服務中心聯繫。
定期更換濾芯。當需要更換濾芯時,濾芯壽命指示燈會閃爍。請參閱
第10頁的4-2 濾芯更換。
請勿靠近強磁性設備以免引起火災、電路損壞或機器故障。
4
應由專業人員安裝或拆卸淨飲機,以免損壞內部部件或引起觸電。
出水時有輕微的噪音和震動是正常現象。
爲避免由熱斷路器的誤復位產生危險,淨飲機不能通過外部開關裝置
供電,例如定時器或者連接到由通用部件定時進行通、斷的電路。
用於檢查和維修
警告
未經允許不得
拆卸和修理
禁止
斷開電源插頭
使用說明
認證的技術人員
室內
如果電源線損毀,為避免危險,必須由製造商、其服務機構或具有
類似資歷人士更換,以免引起火災、觸電。
注意
請勿使用高壓設備清洗淨飲機。
絕緣材料惡化,可能引起觸電或火災。
在清理或檢查淨飲機前 , 請確保切斷電源,以免引起觸電。
出現以下情況時,請立即切斷電源並聯繫售後服務:
出現燒焦的味道;
出現異常現象;
以上情況有可能引起短路、火災或觸電。
為免損壞淨飲機 , 服務只能由認證的技術人員進行 , 以免引起觸電。
請勿在室外使用淨飲機,可能引起故障、火災或觸電,也可能造成淨飲機
本體顏色改變、變形、滋生苔蘚或造成污染。
禁止
在進行維護之前,請斷開設備與電源的連接。
使用說明
機器通過漏電保護器(RCD)提供,其額定剩餘工作電流不超過30毫安。
不得使用有明顯損壞的機器。
禁止

1-2 包裝清單
5
2. 產品介紹
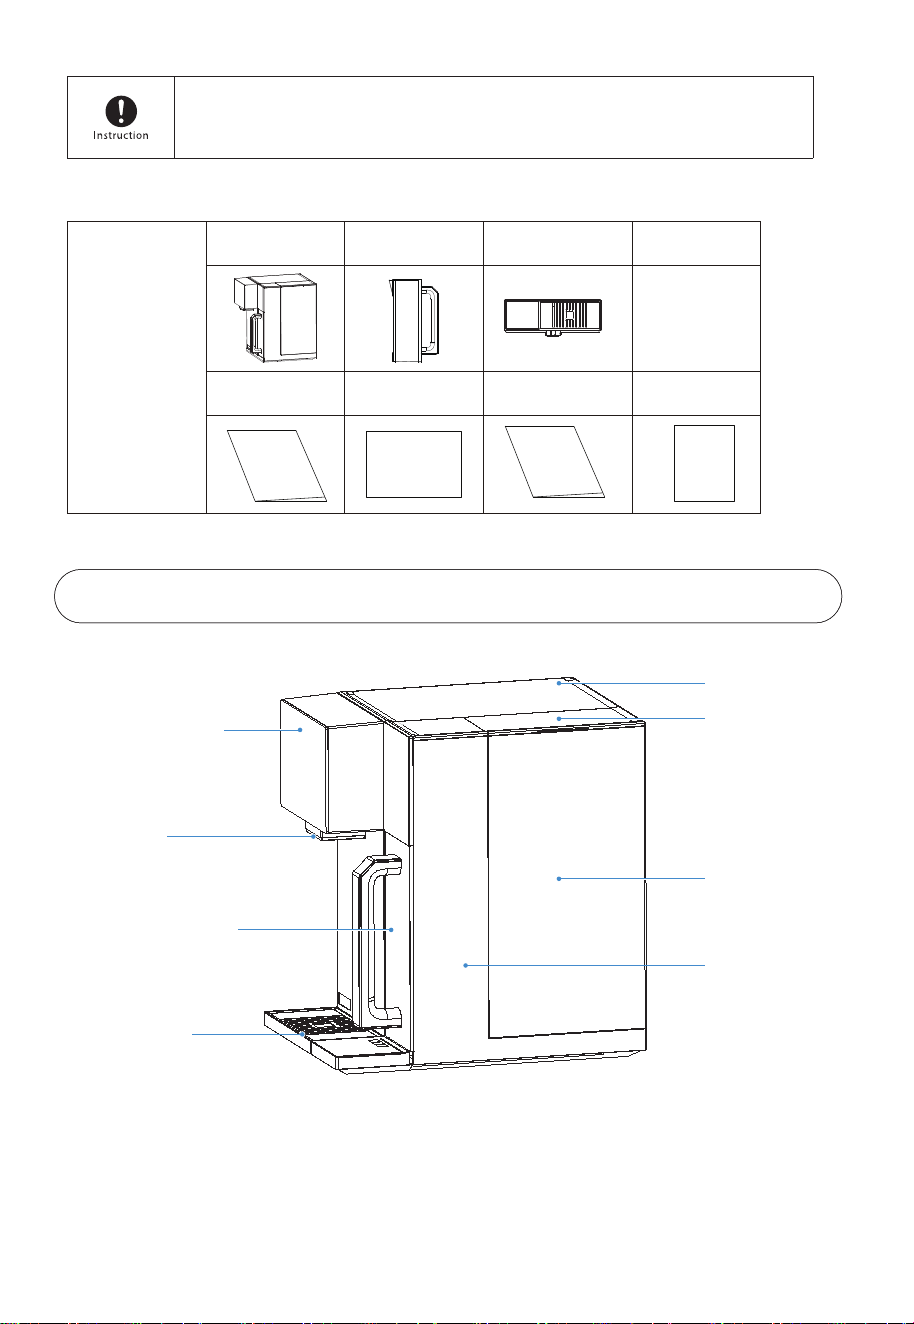
2-1 部件名稱
上蓋
水箱蓋
顯示屏
出水嘴
淨水壺
接水盤
水箱
機身
包裝箱
機器 淨水壺 接水盤
說明書
說明書
聯網説明書
快速指引
快速指引
聯網説明書
保修卡
保修卡
6
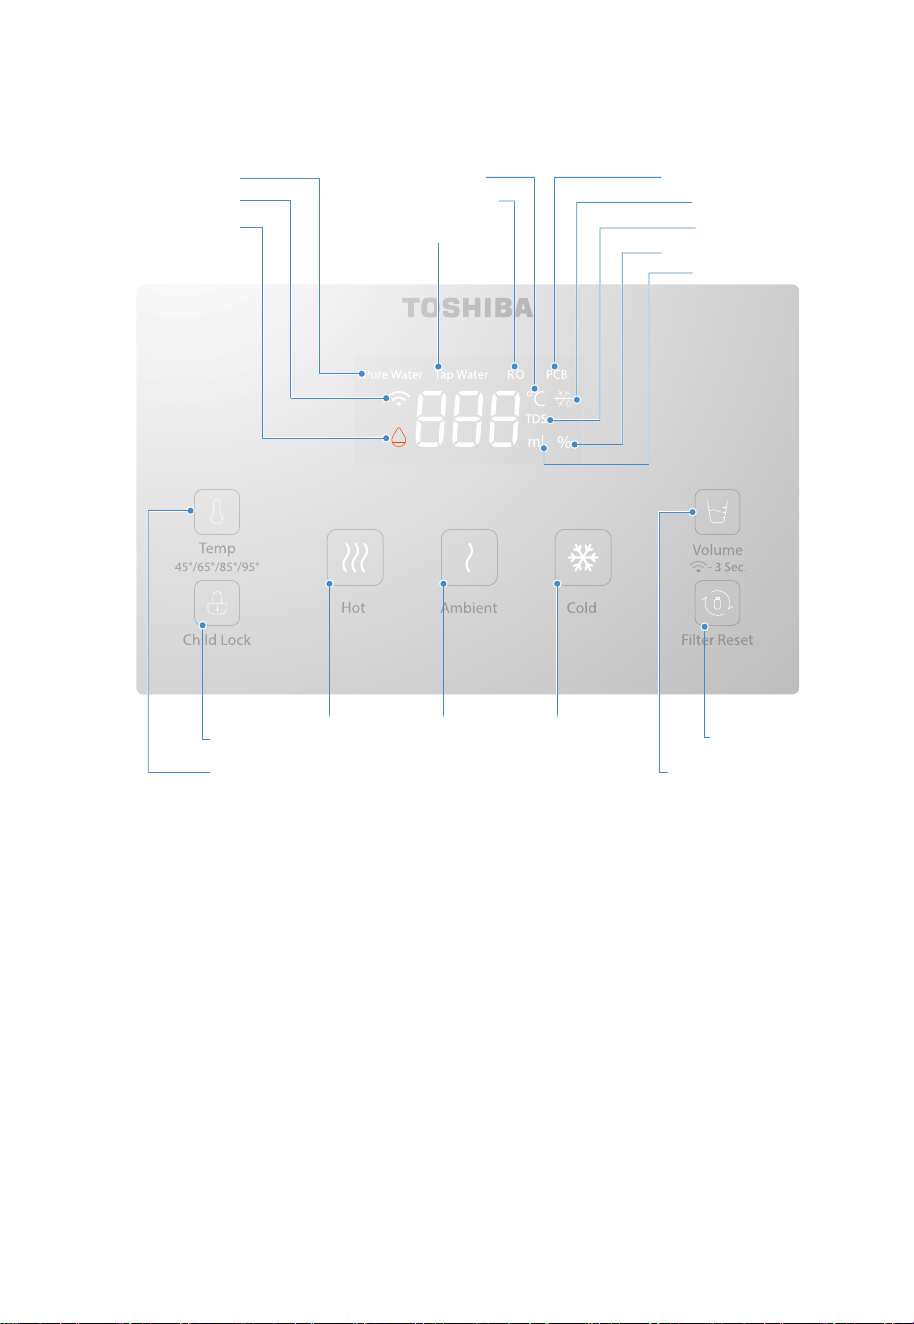
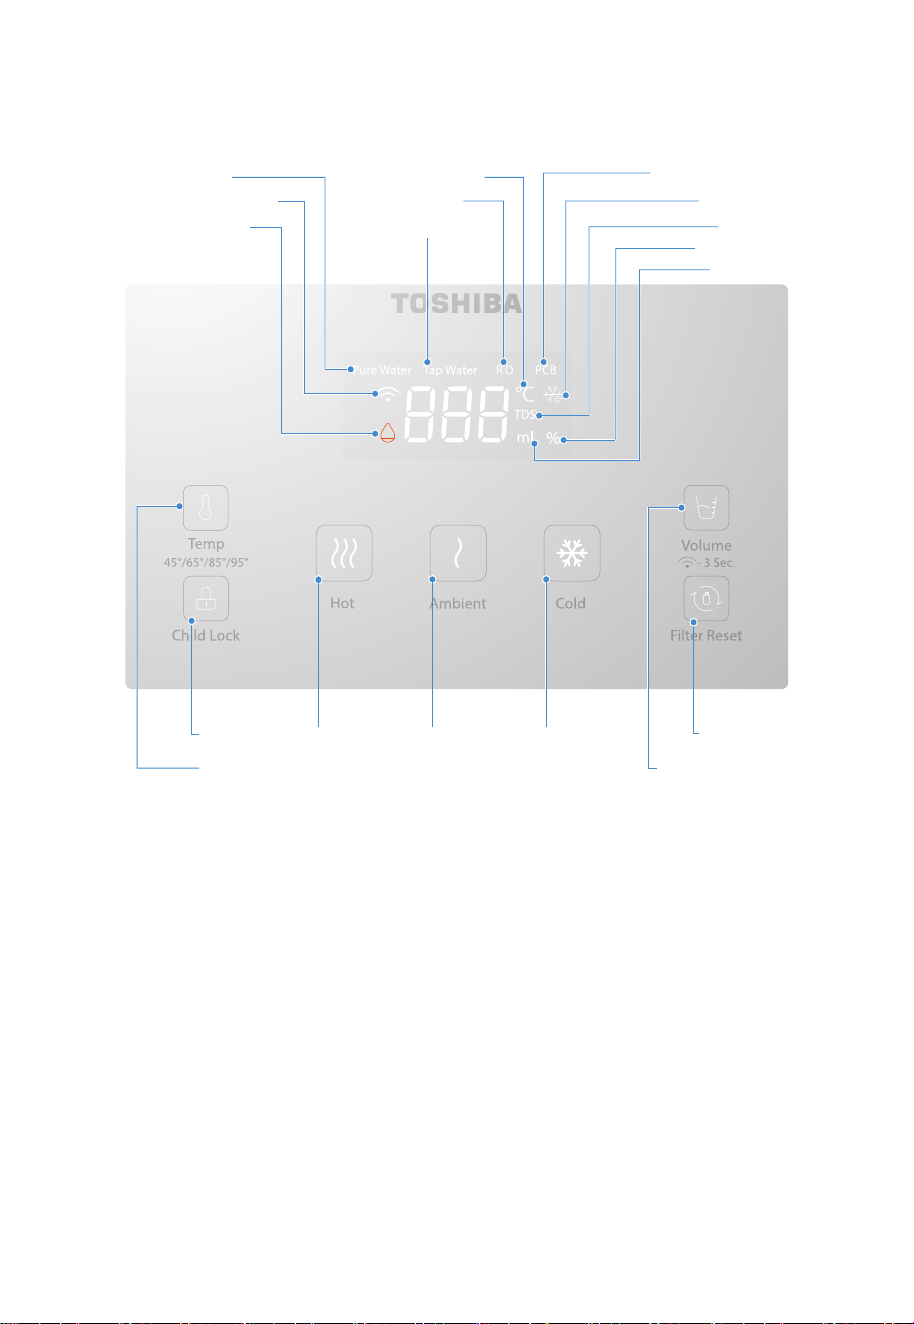
2-2 操作面板
按鍵使用說明
水溫選擇
點擊調溫鍵,可以調整熱水的出水溫度,有45℃/65℃/85℃/95℃四種熱水水溫選擇,選擇水溫後,
按童鎖和熱水出水按鍵,即可獲得熱水,首次出熱水,如不調溫,默認95℃,且調溫後,自動保存
最後一次調節的出水溫度。
水箱換水:
當原水箱水位低於最低水位、水箱拿走或者水箱沒有放好,顯示屏上的“Tap Water”和缺水圖標同
時緩慢閃爍 (每秒一次)。
淨水壺補水:
當淨水壺的水低於最低水位時,顯示屏上的“Pure Water”和缺水圖標快速閃爍 (每秒5次),此時,
暫無法取水,當水位高於最低水位時,“Pure Water”和缺水圖標熄滅,補水繼續,此時可以取水
;當達到最高水位時,淨水壺補水結束。
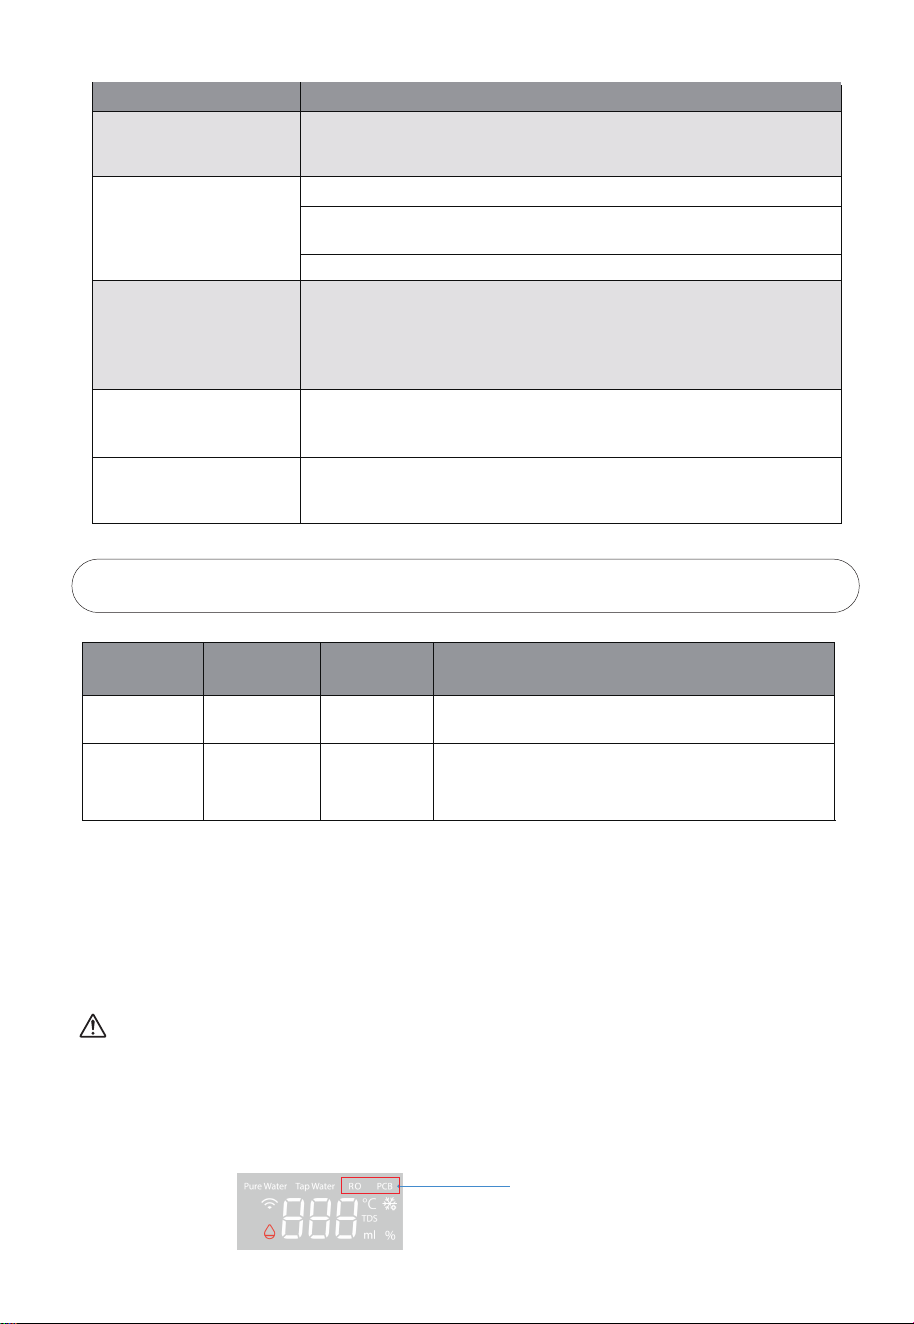
純水指示燈
缺水指示燈 原水指示燈
聯網指示燈
溫度調節鍵
童鎖鍵 熱水出水鍵 常溫水出水鍵 冷水出水鍵
濾芯重設鍵
定量/聯網連接鍵
水量指示燈
TDS指示燈
製冷指示燈
PCB濾芯指示燈
溫度指示燈
RO濾芯指示燈
濾芯壽命指示燈
備註:當淨水壺與原水箱同時缺水時,顯示屏顯示純水TDS值的時候,只有缺水燈閃爍 (快閃)。

濾芯沖洗:
首次上電時,整機會進行濾芯沖洗,沖洗三次,每次300秒,沖洗時,屏幕顯示300秒倒計時,沖洗
缺水或者本次清洗完成時,缺水圖標會閃爍。
待機與喚醒:
機器連續待機2分鐘,無任何點擊操作,除了童鎖按鍵常亮,其他圖標熄滅,待機狀態下,點擊任何
按鍵均令機器回覆工作狀態。
童鎖:
取熱水的時候,童鎖鍵會亮起,需要點擊其進行解鎖,再按熱水出水鍵;如取常溫水及冷水,直接
按相應出水鍵即可;亦可以長按三秒童鎖鍵取消童鎖。
濾芯更換:
更換濾芯后,機器會對濾芯進行自動冲洗,冲洗三次,時間為10/15/10分鐘,冲洗時,顯示屏顯示
600/900/600秒倒計時。冲洗過程中,原水箱缺水或本輪冲洗完需要換水時,則“缺水”圖標閃爍,
更換水箱的水后,衝洗繼續。
出水量:
按照客戶用水習慣,設置了“---、200ml、500ml”三個檔位,“---”為不定量檔為,具體出水量
視淨水壺水量, 當需要定量出水設置時,單擊定量鍵進行水量選擇。
應用程式連接:
接上電源後, 聯網連接指示燈閃爍, 此時打開TSmartLife APP進行連接, 詳細步驟請參考聯網說明書。
顯示說明
上電後圖標全亮閃爍三次(一次一秒),蜂鳴器響三聲,然後整機進入工作狀態。
1. 純水指示燈:當數碼屏顯示淨水壺TDS數值時,圖標亮起,當純水TDS≥50時,圖標顯示45。
2. 原水指示燈:當數碼屏顯示原水箱TDS數值時,圖標亮起,當原水TDS≥999時,圖標閃爍,提
示用戶需要清洗原水箱。
3. RO濾芯指示燈:當數碼屏顯示RO濾芯壽命時,圖標亮起,當濾芯壽命≤5%及壽命到期後,圖
標閃爍。
4. PCB濾芯指示燈:當數碼屏顯示PCB濾芯壽命時,圖標亮起,當濾芯壽命≤5%及壽命到期後,
圖標閃爍。
5. 聯網指示燈:聯網成功後,指示燈常亮。長按定量/聯網連接鍵三秒,進入聯網時,圖秒閃爍(一
秒一次),快聯網成功時,圖標快閃(一秒五次),聯網失敗密碼錯誤時,圖標熄滅。
6. 溫度指示燈:當出熱水和冷水時,數碼屏顯示出水溫度,圖標亮起。
7. 製冷指示燈:啓動製冷功能後,若冷水溫度高於8℃,則圖標閃爍,若冷水溫度≤8℃中,則圖標
常亮;長按冷水出水鍵三秒,關閉製冷功能後,圖標熄滅。
7
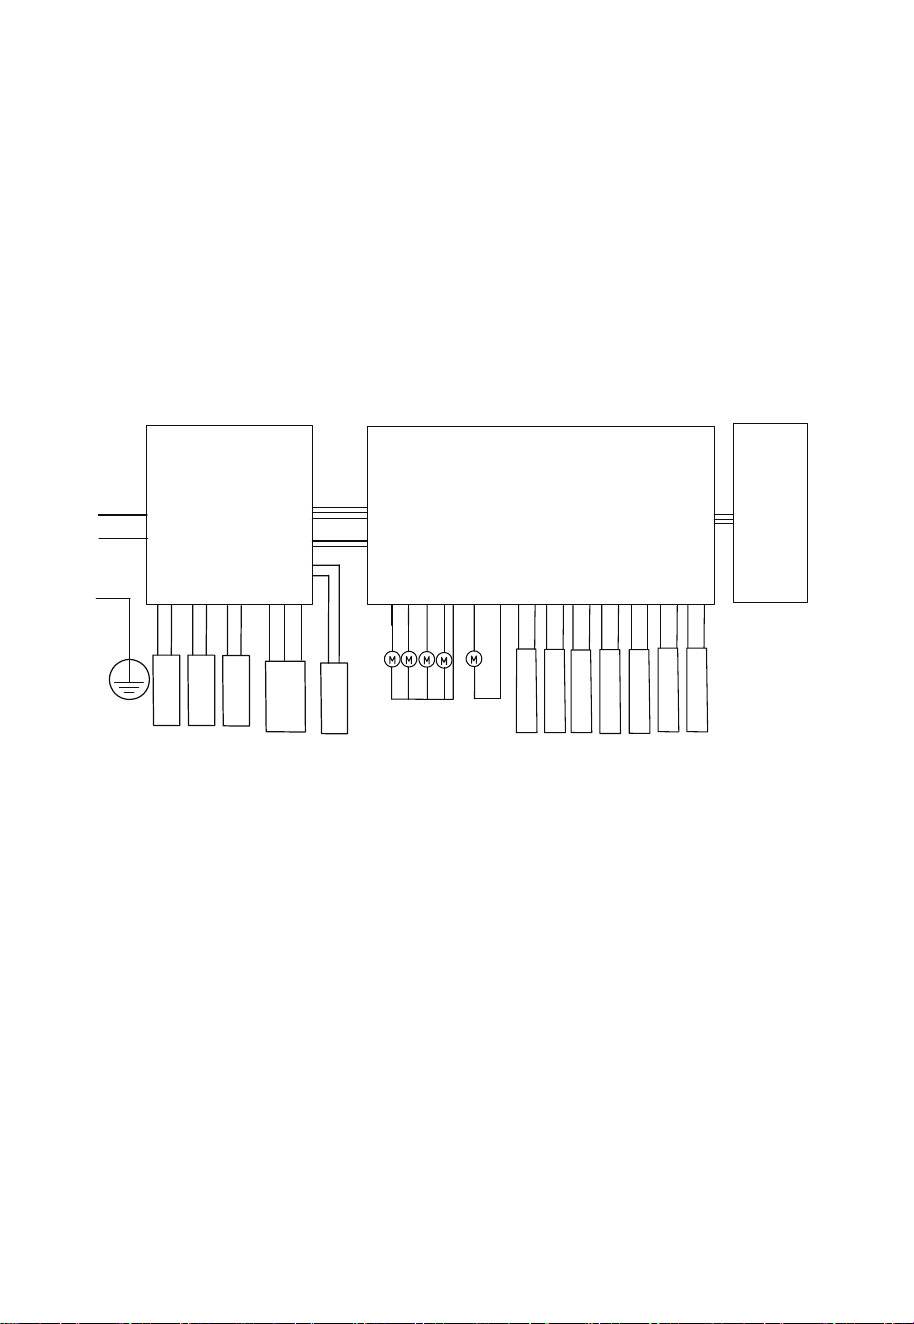
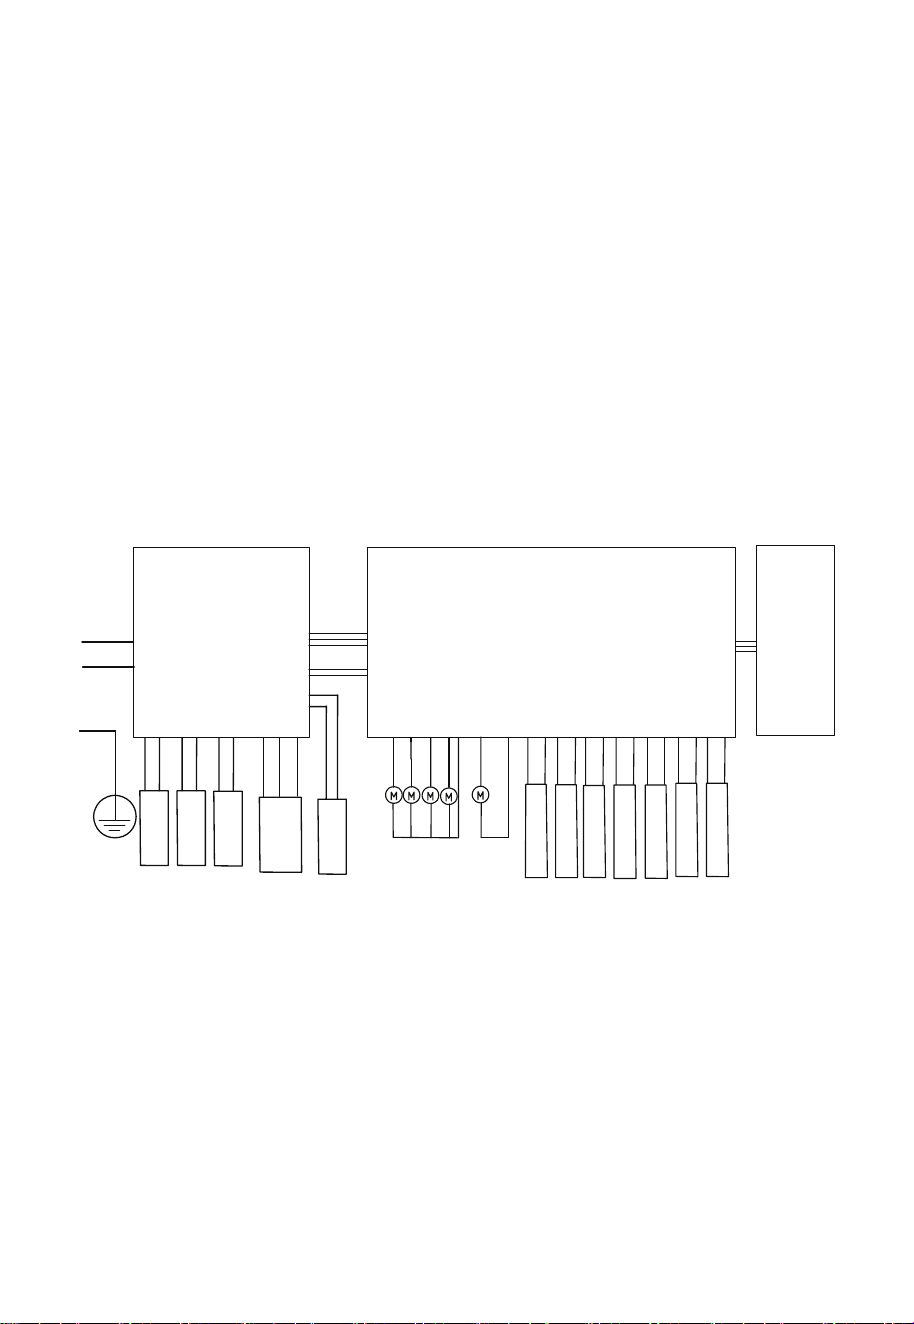
2-3 電路原理圖
顯示板
即熱電源板
N
L
PE
L
N
PE
N
L
TDS檢測傳感
溫度傳感器
水箱浮子
純水杯高浮子
純水杯低浮子
純水杯位置檢測
冰膽板反饋信號
增壓泵
冰膽板
即熱組件
水泵
進水NTC
出水NTC
電磁閥2
電磁閥1
廢水閥
冷水泵
中轉板
8. 缺水指示燈:原水箱缺水或者沒有放好時,圖標閃爍(一秒一次),淨水壺缺水或者水杯沒有
放好時,圖標快閃(一秒五次)。
9. TDS指示燈:當數碼屏顯示TDS數值時,圖標亮起。
10. 水量指示燈:當數碼屏顯示出水量時,圖標亮起。
11. 濾芯壽命指示燈:當數碼屏顯示PCB或者RO濾芯壽命時,圖標亮起。
8
9
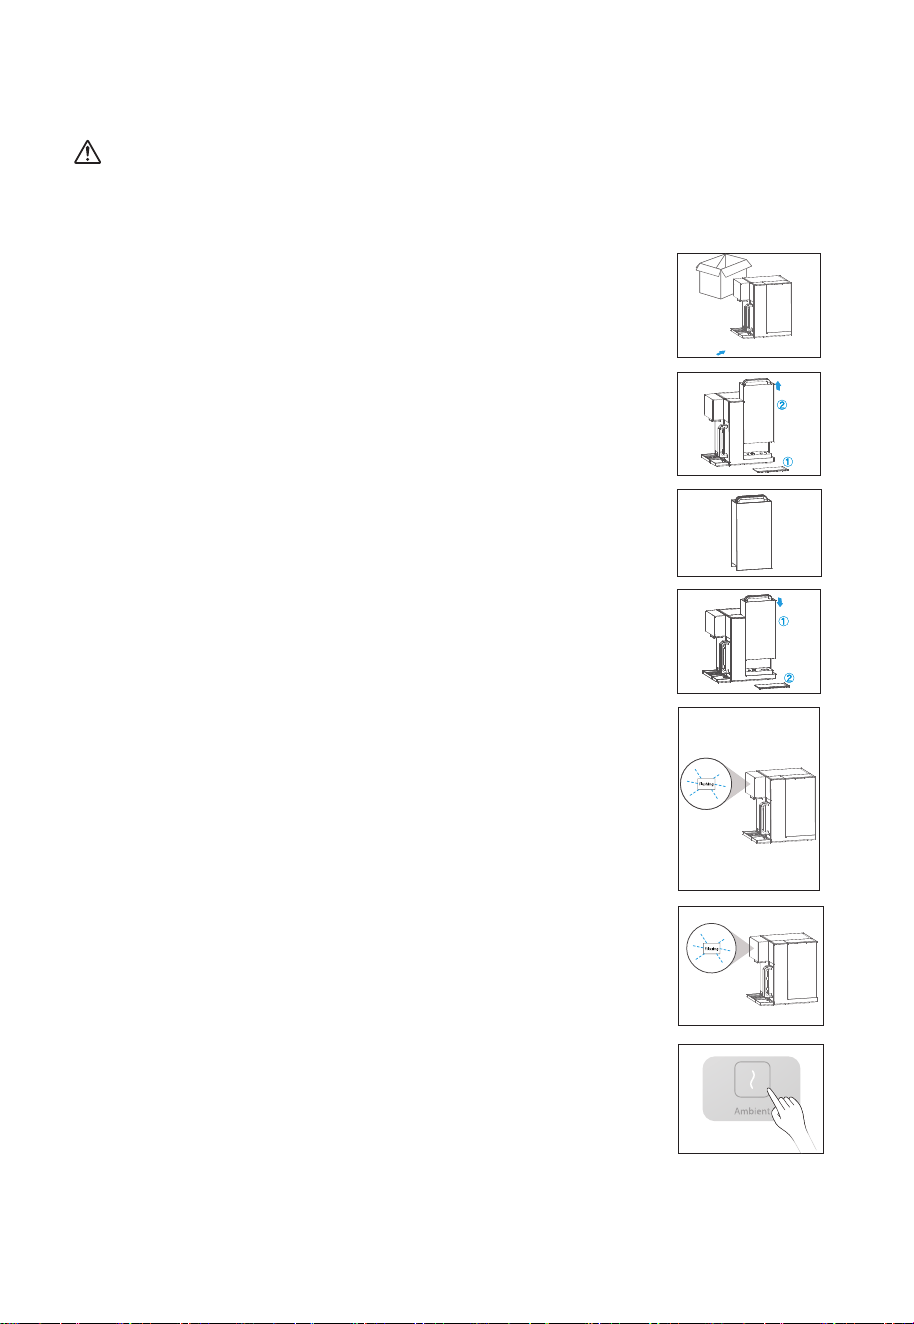
2-4 使用說明
注意
切勿自行拆卸機器, 此操作需經當地經銷商服務網點的專業人員進行。
首次使用說明
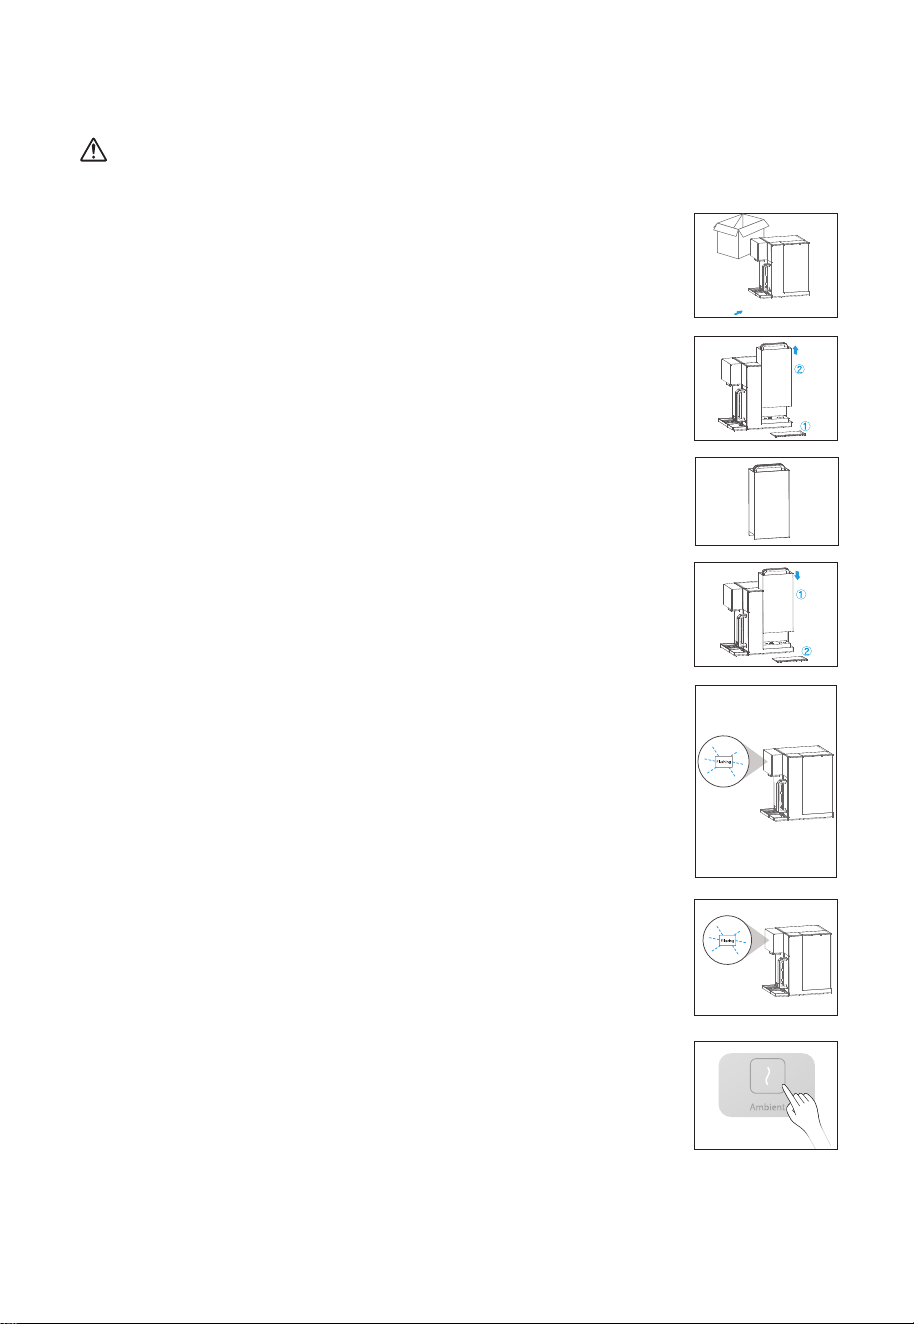
4. 裝上水箱:
4.1 將水箱對準底座插孔往下壓;
4.2 蓋上水箱蓋,此時水箱蓋頂部與機身頂部平齊。
1. 打開包裝,將機器放置在穩固的平面上及擺放接水盤。
3. 注水:
往水箱中加自來水至最高水位。
5.沖洗濾芯 :
2. 取水箱步驟:
2.1 取下水箱蓋;
2.1 提起水箱把手往外拉動水箱,待與底座鬆動後再往外提起。
6. 開始制水:
水箱接第四箱水,開始制水。新機器制水時間需要約10~15分鐘,請
耐心等候。
7. 制水完成後, 按“常溫水”鍵排出適量的水清洗內部管路及出水咀,
機器可正常使用。(可選擇)
5.1 把水箱放置回機器,機器開始進行自動清洗,冲洗濾芯,分三
次進行,冲洗時間為5分鐘,顯示屏顯示冲洗倒計時300秒。
5.2 濾芯冲洗結束后,缺水圖標閃爍,提示用戶去換水,此時,需
要將原水箱的水全部倒掉,並重新加水至最高水位附近。
5.3 重複 5.1、5.2步驟三次。

10
8. 當首次啟動機器時,為原水箱注滿水後,機器開始過濾水,待淨水壺注滿後,機器會進入待機
狀態。
9. 取水
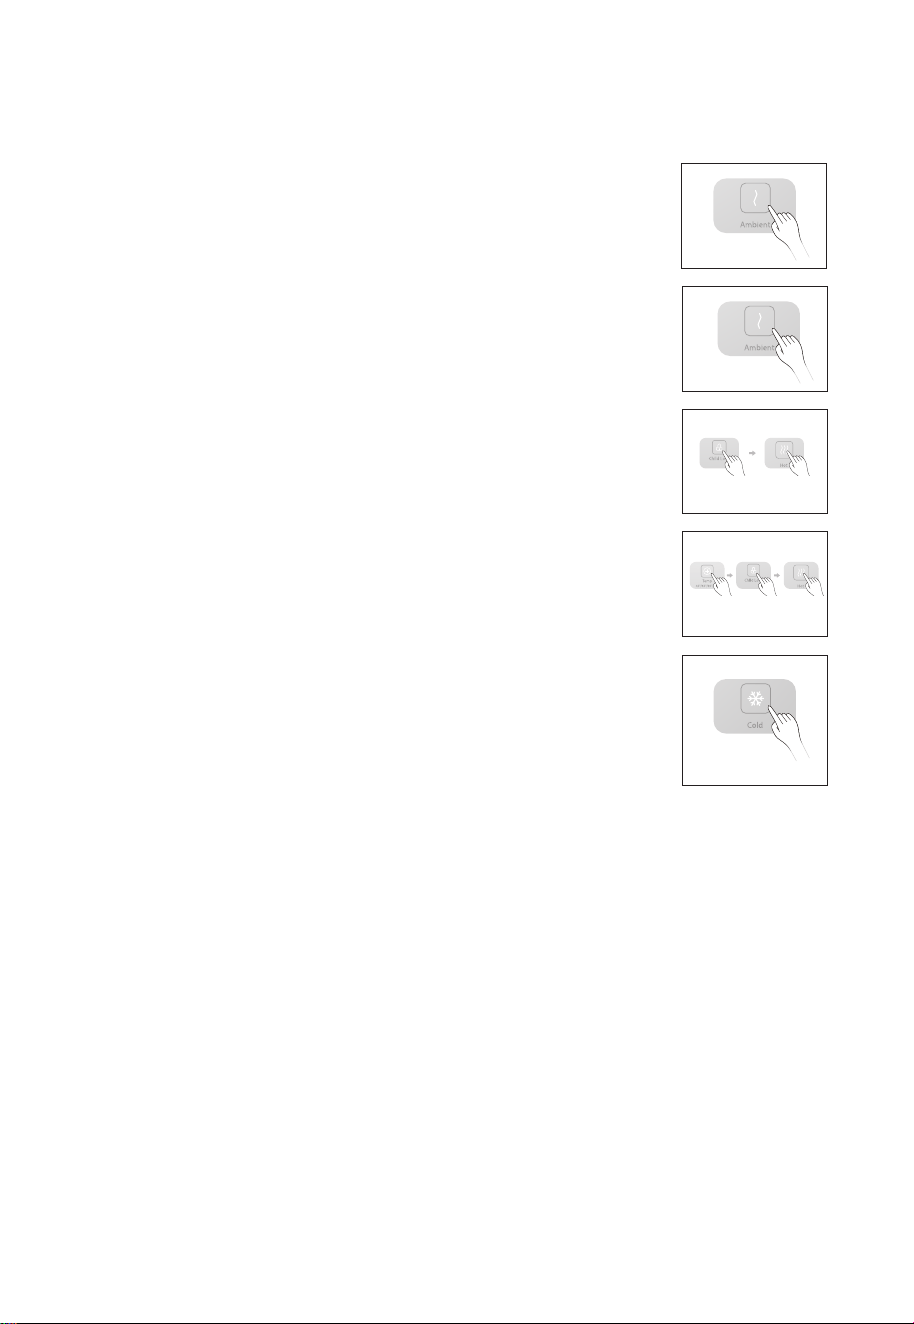
9.1 任意點擊一個圖標, 點亮屏幕, 表示機器進入工作狀態, 屏幕
亮燈時間為2分鐘。
9.2 常溫水
屏幕點亮後,點擊溫水出水鍵即可取常溫淨水。
9.3 熱水(95℃)
屏幕點亮後,點擊童鎖,再點擊熱水出水鍵即可取熱水,熱水默認
溫度爲95℃。
9.4 熱水(其他水溫)
如需選擇其他水溫,點擊調溫鍵,選擇45℃/65℃/85℃/95℃四種
水溫,然後點擊童鎖,再點熱水出水鍵即可獲得相應溫度的熱水。
9.5冷水
屏幕點亮後,如果屏幕雪花標識閃爍,則表示,機器正在製冷,將
不能獲得低於8℃的冷水,當雪花標識長亮,則表示製冷結束,此
時點擊冷水出水鍵,將獲得低於8℃的冷水;如不需要冷水,長按3
秒冷水出水鍵即可取消製冷功能,此時點擊冷水出水鍵,將獲得常
溫水。
10. 換水提示
當水箱連到最低水位線時,顯示屏的“Tap Water”和缺水圖標閃爍,請倒掉水箱餘水,並往水
箱中加入自來水至最高水位,把水箱放置回機器。
11.缺水提示
當淨水壺的水位處於較低水位時,顯示屏的“pure Water”和缺水圖標閃爍,此時,需要等待
1-2分鐘,我們才能操作機器獲得相應溫度的水。
11
3. 故障自檢
注意
以下為常見異常的判斷與檢查,若簡單處理無法排除,請送至維修網點或向撥打客服熱線進行諮詢。
請不要自行拆卸修理,以免發生危險或者對機器造成損害。
在淨化過濾過程中 , 水泵工作時會發出輕微噪音。
使用過程中如有疑難故障,請參照以下方法處理 , 如無法自行解決,請送至維修服務中心檢修。
現象 排除方法
不通電
不能正常加熱
不能正常制水
請檢查是否接通電源
請檢查電源電壓是否滿足220-240V±15%的要求
請檢查水箱是否安裝到位,原水箱內是否有水
請檢查濾芯是否安裝到位,濾芯壓蓋是否處於正確位置
請檢查水箱和連接水箱的進水口是否有異物阻塞
請檢查濾芯壽命是否到期
2-5 日常保養
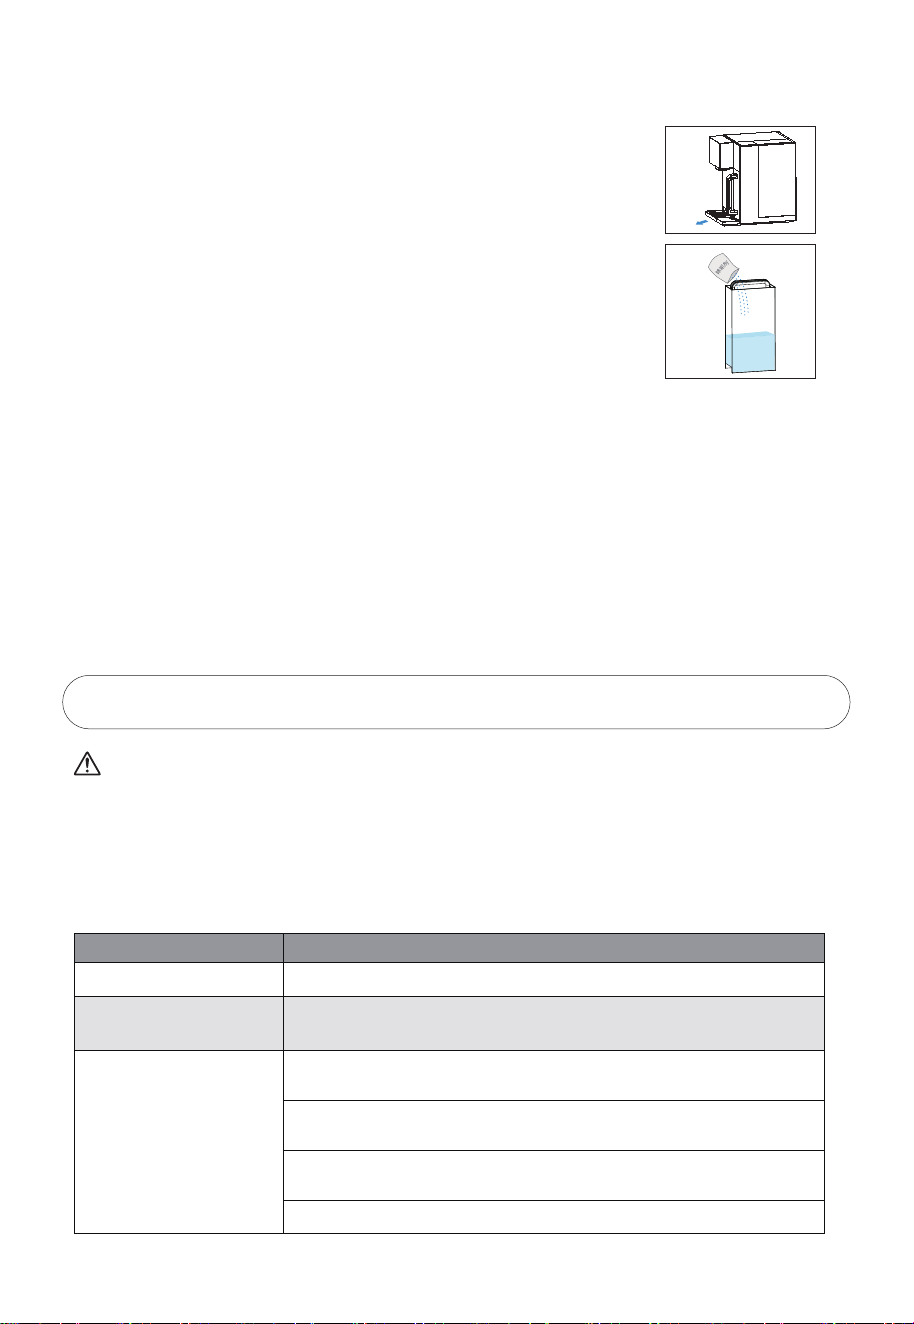
1. 接水盤:取下接水盤, 倒掉盤內殘留水。
2. 水箱:建議每月加入少量除垢劑(如檸檬酸)浸泡水箱3 0 分鐘後進行
清洗,請勿使用汽油等有機溶劑擦拭。
3. 排空淨水壺: 取出淨水壺倒掉當中的餘水, 或長按常溫水出水鍵進行強制排空。
4. 排空電子冰膽: 取下機器後面的排水塞, 排空後裝上便可。
5. 沖洗濾芯及水路: 超過一周使用機器, 建議使用自清洗模式。首先往原水箱中加水至最高水位線,
長按”熱水”+”冷水”出水鍵3秒, 進入自清洗模式, 沖洗時間為300秒。沖洗時, 溫度調節鍵亮
起, 顯示屏顯示300秒倒計時。原水箱缺水時, “TapWater”+”缺水”圖標閃爍, 顯示”OFF”, 溫
度調節鍵呈半亮狀態, 此時需要往原水箱注水。如需要暫停, 短按溫度調節鍵, 再短按重新啟動程
序; 如需要退出自清洗模式, 長按溫度調節鍵3秒即可。
12
現象 排除方法
機器長時間制水工作不停機
漏水
有異味
屏幕沒有反應無法操作
請檢查濾芯壽命是否到期
請檢查水箱是否對準底座插孔
請檢查濾芯是否安裝到位,濾芯壓蓋是否處於正確位置
更換濾芯
爲保持清潔狀態,請定期清洗水箱和淨水壺,長時間不用時,請倒掉水箱
及淨水壺中的水,再排空冰膽中的水,再次使用時,請長按常溫水出水鍵,
進入清洗模式清洗機器。
不製冷
長按冷水出水鍵3秒,看是否出現雪花標識閃爍,如果閃爍,請等待10-15
分鐘,將獲得冷水,如不工作。請撥打售後服務電話進行維修。
請拔下電源插頭重新啟動電源
4. 濾芯介紹
4-1 濾芯簡介
特別提示
濾芯使用週期不是質量保證期限,是以原水符合生活飲用水國家標準,以一般家庭正常用水為
基準的理想濾芯使用週期。
濾芯的保養週期會因使用地域、水源、使用量及季節不同而導致實際使用週期有所不同(以當
地經銷服務網點建議為準)。只有適時更換濾芯才能喝上純淨的水。
濾芯名稱 作用建議壽命
PCB濾芯
濾芯數量
1支 12個月
RO濾芯
1支 24個月
有效過濾去除水中的泥沙、鐵鏽、懸浮物等大顆粒物質,還可去除
水中餘氯及異味
過濾精度0.0001-0.001微米的有害物質,及去除水中的有機物
(三氯甲四氯化碳)、重金屬(砷、鉛、鉻等)
4-2 濾芯更換
注意
濾芯更換可自行完成或由本公司指定工作人員完成。
換芯過程中可能有少量餘水流出,屬於正常現象。
濾芯型號:PCB和RO滤芯。
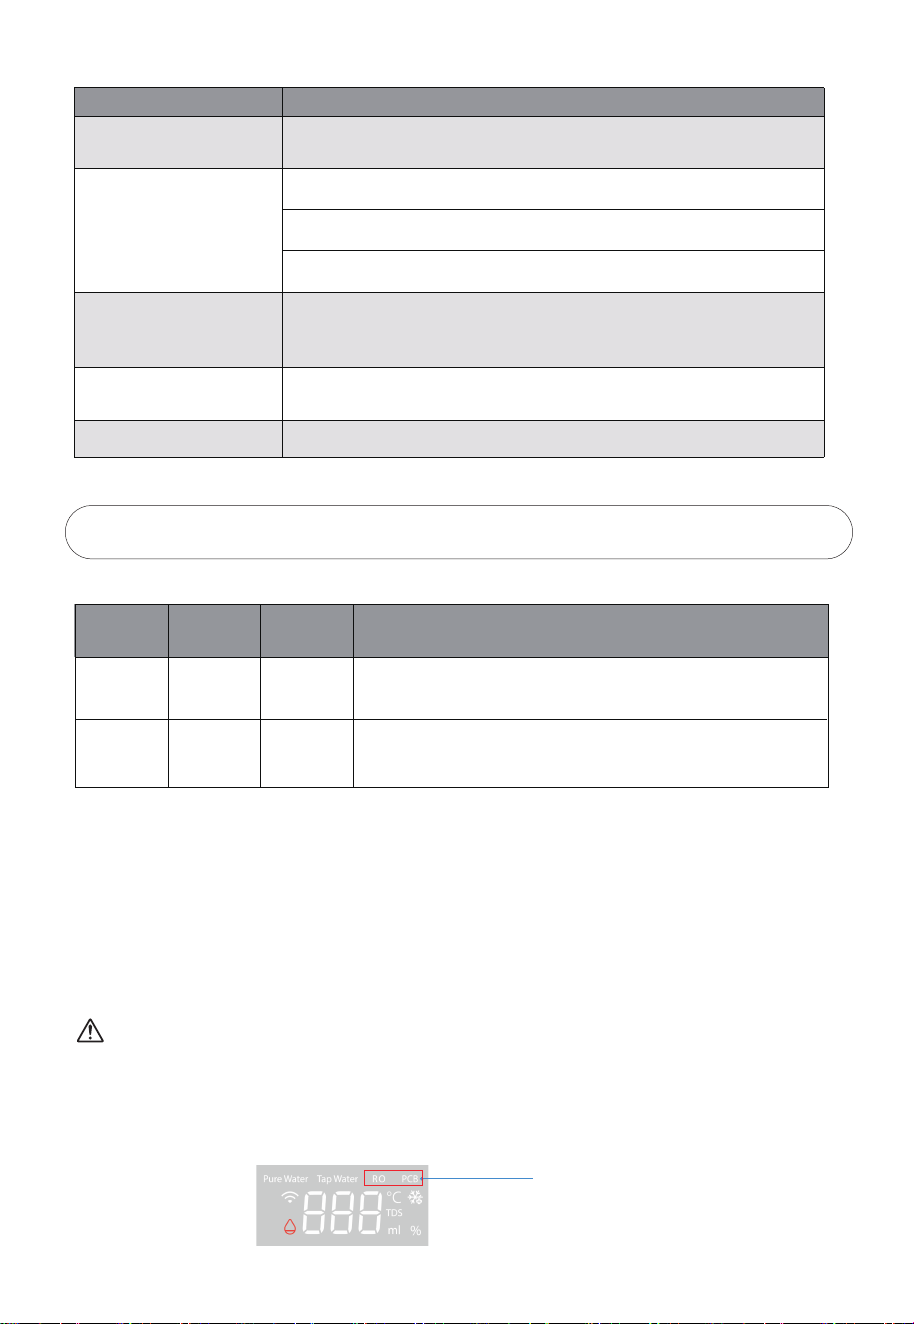
1. 當RO或PCB濾芯指示燈閃爍時,請撥打售後電話購買相應新濾芯,PCB閃爍更換PCB濾芯,RO
閃爍更換RO濾芯。
濾芯壽命提示燈
13
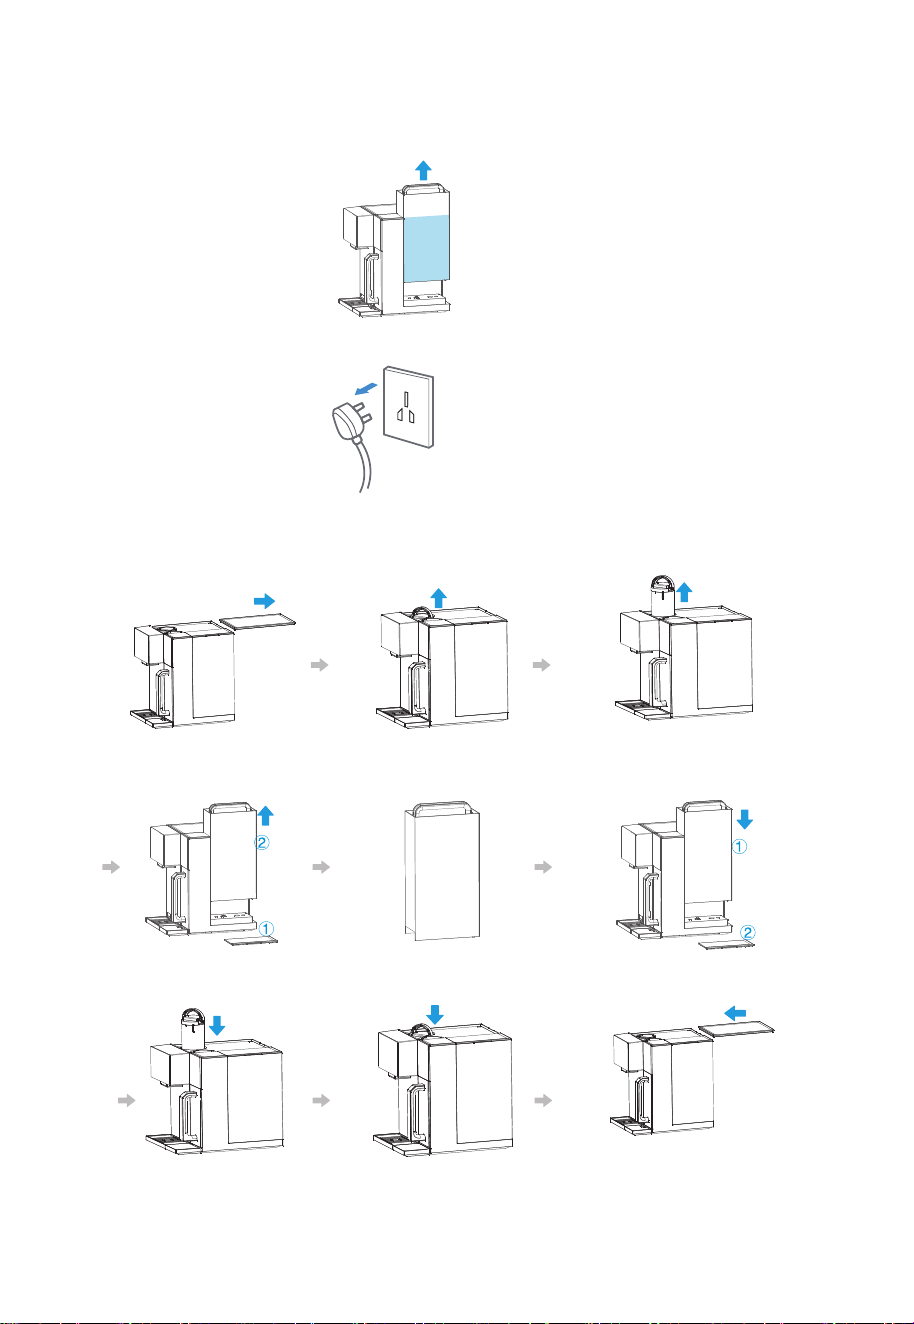
3. 更換濾芯前必須關閉電源。
4. 按下圖所示:
①按照以下圖示步驟進行濾芯更換。
移開濾芯蓋板 提起濾芯把手 抽出需更換濾芯
取下水箱蓋,提起水箱
加水至水箱最高水位線
放好水箱,蓋上水箱蓋
2. 更換濾芯前, 請先排空淨水壺及冰膽的水, 然後將原水箱加水至最高水位線以進行濾芯沖洗。
(如事前沒有進行內部排水, 更換濾芯後, 濾芯壽命將會受影響)
換上新濾芯 按照安裝方向進行安裝好,按下濾芯 蓋上蓋板
型號
額定電壓/頻率
額定製熱水能力
額定功率
額定總淨水量
淨水流量
進水壓力
RO膜工作壓力
適用水源
適用環境
外觀顏色
220-240V~ / 50Hz
≥90℃, 20L/h
額定製冷水能力
≤10℃, 0.4L/h
2290W
2000L
0.2L/min
0.05-0.1MPa
0.45-0.8MPa
市政自來水
4-38℃,環境濕度≤90%
極地白
5. 技術參數
5-1 基本參數
TWP-W2265THK(W)
14
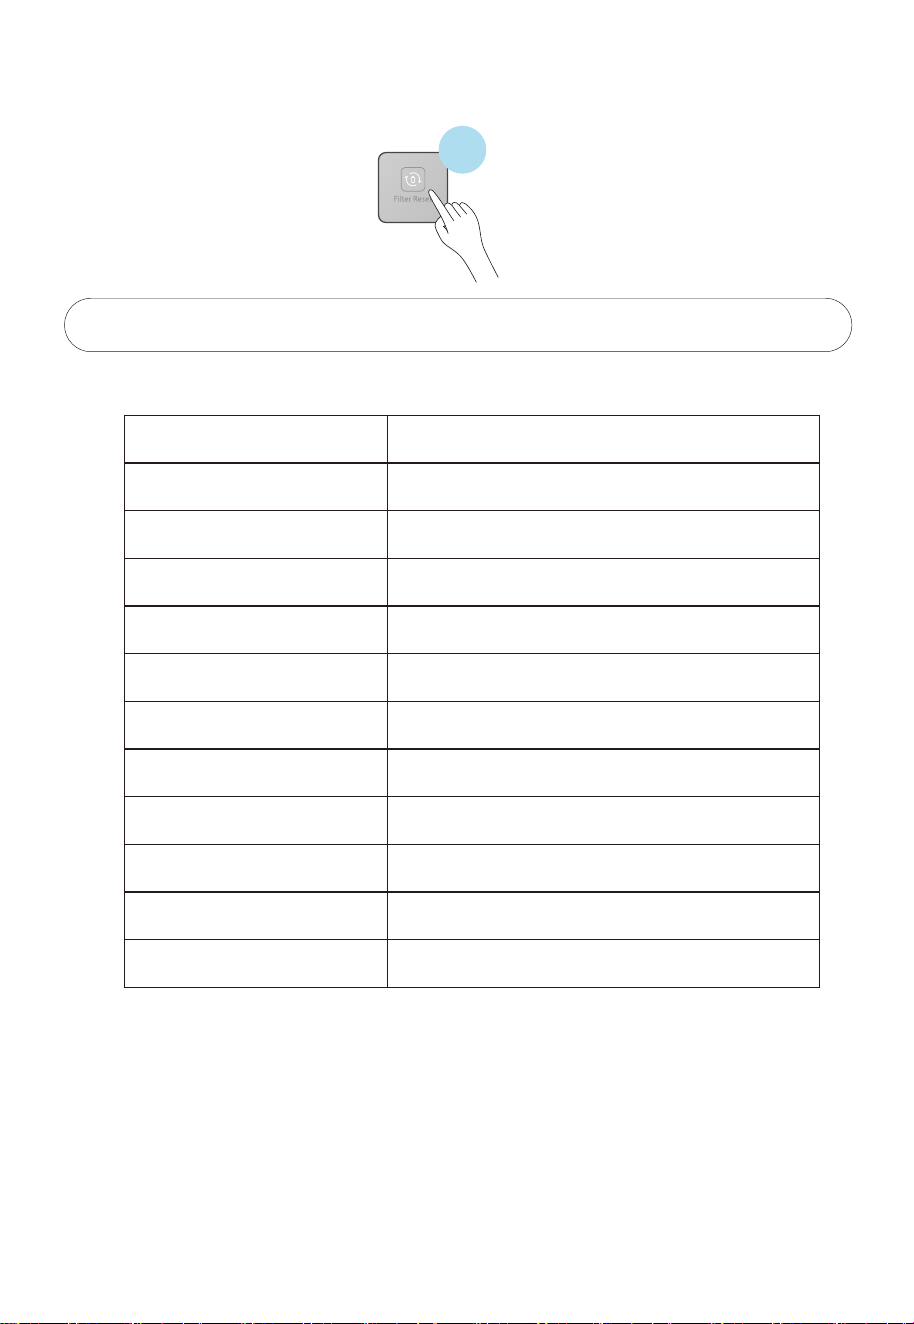
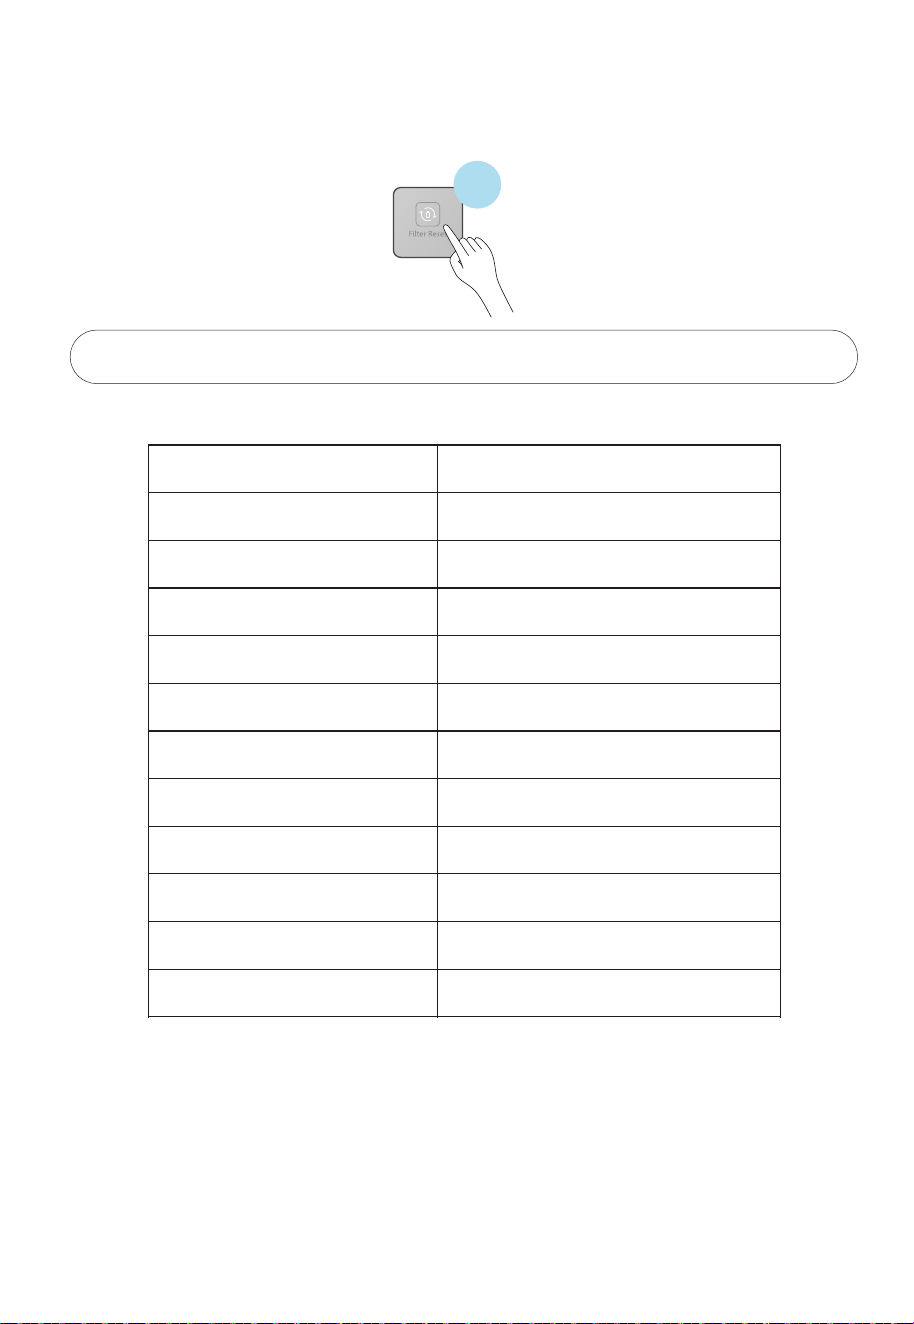
②單擊“復位”按鍵進行對應的濾芯選擇,先顯示PCB再RO,選定對應的濾芯後,長按“復位”
按鍵3秒,進行濾芯復位,不長按,則10秒後退出。
3秒


USER MANUAL
RO Tabletop Water Purifier with heating
and cooling
TWP-W2265THK(W)
Please read the manual carefully before operating the water purifier.
Retain it for future reference.
1. Safety Instruction----------------------------------------------------------------------------------------------
1-1 Safety instructions----------------------------------------------------------------------------------------
1-2 Packing list--------------------------------------------------------------------------------------------------
2. Product Introduction-----------------------------------------------------------------------------------------
2-1 Name of parts----------------------------------------------------------------------------------------------
2-2 Control panel-----------------------------------------------------------------------------------------------
2-3 Electric schematic diagram-----------------------------------------------------------------------------
2-4 How to use--------------------------------------------------------------------------------------------------
2-5 Daily maintenance----------------------------------------------------------------------------------------
3. Troubleshooting-----------------------------------------------------------------------------------------------
4. Filter Introduction----------------------------------------------------------------------------------------------
4-1 Filter introduction-----------------------------------------------------------------------------------------
4-2 Filter change-----------------------------------------------------------------------------------------------
5. Technical Parameters-----------------------------------------------------------------------------------------
5-1 Basic parameter-------------------------------------------------------------------------------------------
1
1
5
5
5
6
The packaging material used is recyclable; we recommend that you separate plastic,
paper and cardboard and give them to recycling companies. Guidelines, waste from
electrical and electronic devices should be collected separately. If you need
to dispose of this appliance in the future, do NOT throw it away with the rest
of your domestic garbage.
8
11
9
11
12
12
12
14
14
.
1
1-1 Safety instructions
All instructions described should be carefully read and followed.
These instructions are precautions to prevent the risks of serious injury or death of the user, and
any damages to property.
Serious injury - injury which requires hospitalization, lengthy treatment, or blindness, hot and cold
skin burn, electric shock, broken bones or poisoning.
Injury — injury, skin burn or electric shock which does not require hospitalization or lengthy
treatment.
Property loss – extended loss of houses, furniture, domestic animals or pets.
Detailed instructions would be indicated on the inside of the circle
or around the symbol in figures or in writing.
Detailed instructions would be indicated on the inside of the circle or
around the symbol in figures or in writing.
Detailed instructions would be indicated on the inside of the triangle
or around the symbol in figures or in writing.
Away from
flammable materials
Prior to use, the water purifier must be properly assembled and installed in
accordance with this manual.
It may damage to the water purifier and cause danger.
Do not use the water purifier near a material with high volatility which
is easily ignited or exploded.
It will cause explosion or fire.
Do not use an extension cord with the water purifier.
It may cause electric shock or fire due to heat.
Do not use damaged power lines, power plug or loose power socket.
It may cause electric shock, fault, fire or injuries.
Make the water purifier on a solid level surface.
It may cause the water purifier to fall and tumble down.
No modification
2
Wipe off dust
Do not immerse cord, plug, or any other part of the water purifier in waterd or
other liquids.
It may cause electric shock or fire.
Do not operate the water purifier by weak people (including children)
which are reduced physical, sensory, mental capabilities, nor
inadequate experience and knowledge, unless sufficient instructions
have been given by the person who can guarantee the safe use of the
water purifier.
It may cause electric shock, damage, or malfunction.
Children should be supervised to ensure that they do not play with
the water purifier.
It may cause electric shock, damage, or malfunction.
Use outlet with rated voltage AC 220-240V, and don't use multiple outlets.
It may cause a fire or an electric shock.
Do not damage power line.
Do not damage, cut, process power line or bend, pull, twist or bind
power line.
Besides, do not yank the power line violently, or put weights on the
line or clamp the power line.
The power line may be damaged and cause fire or electric shock if
the power line is damaged, the damaged line must be replaced by
the manufacturer or its service agent or personnel having similar
qualification, so as to prevent dangers.
Insert the power plug securely to the base and let the cord go
downward.
If the cord goes upward or if the plug is incompletely inserted, it may
cause fire due to electric leakage or heat generation.
Wipe off dust or dirt accumulated on the plug of power line.
The accumulated dust or dirt may cause fire, electric shock, or short circuit.
Do not disassemble, remodel, modify and repair the water purifier.
This may cause fire, electric shock or fault, and cause injuries. If repair is required,
please contact with the vendor of the water purifier.
Do not place anything on the water purifier.
It may cause fire, electric shock or injuries.
To clean the water purifier, use the soft cloth moisten by the neutral detergent
diluted with water. Do not use the insecticide, Thinner, Benzine, chlorine or acid
lotion.
It may cause crack, electric shock, fire, or deleterious gas.
Do not freeze. It may cause leakage or other malfunctions.
Reverse osmosis membrane filters will be damaged below 0℃.
Do not fill undrinkable water to the tank of water purifier.
This water purifier is exclusively for the tap water with known
ingredient.
It may damage health or cause trouble.

3
Do not switch on if there is a possibility that the water in the heater is frozen.
Power connections must be made with reliably grounded devices.
Away from fire
Do not use outdoors. Keep the water purifier at dry place and away
from direct sunlight.
It may cause fire or malfunction. Also the body of the water purifier
may change color, deform and breeds moss and fungus.
When disconnecting the plug from the socket, do not pull the power
line by force. Pull out by grasping the power plug.
It may cause electric shock or fault and cause injuries.
Indoor use only.
This appliance is intended to be used in household and similar applications such
as staff kitchen areas in shops, offices and other working environments; farm
houses and by clients in hotels, motels and other residential type environments;
bed and breakfast type environments; catering and similarnon-retl lcatns.
The water purifier usage temp range is between 4℃-38℃. Do not use the water
purifier out of usage temp range.
The flow rate will be reduced when the environmental temp gets lower.
This is the inherent feature of RO membrane.
This product is only suitable for safe use in the area below 1500 meters above sea
level.
Do not place the water purifier close to fire.
It may damage to the water purifier and cause fire.
Do not put anything on the water purifier, also do not lean, shake and push the
water purifier.
It may damage to the water purifier and cause injury, leakage, electric shock, fire or
others.
Do not install the water purifier in where the water jet washer is used.
It may cause electric shock or fire due to an insulation deterioration.
Stay away from the fire source above 30cm. It will cause fire or machine damage.
Do not reset the filter except to replace expired filters or to stop using them for
long periods.
It may cause adhesion of germs or water leakege.
Do not connect hot water pipe of water heater to the water inlet.
Reverse osmosis membrane filter will be damaged above 38℃.
When water leakage remove the water tank and unplug the power cord as soon
as possible.
Leakage can cause other damage. Please contact teh local service center.
4
To inspect and maintain
Disconnect the appliance from the supply before carrying out maintenance.
Appliances that are obviously damaged must not be operated.
In order to avoid a hazard due to inadvertent resetting of the thermal cut-out,
this appliance must not be supplied through an external switching device, such
as a timer, or connected to a circuit that is regularly switched on and o by the
utility.
Certified technician
Replace the filter regularly.
The filter change lamp will flash when the filter need to change.
Please see page 10 for 4-2 Filter Change.
Do not install close to strong magnetic devices.
It may cause fire, damege or circuit failure.
The water purifier shall be installed or removed by professional.
It's easy to damage the inner parts or cause electric shock.
It's normal that there will be slight noise and vibration when the water
purifier is producing water.
If the supply cord is damaged, it must be replaced by the
manufacturer, its service agent or similarly qualied person in order
to avoid a hazard.
It may cause re, electric shock.
Do not clean the water purier with high water pressure equipment.
It may cause electric shock or re due to an insulation deterioration.
Make sure the water purier's power plug disconnects from the power outlet
before clearing or inspect the water purier.
It may cause electric shock.
Disconnect the power plug from power supply immediately and call
for service when:
- burnt smell from the water purier;
- abnormal phenomenon happens.
It may cause short circuit, re or electric shock.
Service should be performed only by a certified technician.
It may damage to the purifier and cause electric shock.
Do not use the water purifier outdoor.
It may cause malfunction, fire or electric shock.And also it may cause the water
purifier body color changed, deformation, growth of moss or contamination.
2-1 Name of parts
2. Product Introduction
1-2 Packing list
5
Upper cover
Water tank cover
Display screen
Nozzle
Pure water tank
Water tray
Water tank
Machine body
Packing box
Machine Pure water cup Water tray
Instruction
Manual
Instruction Manual
Application
Software Use Guide
Quick start Guide
Quick start Guide
Application
Software Use Guide
Warranty card
Warranty card
The appliance is to be supplied through a residual current device (RCD) that
rated residual operating current does not exceed 30 mA.
Pure water indicator
Water shortage indicator Tap water indicator
Wireless Connection indicator
Temperature selection button
Child lock button
Filter reset button
Quantitative / Wireless
Connection button
Filter life indicator
Water indicator
TDS indicator
Cooling indicator
Temperature indicator
RO lter indicator
Hot water
outlet button
Warm water
outlet button
6
2-2 Control panel
Key instruction
Cold water
outlet button
PCB lter element indicator
Water temperature selection
Click the temperature adjustment button, you can adjust the outlet temperature of hot water, there are
45
℃/65℃/85℃/95℃ four hot water temperature options, after selecting the water temperature, press
the child lock and hot water outlet button, you can get hot water, the rst hot water, if the temperature
is not adjusted, the default is 95℃, and after the temperature adjustment, the last adjusted outlet
temperature will be automatically saved.
Tank change
When the Water level of the original tank is below the lowest level, the tank is removed, or the tank is
not properly placed, the Tap Water and water shortage icons on the display ash simultaneously(Once
per second ).
Pure water cup hydrates
When the Water in the Pure Water cup is lower than the lowest water level, the ICONS of Pure Water and
water shortage on the display ash (5 times per second ), and water cannot be drawn temporarily. When
the water level is higher than the lowest water level, the icons of pure water and water shortage will be
extinguished, and water replenishment will continue, and water can be drawn at this time. When the
highest water level is reached, the water rell of the pure water cup ends.
Note: When the pure water cup and the original water tank are short of water at the same time, when
the display displays the pure water TDS value, only the water shortage lamp flashes (quick flashing).

7
Filter flushing
When powered on for the first time, the entire machine will perform filter element flushing three times,
each time for 300 seconds. During flushing, the screen will display a countdown of 300 seconds. If there
is a water shortage during flushing or when the cleaning is completed, the water shortage icon will
flash.
Standby and wake up
The machine has been in standby for 2 minutes without any clicking operation, except for the child lock
button which is steady on and the other icons are off. In standby state, click any button to make the
machine return to working state.
Child lock
When taking hot water, the child lock key will light up, you need to click it to unlock, and then press the
hot water water key;If you take room temperature water or cold water, press the corresponding water
key directly;You can also press and hold the child lock button for 3 seconds to cancel the child lock.
Cartridge replacement
With the use of the filter element, the filter element will reach its service life, and when it will reach its
service life, the RO or PCB filter indicator light will flash, prompting the user to buy the filter element
replacement, when the filter element expires, the filter indicator light is on, the filter filter performance
decreases, and the user needs to replace the filter element immediately.
Quantitative effluent
According to the customer's water usage habits, set the "--, 200ml, 500ml" three stalls, "--" is the
non-quantitative file, the specific water output depends on the water volume of the pure water cup,
when the need to set the quantitative water, click the quantitative water key to select the water volume.
APP function
After power-on, the Wireless Connection indicator blinks slowly, open Toshiba APP TSmartLife, and
perform networking operations. For details, refer to the networking instructions.
Display description
After the device is powered on, the icon blinks three times (one second at a time), and the buzzer buzzes
three times. Then the device starts to work.
1. pure water indicator: when the digital screen shows the TDS value of the net kettle, the icon lights
up, when the pure water TDS≥50, the icon shows 45.
2. raw water indicator: when the digital screen shows the TDS value of the original water tank, the
icon lights up, when the raw water TDS≥999, the icon flashes, prompting the user to clean the
original water tank.
3. RO filter indicator light: when the digital screen shows the life of the RO filter, the icon lights up,
when the life of the filter is less than 5% and the life expires, the icon flashes.
4. PCB filter indicator light: when the digital screen shows the life of the PCB filter, the icon lights up,
when the life of the filter is less than 5% and the life expires, the icon flashes.
5. Networking indicator: After the networking is successful, the indicator is steady on. Press and hold
the quantitative/Network connection button for three seconds. When entering the network, the icon
will blink (once a second). When the network is nearly successful, the icon will blink quickly (five
times a second).
8
2-4 Electric schematic diagram
TDS detection sensor
Temperature sensor
Tank oat
Pure tank high oat
Pure tank low oat
Pure tank position
detection
Ice bile feedback signal
N
L
PE
L
N
PE
N
L
Transfer plate
Display
board
Immediate heat
power panel
Ice sheet
Immediate
thermal module
water pump
Inuent NTC
Euent NTC
Booster pump
Solenoid valve 2
Solenoid valve 1
Waste water valve
cold water pump
6. temperature indicator: when the hot water and cold water, the digital screen displays the water
temperature, the icon lights up.
7. Cooling indicator: After starting the cooling function, if the cold water temperature is higher than
8 ℃, the icon blinks; if the cold water temperature is less than 8 ℃, the icon is steady on; Press and
hold the cold water outlet key for three seconds to turn off the cooling function, and the icon goes
out.
8. water shortage indicator: when the original water tank is short of water or not put well, the icon
flashes (once a second), when the water bottle is short of water or the water cup is not put well, the
icon flashes quickly (five times a second).
9. TDS indicator: When the digital screen shows the TDS value, the icon lights up.
10. water indicator: When the digital screen shows the amount of water, the icon lights up.
11. filter life indicator: When the digital screen shows PCB or RO filter life, the icon lights up.
Instructions for rst use
9
2-4 Instructions
Notes:
Do not disassemble the machine yourself. This operation should be performed by professional personnel
at authorized service centers or local dealerships.
4. Install the water tank:
4.1 Align the water tank with the base socket and press down;
4.2 Cover the water tank with the cover, ensuring that the top of the water
tank cover is aligned with the top of the machine.
1. Open the package, place the machine on a stable surface and place the
water tray.
3. Water lling:
Fill the water tank with tap water to the maximum level.
2. Steps to remove the water tank:
2.1 Remove the water tank cover;
2.2 Lift the handle of the water tank and pull the water tank outward, and
then lift it out after it disconnect with the base.
7. After the water making is completed, press the "Ambient Water" button to
discharge an appropriate amount of water to clean the internal pipeline
and water nozzle, and the machine can be used normally. (optional)
5. Rinse the lter element
6. Start making water
The water tank is connected to the fourth box of water, and the water is
made. The new machine takes about 10~15 minutes to make water,
please wait patiently.
5.1 Put the water tank back to the machine, and the machine starts to
automatically clean and flush the filter element, which is carried out in
three times, the flushing time is 5 minutes, and the display screen
displays the countdown of 300 seconds.
5.2 After the washing of the filter element is finished, the water shortage
icon flashes, prompting the user to change the water. At this time, all
the water in the original tank needs to be poured out, and the water is
re-added to the highest water level.
5.3 Repeat Steps 5.1 and 5.2 three times.
10
8. When the machine is initially powered on, ll the water tank with water. The machine will start
ltering the water until the puried water tank is lled. Once the puried water tank is lled, the
machine will enter standby mode.
9. Take water
9.1 Press any icon to light up the screen, indicating that the machine has
entered the working state. The screen will remain light for 2 minutes.
9.2 Ambient temperature
Water After the screen is lit, click the warm water water key to clean water
at room temperature.
9.3 Hot Water
Afterthe screen is lit up, click the child lock, and then click the hot water
outlet key to obtain hot water, the default temperature of hot water is 95℃,
if you need to choose other water temperatures, click the temperature
adjustment key, select 45℃/65℃/85℃/95℃ four kinds of water
temperatures, then click the child lock, and then click the hot water outlet
key to obtain the corresponding temperature of hot water.
9.4 Cold Water
After the screen is lit up, if the snowake logo on the screen ashes, it means
that the machine is cooling, it will not be able to get cold water below 8
℃.
When the snowake keeps shining, it means that the refrigeration is
over. Click the cold water outlet key at this time, and you will get cold water
below 8
℃. If you do not need cold water, long press the cold water outlet
key for 3 seconds to cancel the cooling function, then click the cold water
outlet key, you will get room temperature water.
10. Water change tips
When the Water tank is connected to the lowest water level, the Tap Water and water shortage
ICONS on the display ash. Please pour out the remaining water in the water tank, add tap water
to the water tank to the highest level, and place the water tank back to the machine.
11. Water shortage tips
When the Water level of the pure Water cup is at a low level, the pure water and water shortage
ICONS on the display screen ash, at this time, we need to wait 1-2 minutes before we can operate
the machine to obtain the corresponding temperature of water.

11
3. Troubleshooting
Notes:
The following is the judgment and inspection of common abnormalities. If simple treatment cannot
be eliminated, please send it to the maintenance oce for consultation. Please do not disassemble
and repair yourself to avoid danger or damage to the water purier.
The pump may make slight noise when it operates in the purifying and ltering of the water
purier. You can use it normally.
If there is any problem in using, please solve as the following methods. For the fault that can
not be solved, please contact the local sell service center.
2-5 Daily maintenance
1. Water Tray: Remove the water tray and empty any remaining water in the tray.
2. Water Tank: It is recommended to add a small amount of descaling agent
(such as citric acid) to the water tank once a month. Let it soak for 30 minutes
before cleaning. Please do not use organic solvents like gasoline for wiping.
Issues
Troubleshooting
No power supply
Failure to heat normally
Please check if the power is connected.
Please check whether the supply voltage meets the requirements
of 220-240V±15%.
Failure to heat normally
Please check whether the water tank is installed in place and whether
there is water in the raw water tank.
Please check that the lter is installed in place and the lter cover is in
the correct position.
Please check whether the water tank and the water inlet connected to
the water tank are blocked by foreign objects.
Please check if the lter life is expired.
3. Empty the water bottle: take out the water bottle and pour away the remaining water, or long press the
room temperature water outlet key to force empty.
4. Empty the electronic ice bladder: remove the drain plug behind the machine and install it after
emptying.
5. After using the machine for more than a week, it is best to use the self-cleaning mode to clean the
machine, rst add water to the original water tank to the highest water level, and then power on, long
press the "hot water" + "cold water" water key for 3 seconds, enter the self-cleaning mode, clean the
lter element and water, ushing time is 300 seconds, cleaning, the temperature control key lights up,
the display displays a countdown of 300 seconds, when the original water tank is short of water, The
Tap Water + Water Shortage icon blinks slowly, and OFF is displayed. The Temperature adjustment icon
is half-on. In this case, water is supplied to the original water tank. When you need to pause, press the
temperature control key and restart it. When you feel that the time is too long, press and hold the
temperature control key to exit the self-cleaning mode.
Scale inhibitor
4-2 Filter Replacement
12
The lifespan of lter element is not quality guarantee time, but the ideal lifespan of lter with the
raw water in accordance with the national standard of domestic drinking water and based on the
normal water using of a common family.
The maintenance period of lter is expected time, but the real lifespan is depend on area, the
quality of water, the quantity of water using and season(it is subjected to the suggestions of local
sell on commission and service site). Only change lter timely, you can drink pure water.
Filter name
PCB Filter
RO Filter
Function
Eectively lter mud, sand, rust, suspended solid and other
large-grained substance and organic and residual chlorine.
The theoretical ltering precision of RO membrane lter element is
up to 0.0001-0.001 micron. RO membrane lter intercept organics
(trichloromethane and carbon tetrachloride ), heavy metal (arsenic,
lead and cadmium etc.) in water.
Quantity
Suggested
service life
24 months
12 months
1
1
Special Prompt:
4. Filter Introduction
4-1 Filter introduction
Issues
Troubleshooting
The machine does not
stop water production for
a long time
Please check if the lter life is expired.
Water leakage
Please check whether the water tank is installed in place.
Replace the lter.
Please check that the lter is installed in place and the lter cover is in
the correct position.
The screen does not turn
on and the machine
cannot be operated
Please unplug the power plug and power on again.
Long press the cold water outlet key for 3 seconds to see whether the
snowake sign ashes, if it ashes, wait 10-15 minutes, you will get cold
water, if it does not work. Please call after-sales service for repair.
Odor
No cooling
In order to keep clean, please clean the water tank and pure water cup
regularly. If not used for a long time, please drain the water in the water
tank and pure water cup, and then empty the water in the ice bladder.
When using the machine again, please press the water key of warm
water and enter the cleaning mode to clean the machine.
Notes:
The lter can be replaced by yourself or contact with Toshiba service.
Minor water leakage during the lter replacement process is normal.
Filter model: PCB and RO lter element.
1. When the RO or PCB lter indicator light blinks, please call the after-sales phone to buy the
corresponding new lter, PCB blinks to replace the PCB lter, RO blinks to replace the RO lter.
Filter llife indicator
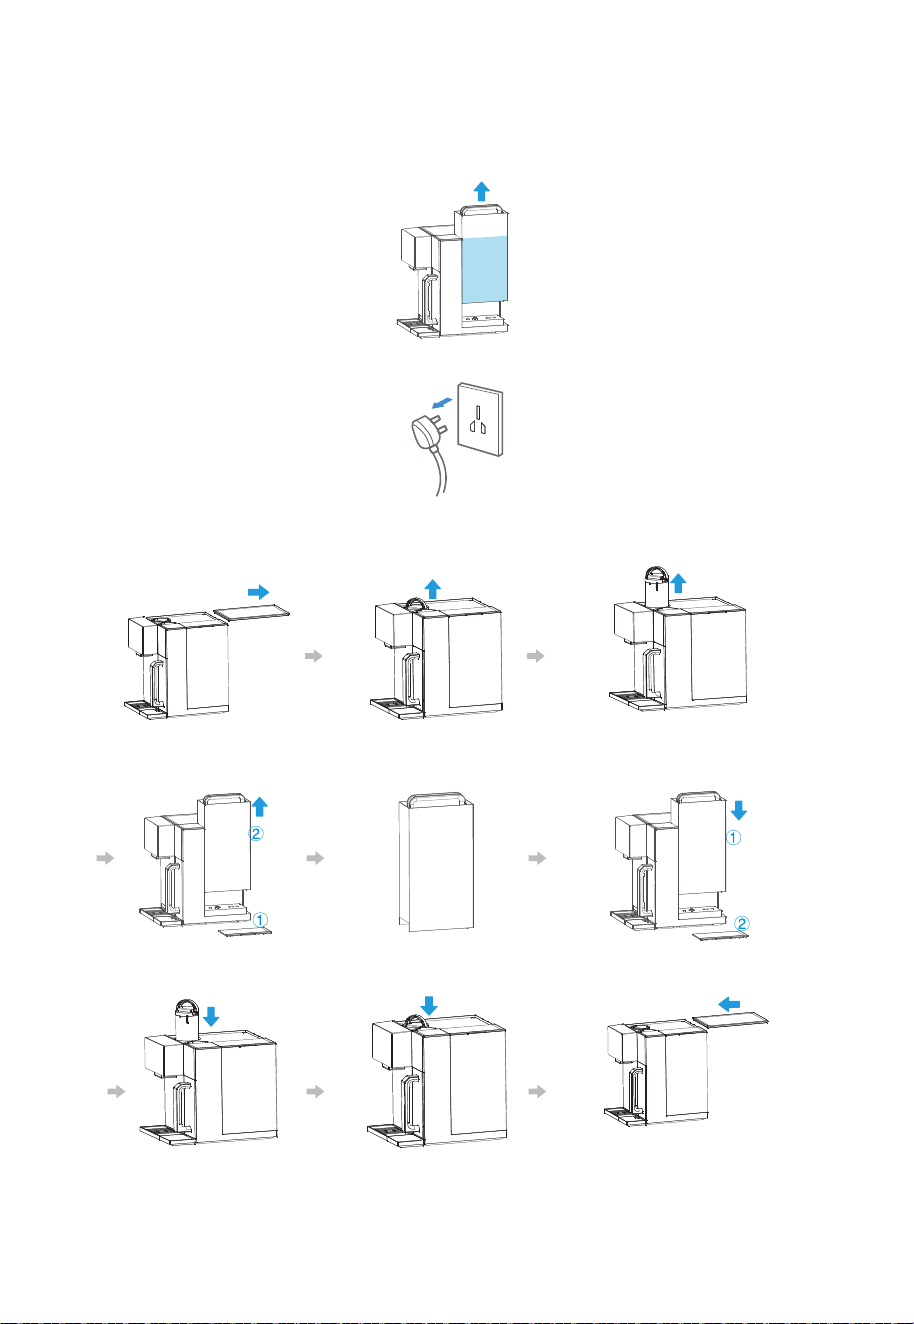
Remove the filter
cartridge cover
Lift the filter handle Pull out the pending
filter element
Remove the tank cover
and lift the tank
Add water to the tank near
the highest water level
Put the tank in place and
close the lid
Replace with a new filter element
that needs to be replaced
Follow the installation direction
to install, press the filter element
Lid top plate
13
3. The power must be cut o before replacing the lter.
4. As shown below:
①Follow the steps shown below to replace the lter.
2. Before replacing the filter element, please first empty the water in the pure water cup, and then
empty the water in the ice bladder, and then add water to the tank to highest water level. If the internal
drainage is not carried out in advance, the filter can be washed after replacing the filter element, and
the life of the filter element will be affected )
14
② Click the "Reset" button to select the corresponding filter element, first display PCB and then RO,
select the corresponding filter element, long press the "reset" button for 3 seconds to reset the
filter element, do not long press, then exit after 10 seconds.
5. Technical Parameters
5-1 Basic parameter
Model
Rated voltage/ frequency
Rated hot water capacity
Rated power
Rated quantity of pure water
Puried water ow
Inlet water pressure
Work pressure of RO membrane
Suitable water resource for using
Applicable environment
Exterior colors
TWP-W2265THK(W)
220-240V~ / 50Hz
≥90℃, 20L/h
Rated cold water capacity
≤10℃, 0.4L/h
2290W
2000L
0.2L/min
0.05-0.1MPa
0.45-0.8MPa
Municipal water
4-38℃ Applicable humidity≤90%
White
3 seconds