220-240V~ 50/60Hz 1500W

PARTS DESCRIPTION
IMPORTANT SAFEGUARDS
POLARIZED PLUG INSTRUCTIONS
SHORT CORD INSTRUCTIONS
KNOW YOUR SMART FRYER OVEN
BEFORE THE FIRST USE
OPERATING INSTRUCTIONS
· Preparing for use
· Installing the 2-in-1 baking tray and drip tray
· Installing the air racks
· Installing the rotating mesh basket rotisserie spit
· Using the rotisserie spit
· Cooking process
· Using the preset menus
TIPS
IMPORTANT
MAKING HOME-MADE FRIES
CLEANING AND MAINTENANCE
· Cleaning inside the Cavity
· Cleaning the Smart Fryer Oven's Exterior
TROUBLESHOOTING
4
6
10
11
11
13
13
13
14
14
14
15
16
18
19
19
20
20
21
21
23
DIRECTORY:
-----------------------------------------------------------------------------------
---------------------------------------------------------------------------
----------------------------------------------------------------
----------------------------------------------------------------------
-----------------------------------------------------------------
------------------------------------------------------------------------------
------------------------------------------------------------------------
------------------------------------------------------------------------------------
-----------------------------------------------
------------------------------------------------------------------------------
-----------------------------------------
----------------------------------------------------------------------------
-------------------------------------------------------------------------------------
---------------------------------------------------------------------------
---------------------------------------------------------------------------------------------------------
----------------------------------------------------------------------------------------------
-----------------------------------------------------------------------
------------------------------------------------------------------
-----------------------------------------------------------------------
----------------------------------------------------
---------------------------------------------------------------------------------
We hope you enjoy the new oven as much as we do!
---------------------------------------------------------------------
---------------------------------------------------------------------
Thank you for
your purchase!
Thank you for
your purchase!
We are redefining customer satisfaction, and
responding to your needs with helpful solutions,
your uten-chef are here for you, ready whenever,
wherever.
Contact us: [email protected]
AC���-���V~ ��/�� Hz
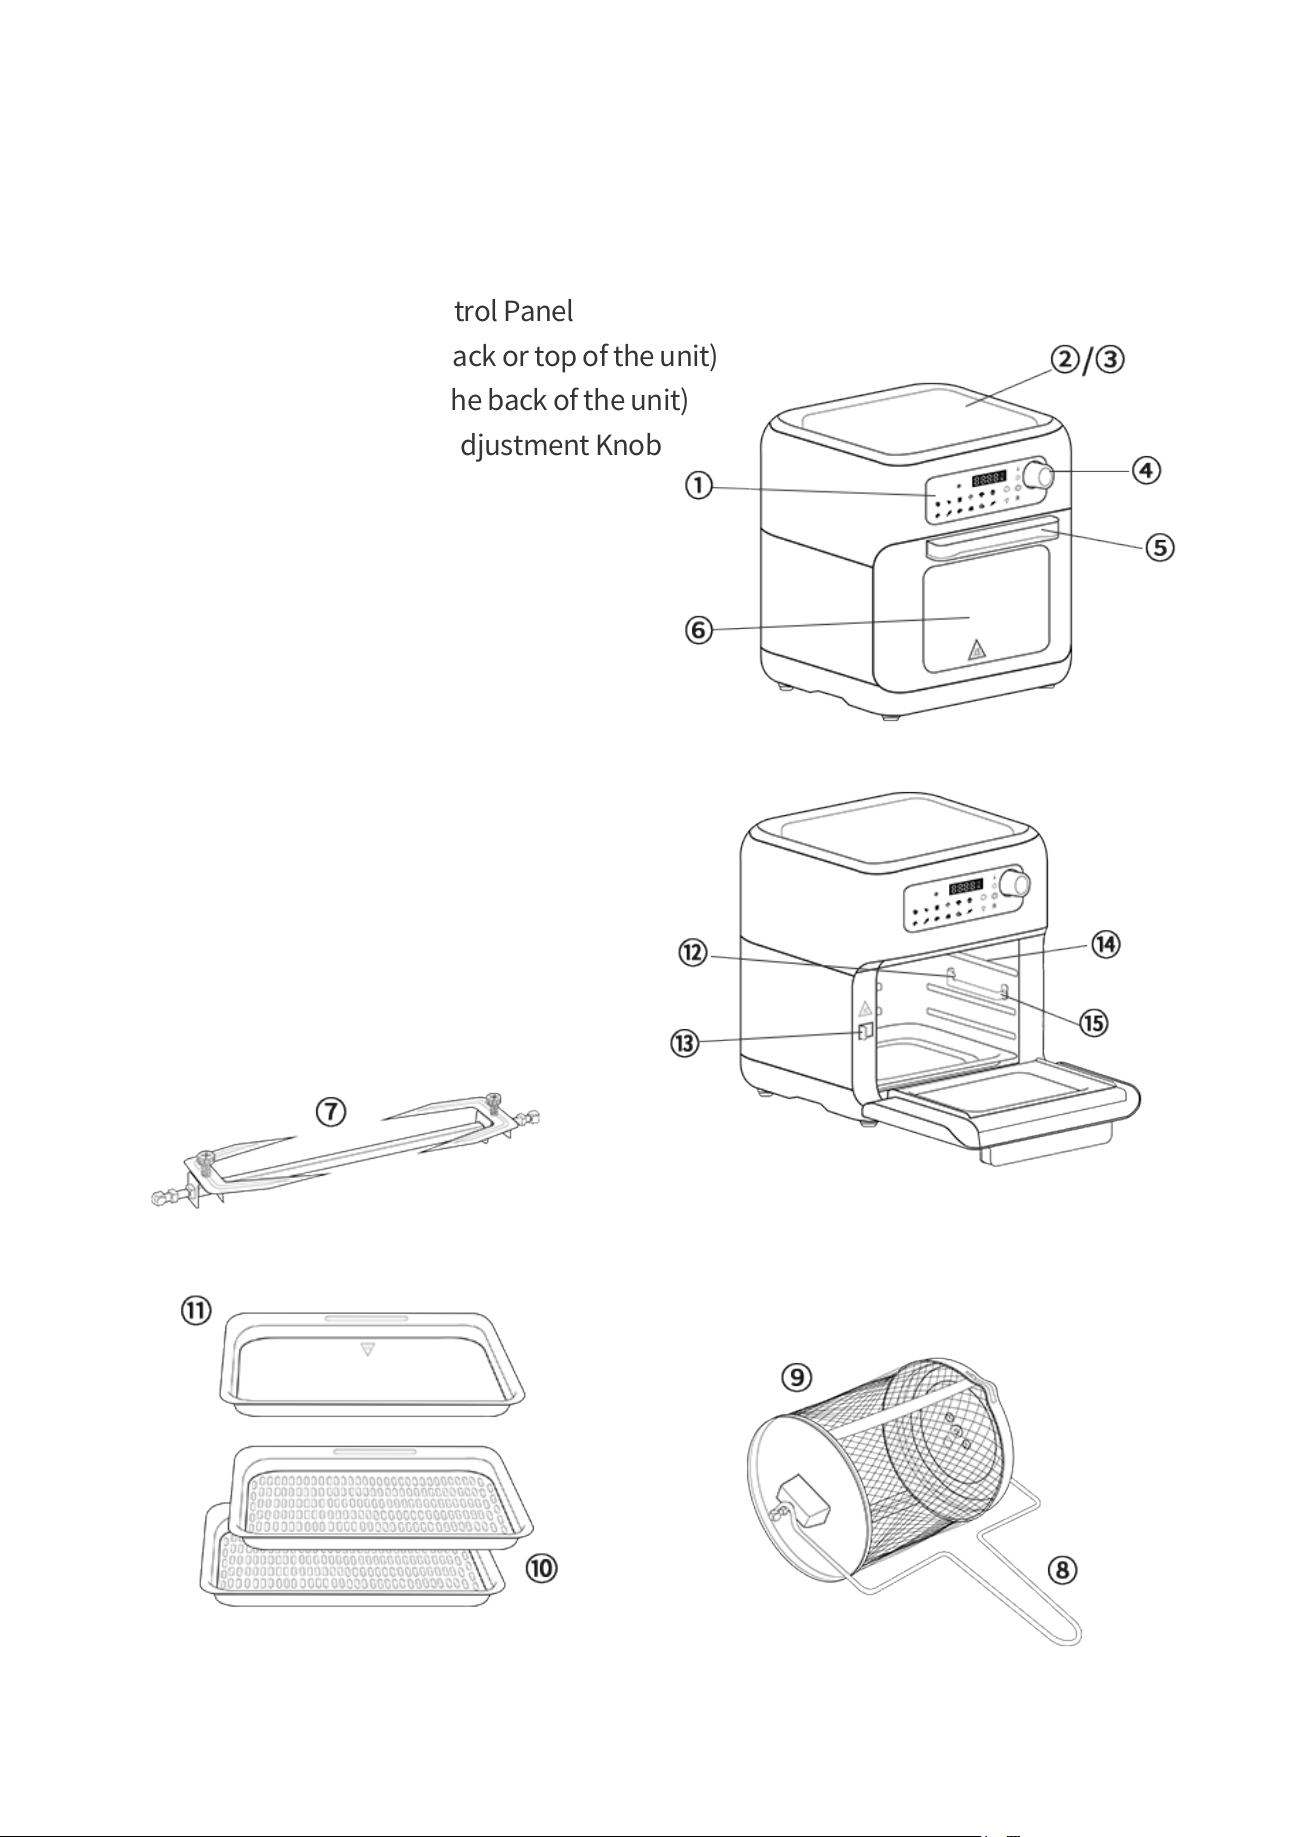
1. Touchscreen Digital Control Panel
2. Air Intake Vents (at the back or top of the unit)
3. Hot Air Outlet Vents (at the back of the unit)
4. Time and Temperature Adjustment Knob
5. Handle
6. Viewing Window
7. Rotisserie Fork
8. Accessory Handle
9. Rotating Mesh Basket
10. Air Racks x 2
11. Crumb/Oil/Baking Tray
12. Accessory Lock Socket
13. Accessory Lock Switch
14. Air Rack Grooves
15. Rotating Accessory Rail
PARTS DESCRIPTION
Elements
---------------------------------------------------------------------
4
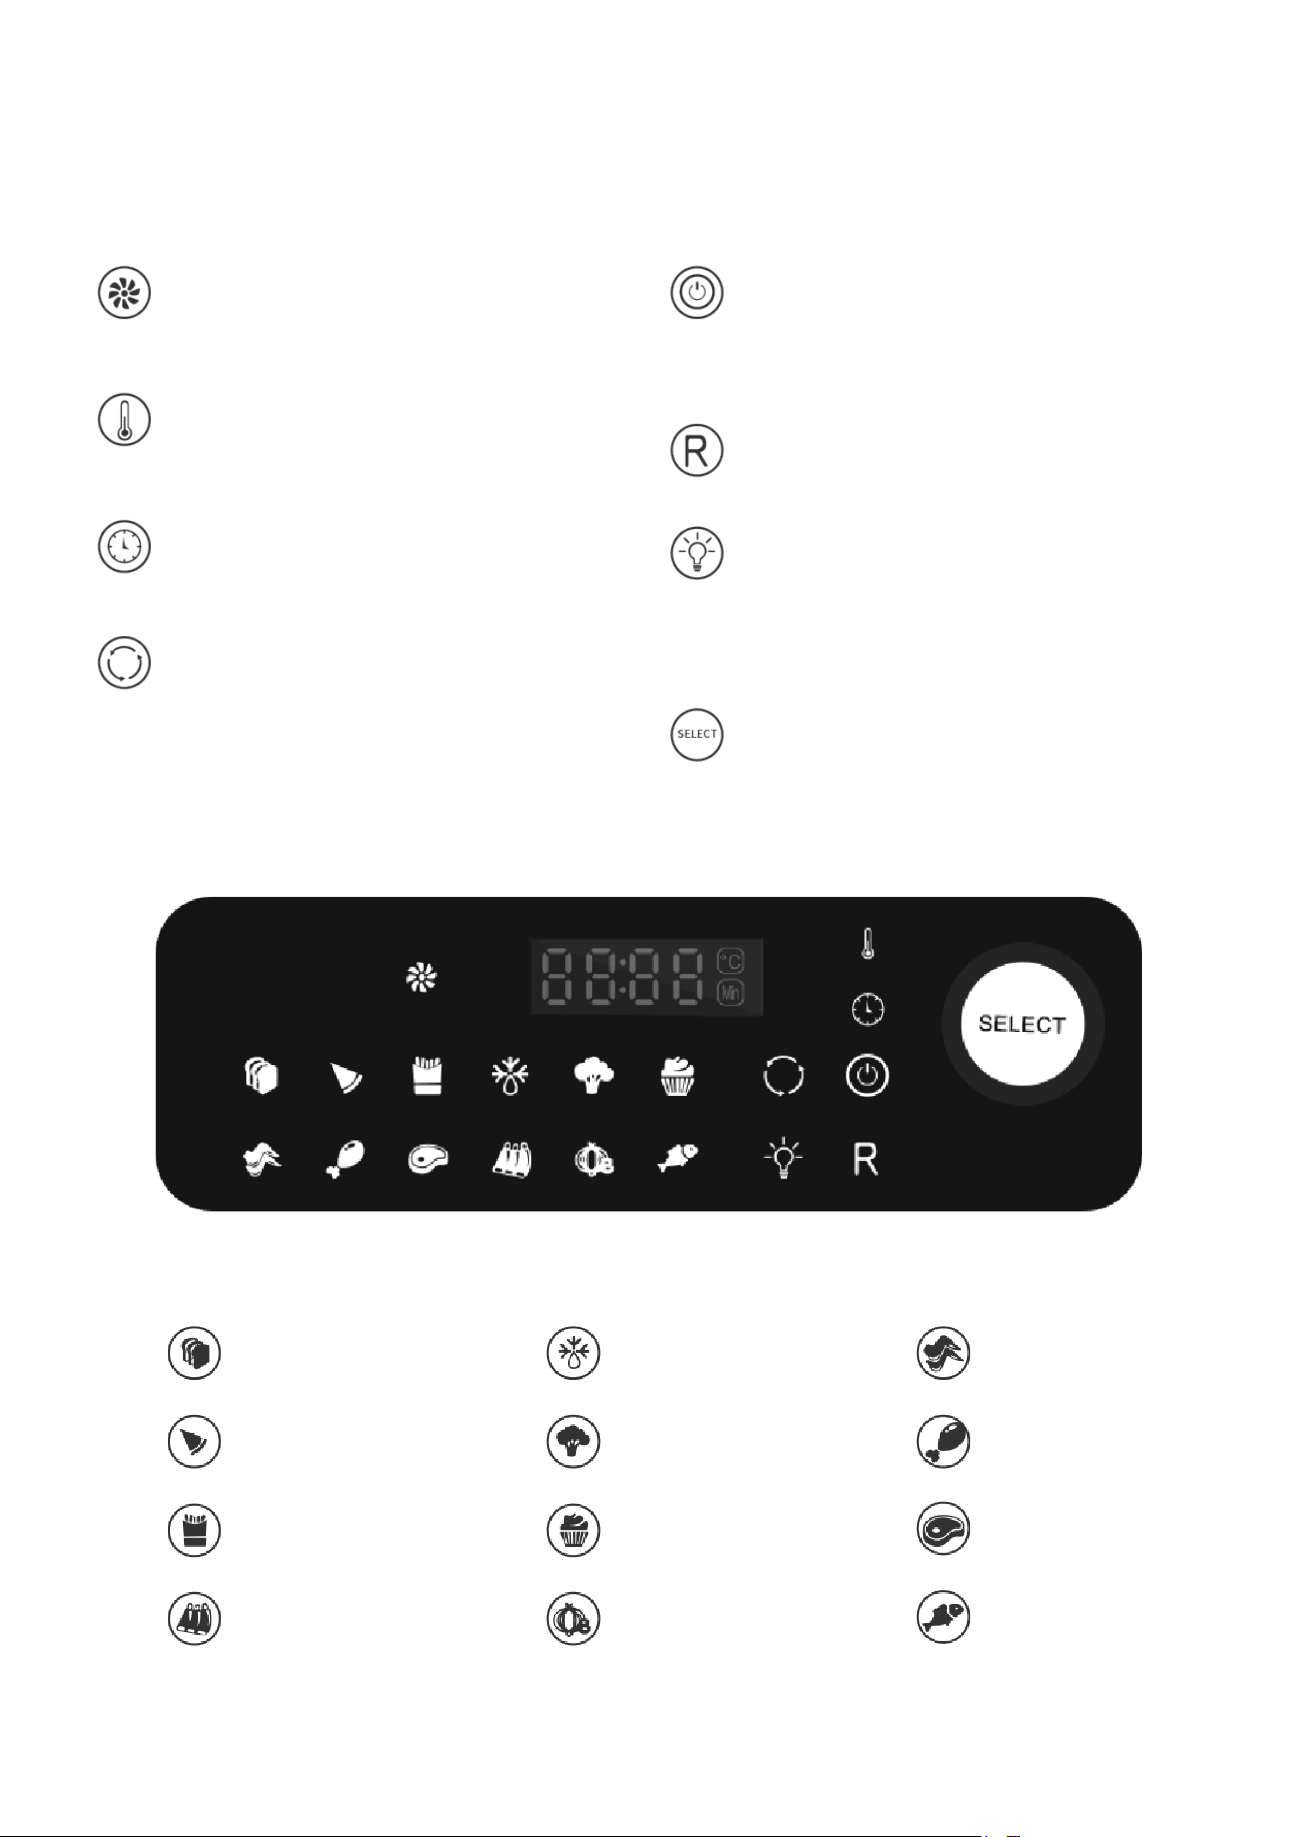
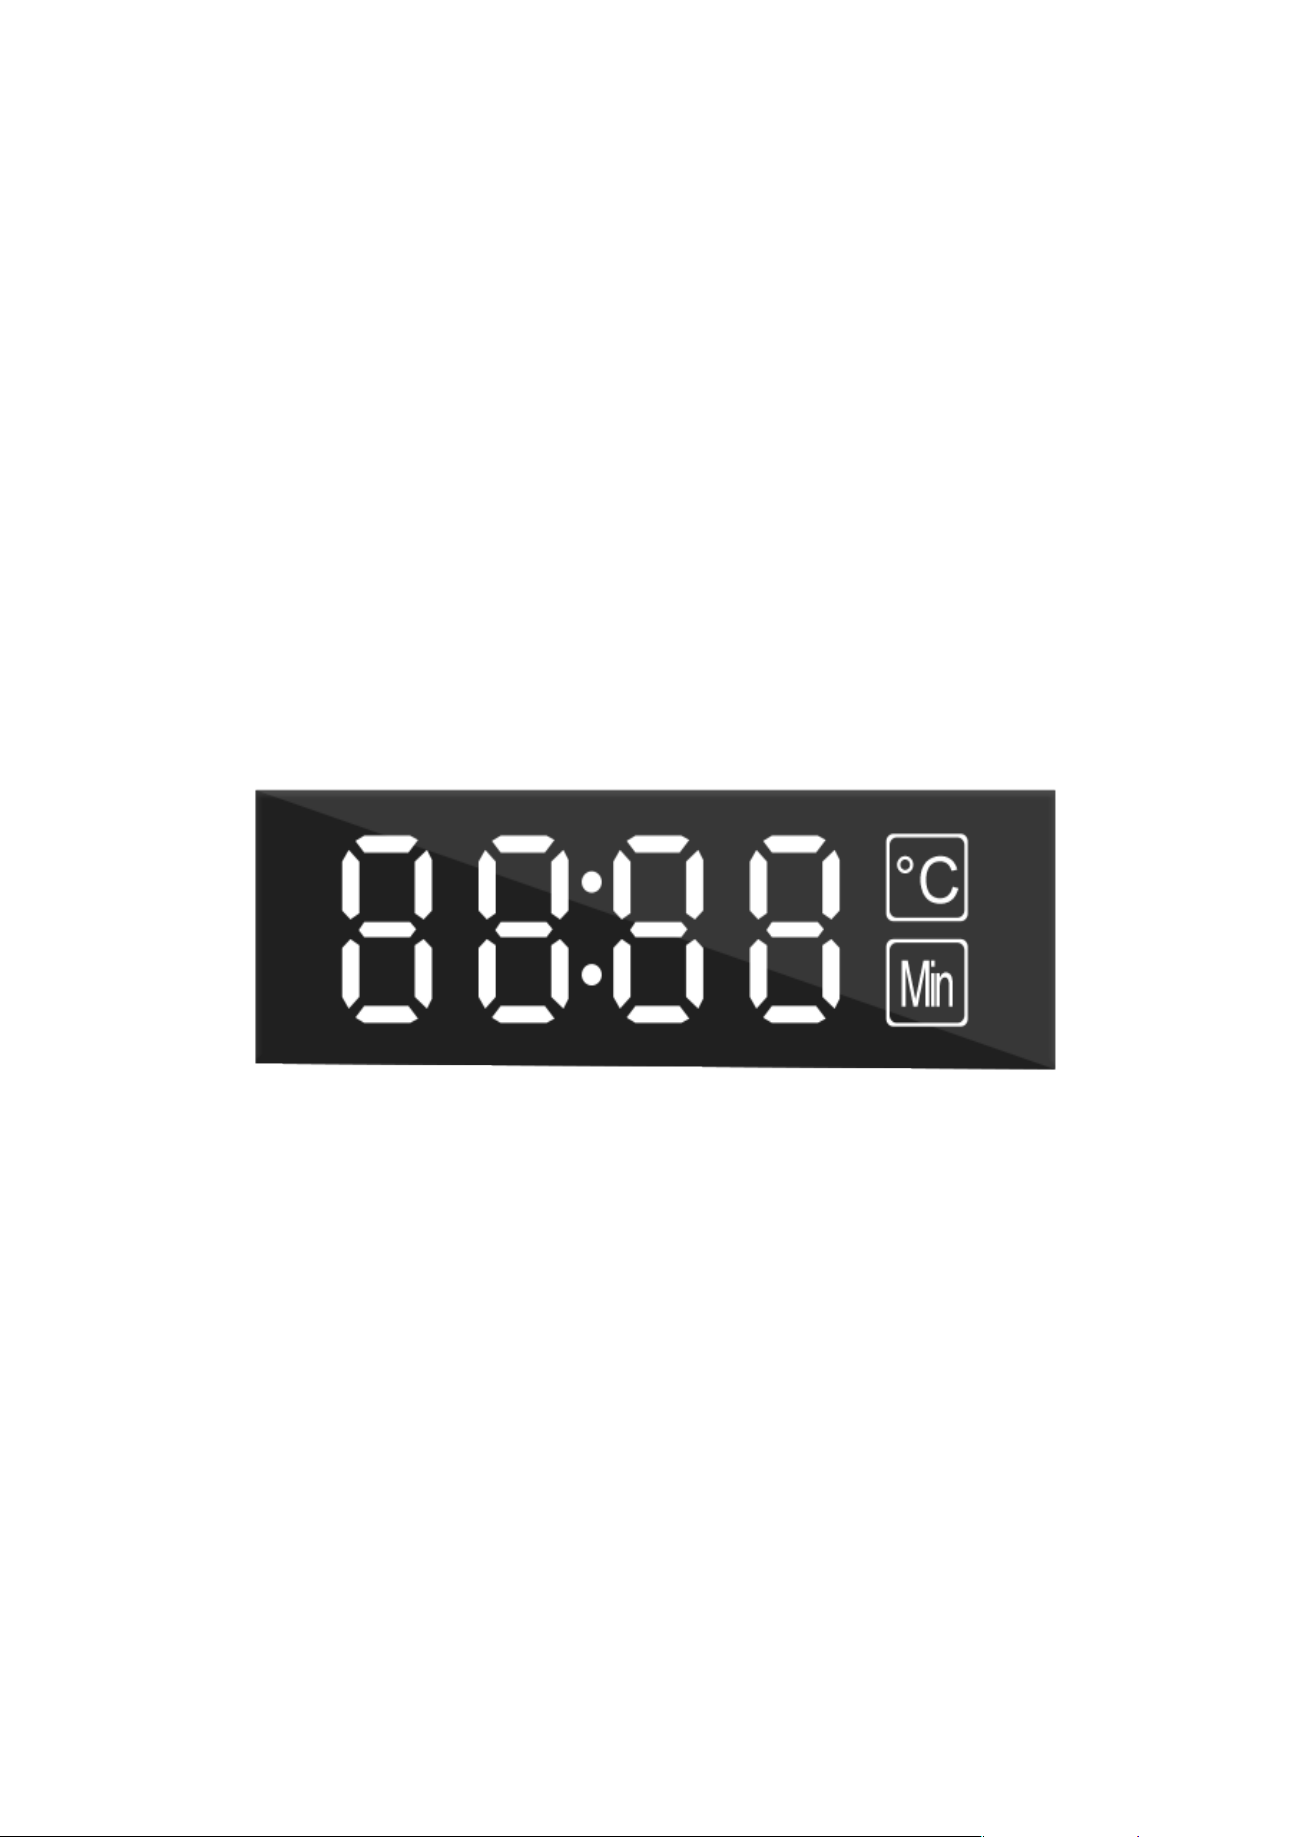
Digital Control Panel:
Cooking signal (blinks during
cooking).
Temperature icon: Blinks when
temperature is being adjusted.
Timer icon: Blinks when time is
being adjusted.
Rotation button: Select this button
to start or stop the rotation of the
compatible accessories. Blinks
when function is on.
Power On/Off button: Press to tum
the unit on, off, or to begin or pause
the cooking process.
Reheat: Use to reheat already cooked
food or leftovers.
Internal light-Select this button to
help check cooking progress while
unit is in operation. Press to tum on
or off, Blinks when function is on.
Time and temperature adjustment
knob / Select button.
5
Bake
Pizza
French Fries
Lamb Chops
Defrosting
Vegetable
Cake
Onion
Chicken Wing
Chicken Leg
Steak
Fish
IMPORTANT SAFEGUARDS
---------------------------------------------------------------------
When using electrical appliances, basic safety precautions
should always be followed, including the following:
1. READ ALL INSTRUCTIONS BEFORE USE!
2. Check that the voltage in your home corresponds to that stated on the appliance.
3. Make sure the appliance is plugged into a dedicated wall socket, always make sure
that the plug is inserted into the wall socket properly and without any other
appliances on the same outlet.
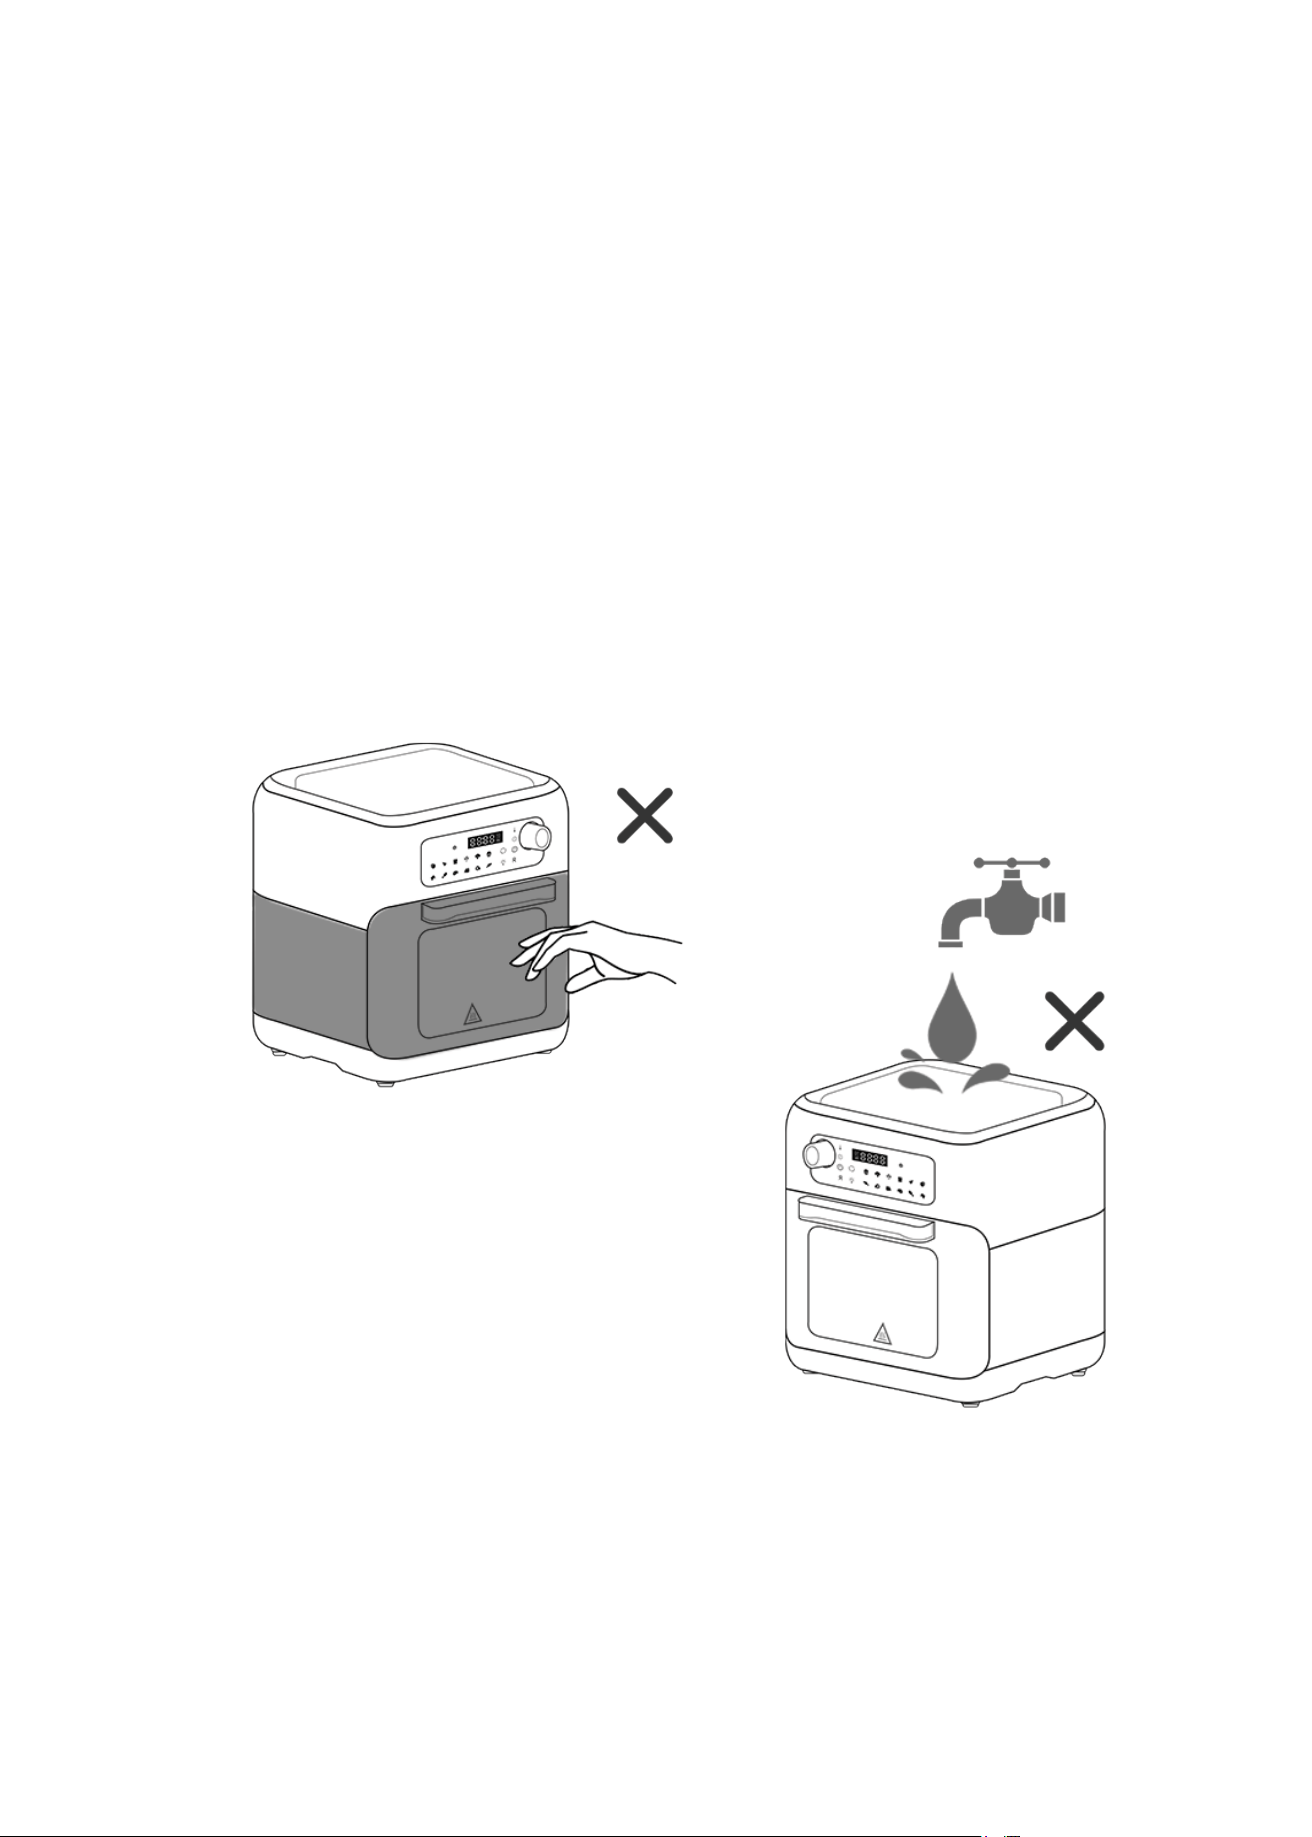
6. To protect against electrical shock, fire or personal injury, do not immerse cord,
plugs, or the appliance in water or other liquid. Do not plug in the power cord or
operate the unit controls with wet hands.
4. Do not touch hot surfaces, use handles or knobs.
5. Never immerse the unit's housing in
water or rinse it under the tap.
7. Never connect this appliance to an external timer switch or separate remote-control
system.
6
8. Unplug from outlet when not in use and before cleaning. Allow to cool before putting
on or taking off parts.
9. Do not operate any appliance with a damaged cord or plug or after the appliance
malfunctions or hasbeen damaged in any manner. Return the appliance to the
nearest authorized service facility for examination, repair, or adjustment.
10. Keep the appliance and its power cord out of the reach of children under � years old
when it is in operation or in the cooling process.
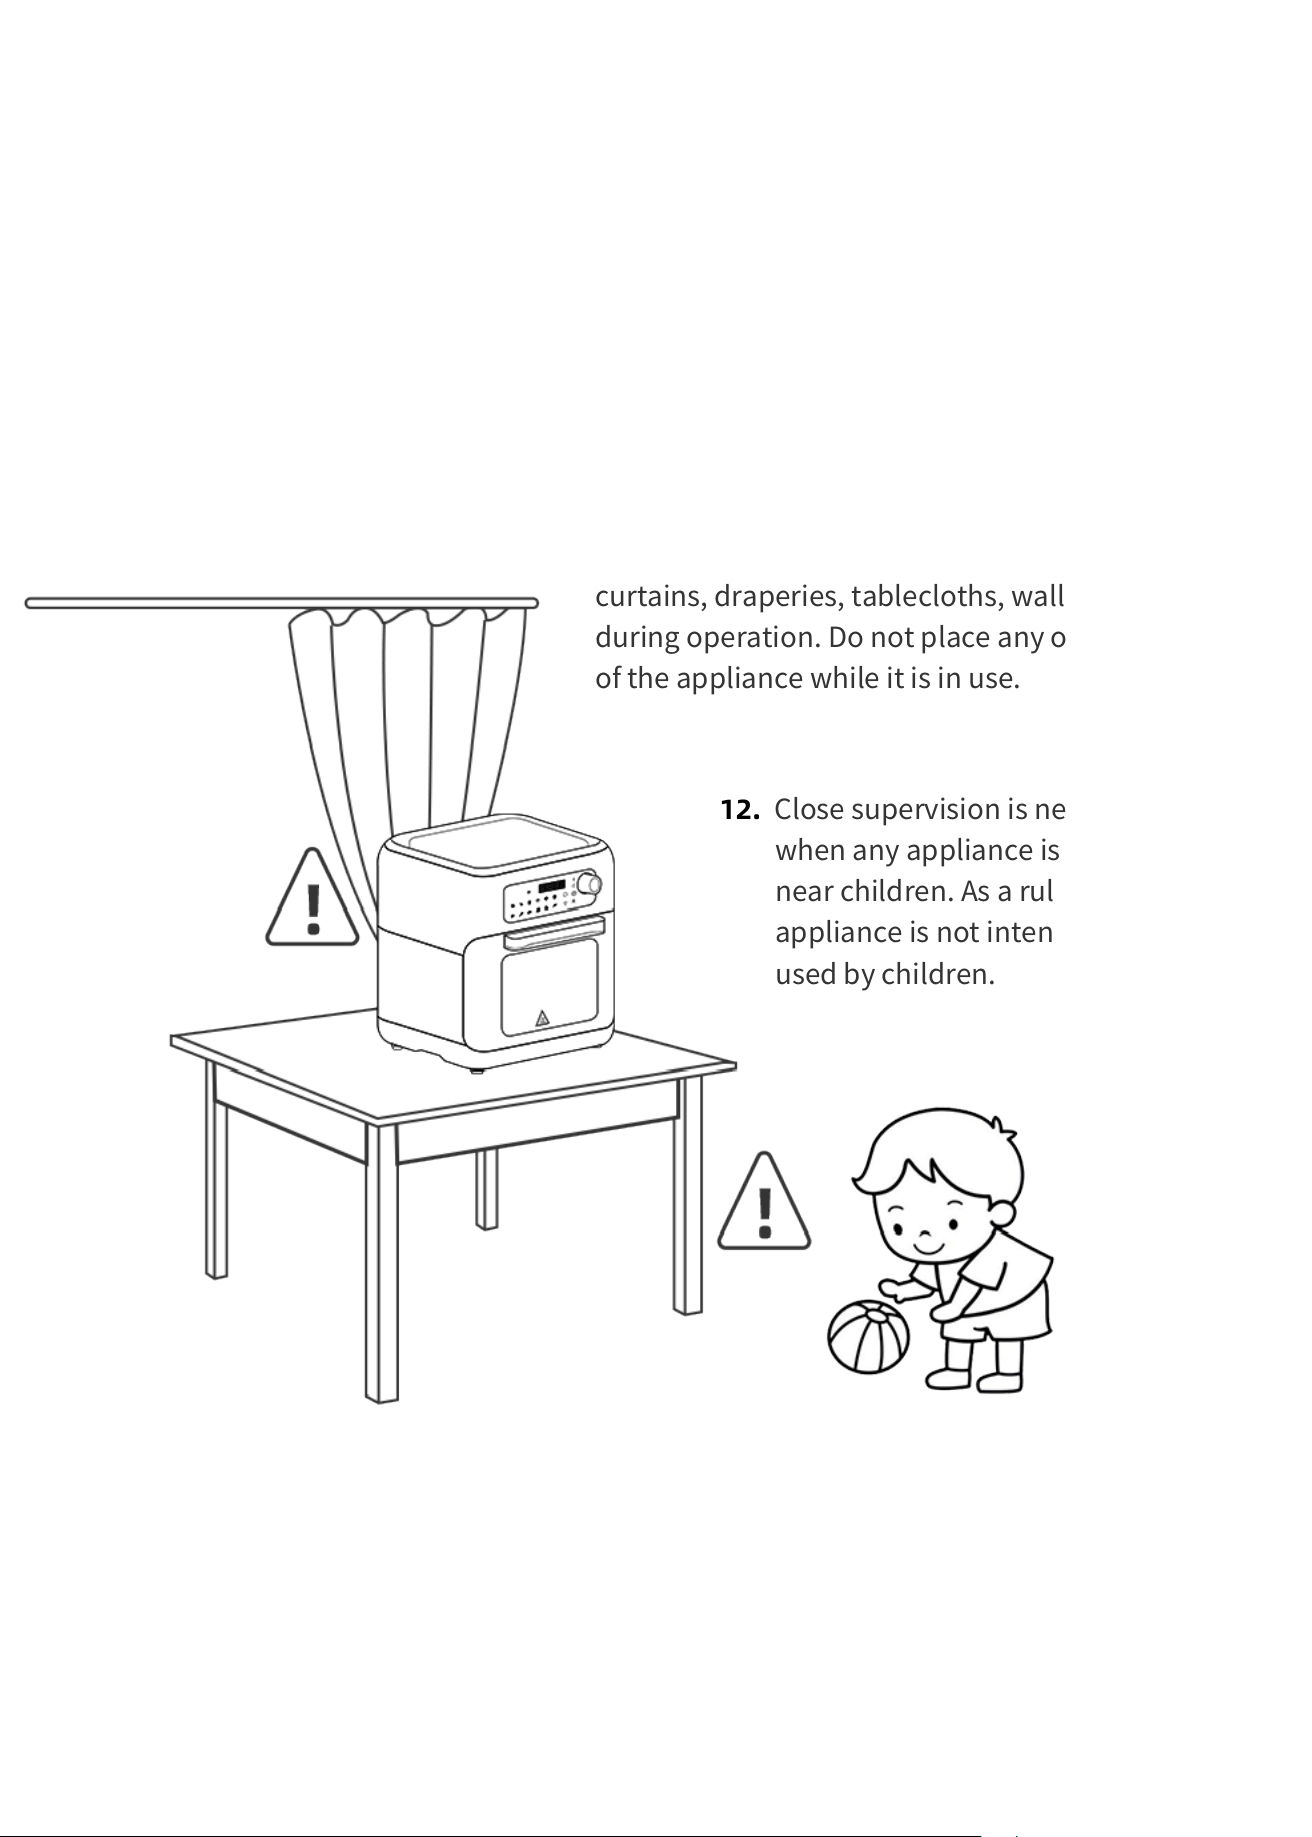
11. A fire may occur if the appliance is covered or in
contact with flammable materials, such as
curtains, draperies, tablecloths, walls, and the like,
during operation. Do not place any objects on top
of the appliance while it is in use.
12. Close supervision is necessary
when any appliance is used by or
near children. As a rule, this
appliance is not intended to be
used by children.
13. The use of accessory attachments not recommended by the appliance manufacturer
may cause injuries.
14. Do not use outdoors.
15. Do not let the cord hang over the edge of a table or counter, or touch hot surfaces.
7
16. Do not cover the air intake vent or air outlet vent while the Smart Fryer Oven is
operating. Doing so will prevent even cooking and may damage the unit or cause it
to overheat.
17. Extreme caution must be used when moving an appliance containing hot oil or
other hot liquids.
18. To disconnect tum any control to "off", then remove the plug from wall outlet.
19. Do not use the appliance for anything other than intended use.
20. Oversize foods or metal utensils must not be inserted in the Smart Fryer Oven as
they may create a fire or risk of electric shock.
21. Do not dean with metal scouring pads, Pieces can break off the pad and touch
electrical parts involving a risk of electric shock.
22. Extreme caution should be exercised when using containers constructed of other
than metal or glass.
23. Do not store any materials, other than manufacturers recommended accessories,
in this appliance when not in use.
24. Do not place any of the following materials in the appliance: paper cardboard,
plastic, and the like.
25. Do not leave unit unattended when in use.
26. The Smart Fryer Oven can be turned off while using any of the functions by
pressing the on/off button for 3 seconds.
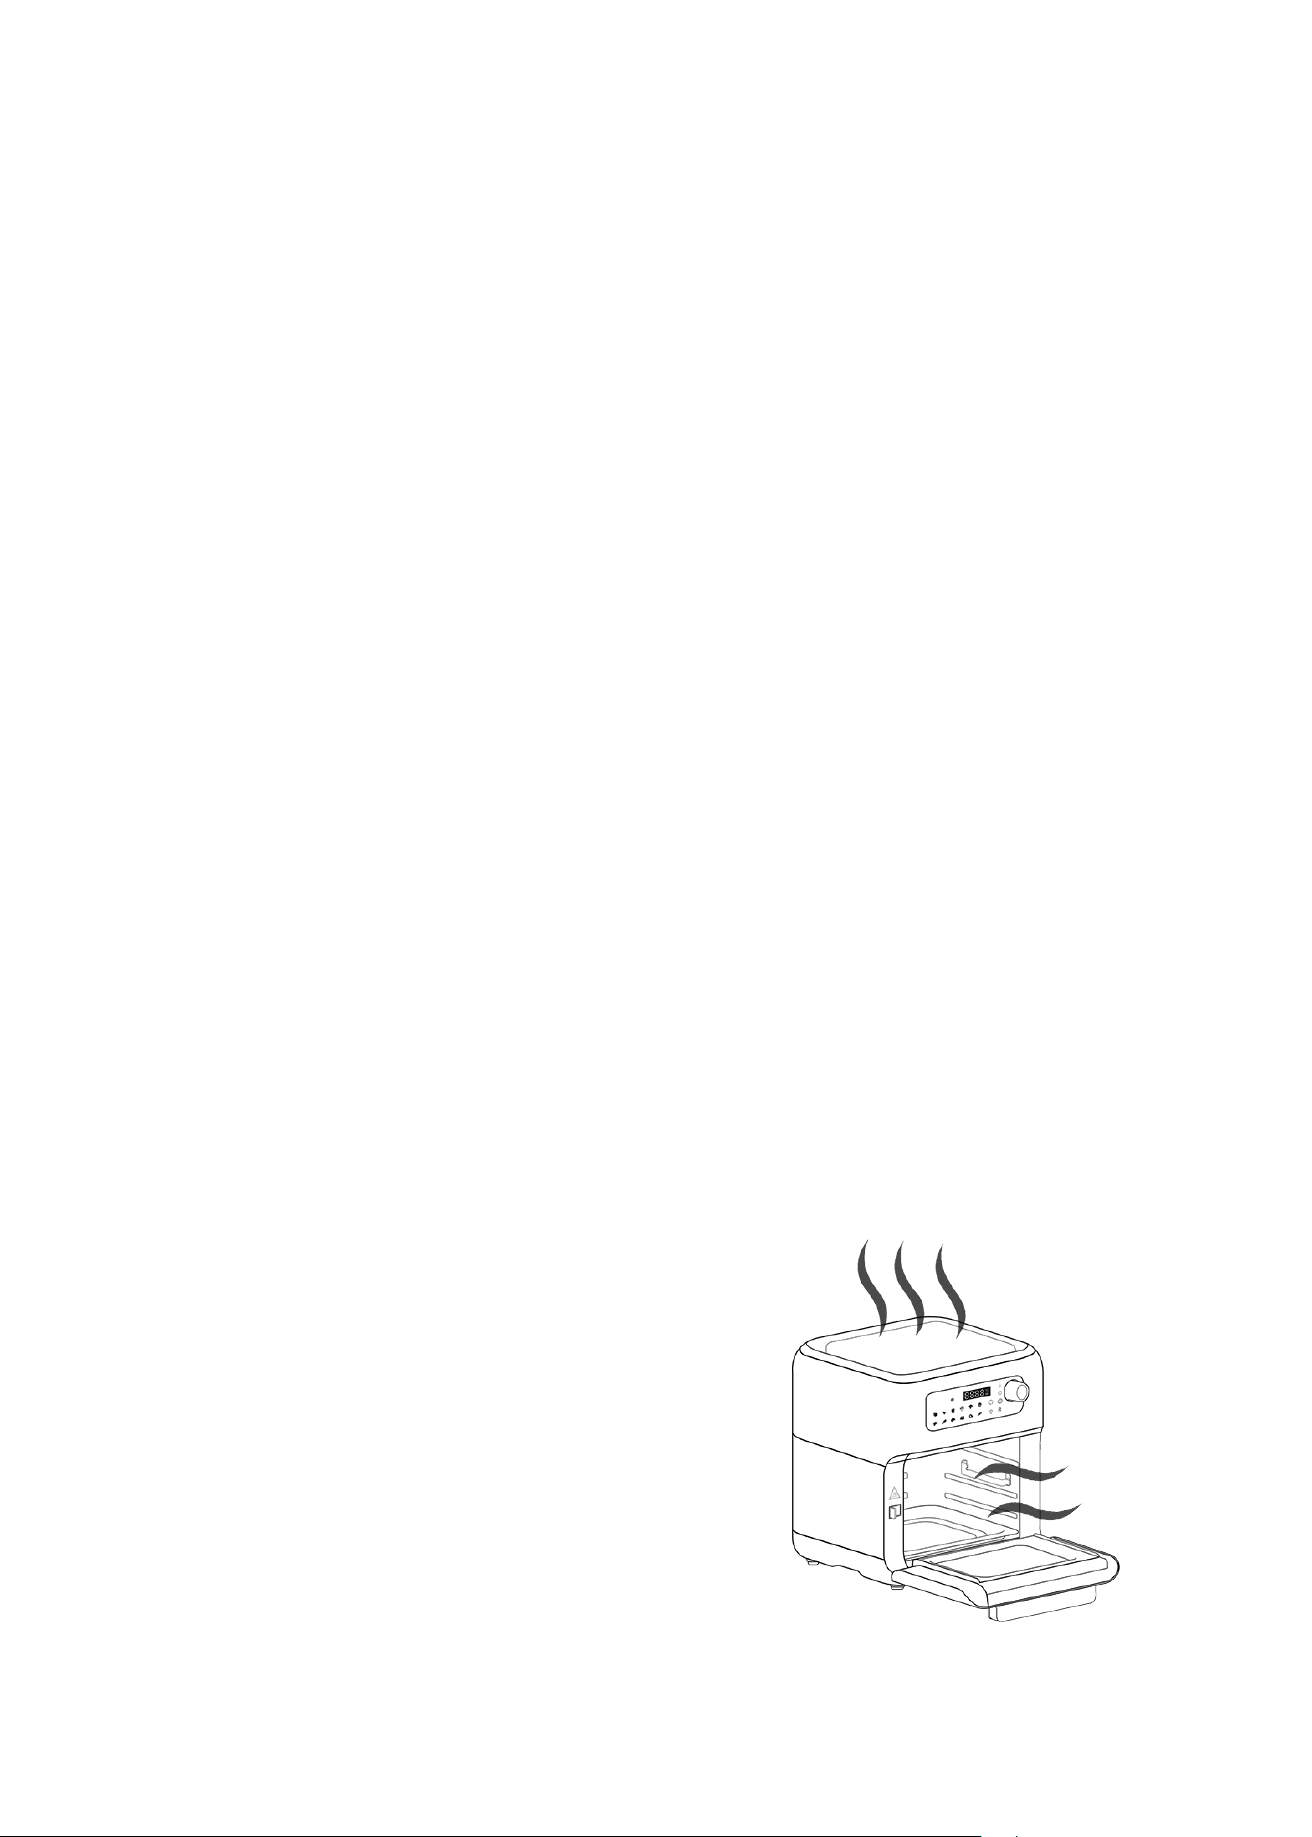
27. During hot air frying, hot steam is released
through the air outlet openings. Keep your
hands and face at a safe distance from the
steam and from the air outlet openings. Also
be careful of hot steam and air when you
remove the cooking accessories from the
appliance.
8
Beware of steam burns
29. The unit' s outer surfaces may become hot during use. The accessories will be hot,
Always wear oven mitts or use the fetch tool when handling hot components. Wear
oven mitts when handling hot surfaces.
30. Immediately switch off and unplug the appliance if you see dark smoke coining
out of the appliance. Wait for the smoke emission to stop before you remove the
pan from the appliance.
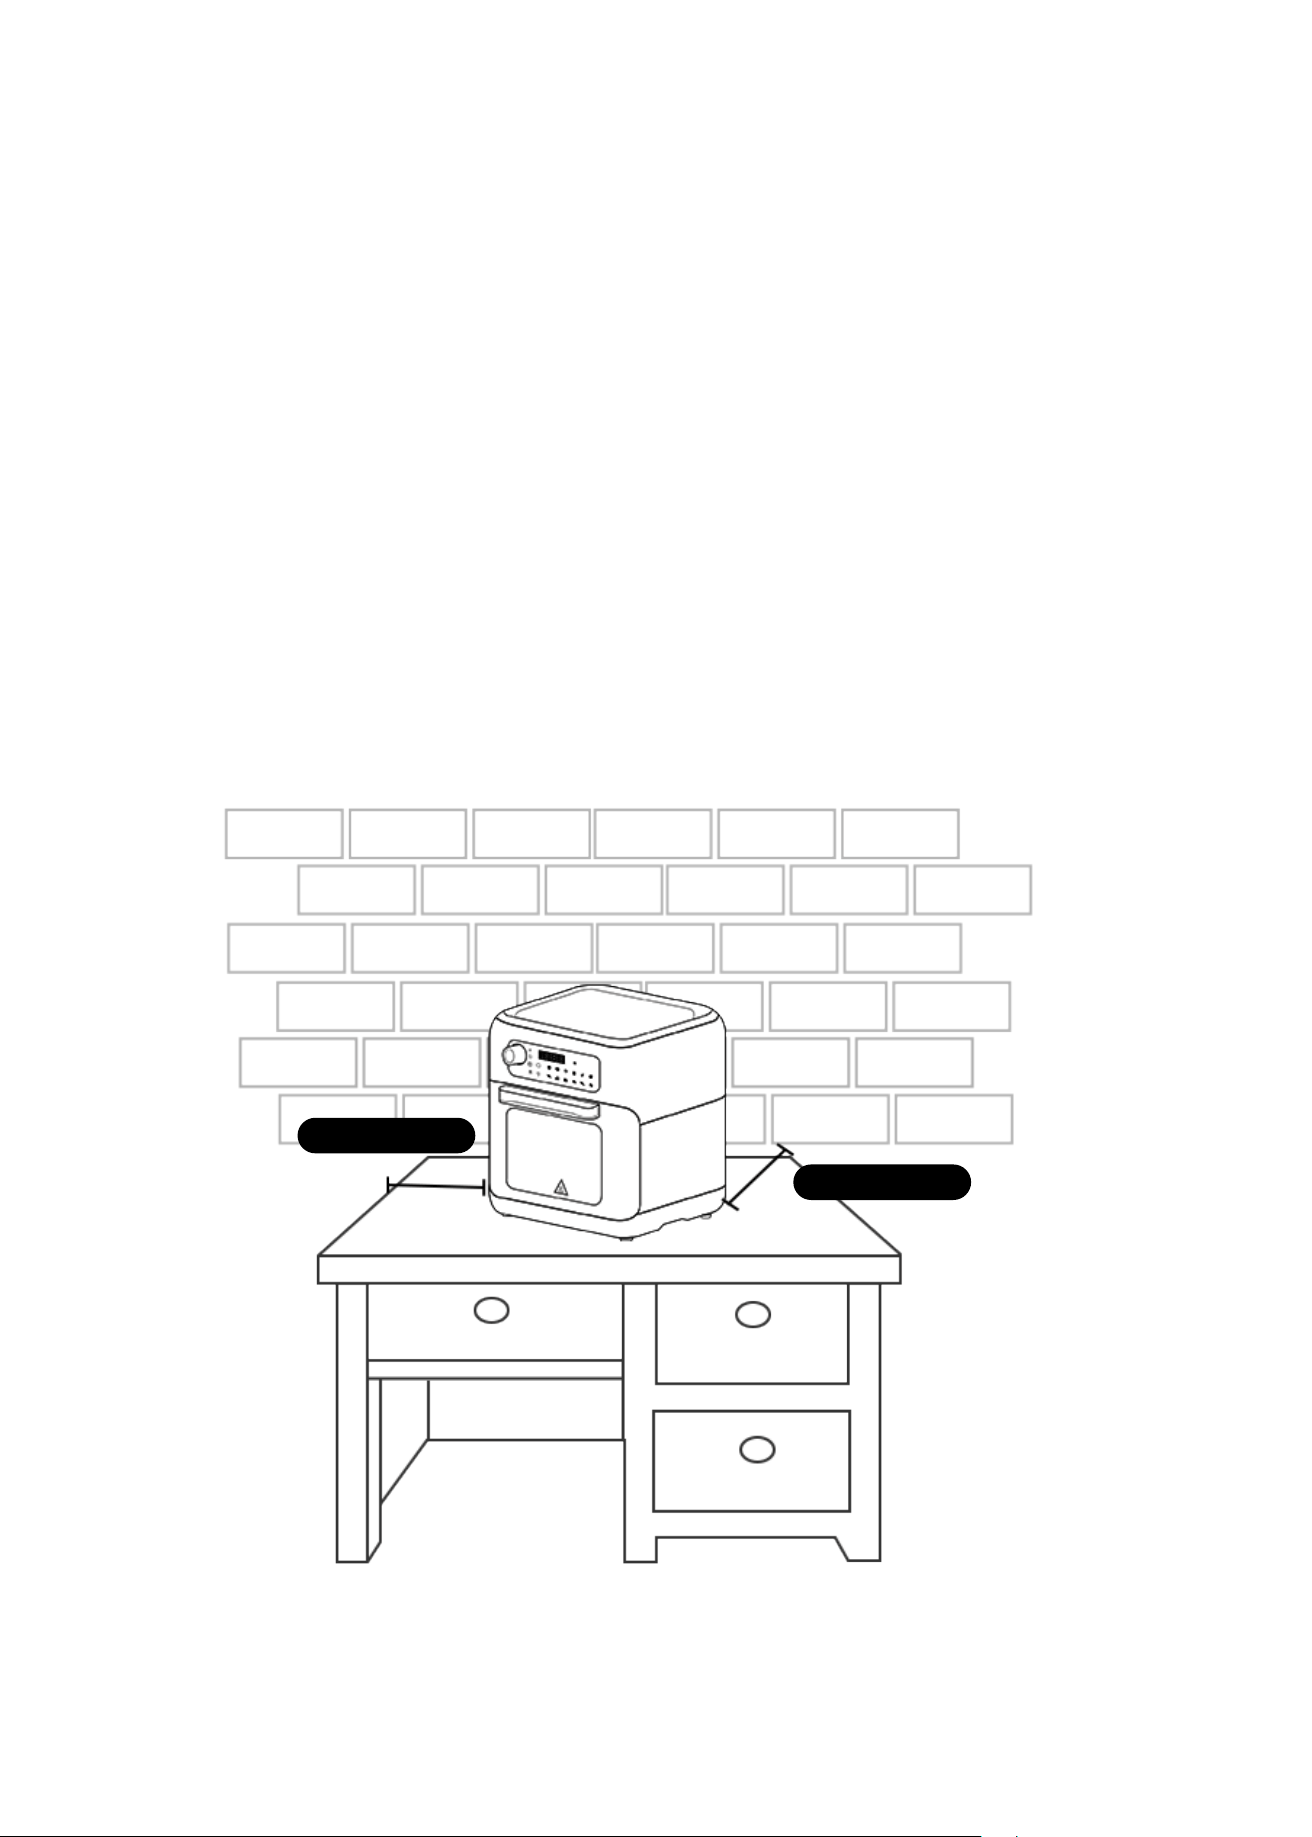
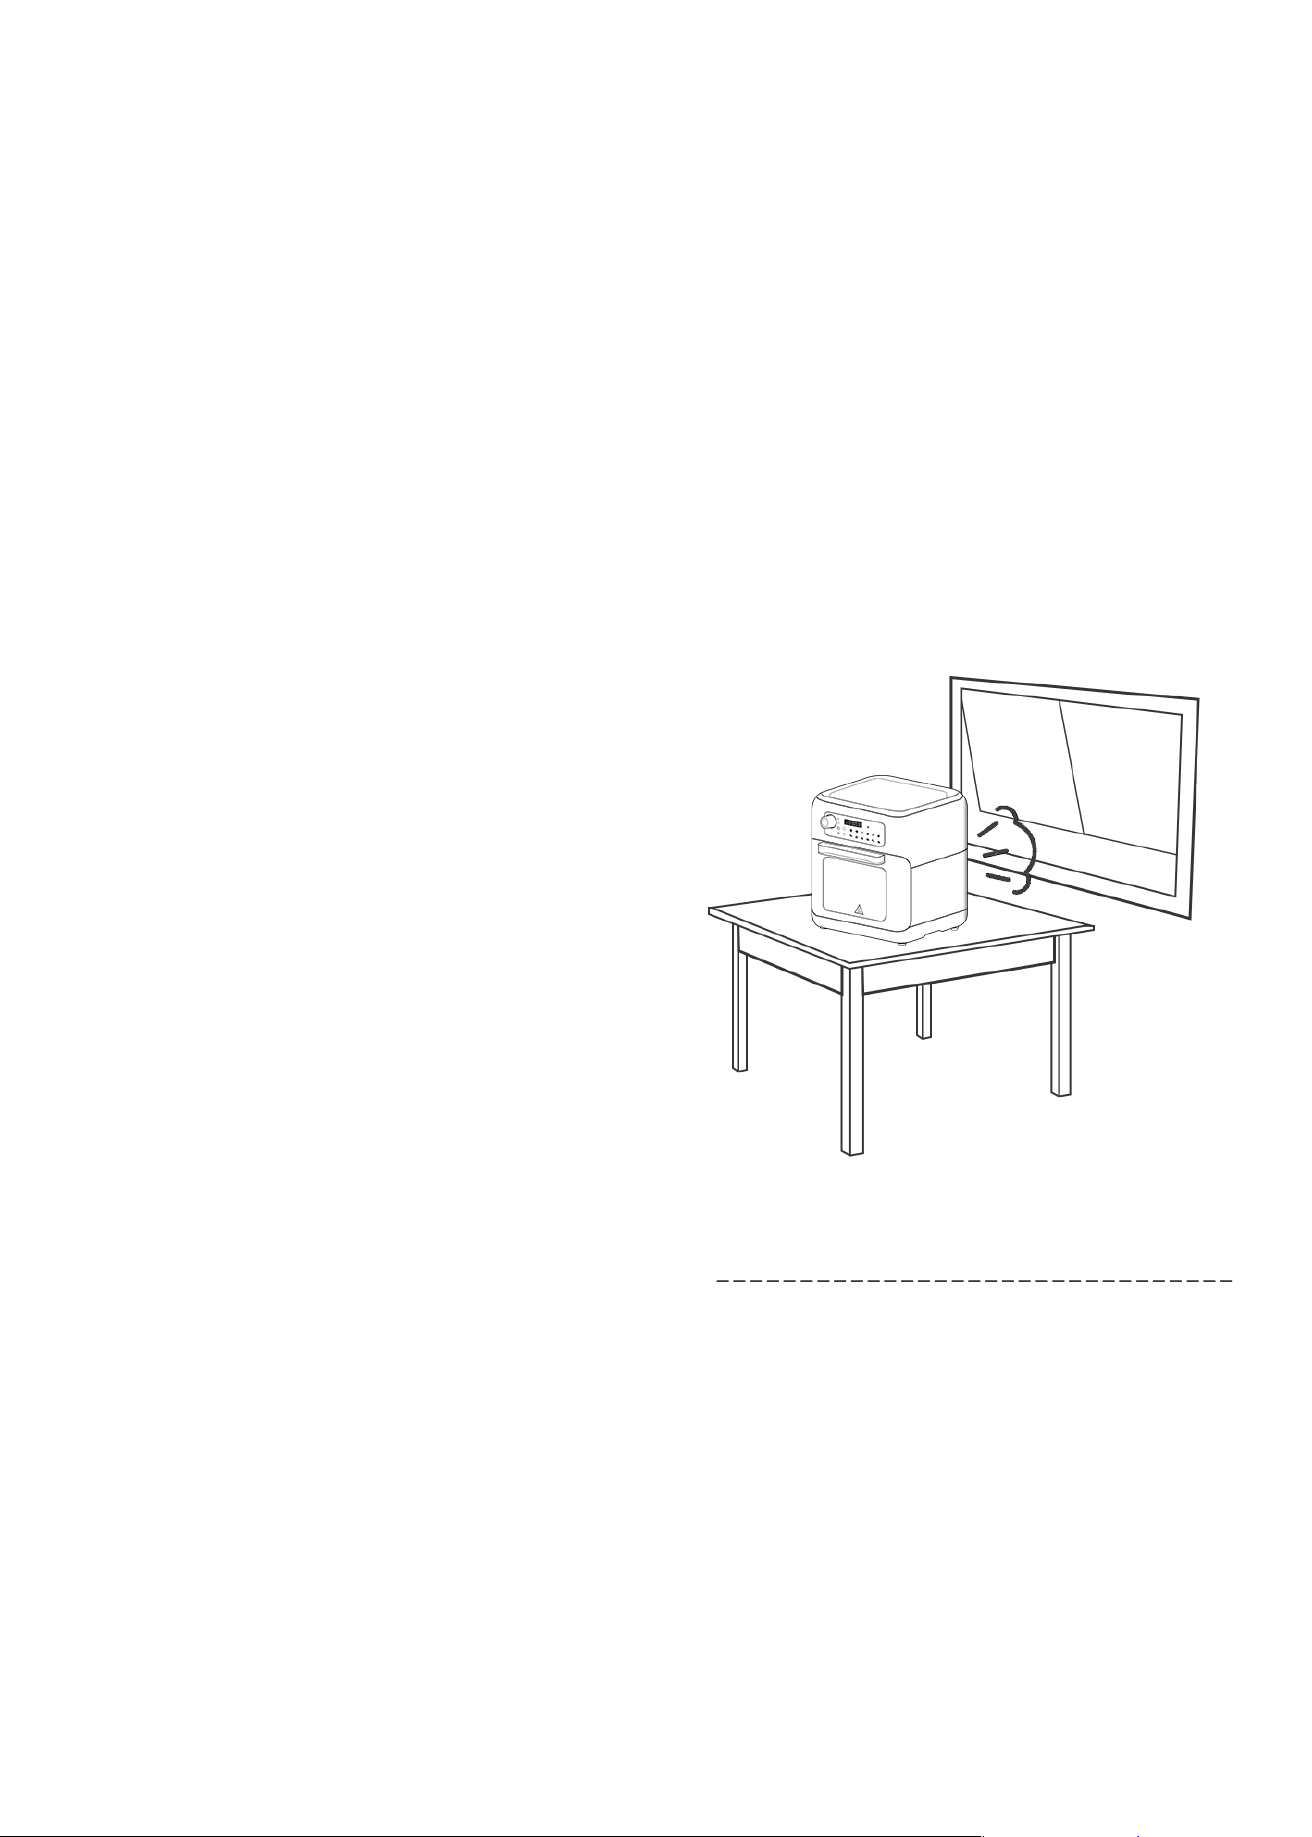
31. Do not place the appliance against a wall or against other appliances.
32. Leave at least 6 inches (15 cm) of free space on the back, sides and above the
appliance.
Keep a safe distance
5cm / 6inch
5cm / 6inch
9
28. Do not place on or near a hot gas or electric burner, or in a heated oven. Do not
place on stove top surfaces.
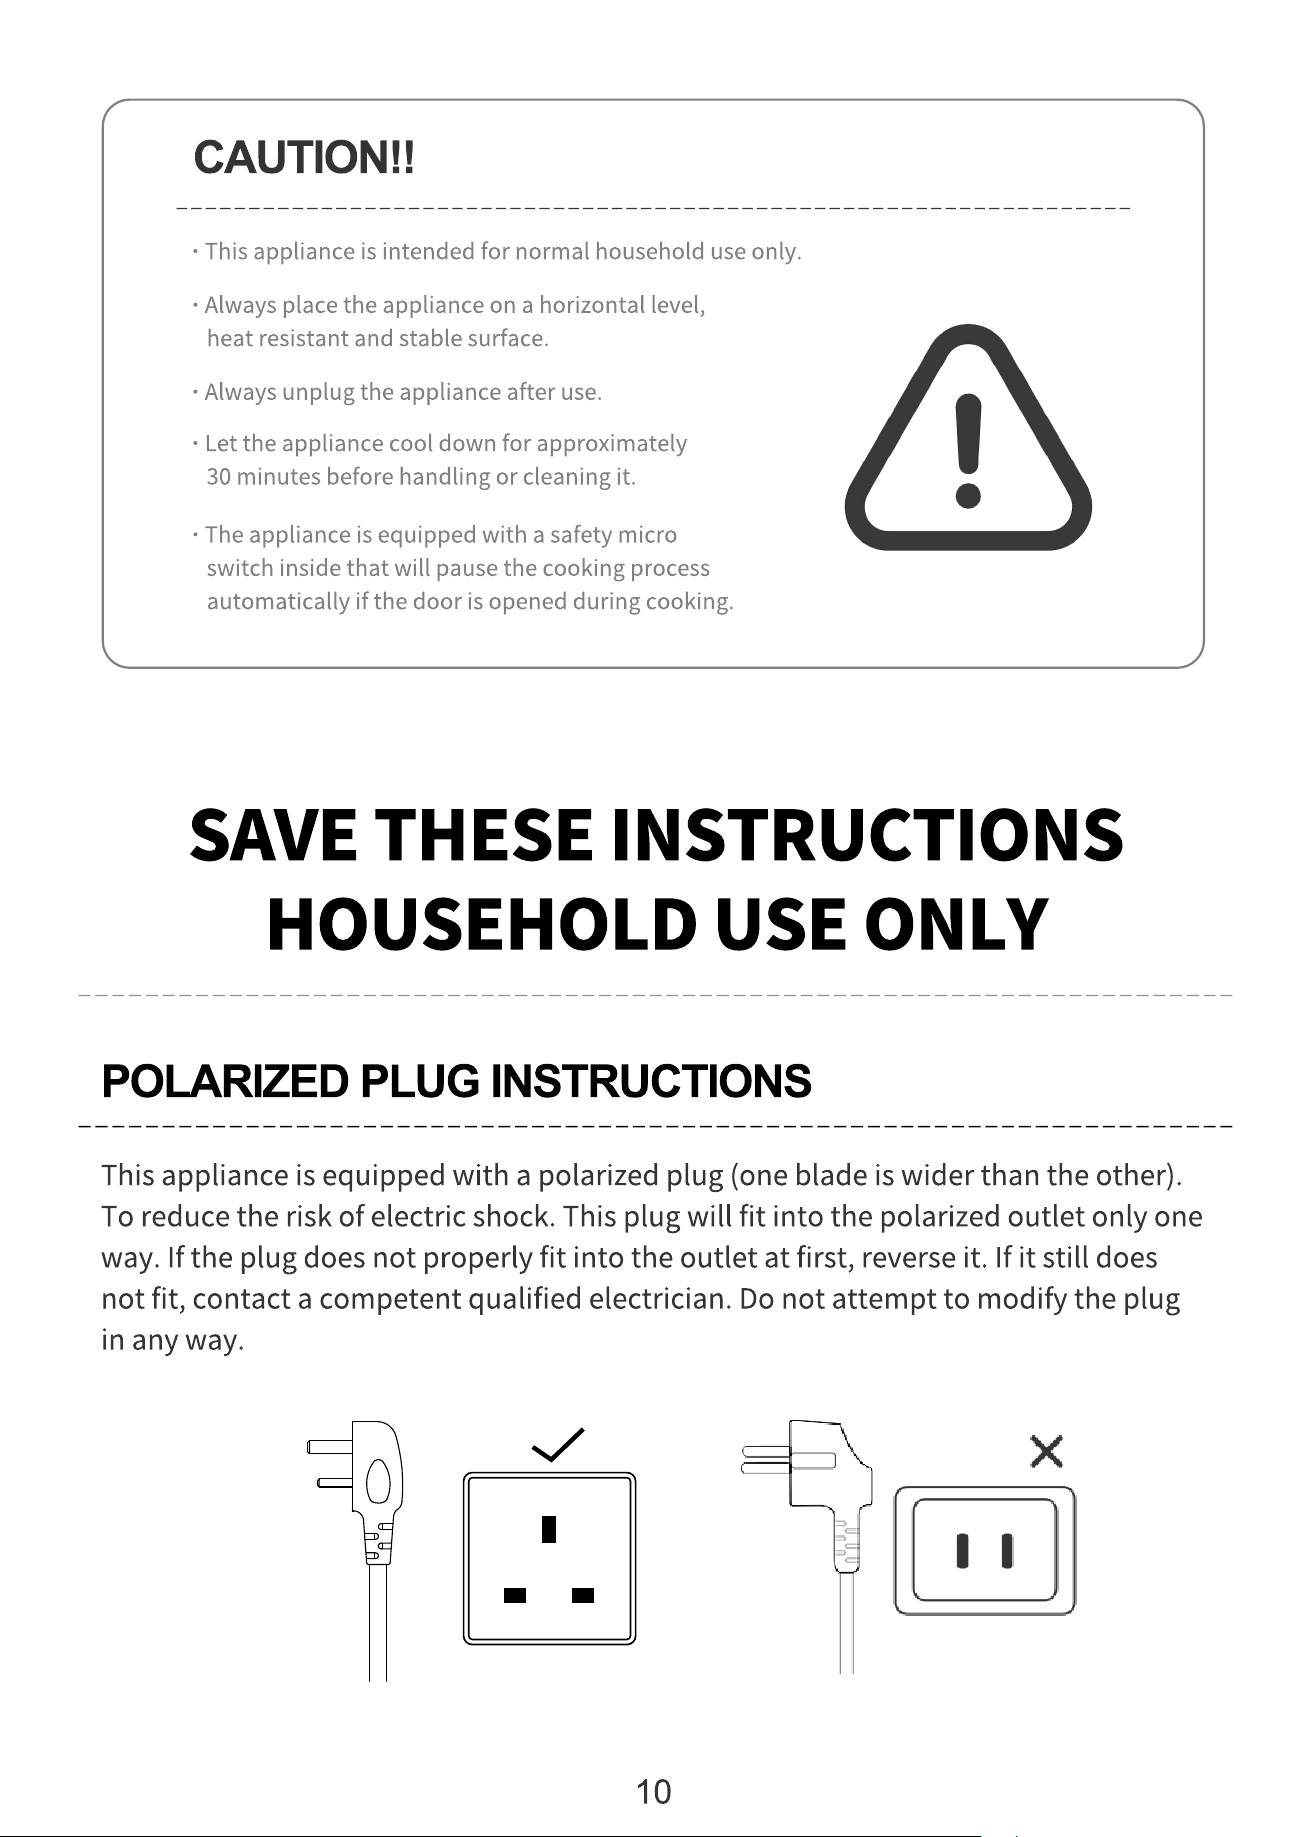

A short power supply cord is provided to reduce the hazards resulting from
becoming entangled in, or tripping over a longer cord.
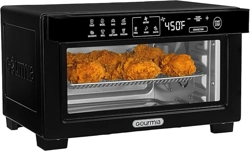
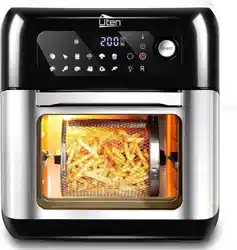
Prepare your favorite foods and snacks in a quick, healthy and easy way with your
new Smart Fryer Oven. The Smart Fryer Oven is a versatile unit that uses rapid hot
air technology to rapidly and evenly cook all your favorite foods. Bake, grill, broil,
toast or air fry with little to no oil and get evenly cooked, healthy and tasty food
every time Obtain the crispiness and flavor of deep-fried food without the oil! The
Smart Fryer Oven uses advanced technology that gives your food the crispy finish of
fried food, while keeping the inside moist, all with little-to-no oil More
space-efficient than a regular oven and with a larger capacity than a Smart Fryer,
this is the perfect unit for all your cooking needs.
- The marked electrical rating of the extension cord should be at least as great as
the electrical rating of the appliance.
- The longer cord should be arranged so that it does not drape over the countertop
or table top where it can be pulled by children or tripped over unintentionally.
SHORT CORD INSTRUCTIONS
------------------------------------------------------------------
· Longer extension cords are available and may be used if care is exercised in
their use.
· If an extension cord is used:
KNOW YOUR SMART FRYER OVEN
------------------------------------------------------------------
11
• An easy-to-use control panel with 12 preset menus.
• A quick-dial feature that allows you to dial-in time and temperature in seconds.
• 10-quart capacity for family size meals
• A temperature control range of 180°F - 400°F (80°C-200°C)
• A timer range from 0 to 60 minutes, which is equipped with an auto shut-off feature.
Once the timer reaches "0:00", the unit will beep five times and tun itself off.
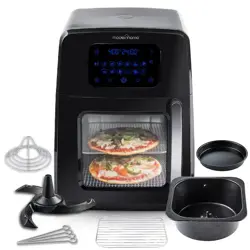
• 6 Accessories to prepare vast variety of food! Two easy-to-clean, non-stick
air-racks, a stainless-steel rotating skewer rack, a mesh basket with accompanying
handle, a drip tray.
12
This Smart Fryer Oven Feature:
Other great advantages provided by your Smart Fryer
Oven include:
• Fast cooking, with little to no preheating required.
• Quick and easy clean-up: Cooking accessories are dishwasher safe.
• Hassle-free frying—no splatters, no mess, and no oil smell!
• Versatility with its frying, baking, grilling and roasting capacities, this unit serves
as a great cooking tool for a busy kitchen.
• Also features multi-level cooking with adjustable rack positions.
BEFORE THE FIRST USE
---------------------------------------------------------------------
• Unpack the appliance and its accessories. Wash the accessories in hot, soapy water
and then wipe them dry. Wipe the interior of the frying cavity with a damp cloth or
sponge, and then dry with a paper towel. Make sure the cavity is dry before operating
the unit.
• Position the Smart Fryer Oven on a flat, level and heat-resistant surface. Make sure
that it is also positioned at least 6 inches (15 cm) away from any surrounding objects.
• It is recommended to let the Smart Fryer Oven heat for about 20 minutes without any
food in it. This helps to eliminate grease that may have adhered during manufacturing,
and to eliminate the "new" appliance smell.
• During the initial use of your Smart Fryer
Oven, it may emit slight smoke or odor,
which is normal for many heating appliances.
To ensure proper ventilation, open a window
or use a fan during this period. Please note
that this does not affect the safety of your
appliance.
OPERATING INSTRUCTIONS
Preparing for use:
---------------------------------------------------------------------
• To use the Smart Fryer Oven, insert the power plug into a wall socket. The appliance
will turn on and the icons will briefly flash before the On/Off button starts blinking red.
• Press the On/Off button to turn on the oven. All the icons will light up in white,
indicating that the appliance is in standby mode. Please refer to the "Using the
Appliance" section for instructions on how to prepare a variety of delicious foods.
13
The Smart Fryer Oven is capable of preparing a wide variety of foods. To get started,
refer to the table in the "Settings" section for basic cooking times, or consult the
included recipe book for inspiration.
Caution!
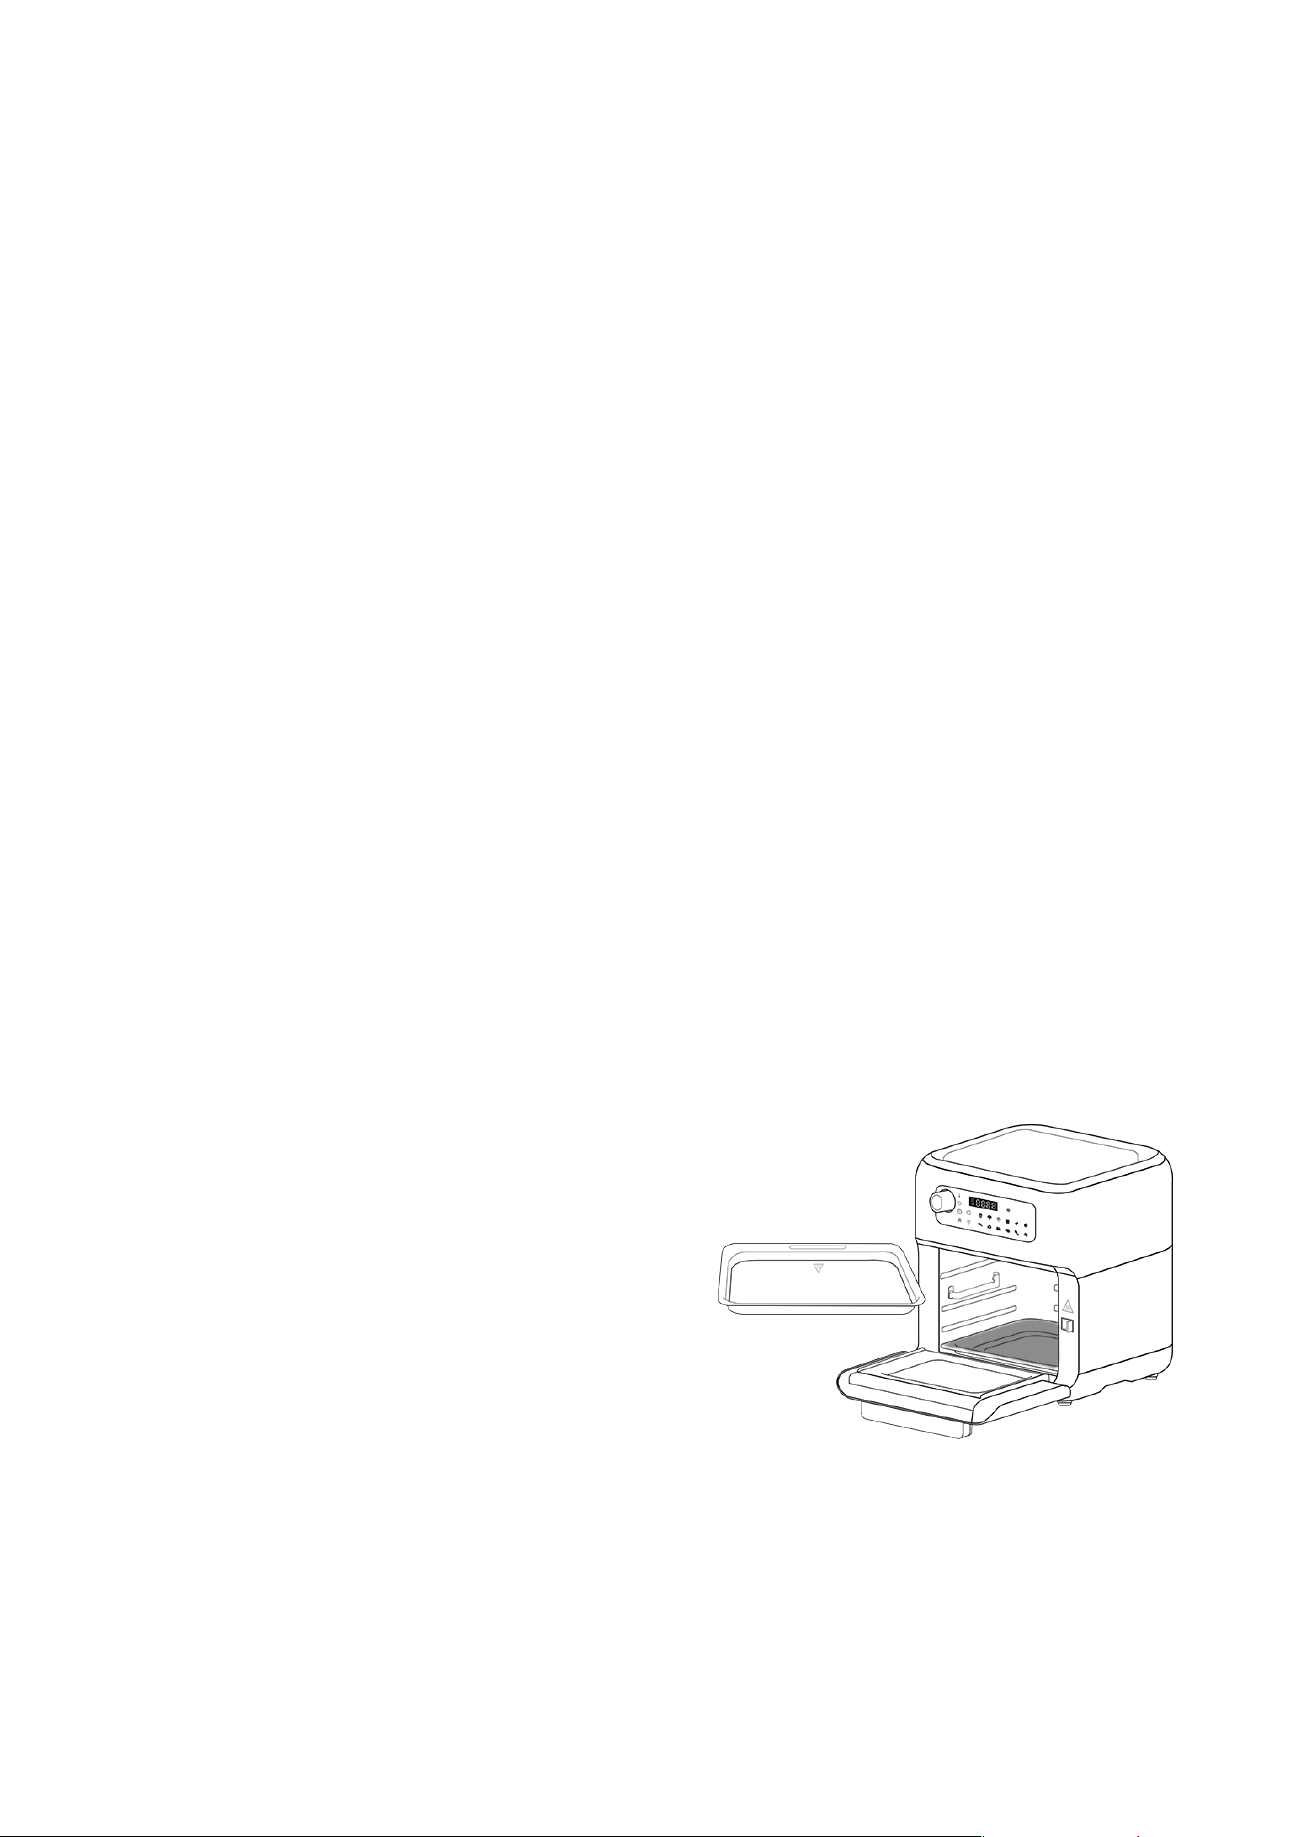
Installing the 2-in-1 baking tray and drip tray:
• Do not cover the air inlet on the top or the air outlet on the back of the unit while the
appliance is in use.
• Never immerse the unit's housing in water or rinse it under the tap.
• Pull the handle to carefully open the door.
• Follow the instructions in the Accessories part below to install your racks or rotating
accessories.
• Use this accessory on the bottom position when using the air racks, rotating mesh
basket, or rotisserie spit. Placed in the bottom of the unit, the drip tray will help
collect excess grease or crumbs, making cleaning easier!
• Insert the drip tray into the bottom of the unit.
Use the air-racks for broiling, baking, toasting and general cooking with other
containers made of metal or ovenproof glass. Use on the top, middle or bottom rails
of the appliance.
• This accessory can also be used as a baking tray when placed on higher rack groves.
• When using this accessory as a baking tray,
we recommend placing it on the lowest or
middle rack grooves. Cooking with the
baking tray on the highest rack groove
position may cause the food to cook too
fast and overcook.
14
Installing the air racks:

15
• Place air racks into unit by sliding through the side grooves and onto the back lip.
• Always wear oven mitts when handling the accessories!
• Insert the drip tray into the bottom of the unit.
• Using the accessory handle, hook the bottom of the left and right sides of the shaft
attached to the rotating mesh basket, or hook the bottom of the left and right sides of
the rotisserie spit.
• Open the door of the unit. Push and hold the accessory lock switch to the right and
slide the shaft of the accessory onto the rails in the center of the unit until it reaches
the rod supports located on each sides of the unit's walls.
• Release the switch. The switch should slide back into the left position and the left side
of the accessory shaft should be locked in place.
• Always wear oven mitts when handling the accessories!
Switch the rotate function on to allow the rotating accessories to rotate and cook the
food evenly.
Note: The rotation function only works during the cooking process.
Use the rotating mesh basket for fries, roasted nuts, or snacks that require shaking or
tumbling during the cooking process.
Use the rotating mesh basket or rotating spit for foods that need to rotate during the
cooking process.
Important: For best results and a more even cooking, rotate the air racks mid-cycle for
even cooking.
Installing the rotating mesh basket rotisserie spit:
16
Using the rotisserie spit:
To place your meat or poultry on the rotisserie rod please follow the instructions below:
• Insert one end of the rotisserie rod through one of the spikes. Position the spikes dose
to one of the ends of the rods, with the spikes facing the center of the rotisserie rod.
Secure the spikes by turning the thumbscrew in a clockwise direction.
• Run the rod through the center of the food to be cooked. Slide the food until the spike
is securely imbedded into the food. Slide the second spike onto the rotisserie rod at
the other end of the food to be cooked until securely imbedded in the food. Secure in
place by tightening the thumbscrew.
• Place the baking tray on the lowest position
to catch food drippings.
• Use the rotisserie handle to the rotisserie rod.
The hooks of the rotisserie handle should
be placed under the grooves on both sides
of the rod.
• Use the rotisserie handle to the rotisserie rod. The hooks of the rotisserie handle should
be placed under the grooves on both sides of the rod.
Warning! Place all ingredients on the racks, rotisserie spit or in the rotating mesh
basket, in a way to prevent any contact with the appliance's heating elements. Do
not overfill.
When cooking is completed, the rotating mesh basket, rotisserie spit can be placed on
the stand to easily retrieve or cut cooked food.
To use the rotisserie stand, turn the tightening rod in the base towards the left, insert
one end of the rotating mesh basket or rotating skewer rack into the square hole inside
the stand. Then turn the tightening rod clockwise to secure the accessory into the stand.
With the accessory placed in a vertical position, use tongs to retrieve cooked food from
the rotating mesh basket, use heat-resistant cooking gloves to remove the skewers from
the rotating skewer rack, or carve meat directly from your rotisserie spit.
Using the accessory stand:

17
Cooking process:
The cooking presets do not require preheating. If using a preset, simply add your food
on top of the racks, rotisserie spit or in the rotating basket and begin the cooking
process. For other cooking needs, we recommend letting the unit preheat for 3 minutes
or to add 3 minutes to your desired cooking time to compensate.
Important : Please also take into consideration that cooking in the Smart Fryer oven
will be much faster than cooking in a traditional oven.
• Determine the required preparation time and cooking temperature for the
ingredients (see section "Settings" this chapter).
• Press the On/Off key to start standby mode.
• When the unit is in standby, select a cooking preset by pressing on the chosen
function, or adjust the time and temperature directly by using the Time and
Temperature adjustment knob.
• Time and temperature can be adjusted when the corresponding icons appears on the
screen, or by selecting "Time" or "Temperature" using the "Select" button.
• When the "Timer" icon appears on the screen, simply turn the adjustment knob to
the right to increase the cooking time or tum the knob to the let to decrease the
cooking time. Press select to set the cooking time. The unit will automatically switch
to cooking temperature adjustment.
• Alternatively, when the "Temperature" icon appears on the screen, turn the knob to
the right to increase the temperature or tum to the left decrease the temperature.
Press select to set the cooking temperature. The unit will automatically switch to
time adjustment mode.
• Press "Select" to switch back and forth between temperature mode and timer
adjustment modes. Note: The timer and temperature icons blink while time and
temperature are being adjusted. These icons turn off once cooking time and
temperature are confirmed, or if no other buttons are touched for 5 seconds.
• Please note that time and temperature can also be adjusted after selecting a cooking
preset. To do so, simply select a cooking preset by touching the desired setting icon.

18
Then press the "Select" knob to select the time or temperature adjustment mode and
turn the knob to adjust the time or temperature to you desired setting.
• Press the On/Off button to begin cooking or wait 5 seconds for the unit to start
automatically.
• During the cooking process, time and temperature can both be adjusted, and cooking
presets can be switched. To adjust time, temperature, or preset, press the On/Off
button to pause the cooking preset, adjust the time/temperature and/or cooking
preset, and then wait 5 seconds for the unit to resume cooking automatically, or press
On/Off to resume the cooking process.
Note: The inner lights can be turned on or off, and the rotation function can be activated
or deactivated by pressing on the rotation button and/or internal light button during the
cooking process.
• The cooking process can be paused at any time by pressing the On/Off button. Press
the On/Off button again to resume cooking at the selected time and temperature.
• When the cooking time has elapsed, the unit will beep 5 times and go into OFF mode.
Note: During cooking, excess oil and cooking juices from the ingredients will collect in
the drip tray. This is to be normal when using the air fryer oven.
Important: If or best results we recommend rotating the air racks mid-cycle for even
cooking.
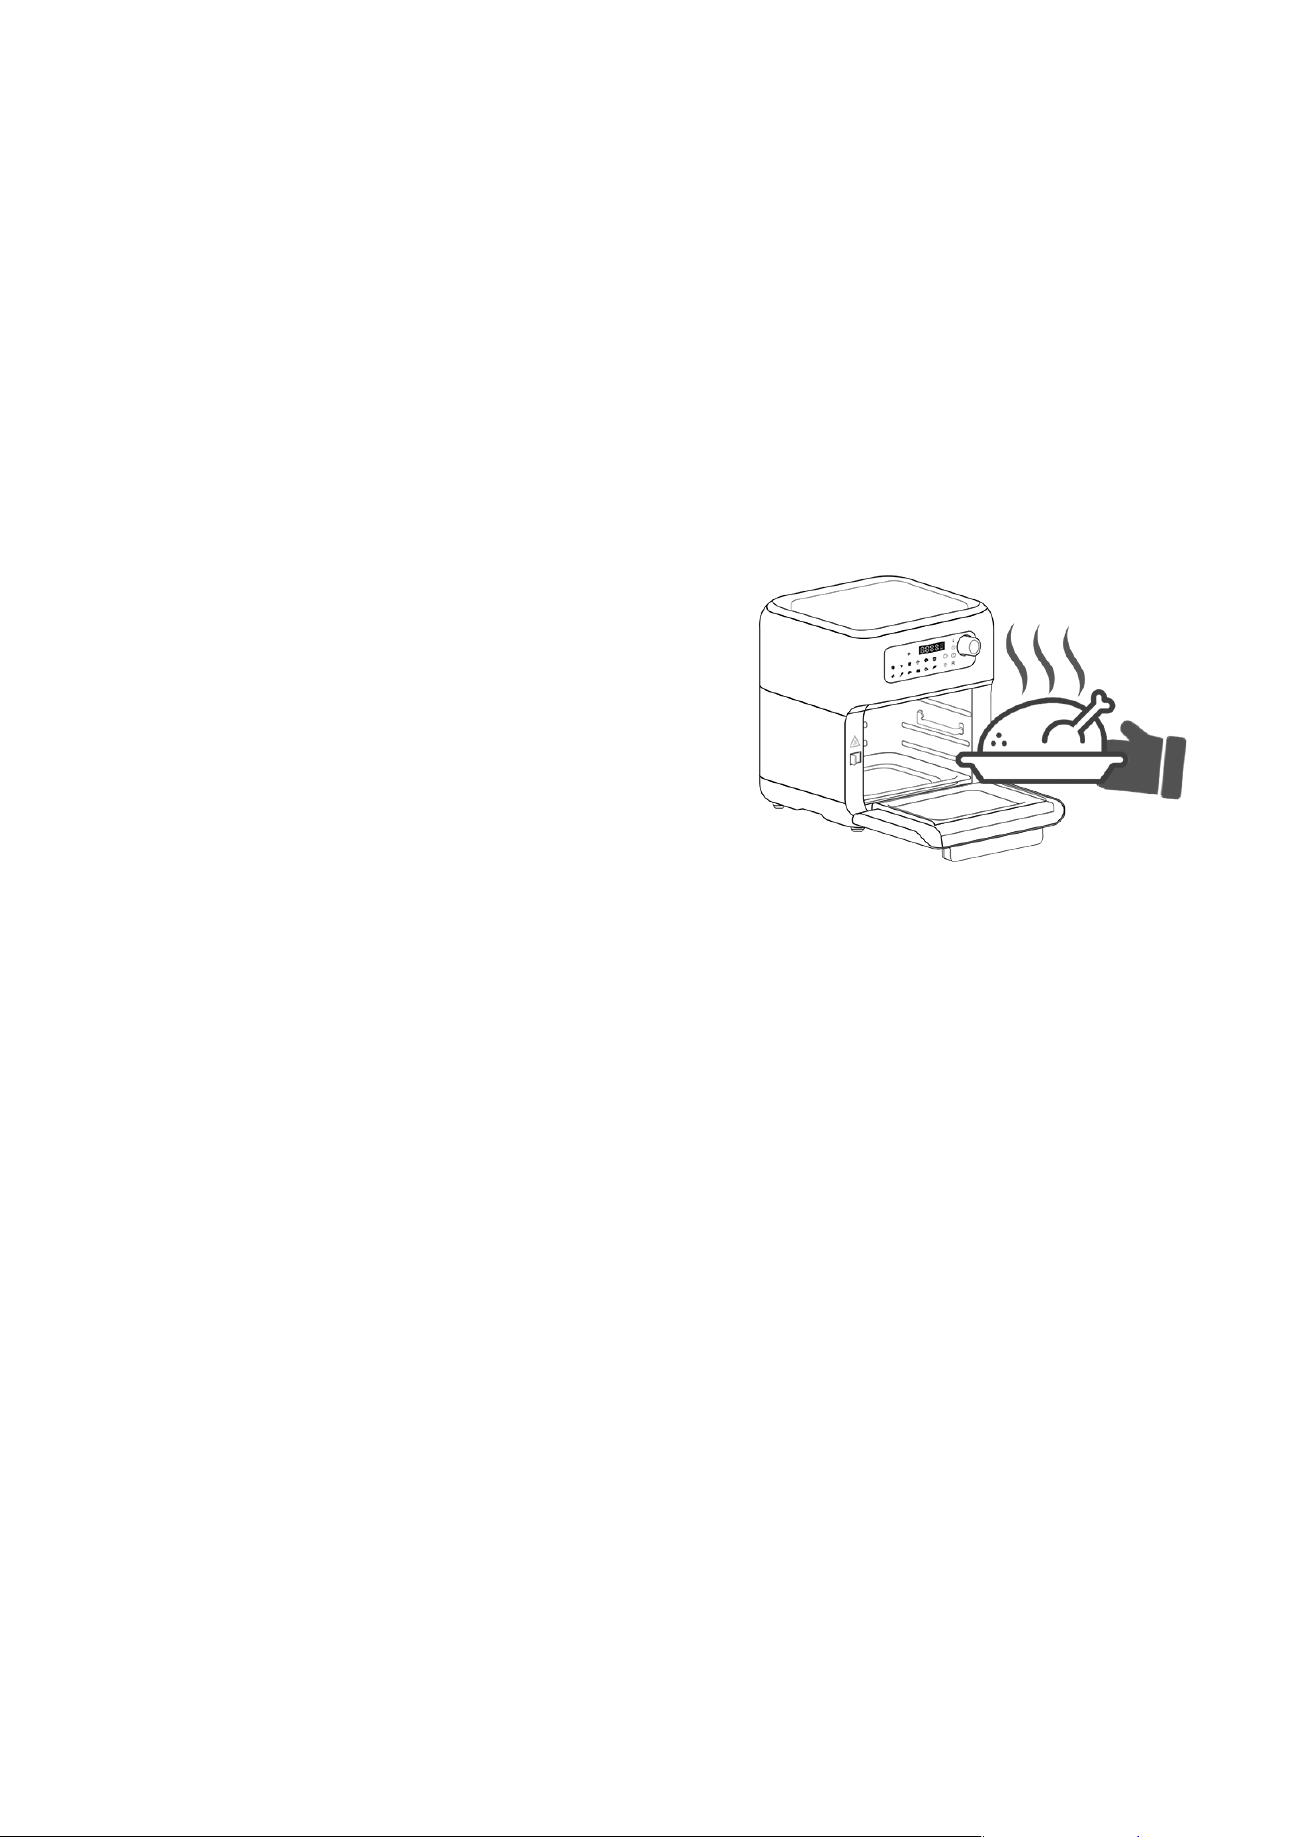
• When you hear the timer bell (5 beeps), the set cooking time has elapsed, using oven
mitts, open the door and remove the racks, rotating mesh basket, rotisserie spit and
place on a heat- resistant surface.
• To disengage and retrieve the rotating mesh basket, or rotisserie spit, take the
following steps: Wear heat- resistant gloves, open the door of the oven, and push and
maintain accessory lock switch to the right position. Using the accessory handle, hook
the bottom of the left and right sides of the sha attached to the mesh basket, or
rotisserie spit and pull the accessory toward you.
Release the switch.
Caution: After the cooking process, the cooking accessories and ingredients in the Smart
Fryer Oven will be hot. Depending on the type of ingredients used, steam may escape from
the unit, so be mindful of the risk of scalding. To ensure your safety, wear kitchen gloves
when handling the hot accessories and ingredients.

19
• The Smart Fryer Oven is designed to be instantly ready for preparing another batch
of food once a batch is done.
IMPORTANT: If you notice that the fan is not operating during cooking (indicated by no
noise or airflow), please discontinue use of the appliance immediately and contact
Customer Service.
Using the preset menus:
• 12 "short-cut" preset functions are provided; VEGGIE, PORK RIBS, CORN ON THE COB,
CUPCAKE, TOAST, PIZZA, FRIES, STEAK, FISH, SHRIMP, CHICKEN WINGS, CHICKEN
THIGHS.
To select a preset, simply select the desired cooking preset on the control panel, press
the On/Off key to start air frying.
The time and temperature settings can be adjusted at any time when using the preset
menus by pressing ON/OFF and using the knob to adjust the preset to your desired
cooking time and temperature. The unit automatically resumes the cooking process 5
seconds or by pressing again on the ON/OFF button.
Below are the cooking times and temperatures for each preset:
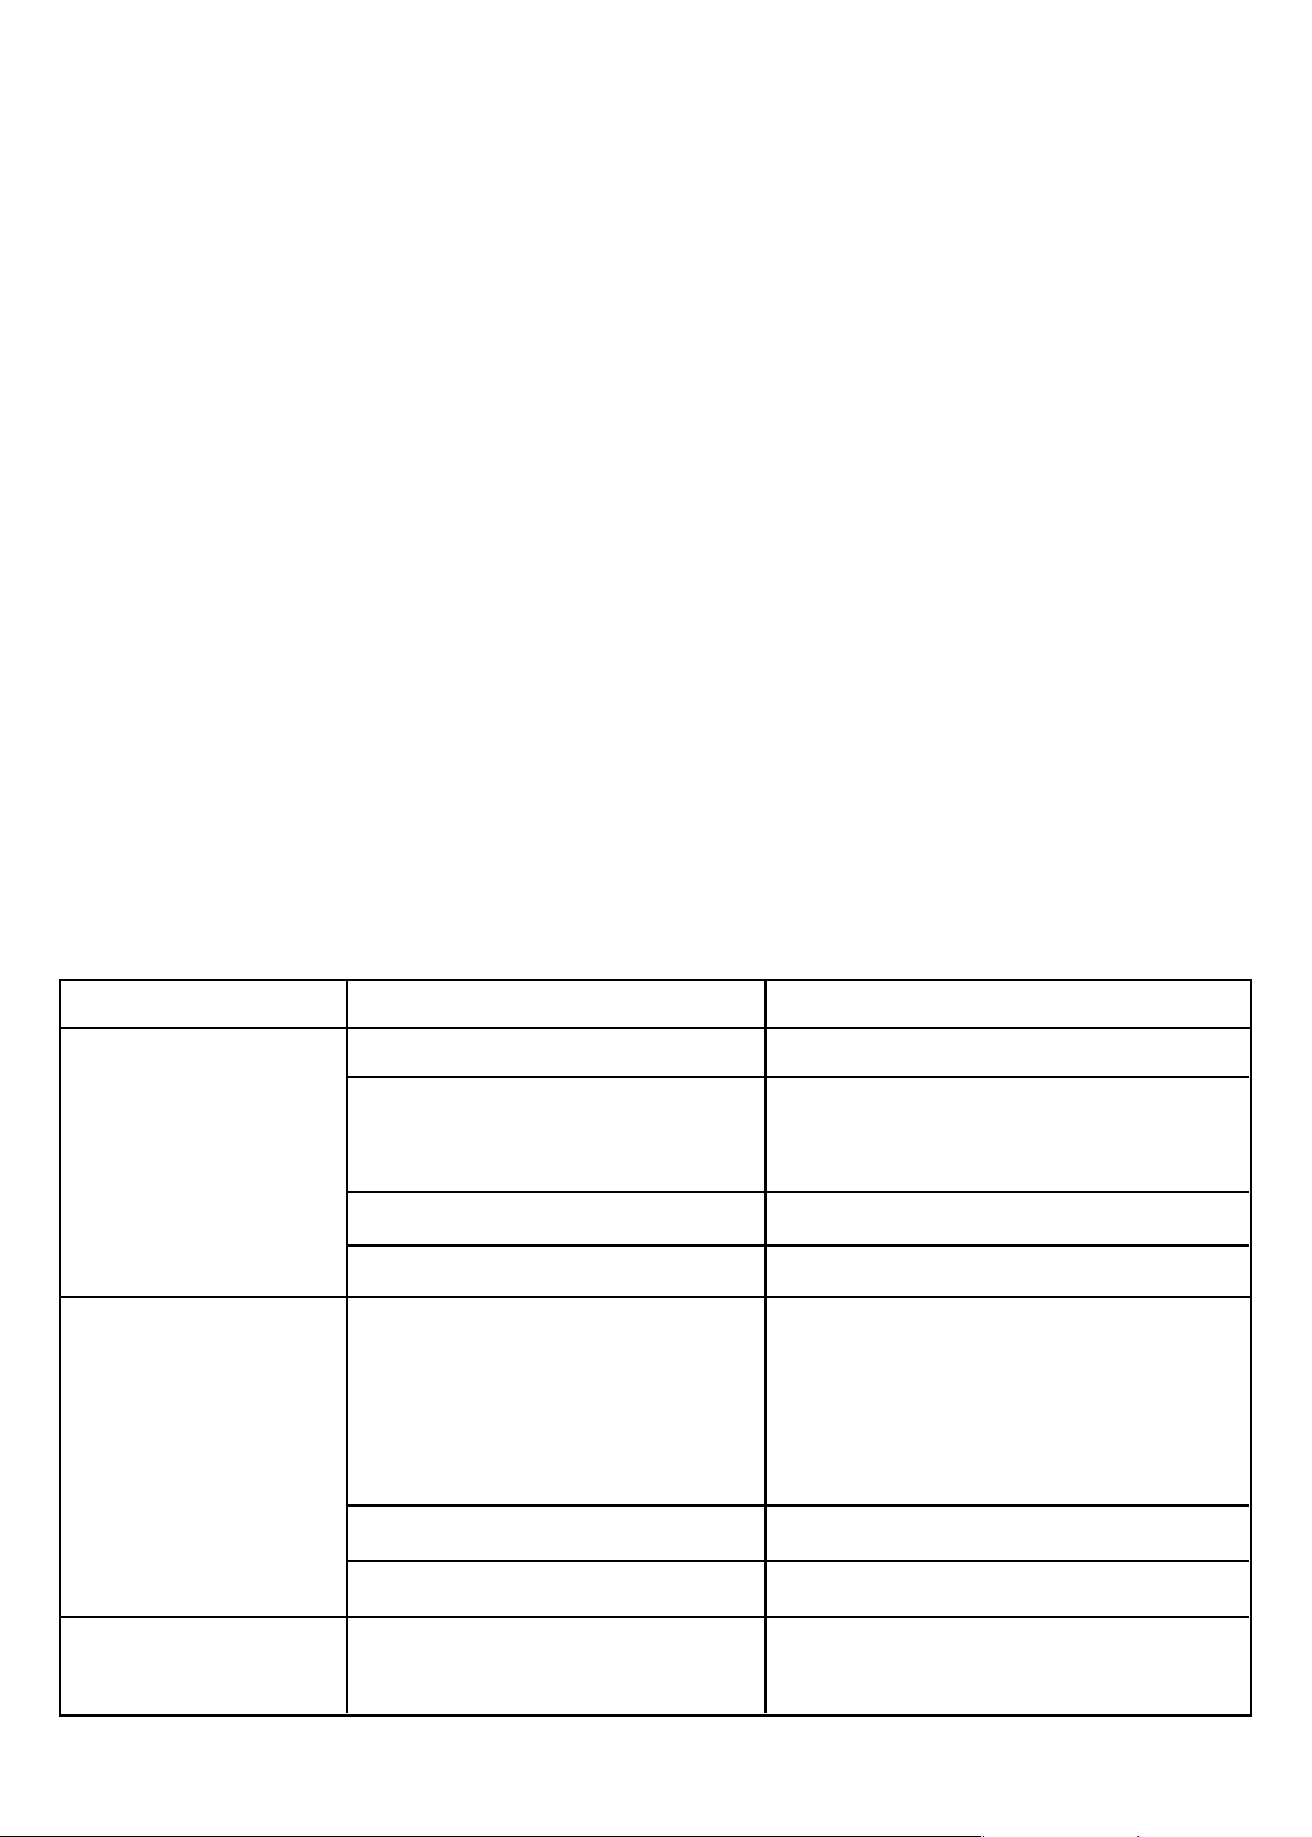
PRESET TEMPERATURE (°C) TIME (min) TIPS
Roast
Pizza
Fries
Defrost
Veggie
Cupcake
Chicken Wings
Chicken Thighs
Steak
Pork Ribs
Onion
Fish
Reheat
180°C
150°C
200°C
30°C
200°C
170°C
200°C
190°C
170°C
180°C
190°C
160°C
140°C
5mins
12mins
15mins
45mins
12mins
12mins
30mins
30mins
15mins
27mins
15mins
12mins
6mins
Flip at 3 min
Use the air rack(s)
Use the mesh rotating basket
Use the air rack(s) or the rotating basket
Use the air rack(s) or the rotating basket
Use the air rack(s)
Use the air rack(s)
Use to reheat previously cooked
food or leftovers

20
TIPS
---------------------------------------------------------------------
• Any food that can be prepared in a traditional oven can also be prepared in the Smart
Fryer Oven.
• Rotating the air racks halfway through the preparation time optimizes the end result
and can help prevent unevenly air-fried food.
• A larger amount of ingredients only requires a slightly longer preparation time;
A smaller amount of ingredients only requires a slightly shorter preparation time.
• If some foodstuffs tend to stick to the air racks or rotating mesh basket, add some
cooking oil spray on the cooking surface prior to adding the ingredients to cook.
• For best results, we do not recommend preparing food with batter that has a very
liquid consistency, as the fast air technology may cause the batter to slide off the food
and drip through the air racks. When cooking battered-food, we recommend using a
batter with a thicker/dryer coating and placing the food in an oven-compatible
accessory such as a pie pan or baking pan.
• To reduce cooking time, defrost food prior to cooking.
• Add some oil to fresh potatoes for a crispy result.
• Use pre-made dough to prepare filled snacks quickly and easily. Pre-made dough also
requires a shorter preparation time than home-made dough.
• Rotating the air-racks mid-cycle through the cooking process optimizes the end result
and can help prevent unevenly air-fried food.
• If you want to bake a cake or quiche or fry fragile or filled ingredients, place a baking tin
or oven dish on top of an air-rack to ensure even heating and prevent sticking.
IMPORTANT
-------------------------------------
• Always use on a heat resistant surface.
• NEVER put anything on top of the appliance.
• NEVER cover the air vents on the top and at the
back of the unit.
• NEVER fill any cooking vessel with oil or liquid
of any kind. This unit cooks with hot air only.
• ALWAYS use oven mitts when removing the air-racks or meshed basket.
• ALWAYS use the accessory handle to remove the rotating mesh basket from the unit.
21
MAKING HOME-MADE FRIES
---------------------------------------------------------------------
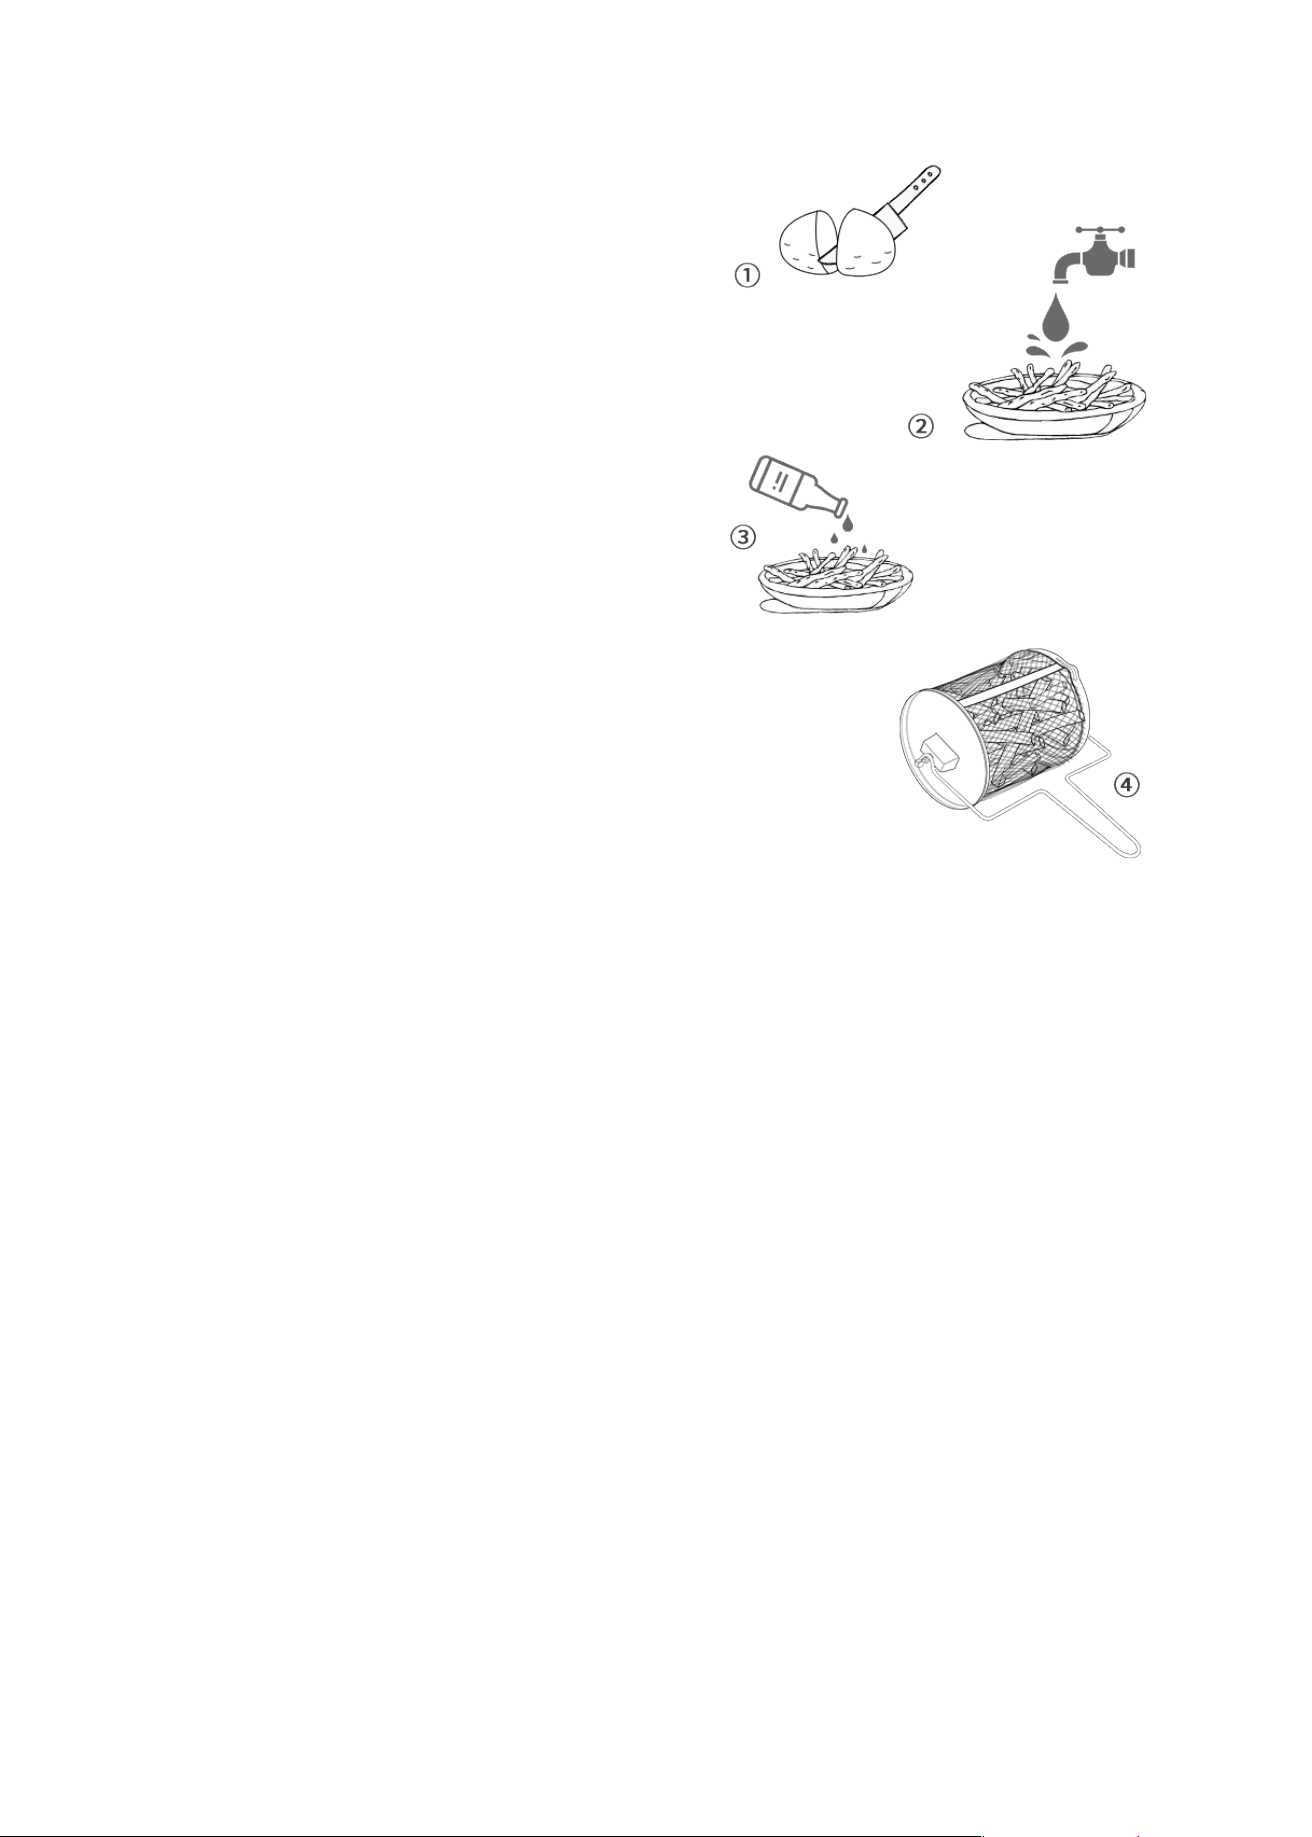
To make home-made fries, follow the steps below :
• Peel the potatoes and cut them into sticks.
• For best results, soak the potato sticks in
water for 30 minutes.
• Rinse the potato sticks thoroughly and dry
them with paper towels.
• Pour 1/2 tablespoon of canola oil in a bowl
put the sticks on top and mix until they are
coated with oil.
• Remove the sticks from the bowl with your
hands or a kitchen utensil so that excess oil
stays behind in the bowl. Put the sticks in the
rotating basket or place them on a single
layer on the air racks.
pickled
Soak for 30 minutes,
rinse and dry
Cut into strips
Note: Do not tilt the bowl to pour the potato sticks onto the racks or into the rotating
basket. Transfer them with your hands or a kitchen utensil in smaller batches to prevent
excess oil to be transferred Air fry the potato sticks according to the instructions above.
Cooking time and temperature might need to be adjusted depending on quantity.
CLEANING AND MAINTENANCE
---------------------------------------------------------------------
• Make sure to clean the appliance each use!
• Switch the appliance off. Before cleaning, unplug the appliance from outlet and
allow it to cool down completely.
• The air racks, 2-in-1 baking tray and oil drip tray, rotating mesh basket, rotisserie spit,
accessory handle can be cleaned in hot water with mild detergent / dish soap, or in
the dishwasher. Do not use metal kitchen utensils or abrasive cleaning materials to
clean them, as this may damage the non-stick coating. Rinse and dry thoroughly
cleaning.
• Clean the accessory stand with damp cloth or sponge. Dry with a paper towel.
22
• Wipe the cavity with a damp cloth or sponge. Dry with a paper towel.
• Never use abrasive products in the cavity!
• Clean the heating element inside the Smart Fryer Oven with a cleaning brush to
remove any food residue.
CLEANING THE SMART FRYER OVEN'S EXTERIOR:
CLEANING INSIDE THE CAVITY:
• Wipe clean with a damp sponge or doth. Wipe dry.
• NEVER use steel wool, metal scouring pads or abrasive cleaners, as they may damage
the finish.
• Do not let any liquids enter the air inlet on the top of the Smart Fryer Oven. Any other
servicing should be performed by an authorized service representative.
DO NOT IMMERSE THE FRYER IN WATER OR ANY OTHER LIQUID!
STORAGE:
• Before storage, always make sure the appliance is completely cool dean and dry.
• It is recommended to store the appliance in a dry place.
Food is not fried
evenly
Some foods need to be turned
during the cooking process
Rotate the air racks mid-cycle or turn
the food
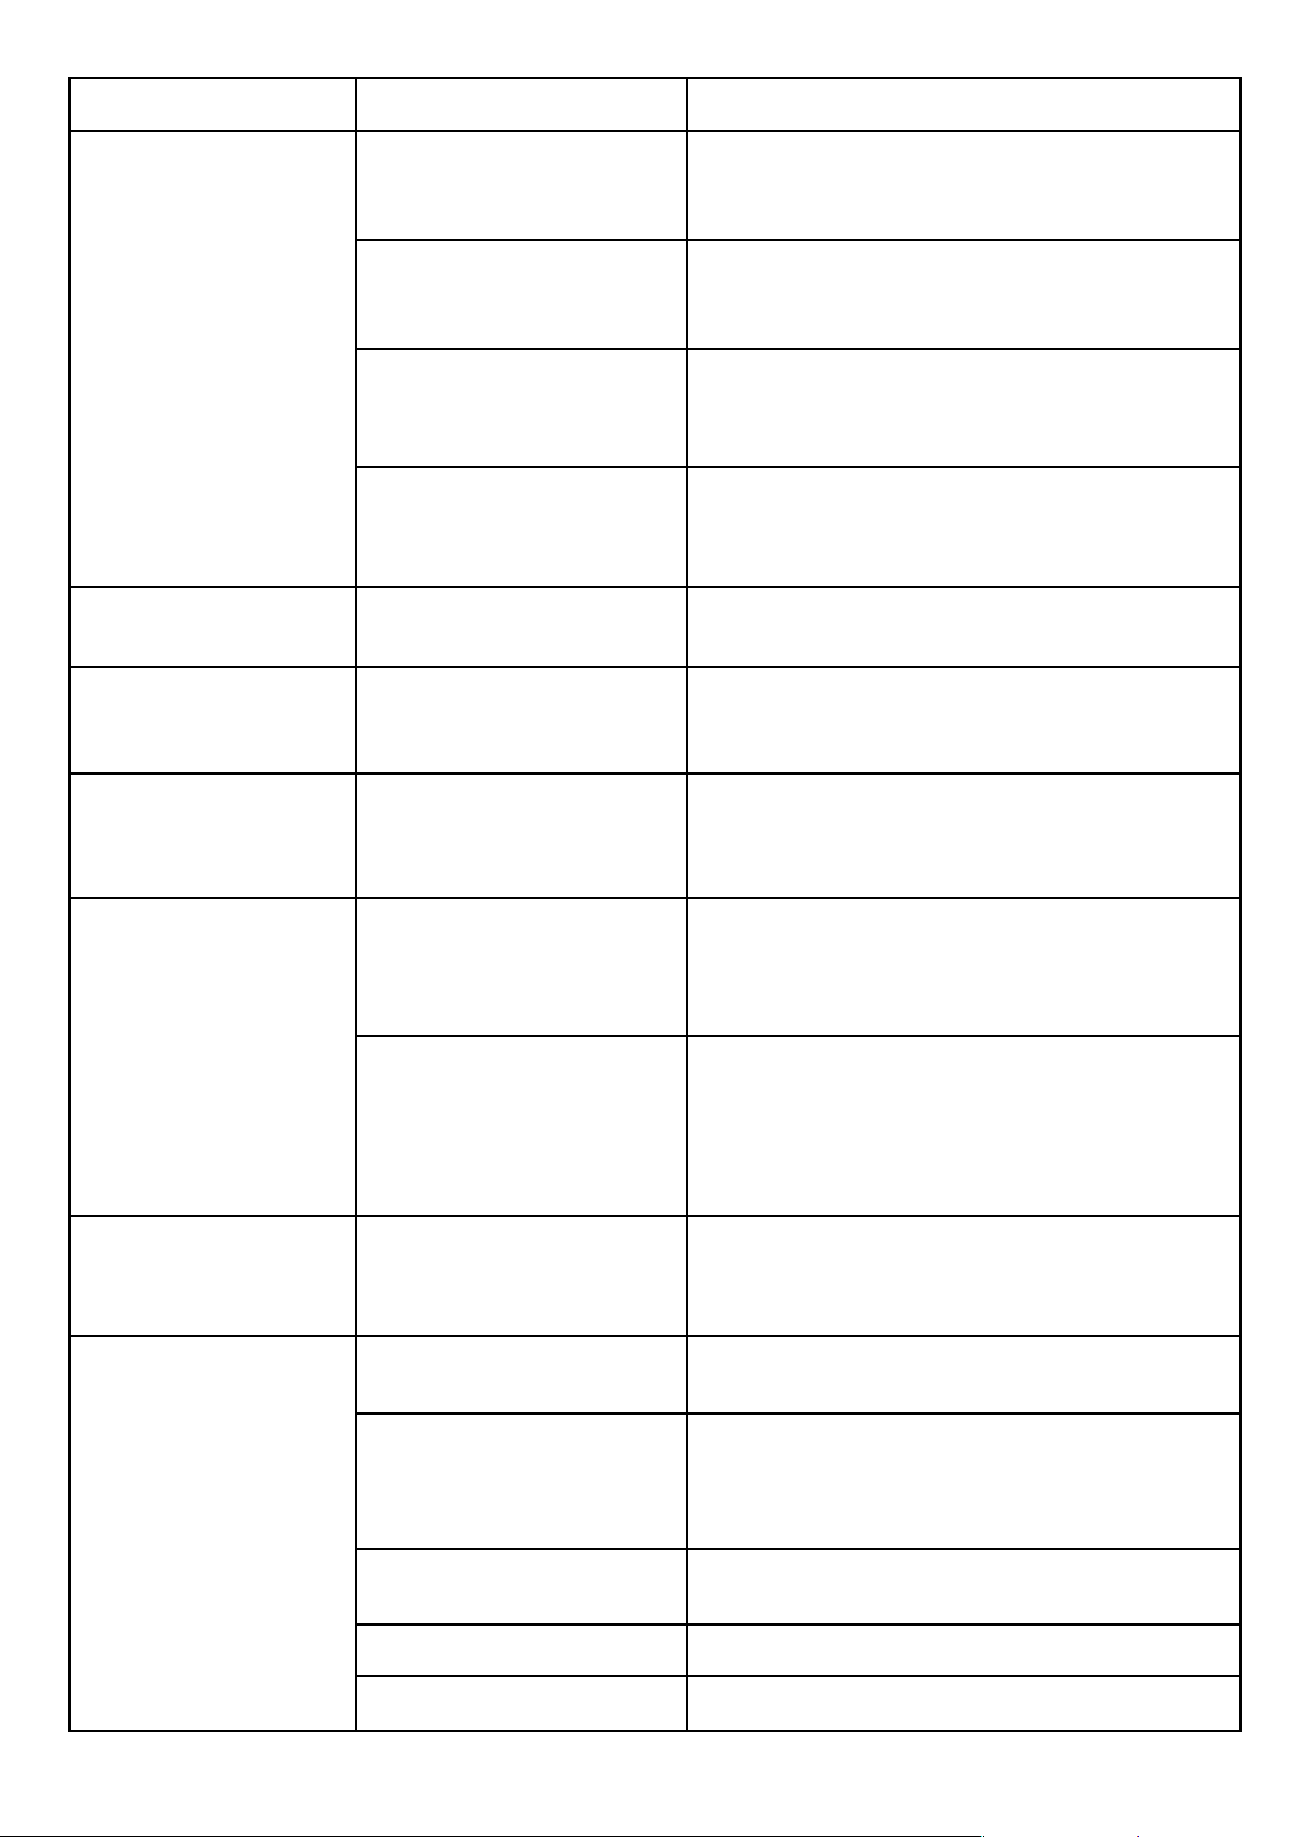
TROUBLESHOOTING
PROBLEM POSSIBLE CAUSE SOLUTION
The Smart Fryer
Oven does not
work
The appliance is not plugged in
You have not turned the unit on
by setting the preparation time
and temperature
The door is open
The ON/OFF button is not pressed
Put the main plug into wall socket
Set the temperature and time. Press
on/off button to start.
Check that the door is closed
Press ON/OFF button
The ingredients
cooked with the
Smart Fryer Oven
are not done
Quantity of food is too large
The set temperature is too low
The cooking time is too short
Put smaller batches of food. Smaller
batches are fried more evenly.
Cook on the air-racks in single layer
Rotate the air racks mid-cycle or turn
the food.
Increase the cooking temperature
Increase the cooking time
23
Potato sticks are too thick
Cut the potatoes into thinner sticks for a
crispier result
There is not enough oil Add slightly more oil for a crispier result
The temperature is too low Use the maximum temperature
The appliance
produces and emitd
smoke
Residue from theproduction
process are eliminated
during first use
Operate the appliance for at least 20 minutes
on its highest setting, with no food, until no
odor or smoke is present
Food too greasy
Ensure ample ventilation, disconnect the
appliance from the wall outlet and let it cool
down
Food residues not properly
removed following previous
use
Disconnect the appliance from the wall outlet
and contact qualified personnel to check and
repair the appliance
Malfunctioning appliance
Disconnect the appliance from the wall outlet,
let it cool down and clean thoroughly before
using again
The On/Off button
lights up
Preheat time too short Let the appliance preheat for a longer time
The appliance does
not heat up
Malfunctioning appliance
Disconnect the appliance from the wall outlet
and contact qualified personnel to check and
repair the appliance
The appliance is
working but the LED
display does not light
up
Damaged LED display
Disconnect the appliance from the wall outlet
and contact qualified personnel to check and
repair the appliance
The rotating
accessories do not
rotate
The accessory is not
placed correctly
Press the On/Off button to stop the operation
and refer to the “Installing the rotating mesh
basket, rotating skewer rack or rotisserie spit”
part
The cooking process has
not started. Note: the rot
ating air fry basket
rotates only during the
cooking process
Start the cooking process
The inner light does
not light up
Damaged inner light
Disconnect the appliance from the wall outlet
and contact qualified personnel to check and
repair the appliance
Fries are not crispy
You did not use the right
type of potato
Use fresh potatoes and make sure they stay
firm during frying
You did not rinse and dry
the potato sticks
properly before you fried
them.
Rinse the potato sticks thoroughly to remove
starch from the outside of the sticks. Make sure
to dry the potato sticks thoroughly before you
add the oil
PROBLEM POSSIBLE CAUSE SOLUTION

10L Air Oven
AFO 44880(TXG-TM10L)