1
Instruction
& Recipe
Booklet
For your safety and continued enjoyment of this product,
always read the instruction book carefully before using.
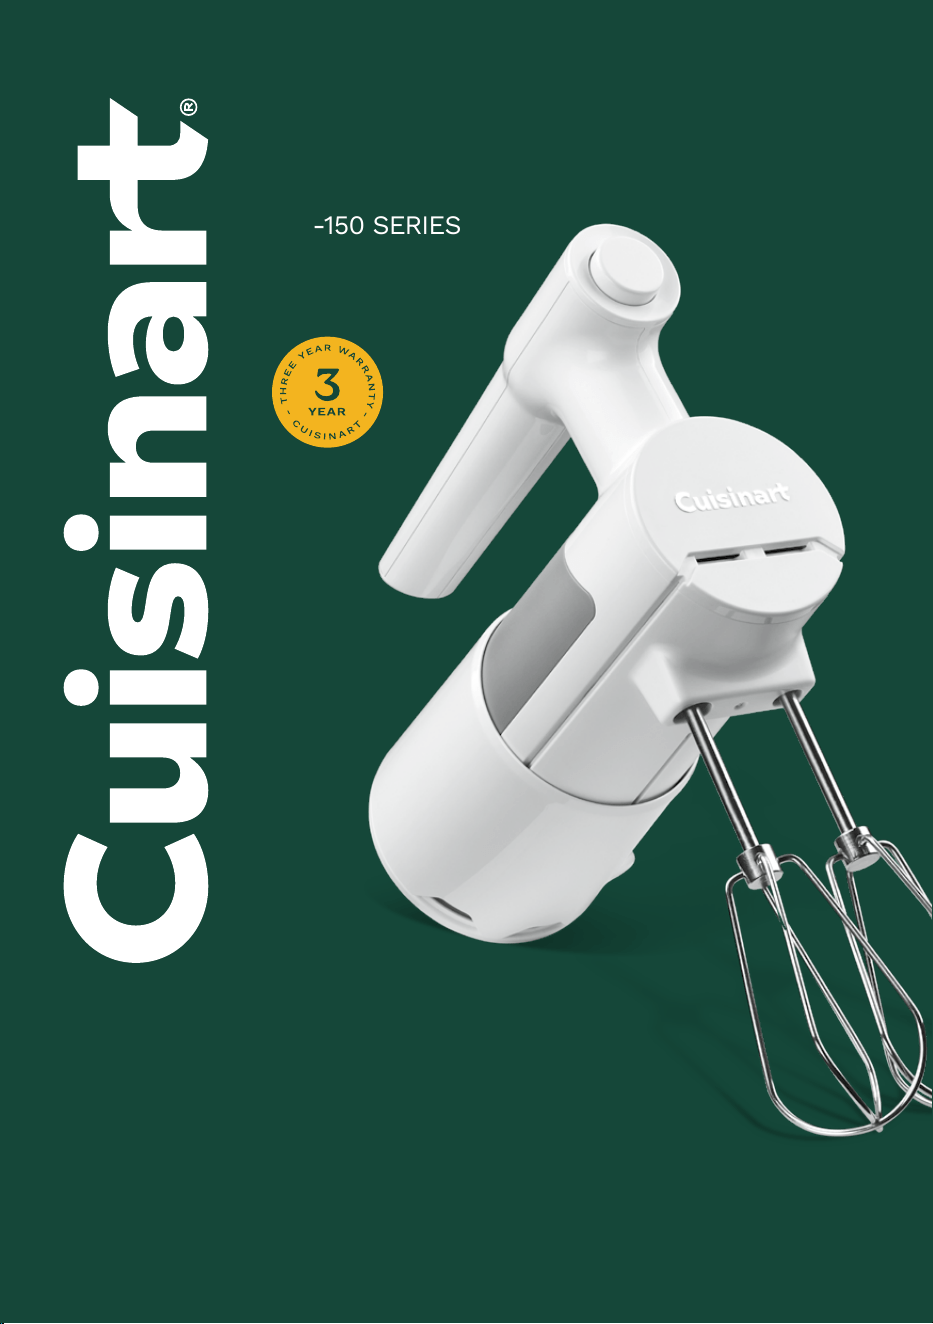
5-Speed Hand Mixer
HM-150 SERIES

2
Contents
Important Safeguards ...................................... 2
Features and Benefits ...................................... 3
Use, Care and Maintenance ............................ 4
Quick Reference Guide ..................................... 5
Warranty ................................................................ 6
Recipes .................................................................. 8
Important
Safeguards
When using an electrical appliance, basic safety
precautions should always be followed, including
the following:
1. Read all instructions.
2. Turn the appliance OFF, then unplug from the
outlet when not in use, before assembling or
disassembling parts and before cleaning. To unplug,
grasp the plug and pull from the outlet. Never pull
from the power cord.
3. To protect against risk of electric shock, do not put
the hand mixer motor housing or cord in water or
other liquids. If hand mixer motor housing or cord
falls into liquid, unplug the cord from outlet
immediately. Do not reach into the liquid.
4. To avoid accidental injury, close supervision is
necessary when any appliance is used by or near
children.
5. Avoid contact with moving parts. Keep hands, hair,
clothing, and spatulas and other utensils away
from beaters/whisk during operation to reduce risk
of injury to persons and/or damage to the mixer.
6. Remove beaters or whisk from the mixer before
washing.
7. Do not operate any appliance with a damaged cord
or plug, or after the appliance malfunctions, or is
dropped or damaged in any manner. Return
appliance to the nearest authorized Cuisinart
®
service facility for examination, repair, or
mechanical or electrical adjustment.
8. The use of attachments not recommended by
Cuisinart may cause re, electric shock, or risk
of injury.
9. Do not use outdoors or anywhere the cord or mixer
might come into contact with water while in use.
10. To avoid possibility of mixer being accidentally
pulled o work area, which could result in damage
to the mixer or in personal injury, do not let cord
hang over edge of table or counter.
11. To avoid damage to cord and possible re or
electrocution hazard, do not let cord come in
contact with hot surfaces, including the stove.
12. The chef’s whisk should be used without any
other attachment; leave second attachment port
empty.
13. This appliance is not intended for use by persons
(including children) with reduced physical, sensory,
or mental capabilities, or lack of experience and
knowledge, unless they are closely supervised and
instructed concerning use of the appliance by a
person responsible for their safety. Close
supervision is necessary when any appliance is
used by or near children. Children should be
supervised to ensure that they do not play with
the appliance.
14. Do not use this appliance for other than
intended use.
3
Save These
Instructions
For Household
Use Only
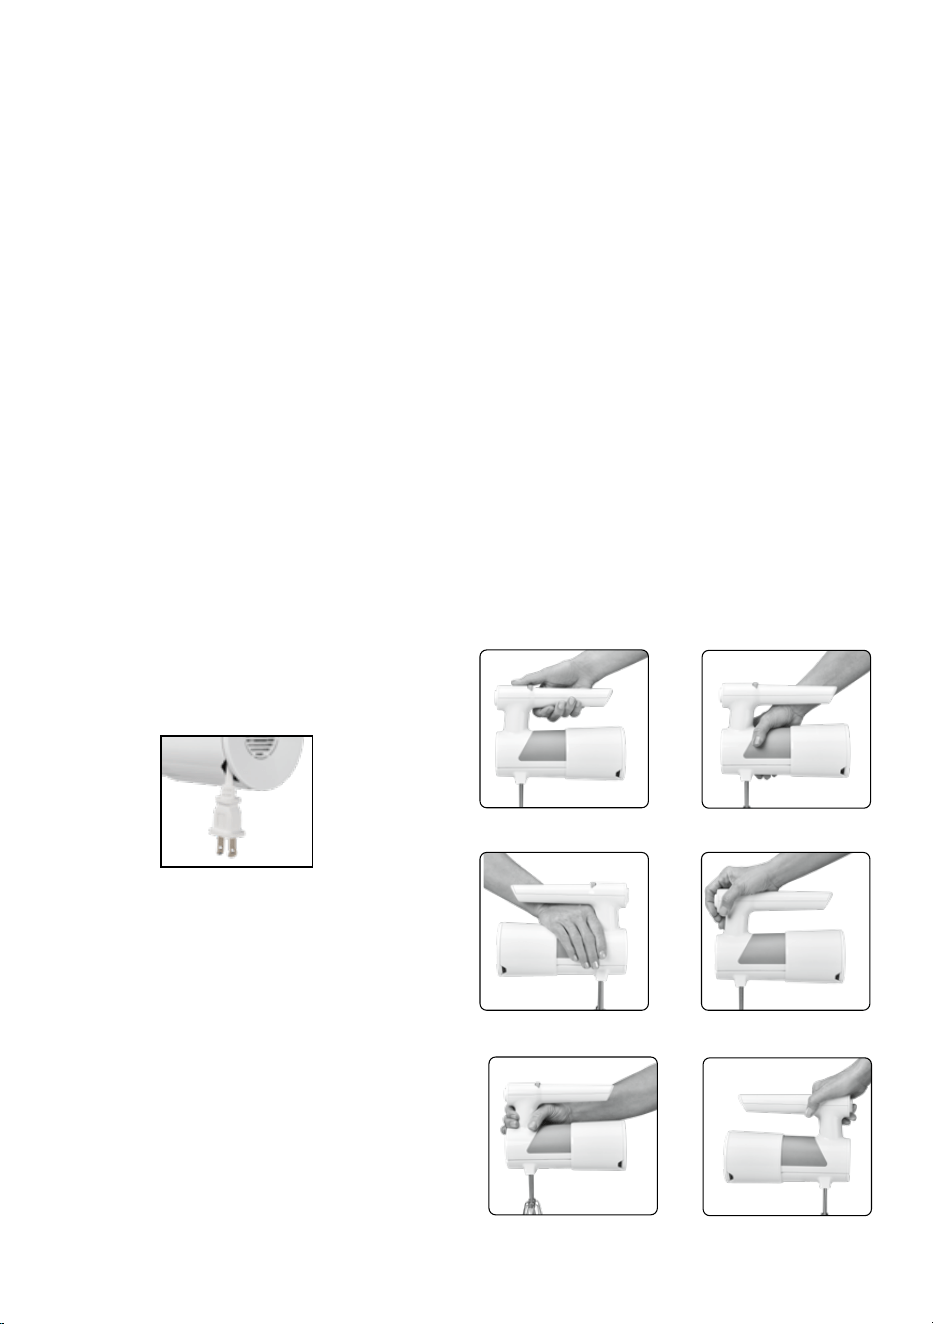
Notice
This appliance has a polarized plug (one prong is
wider than the other). As a safety feature, this plug
will t into a polarized outlet only one way. If the plug
does not t fully into the outlet, reverse the plug. If it
still does not t, contact a qualied electrician. Do
not modify the plug in any way.
Features and Benefits
Strong and Comfortable to Use:
• Innovative handle design: Ergonomically designed
body for unparalleled comfort and control at any
angle.
• SmoothStart
®
: When the mixer is turned on, the
beaters/whisk start spinning very slowly to prevent
ingredients from splattering.
• Easy to Clean: Smooth, sealed housing wipes clean
easily. Mixing beaters, chef’s whisk, and storage
case are dishwasher safe.
• Heel Rest: Allows mixer to rest on countertop
vertically.
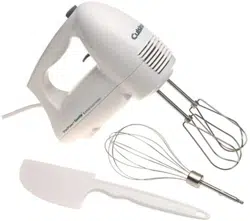
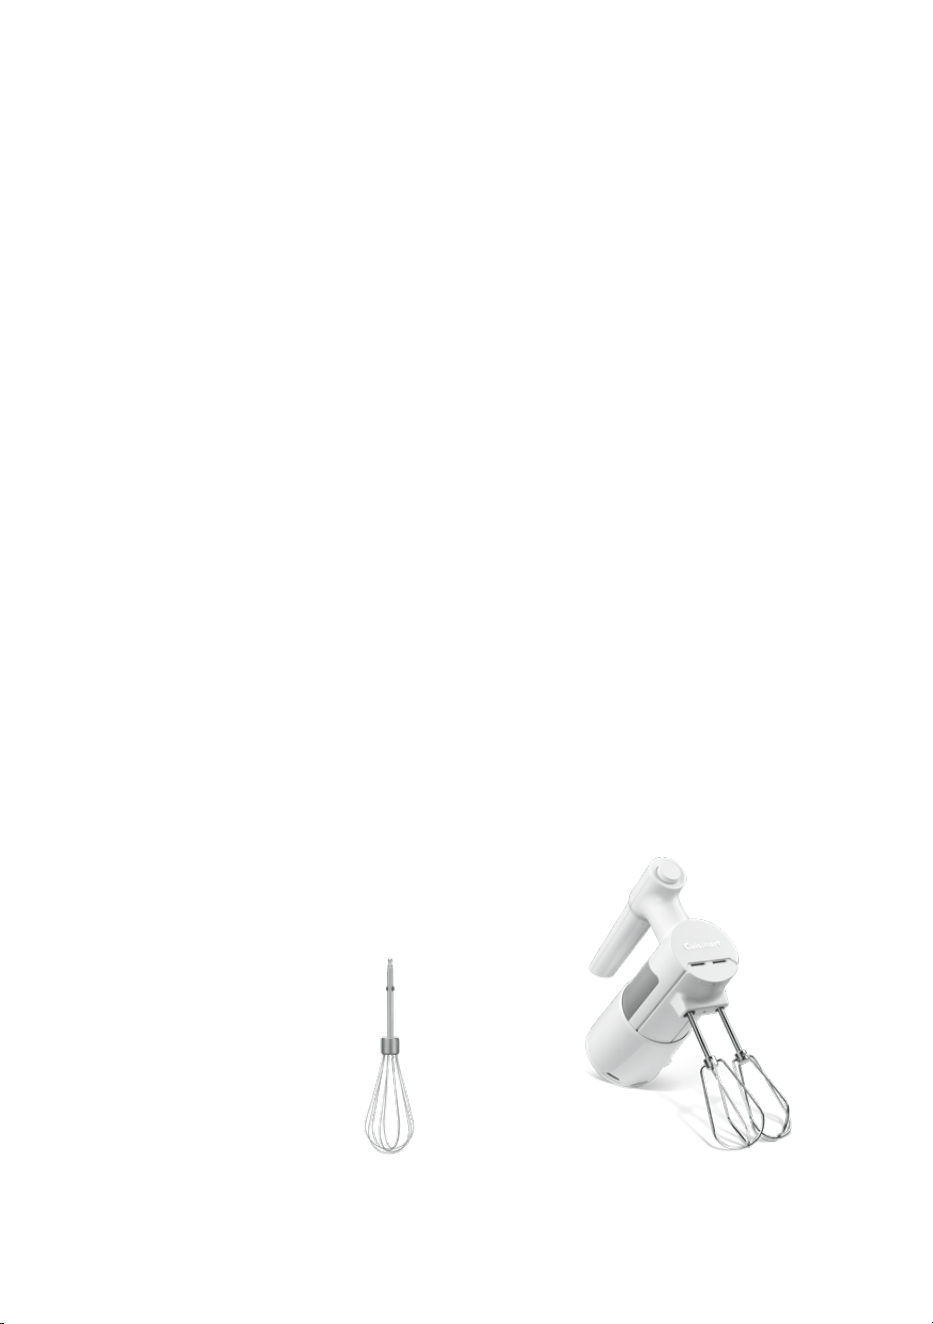
Parts
• Lighted LED Speed Display: Digital speed settings
are easy to read.
• 5-Speed Control Dial: Allows you to change speeds
quickly while you are mixing.
• Integrated Cord Wrap: Saves space for easy storage.
• Beater Release Button: Conveniently located for
easy ejection of mixing beaters or chef’s whisk.
• Mixing Beaters: Extra-wide beaters allow for
superior mixing with faster aeration. Designed
without center post to prevent ingredients from
clogging beaters. Beaters are easy to clean and
dishwasher safe.
• Chef’s Whisk: 1.75-inch-diameter whisk adds
volume to whipped cream and creates sti,
ne-textured egg whites. Provides superior
whipping and aerating, is easy to clean
and is dishwasher safe.
Chef’s Whisk
Mixing Beaters
Innovative
Handle
4
Use, Care, and
Maintenance
To Turn Hand Mixer On/O
Ensure the dial is all the way to the left and the mixer
is o. Plug mixer into outlet. Scroll the dial to the
right to the desired speed. Mixer will immediately
begin with the SmoothStart
®
feature at any speed
selected. To turn mixer o, scroll the dial all the way
back to the left.
To Insert Beaters:
1. Ensure unit is turned o and unplugged.
2. Insert beater with collar into the larger hole. Push
beater in until it clicks into place. Insert the beater
without collar into the smaller hole. Push beater in
until it clicks into place.
To Insert Chef’s Whisk:
1. Ensure unit is turned o and unplugged.
2. Holding chef’s whisk by its hub, insert it into either
hole and push in until it clicks. DO NOT HOLD OR
PUSH WHISK FROM WIRE END AS IT MAY DAMAGE
WIRES.
3. To release attachment: simply push the release
button at handle front.
Cord Wrap
Slide the cord cover o the mixer to expose the cord
storage area. Push cord in to wrap, making sure to
insert plug in as well. Slide cord cover back to cover
cord.
To Remove Attachments
Ensure the hand mixer is o by turning the dial to the
left, and then unplug from wall outlet. Press the
beater release button and remove the attachments
from the mixer.
Cleaning
1. Wash all attachments after each use in hot, soapy
water or in a dishwasher.
2. NEVER PUT THE MOTOR HOUSING IN WATER OR
OTHER LIQUIDS TO CLEAN. Wipe it with a damp
cloth or sponge. Do not use abrasive cleansers,
which could scratch the surface.
3. To clean the hand mixer body, rst remove block
cover. The slide the cord cover o the mixer, and
wash separately by hand or top shelf dishwasher.
NOTE: DO NOT USE THE CUISINART
®
HAND MIXER
WITH NONSTICK COOKWARE.
Maintenance
Any other servicing should be performed by an
authorized service representative.
Hand Grips

5
Quick Reference
Guide
Mixing Techniques
The hand mixer should always be set on the lowest
speed when you start mixing.
NOTE: Use the chef’s whisk only for light whipping, as
with heavy cream or egg whites. For all other mixing
tasks, use the beaters.
Speed 1
• Start mixing most ingredients together
• Combine dry ingredients
• Start creaming butter and sugar
• Start whipping cream
• Start whipping egg whites. Add our to batters,
or liquids to dry ingredients
Speed 2
• Sift and aerate dry ingredients
• Mash potatoes/squash
• Mix heavy cookie doughs
• Add nuts, chips, and dried fruit to doughs and
batters
• Add eggs to batters/doughs
• Mix pudding ingredients
• Cut cold butter into dry ingredients
(for pie doughs, biscuits, and pastries)
Speed 3
• Complete beating cake mixes and batters
• Complete mixing frostings
• Whip potatoes/squash
• Beat whole eggs/yolks
• Cream butter and sugar until light and uy
Speed 4
• Whip butter or cream cheese to light and uy
consistency for dips and spreads
Speed 5
• Complete whipping cream
• Complete whipping egg whites/meringues
Mixing Tips
Measure ingredients before beginning the mixing
process.
For best results, do not measure our directly from
the bag. Pour into a container or bowl, scoop out the
our, and level with the back of a knife or spatula. For
our stored in a container, stir before measuring.
more thoroughly at room temperature.
Remove butter for recipe from refrigerator rst and
cut into ½-inch pieces, then measure out remaining
ingredients for recipe. This will hasten the warming
process. Do not warm butter for baking in a
microwave unless instructed to do so. Microwaving
can melt butter; melted butter will change the
nal product.
The best cheesecakes are made when the eggs and
cream cheese are at a similar room temperature.
While the Cuisinart
®
5-Speed Hand Mixer can easily
mix cold cream cheese, the trick is not to add too
much air, which can cause cracking. For best results,
use heavy cream, cold from the refrigerator, for
whipped cream.
To separate eggs for any recipe, break one at a time
into a small bowl, gently remove yolk, then transfer
egg white to spotlessly clean mixing bowl. If a yolk
breaks into the egg white, reserve that egg for
another use. Just a drop of egg yolk will prevent the
whites from whipping properly.
To achieve the highest volume of egg whites, the
mixing bowl and chef’s whisk attachment or beaters
must be spotlessly clean and free of any fat, oil, etc.
For best results, use a spotlessly clean stainless steel
or glass mixing bowl. If available, use a copper mixing
bowl. (Plastic bowls are not recommended for
whipping egg whites.) The presence of any trace of fat
or oil will prevent the egg whites from increasing in
volume. Wash bowl and attachments thoroughly
before beginning again.
Occasionally ingredients may stick to the sides of the
mixing bowl. When this occurs, turn mixer o and
scrape the sides of the bowl with a rubber spatula.

6
LIMITED
WARRANTY
Subject to the exclusions and limitations contained
herein, Conair LLC dba Cuisinart (“Cuisinart”) warrants
that the
Cuisinart
®
5-Speed Hand Mixer
(“Product”)
will be free from material defects in materials and
workmanship under normal home use conditions for
a period of THREE (3) years beginning on the date the
Product was purchased in its original, sealed packag-
ing, unless otherwise specified in this Limited Warranty.
This Limited Warranty is only for U.S. consumers
(defined herein as purchasers at retail for personal,
family, or household use) who originally purchase the
Product from Cuisinart or an authorized Cuisinart
®
reseller (if you are unsure whether a retailer or other
point of sale is an authorized or unauthorized Cuisinart
reseller, contact Cuisinart).
This Limited Warranty does NOT cover:
• Normal wear and tear;
• Any Product purchased by commercial purchasers
or for commercial or nonhousehold uses;
• Accessories, parts, or software added to the Product
after the system is shipped from Cuisinart;
• Any costs associated with the replacement
or repair of the Product, including labor, installation,
or other costs incurred by you without prior
Cuisinart approval;
• Damage to the Product, defective conditions, or
nonconformities due to: (1) external causes, includ-
ing shipping, accidents, problems with electrical
power (Product designed only for use with 120-volt
outlets), abnormal conditions (such as mechanical
or environmental); (2) usage not in accordance with
Product instructions; (3) misuse, neglect, unauthor-
ized alteration, unauthorized repair; and (4) acts of
God or other events beyond Cuisinart’s control;
• Damage caused by you or any unauthorized third
party, even though necessary repairs and mainte-
nance might be performed by any company.
• Damage caused by accessories or replacement parts
not specifically authorized by Cuisinart; and
• Any Product where the original Product identification
markings (trademark or serial number) have been
removed, altered, or obliterated.
It is recommended that you visit the website, https://
www.cuisinart.com/register-your-product.html, for a
fast, efficient way to complete your Product registra-
tion. However, Product registration does not eliminate
the need for the consumer to maintain the original
proof of purchase in order to obtain the warranty
benefits. In the event that you do not have proof of
purchase date, the purchase date for purposes of this
Limited Warranty will be the date of manufacture.
HASSLE-FREE WARRANTY
If the Product that is the subject of this Limited
Warranty fails during the warranty period for reasons
covered by this Limited Warranty, Cuisinart will, at its
option, repair the Product, replace the Product with
another identical or reasonably equivalent product, or
if Cuisinart is unable to repair or replace the Product,
refund the purchase price, less the amount directly
attributable to the consumer’s prior usage of the
Product. To obtain a return shipping label, email us
at https://www.cuisinart.com/customer-care/product-
assistance/product-inquiry/, or call our Consumer
Service Center toll-free at 1-800-726-0190 to speak
with a representative.
Upon receipt of the Product, Cuisinart will inspect the
Product and, if required under this Limited Warranty,
attempt to repair, replace, or refund the Product within
thirty (30) days. However, there may be delays beyond
Cuisinart’s control, in which case that time period may
be extended as reasonably necessary.
IMPORTANT: If the nonconforming Product is to be
serviced by someone other than Cuisinart’s Authorized
Service Center, please remind the servicer to call our
Consumer Service Center at 1-800-726-0190 to ensure
that the problem is properly diagnosed, the Product is
serviced with the correct parts, and the Product is still
under warranty.
CALIFORNIA RESIDENTS ONLY
The THREE (3) year Limited Warranty period begins
on the date the Product was delivered, which may be
different than the date the Product was purchased.
California residents also have the option of obtaining
the benefits of this Limited Warranty by bringing the
Product to (A) the store where it was purchased or
(B) another retail store that sells Cuisinart products of
the same type. The retail store shall then, according
to its preference, either repair the Product, refer the
consumer to an independent repair facility, replace the
Product with another identical or reasonably equivalent
product, or refund the purchase price less the amount
directly attributable to the consumer’s prior usage of
the Product. California residents may also, according
to their preference, return nonconforming Products
directly to Cuisinart for repair or, if necessary, replace-
ment with another identical or reasonably equivalent
Product by calling our Consumer Service Center toll-
free at 1-800-726-0190. Cuisinart will be responsible for

7
the cost of such repair, replacement, and/or shipping
and handling for such nonconforming Products under
warranty.
THIS LIMITED WARRANTY GIVES YOU SPECIFIC LEGAL
RIGHTS, AND YOU MAY ALSO HAVE OTHER RIGHTS THAT
VARY FROM STATE TO STATE OR BY JURISDICTION. IN
THE EVENT THIS LIMITED WARRANTY IS BREACHED,
YOU MAY HAVE CLAIMS FOR REPLACEMENT, DAMAGES,
OR OTHER PENALTIES
LIMITATIONS OF LIABILITY/ADDITIONAL LIMITATIONS
AND EXCLUSIONS
ALL EXPRESS AND IMPLIED WARRANTIES ARE
LIMITED IN DURATION TO THE LIMITED WARRANTY
PERIOD. NO WARRANTIES APPLY AFTER THAT PERIOD.
SOME STATES (OR JURISDICTIONS) DO NOT ALLOW
LIMITATIONS ON HOW LONG AN IMPLIED WARRANTY
LASTS, SO THIS LIMITATION MAY NOT APPLY TO
YOU. CUISINART’S RESPONSIBILITY UNDER THIS OR
ANY OTHER WARRANTY, IMPLIED OR EXPRESS, IS
LIMITED TO REPAIR, REPLACEMENT, OR REFUND, AS
SET FORTH ABOVE. THESE REMEDIES ARE THE SOLE
AND EXCLUSIVE REMEDIES FOR ANY BREACH OF
WARRANTY. TO THE MAXIMUM EXTENT PERMITTED
BY LAW, CUISINART IS NOT RESPONSIBLE FOR
ANY DIRECT, INDIRECT, SPECIAL, INCIDENTAL, OR
CONSEQUENTIAL DAMAGES RESULTING FROM ANY
BREACH OF WARRANTY, OR UNDER ANY OTHER LEGAL
THEORY (INCLUDING, BUT NOT LIMITED TO, LOST
PROFITS, DOWNTIME, LOSS OF GOODWILL, DAMAGE
TO OR REPLACEMENT OF EQUIPMENT AND PROPERTY,
AND ANY COSTS OF RECOVERING, REPROGRAMMING,
OR REPRODUCING ANY PROGRAM OR DATA STORED
IN OR USED WITH A SYSTEM CONTAINING THE
PRODUCT), EVEN IF CUISINART HAS BEEN ADVISED OF
THE POSSIBILITY OF SUCH DAMAGES. SOME STATES
(OR JURISDICTIONS) DO NOT ALLOW THE EXCLUSION
OR LIMITATION OF INCIDENTAL OR CONSEQUENTIAL
DAMAGES, SO THE ABOVE LIMITATIONS OR EXCLUSIONS
MAY NOT APPLY TO YOU. ALL EXPRESS AND IMPLIED
WARRANTIES ARE LIMITED IN DURATION TO THE
LIMITED WARRANTY PERIOD. NO WARRANTIES
APPLY AFTER THAT PERIOD. SOME STATES (OR
JURISDICTIONS) DO NOT ALLOW LIMITATIONS ON
HOW LONG AN IMPLIED WARRANTY LASTS, SO THIS
LIMITATION MAY NOT APPLY TO YOU.
This Limited Warranty is issued by:
Conair LLC
1 Cummings Point Road
Stamford, CT 06902
1-800-726-0190

8
Recipes
Gluten-Free Banana Muffins .............................. 8
Lemon-Thyme Shortbread .................................. 9
Edible Cookie Dough ............................................ 9
Ginger Cookies ......................................................10
Pavlova with Blood Orange
and Pomegranate ................................................10
Chocolate Cream Pie ............................................11
Yellow Buttermilk Sheet Cake
with Fluffy Chocolate Frosting ......................... 12
Creamy Mashed Potatoes ..................................12
Buffalo Chicken Dip ............................................. 13
Pimento Cheese Spread ...................................13
Gluten-Free Banana Muffins
Gluten-free, all-purpose our blends make gluten-
free baking easy and convenient. There are a
number of dierent brands on the market, so try a
few and nd your favorite.
Makes 12 muns
Nonstick cooking spray
2 cups gluten-free, all-purpose our
½ cup whole rolled oats (not quick cooking)
¹⁄³ cup granulated sugar
¹⁄³ cup packed light brown sugar
1½ teaspoons baking powder
¼ teaspoon baking soda
½ teaspoon kosher salt
½ teaspoon xanthan gum (optional; use only if
our blend does not include it)
½ teaspoon ground cinnamon
1½ cups mashed, very ripe bananas (about 3
medium bananas)
½ cup vegetable oil
2 large eggs, room temperature
½ teaspoon pure vanilla extract
1. Preheat the oven to 375°F with the rack in the
middle position. Lightly coat a regular 12-cup
mun pan with nonstick cooking spray; reserve.
2. Put the our, oats, sugars, baking powder, baking
soda, salt, xanthan gum (if using), and cinnamon
into a mixing bowl. Using the beaters, mix on
Speeds 1 to 2 until fully combined, about 30
seconds.
3. In a separate, large mixing bowl, combine the
bananas, oil, eggs, and vanilla extract on Speed 3
until smooth and creamy, 1 to 2 minutes. Add the
dry ingredients and mix on Speed 2 until fully
combined.
4. Divide evenly among the prepared mun cups.
Bake until the tops of the muns spring back to
the touch, about 16 to 18 minutes. Transfer pan to
a wire rack. Enjoy muns warm or at room
temperature.

9
Lemon-Thyme Shortbread
While thyme may seem like an unlikely ingredient
for a sweet cookie, you will quickly learn why
these are so popular.
Makes about 3 dozen cookies
Cookie Dough:
1¾ cups unbleached, all-purpose our
½ teaspoon kosher salt
16 tablespoons (2 sticks; ½ pound) European-style,
unsalted butter, cut into 8 pieces, room
temperature
¹⁄³ cup granulated sugar
¹⁄³ cup confectioners’ sugar, sifted
2 large egg yolks, room temperature
1 to 2 tablespoons fresh thyme leaves
2 tablespoons grated lemon zest
Lemon Icing:
½ cup confectioners’ sugar, sifted
2 tablespoons heavy cream
2 teaspoons fresh lemon juice
Pinch ne sea salt
1. Put the our and salt into a medium mixing bowl.
Using the beaters, mix on Speed 1 to fully
combine, about 30 seconds. Reserve.
2. Put the butter into a large mixing bowl. Mix on
Speeds 2 to 3 until creamy, then add the sugars.
Mix on Speeds 2 to 3 until light, then add the egg
yolks, and beat until combined. Add the dry
ingredients, and mix on Speed 2 until evenly
combined. Add the thyme and lemon zest, and
gently mix into dough.
3. Divide dough into two disks. Place each piece of
dough between two separate pieces of
parchment. Roll each out to ¼-inch thickness.
Transfer the dough to a baking sheet and cover
tightly with plastic wrap. Refrigerate overnight.
4. Preheat the oven to 350°F with racks in the lower
and upper thirds of the oven. Line two rimmed
baking sheets with parchment paper.
5. Take the dough out of the refrigerator. Use a
1½-inch round cutter to form small disks. Transfer
to the prepared baking sheets. Chill for about 10
minutes. Repeat with remaining dough, reforming
and rerolling the scraps as necessary.
6. Bake the chilled dough until just browned around
the edges, about 12 minutes, rotating the pans if
necessary. Cool the cookies completely.
7. While cookies are cooling, prepare the icing. Put
the sugar, cream, lemon juice, and salt into a
medium mixing bowl, and then mix on Speed 1
until very smooth and spreadable. If the icing
seems too thick, add more cream, 1 teaspoon at a
time. If it seems too thin, add more confectioners’
sugar, 1 teaspoon at a time. Spread on top of the
cooled cookies.
Edible Cookie Dough
Enjoy that dough guilt-free (well, egg-free!) with this
edible cookie dough. Eat by the scoop, or even
crumble into vanilla ice cream; there are so many
possibilities.
Makes about 3½ cups
8 tablespoons (1 stick) unsalted butter, cut into 4
pieces, room temperature
⅔ cup packed light brown sugar
⅓ cup granulated sugar
2 tablespoons milk (any fat variety or nondairy
alternative)
1 tablespoon pure vanilla extract
1⅓ cups unbleached, all-purpose our (you can
substitute a gluten-free, all-purpose our
blend)*
½ teaspoon kosher salt
1 cup semisweet chocolate chips
1. Put the butter and sugars into a large mixing bowl.
Mix on Speeds 2 to 4 until very light and creamy,
about 2 minutes. Stop to scrape down the bowl as
needed.
2. While mixing on Speed 2, add the milk and vanilla
extract. Add the our and salt, and mix on Speed
2 until completely combined. Add the chips and
mix on Speed 2.
3. Scoop the dough into desired-size pieces. While
the dough can be eaten immediately, it is best
chilled. Store in the refrigerator for up to 1 week
or in the freezer for up to 1 month.
* It is important to precook our before using to
avoid consuming a raw product. It is simple to do
in your own home oven. Spread the our that you
will be using on a rimmed baking pan. Put into a
350°F oven and cook for about 5 minutes, stirring
halfway through. The our needs to reach 160°F to
be sure that it is safe to eat.

10
Ginger Cookies
Not your ordinary ginger cookie. We up the zing with
chopped crystallized ginger in these chewy and spicy
treats.
Makes about 2½ dozen cookies
2¼ cups unbleached, all-purpose our
1 teaspoon baking soda
1 tablespoon ground ginger
1 teaspoon ground cinnamon
½ teaspoon ground allspice
¾ teaspoon kosher salt
¼ cup nely chopped crystallized ginger
12 tablespoons (1½ sticks) unsalted butter, cut into
1-inch pieces, room temperature
¼ cup molasses
¾ cup packed light brown sugar
¼ cup granulated sugar
1 large egg, room temperature
1 teaspoon pure vanilla extract
¹⁄³ cup turbinado sugar, for rolling
1. Preheat the oven to 350°F with racks in the lower
and upper thirds of the oven. Line two baking
sheets with parchment paper.
2. Put the our, baking soda, spices, and salt into a
medium mixing bowl. Using the beaters, mix on
Speed 1 to fully combine, at least 30 seconds. Add
the chopped ginger and mix on Speed 1 to coat;
reserve.
3. Put the butter and molasses into a large mixing
bowl. Mix, starting at Speed 2 and increasing to
Speed 4, until smooth, about 2 minutes. Scrape
down the bowl and then add the sugars. Mix on
Speeds 2 to 4 until very light and the sugar has
dissolved into the butter and molasses, about 2
minutes. Add the egg, mixing on Speeds 2 to 3,
and then the vanilla extract. Add the dry
ingredients and mix on Speed 2 until just
combined.
4. Put the turbinado sugar into a shallow bowl or
baking pan.
5. Scoop the dough into golfball-size pieces. Roll in
the turbinado sugar and then place on the
prepared baking sheets. Gently atten each piece
of dough with the bottom of a clean glass.
6. Bake until just set at the edges, 12 to 15 minutes.
Allow pans to cool between batches of cookies.
Pavlova with Blood Orange
and Pomegranate
A showstopping dessert. This gorgeous creation
needs to be eaten the day it is made, preferably a
day that is not humid!
Makes 12 servings
Meringue:
4 large egg whites
Pinch cream of tartar
Pinch kosher salt
1 cup granulated sugar
2 teaspoons cornstarch, sifted
1 teaspoon white vinegar
¼ teaspoon pure vanilla extract
½ teaspoon grated citrus zest
Topping:
2 blood oranges, peeled and segmented
3 tablespoons pomegranate seeds
½ cup granulated sugar
½ cup water
1 cup blood orange juice (for a pink-red syrup,
substitute with pomegranate juice; blood
orange makes a dark orange-colored syrup)
¾ cup heavy cream
¼ cup sifted confectioners’ sugar
1 teaspoon pure vanilla extract
Finely grated citrus zest, for garnish (optional)
1. Preheat the oven to 350°F with the rack in the
middle position. Line a cookie sheet with
parchment paper. (If your baking pan is rimmed,
invert it so you are using the bottom. This will
make transferring the meringue easier once it has
baked.)
2. Prepare the meringue. Put the egg whites, cream
of tartar, and salt into a large mixing bowl (make
sure it is spotlessly clean). Using the whisk, start
mixing on Speed 1 and very gradually increase to
Speed 3. Whip until the whites form soft peaks.
With the mixer running, gradually add the
granulated sugar. Increase to Speed 5 and whip
until sti peaks form, about 8 minutes. Add the
cornstarch, vinegar, vanilla, and zest, and gently
mix on Speed 2 to combine.
3. Transfer the meringue to the parchment-lined
baking pan. Shape into an 8-inch circle and, using
a spatula or knife, scrape the sides upward, from

11
the bottom of the meringue to the top, to create
smooth edges along the sides of the meringue
and little peaks at the top.
4. Transfer to the oven and then immediately reduce
the temperature to 200°F.
5. Bake for 1½ hours, until the edges and top are dry;
the meringue should be very pale. At the end of
baking time, turn o the oven, but leave the
meringue in the oven until it has cooled
completely, about 1 hour.
6. While the meringue is cooling, prepare the
topping. Be sure that the oranges have no visible
white pith on the segments. Reserve on a plate
with the pomegranate seeds.
7. Prepare the orange syrup. Put the sugar and water
into a heavy-bottomed saucepan. Cook over
medium heat until the sugar has dissolved, then
add the juice. Cook until the mixture thickens and
coats the bottom of the pan, 20 to 25 minutes.
Reserve and cool. NOTE: If the syrup seems too
thick to use, you can thin it with hot water, adding
a teaspoon at a time.
8. Once the meringue is fully cool, prepare the
whipped cream. Put the cream into a large mixing
bowl. Using the whisk, start whipping the cream
on Speed 1, gradually increasing to Speed 3, for
about 1 minute, so that the cream has some body.
Add the sugar and vanilla extract, and continue to
whip to Speed 4 until cream forms soft peaks.
9. Assemble the pavlova. Put the meringue on a
serving plate. Fill with the whipped cream and
then, using a slotted spoon, top the whipped
cream with the fruit. Drizzle the syrup around the
plate. You may garnish with grated zest as well.
10. Serve immediately.
Chocolate Cream Pie
This crowd-pleasing pie is perfect for any holiday
or special occasion.
Makes about 12 servings
Crust:
2½ cups chocolate cookie crumbs (from about 24
chocolate sandwich cookies)
5 tablespoons unsalted butter, melted
Filling:
¼ cup packed light brown sugar
¼ cup granulated sugar
3 tablespoons unsweetened cocoa powder
2½ tablespoons cornstarch
¼ teaspoon kosher salt
3 cups half-and-half
3 large eggs, lightly beaten
4 ounces semisweet chocolate, chopped
3 tablespoons unsalted butter, cut into small dice
Topping:
2 cups heavy cream, well-chilled
¼ cup plus 2 tablespoons granulated sugar
Chocolate curls, for garnish
1. Make the crust. Preheat the oven to 350°F with
the rack in the middle position.
2. Put the cookie crumbs and melted butter into a
medium mixing bowl. Using the beaters, mix on
Speeds 1 to 2 to fully combine. Transfer the crumb
mixture to a 9-inch pie plate. Press evenly into the
bottom and sides.
3. Bake for 10 to 15 minutes, until fully set. Cool
completely while preparing the lling.
4. Put the sugars, cocoa powder, cornstarch, and
salt into a large, wide saucepan (NOTE: DO NOT USE
THE CUISINART
®
HAND MIXER WITH NONSTICK
COOKWARE). Using the beaters, mix on Speed 1 to
combine. While still mixing on Speed 1, gradually add
the half-and-half and then the eggs, and continue to
mix until completely smooth.
5. Place the pan over medium-low heat. Mix
occasionally on Speeds 1 to 2 to prevent the mixture
from sticking to the bottom of the pan (do not leave
the pan unattended).
6. Cook the mixture, continuing to mix on Speed 1,
until just about boiling and thickened, and then
remove from the heat. Using a heatproof spatula or
spoon, stir in the chopped chocolate and butter by
hand until completely incorporated. Strain the lling
through a ne-mesh strainer into a medium bowl,
and then transfer the lling into the cooled crust.
Cover the lling directly with waxed paper or plastic
wrap to prevent a skin from forming. Transfer to the
refrigerator, and chill until set.
7. After the lling is set, prepare the whipped cream.
Put the cream into a large mixing bowl. Using the
whisk, start whipping the cream on Speed 1,
gradually increasing to Speed 3, for about 1 minute
so that the cream has some body. Add the sugar and
continue to whip to Speed 4 until the cream forms
medium-sti peaks.
8. Top the pie evenly with the whipped cream.
Garnish with chocolate curls prior to serving.

12
Yellow Buttermilk Sheet Cake
with Fluffy Chocolate Frosting
The go-to cake recipe for all you yellow cake lovers
out there. This goes well with just about
any frosting, but we especially love it with our
chocolate frosting for a classic combination.
Makes one 13x9-inch sheet cake (16 servings)
Cake:
Nonstick cooking spray
3 cups cake our (not self-rising)
1¾ cups granulated sugar
1 tablespoon baking powder
¾ teaspoon kosher salt
1½ cups buttermilk, room temperature
2 large eggs, room temperature
2 large egg yolks, room temperature
2 teaspoons pure vanilla extract
1 cup vegetable oil
Chocolate Frosting:
4 cups confectioners’ sugar, sifted
4 ounces unsweetened chocolate, melted and
cooled
2 ounces semisweet chocolate, melted and
cooled
8 tablespoons (1 stick) unsalted butter, cut into
½-inch pieces, room temperature
2 teaspoons pure vanilla extract
¼ teaspoon ne sea salt
10 to 12 tablespoons milk or cream
1. Preheat the oven to 350°F with the rack in the
middle position. Spray a 13x9-inch cake pan with
nonstick cooking spray and line the bottom with
parchment paper. Reserve.
2. Put the our, sugar, baking powder, and salt into a
large mixing bowl. Using the beaters, mix on
Speed 1 to fully combine, at least 30 seconds.
Reserve.
3. Put the buttermilk, eggs, yolks, and vanilla extract
into a medium bowl. Mix on Speed 3.
4. Reduce to Speed 2. Gradually add the oil to the
wet ingredients, and mix until combined, then
increase to Speeds 3 to 4 and mix until smooth,
about 1½ minutes.
5. Gradually add add the liquid mixture to the cake
batter, mixing on, mixing on Speed 2 until
completely combined.
6. Pour the batter evenly into the prepared cake pan.
Tap gently on the countertop to remove any
bubbles, and then place in the oven. Bake until
the center springs back to the touch and a cake
tester comes out clean when inserted in the
center, about 25 minutes.
7. Remove from the oven. Put the pan on a wire rack
until cool to the touch, then transfer the cake to a
wire cooling rack to cool completely before
frosting.
8. While cake is cooling, prepare the frosting. Put the
sugar, chocolates, butter, and vanilla extract into a
large mixing bowl. Using the whisk, mix on Speed
2 for 2 minutes. Add 10 tablespoons of the milk.
Increase speed to 4 and beat until smooth and
uy, scraping down the bowl as needed, about 4
minutes. If the frosting seems thick or sti, add
milk, 1 tablespoon at a time, until easily
spreadable.
Creamy Mashed Potatoes
This recipe is a blank canvas. We keep it simple,
but it can easily be changed with mix-ins or
toppings, such as chopped chives or scallions,
crispy bacon bits, or grated Cheddar.
Makes about 6 cups
2½ pounds Yukon Gold potatoes, peeled and cut
into 1-inch pieces
½ cup whole milk, room temperature
3 tablespoons unsalted butter, cut into 1-inch
pieces, room temperature
¾ teaspoon kosher salt
½ teaspoon freshly ground black pepper
½ cup mascarpone cheese or crème fraîche, room
temperature
1. Put the potatoes into a medium to large nonstick
stockpot; add cold water to cover by 2 inches. Set
over medium-high heat. Bring to a boil, and then
reduce to simmer until the potatoes are very soft,
10 to 15 minutes.
2. Drain the potatoes and then return to the pot.
Using the beaters, mix on Speeds 1 to 2 to mash
to desired consistency, about 30 seconds. Add the
remaining ingredients and mix on Speed 2 until
fully incorporated.
3. Taste and adjust seasoning according to
preference.

13
Buffalo Chicken Dip
For the big game or the next holiday gathering, this
dip is sure to please a hungry crowd. The hand mixer
makes quick work of shredding cooked chicken.
Use this trick for weekly meal prep; shredded chicken
can be the foundation for countless meals.
Makes about 6 cups
Nonstick cooking spray or olive oil
1 whole roasted chicken, warm, about 3½ to 4
pounds
16 ounces (2 standard packages) cream cheese,
each package cut into 4 pieces, room
temperature
1 celery stalk, diced
1 teaspoon kosher salt
½ teaspoon freshly ground black pepper
6 to 8 tablespoons hot sauce*
1 cup crumbled blue cheese
Cut veggies, bread pieces, or tortilla chips, for
serving
1. Preheat the oven to 375°F with the rack in the
middle position. Lightly coat the inside of a
1½-quart baking dish with cooking spray. Reserve.
2. Remove all meat from the roasted chicken,
discarding the skin and bones. Put the chicken
meat into a large mixing bowl. Using the beaters,
mix on Speed 2 to shred the chicken, about 30
seconds. Once shredded, add the cream cheese,
celery, salt, pepper, and hot sauce. Continue to
mix on Speed 2 until ingredients are well
combined, about 1 minute.
3. Transfer the dip to the prepared baking dish and
top with the crumbled blue cheese. Bake until hot
and bubbling, about 40 minutes.
4. Serve hot with cut veggies, bread pieces, or
tortilla chips.
* We developed this recipe to be on the milder side,
so either adjust the hot sauce accordingly or serve
with some hot sauce on the side, for those who
like it extra spicy.
Pimento Cheese Spread
This recipe stays pretty close to the beloved
Southern favorite. It can be spread on crackers or
toasted bread, or used as a lling as a twist on a
grilled cheese sandwich.
Makes about 2 cups
4 ounces cream cheese, cut into 1-inch pieces,
room temperature
¼ cup mayonnaise
2 cups shredded sharp Cheddar
1 jar (7 ounces) pimentos, drained
½ teaspoon onion powder
¼ teaspoon kosher salt
Pinch freshly ground black pepper
2 dashes hot sauce
1. Put the cream cheese into a medium mixing bowl.
Using the beaters, mix on Speed 3 until softened,
about 30 seconds. Add remaining ingredients and
mix on Speed 2 to fully combine, about 20
seconds.
2. Serve immediately.

©2025 Cuisinart
Glendale, AZ 85307
Printed in China
25CE200874
IB-18983