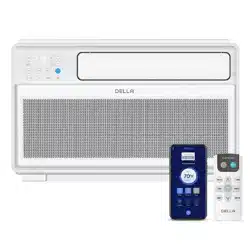
Fenestra Window AC
Instruction Manual
Installation and Operation Guide

Table of Content
Warning and Safety
Name of Parts
04
07
08
27
28
29
31
32
Air Filter
Maintenance Routine
Installation Preview
Installation
09
10
Troubleshooting
Disposal Guideline
Warranty
Power ON / OFF
Operation Modes
- Cool, Fan, Dry, Auto
Change Temperature
Change Fan Speed
22
22
22
23
23
Timer
ECO Mode
Sleep Mode
Display ON / OFF
Filter Reset Button
Wi-Fi Reset Button
Wi-Fi Setup
Operation Tips
Parts of the Air Conditioner
Front Panel
Remote Control
17
18
19
20
Before Installation Care and Maintenance
Having Problems?
Installation
Before Using
Basic Operation
Advance Function
24
24
25
25
25
25
26
4
Before Installation
Before Installation
Warning and Safety
• Read this guide before installation. Failure to follow the safety instructions may result in property damage, serious injury, or death.
• Please Keep this manual.
Danger:
Indicates an IMMINENTLY hazardous situation that, if not avoided, will result in death, serious injury, or serious property damage.
Warning:
Indicates an POTENTIALLY hazardous situation that, if not avoided, will result in death, serious injury, or serious property damage.
Caution:
Indicates an POTENTIALLY hazardous situation that, if not avoided, will result in minor to moderate injury. It may also be used to
indicate unsafe practice.
About Refrigerant
Attention:
Pay additional attention to the instruction.
DO NOT:
Indicates prohibited actions and / or practice.
• The air conditioner is pre-charged with refrigerant. Handle the air conditioner with care and check if there is any
refrigerant may cause frostbite, cardiac arrhythmia, and / or irritation, as well as cause environmental damage.
• In the case of refrigerant leakage, shut down the appliance and disconnect from the power supply. An inspection must
DANGER
DANGER
WARNING
CAUTION
About Installation
• Do not install or use this appliance in the bathroom, laundry area, or places that might come into contact with water.
•
containers such as spray cans.
•
gas appliances, or electric heater.
• Do not alter, change, or modify the appliance.
• The window AC must be stored at its upright position for at least 48 hours before installation to allow the compressor's
oil to settle and prevent damaging the compressor.
• Prevent children from accessing the work area during installation to prevent unforeseeable accident.
• The appliance must be securely attached to the window or wall opening to prevent the AC from falling out.
• Carry out a test run after the installation.
• The appliance should not be installed in a location where the air outlet of the unit is obstructed. Obstruction of these
opening may cause damage or malfunctions to the appliance.
• Wear protective gloves and clothing during installation to prevent cuts or injuries.
WARNING
CAUTION
5v.20241112
Before Installation
Before Installation
Warning and Safety
About Power and Electricity
• Ensure that the power voltage corresponds to that stamped on the rating plate.
• Make sure this appliance is connected to a properly grounded power outlet to prevent electric shock.
• Do not bend, tug, or compress the power cord during installation to prevent damaging the power cord. Damaged
• This appliance must be plugged directly into a wall power socket. Do not use power extensions and / or multi-socket
modules for appliance installation.
WARNING
WARNING
About Operation
•
•
• Do not climb onto or place any objects on the appliance.
• Do not insert any objects into the appliance to prevent damage or injury.
• Do not obstruct the air inlet or outlet.
• Do not operate the appliance with wet hands.
• If the appliance is used in areas without the possibility of ventilation, precautions must be taken to prevent any leaks of
refrigerant.
• Only use the appliance as instructed in this booklet. These instructions are not intended to cover every possible
condition and situation. As with any electrical household appliance, common sense and caution are therefore always
recommended for usage and maintenance.
• This appliance is designed and made for air conditioning in domestic environments only. It must not be used for any
other purpose such as drying clothes or cooling foods.
• This appliance can be used by children 8 years old or above and persons with reduced physical, sensory, or mental
capabilities, or lack of experience and knowledge if they have been given supervision or instruction concerning the use
of the appliance in a safe way and understand the hazards involved.
• Children shall not play with the appliance.
WARNING
CAUTION
6
Warning and Safety
Before Installation
Before Installation
About Handling and Maintenance
Encountering Troubles
• Do not attempt to disassemble, alter, or modify the appliance.
•
• In the case of the appliance emitting smoke, burning smell, leaking water, or making unusual noise, shut down the
•
potential electric shock or other kinds of hazard.
• Before cleaning the unit, the appliance must be shut down and disconnect from the power supply for at least 5 minutes.
WARNING
WARNING
WARNING

7v.20241112
Before Installation
Before Installation
Name of Parts
Package Contents
Window AC
1x
Filler Panel Set
1x
1x
1x 2x
3/4" Screws
4x
1/2" Screws
3x
3/8" Screws
4x
Remote Control
1x
Top Rail
1x
• Screw Driver
• Power Drill
• Refrigerant Leak Detector
• Measuring Tape
• Thermometer
• Cutter / Scissors
Tools Needed (Not included)
8
Before Installation
Before Installation
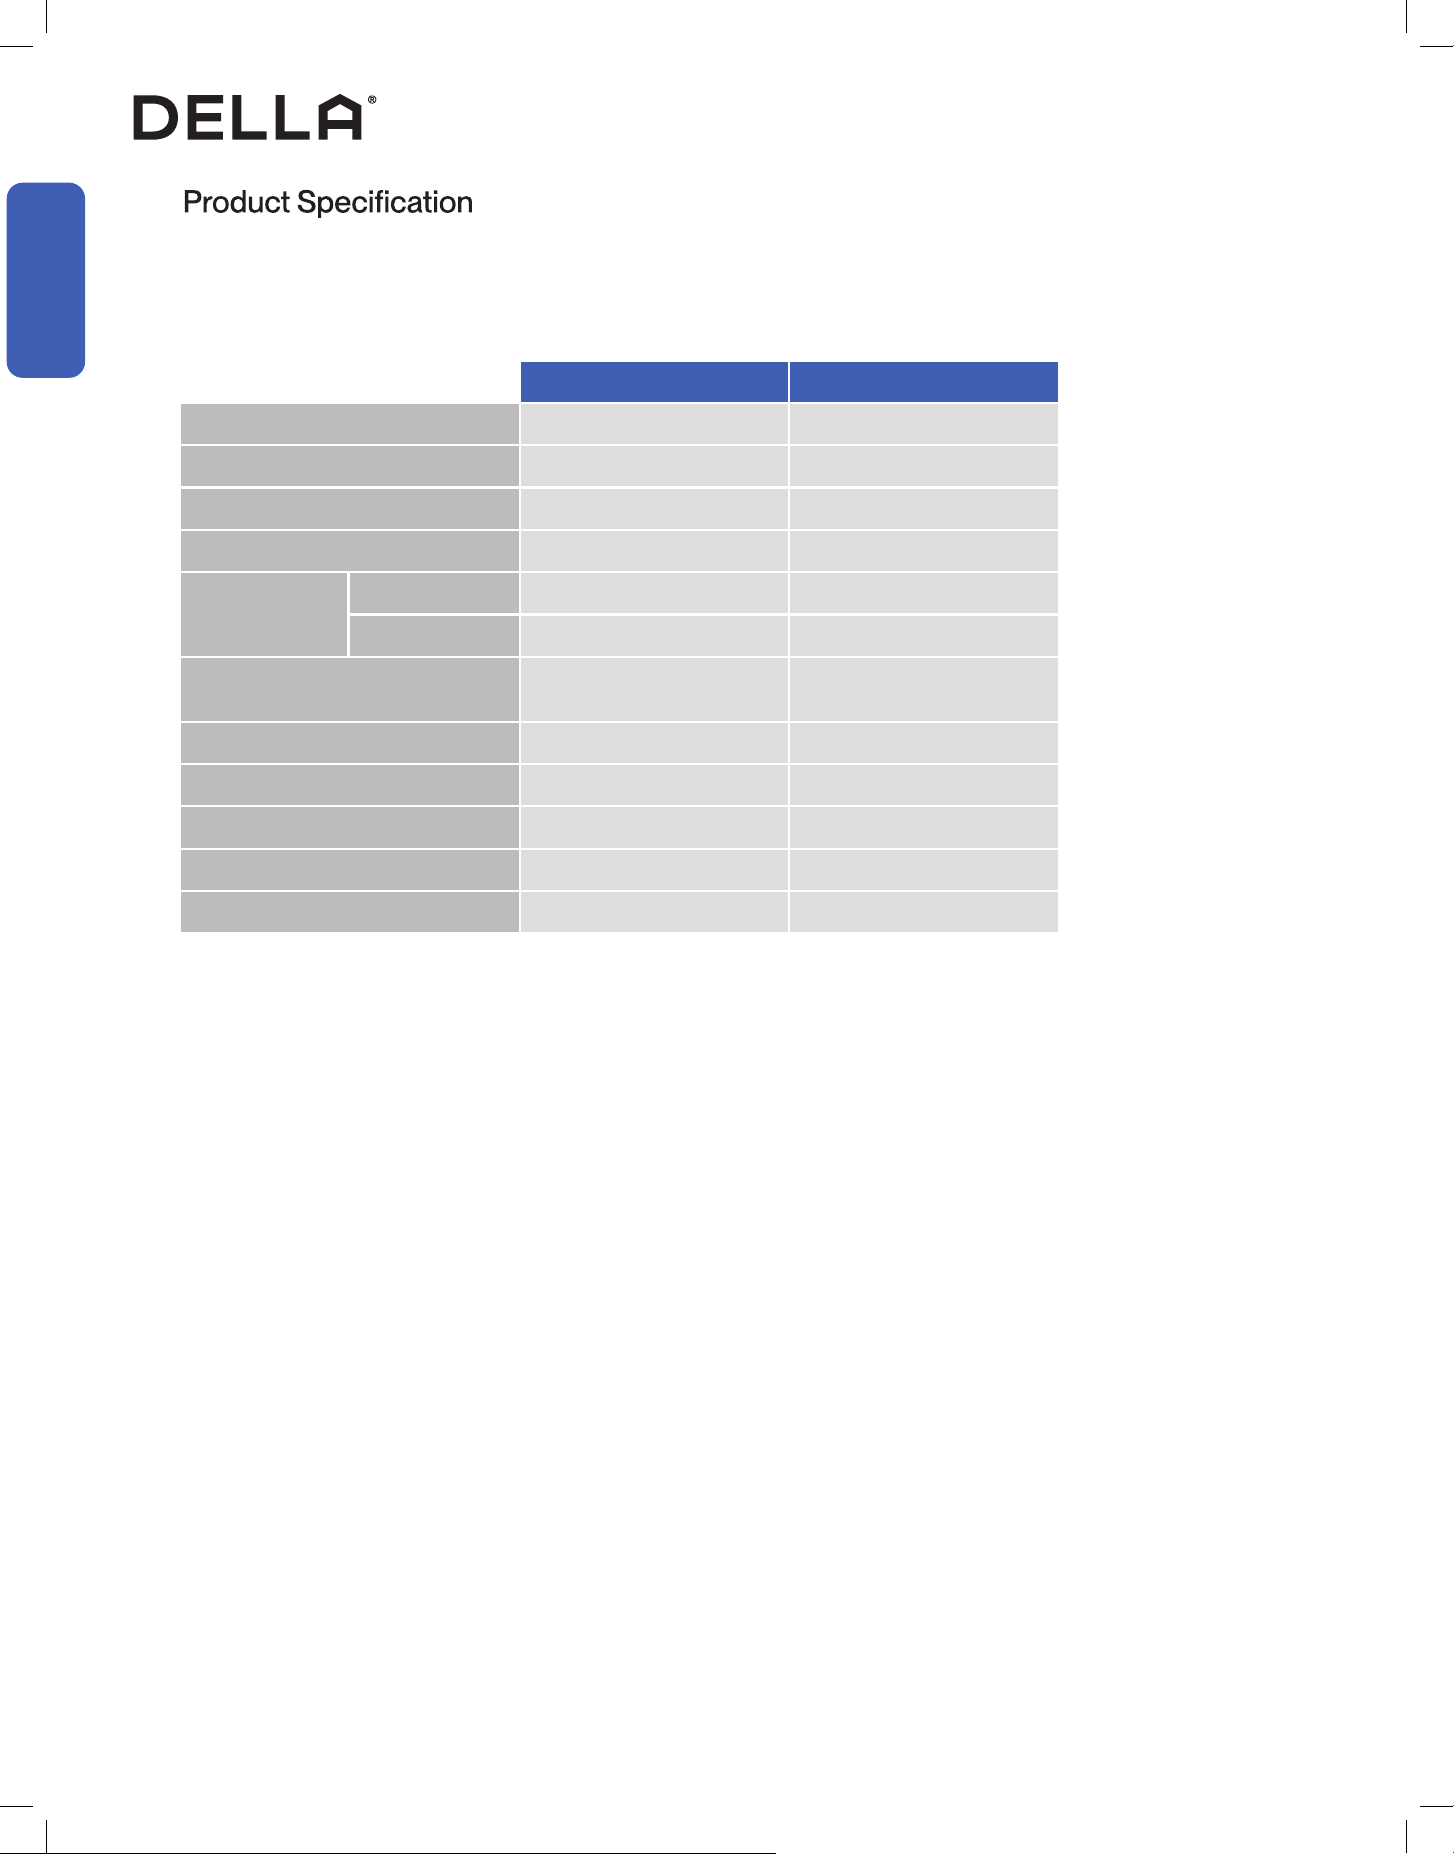
048-TL-W5KWDS 048-TL-W6KWD
Power Supply 115 V / 60 Hz / 1P 115 V / 60 Hz / 1P
Rated Capacity (Btu/h) 5000 6000
Power Consumption 460 W 550 W
Rated Current 4,6 A 6 A
Noise Level
Indoor 51 - 55 dBA 51 - 55 dBA
Outdoor 55 - 60 dBA 53 - 58 dBA
Dimension
15.98" x 13.66" x 12"
406 mm x 347 mm x 305 mm
15.98" x 15.83" x 12.52"
406 mm x 402 mm x 318 mm
Net Weight 36.4 lb / 16.5 kg 38.6 lb / 17.5 kg
Suitable Area 100 - 150 sq. ft 151 - 250 sq. ft
Moisture Removal (per hour) 1.3 pints / 0.6 L 1.7 pints / 0.8 L
Refrigerant Type R32 R32
Refrigerant Amount 6.17 oz 7.23 oz
9v.20241112
Installation
Installation
Installation Preview
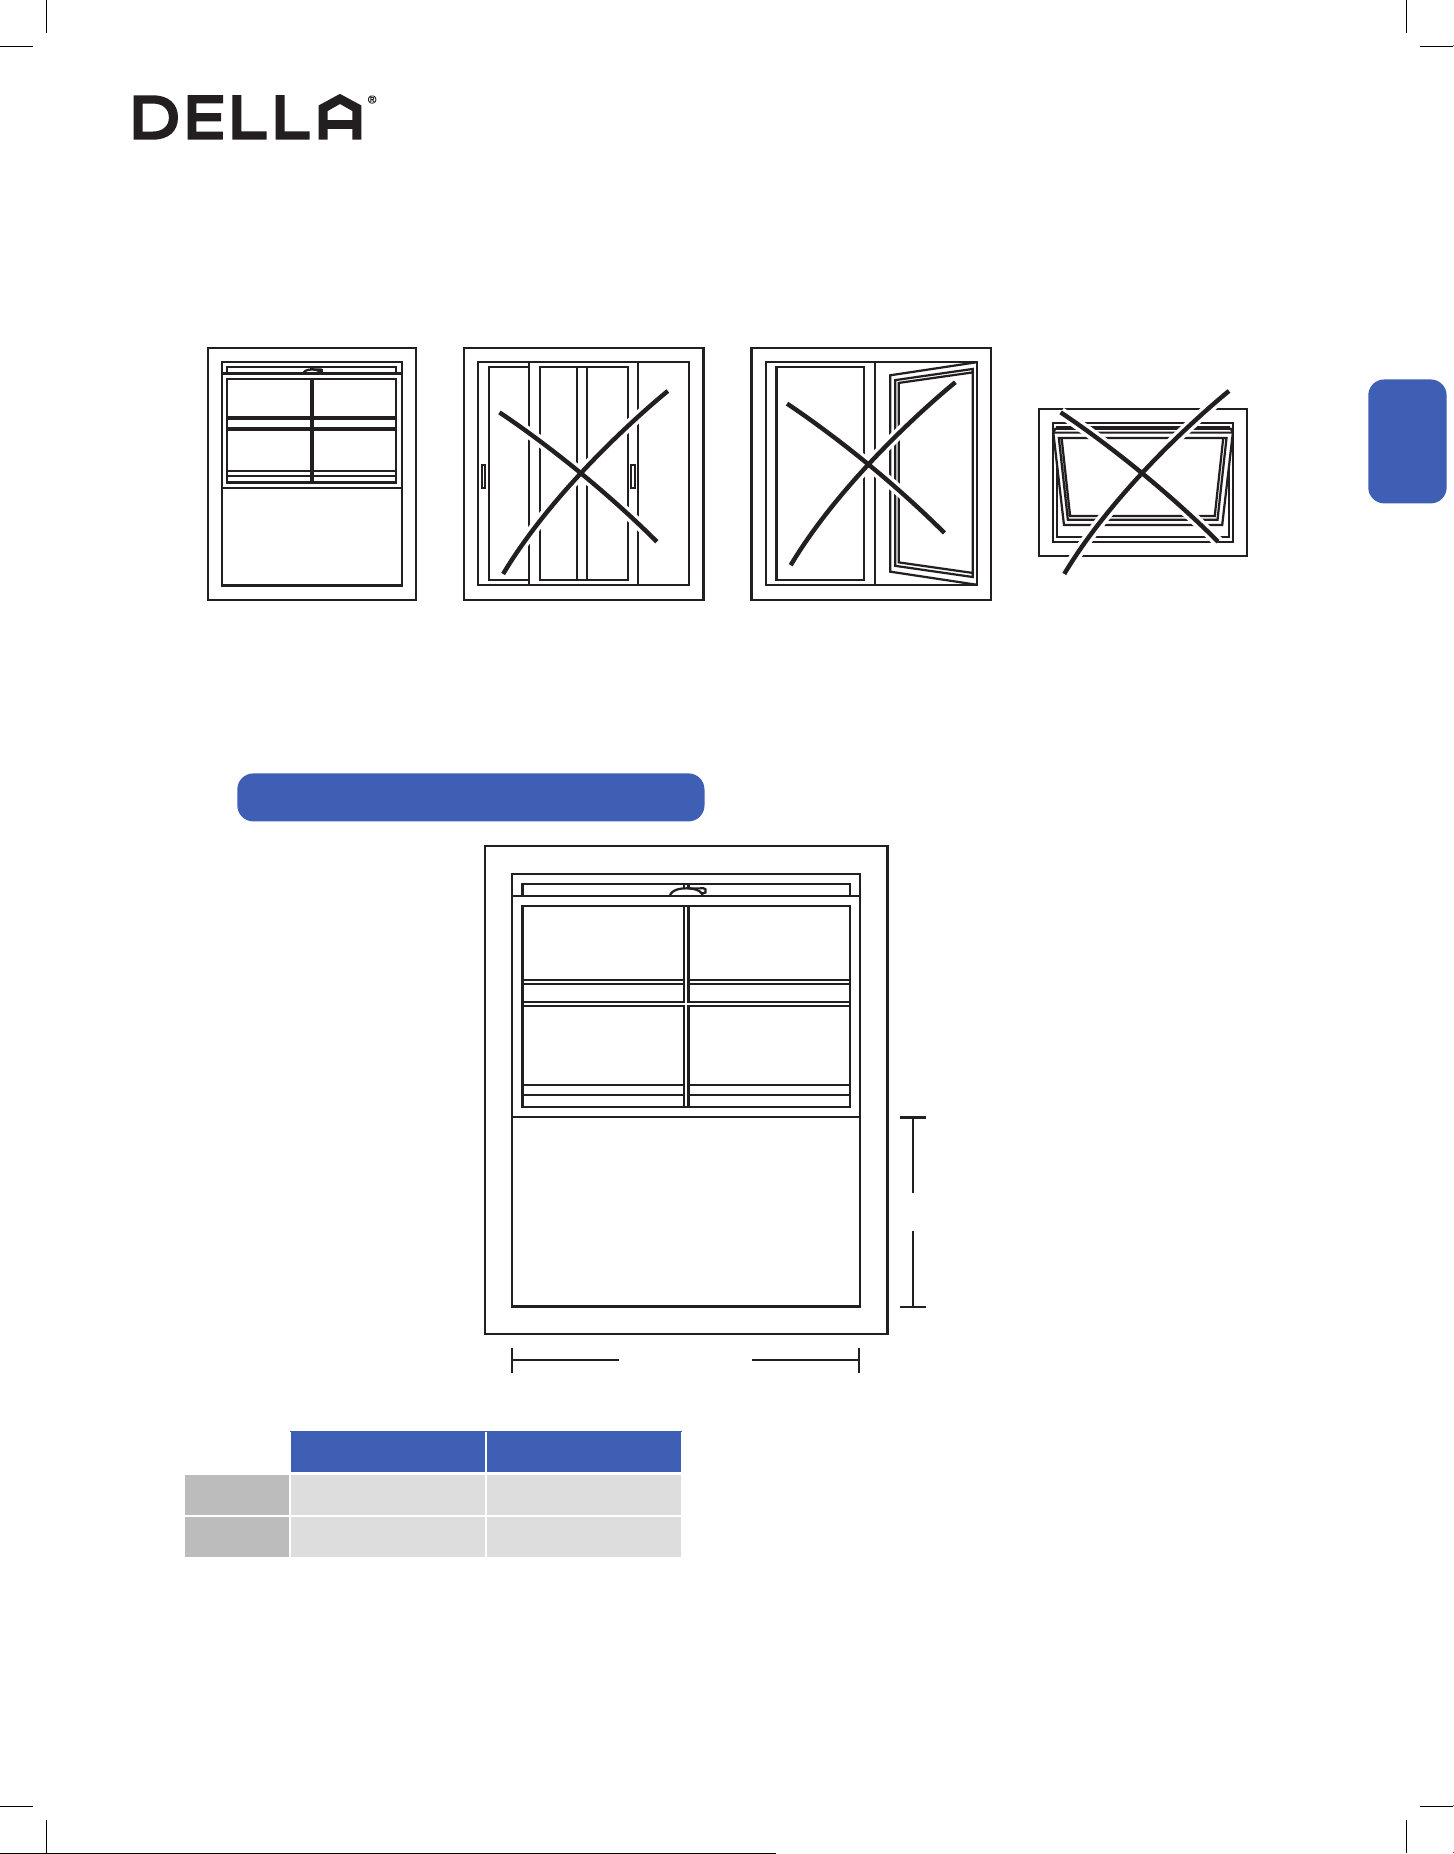
Window Requirement
The air conditioner is deisnged to be installed in a standard single-hung or double-hung window. The AC would not t in other window types.
Make sure your window has enough clearance for the window AC to be properly seated in the opening.
Single Hung / Double Hung
Window
Sliding Window Casement Window Awning Window
Height
Width
048-TL-W5KWD 048-TL-W6KWD
Width 23" - 34" 23" - 34"
Height ≥ 14.5" ≥ 14.5"
Window Opening Size Requirement for Installation
10
Installation
Installation
Installation Preview
Installation
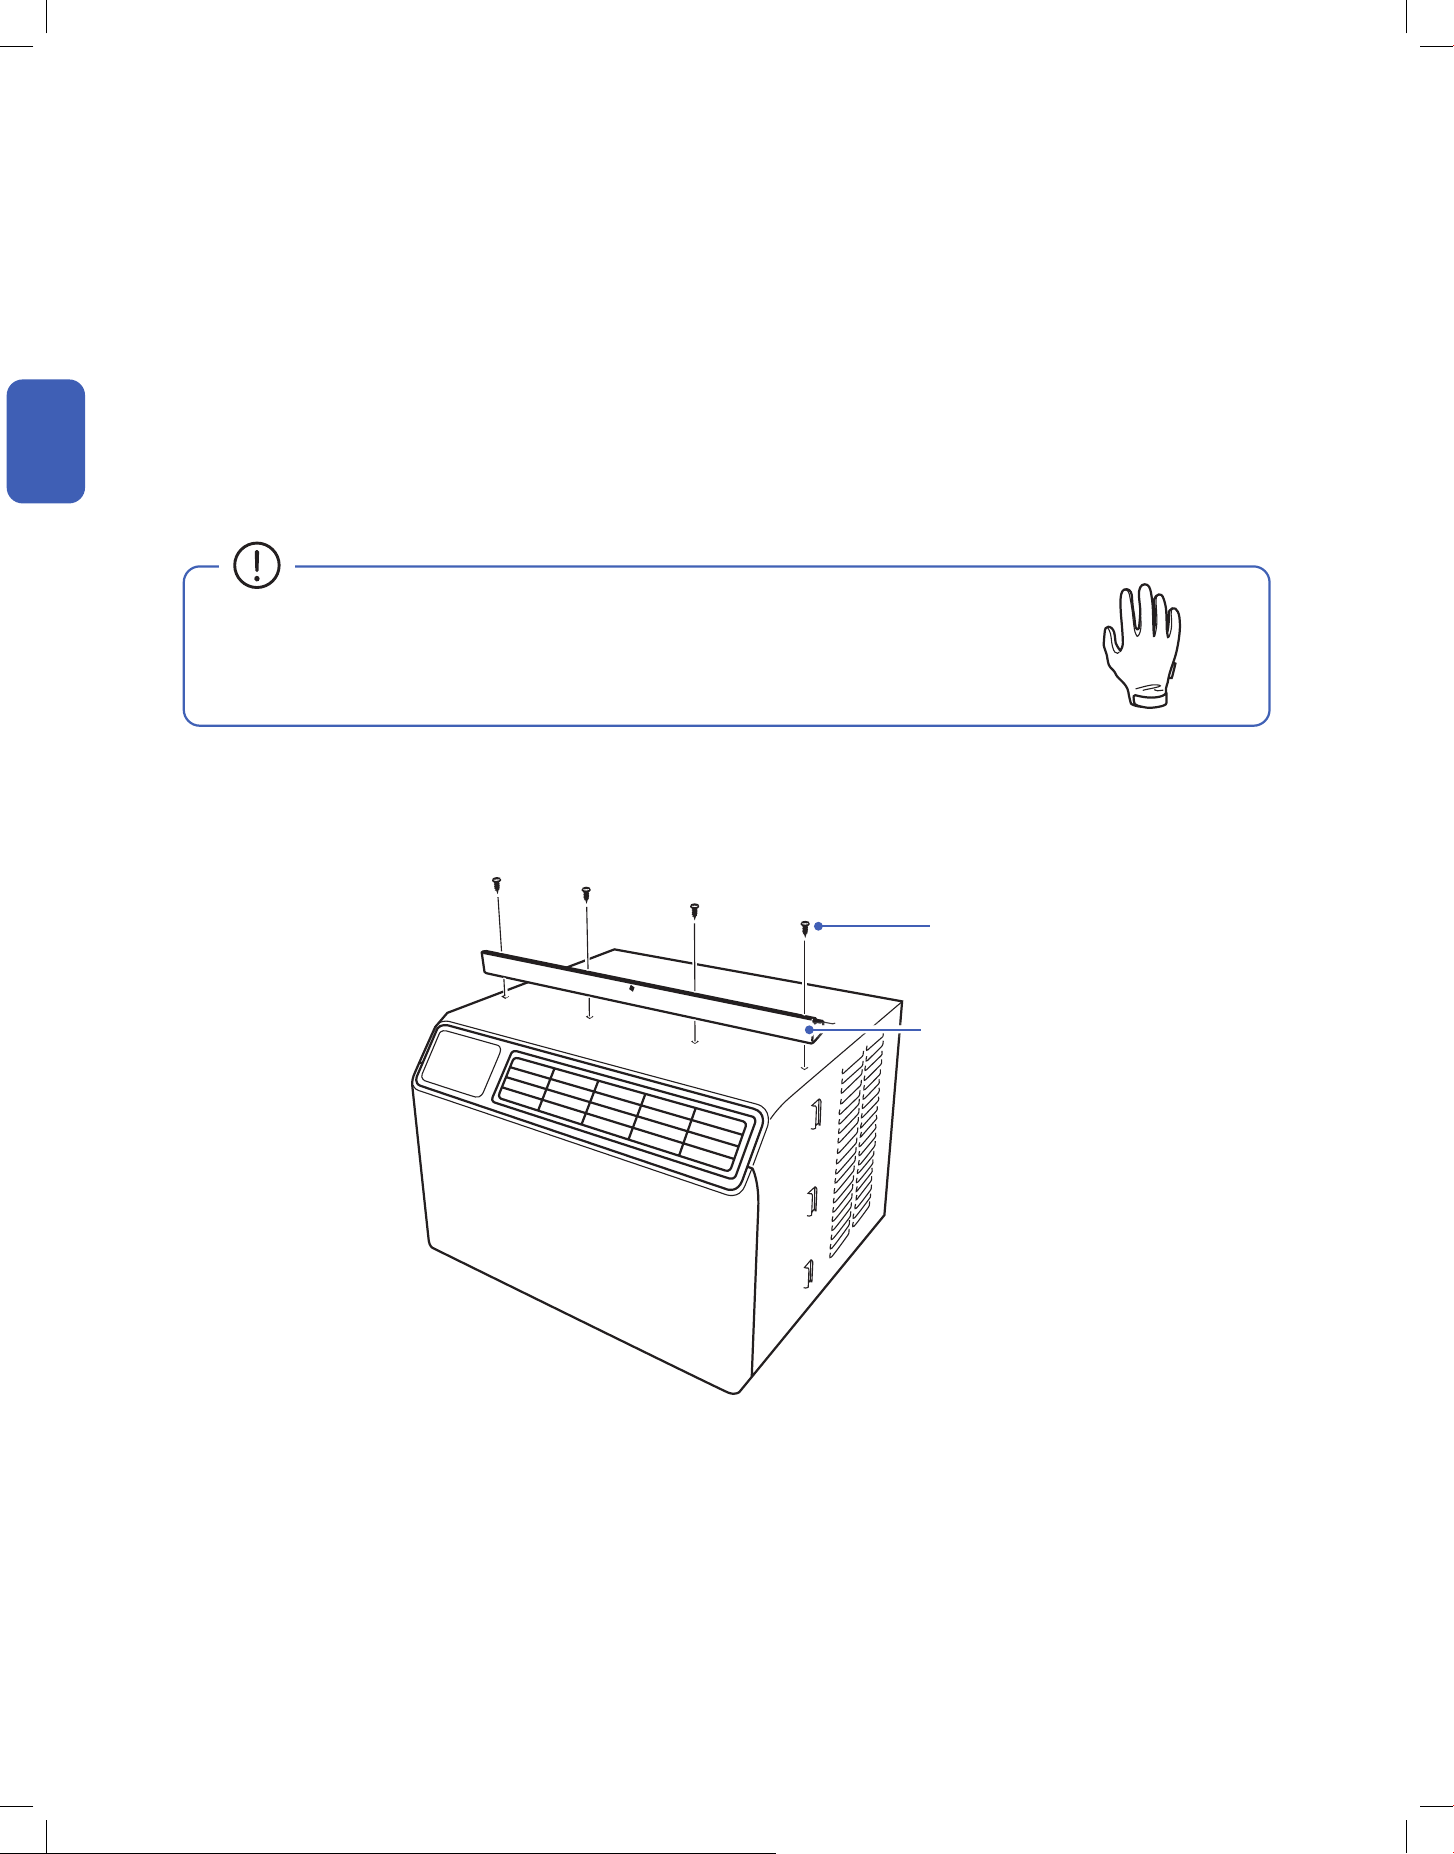
Picking a Installation Location
• Wear protective gears when installing the AC to prevent cuts or injuries from sharp metal edges.
• Installation should performed by 2 people to prevent accident.
Attach Top Rail
3/8" Screws
1. Attach the top rail on top of the window AC and secure it using 4x 3/8" screws.
• Do not install the unit near a heat source, steam, or ammable gas.
• Do not install unit in a location where drain water would cause inconvenience to others.
• Make sure the window AC is installed in places where the power cord is long enough to reach an power outlet.
• Make sure there is no objects near the installation site which would obstruct air ow.
Top Rail
11v.20241112
Installation
Installation
Installation
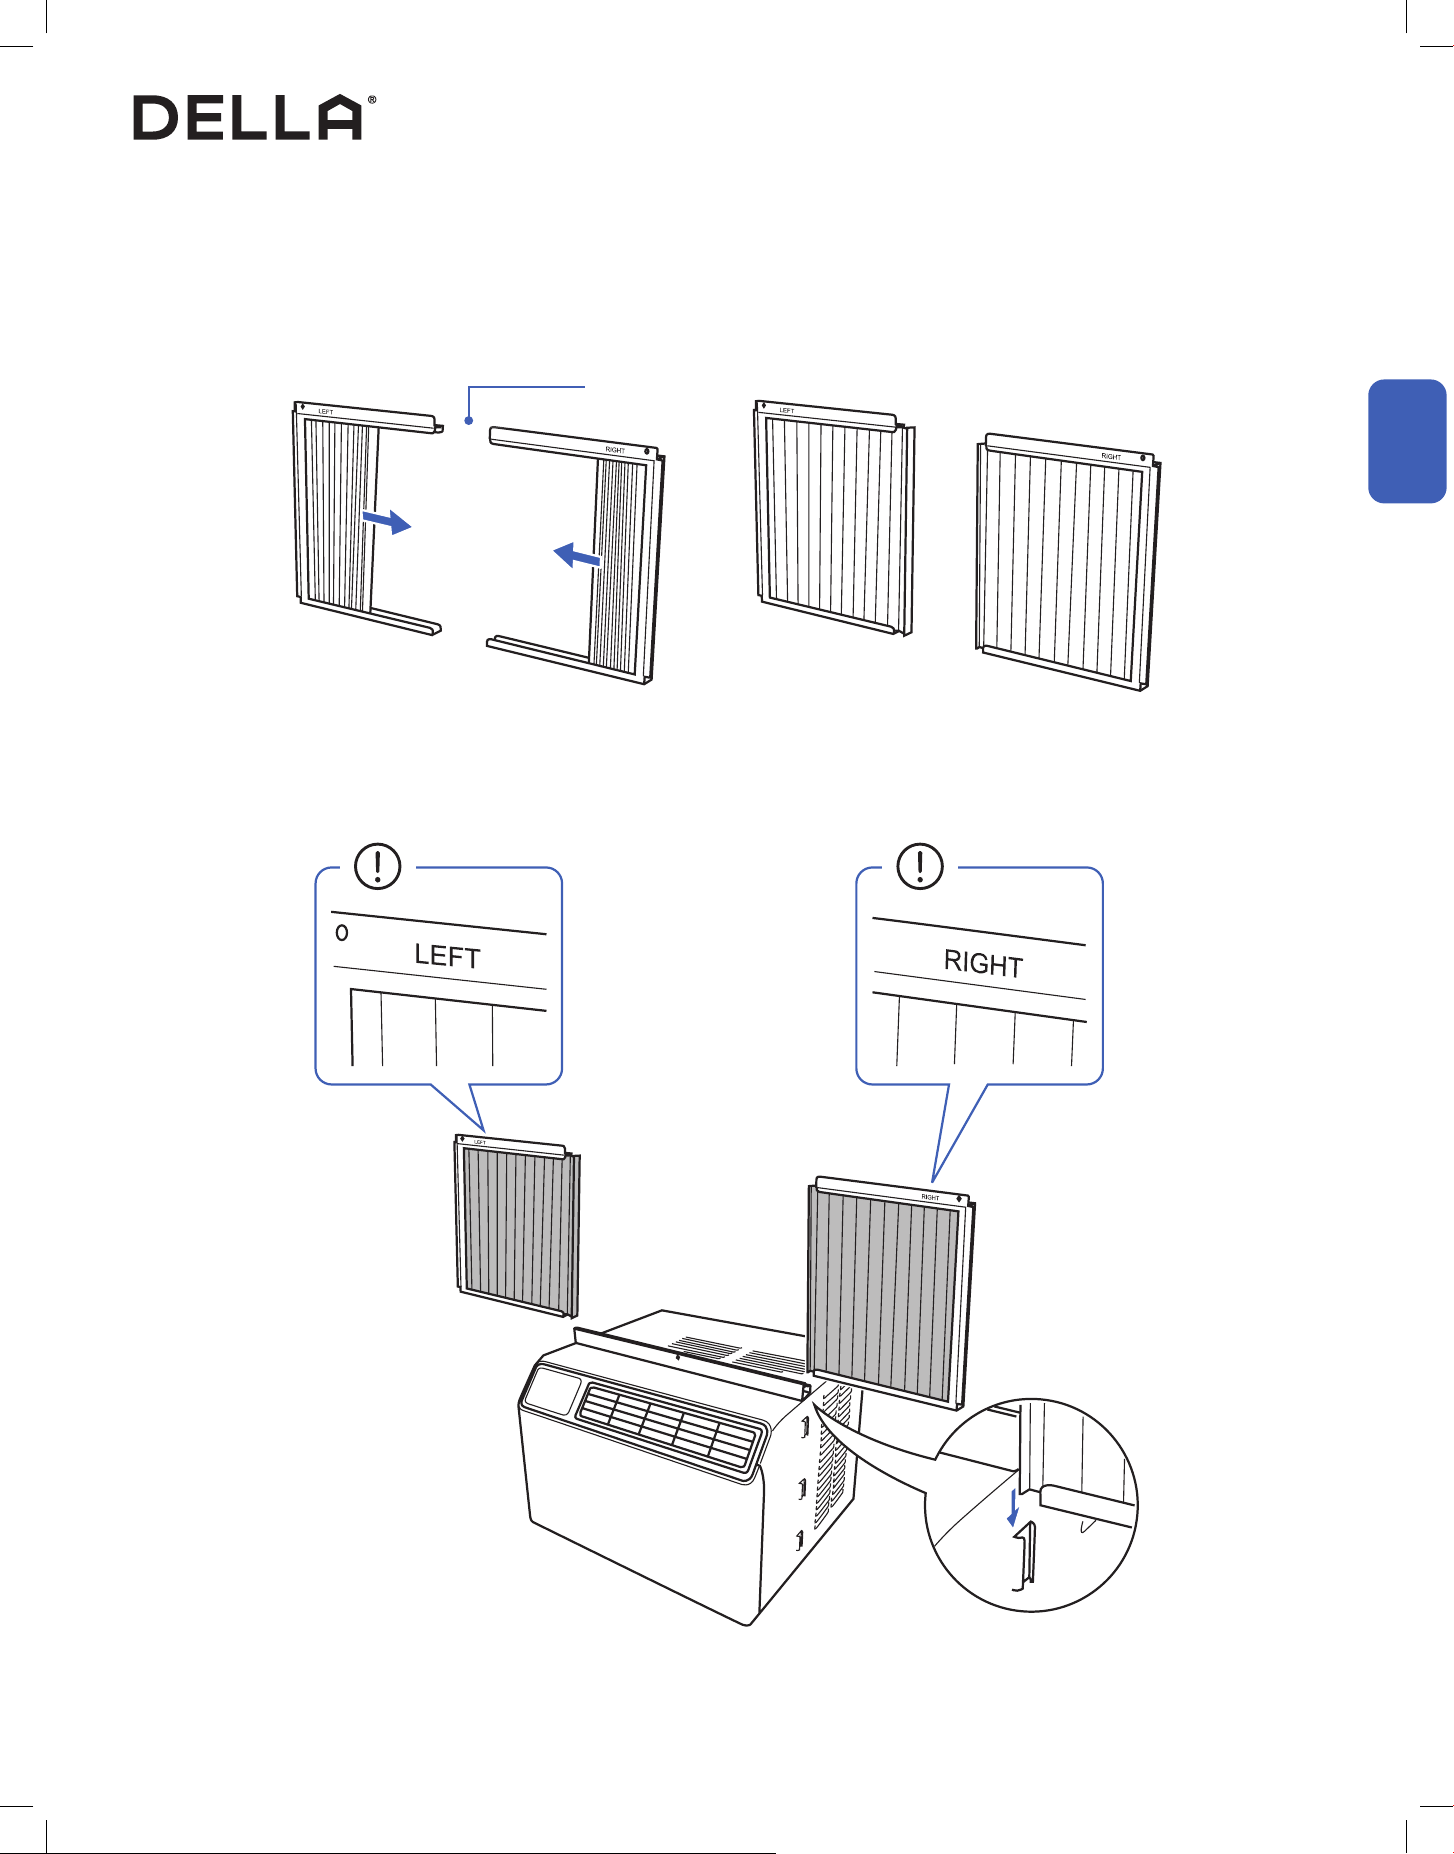
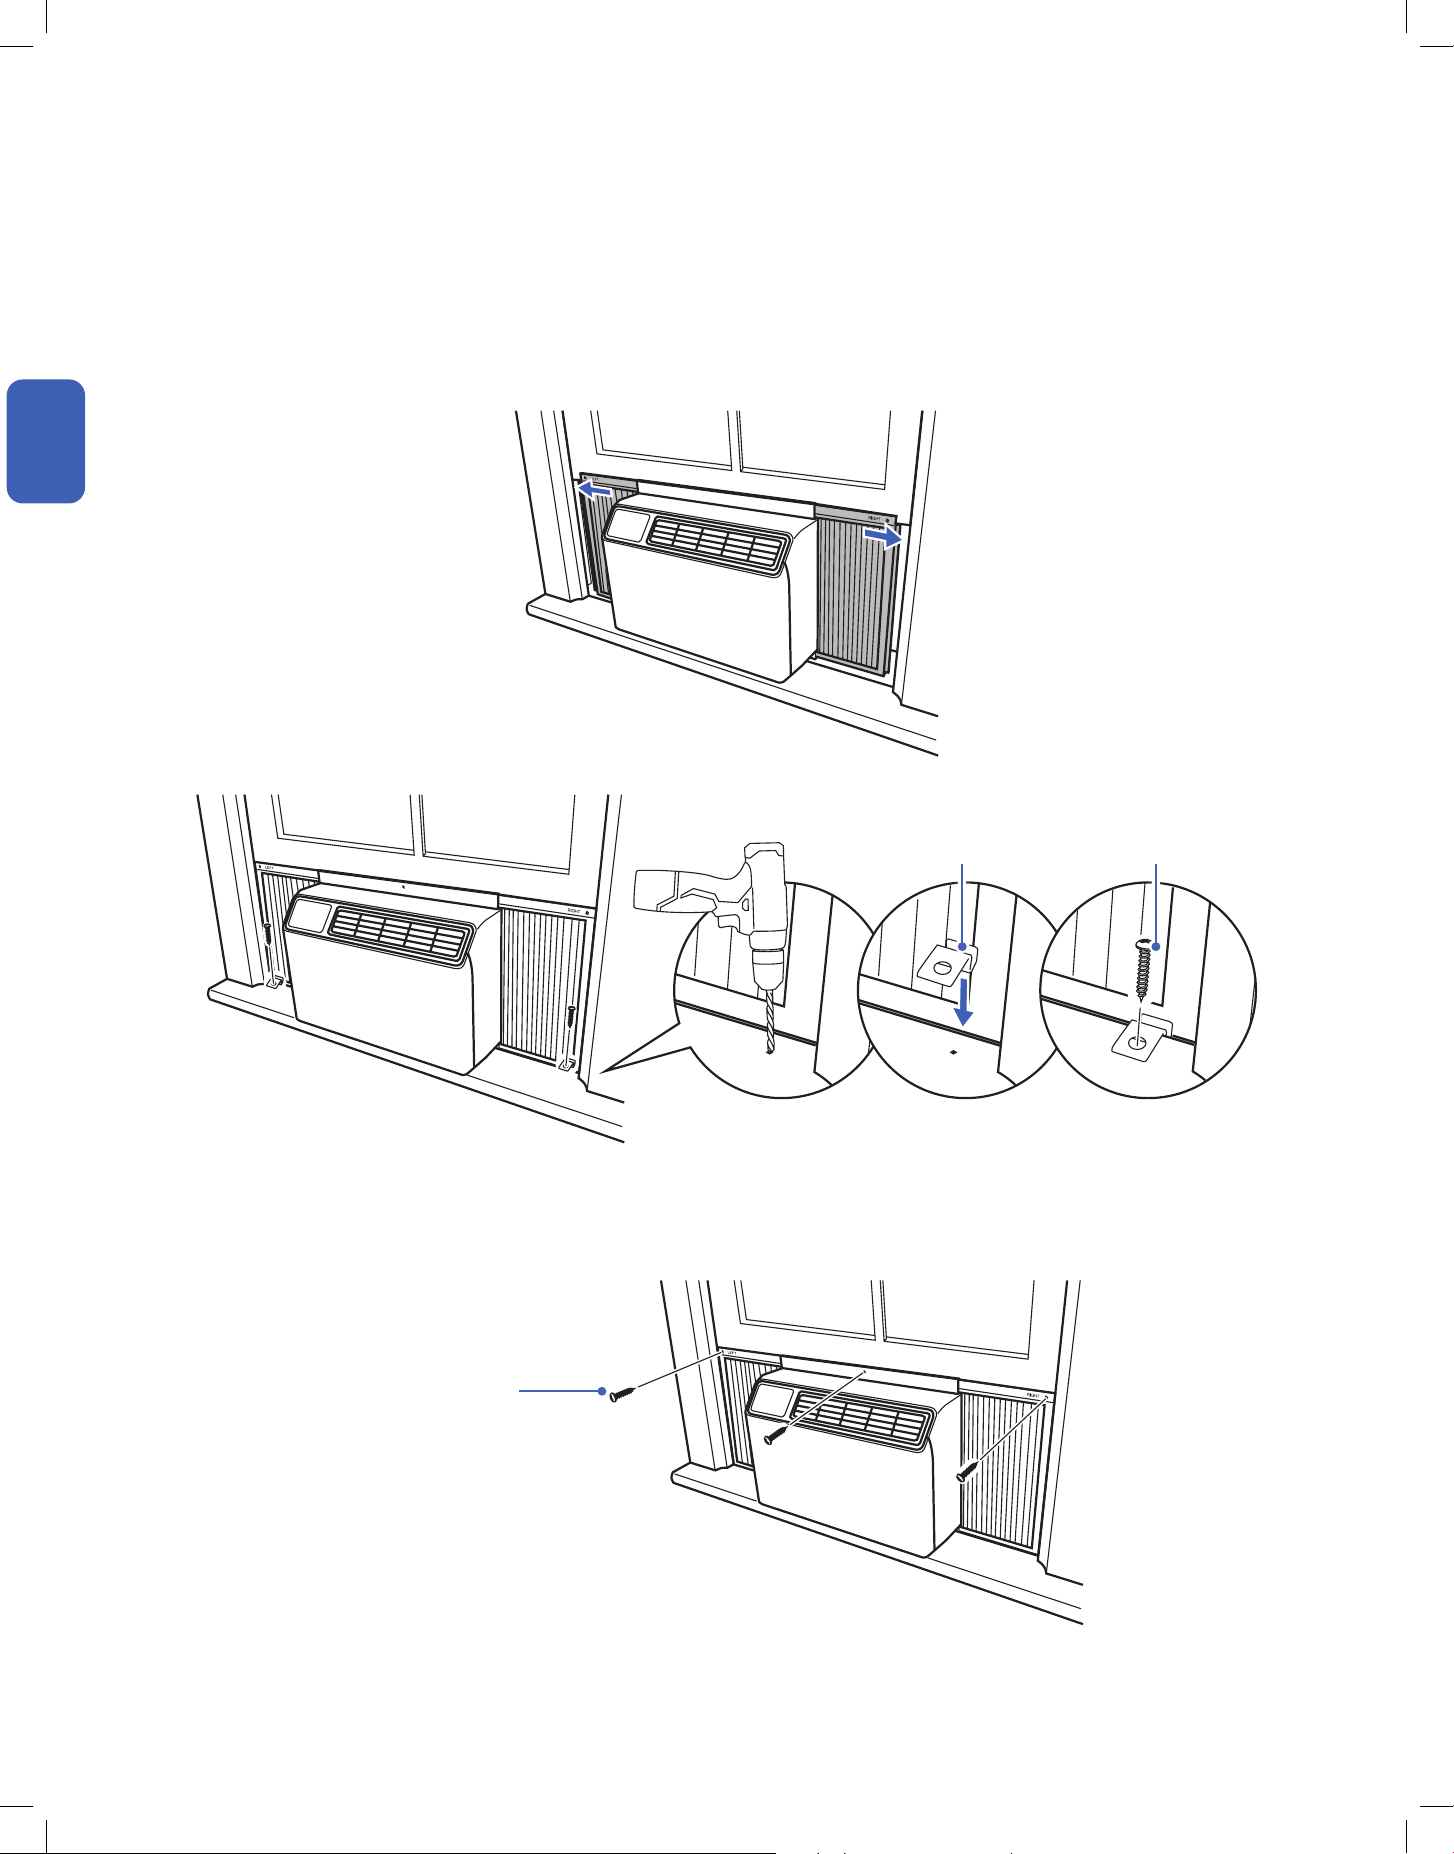
Attach Filler Panels
1. Fully extend the ller panels.
2. Slide the ller panels to the sides of the window AC.
Filler Panels
12
Installation
Installation
Installation
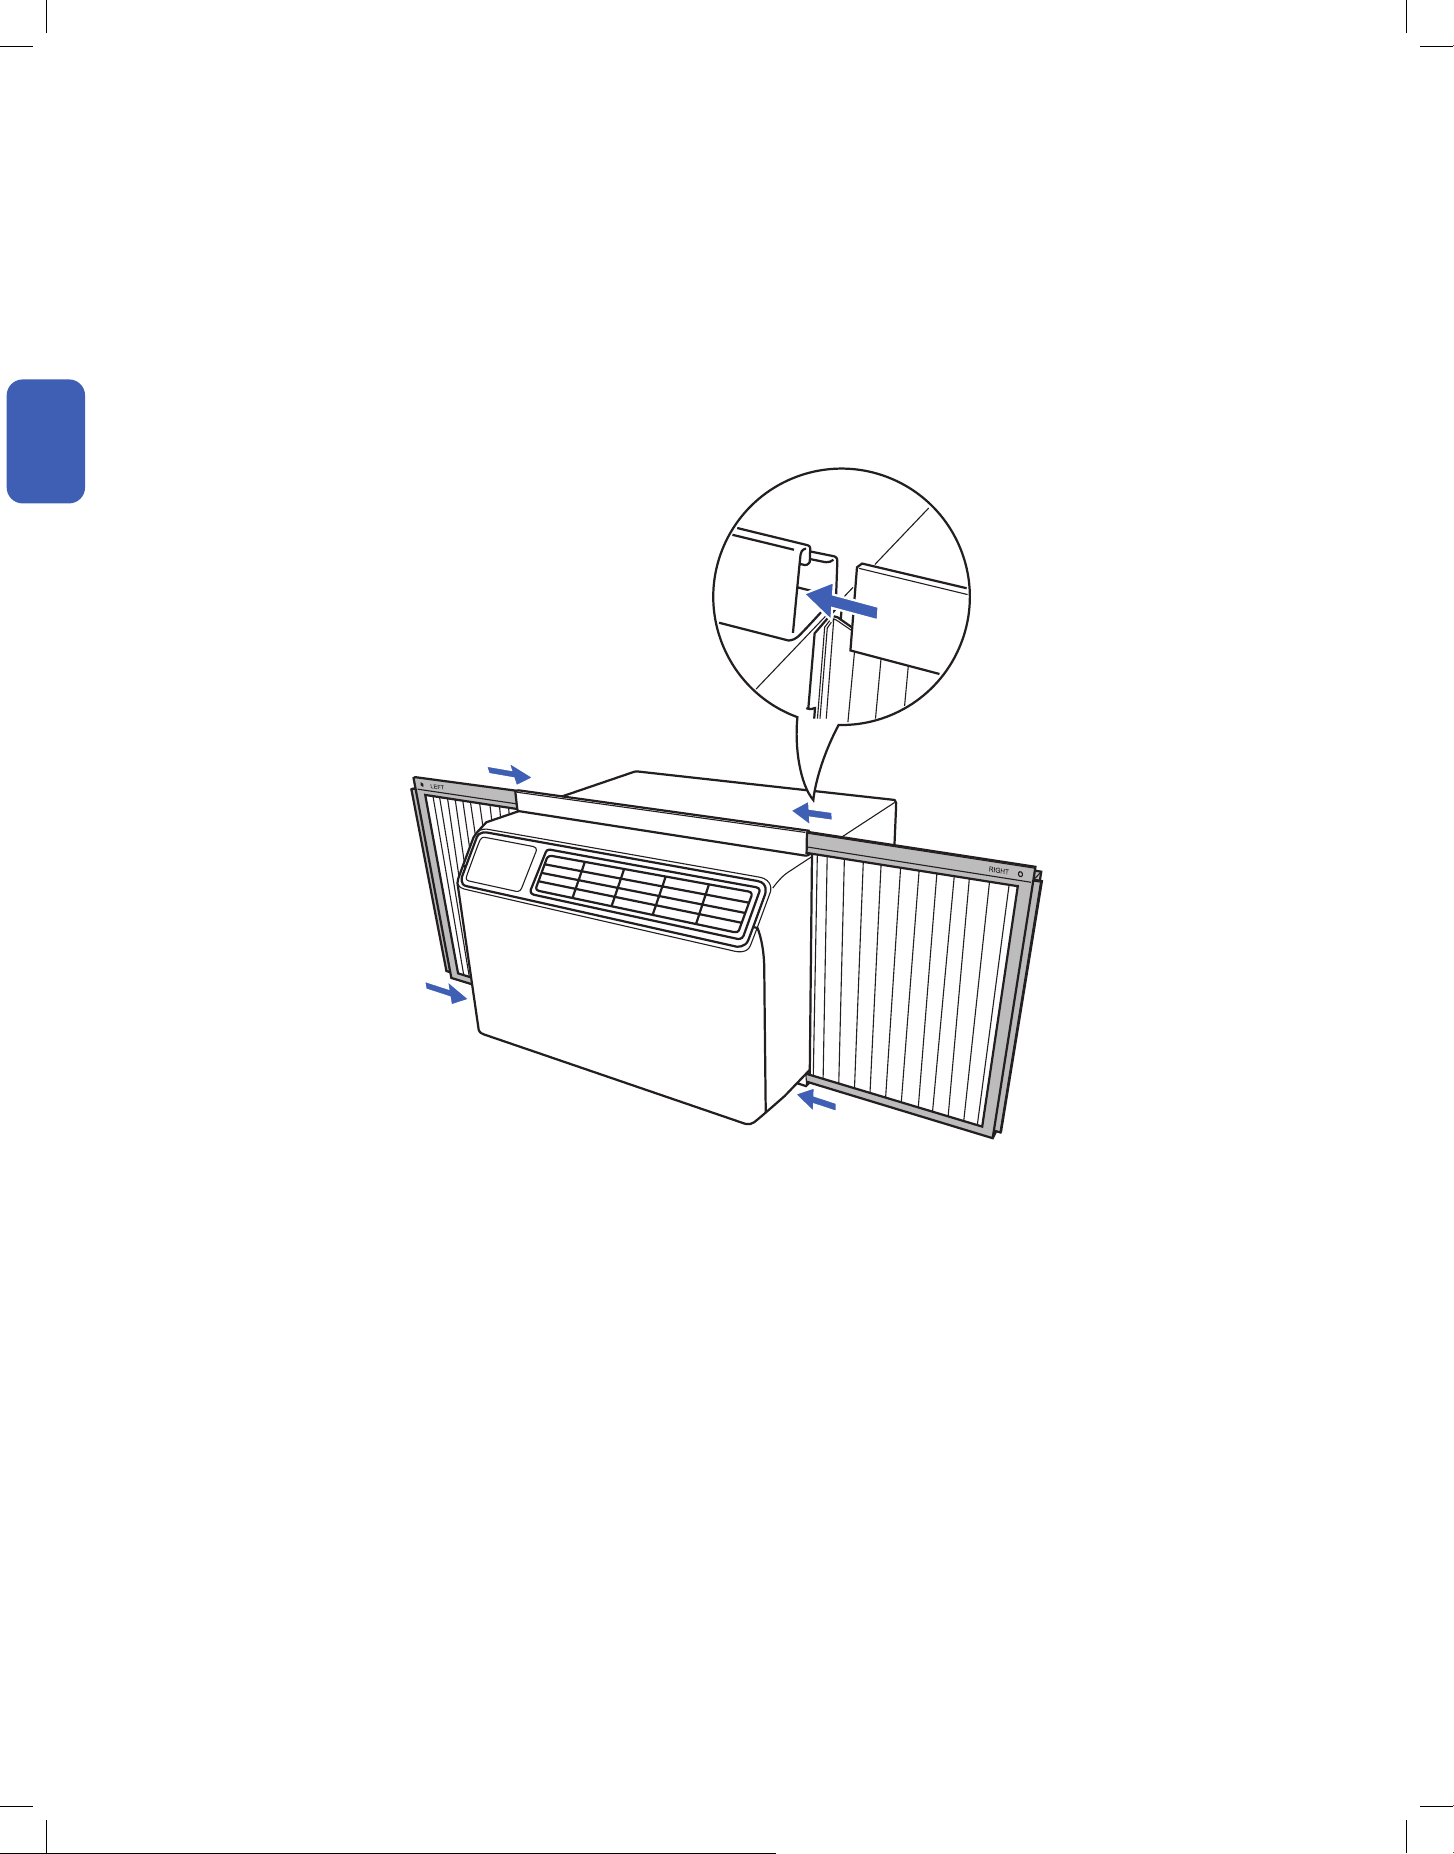
Attach Filler Panels
3. Insert the ller panels to the top and bottom rails of the window AC.
13v.20241112
Installation
Installation
Installation
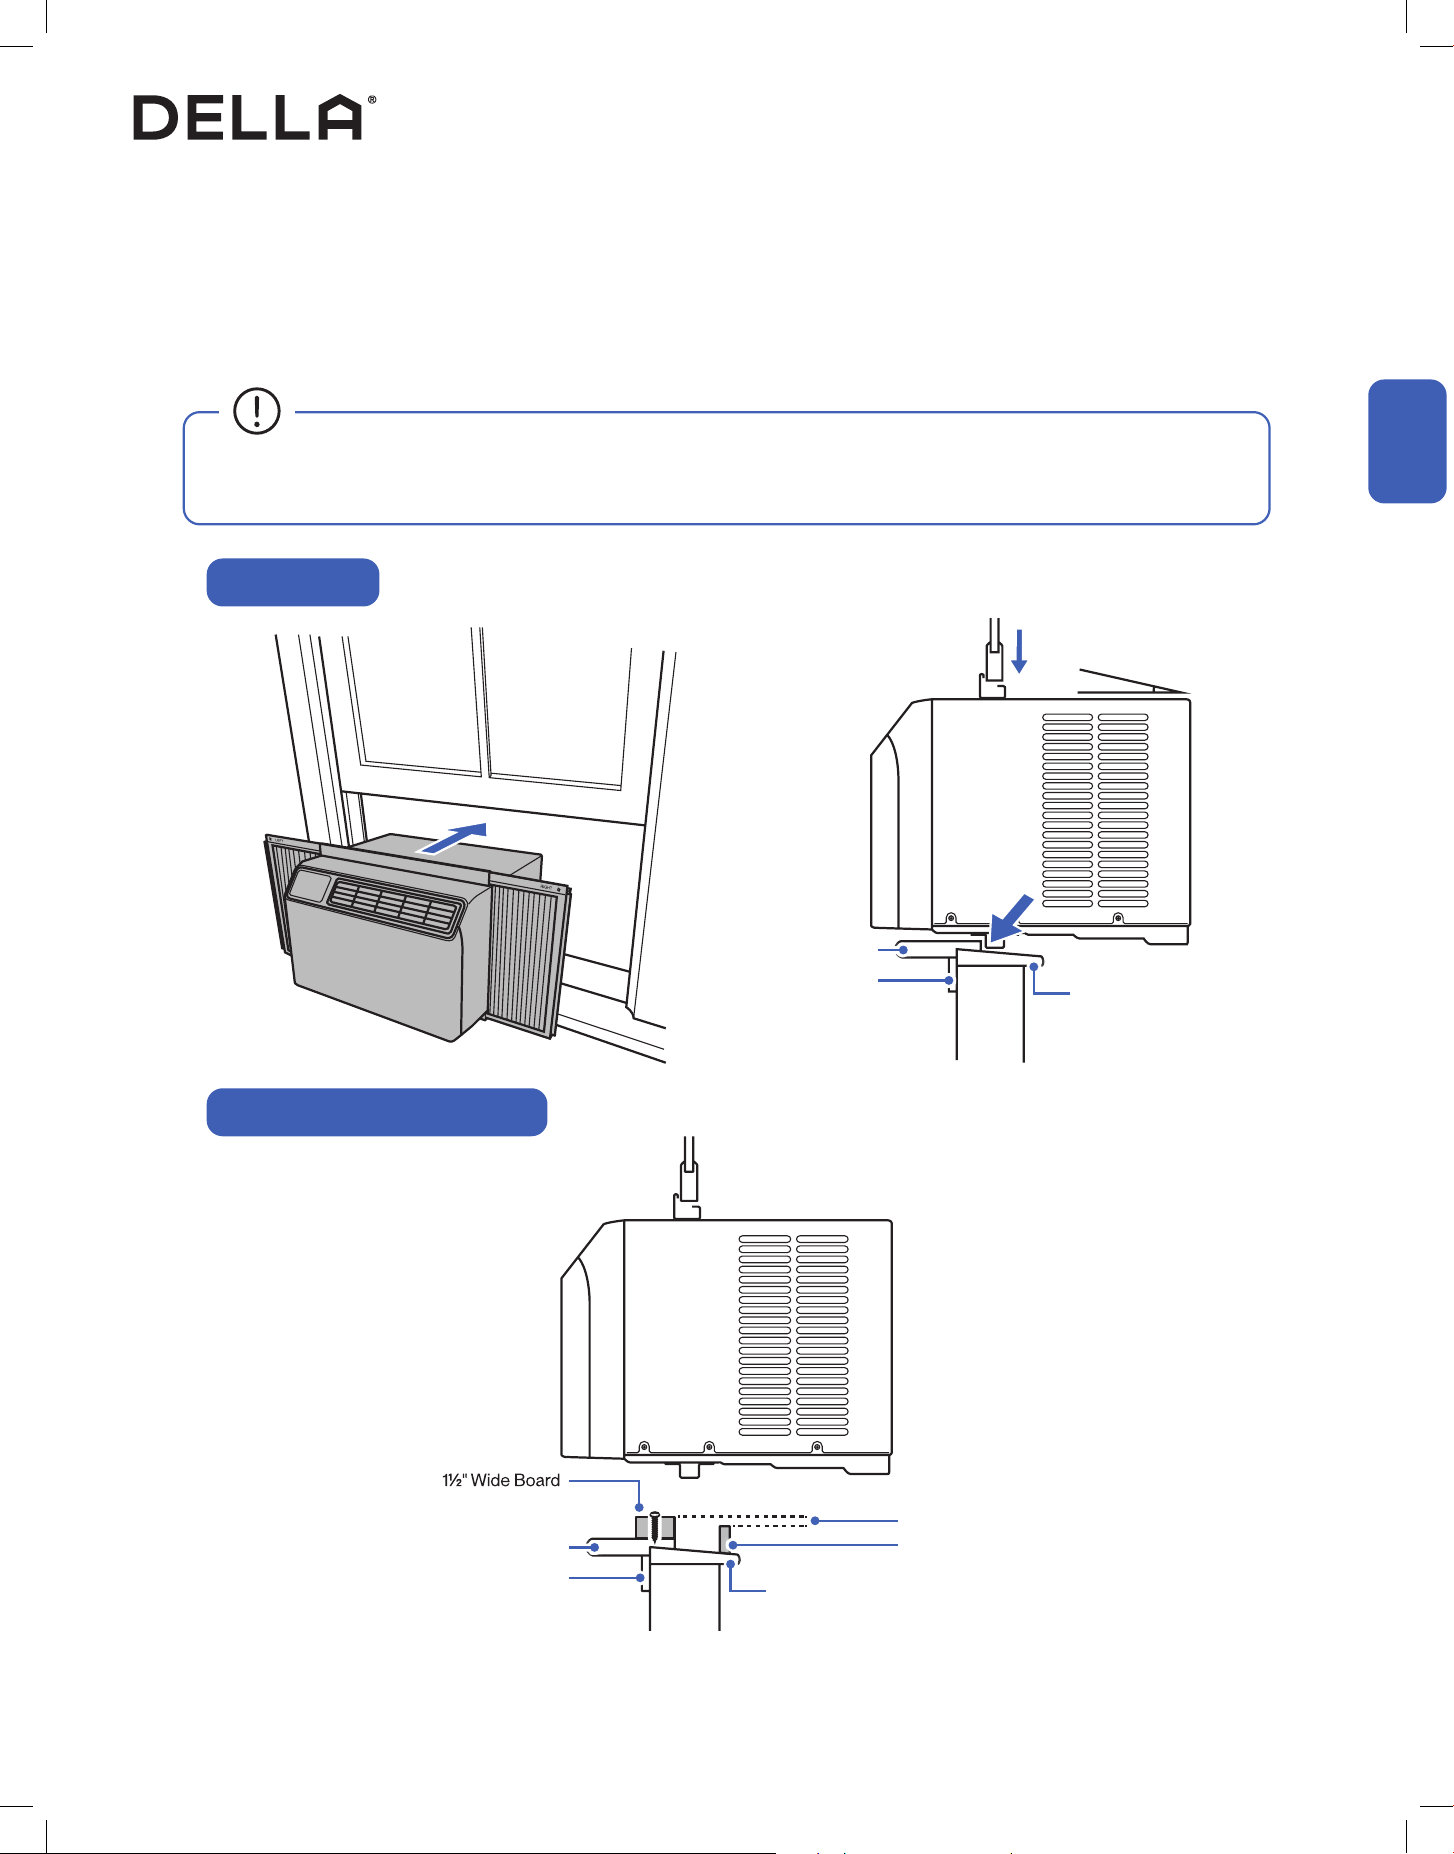
Install Window AC to the Window
1. Place the AC on the window with the bottom rail rest against the corner of the sill and the stool.
2. Center the AC and close the window sach onto the top mounting rail. The AC should be around 3° tilted towards the outside.
NOTE: Tilt the AC outside to prevent condensate or rain water from back owing into the house.
Outdoor
Outdoor
Wall
Wall
Indoor
Indoor
Window Sill
≈3°
Window Stool
Apron
Normal Window
Window with Storm Window Frame
Window Stool
Apron
Window Sill
1/2" Height Dierent
Storm Window Frame
• If installing the window AC on a window with storm window frame, a elevated board need to be installed on top of the window stool in
order to keep the AC properly tilted towards outside.
14
Installation
Installation
Installation
Secure Window AC In Place
1. Fully extend the ller panels to the sides of the window.
2. Fit frame locks between the ller panels and window stool, then lock them in place with 3/4" screws.
3. Secure the AC top rail and ller panels to the window sach with 1/2" screws.
1/2" Screws
Frame Lock 3/4" Screw
15v.20241112
Installation
Installation
Installation
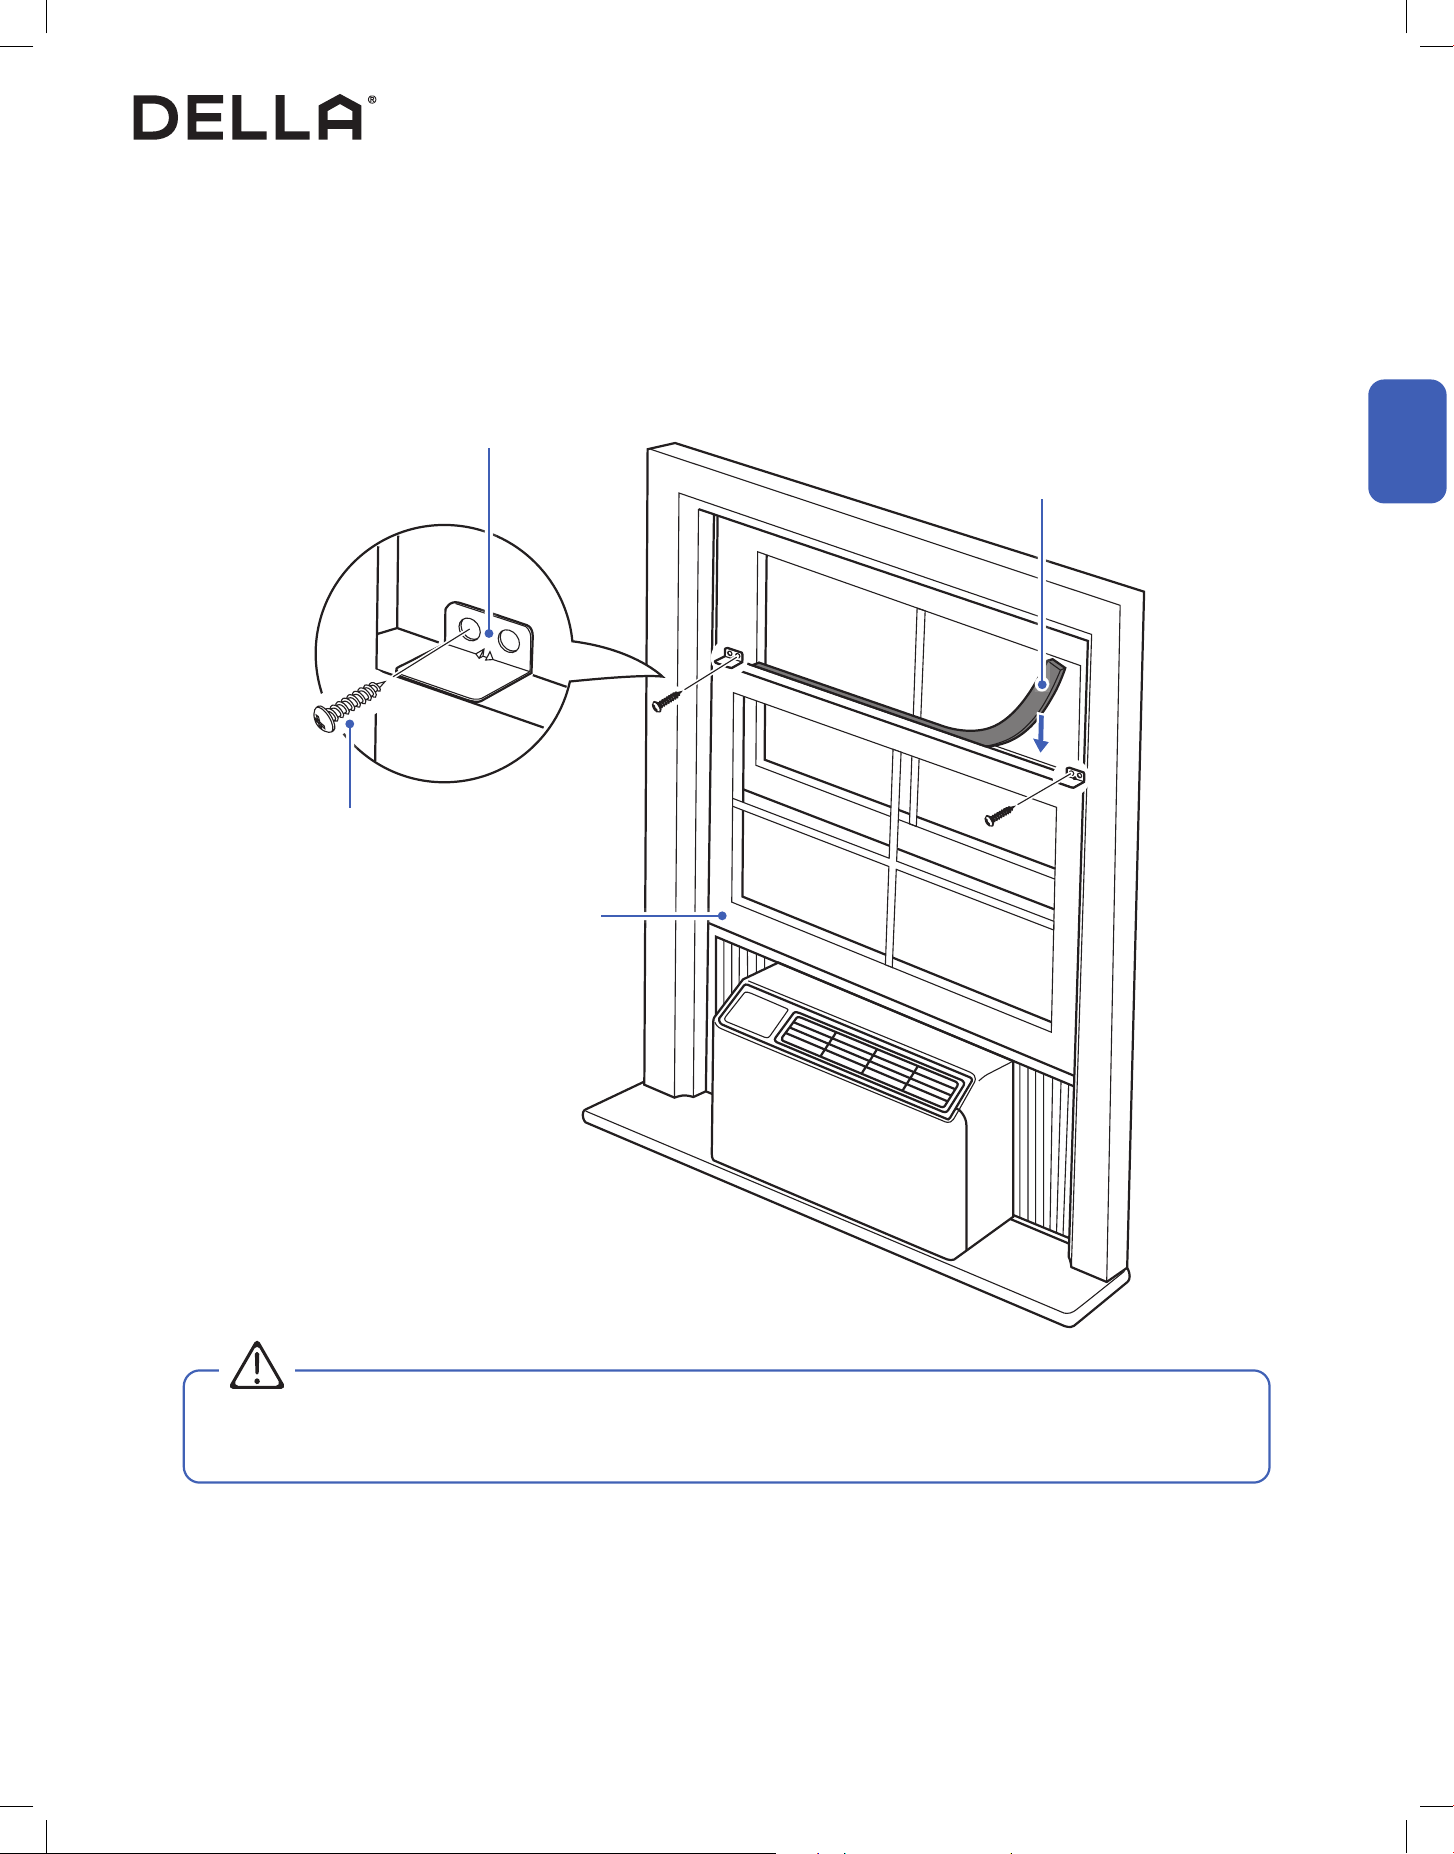
Hold Down the Window Sach and Insulation
1. Make sure the bottom window sach is push down all the way against the window AC, then secure it in place with sach lock and 3/4" screws.
2. Measure and cut window sach seal to the length of your window sach width. Insert the sach seal to the gap between the bottom window
sach and top window sach as additional insulation.
Bottom Window Sach
Window Sach Seal
Sach Lock
3/4" Screw
• Lock down the bottom window sach to prevent the window sach from opening and dropping the window AC out of the window, which
could potentially injuring people or animals on the other side.
WARNING
16
Installation
Installation
Installation
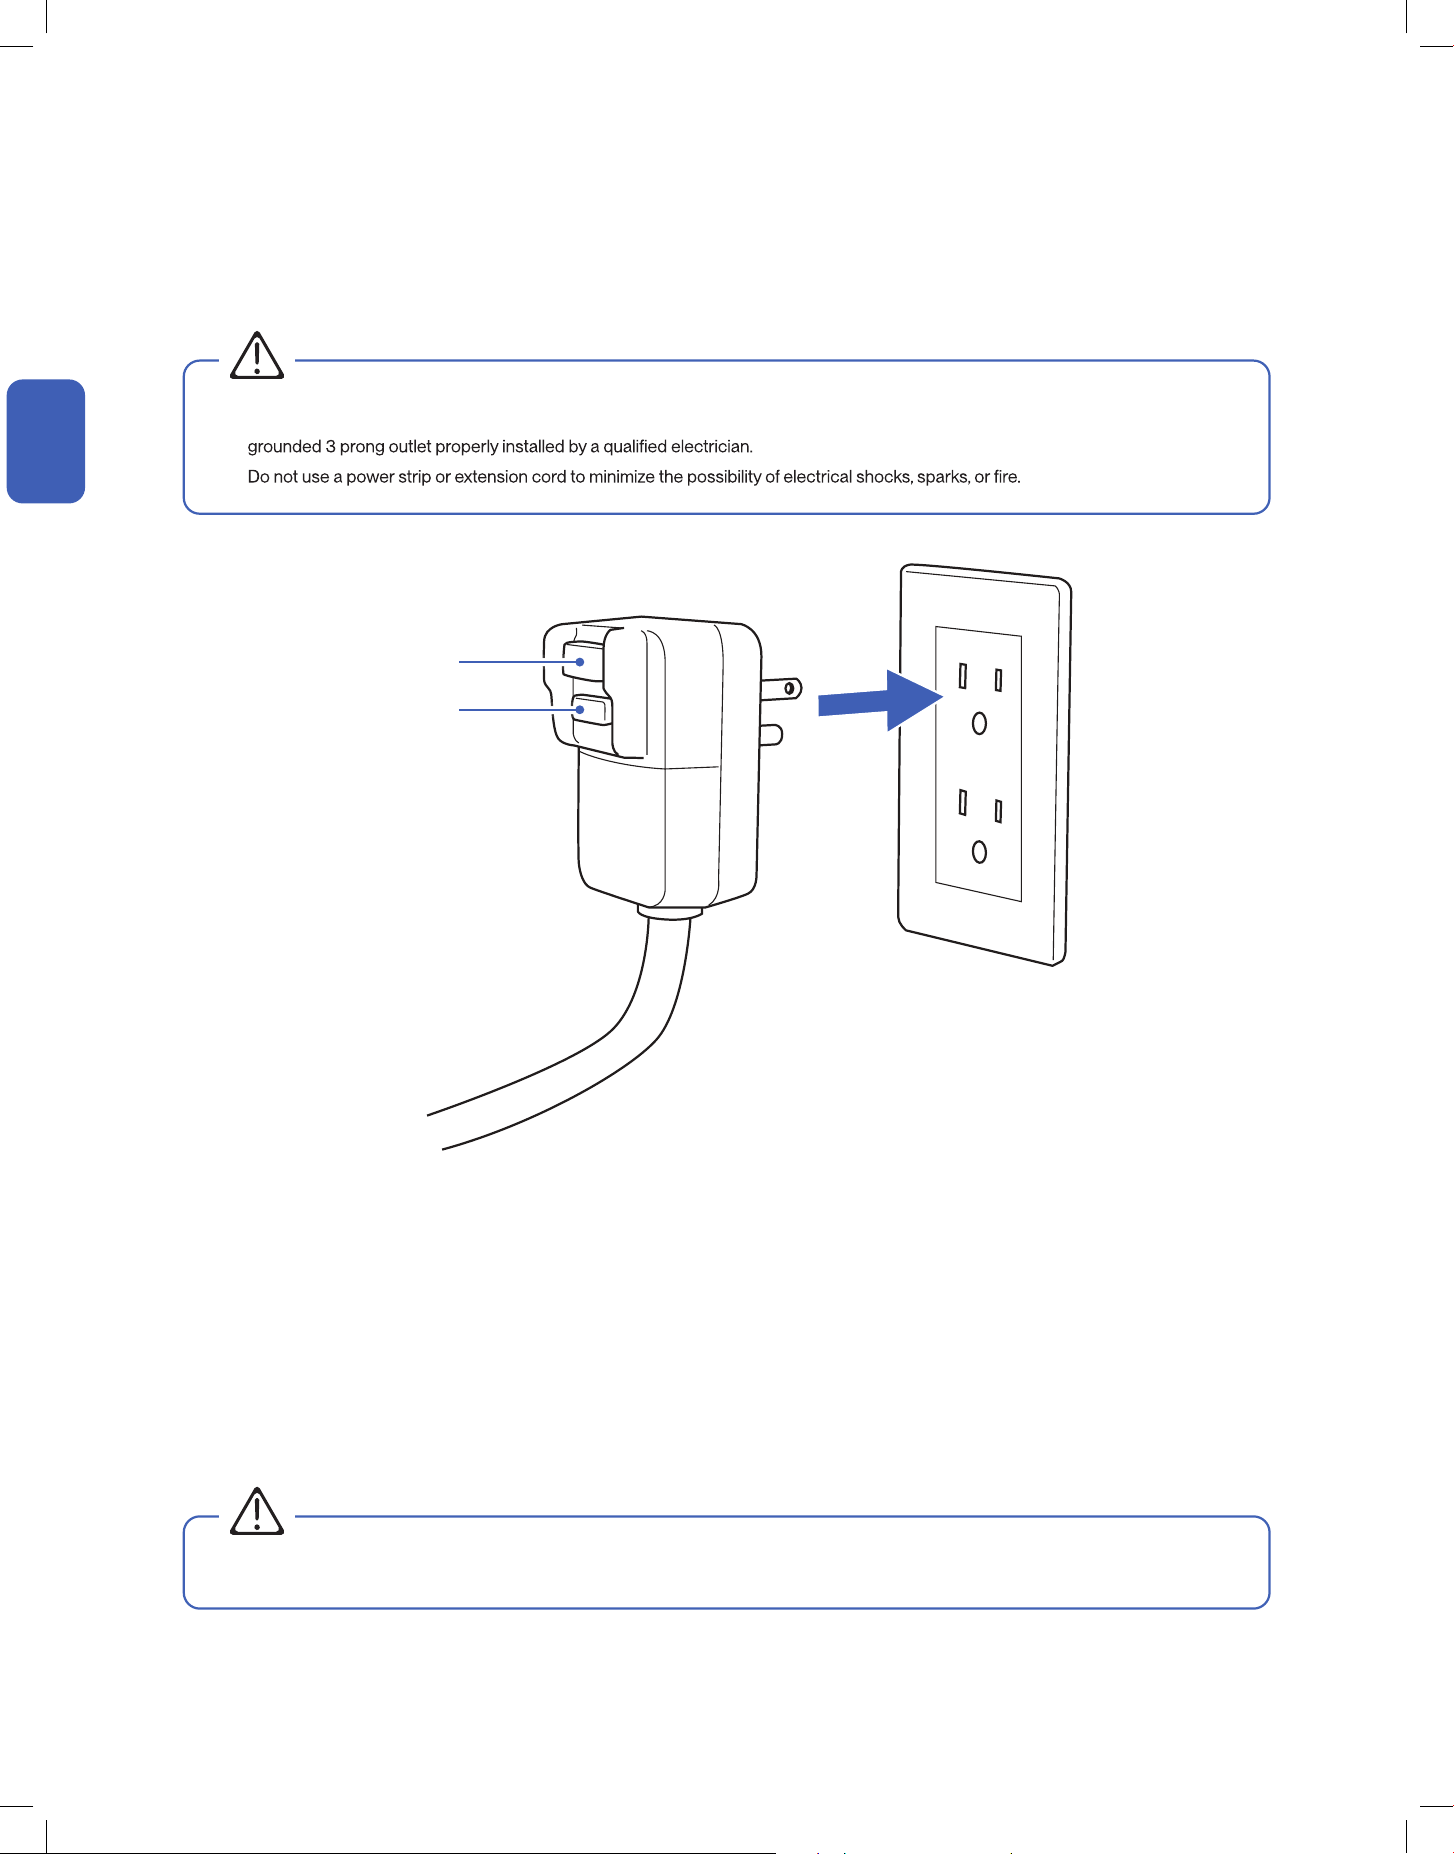
Power Connection
Power Plug Testing
1. Insert the power plug into a wall power socket.
1. Insert the plug into a grounded 3 prong power outlet.
2. Press the RESET button.
3. Press the TEST button. If the plug is funtioning properly, the circuit should tripped, cutting power and the appliance should not work.
4. Press the RESET button again, you will hear a click and the appliance should work again without any problem.
This appliance is equipped with a Leakage Current Detection Interrupter (LCDI) plug. LCDI plug will disconnect the unit from power if it senses
leakage current.
Test the LCDI plug to check if the plug is functioning properly.
• The AC should only be plugged into a 3 prong wall outlet. If a 3 prong is not available, it is the customer's reponsibility to have a
•
• Do not operate the appliance with a defective LCDI plug.
WARNING
WARNING
Reset Button
Test Button
17v.20241112
Operation Tips
Before Using
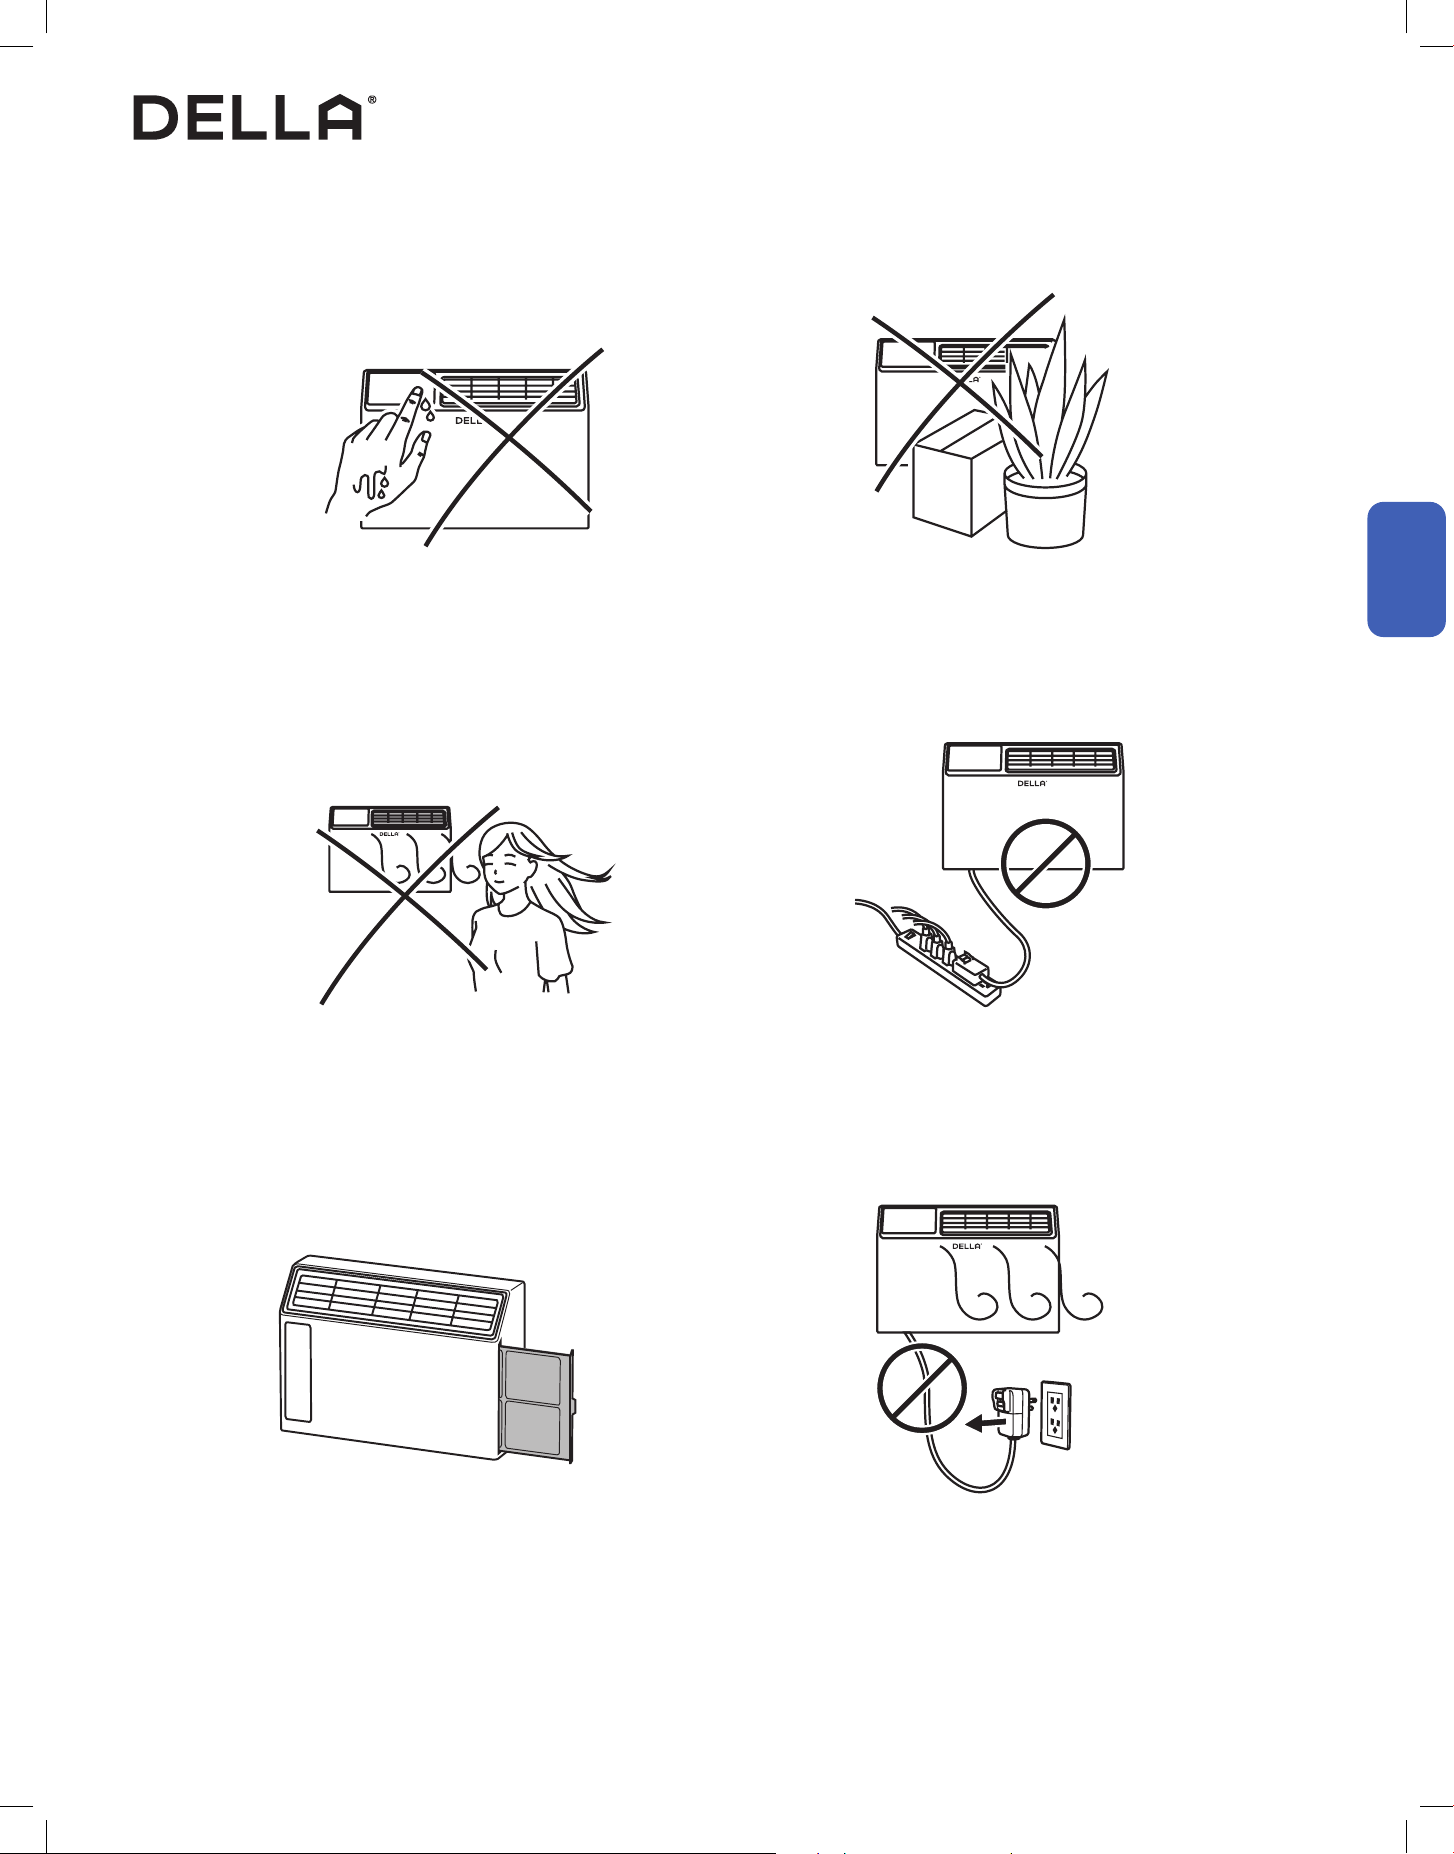
Avoid operating the air conditioner with wet hand. Avoid putting plants or objects around the air conditioner.
DO NOT plug the air conditioner to a power strip.Avoid direct wind ow to people, pets, or plants.
Follow cleaning and maintenance routine. DO NOT disconnect the air conditioner from power socket
before shutting down.
• It may cause electric shock. • It may block air ow and lower the air conditioner eciency or
cause malfunction.
• It may leads to power strip overload and overheat, potentially
cause electric shock and re.
• Expose to direct wind ow for extended period of time may
have a negative impact on your health.
• Regular cleaning and maintenance are needed for the best
eciency and prevent bad odor or water leak.
• It may cause electric spark and re.
Before Using
Before Using
18
Before Using
Before Using
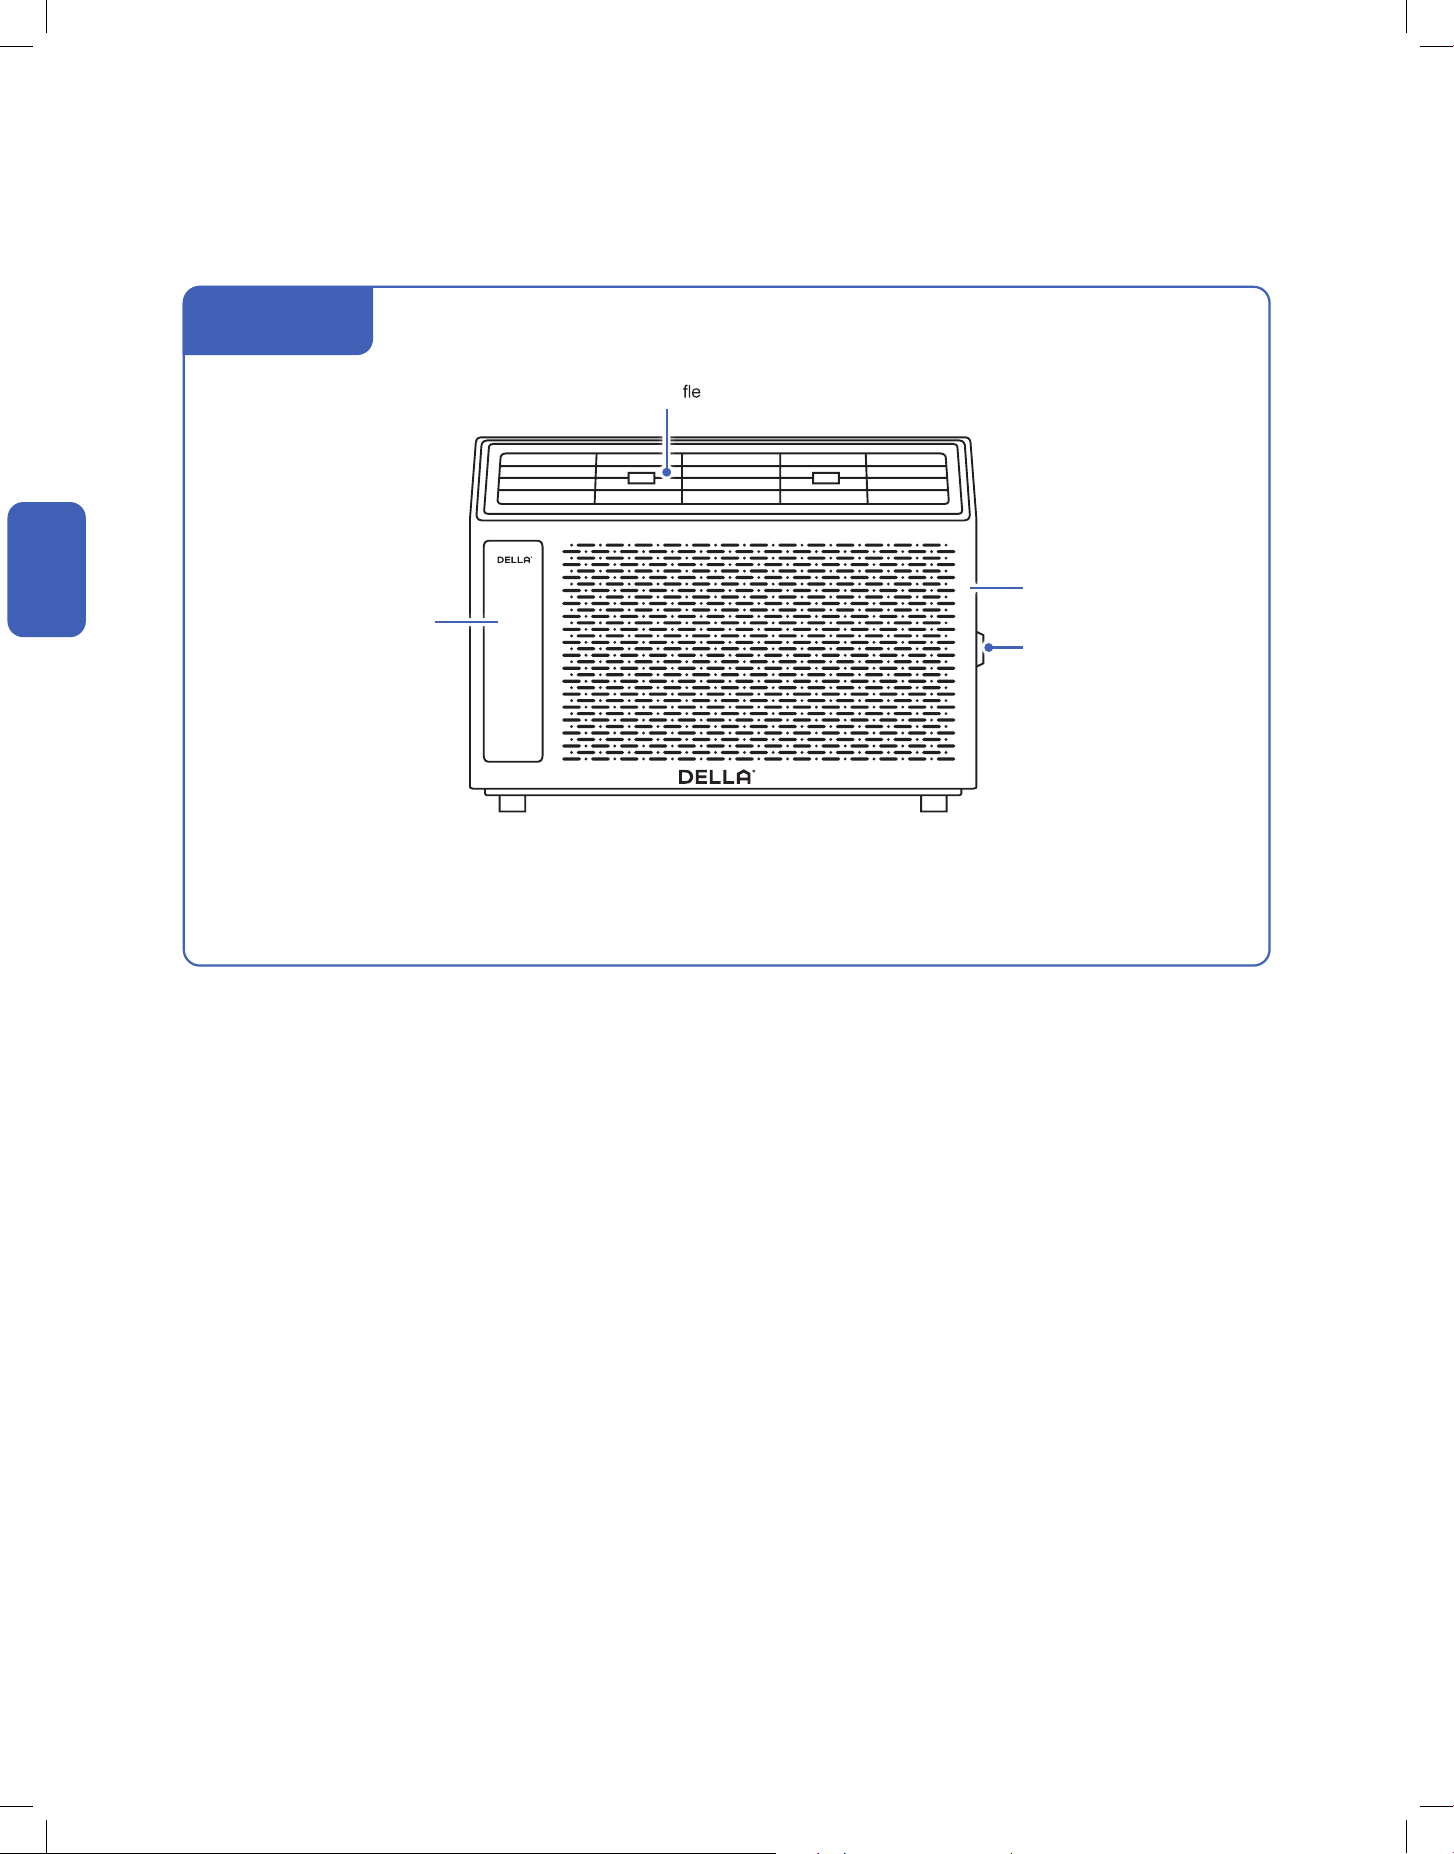
Parts of the Air Conditioner
Before Using
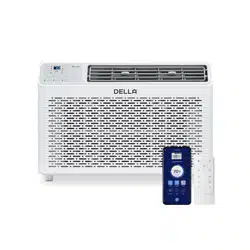
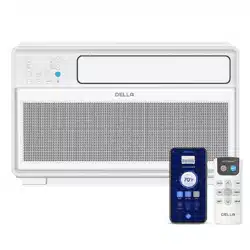
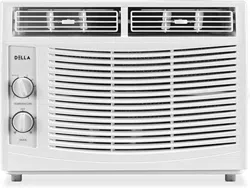
048-TL-W5KWDS
048-TL-W6KWD
Air Outlet
Air De
ctor and Flap
Front Panel
AIr Filter Tab
Control Panel
19v.20241112
Before Using
Before Using
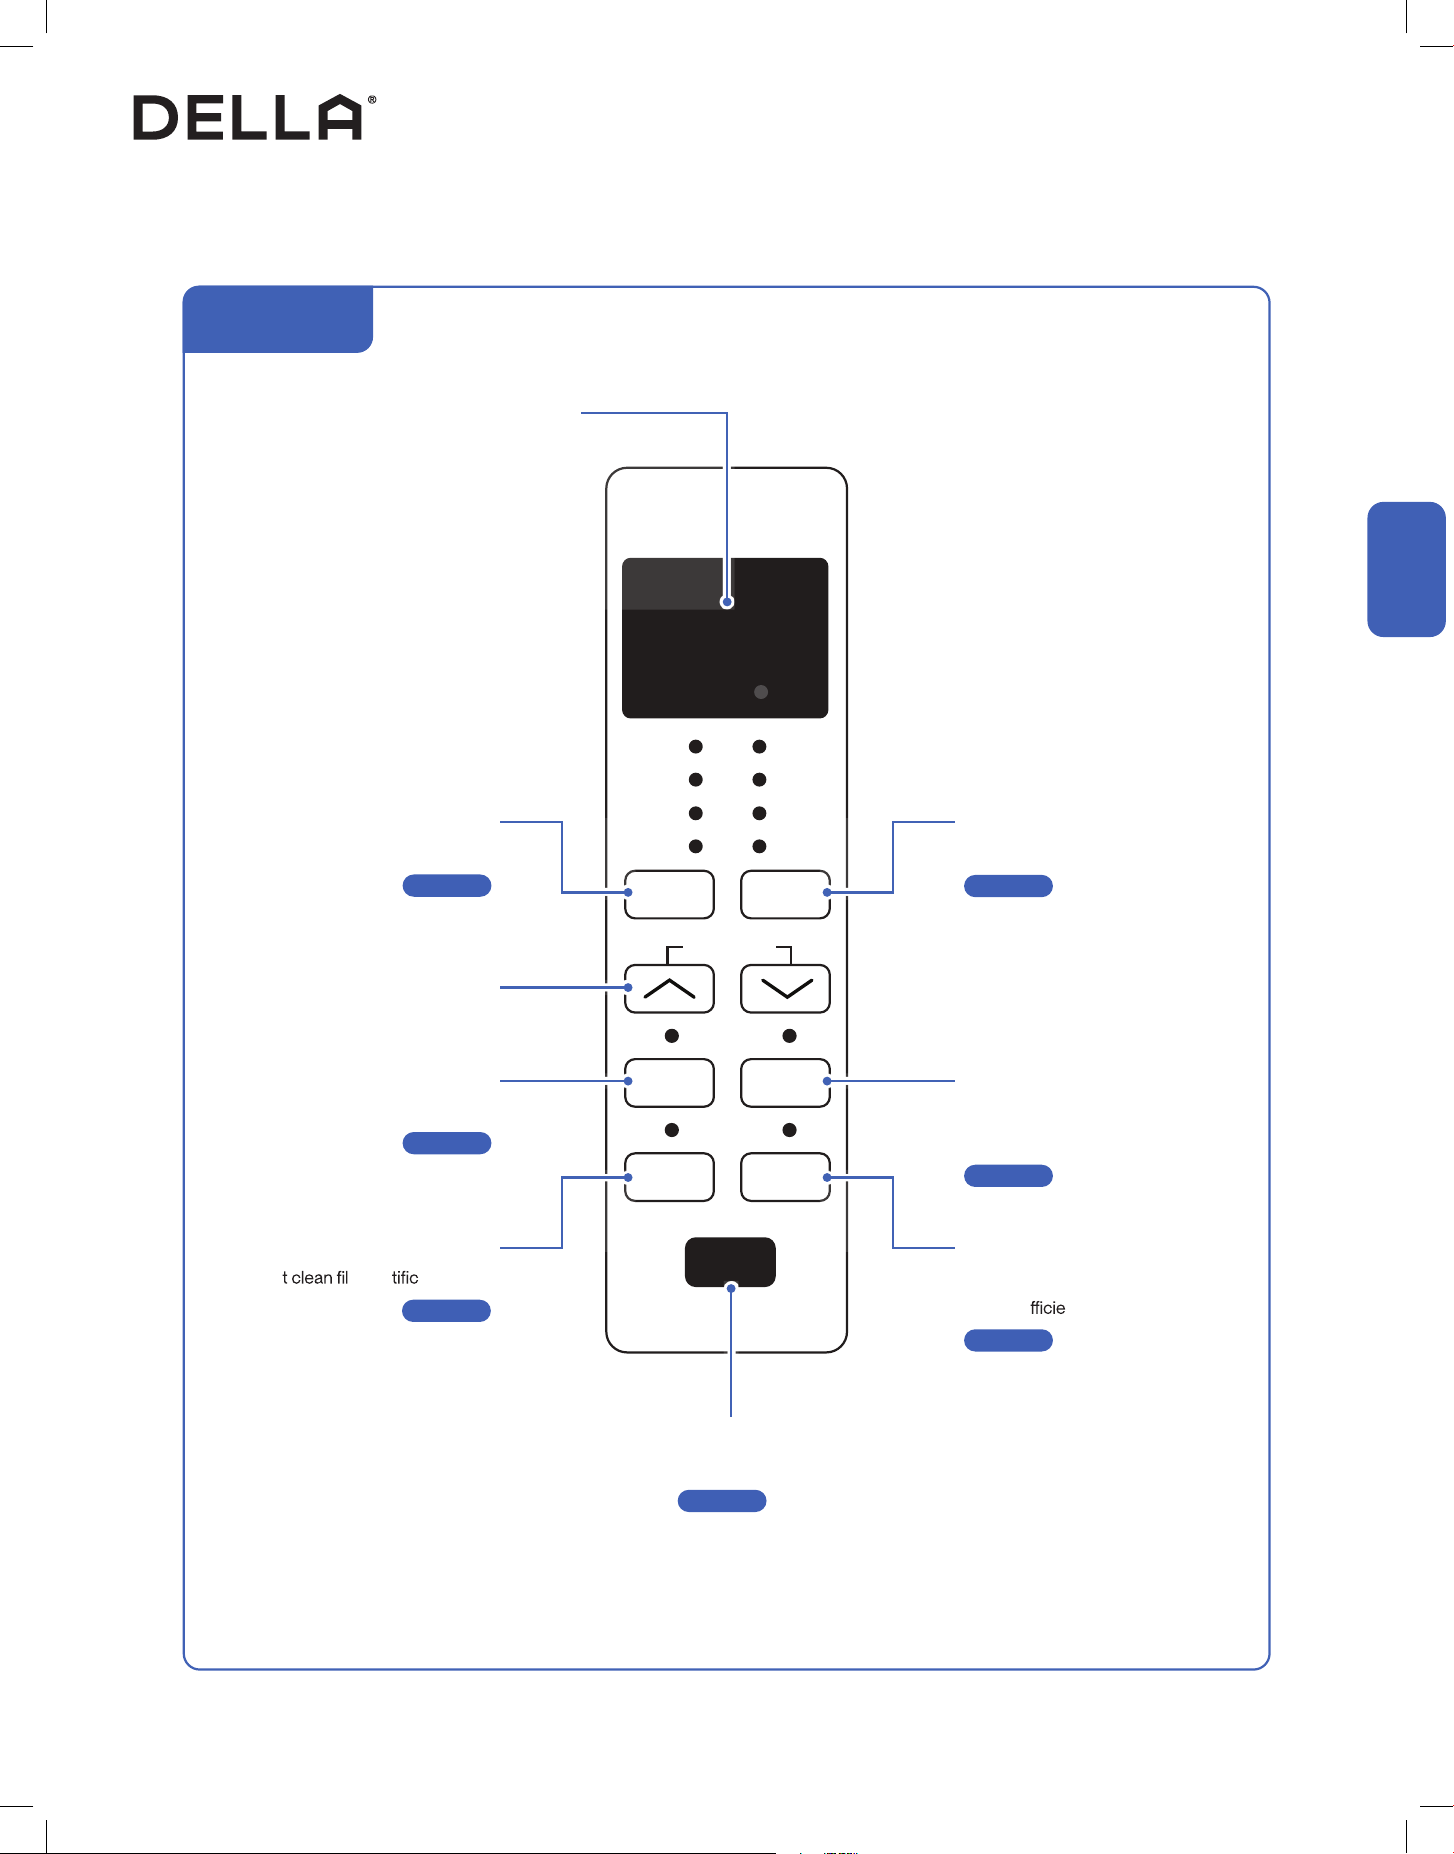
Control Panel
Before Using
FILTER ECO
TIMER SLEEP
MODE
FAN
SPEED
TEMP/TIMER
POWER
WIFI
COOL
DRY
FAN
AUTO
MODE
HIGH
MED
LOW
AUTO
SPEED
Power Button
Turn ON / OFF the air conditioner
-00-
Page 23
Sleep Button
Enable the air conditioner to operate a
pre-set program suited for sleep time
-00-
ECO Button
Enable the air conditioner to be more
energy e
nt
-00-
Timer Button
Enable ON / OFF timer setting
-00-
Filter Reset Button
Rese ter no ation light
-00-
Page 25
Page 25
Page 26
Page 26
Fan Speed Button
Select fan speed
-00-
Page 24
Increase / Decrease Button
Adjust temperature / timer setting
Mode Button
Select operation mode
-00-
Page 23
Display
Indicate operating status, temperature or
timer setting
048-TL-W5KWDS
048-TL-W6KWD
20
Before Using
Before Using
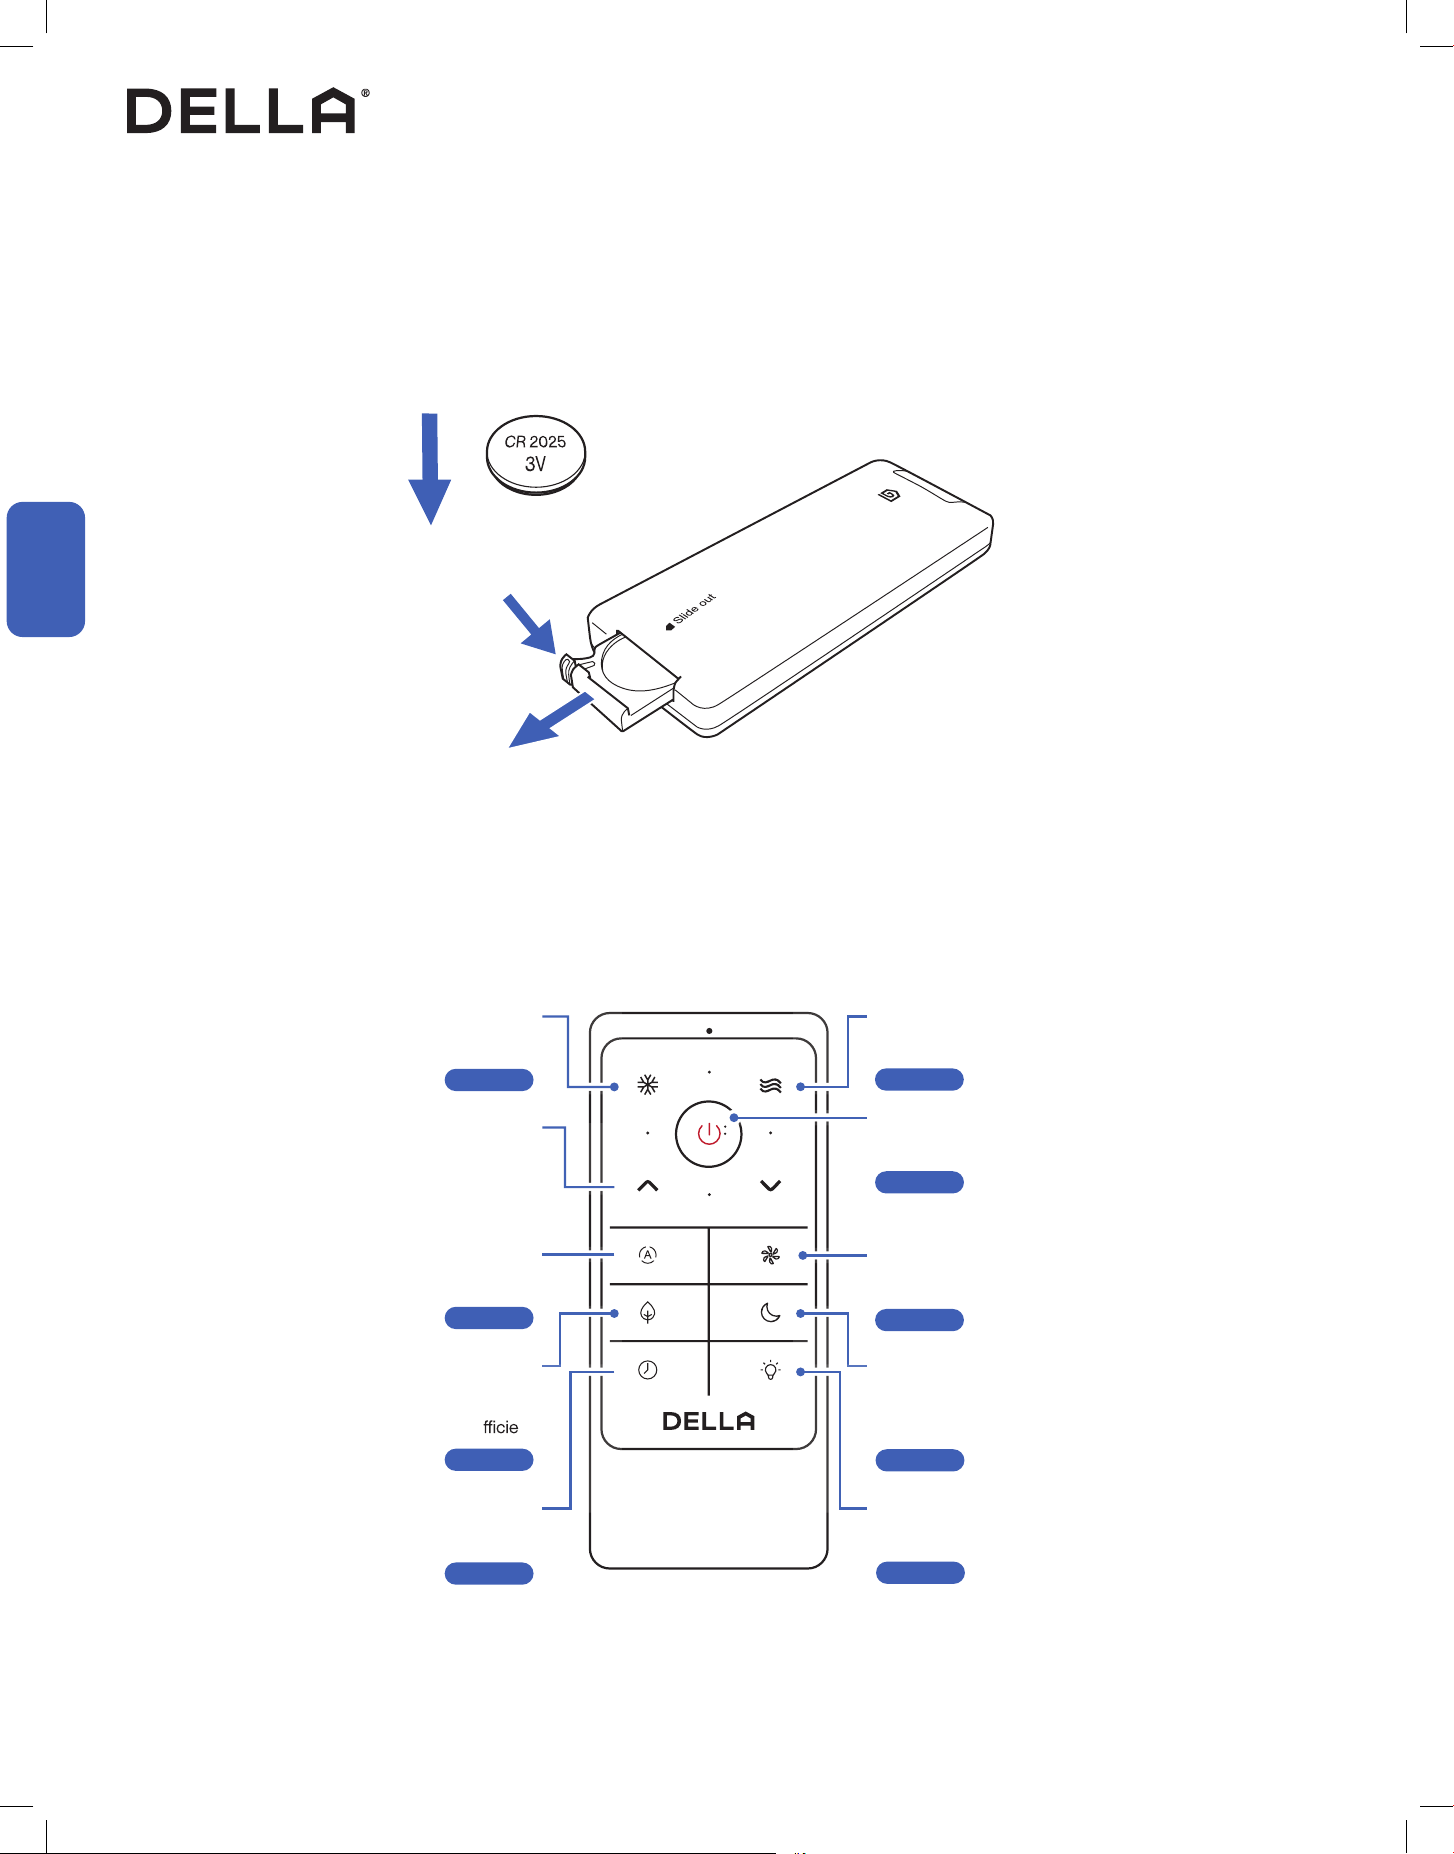
Remote Control (Insert Battery)
Remote Control
Before Using
1. Slide and remove the battery tray from the remote control.
2. Place a CR2025 coin battery into the battery compartment in correct polarity.
3. Reinstall the battery tray into the remote control.
Power Button
Turn ON / OFF the air conditioner
-00-
Fan Mode Button
Select fan mode
-00-
Page 23
Page 23
Sleep Button
Enable the air conditioner to operate a pre-set
program suited for sleep time
-00-
ECO Button
Enable the air conditioner to be more
energy e
nt
-00-
Display Button
Turn ON / OFF the indoor unit display
-00-
Timer Button
Enable ON / OFF timer setting
-00-
Page 25
Page 25
Page 26
Page 26
Fan Speed Button
Select fan speed
-00-
Page 24
Cool Mode Button
Select cool mode
-00-
Auto Mode Button
Select auto mode
-00-
Page 23
Page 23
Increase / Decrease Button
Adjust temperature / timer setting
+
-
From the bac
Note: Before using, please take out the insulating strip from the bottom of remote control.
k of the remote control, push the left fastener of the battery tray to the right
while holding the top of battery tray and pulling out.
1
2
21v.20241112
Before Using
Before Using
a ) Remove and immediately recycle or dispose of used batteries according to local regulations and keep
away from children. Do NOT dispose of batteries in household trash or incinerate.
b ) Even used batteries may cause severe injury or death.
c ) Call a local poison control center for treatment information.
d ) Compatible battery type: CR 2025, Voltage: 3V.
e ) Non-rechargeable batteries are not to be recharged.
f ) Do not force discharge, recharge, disassemble, heat above (manufacturer‘s specied temperature rating)
or incinerate. Doing so may result in injury due to venting, leakage or explosion resulting in chemical burns.
g ) Ensure the batteries are installed correctly according to polarity (+ and -).
h ) Do not mix old and new batteries, dierent brands or types of batteries, such as alkaline, carbon-zinc,
or rechargeable batteries.
i ) Remove and immediately recycle or dispose of batteries from equipment not used for an extended period
of time according to local regulations.
j ) Always completely secure the battery compartment. If the battery compartment does not close securely,
stop using the product, remove the batteries, and keep them away from children.
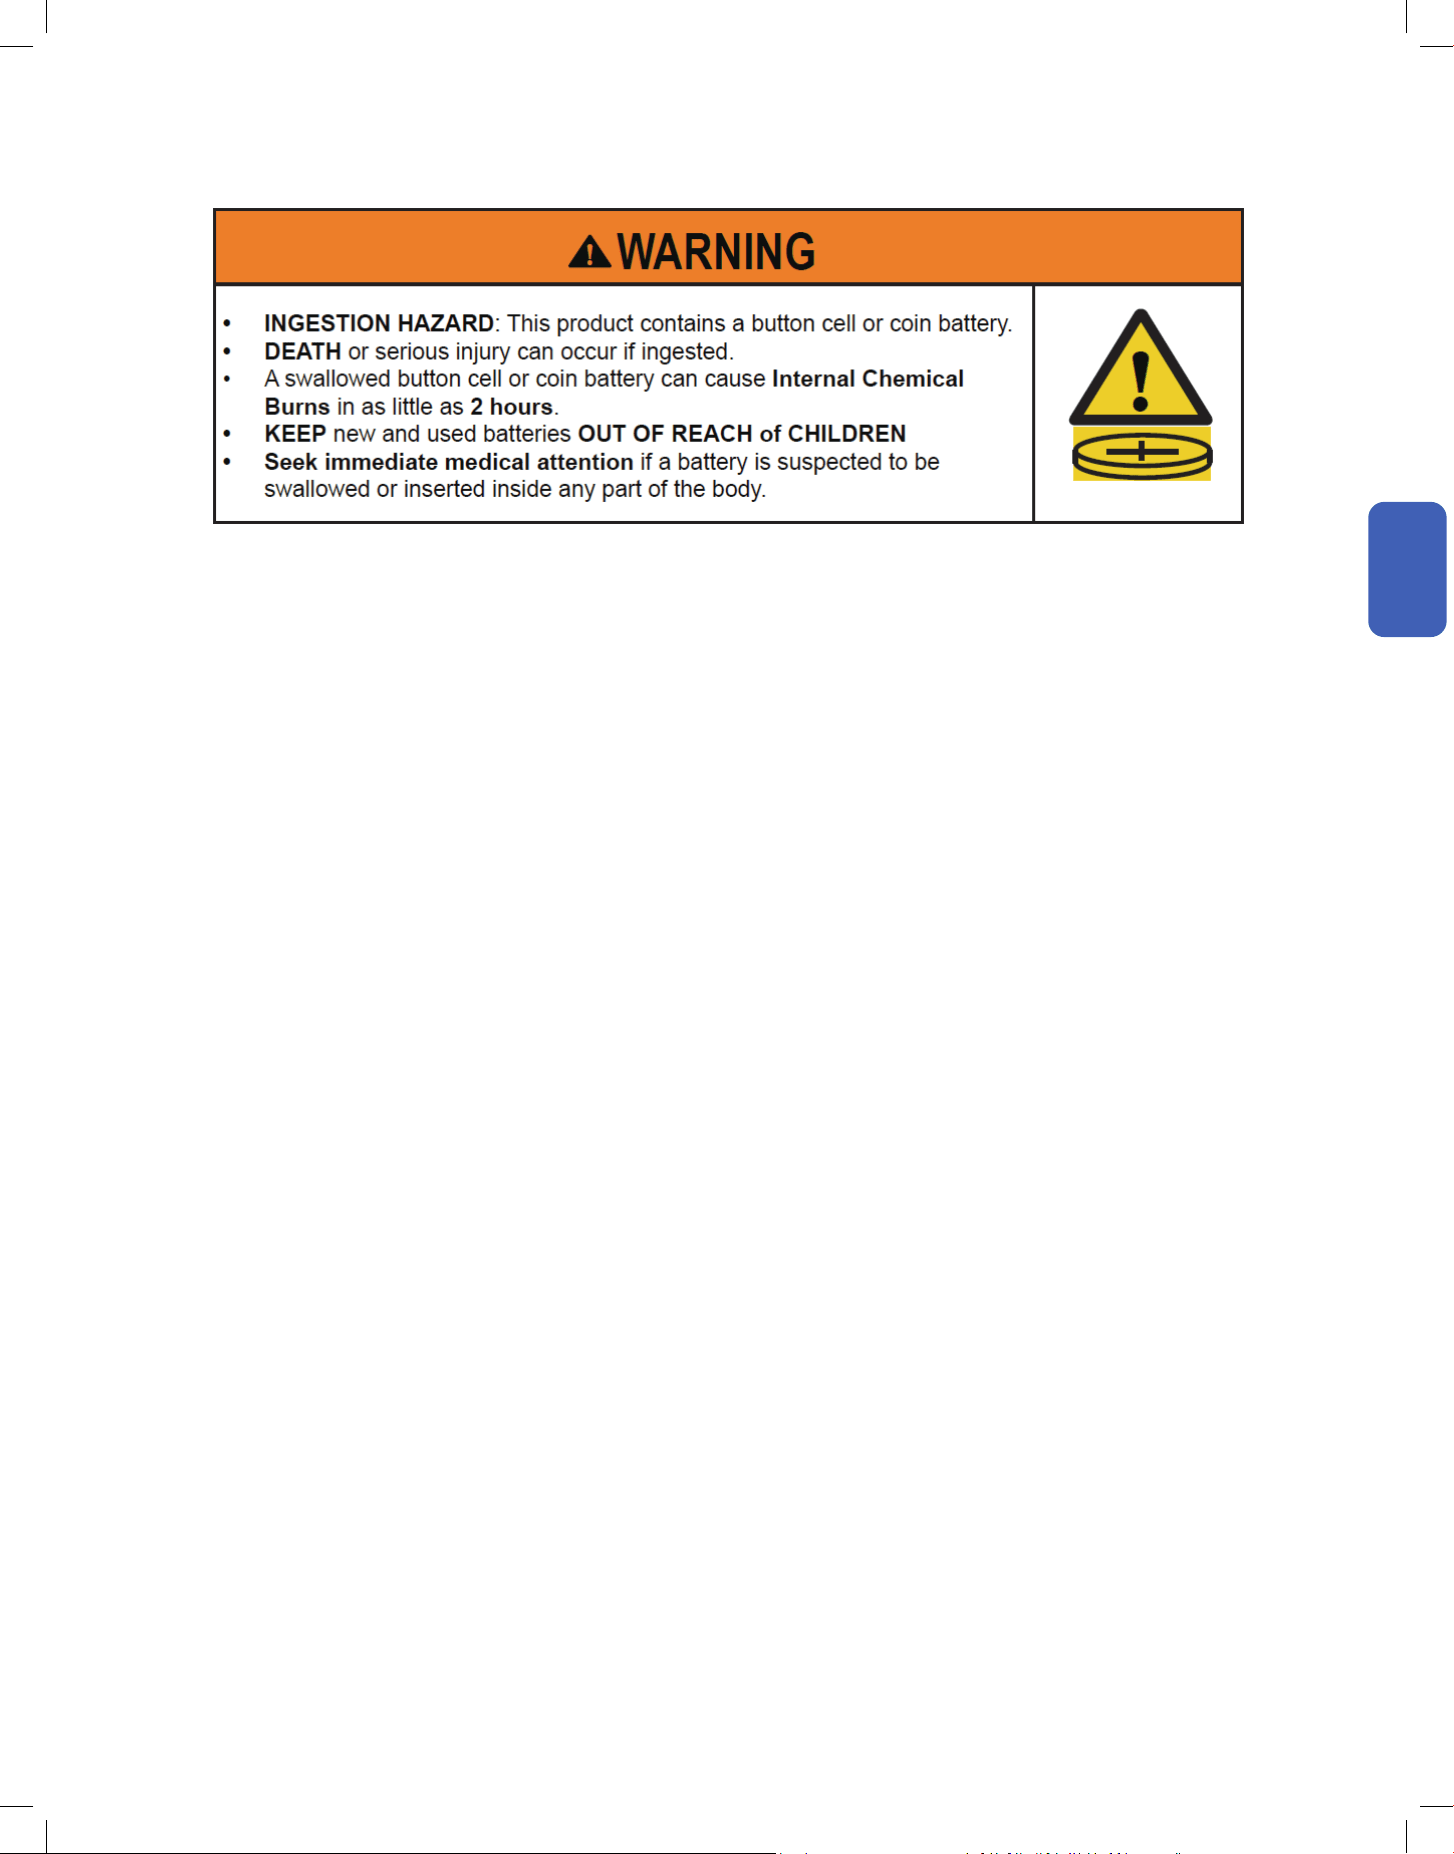
k ) Do not ingest battery, Chemical Burn Hazard.
l ) This product contains a coin or button cell battery. If the coin or button cell battery is swallowed, it can
cause severe internal burns in just 2 hours and can lead to death.
m ) Keep new and used batteries away from children. If the battery compartment does not close securely,
stop using the product and keep it away from children. If you think batteries might have been swallowed
or placed inside any part of the body, seek immediate medical attention.
Coin Cell Battery Safety Warning:
22
Basic Operation
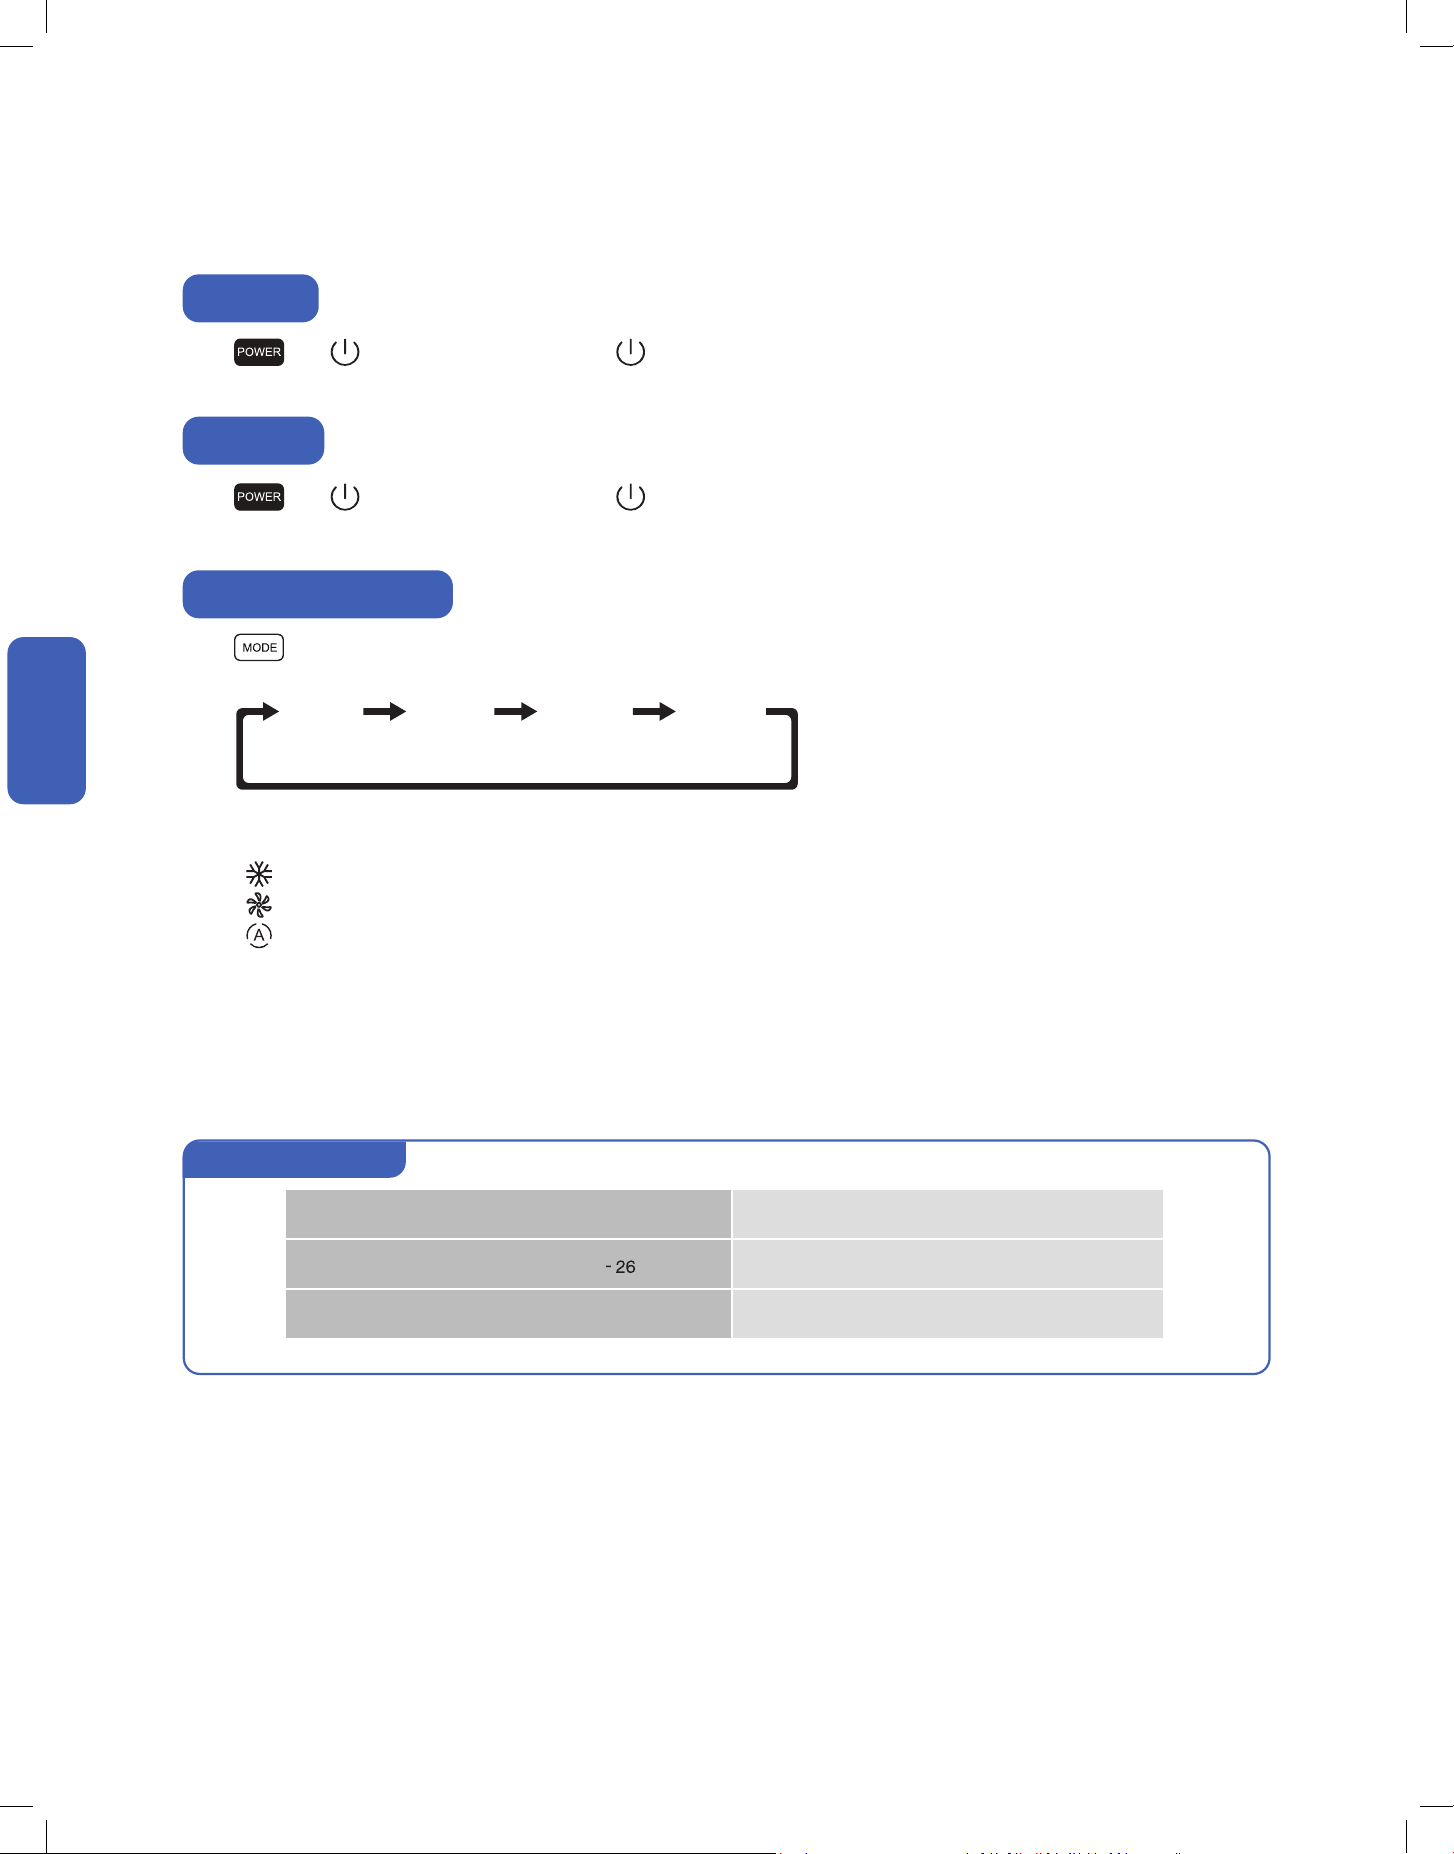
Press or on the control panel or press on the remote control.
• The air conditioner will start operating.
Press on the control panel to select operation mode.
Alternatively, on the remote control,
Press to select cool mode;
Press to select fan mode;
Press to select auto mode.
Press or on the control panel or press on the remote control.
• The air conditioner will stop operating.
Power ON
Power OFF
COOL DRY FAN
AUTO
MODE
Select Operation Mode
NOTE: Dry mode is not selectable using the remote control and is only available on the control panel.
• Cool Mode: The air conditioner will cool the room according to your set temperature.
• Dry Mode: The air conditioner will automatically alternate between cooling cycles and fan function to reduce humidity in your room.
• Fan Mode: The air conditioner will circulate air in the room.
• Auto Mode: The air condioner automatically select operation mode based on build in program logic.
Auto mode operation
Room temp. ≥ 79°F / 26°C Cool Mode, Set temp. 73°F / 23°C
Room temp. 68°F - 79°F / 20°C
°C Dry Mode, Set temp. = Room temp. − 4°F / 2°C
Room temp. < 68°F / 20°C Fan Mode
Basic Operation
Basic Operation
23v.20241112
Basic Operation
Basic Operation
Auto
Mode
Basic Operation
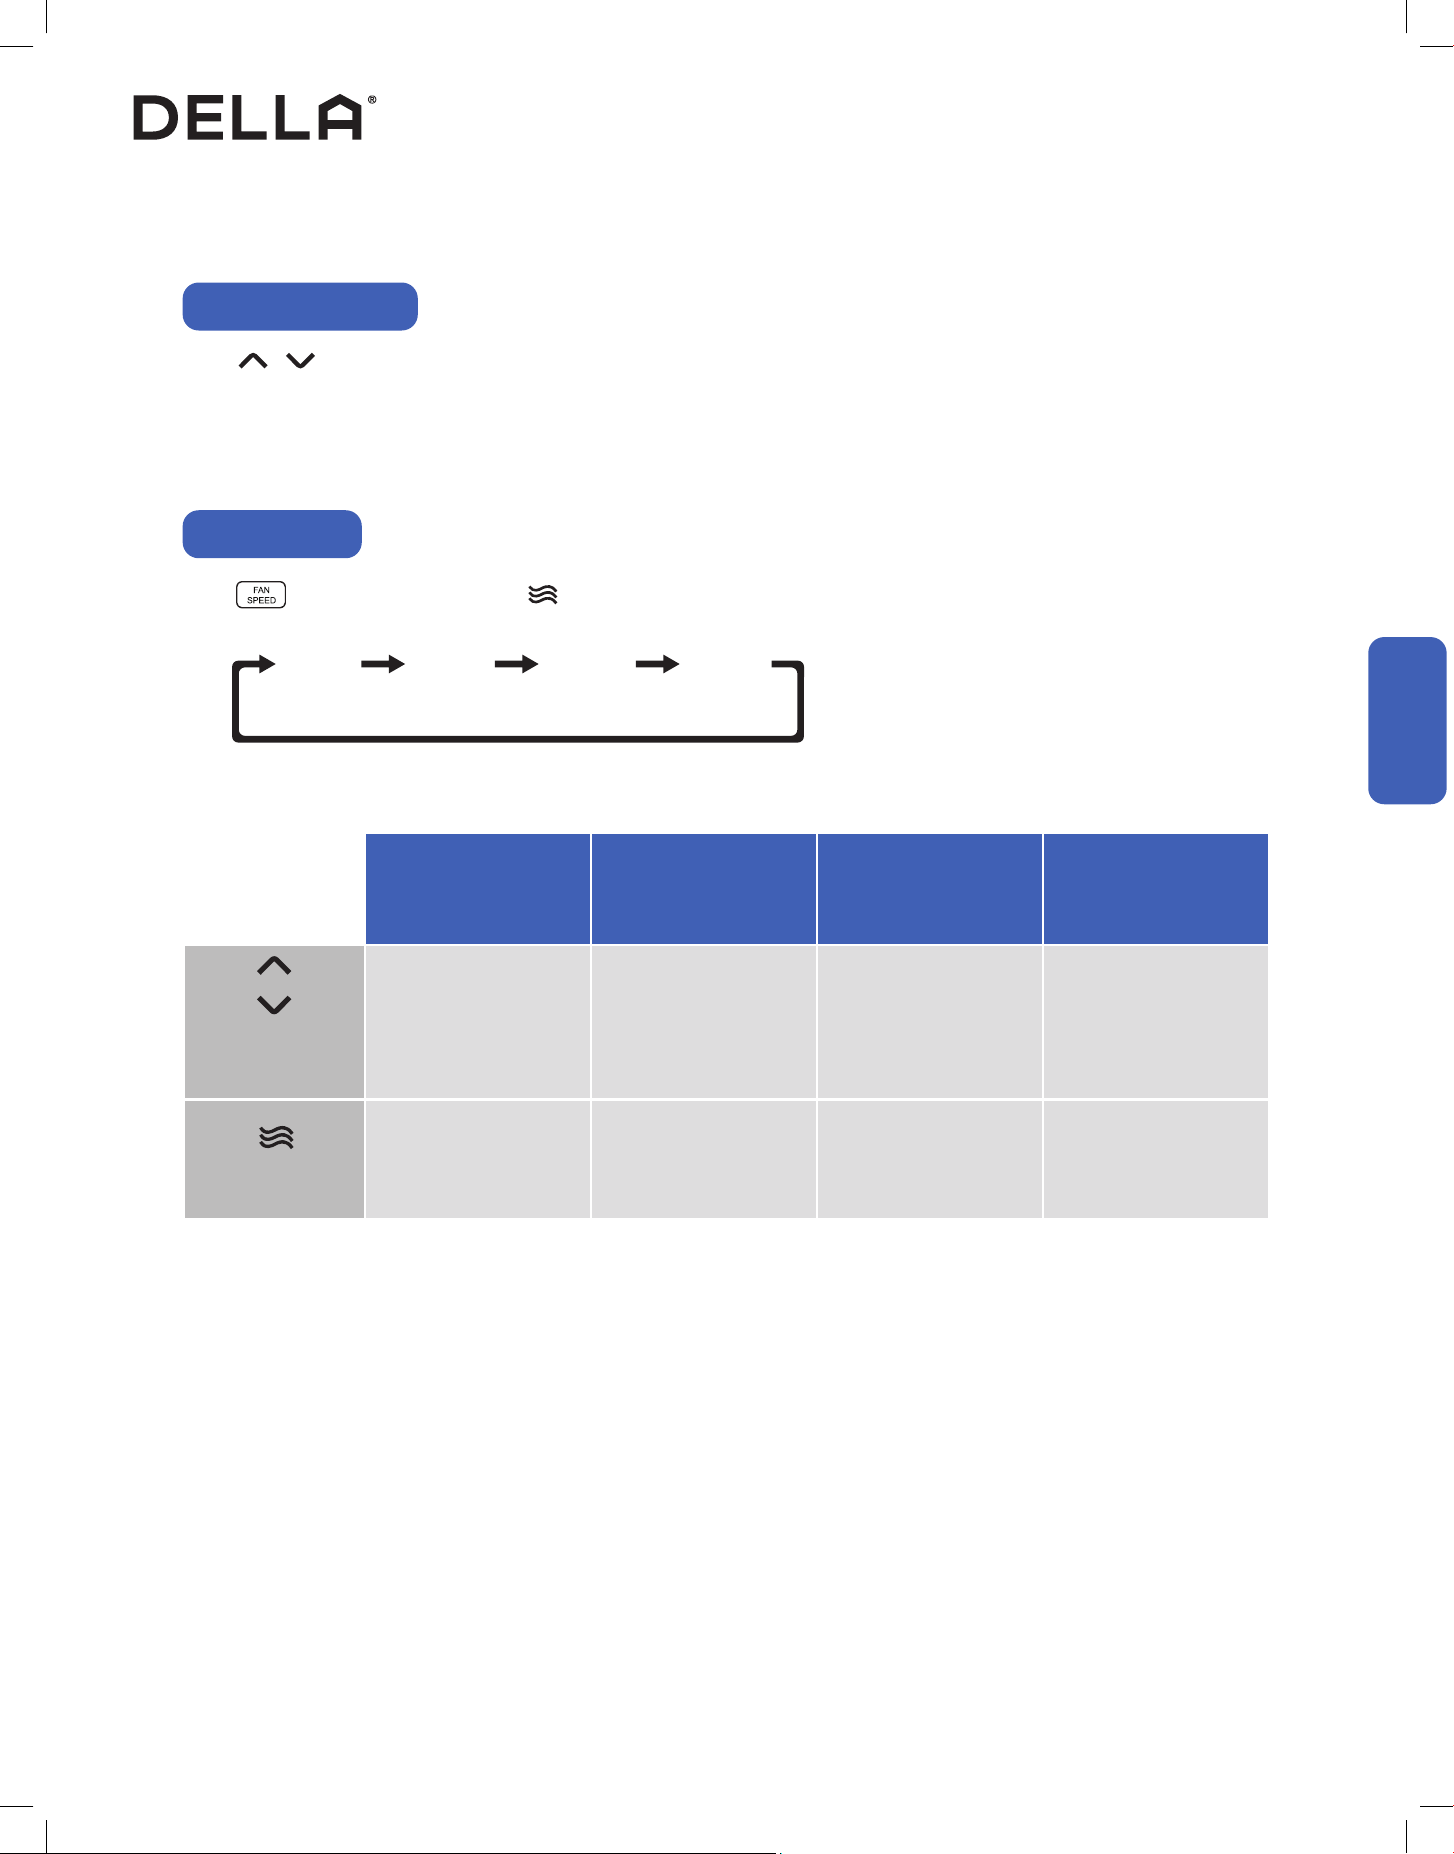
Adjust Temperature
Press on the control panel or remote control to adjust temperature setting.
• Temperature setting will adjust by 1°F / 1°C increment for each time the button is pressed.
• Temperature can only be set between 61°F - 88°F / 16°C - 31°C.
Set Fan Speed
Press on the control panel or press on the remote control to select your desired fan speed.
HIGHMEDLOW
AUTO
SPEED
Cool
Mode
Dry
Mode
Fan
Mode
Auto
Mode
61°F - 88°F / 16°C - 31°C N/A
All Fan Speed High, Med, Low All Fan Speed
Temperature
Setting
Fan Speed
24
Advance Function
Advance Function
Advance Function
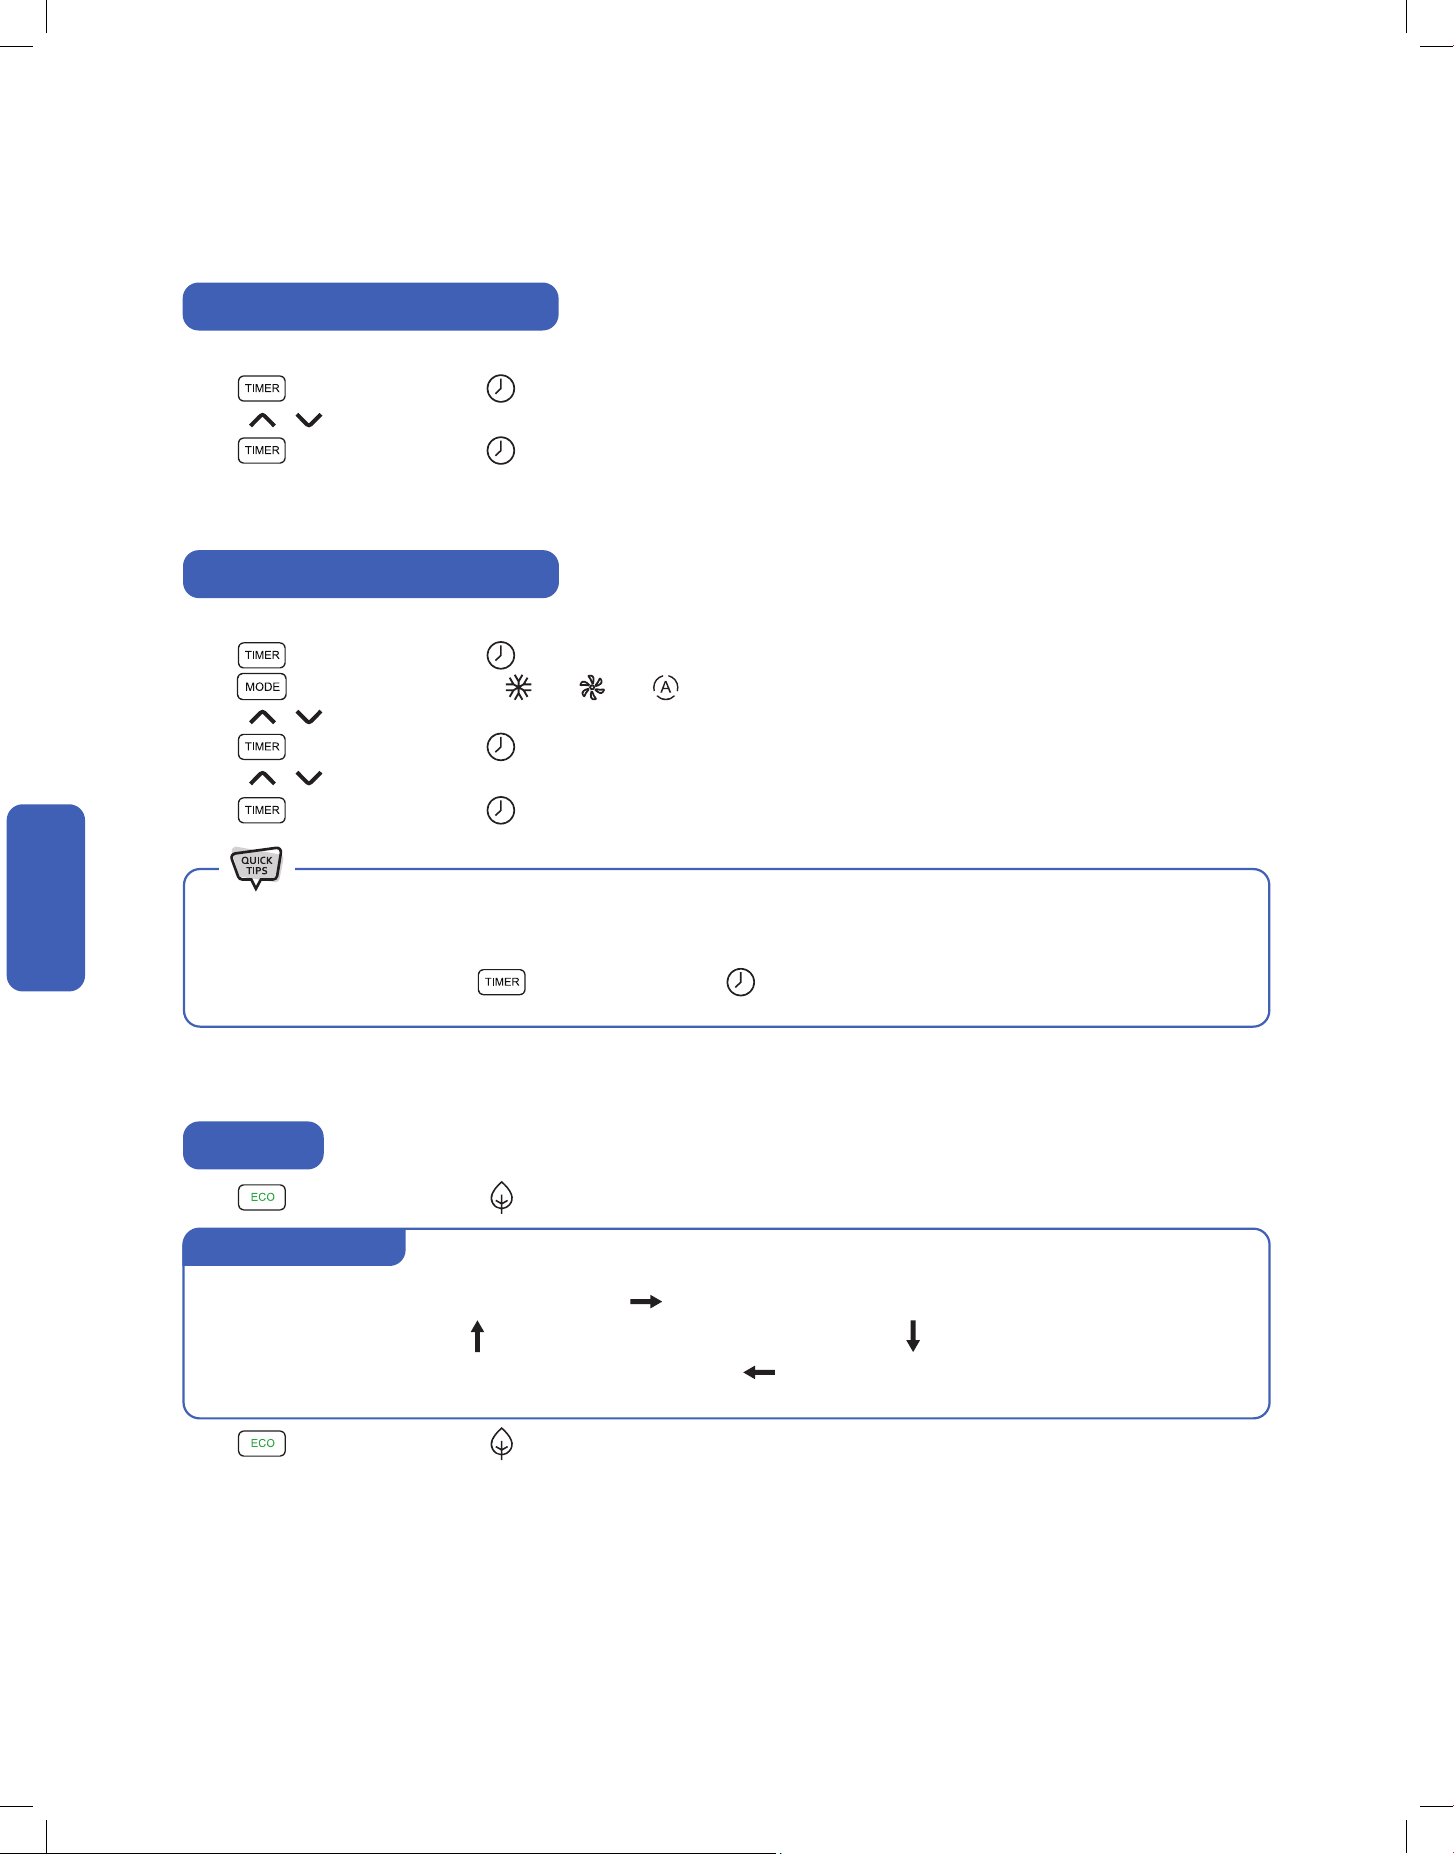
Timer Function (Shutdown Timer)
Timer Function (Start-up Timer)
Set a timer to automatically turn OFF the air conditioner.
Press on the control panel or on the remote control when the air conditioner is ON.
Press to set the desired turn o time.
Press on the control panel or remote control again to conrm the timer setting.
Set a timer to automatically turn ON the air conditioner.
Press on the control panel or on the remote control when the air conditioner is OFF.
Press to on the control panel or / / on the remote control to select operation mode.
Press to set the desired temperature.
Press on the control panel or on the remote control again.
Press to set the desired start-up time.
Press on the control panel or on the remote control one more time to conrm the timer setting.
• Both the shutdown and start-up timer can be set between 0.5 - 24 hours.
• Timer can be set in 0.5 hour increment below 10 hours, and in 1 hour increment between 10 and 24 hours.
• To cancel timer setting, press on the control panel or on the remote control after the timer has been set.
ECO Mode
Press on the control panel or on the remote control to enable ECO mode.
Press on the control panel or on the remote control again to disable ECO mode.
Cool Room to your desired temp. Turn OFF until room temp. rises above desired temp.
Fan motor turn on and run for a while
Compressor start operating and cool the room
ECO mode operation
25v.20241112
Advance Function
Advance Function
Advance Function
In sleep mode, the air conditioner will operate a pre-set program which is suitable during sleep.
Press on the control panel or on the remote control to enable sleep mode.
Press on the control panel or on the remote control again to disable sleep mode.
Sleep Mode
Sleep mode operation
• When sleep mode is enabled, sleep mode light indicator will be turn on after 30s, and then all indicator lights will be o.
• During sleep mode, the air conditioner will raise the temperature by 2°F / 1°C every 30 - 60 minutes until the set temperature reach
82°F / 28°C.
• During sleep mode, the air conditioner will automatically adjust fan speed.
Switch ON / OFF the display on the control panel.
Press on the remote control to turn OFF the indoor unit display.
Press on the remote control again to turn ON the indoor unit display.
Display ON / OFF
NOTE: Display control is only available using the remote control and is not on the control panel.
Press on the remote control 6 times in 4 seconds on the remote control to reset and ready for pairing with your air conditioner to the
"Della+" app.
The lter check light wil turn on after the fan motor works for 500 total hours as a reminder to clean the lter.
Press on the control panel to reset the lter check light indicator after cleaning the air lter.
Wi-Fi Reset
Filter Reset Button
NOTE: Filter check light can only be reset on the control panel and is not accessible on the remote control.

26
Advance Function
Advance Function
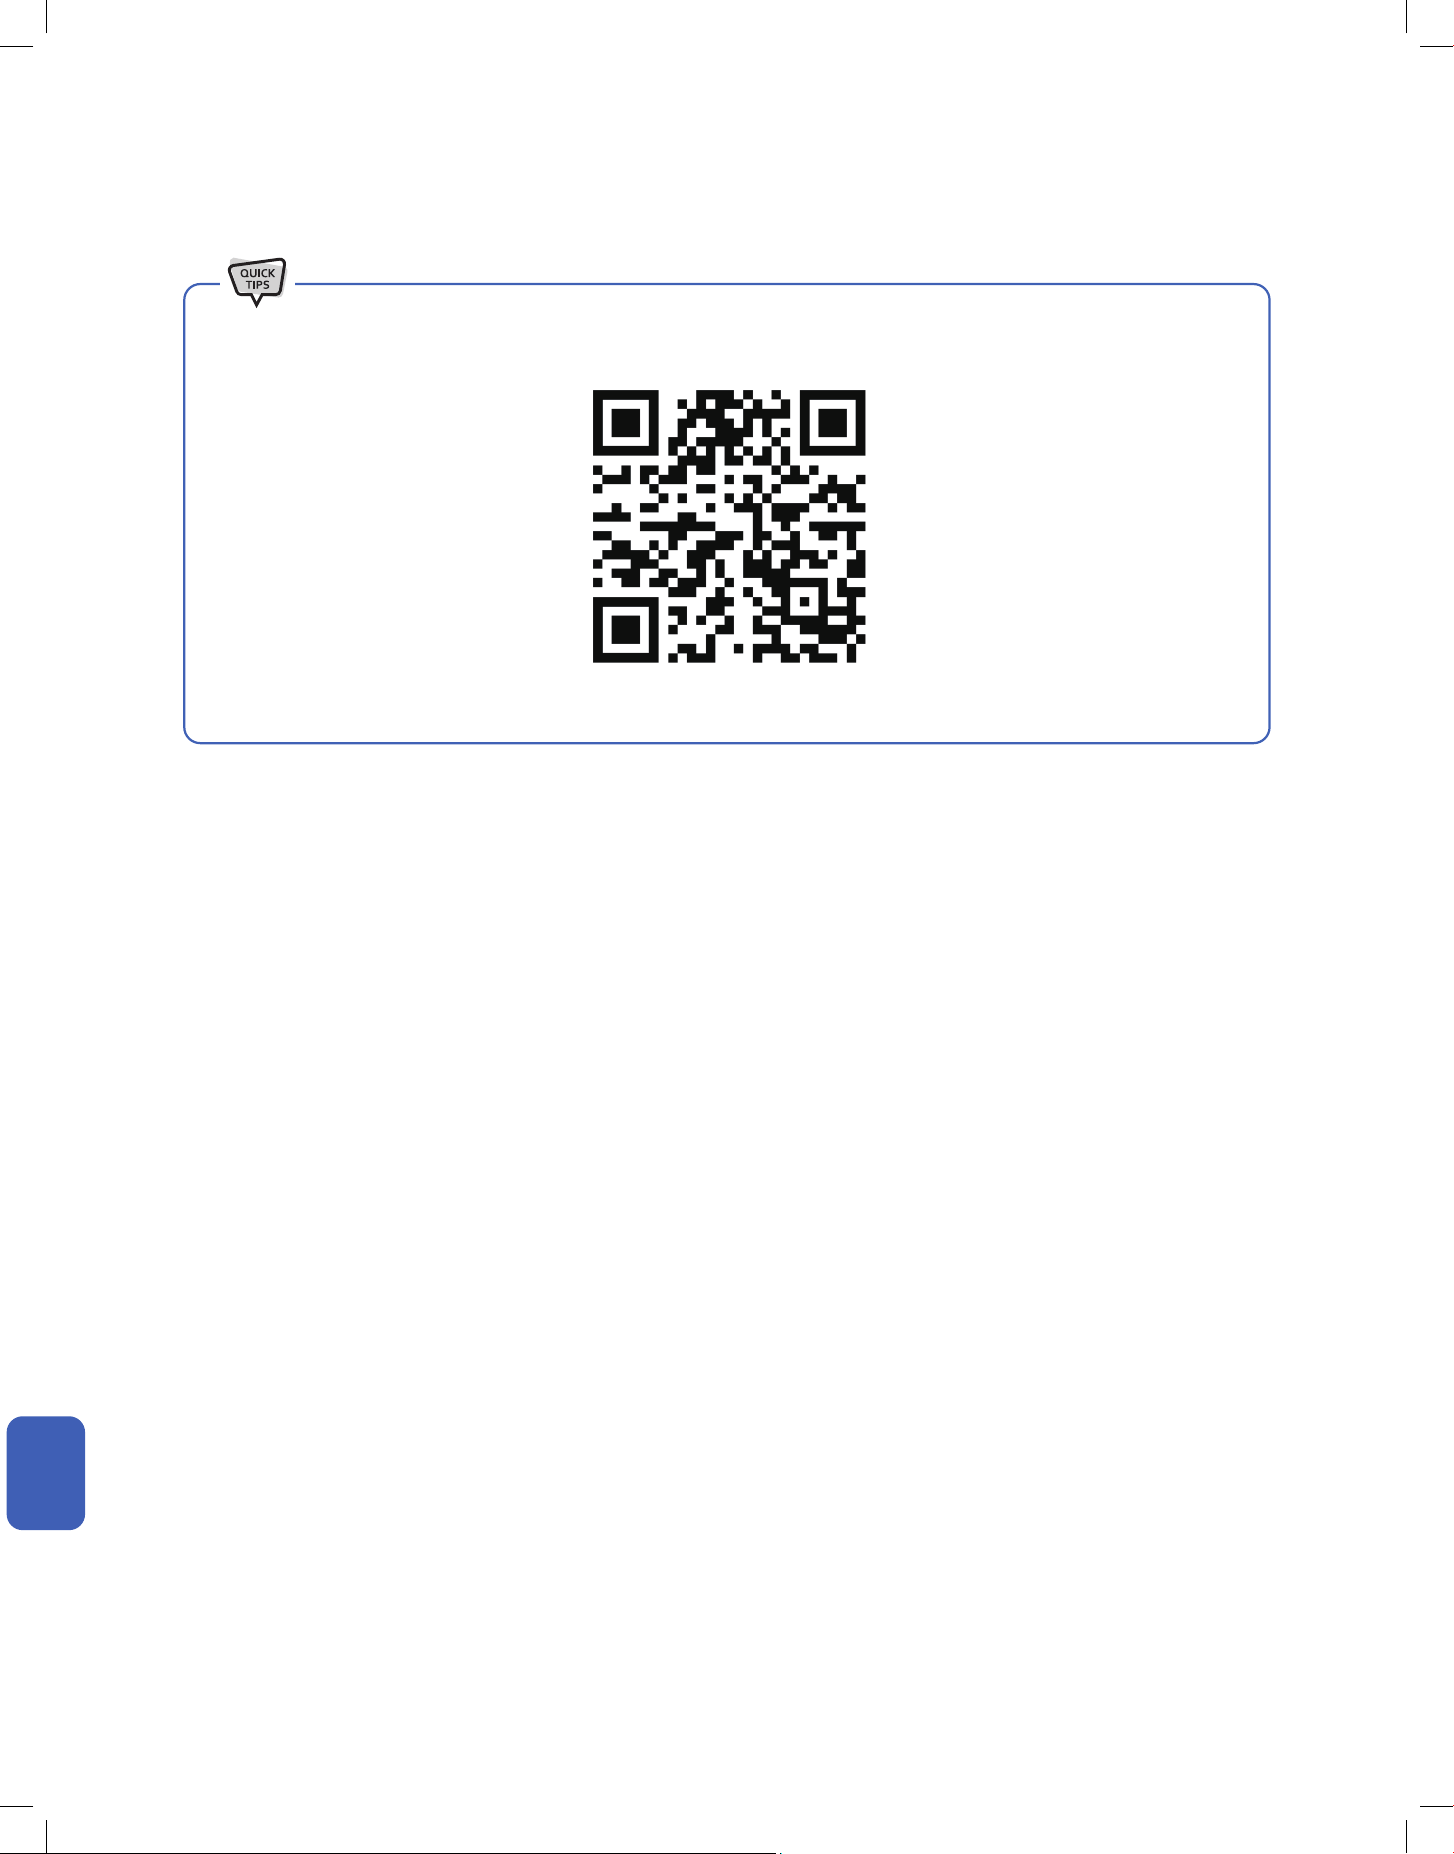
1. Search “DELLA+” on Apple app store or Google Play, or scan the QR code below to download the application.
2. Register an account in the app.
3. Follow the in app instructions to add and pair your Della AC to the app and complete the Wi-Fi set up.
Advance Function
Wi-Fi Set up
Beside the remote control, you can control your Della AC via the Della + app.
• The Della+ application is free, however, data charges may apply when downloading or using the application.
• Della + can be altered without notice for quality improvement and also be deleted depending on the circumstances of manufacturing
rms.
• All trademarks, logo, brand names are the property of their respective companies. Use of these names, brands, and trademarks does
not imply endorsement. Della assumes no responsibility with regard to the performance or use of these products.
Check out detailed tutorial on the most updated application on dellahome.com/support
Scan this QR code to add device to your Della+ app.
Device QR code
27v.20241112
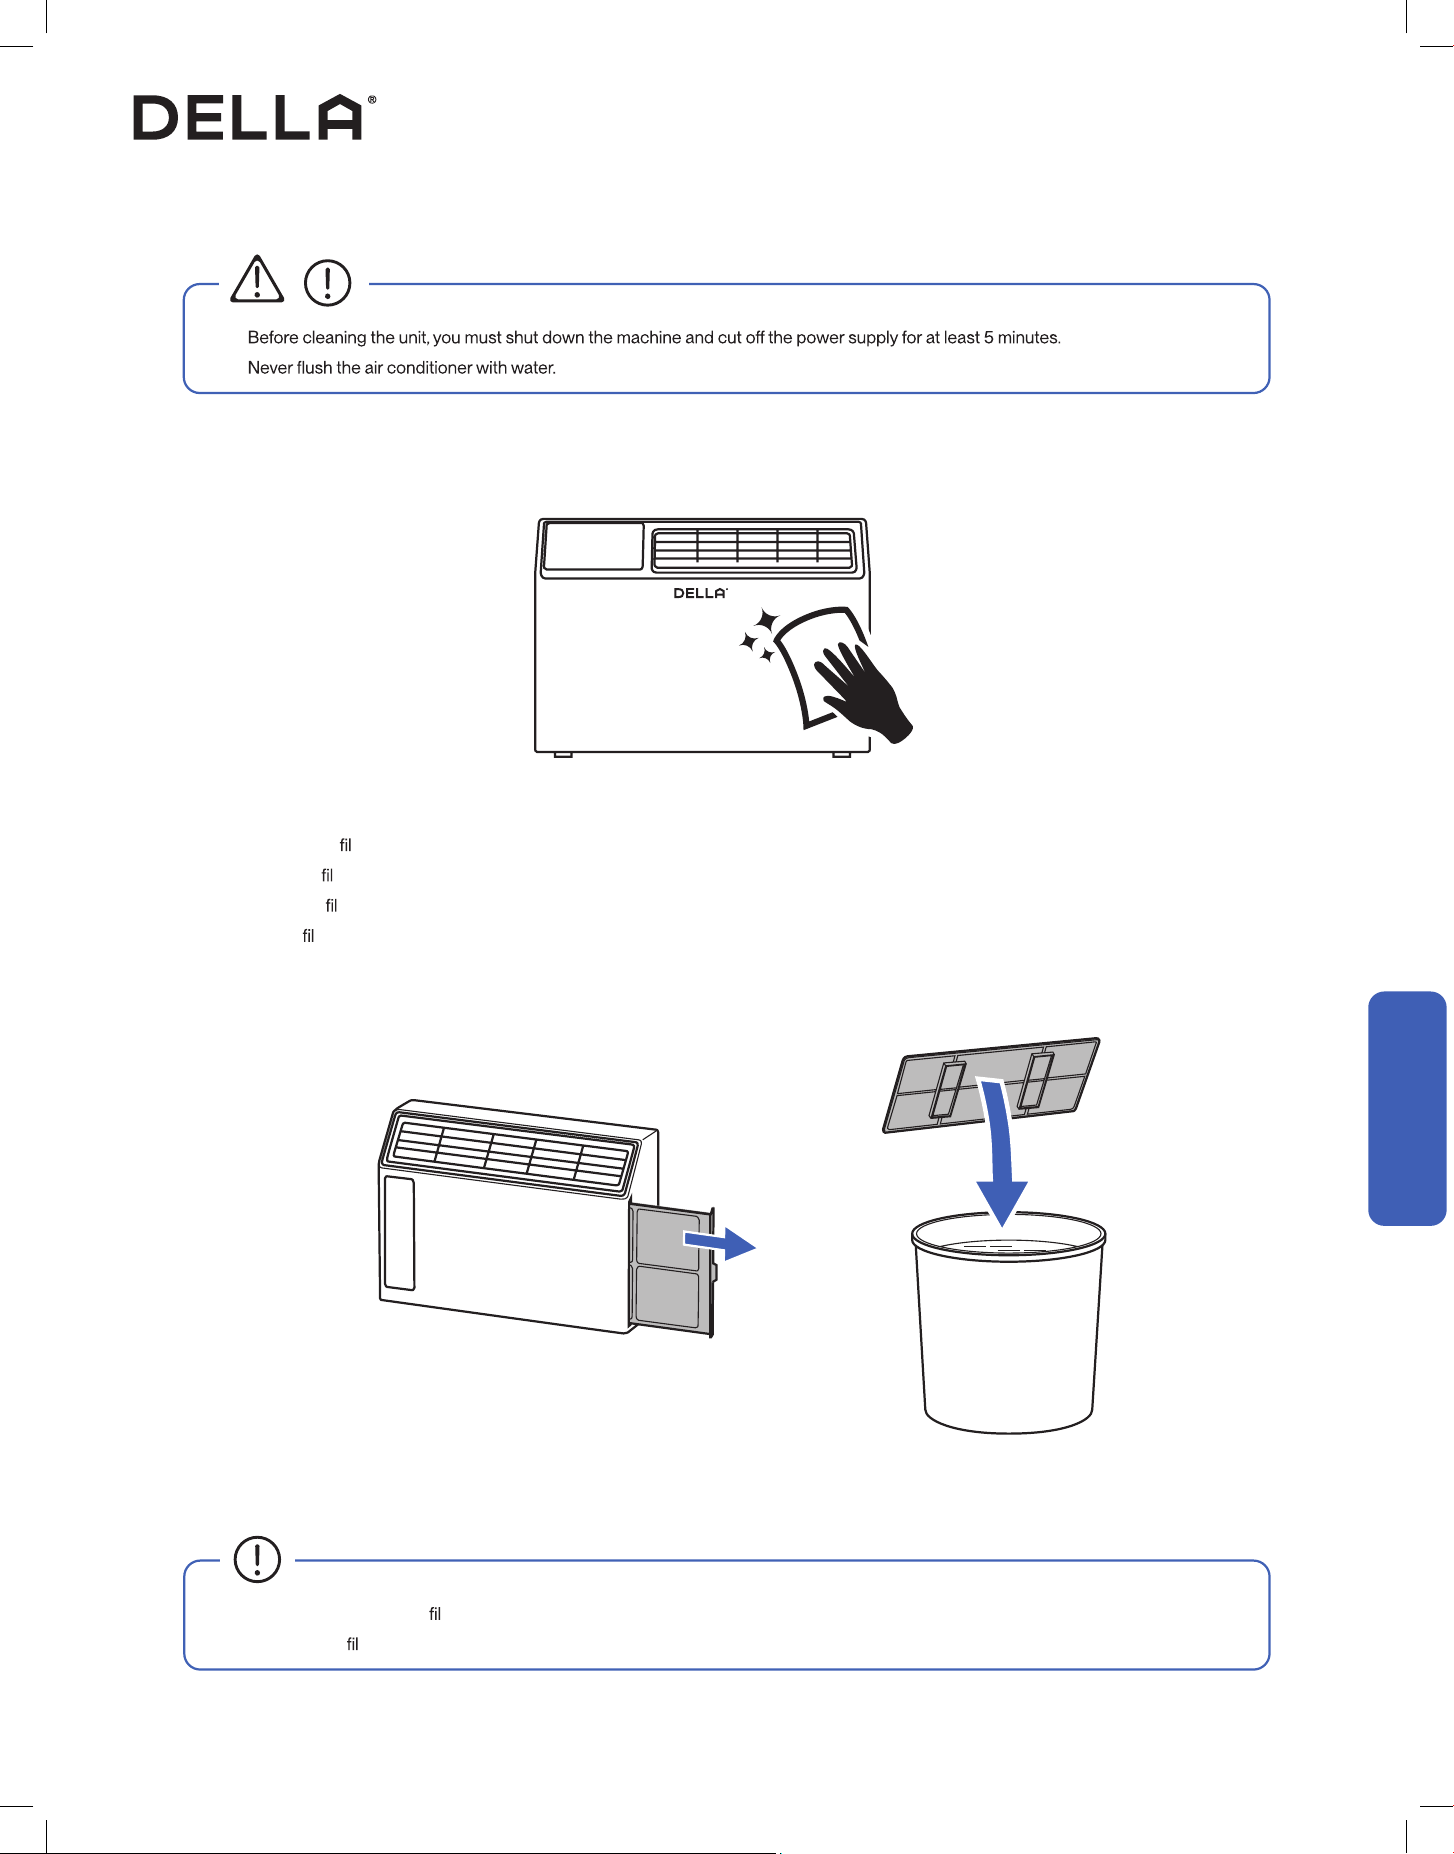
Care and Maintenance
Care and Maintenance
1. Clean the air conditioner with a soft dry cloth or a damped cloth with neutral detergent.
2. Remove any possible debris on the vents and air outlet.
Care and Maintenance
Clean the Unit
1. Remove the air ter from the air conditioner.
2. Clean the air
ter with soapy water.
3. Air dry the air
ter.
4. Put the air
ter back to its original position after it is dry.
<113°F / 45°C
Clean the Air Filter
• Check and clean the air ter regularly to prevent dust accumulation.
• Clean the air
ter frequently if the operating environment is dusty or has bad air quality.
•
•
CAUTION
048-TL-W5KWDS
048-TL-W6KWD

28
Care and Maintenance
Care and Maintenance
• Clean the air lter screen every month.
• Regularly check and remove any obstacles from the air vent.
• Take out the batteries from the remote control and disconnect the power supply of the air conditioner.
• Clean the unit and the air lter screen.
• Remove any obstacles at the air inlet and outlet.
• Install batteries into the remote control and connect the power supply to the air conditioner.
Planning to Not Operate the Air Conditioner for a Long Period
Using the Air Conditioner After a Long Idle Period
Care and Maintenance
Maintenance Routine

29v.20241112
Having Problems?
Having Problems?
Before consulting repair or warranty, please check the following troubleshooting guide.
In the case of an persistent problem, contact a qualied technician for diagnosis and repair.
• When encountering persisting problem, stop operation and turn o the breaker. Continue operation in an abnormal condition may
cause electric shock, re, or damage to the unit.
• Do not attempt to repair or modify the unit by yourself. Incorrect work may result in electric shock, re or injury.
Troubleshooting
WARNING
Problem Possible Cause / Explanation / Solution
The air conditioner is non operational
The power cord is not plugged to a electric outlet.
The house's circuit breaker box tripped. Check and reset the breaker.
When pressing the power button soon after power failure
- The internal protection is acticated, wait for a few minutes for the AC to resume normal
operation.
The LCDI plug tripped. Reset the power plug.
Fauly electric connection, mismatch outlet voltage, or damaged electronic control board.
The air conditioner does not cool
Check and make sure the temperature setting is below the room temperature.
Cold air is leaking out from the room. Close windows to prevent cold air leaking out.
Other heat source in the room. Remove heat source.
The smells of the room, furniture, or cigarettes are absorbed into the unit and then discharged.
Remove odorous objects from the room.
30
Having Problems?
Having Problems?
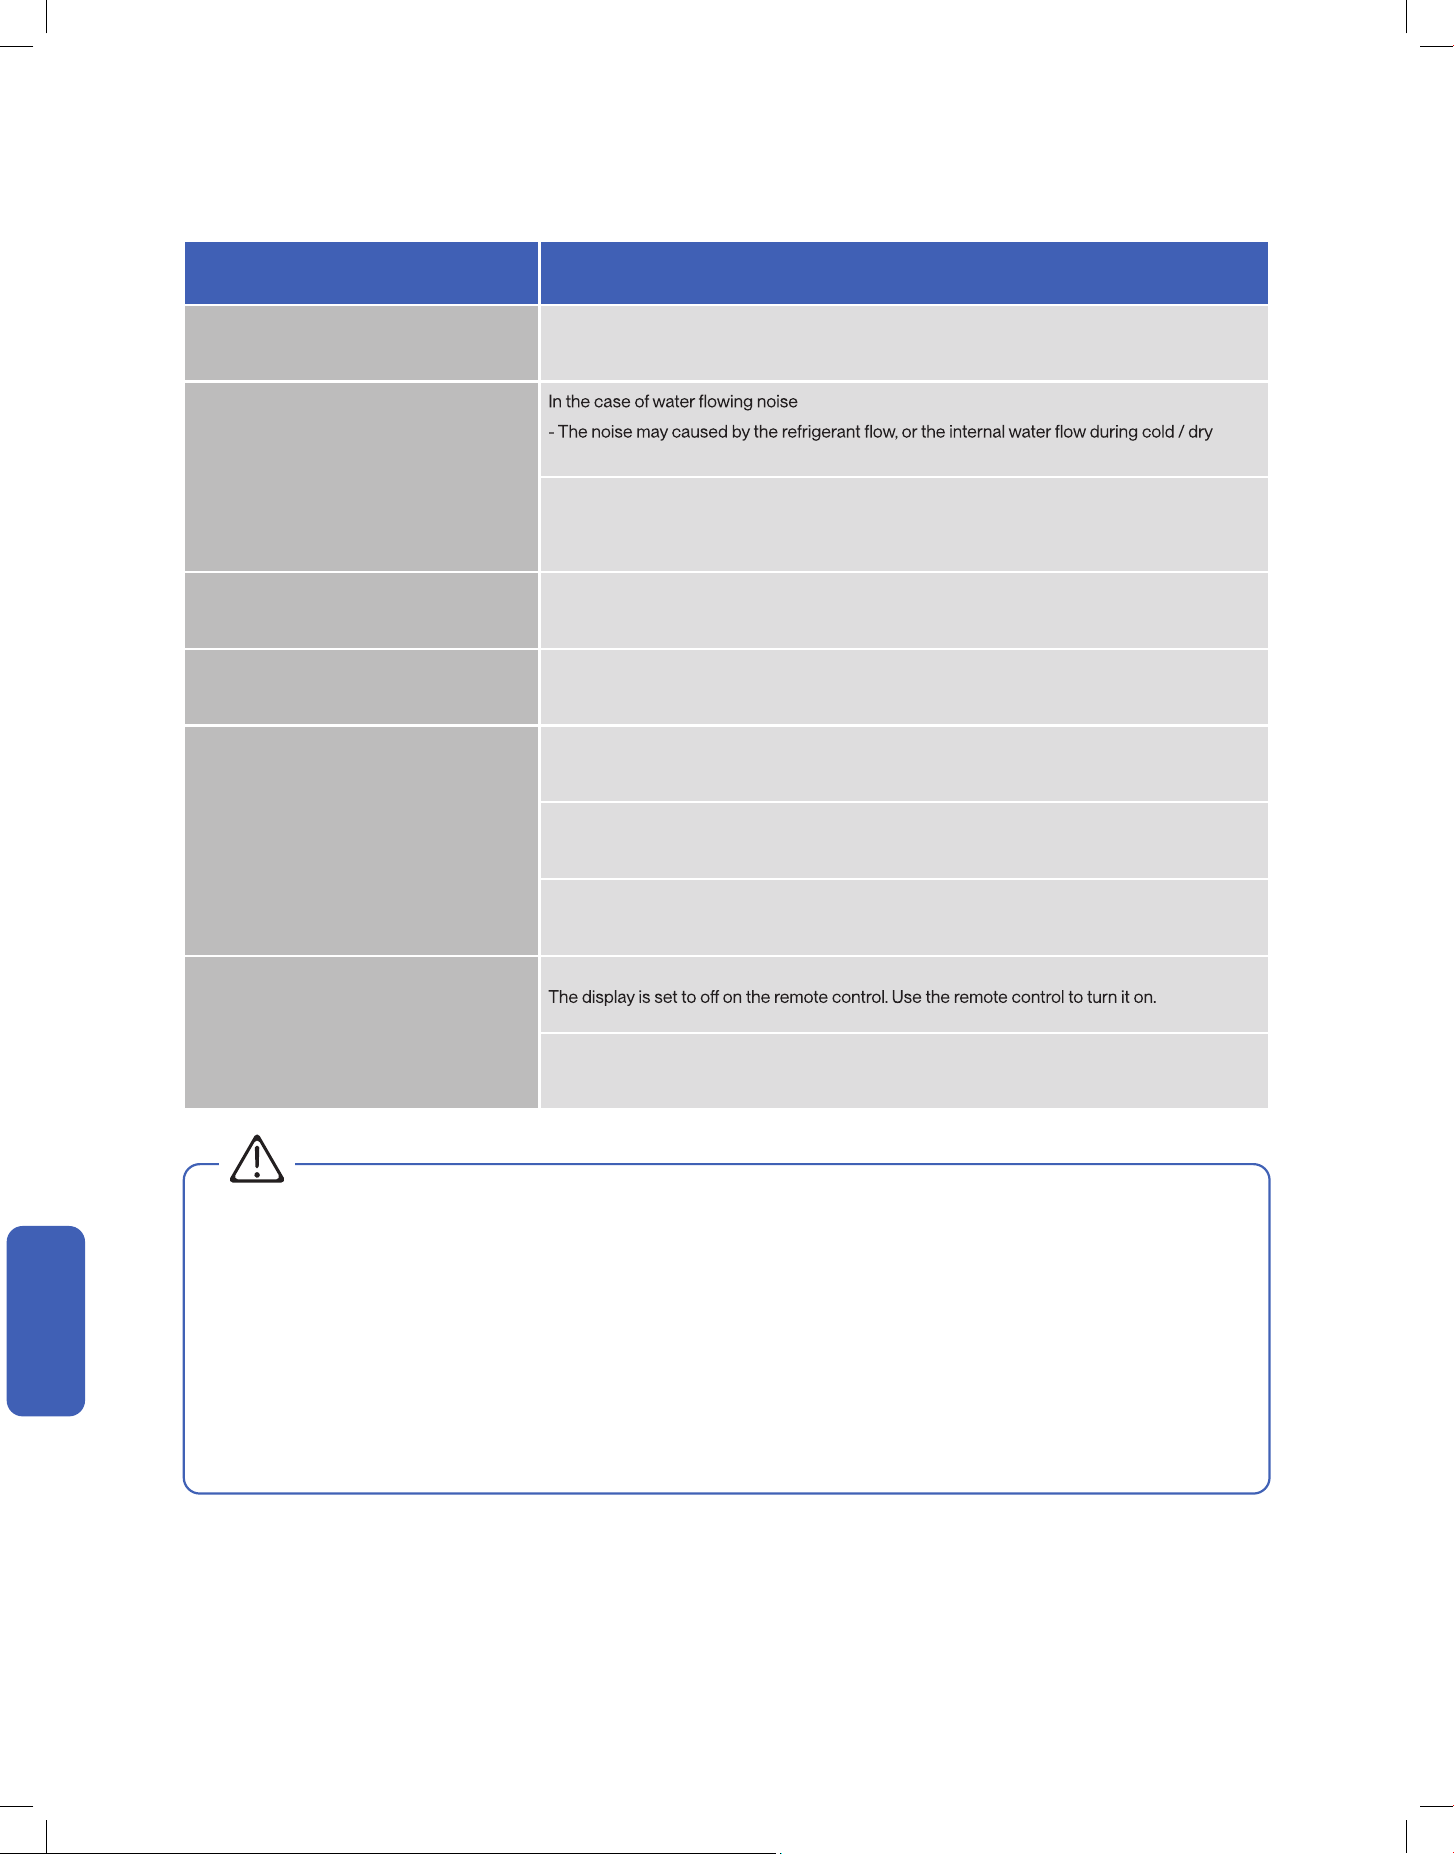
Problem Possible Cause / Explanation / Solution
Mist comes out from the air outlet
This occurs when the air in the room becomes cold in cool or dry mode. This does not indicate
a problem.
Strange Noise
mode. This is not a malfunction.
In the case of plastic cracking noise
- The noise may caused by the thermal expansion on plastic parts and does not indicate a
problem..
Water Dripping Outside This is normal, especially during hot and humid days.
Water Dripping Inside
The air conditioner is not correctly tilted towards outside. Re-position your air conditioner and
make sure the unit is slightly tilted downward towards the outside.
The air conditioner does not respond to the
remote control commands
Remote Control is too far away from the air conditioner.
There is an obstruction between the remote control and the air conditioner..
The battery power has run out in the remote control. Replace the battery.
The display on the air conditioner is not lit
Power failure. Check the power supply / circuit breaker.
Troubleshooting
WARNING
Switch o the air conditioner immediately and cut o the power supply in the event of:
• Strange, loud noises during operation.
• Faulty electronic control board.
• Faulty fuses or switches.
• Spraying water or objects inside the appliance.
• Frequent circuit breaker tripped during operation.
• Abnormally hot or damaged power cord or plug.
• Very strong smells discharging from the appliance.

31v.20241112
Having Problems?
Having Problems?
Disposal Guideline
This appliance contains refrigerant and other potentially hazardous materials. When disposing of the appliance, follow all federal, state, and local
regulations. DO NOT dispose of this product as normal household waste or unsorted municipal waste.
When disposing of this appliance, you have the following options:
• Dispose of the appliance at a designated municipal electronic waste collection facility.
• When buying a new appliance, the retailer will take the old appliance.
• The manufacturer may take back the old appliance.
• Sell the appliance to a certied scrap metal dealer.
32
Warranty
DELLA distributor (hereinafter “Company”) warrants this product against failure due to defect in materials or workmanship under normal use and
maintenance as follows: All warranty periods begin on the date of purchase. If a part fails due to defect during the applicable warranty period,
Company will provide a new or remanufactured part, at Company’s option, to replace the failed defective part at no charge for the part. This
limited warranty is subject to all provisions, conditions, limitations and exclusions listed below.
• The standard warranty period is one (1) year for the entire unit and all parts, with no registration required.
• The extended warranty peroid for Window ACs and Portable ACs is an additional 6-months peroid.
• In order to qualify for the free extended warranty the unit must be:
1. Registered within one hundred (100) days of purchase.
2. Must be with the original owner.
3. In the same address of residence that you entered with your regi
stration.
• Some parts may need to be returned to Della. The limited lifetime warranty covers only parts that need to be replaced
For more information, please contact Della.
dellahome.com/pages/warranty
WARRANTY COVERAGE
STANDARD WARRANTY
EXTENDED WARRANTY
WARRANTY PARTS REPLACEMENT
Scan the QR code or visit our page on dellahome.com/pages/warranty to sign up for warranty coverage on your new DELLA appliance.
Warranty
Warranty

33v.20241112
Warranty
Warranty
Warranty
LIMITATIONS OF WARRANTIES: ALL IMPLIED WARRANTIES AND/OR CONDITIONS (INCLUDING IMPLIED WARRANTIES OR CONDITIONS
OF MERCHANTABILITY AND FITNESS FOR A PARTICULAR USE OR PURPOSE ARE LIMITED TO THE DURATION OF THIS LIMITED
WARRANTY. SOME STATES DO NOT ALLOW LIMITATION ON HOW LONG AN IMPLIED WARRANTY OR CONDITION LASTS, SO THE
ABOVE MAY NOT APPLY TO YOU THE EXPRESS WARRANTIES MADE IN THIS WARRANTY ARE EXCLUSIVE AND MAY NOT BE ALTERED
ENLARGED, OR CHANGED BY ANY DISTRIBUTOR, DEALER, OR OTHER PERSON, WHATSOEVER.
This warranty gives you specic legal rights, and you may also have other rights which vary from state to state. In jurisdictions where warranty
benets conditioned on registration are prohibited by law, registration is not required, and the STANDARD warranty period shown above will
apply.
1. Labor or other costs incurred for diagnosing, repairing, removing, installing, shipping, servicing or handling of either defective parts, or
replacement parts, or new units.
2. Product cleaning required prior to
warranty service and repair.
3. Normal maintenance as outlined in the installation and servicing instructions or Owner’s Manual, including lter cleaning and/or replacement
and lubrication.
4. Failure due to faulty installation or repairs, damage, misapplication, abuse, improper servicing, lack of or in-sucient maintenance,
unauthorized alteration or improper operation.
5. Failure to start due to voltage conditions, improper wiring, blown fuses, open circuit breakers, or damages due to the inadequacy or
interruption of electrical service.
6. Failure or damage due to oods, winds, res, lightning, accidents, corrosive environments (rust or residue etc.) or other conditions beyond
the control of the Company.
7. Damages due to chemicals (volatile organic compounds, sulfur, acids, etc.) or particulates.
8. Failure or damage of coils, piping or other parts due to corrosion, when installed in corrosive environments or within one (1) mile of seacoast.
9. Parts not supplied or designated by Company, or damages resulting from their use.
10. Produc
ts installed outside the 48 contiguous United States, except the District of Columbia and Hawaii, and Canada.
11. Electricity or fuel costs or increases in electricity or fuel costs from any reason whatsoever, including additional or unusual use of
supplemental electric heat.
12. Any cost to replace, rell or dispose of refrigerant, including the cost of refrigerant.
13. Shipping damage or damage as a result of transporting the unit.
14. Accessories such as condensate pumps, line sets and so forth are not covered.
15. Any special, indirect or consequential property or commercial damage of any nature whatsoever. Some states do not allow the exclusion of
incidental or consequential damages, so the above limitation may not apply to you.
16. Consumable components, such as air lters, are not covered under parts warranty.
LIMITED WARRANTY STATEMENT
THIS LIMITED WARRANTY DOES NOT COVER:
34
ID: 2ANDL-TYWE1S
FCC Caution
This device complies with part 15 of the FCC Rules. Operation is subject to the following two conditions:
(1) This device may not cause harmful interference, and (2) this device must accept any interference received, including interference that may
cause undesired operation. Any changes or modications not expressly approved by the party responsible for compliance could void the user's
authority to operate the equipment.
NOTE: This equipment has been tested and found to comply with the limits for a Class B digital device, pursuant to Part 15 of the FCC Rules.
These limits are designed to provide reasonable protection against harmful interference in a residential installation. This equipment generates,
uses and can radiate radio frequency energy and if not installed and used in accordance with the instructions, may cause harmful interference
to radio communications. However, there is no guarantee that interference will not occur in a particular installation. If this equipment does cause
harmful interference to radio or television reception, which can be determined by turning the equipment o and on, the user is encouraged to try
to correc
t the interference by one or more of the following measures:
• Reorient or relocate the receiving antenna.
• Increase the seperation between the equipment and receiver.
• Connect the equipment into an outlet on a circuit dierent from that to which the receiver is connected.
• Consult the dealer or an experienced radio / TV technician for help.
Radio Frequency Interference
Model: 048-TL-W5KWDS / 048-TL-W6KWD
Compliance Information
35v.20241112
WARNING
• Please read the manual before installation, using, maintenance.
•
Do not use means to accelerate the defrosting process ofr to clean, other than those recommended by the manufacturer.
•
Do not pierce or burn the appliance.
•
The appliance shall be stored in a room without continuouslyoperating sources (for example: open ames, an operating ignition gas
•
Please contact the nearest after-sale service center when maaintenance is necessary At the time of maintenance, the maintenance
appliance or an operating electric heater.)
personnel must strictly comply with the Operation Manual provided by the corresponding manufacturer and any non professional
is prohibited to maintain the air conditioner.
The handling, installation, storage, servicing and disposal muust comply with the provisions of gas-related national laws and
•
It is necessary to clear away the refrigerant in the system when maintaining or scrapping an air conditioner. Be aware that refrigerants
regulations, andd also national wiring regulation.
•
may not contain an odour.
supervision or instruction concerning use of the appliance by a person responsible for their safety. Children should be supervised
to ensure that they do not play with the appliance. Unit operation limits: Outdoor side 61~110°F, 80%RH, indoor :side 61~90°F, 80%RH.
This appliance is not intended for use by persons (including children) with reduced physical, sensory or mental capabilities, or
Introduct ion to Refrigerants R32
The refrigerants used for air conditioners are environmentally friendly hydrocarbons R32.
This kind of erant is combustible and odorless. Moreover, it can burn and explode under certain condition. However, there
will be no risk of burning and explosion if you comply with the following table to install your air conditioner in a ropom with
an appropriate area and use it correctly.
Compared with ordinary refrigerants, Refrigerant R32 is environmentally friendly and do not destroy the ozone sphere and
that its value of greenhouse e
© Della All rights reserved.
notice for product improvement. Any updates to the manual will be
uploaded to the della website.
www.dellahome.com
support@dellahome.com
800 863 4143
6:00 a.m. 4:00 p.m. PST Monday Friday