Model Number:
CBPVS01-B
www.ciarraappliances.com

IMPORTANT SAFEGUARDS:
Read all instructions before using this appliance.
1
1. To reduce the risk of burns, do not touch the heating strip while using
the appliances.
2. To protect against electrical shock or damage, do not place appliance in
water or other liquid.
3. This appliance is not intended for use by persons (including children) with
reduced physical, sensory or mental capabilities or lack of experience and
knowledge, unless they are supervised or instructed on how to use the
appliance by someone responsible for their safety.
4. Do not place the appliance on or near wet surfaces or heat sources, such as
a hot gas or electric burner or in a heated oven.
5. Please check if the power supply for charging the product is 5V 1A before
charging. Do not charge the product if it does not meet these
requirements.
6. Please do not use this product if it is damaged. In such cases, the product
must be replaced by the manufacturer or a qualified agency to avoid
potential safety hazards.
7. If the product becomes too hot or begins to smoke while in use, stop using
it immediately. Place it in an open area, wait until the product runs out of
power, and then contact the manufacturer’s after-sales service as soon as
possible.
8. Vacuum packaging is not substitute for the heat process of canning.
Perishables still need to be refrigerated or frozen.
9. Do not open the appliance lid during operations.
10. Do not immerse the appliance in water or other liquids when cleaning it.
11. This product is equipped with an overcharge protection function. When the
battery is fully charged, the charging circuit will automatically reduce the
charging current. When the product has low power, the circuit protection
will cut off the power to prevent the battery from being completely
drained and unable to be charged.
12. The product switches off automatically after about 3 minutes of inactivity.

POWER CORD INSTRUCTIONS:
A short power-supply cord or detachable power-supply cord (shorter than 4 ½
feet or 1.4m) is provided on some models to reduce risks resulting from
becoming entangled in or tripping over a longer cord. Longer detachable
power-supply cords or extension cords are available and may be used if care is
exercised. For models with cords longer than 4 ½ feet (1.4m), or if a long
detachable power-supply cord or extension cord is used on short cord models:
a. The marked electrical rating of the detachable power-supply cord or
extension cord should be no less than the marked electrical rating of the
product.
b. When the product is of the grounded type, the extension cord must be a
grounding-type 3-wire cord.
c. The longer cord should be arranged so that it does not drape over the
countertop or tabletop where it can be tripped over, snagged, or
unintentionally pulled, especially by children.
Precautions:
1. If the vacuum seal bag's opening is too wide, you can seal it multiple times,
as shown in the illustration before vacuuming.
2. Bags with water droplets or oily substances should only be sealed, not
vacuum sealed, to prevent water from being sucked into the machine and
causing a malfunction.
3. After sealing 3-5 times, it is suggested to rest for a minute to prevent
overheating and poor sealing.
4. Before use, please make sure the sealer is dry.
5. It is not recommended to vacuum-seal bags containing liquid.
6. The External extraction mode is only suitable for vacuum canisters and
vacuum bags with air valves.
6 inch 8 inch 12 inch
2
Basic Parameters:
Product Name Product
Model
Rated
Power
Battery
Capacity
Input/
Output
Product
Dimensions
Wireless
Handheld
Vacuum Sealer
CBPVS01-
B
40W
1500mAh
5V-
2A/7.4V
7.5"*1.8"*
1.9"
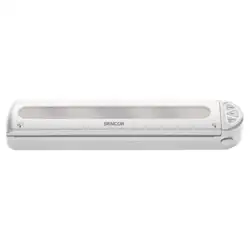
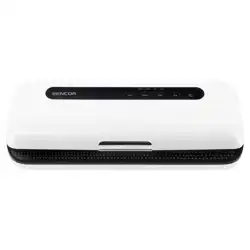
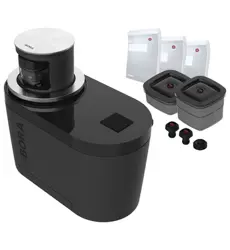
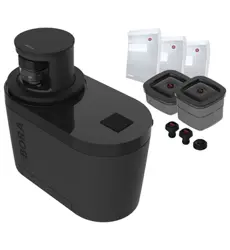
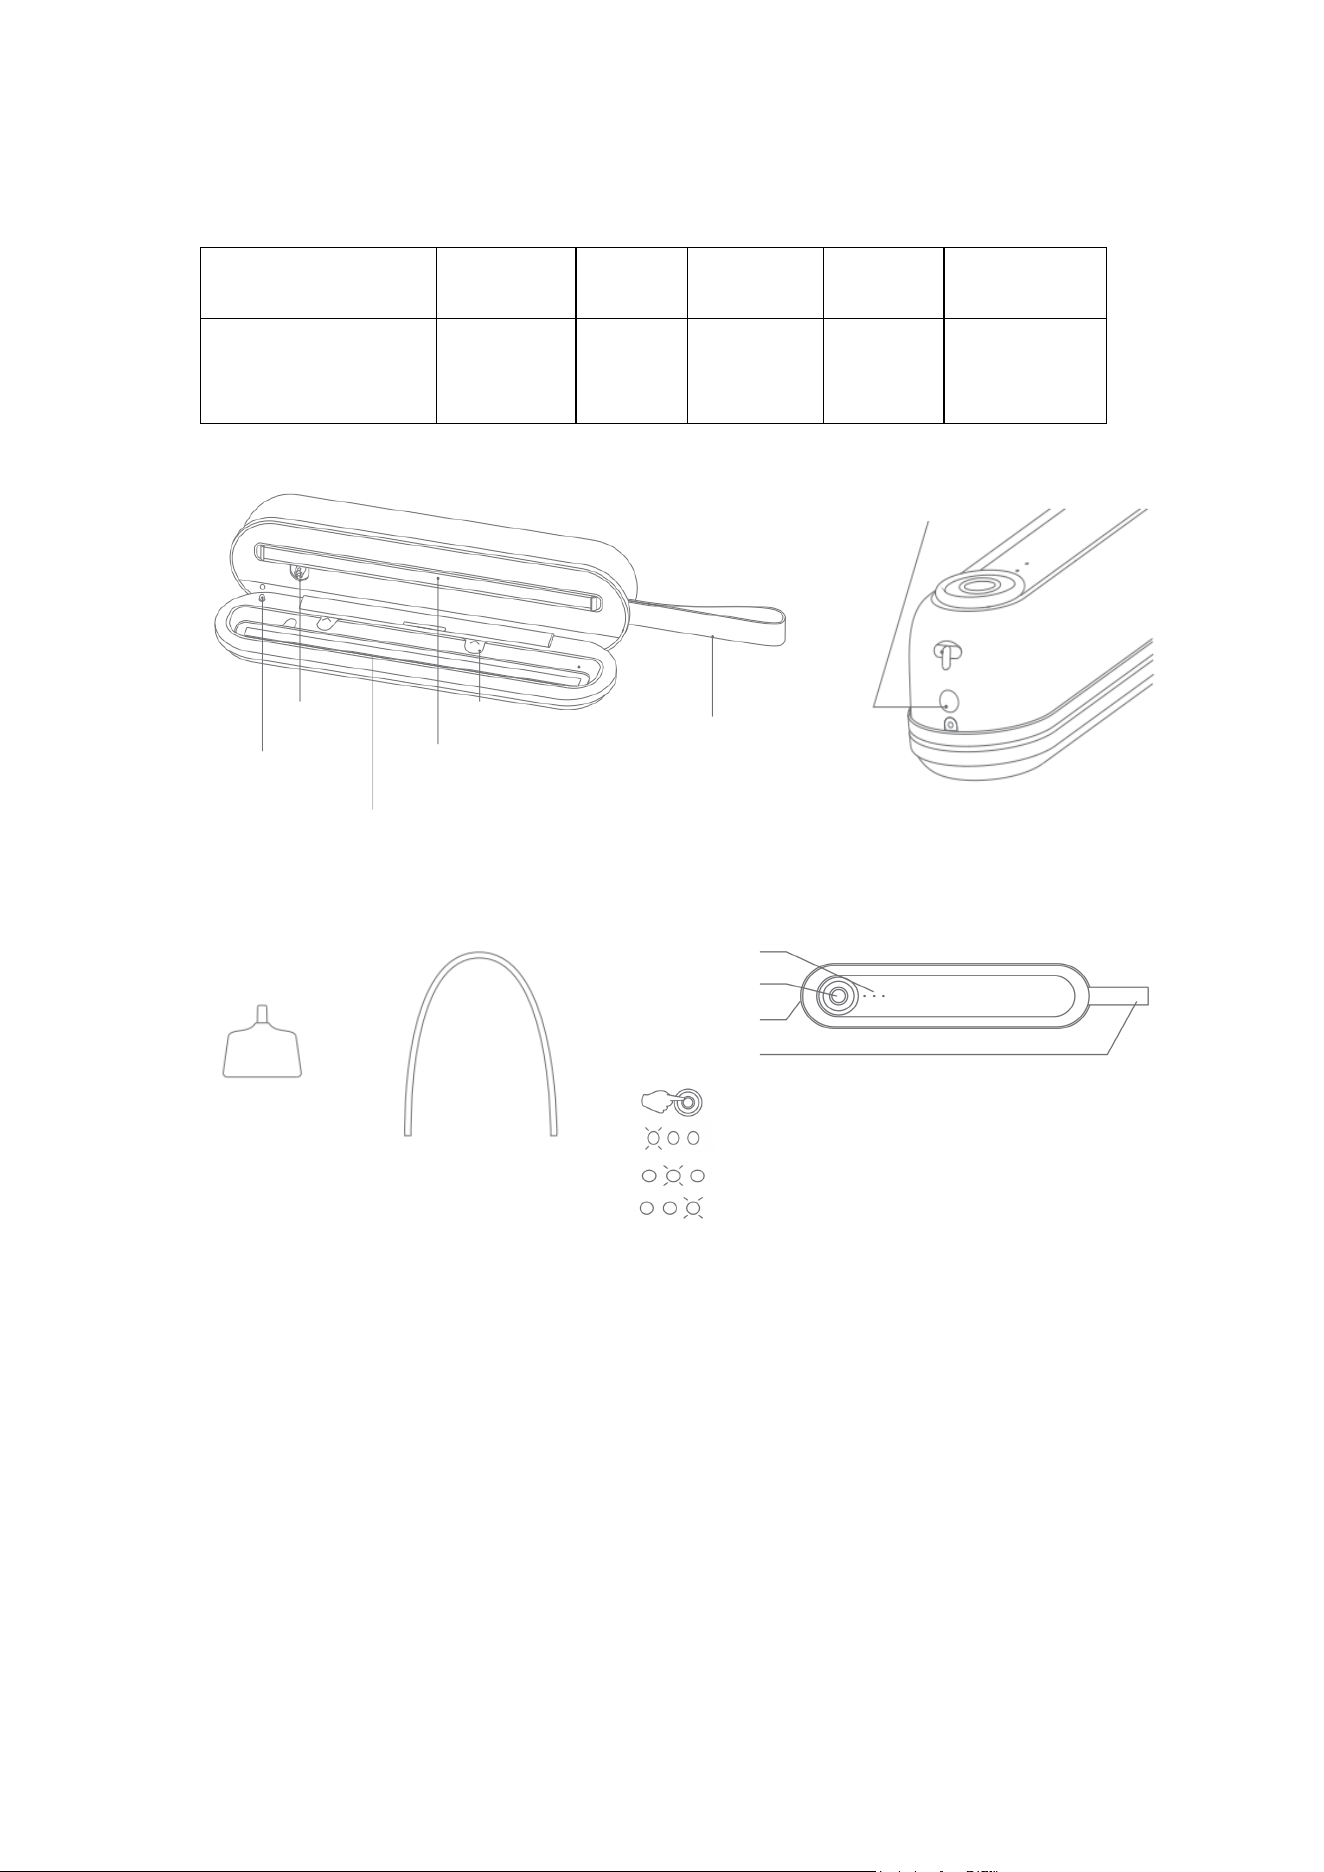
What's include in the box:
1* Wireless Handheld Vacuum Sealer
5* Sealer bags
1* External Vacuum Lid
1* External Vacuum Hose
1* High temperature tape
1* USB power-supply cord
1* Instruction Manual
External
Vacuum Lid
External Vacuum Hose
Control Panel
Click to switch between modes
Vacuum Sealing mode
Sealing mode
External Extraction mode
3
Bag fixing bracket
Vacuum area
Heating strip
Micro-Switch
Air inlet
Strap
Air Valve
Type-C Charging Port
Functions
On/Off
Air valve
Strap
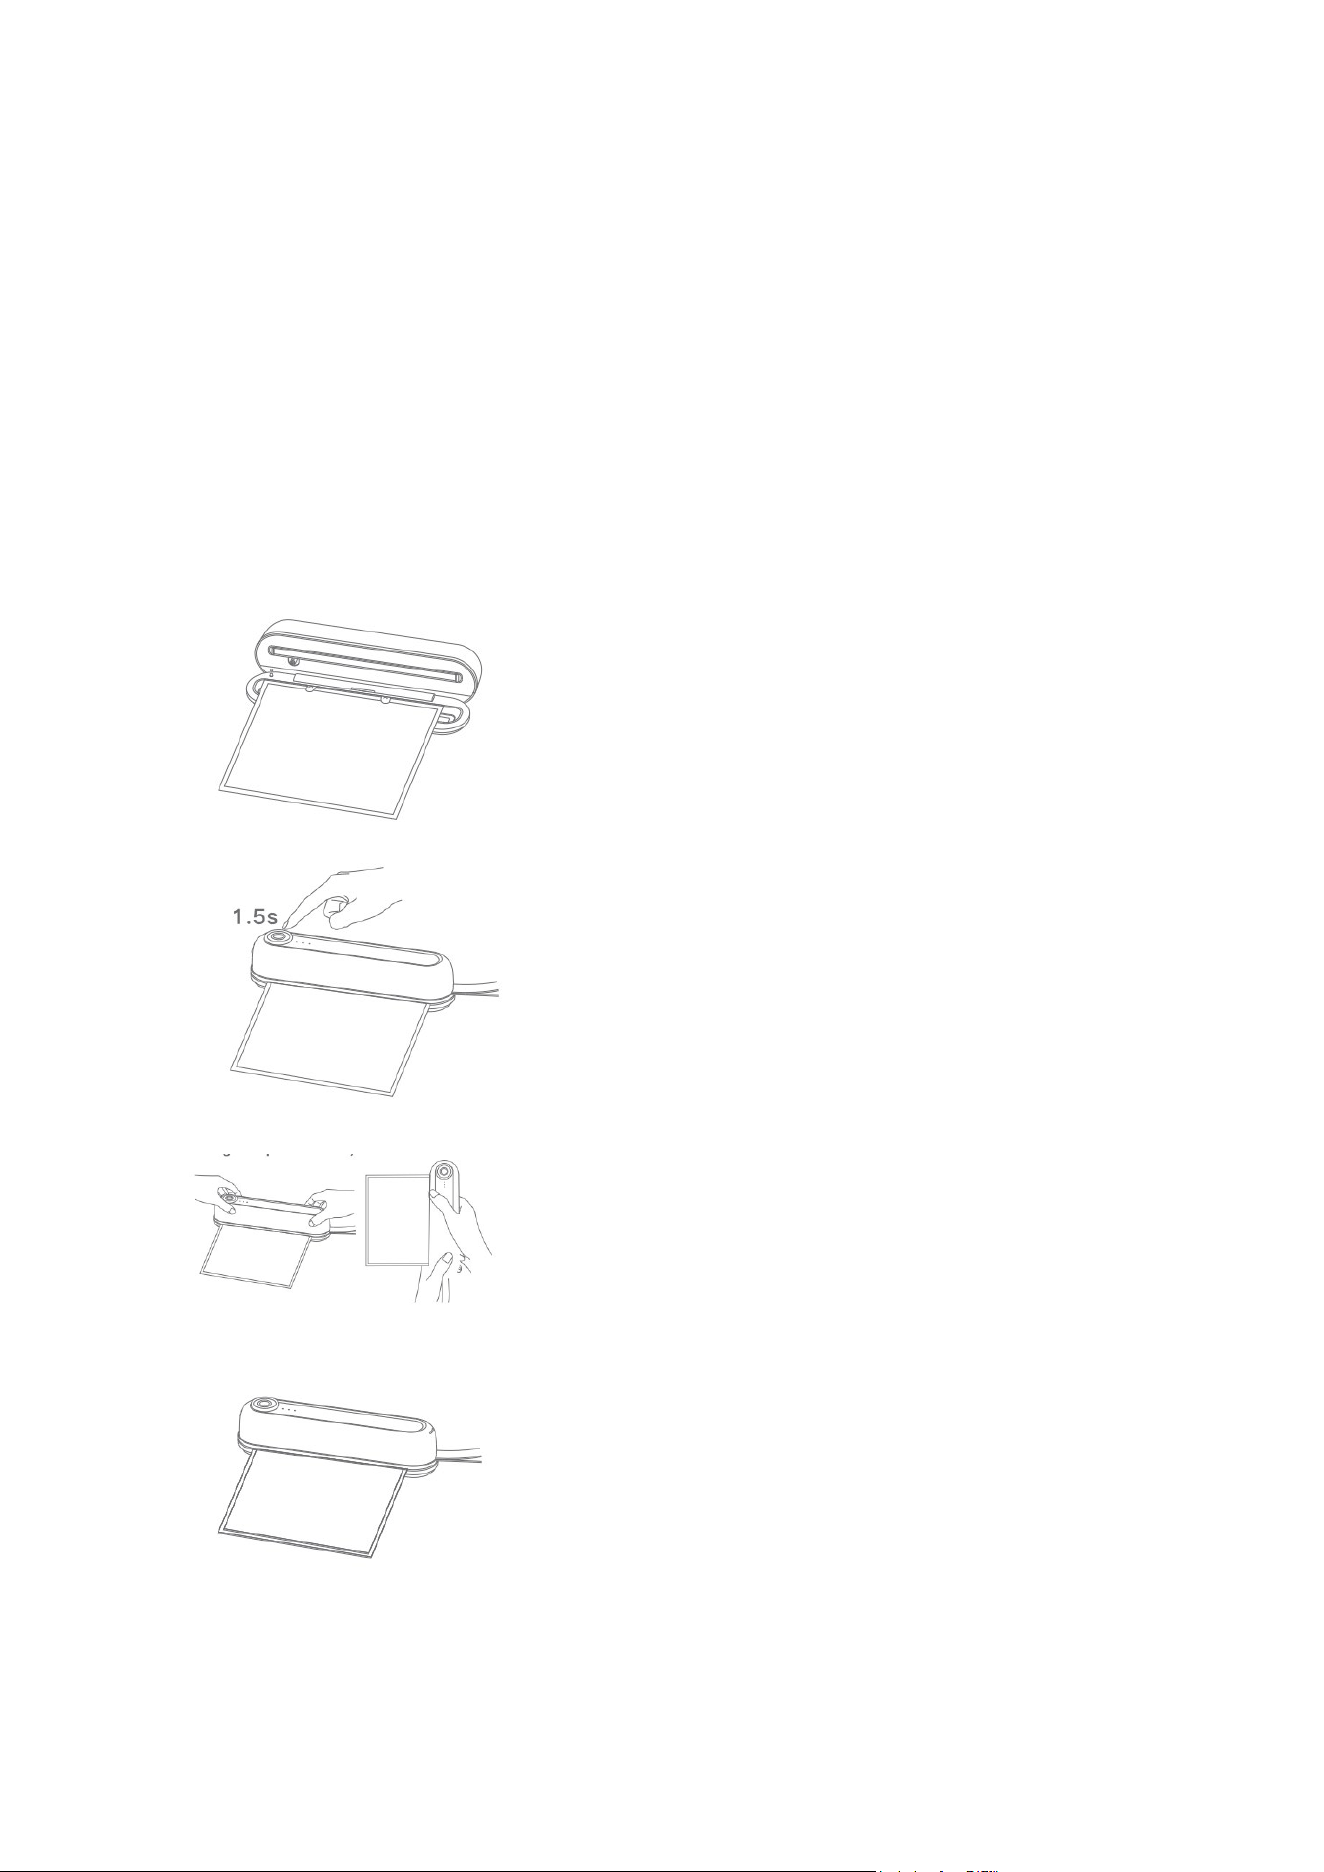
Operation Instructions:
Before using for the first time, please charge the unit for at least 2-3 hours.
Failure to do so will reduce the product’s battery life.
The charging indicator light remains illuminated when the appliance is
plugged in and does not indicate the charge level. When the battery is fully
charged, all lights will flash simultaneously.
Note: The unit should be charged for 2-3 hours every 6 months to maintain
battery life.
1.Open the upper lid and place the sealed bag flat
in the vacuum area within the fixed bracket.
Note: Leave at least 1.4 inches (35mm) of space
between the bag contents and the top of the bag.
2.Close the upper lid. Long Press the power button
to start. (Function can be chosen by pressing the
power button after the appliance starts.)
3. Lightly press down on both ends.The flashing
indicator light indicates the machine is working.
4.The light stops flashing when the operation is
complete.
Note:If the work is complete and the cover cannot
be opened,please press the air valve first,then open
the cover.
4
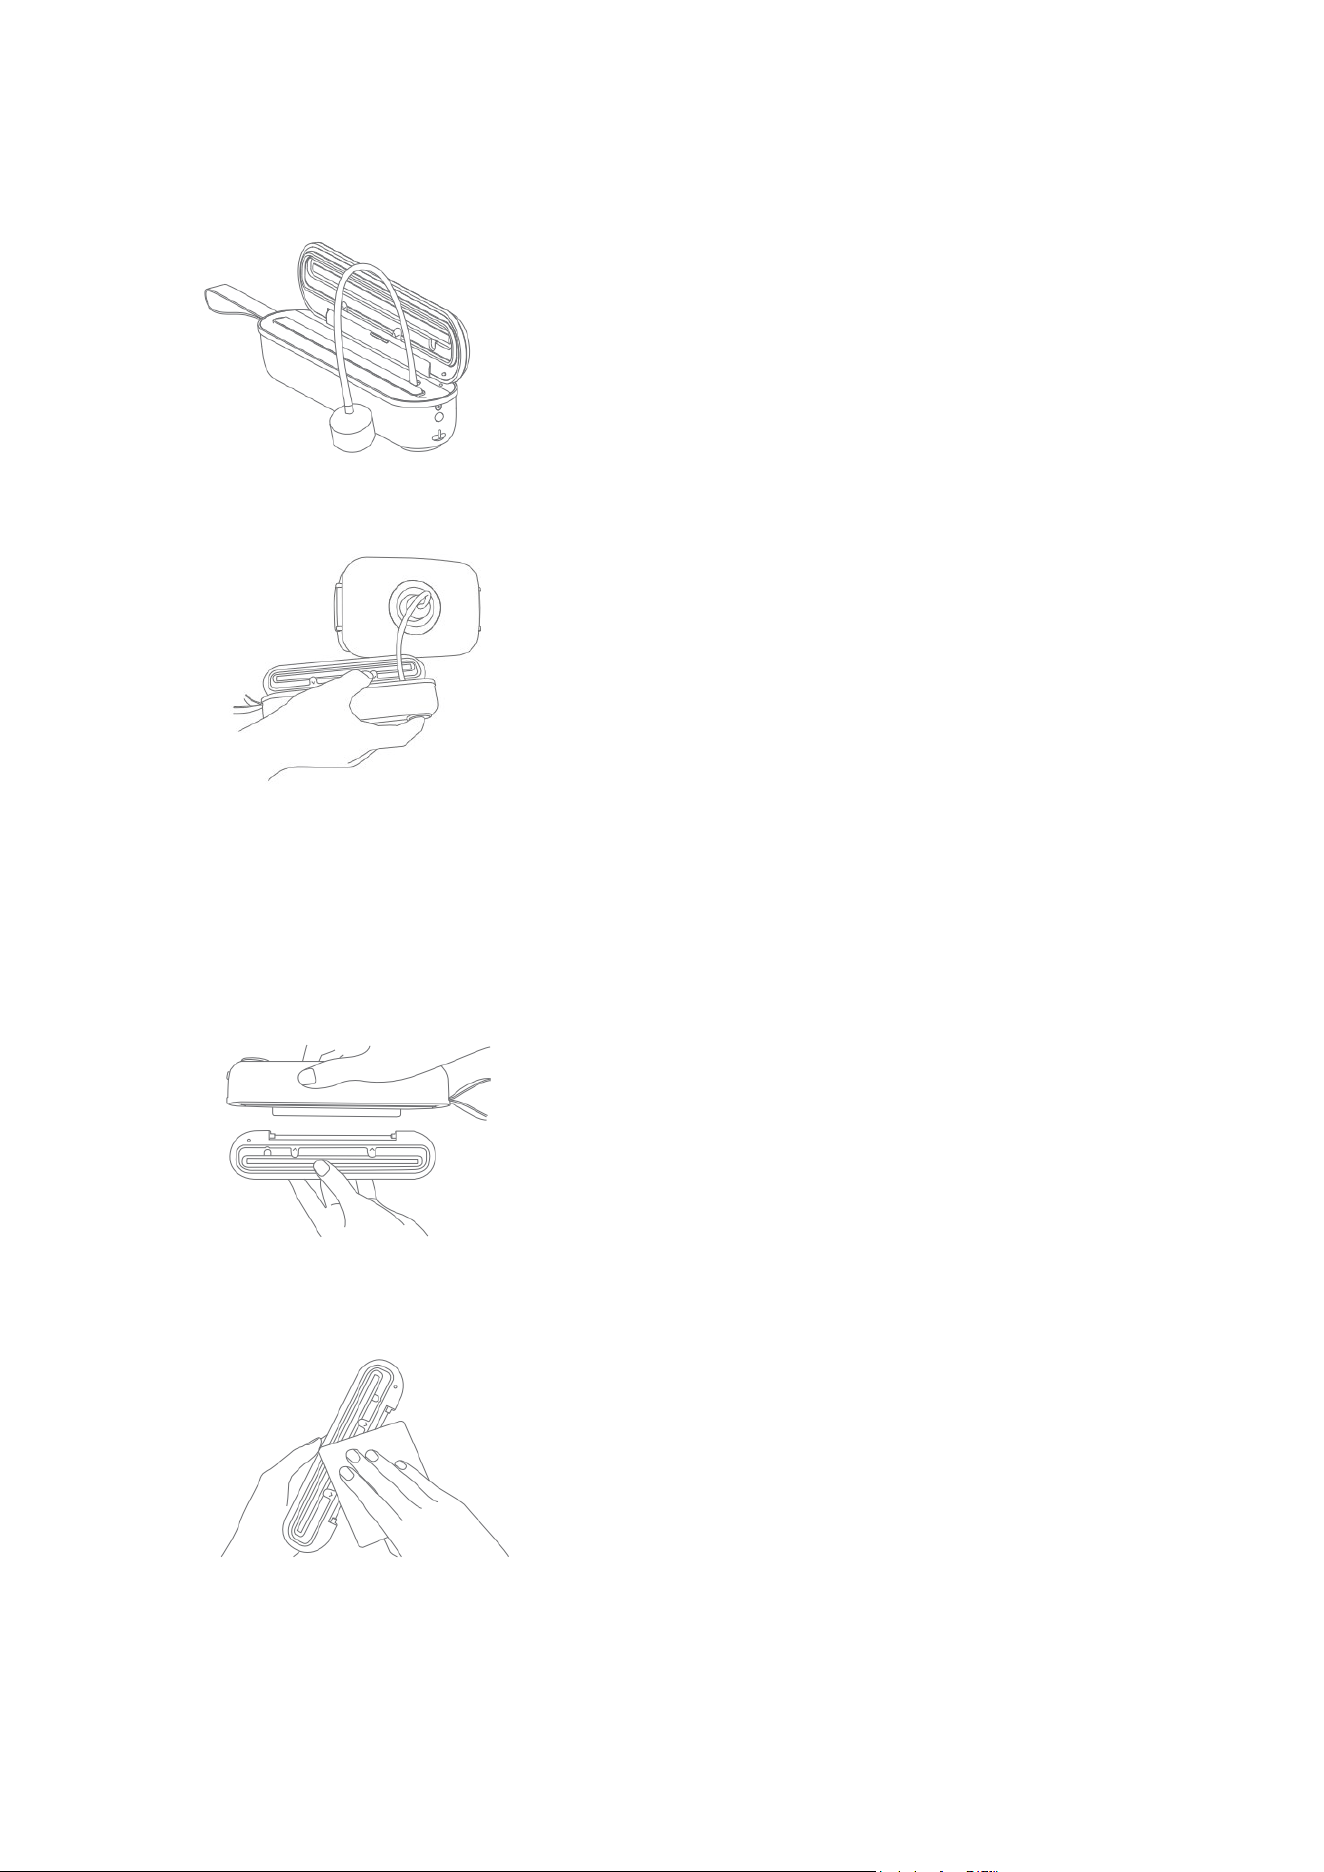
External Vacuum Function
1.Insert one end of External Vacuum Hose into the
air inlet on the appliance. Insert the other end of
the External Vacuum Lid into vacuum bag or
vacuum canister. Twist the tab on the External
Vacuum Hose while inserting to ensure a tight fit.
2.A
fter connection, turn on the machine and
choose "Ext" funtion to start vacuum. To test
vacuum, simply tug on External Vacuum Lid. It
should not move.
Cleaning and Store
1.Remove power cord from electrical outlet. Do
not immerse in liquid. then open the lowerlid to
90 degrees and remove it for cleaning. Only use
the soft cloth to clean the main body.
2.W
ash the lower lid in warm soapy water. Dry
thoroughly before re-inserting into the appliance.
3.A
fter the unit has been cleaned, you can store
it anywhere as your convience. The specail
design of Magnetic bottom make you easily stick
it on your refrigerator.
5

Troubleshooting:
Problem Reason Solution
indicator lights
flashing red and shut
off
Out of power charge 2-3 hours till full
Indicator lights of
Vac&Seal flashing
white
Pressure switch
malfunction
Contact our after-sales
directly
indicator lights of Seal
flashing white
Heat failure/vacuum
pump malfunction
Contact our after-sales
directly
Vacuum pump is
running, but bag is
not evacuating
1.The Lid is not closed
enough;
2.Vacuum bag is not
placed in designated
area;
3.Vacuum bag
leakage.
1.Close the lid
completely;
2. Adjust and put the
vacuum bag in
designated area;
3.Change a new
vacuum bag.
Bag is not sealing
properly
1.Vacuum bag is not
placed in designated
area;
2.Low battery;
3.Vacuum bag
leakage.
1. Adjust and put the
vacuum bag in
designated area;
2.Operate once more;
3.Change a new
vacuum bag.
Cannot insert bag into
machine
In proper operation Try again and put the
vacuum bag in
designated area
Air was removed from
the bag, but now air
has re-entered
1.Vacuum bag is not
placed in designated
area;
2.Vacuum bag
leakage.
1.Adjust and put the
vacuum bag in
designated area;
2.Change a new
vacuum bag.
Bag melts
1.Continuous
repeated usage
cause the machine
overheated;
2.The Lid is not closed
enough
1.Stop working for 10
minutes. After 3-5 times
of sealing, it is
suggested to rest for a
minute to prevent
overheating;
2. Close the lid
completely
External Extraction
mode cannot use
In proper operation
Follow the instructions
6
Light Display:
Function
description
Indicator light
Remarks
Red light 1 2 3
Always
on
Flashing Always
on
Flashing Always
on
Flashing Always
on
Flashing
Power on
(Vacuum&Seal)
Power on
(Seal)
Power on
(External)
Working
(Vacuum&Seal
-Vacuum)
Working
(Vacuum&Seal
-Seal)
Working
(Seal)
Low battery
warning
Forced
charging
Charging
At 7.2~7.9V
Charging
At 7.91~8.15V
Charging
At 8.16~8.39V
Full charge
Stop use
for 10Min
Heating
wire open
circuit
Pressure
switch open
circuit
Vacuum
pump
failure
★☆★☆
★
★
★
☆★☆
★☆★☆
★☆★☆
★☆★☆
★☆★☆
★☆
★☆
★☆
☆★
☆☆★
★
★
☆
☆★
★ ★
★ ★
★
★☆
★☆
★
☆★☆
★
☆
★
☆
★
☆
★☆
★☆★☆
★☆
★☆★☆
★☆
★☆★
☆
Flashing twice
per second
F
lashing twice
per second
F
lashing four
times per
s
econd
F
lashing four
times per
s
econd
Flashing once per
second,after
3times,quit back
t
o turn red
Flashing once per
second,shut off
after flashing 3
times
Pulsating light at
different
frequencies
Pulsating light at
different
frequencies
Pulsating light at
different
frequencies
Flashing four
times per second
a
t different
frequencies
Flashing four
times per
second
F
lashing four
times per
second
Flashing four
times per
second
7