54-49-0283
SERVICE PARTS
BULLETIN NO.
MILWAUKEE TOOL
l
www.milwaukeetool.com
13135 W. LISBON RD., BROOKFIELD, WI 53005
Drwg. 1
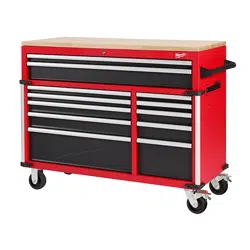
EXAMPLE:
Component Parts (Small #) Are In-
cluded When Ordering The Assembly
(Large #).
0
00
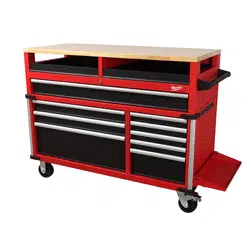
48-22-8559
52" HIGH CAPACITY MOBILE WORK BENCH
March 2023
REVISED BULLETIN
WIRING INSTRUCTION
DATE
SPECIFY CATALOG NO. AND SERIAL NO. WHEN ORDERING PARTS
SERIAL
NUMBER
FIG. PART NO. DESCRIPTION OF PART NO. REQ.
1 22-90-0105 Cord Grommet (Set of 1) (1)
2 14-46-1645 Cord Storage Bracket Kit (1)
3 --------------- Cord Storage Bracket (2)
4 --------------- Screw M4 x 12L (4)
5 14-46-1648 Side Handle Kit (1)
5a --------------- Side Handle (1)
5b --------------- Bolt M6 x 16L (4)
6 14-46-1641 Power Strip (1)
8 14-46-1642 Drawer Slide Kit (Set of 2) (1)
8a --------------- Inner Drawer Slide (2)
8b --------------- Outer Drawer Slide (2)
8c --------------- 5/32" Pop Rivet (16)
9 42-38-0272 Corner Bumper Kit (Set of 4) (1)
9a 42-38-0271 Corner Bumper/Extrusion Kit (Set of 2) (1)
9b --------------- Screw M4 x 16L (8)
9c --------------- Corner Bumper (4)
11 14-46-1245 Caster Kit (Set of 4) (1)
11a --------------- Swivel Caster w/ Brake (2)
11b --------------- Bolt M8 x 16L (16)
11c --------------- Washer M8 (16)
11d --------------- Rigid Caster (2)
12 14-46-1643 Key/Lock Kit (1)
12a --------------- Key (1)
12b --------------- Lock (1)
M14A
FIG. PART NO. DESCRIPTION OF PART NO. REQ.
14 58-95-8559 Drawer Liner Kit (Set of 12) (Not Shown) (1)
15 12-20-0109 Service Nameplate (Not Shown) (1)
17 12-25-1814 Electrical Label (Not Shown) (1)
18 42-38-0269 Rear Bumper Kit (Set of 2) (1)
18a --------------- Rear Bumper (2)
18b --------------- Screw M4 x 16L (4)
19 --------------- Bolt M6 x 45L (Not Shown) (6)
20 31-01-8559 Steel Storage Logo Badge (1)
21 45-64-8553 52" Wood Top (1)
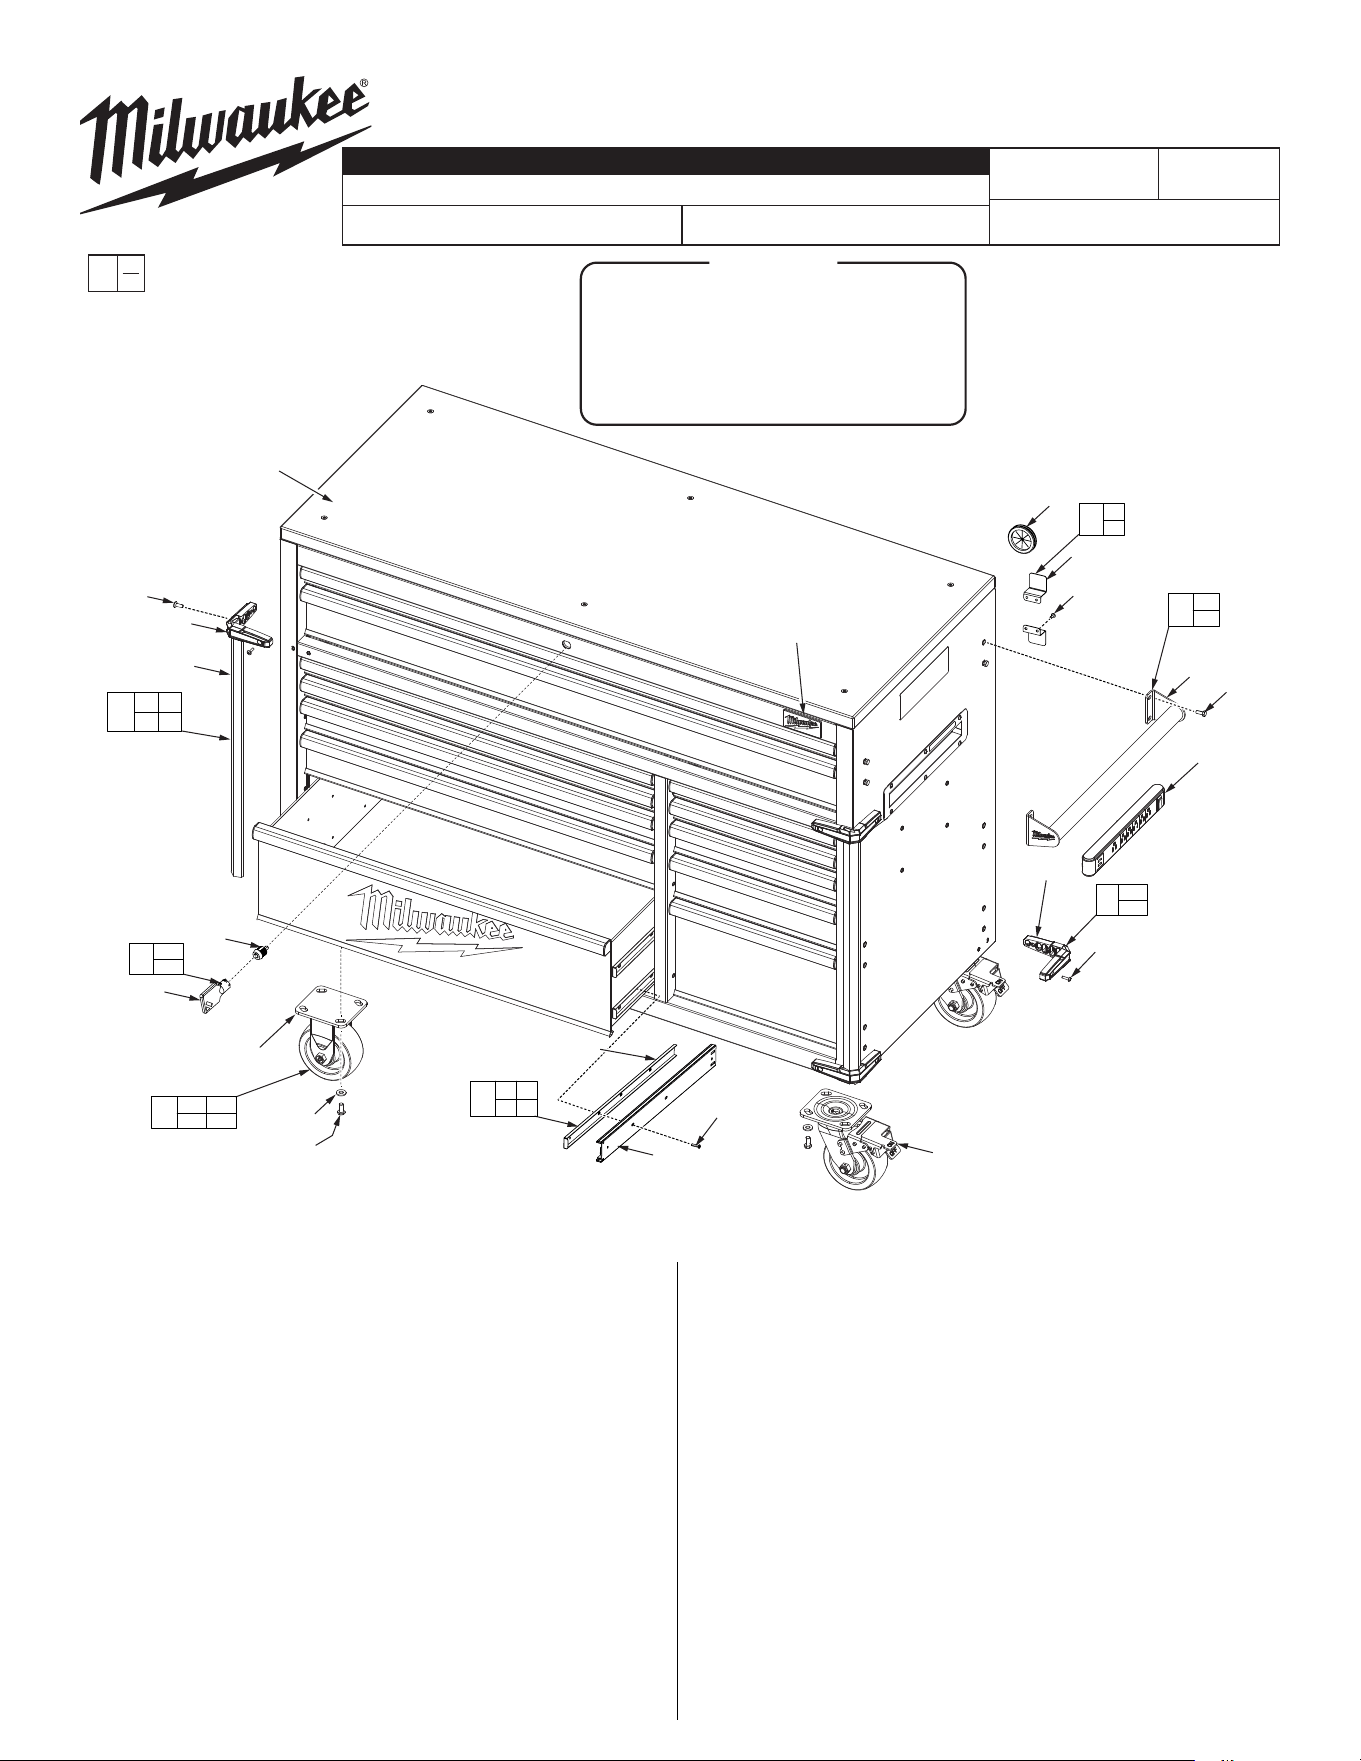
NOTE: See page 2
for drawer slide removal
and installation.
FIG. NOTES
15,17
A clean, dry surface is essential for proper performance for any
adhesive system. The area intended for application of any adhesive
label or nameplate must be prepared by cleaning with isopropyl
alcohol. The solvent is to be applied with a clean, lint free applicator
and the surface allowed to dry before applying the label or nameplate.
1(4x)
3(2x)
4(4x)
5b(
4x)
5b
5
5a
5a
6
20
2
3
4
8c(16x)
9c(2x)
9b(8x)
9a(4x)
8a(2x)
8b(2x)
12b
12a
11b(16x)
11c(16x)
11d(2x)
9a
9c
9b
12
12a
12b
9
11a(2x)
18a(2x)
18b(4x)
8
8a
8b
8c
11
11a 11b
11c 11d
18
18a
18b
21
l14-46-8559
Hardware Kit
11b --------------- Bolt M8 x 18L (16)
11c --------------- Washer M8 (16)
4 --------------- Bolt M4 x 12L (14)
5b --------------- Bolt M6 x 16L (4)
18a --------------- Bolt M4 x 16L (12)
19 --------------- Bolt M6 x 45L (6)
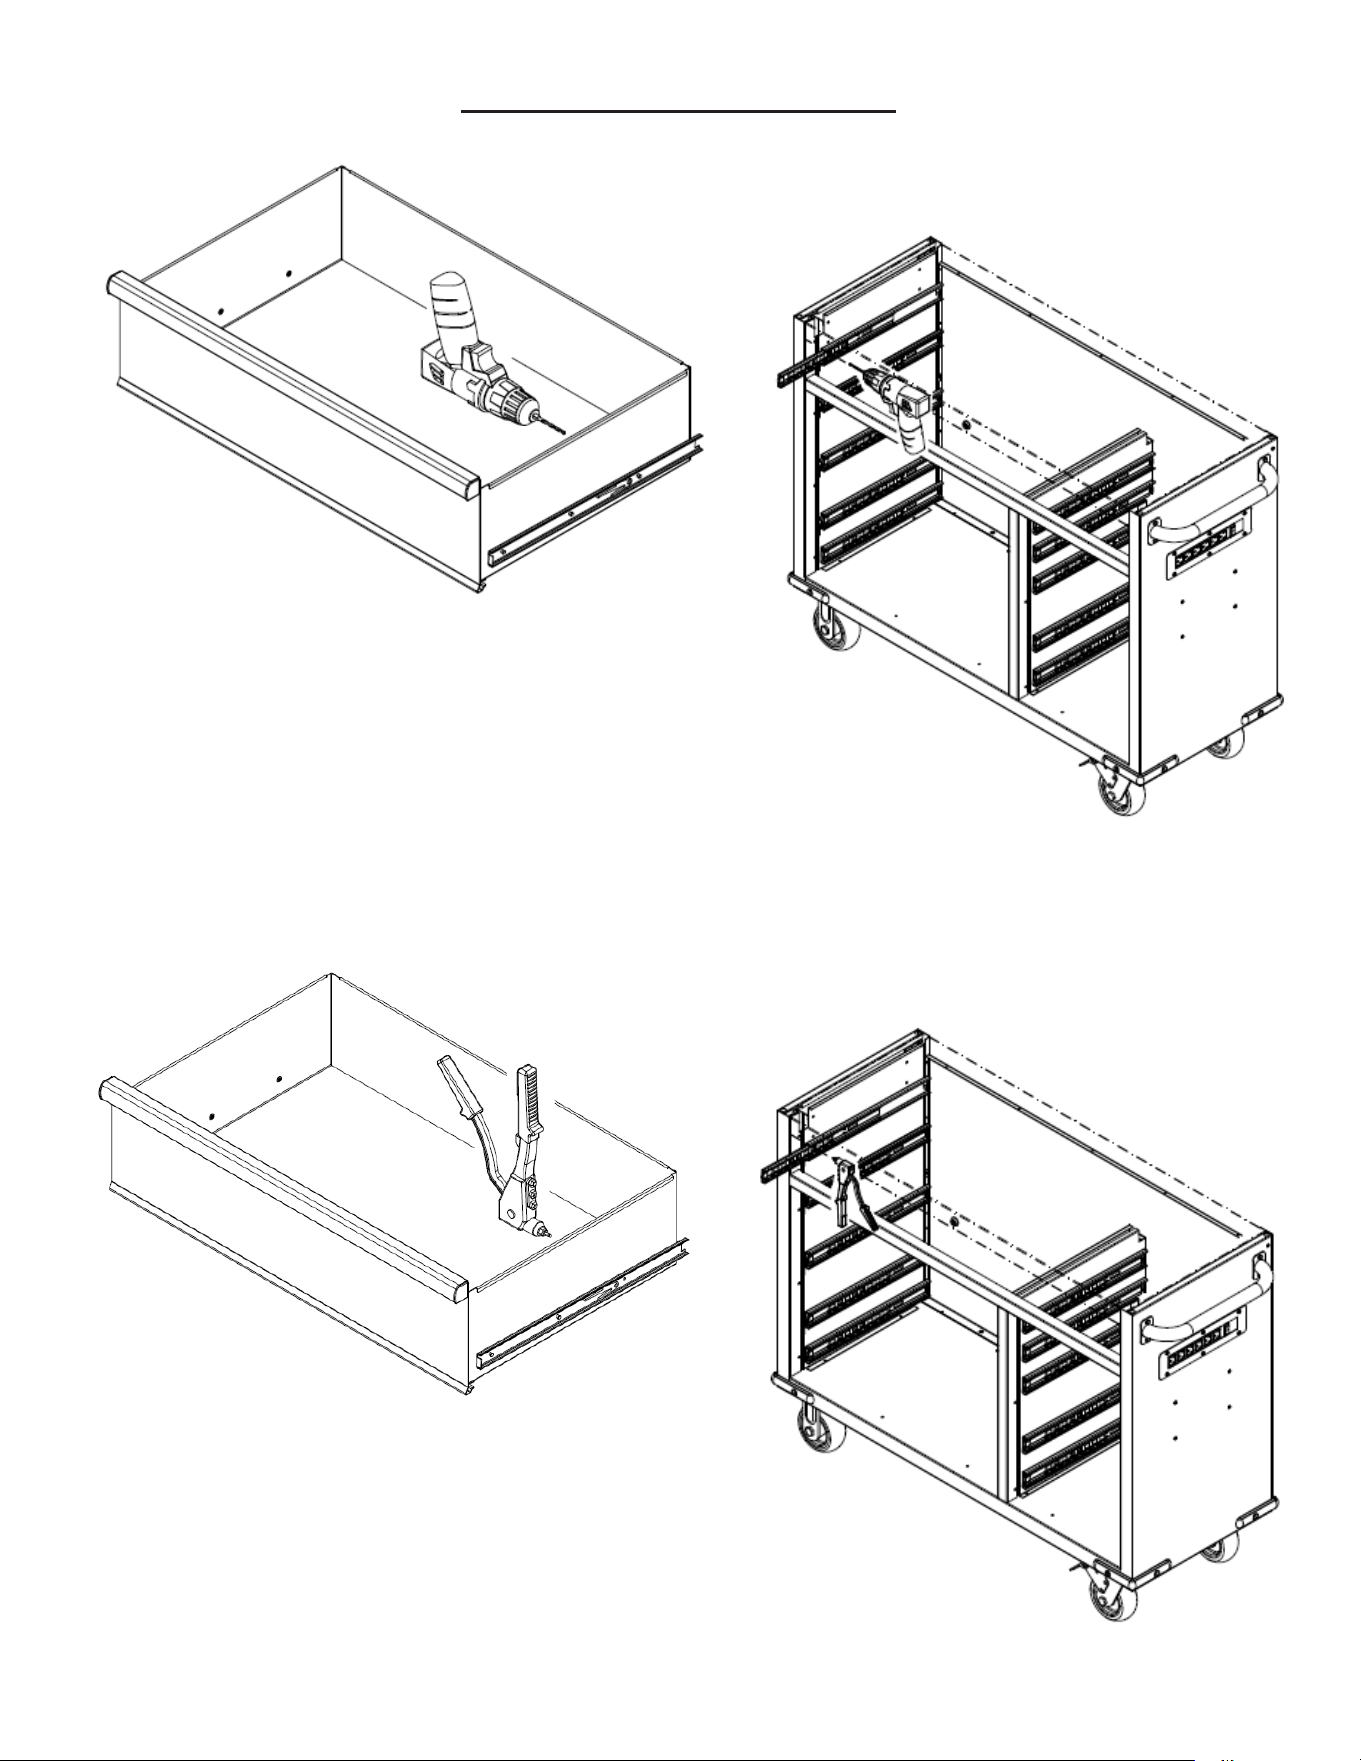
To remove drawer slide, remove rivets (15) from the inner
slide (13) and outer slide (14) by 5/32" drill bit.
Inner Slide
Outer Slide
To install drawer slide, place inner slide (13) into position and
insert rivets (15) by using a rivet gun. Repeat steps for outer
slide (14).
Outer Slide
Inner Slide
Cat. No. 48-22-8520 shown