HOUSEHOLD USE ONLY
Please read all instructions carefully before using the product
INSTRUCTION MANUAL
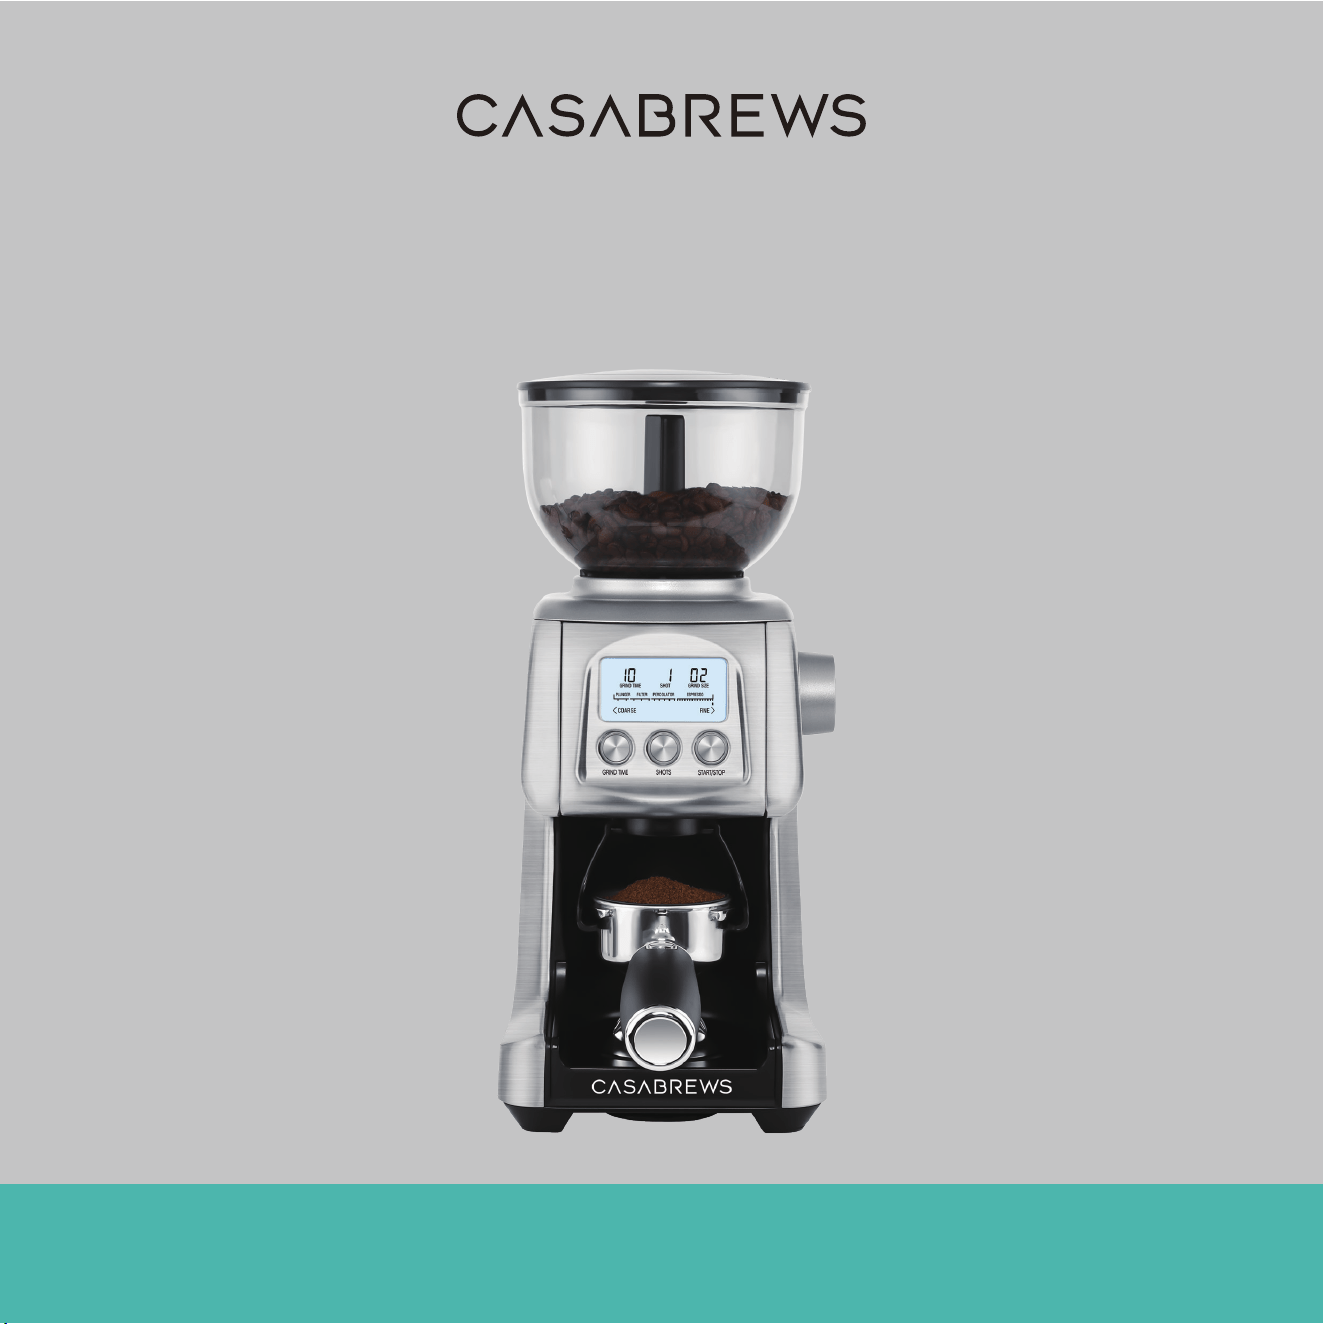
Electrical Conic Burr Grinder
Model: TORNADO

CONTENTS
IMPORTANT SAFEGUARDS ................................................................................................... 1-2
SPECIFICATIONS .................................................................................................................... 2
KNOW YOUR GRINDER ......................................................................................................... 3
CONTROL PANEL ................................................................................................................... 4
BEFORE FIRST USE ................................................................................................................. 5
ASSEMBLING BEAN HOPPER ................................................................................................ 5
IMPORTANT FEATURE ........................................................................................................... 5
GRINDING FOR ESPRESSO COFFEE .................................................................................... 6-8
STEP 1 .................................................................................................................. 6
STEP 2 .................................................................................................................. 6
STEP 3 .................................................................................................................. 6-7
STEP 4 .................................................................................................................. 7
MANUAL GRINDING ................................................................................... 7
PAUSE FUNCTION ......................................................................................... 8
GRINDING FOR DRIP COFFEE OR FRENCH PRESS .................... 8
GRIND SIZE TABLE ................................................................................................................. 8
HOW TO USE THE SILICONE AIR BLOWER ....................................................................... 9
CLEANING AND MAINTENANCE ........................................................................................ 9-10
TROUBLESHOOTING ............................................................................................................. 11
WARRANTY INFORMATION ................................................................................................. 12
CUSTOMER SUPPORT ............................................................................................................ 12

1
Before using this appliance, please follow
these INSTRUCTIONS:
01.
Remove and safely discard any packaging
materials and promotional labels before using the
appliance for the first time.
02. To eliminate a choking hazard for young children,
remove and safely discard the protective cover fitted to
the power plug of this appliance.
03. To protect against electrical shock, do not
immerse the power plug, power cord or motor base in
water or any other liquid.
04. Always use the appliance on a dry, level surface.
05. Do not use the appliance on a sink drain board.
06. Do not place the appliance near the edge of a
bench or table during operation. Vibration during
operation may cause the appliance to move.
07. Do not place the appliance on or near a hot gas or
electric burner, or where it could touch any other source
of heat.
08. Unwind the power cord fully before use.
09. Do not allow the power cord to hang over the edge
of a table or counter, touch hot surfaces or become
knotted.
10. Always ensure the appliance is completely
assembled before connecting to the power outlet and
operating. Follow the instructions provided in this book.
11. Avoid contacting with moving parts.
12. Check the Bean Hopper for presence of foreign
objects before using.
13. Do not operate this appliance for longer than 2
minutes at a time as this can cause overheating. Allow to
cool for at least 2 minutes after each use. Allow the
appliance to cool down 10-15 minutes after long
operation.
14. Turn the appliance OFF, then unplug from the
outlet when not in use, before assembling or disassem-
bling parts and before cleaning.
15. To unplug, grasp the plug and pull from the outlet.
Never pull from the power cord.
16. Strictly follow the care and cleaning instructions
described in this book.
17. This appliance is for household use only. Do not
use the appliance for anything other than its intended
purpose as described in this book. Do not use outdoors.
Do not use in moving vehicles or boats.
18. The use of attachments not sold or recommended
by CASABREWS may cause fire, electric shock or injury.
19. Do not leave the appliance unattended when in
use.
IMPORTANT SAFEGUARDS

2
Model: TORNADO
Voltage: 120V~ 60Hz
Power: 130W
Bean Hopper Capacity: 400g
Grinds Container Capacity: 220 g
Product Size: 8.66*6.22*14.17 INCH
Product Weight: 6.82 LBS
SPECIFICATIONS
20. This appliance is not intended for use by children
or by persons with reduced physical, sensory, or mental
capabilities, or lack of experience and knowledge.
21. Close supervision is necessary when any appliance
is used near children.
22. Children should be supervised to ensure that they
do not play with the appliance.
23. Regularly inspect the power plug, power cord and
actual appliance for any damage. Do not operate if
damaged in any way or after the appliance malfunctions.
Immediately cease use of the appliance and visit
www.casabrews.com or contact CASABREWS
customer support at [email protected] for
replacement, repair or adjustment.
24. For any maintenance other than cleaning, visit
www.casabrews.com or contact CASABREWS
customer support at [email protected].
25. Consult a qualified electrician if the grounding
instructions are not completely understood, or if doubt
exists as to whether the appliance is properly grounded.
HOUSEHOLD USE ONLY.
SAVE THESE INSTRUCTIONS.
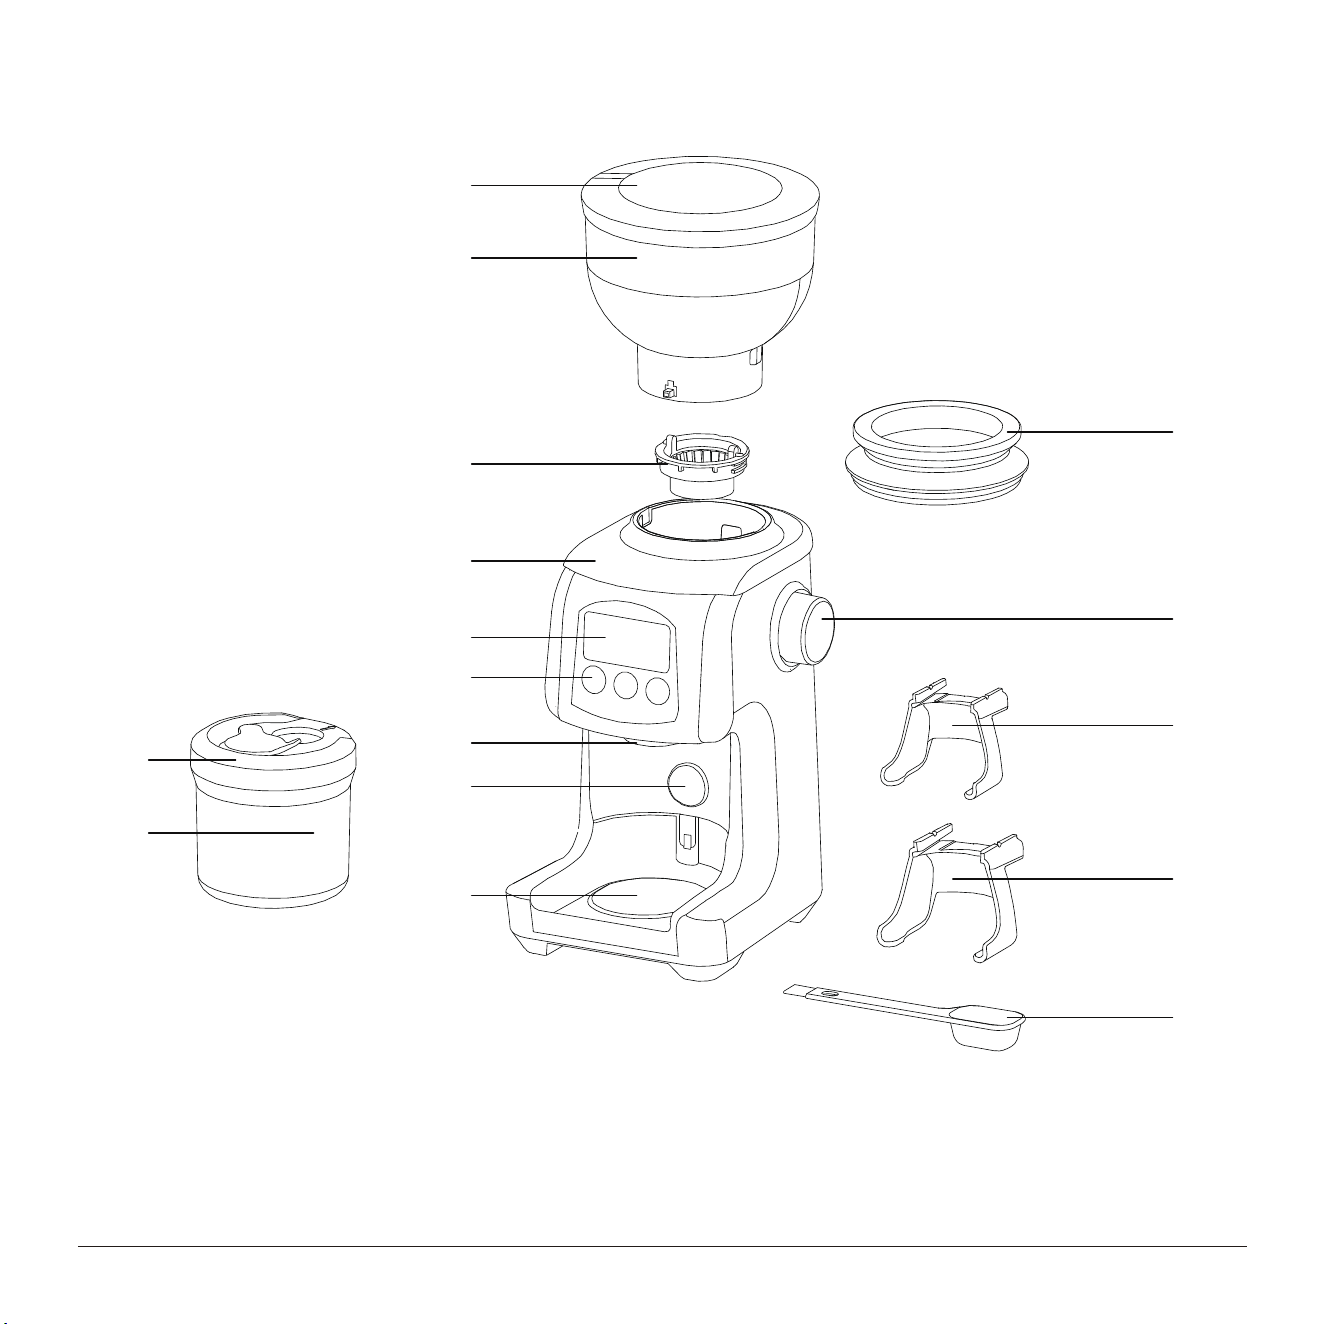
1. Bean hopper lid;
2. Bean hopper;
3. Stainless steel conical burrs;
4. Main body;
5. LCD display screen;
6. Control panel;
7. Grinds container lid;
8. Grinds container;
9. Grinds outlet;
10. Portafilter activation switch;
11. Grind tray;
12. Silicone air blower;
13. Grind size dial;
14. Cradle for 51&54mm portafilter;
15. Cradle for 58mm portafilter;
16. Cleaning brush;
KNOW YOUR GRINDER
1
2
3
4
5
6
9
10
11
7
8
12
13
14
15
16
3
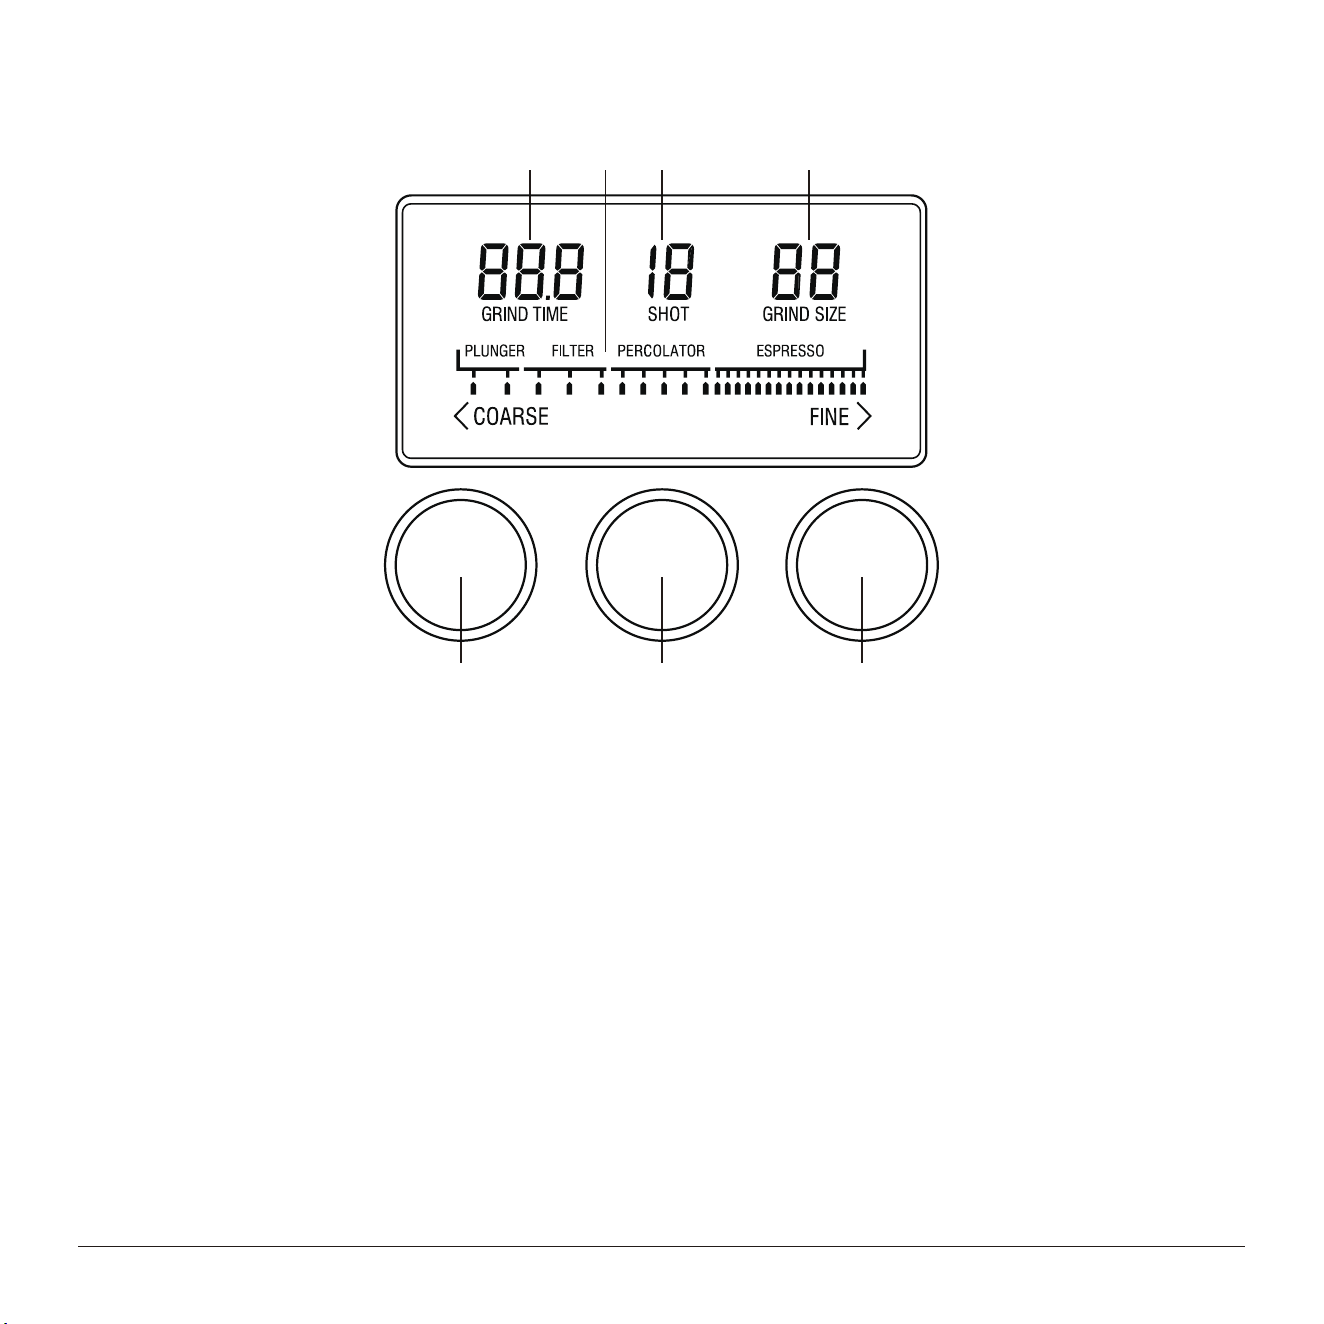
CONTROL PANEL
A CB D
E F G
4
A: Grind Time display;
B: Grind Size Setting display
C: SHOT display;
D: Grind Size display;
E: GRIND TIME button:
Press to increase the grind time.
Press and hold to increase the grind time quickly.
F: SHOTS button:
Press to increase the shot/cup number.
G: START/STOP button:
Press to start/stop grinding process.
Remove and safely discard all promotional labels and
packing materials attached to the grinder.
Wash hopper, grinds container, container lid and
cleaning brush in warm soapy water and dry thoroughly.
Wipe exterior of grinder with a soft damp cloth and dry
thoroughly.
Place grinder on flat level surface and plug power cord
into 120V outlet.
BEFORE FIRST USE
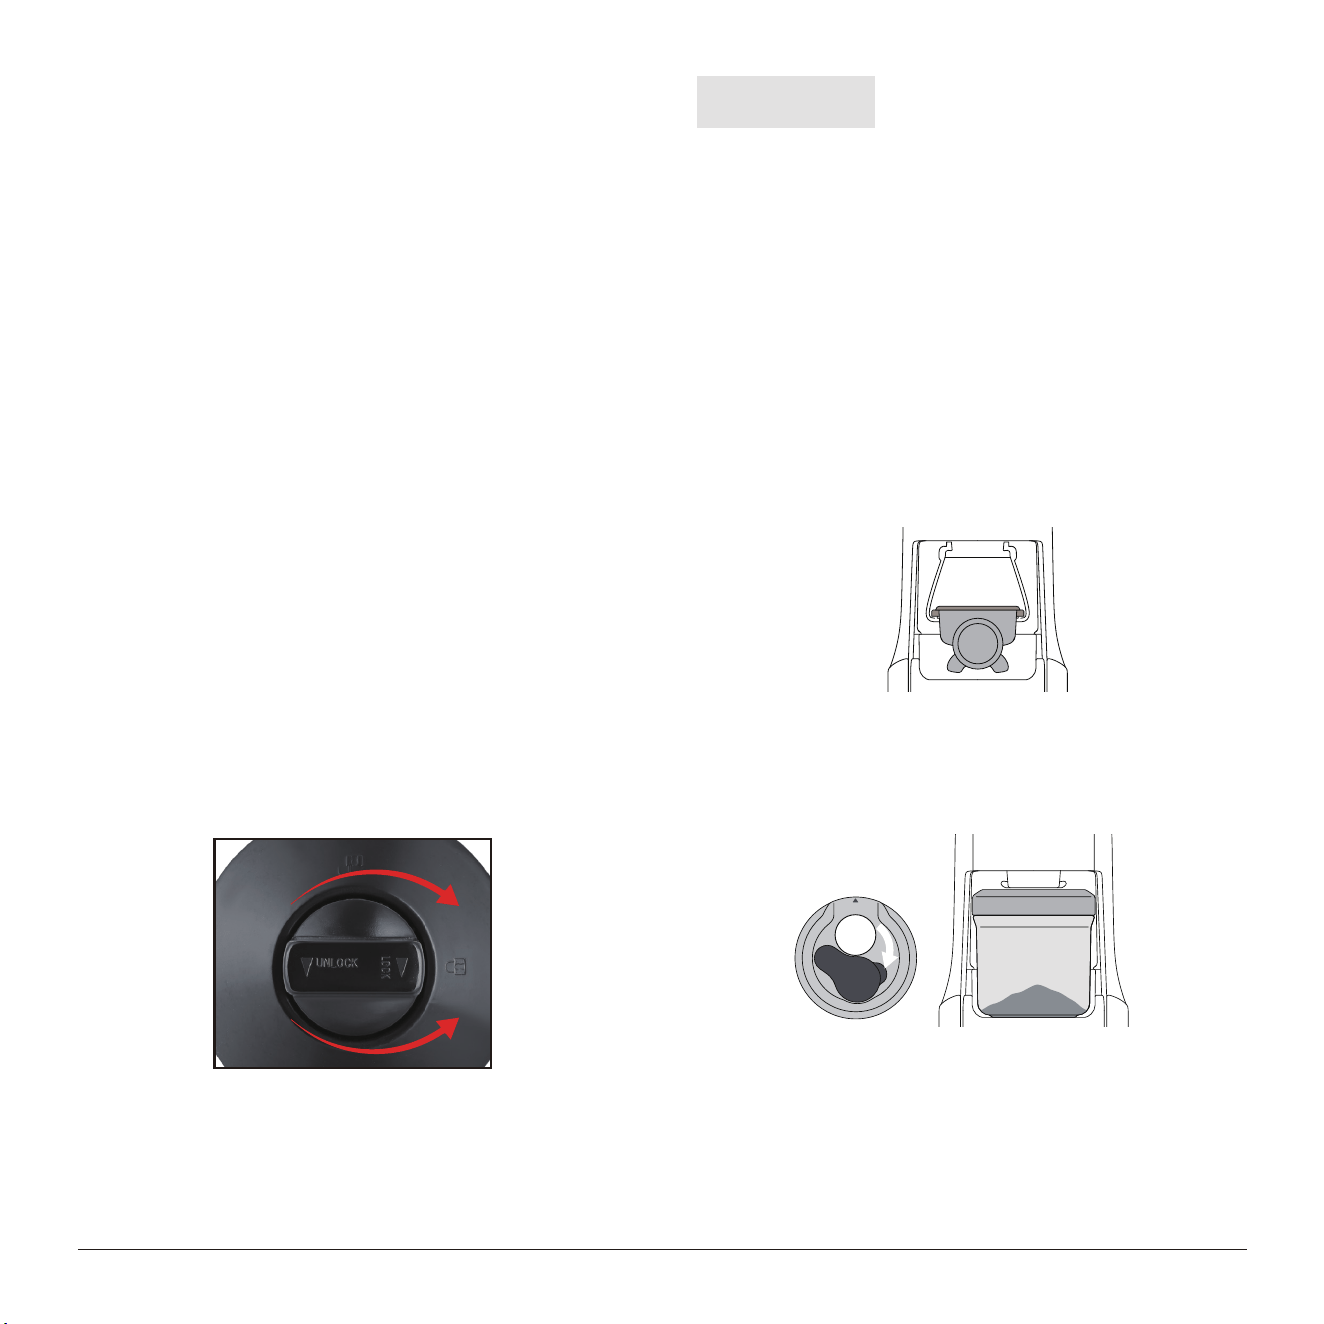
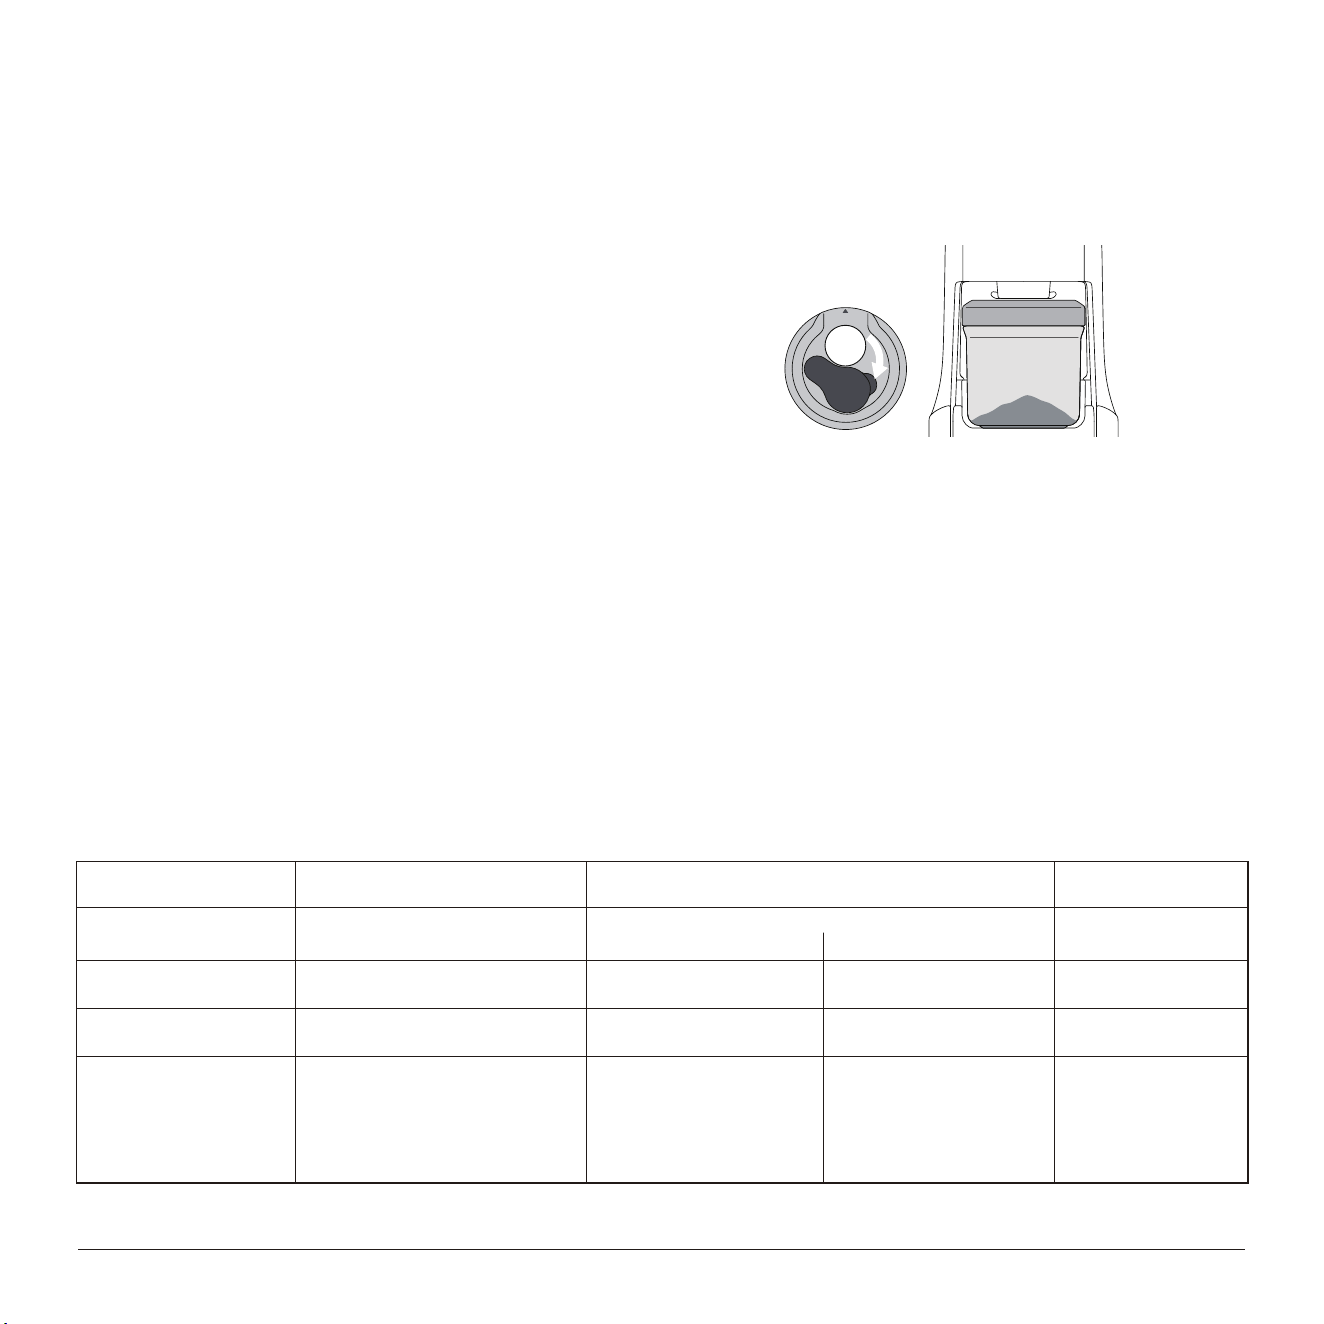
Align tabs on the base of the bean hopper and insert
hopper into position. Turn the hopper dial 90° to lock
into position. Fill with fresh coee beans and secure lid
on top of bean hopper.
The bean hopper can be removed by turning dial anti
clockwise and lifting hopper to pull out. The locking
system allows you to remove and transfer beans in the
hopper to a storage container safely.
ASSEMBLING BEAN
HOPPER
NOTE:
The freshness of the coee beans will
aect the favor of the coee. To get
the best favor, we recommend changing the coee beans
in the bean hopper at least once a week.
LOCK
UNLOCK
The grinder allows you to grind into the portafilter or
grinds container directly.
Assemble or remove the portafilter cradle by sliding in or
out the grinds outlet.
Slide in or out grinds container with cap open directly
under grind outlet.
IMPORTANT FEATURE
OPEN CONTAINER
CAP
5
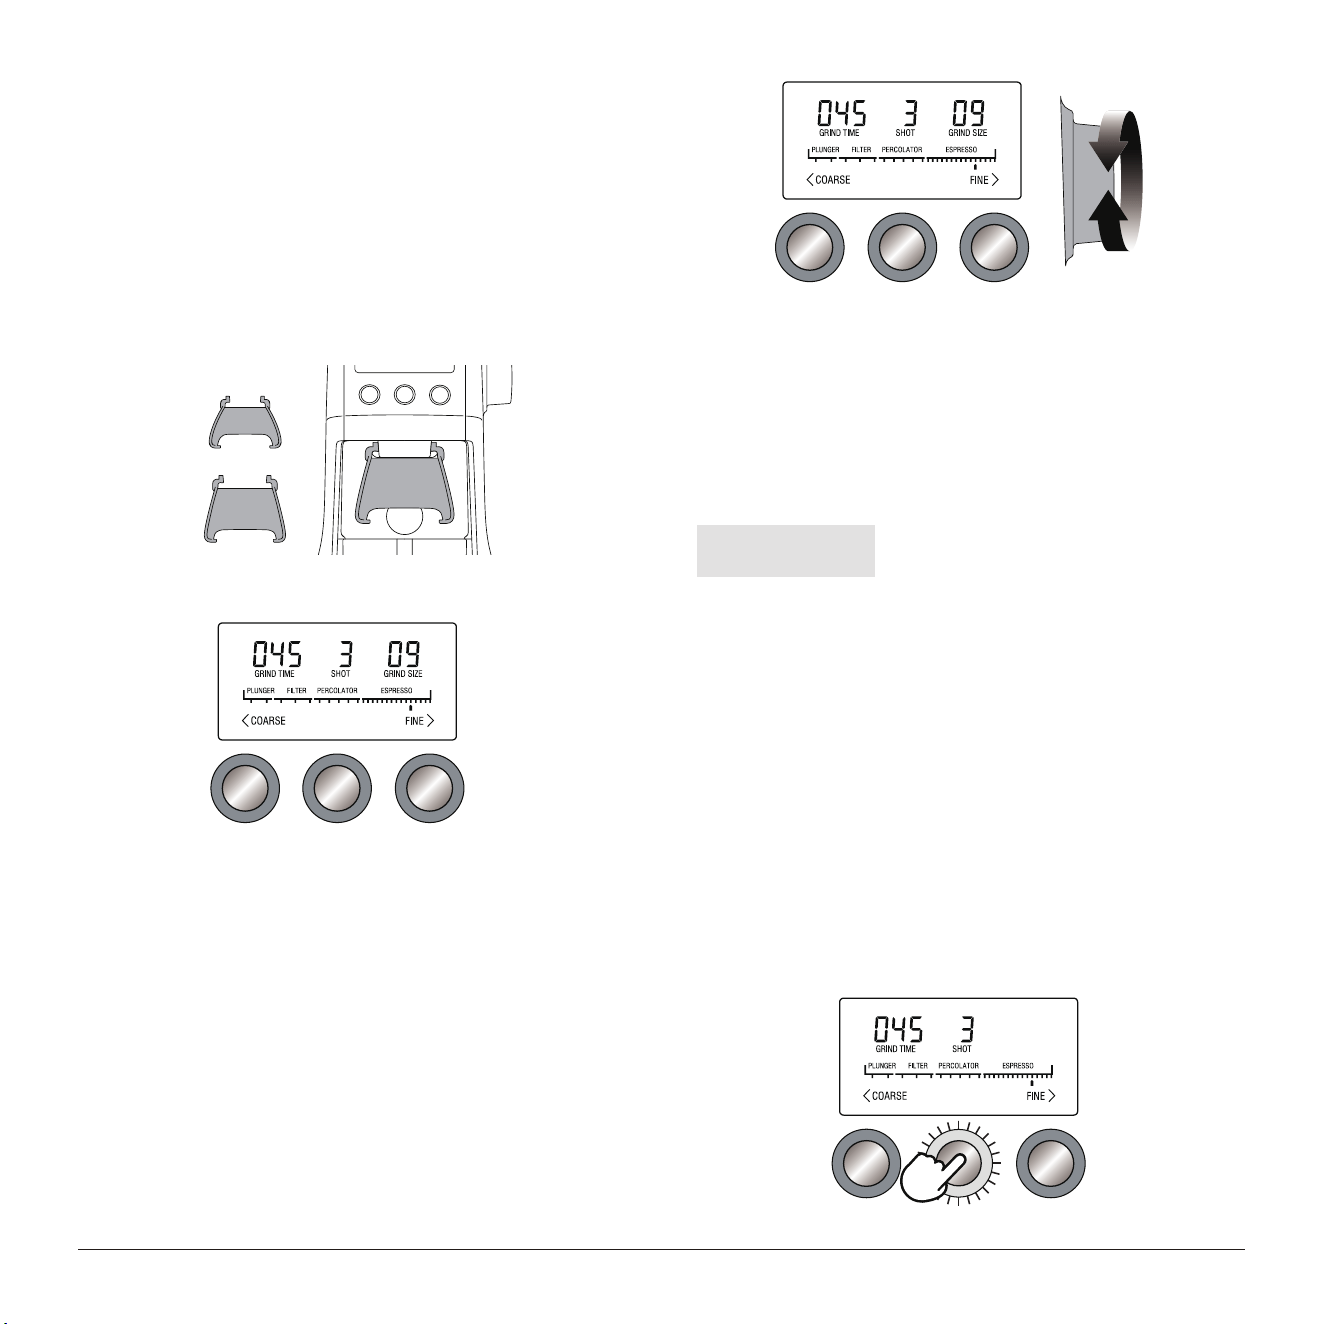
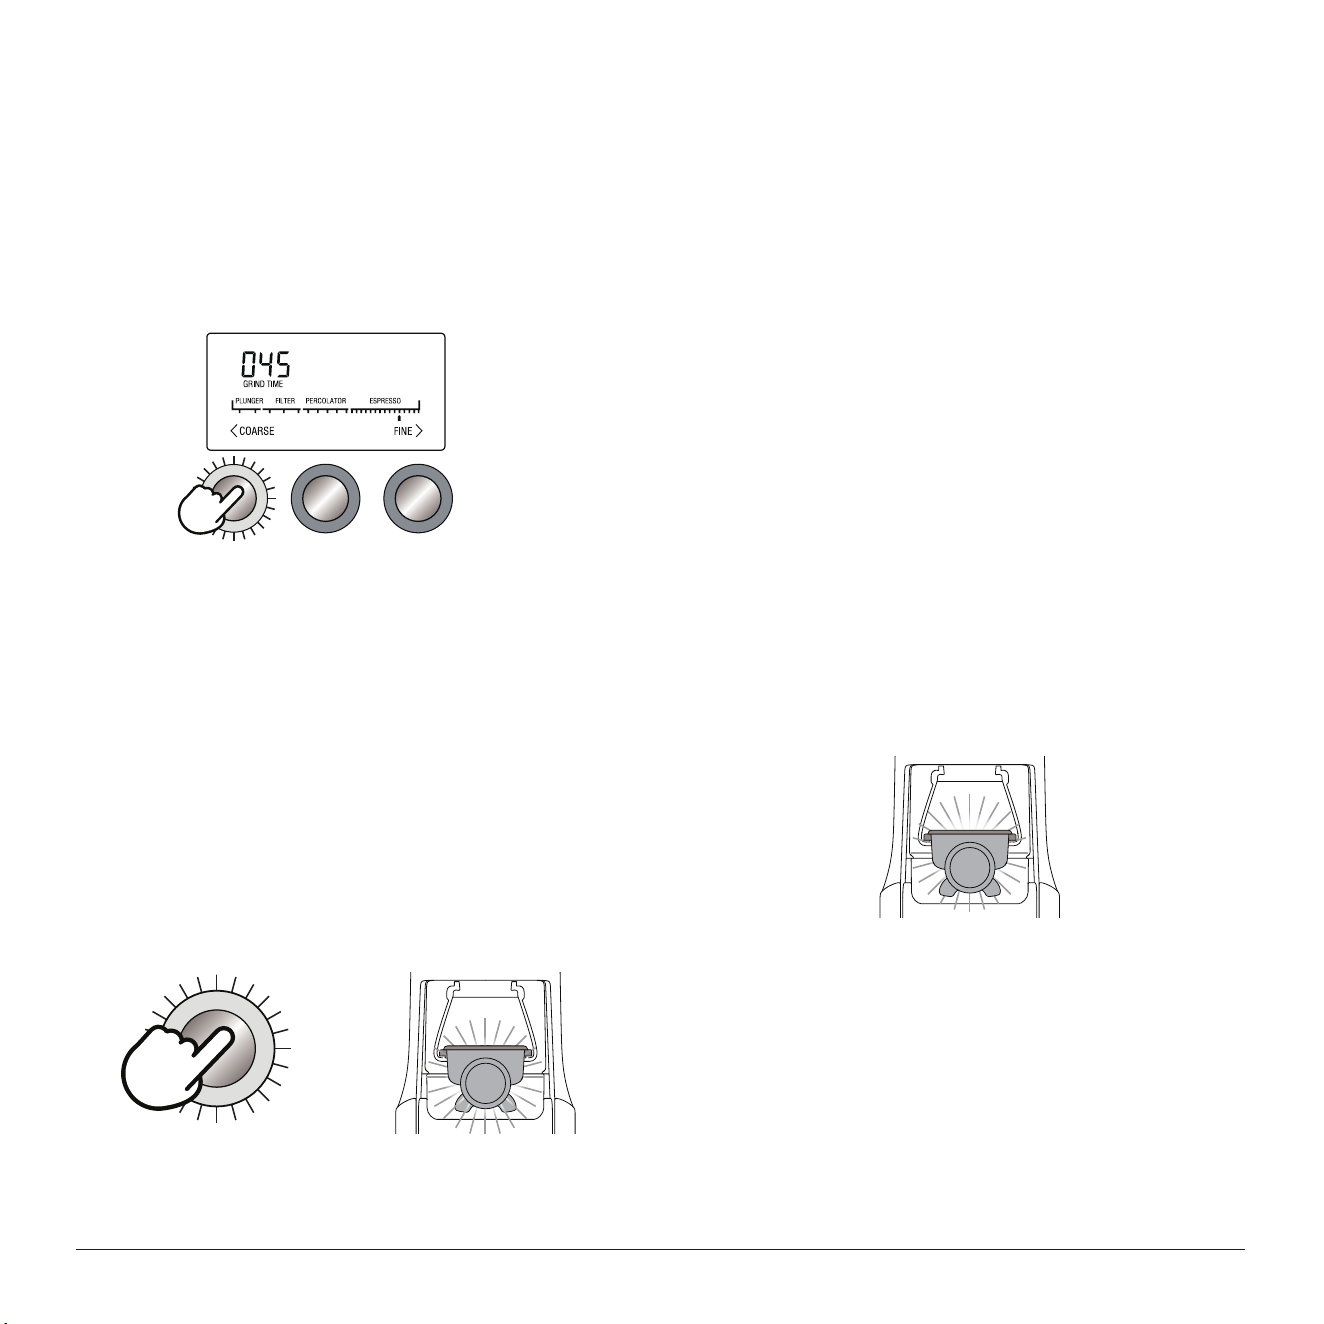
The LCD screen will display as below.
GRINDING FOR ESPRESSO
COFFEE
PUSH
CRADLES
50-54mm
58mm
STEP 1:
Insert the appropriate size portafilter cradle.
Insert your portafilter into the cradle.
GRIND TIME SHOTS
START/STOP
STEP 2:
Select the GRIND SIZE
For espresso, we recommend selecting Grind Size setting
10 as a starting point and rotating the Grind Size Dial
Coarser or Finer to adjust the flow of espresso as
required. This should be done in conjunction with setting
the grind amount (grind time).
GRIND TIME SHOTS
START/STOP
FINER
COARSER
NOTE:
If the Grind Size Dial is tight, run
the grinder by pressing the
START/STOP button while turning the Grind Size
Dial. This will release coee grounds caught between
the conic burrs.
You will need to extract a shot of espresso to determine if
a change in grind size and/or grind amount (grind time)
is necessary to achieve the correct rate of flow.
Traditionally, a single shot of espresso is defined as 1oz in
25 seconds and a double shot of espresso as 2oz in 35
seconds.
STEP 3:
Select the SHOTS|CUPS and grind amount (grind time)
Select the desired amount of ground coee required by
pressing the SHOT button.
Continue pressing the SHOT button until desired
amount is displayed.
GRIND TIME SHOTS
START/STOP
6
Maximum number of shots with the cradle inserted is 5.
The amount dispensed will vary depending on the
grinding size selected and the grind amount (grind time).
Press the Grind Time button to adjust the grinding time
to achieve the correct amount of coee. Increasing time
will increase the dose and decreasing the time will
decrease the dose.
GRIND TIME SHOTS
START/STOP
STEP 4:
AUTOMATIC GRINDING
Grinding automatically allows you to grind hands-free.
The grinder will automatically stop when the preset
amount of coee is dispensed.
01. Press and release either the START/STOP button
or push the handle of your portafilter once. This will
activate the PORTAFILTER SWITCH.
START/STOP PORTAFILTER SWITCH
OR
PUSH
MANUAL GRINDING
Grinding manually allows you to have complete control
over how much coee is dispensed.
01. Push and hold the handle of your portafilter to
activate the PORTAFILTER SWITCH for as long as you
require.
02. Release PORTAFILTER SWITCH and grinding
will stop.
02. Grinding will automatically stop when the preset
amount is dispensed.
It is normal for the correct amount of coee to appear
overfilled in your portafilter. Un-tamped ground coee is
approximately three times the volume of tamped ground
coee.
PORTAFILTER SWITCH
7
PAUSE FUNCTION
You can pause the grinder during operation allowing you
to collapse or settle the coee in the portafilter.
01. During grinding, press the START/STOP button
again or release the portafilter to pause the operation for
30 seconds.
02. Press or push again within this time to resume
grinding the remaining dose.
03. The grinder will go back to standby mode after no
operation for 30 seconds.
GRINDING FOR DRIP COFFEE OR
FRENCH PRESS
Slide in grinds container with cap open or coee filter
directly under grind outlet.
OPEN CONTAINER
CAP
Select the required amount of ground coee by pressing
the SHOT button and the GRIND TIME button.
Press the START/STOP button to start/stop grinding
operation.
You can grind into grinds container without the lid.
However, we recommend keeping the lid on to prevent
coee grinds from escaping.
AMOUNT 1 UP TO 5 SHOTS
1 UP TO 12 CUPS
52-68 69-77
1 UP TO 12 CUPS 1 UP TO 12 CUPS
USE SETTING FOR
ESPRESSO MACHINES
STOVETOP PERCOLATOR
MOCHA MACHINES
PERCOLATORS
DRIP COFFEE MAKER
PERCOLATORS
DRIP COFFEE MAKER
STEAM ESPRESSO
(WITHOUT PUMP)
FRENCH PRESS
GRIND SETTING 1 – 25
26 – 51
GRIND SIZE FINE
MEDIUM
MEDIUM COARSE COARSE
ESPRESSOCOFFEE TYPE DRIP COFFEE / PERCOLATOR FRENCH PRESS
GRIND SIZE TABLE
8
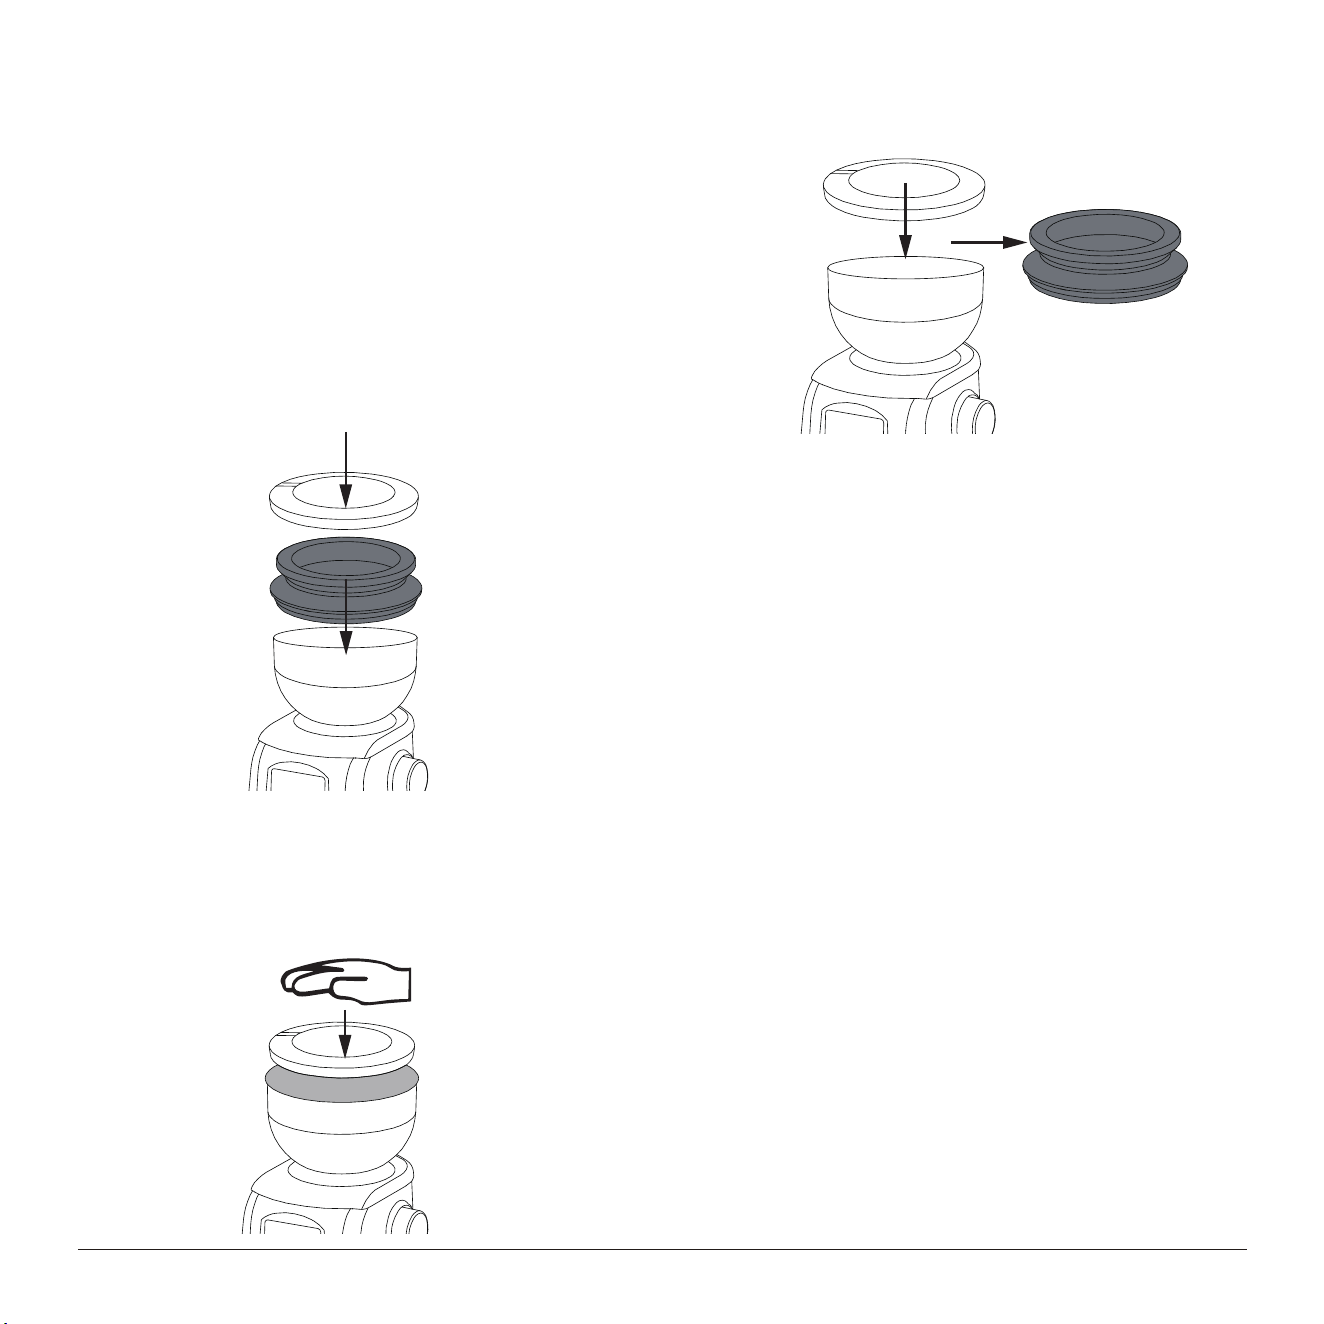
The silicone air blower is designed to install
on the hopper directly. It could create a
strong air pressure, easy to blow out the
residual ground coee.
01.
Install the air blower between the hopper and
hopper lid.
HOW TO USE THE SILICONE
AIR BLOWER
Regular cleaning helps the burrs achieve
consistent grinding results which is
especially important when grinding for
espresso coee.
01.
Turn the bean hopper anti clockwise and lift the
hopper to pull out.
02. Pour the residue beans in the hopper into a
container.
03. Insert and turn the bean hopper into position.
04. Run the grinder until empty.
05. Remove the bean hopper.
CLEANING AND
MAINTENANCE
9
02. Press and release the lid to create a strong air
pressure. This step let air pressure blow out the residual
ground coee. Repeat for
2-3 times.
03. Remove the air blower and install the lid on the
hopper again.
Unlock Lock
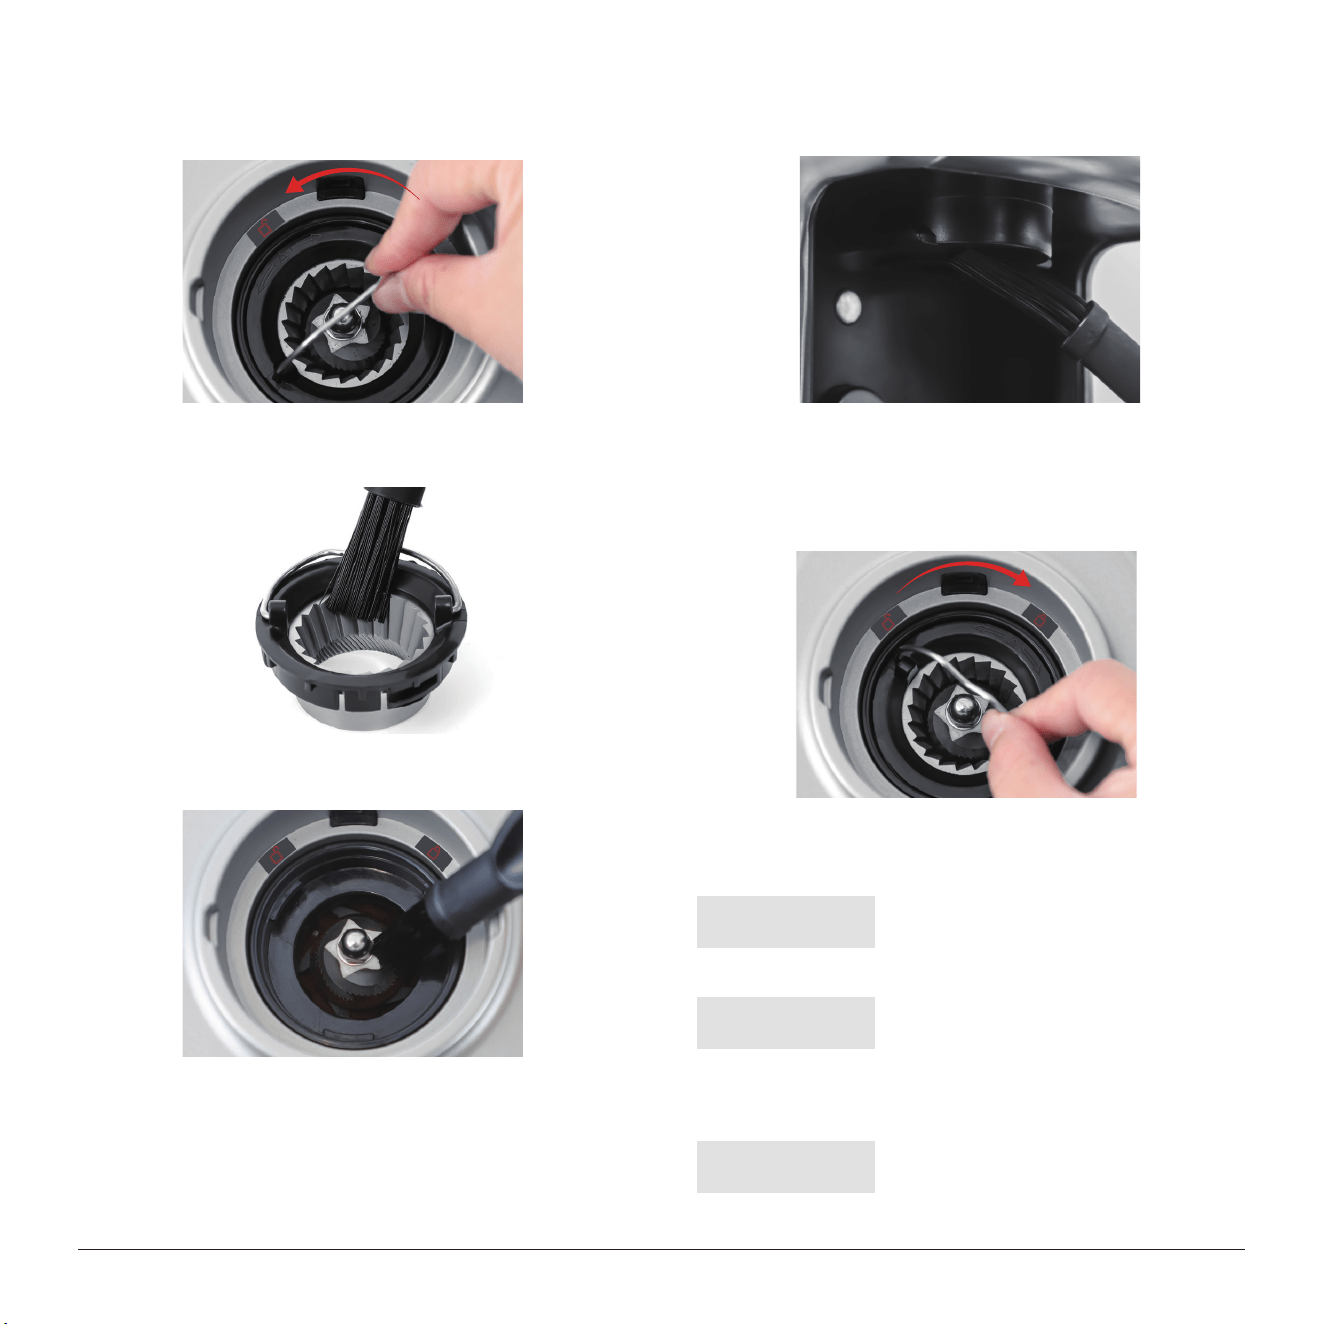
07. Clean the upper burr with cleaning brush.
08. Clean the lower burr with cleaning brush.
09. Clean the grind outlet with brush.
Insert Lock
10. Push the upper burr firmly into position.
Then turn the upper burr clockwise to lock into
position.
NOTE:
Unplug the grinder before cleaning.
NOTE:
To avoid damage, never wash or
immerse the main body, burrs, or
power cord in water, or place in the dishwasher.
NOTE:
Do not use water or wet cloth to
clean the burrs.
11. Insert and turn the bean hopper into position.
10
06. Remove the upper burr by turning it anti
clockwise.
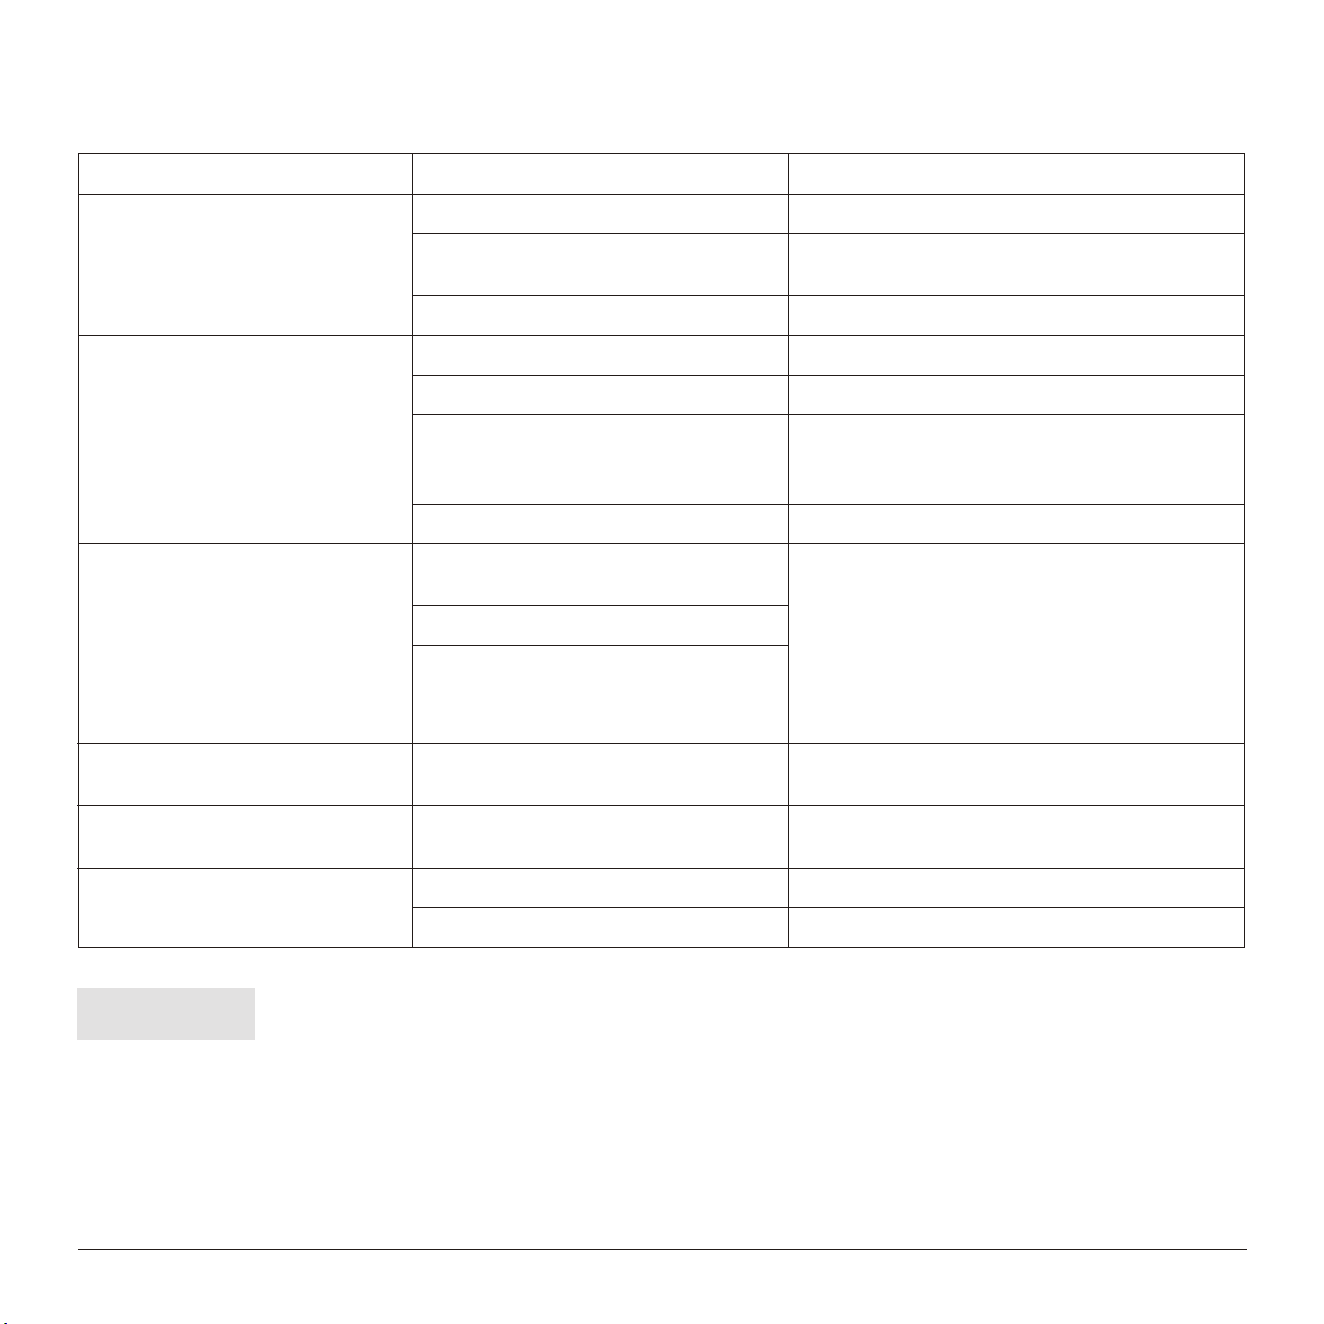
If your problem is not listed, please contact Customer Support.
NOTE:
TROUBLESHOOTING
Motor starts but operates with a
loud "racket" noise.
Motor starts but no ground coee or
less ground coee coming from grind
outlet.
Bean hopper not attached correctly.
Incorrect button pressed. Press START/STOP button to activate.
Lock bean hopper into position.
Grinder/bean hopper is blocked. Remove bean hopper. Inspect bean hopper and
burrs for blockage. Clean the blocked chute and
burrs, then try again.
PROBLEM POSSIBLE CAUSE SOLUTION
Grinder does not start after
pressing
Start/Stop button.
Grinder not plugged in.
Grinder has overheated. Remove power plug from power outlet. Leave for 30
minutes to cool down before using again.
Plug power cord into power outlet.
Moisture clogging grinder.
Grinder is blocked with foreign item or
chute is blocked.
Remove bean hopper, inspect burrs and remove any
foreign body.
Clean burrs and chute.
Leave burrs to dry thoroughly before re-assembling.
You can use a hair dryer to blow air into grinder inlet
(lower burr) to dry.
Unable to lock bean hopper into
position.
Coee beans obstructing bean hopper
locking device.
Remove bean hopper. Clear coee beans from top
of burrs. Re-lock the hopper into position & try again.
Not enough / too much coee grind.
Grind amount requires adjustment.
Press GRIND TIME button or SHOT button to
change grind time.
Moist beans or oily beans.
No coee beans in bean hopper. Fill bean hopper with fresh coee beans.
"E1" displayed on the LED screen
when press the Start/Stop button.
Bean hopper not attached correctly. Lock bean hopper into position.
Grinder is faulty. Contact our customer support.
Moist beans or oily beans. Use freshly beans.
11

WARRANTY INFORMATION
The manufacturer provides warranty in accordance with
the legislation of the customer's own country of
residence, with a minimum of 12 months, starting from
the date on which the appliance is sold to the end user.
The warranty only covers defects in material or work-
manship.
The warranty will not apply in cases of:
- Normal wear and tear.
- Incorrect use, e.g. overloading of the appliance, use of
non-approved accessories.
- Use of force, damage caused by external influences.
- Damage caused by non-observance of the user
manual, e.g. connection to an unsuitable mains supply or
non-compliance with the installation instructions.
- Partially or completely dismantled appliances.
12