Technical Support and E-Warranty Certificate www.vevor.com/support
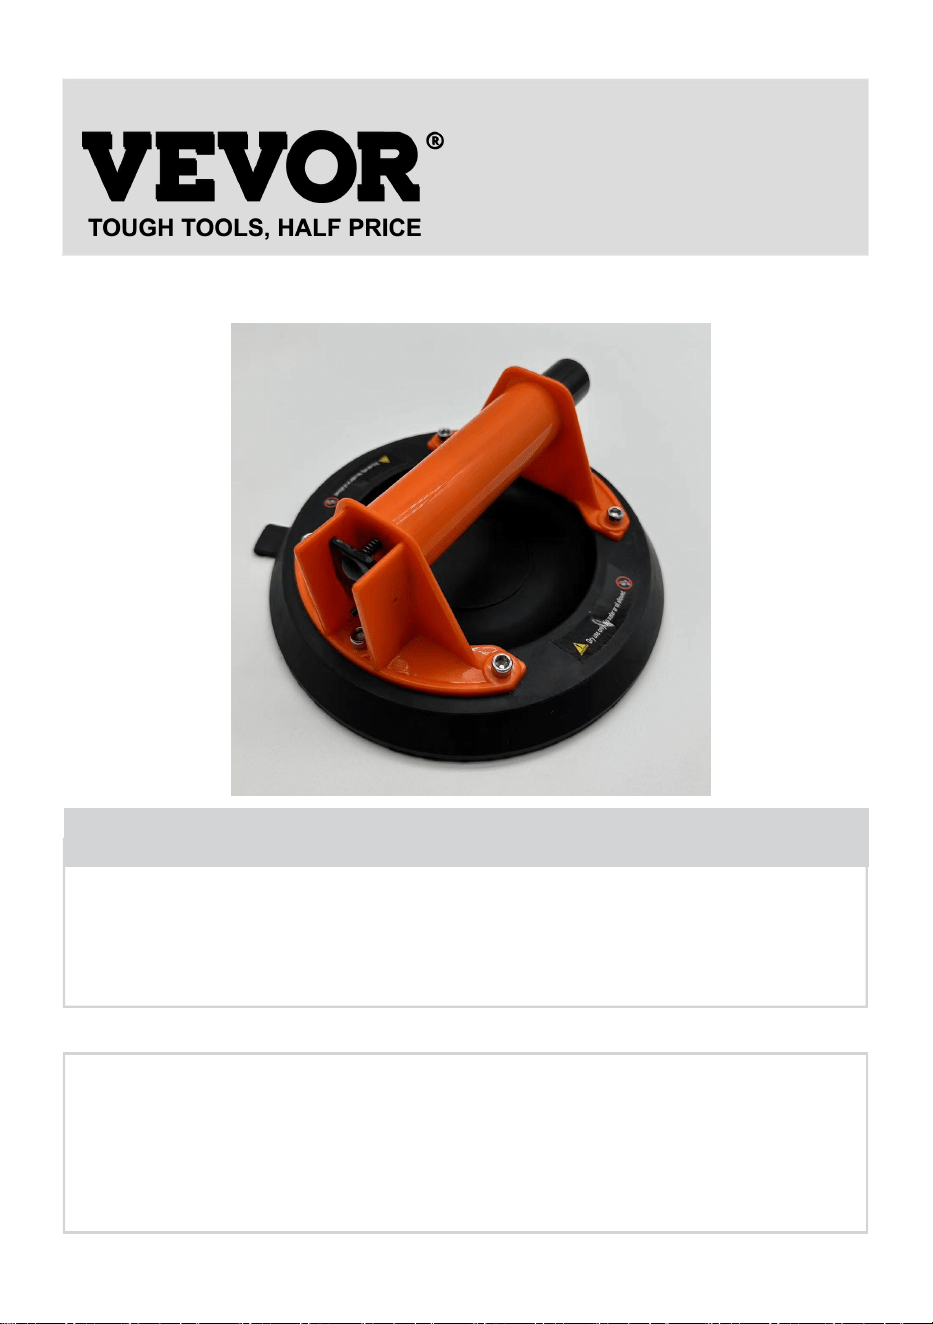
SUCTION CUPS
USER MANUAL
MODEL: GPS-1/GPS-2/GPS-1-10
We continue to be committed to provide you tools with competitive price.
"Save Half", "Half Price" or any other similar expressions used by us only represents an
estimate of savings you might benefit from buying certain tools with us compared to the major
top brands and does not necessarily mean to cover all categories of tools offered by us. You
are kindly reminded to verify carefully when you are placing an order with us if you are
actually saving half in comparison with the top major brands.
- 1 -
MODEL: GPS-1/GPS-2/GPS-1-10
Have product questions? Need technical support? Please feel free to
contact us:
Technical Support and E-Warranty Certificate
www.vevor.com/support
NEED HELP? CONTACT US!
This is the original instruction, please read all manual instructions
carefully before operating. VEVOR reserves a clear interpretation of our
user manual. The appearance of the product shall be subject to the
product you received. Please forgive us that we won't inform you again if
there are any technology or software updates on our product.
SUCTION CUPS

- 2 -
SAFETY INSTRUCTION AND PRECAUTIONS
WARNING:
Read this material before using this product. Failure to do so can result in
serious injury.
1. This product is not a toy. Do not allow children to play with this item.
2. Use as intended only. Do not stand on the product.
3. Make sure the handle is not loose before each use.
4. Do not exceed the listed weight capacity.
Safety Instructions:
1.Keep product away from damp, wet, rainy, high temperature, fire, or
direct sun-shining conditions.
2.Check for alignment and binding of all moving parts, broken parts or
mounting fixtures, and other conditions that may affect proper operation.
3.Never let children handle the product, and Do not use the lifter as a dolly.
4.When serving, use only identical replacement parts. Use of any other
parts will avoid the warranty.
5.Do not exceed the lifter's capacity.
6.Lifter should be used on non-porous materials with smooth, relatively flat
surfaces.
7.Lifter can only be operated by manual for short distance.
8.Check for damaged parts. Before use, any part that appears damaged
should be carefully checked to determine that it will operate properly and
perform its intended function, and the surface of rubber pads should be
cleaned up without dirt.
9.If there is any question about a condition being safe or unsafe, DO NOT
use the product.
Product Use:Lifting and moving non-porous materials
Storage:When not in use, the product should be stored in a dry, not high
temperature, without direct sun shining location to inhibit rust and wear out.
- 3 -
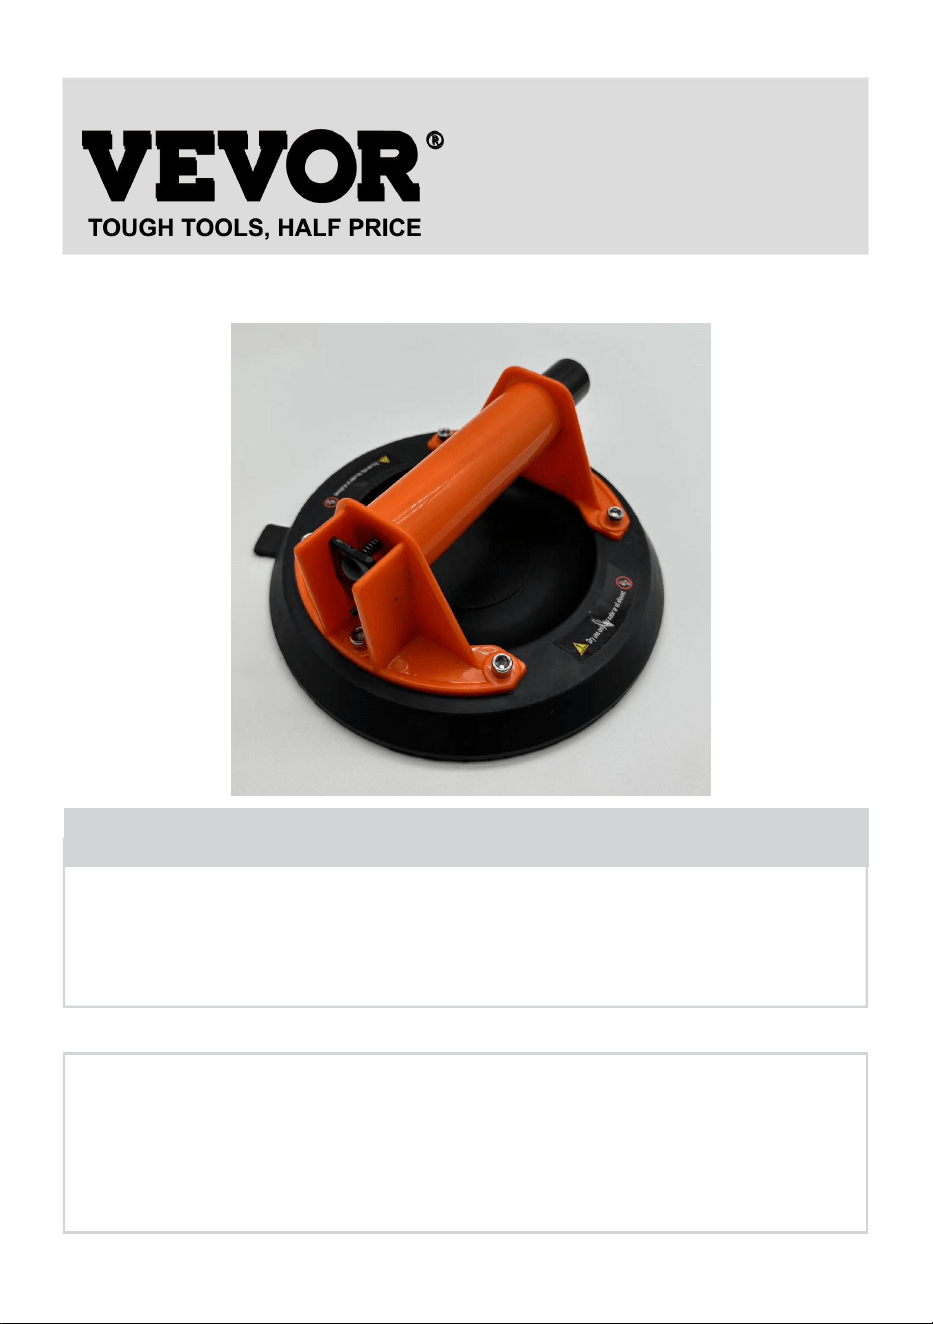
Operation Direction:
1.The principle of operation is by lever and pump action. The round suction
cups are pressed onto the surface of the object to be lifted. The lever grips
are squeezed together into position. The rubber pads are then securely
clamped to the surface by vacuum so that the object can be lifted. To
release, just flip back the levers.
2. The loaded surface needs to be smooth, relatively flat, and non-porous.
Surfaces should be free of oil, grease, or water; otherwise, slipping can
occur. Non-porous materials such as glass, metal, plastics, and polished
stone are good examples.
OPERATION AS BELOW
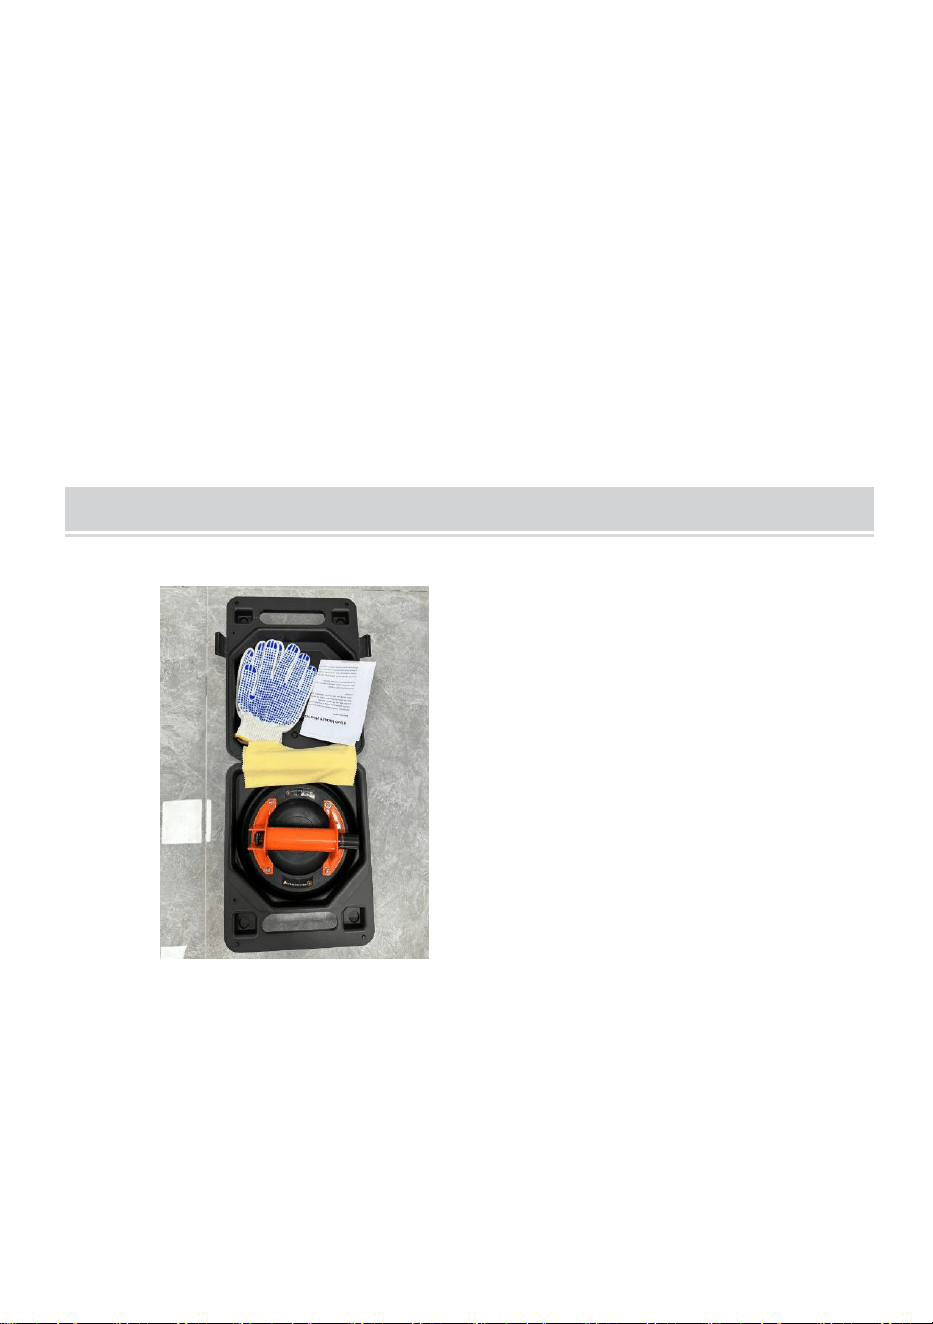
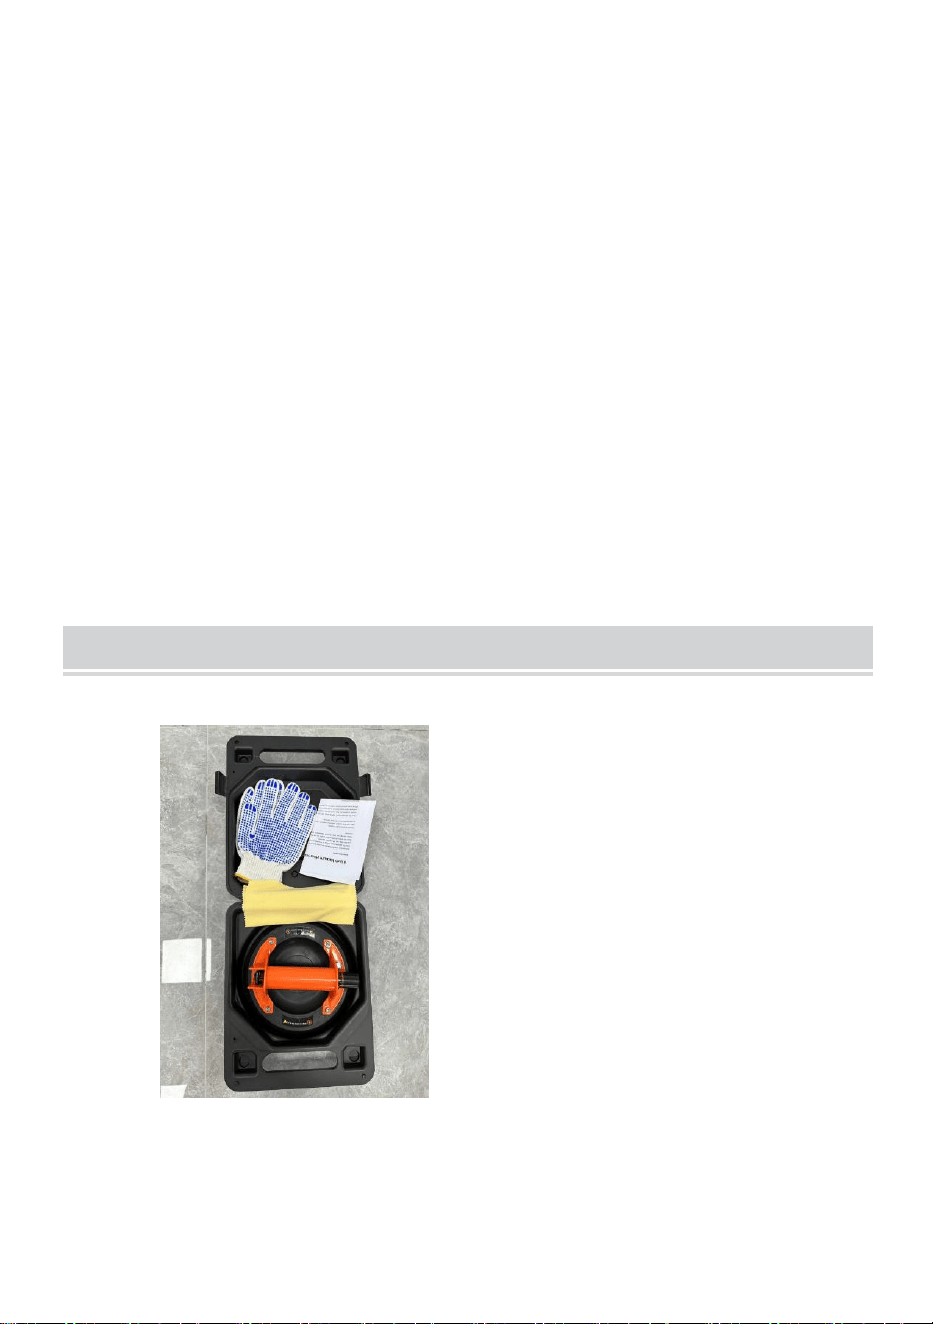
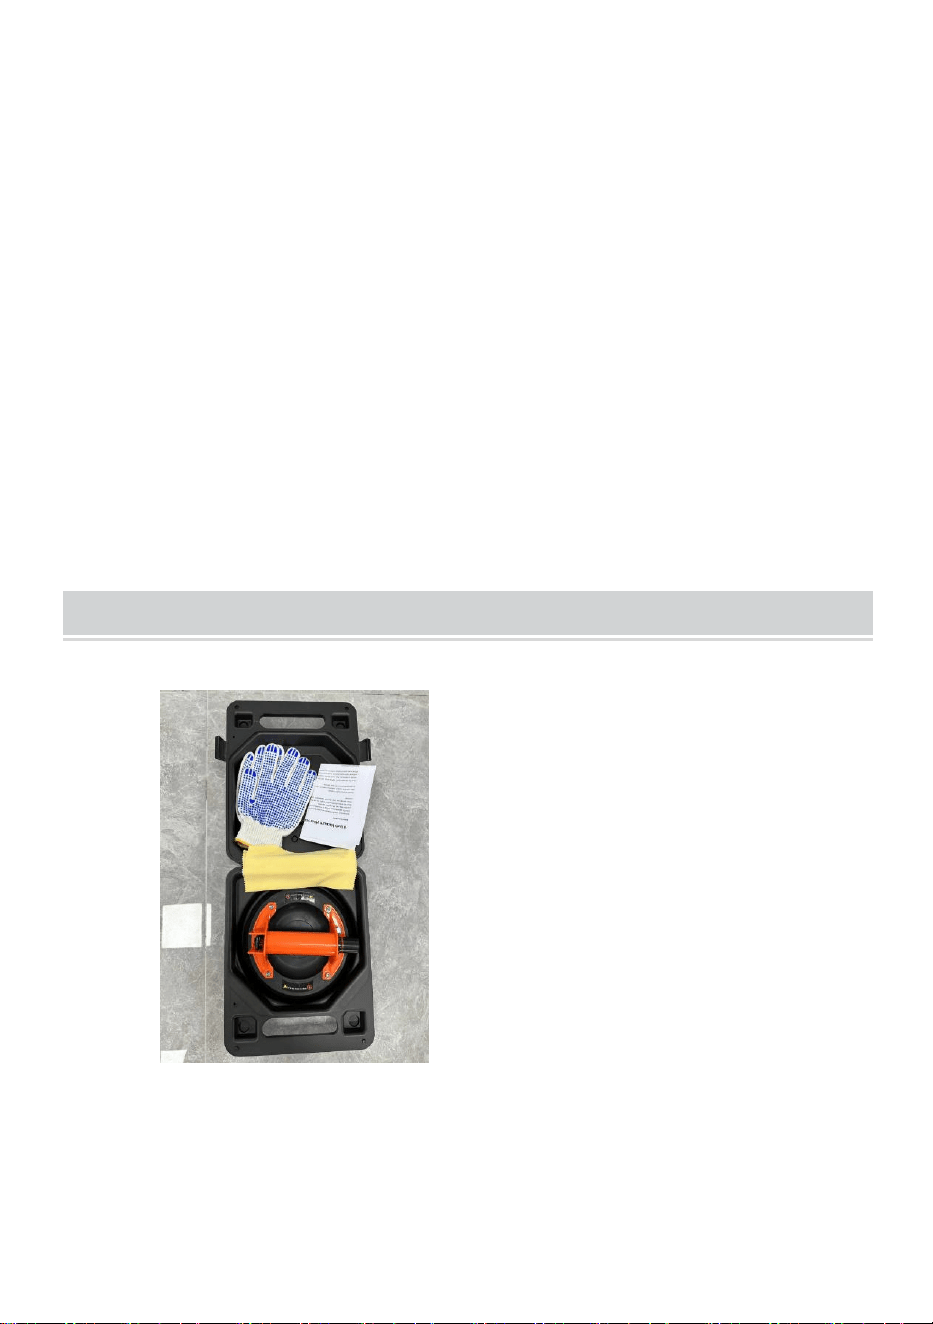
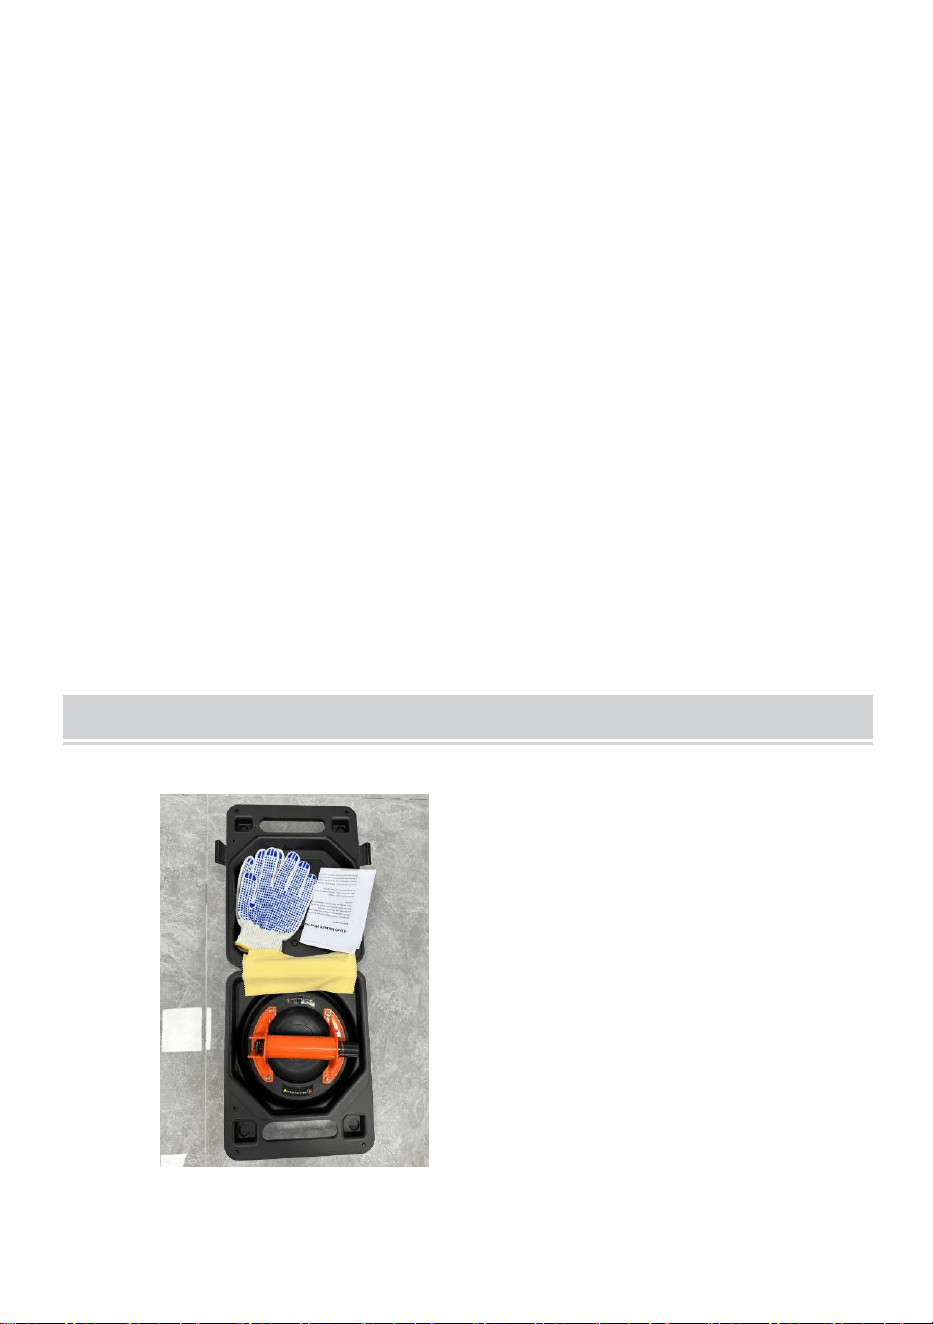
1. Open the vacuum suction
plastic box and check if the
product and accessories are
intact.

- 4 -
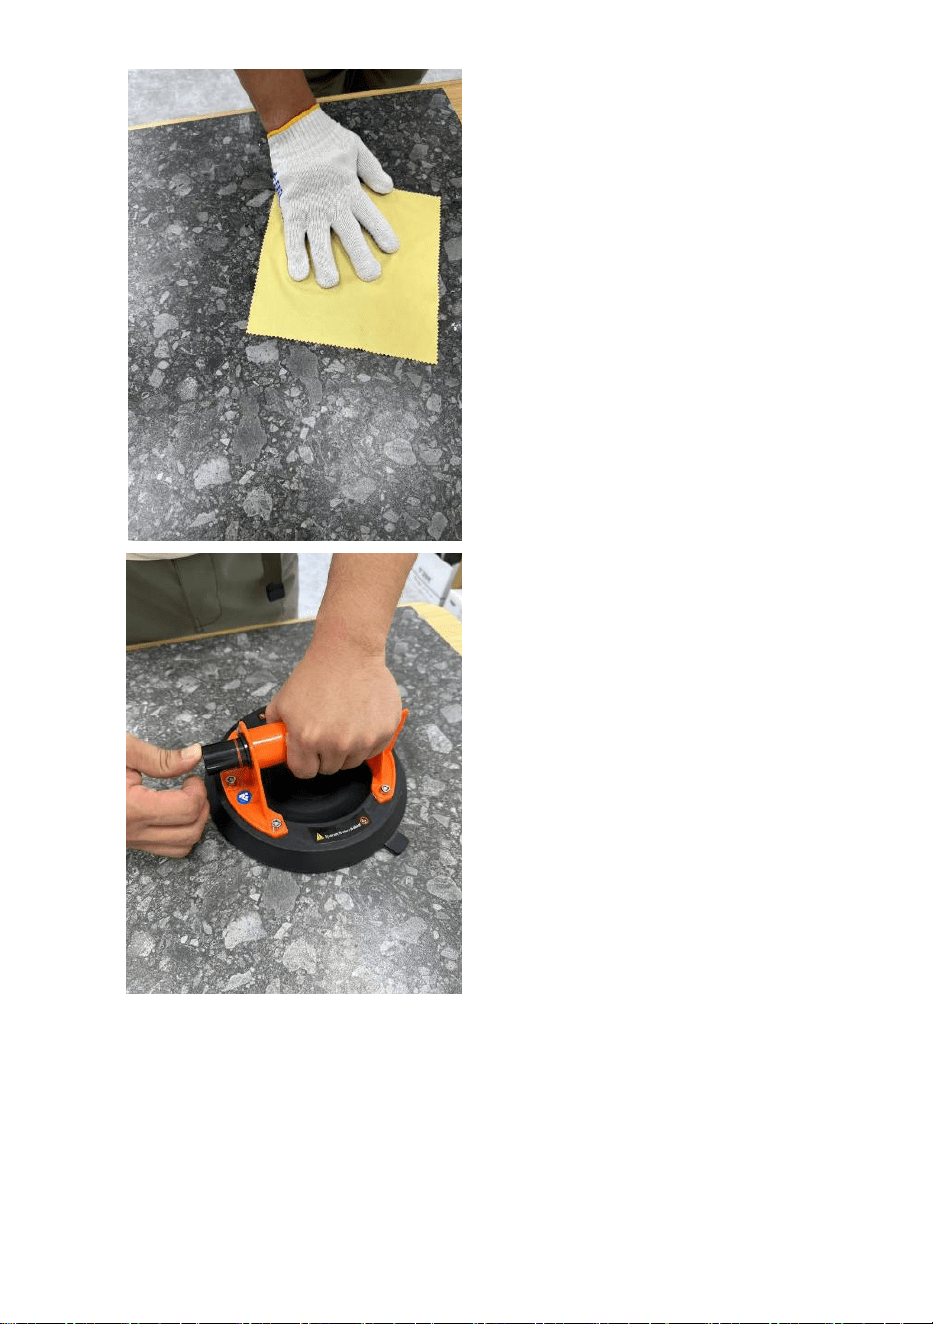
2. When operating, clean the
surface of the object to be
adsorbed with an anti-static
cloth to ensure a smooth
surface.
3. When operating, place the
vacuum suction cup flat on the
surface of the object to be
adsorbed; lightly press the
vacuum suction cup with your
hand to ensure full contact
between the rubber pad and the
object's surface. Then press the
inflation button until it is fully
inflated and the red warning line
is not visible.
- 5 -
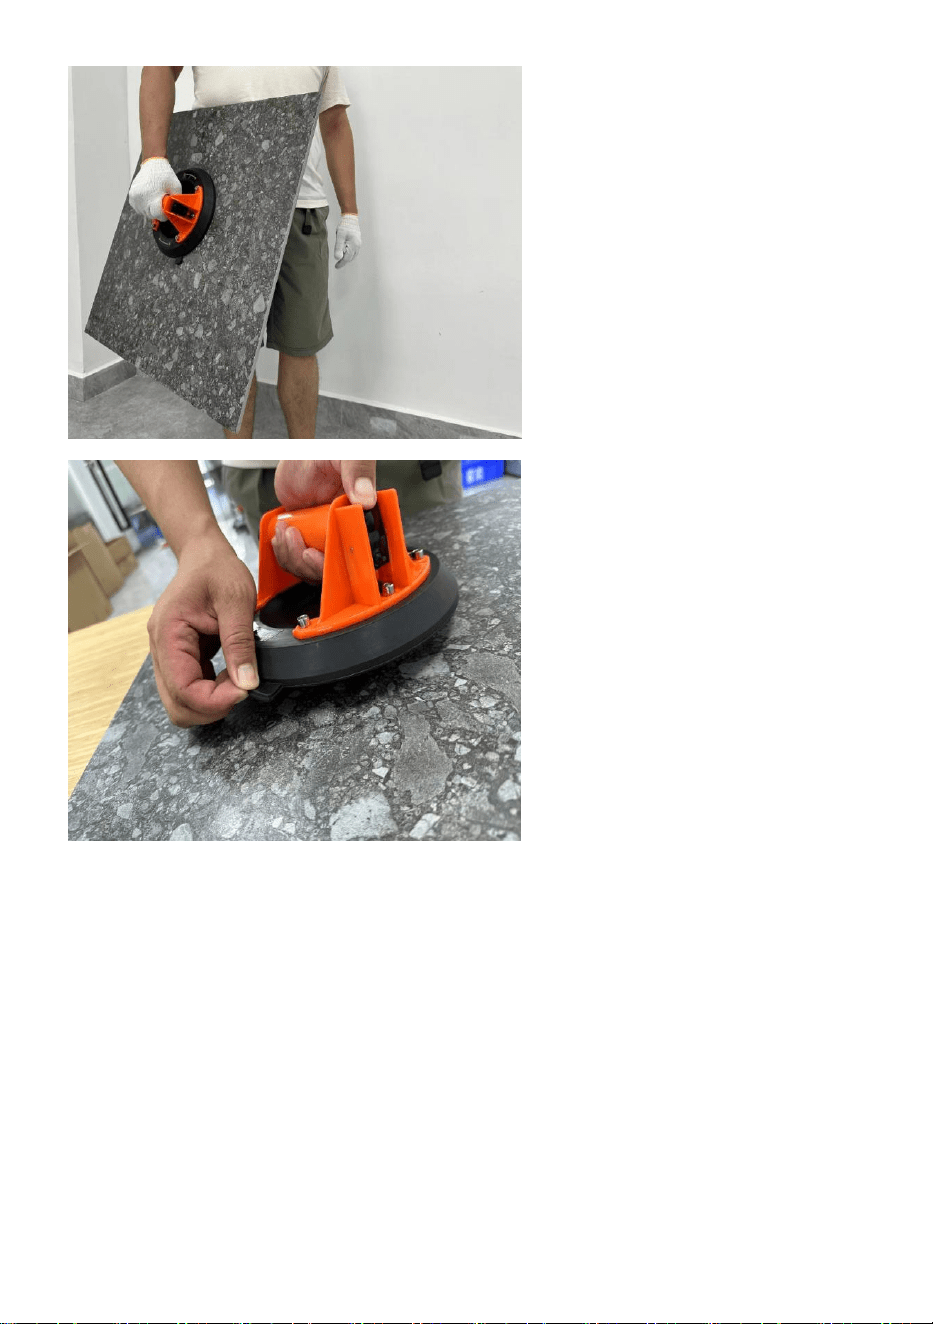
4. After complete inflation, check
the red warning line to see if it
has retracted. If it has not
retracted, then the object can be
moved.
5. After the transportation
process is completed, gently lift
the deflation tongue or press the
black deflation button to remove
the suction cup.

- 6 -
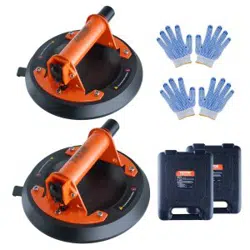
Items
Description
1
Name
Suction Cups
2
Model
GPS-2
3
Parameter
8 inches
,
Plastic handle
,
Circular style
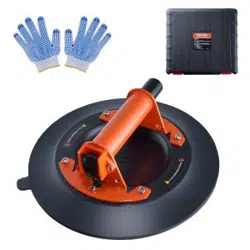
Items
Description
1
Name
Suction Cups
2
Model
GPS-1
3
Parameter
8 inches
,
Metal handle
,
Circular style
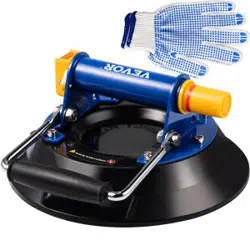
Items
Description
1
Name
Suction Cups
2
Model
GPS-1-10
3
Parameter
10 inches
,
Metal handle
,
Circular style


- 2 -
Technique Certificat d'assistance et de garantie électronique
www.vevor.com/support
VENTOUSES
MANUEL D'UTILISATION
MODÈLE: GPS-1/GPS-2/GPS-1-10
We continue to be committed to provide you tools with competitive price.
"Save Half", "Half Price" or any other similar expressions used by us only represents an
estimate of savings you might benefit from buying certain tools with us compared to the major
top brands and does not necessarily mean to cover all categories of tools offered by us. You
are kindly reminded to verify carefully when you are placing an order with us if you are
actually saving half in comparison with the top major brands.

- 1 -
MODÈLE: GPS-1/GPS-2/GPS-1-10
Have product questions? Need technical support? Please feel free to
contact us:
Technical Support and E-Warranty Certificate
www.vevor.com/support
NEED HELP? CONTACT US!
This is the original instruction, please read all manual instructions
carefully before operating. VEVOR reserves a clear interpretation of our
user manual. The appearance of the product shall be subject to the
product you received. Please forgive us that we won't inform you again if
there are any technology or software updates on our product.
SUCTION CUPS

- 2 -
SAFETY INSTRUCTION AND PRECAUTIONS
AVERTISSEMENT:
Lisez ce document avant d'utiliser ce produit. Le non-respect de ces
instructions peut entraîner des blessures graves.
1. Ce produit n'est pas un jouet. Ne laissez pas les enfants jouer avec cet
article.
2. Utiliser uniquement comme prévu. Ne pas monter sur le produit.
3. Assurez-vous que la poignée n'est pas desserrée avant chaque
utilisation.
4. Ne pas dépasser la capacité de poids indiquée.
Consignes de sécurité :
1. Gardez le produit à l'abri de l'humidité, de la pluie, des températures
élevées, du feu ou de la lumière directe du soleil.
2. Vérifiez l'alignement et la fixation de toutes les pièces mobiles, des
pièces cassées ou des dispositifs de montage, ainsi que d'autres
conditions pouvant affecter le bon fonctionnement.
3. Ne laissez jamais les enfants manipuler le produit et n'utilisez pas le
élévateur comme un chariot.
4. Lors de la réparation, n'utilisez que des pièces de rechange identiques.
L'utilisation de toute autre pièce annulera la garantie.
5. Ne pas dépasser la capacité de l'élévateur.
6. Le Lifter doit être utilisé sur des matériaux non poreux avec des surfaces
lisses et relativement plates.
7. L'élévateur ne peut être utilisé manuellement que sur de courtes
distances.
8. Vérifiez que les pièces ne sont pas endommagées. Avant utilisation,
toute pièce qui semble endommagée doit être soigneusement vérifiée pour
déterminer si elle fonctionnera correctement et remplira sa fonction prévue,
et la surface des tampons en caoutchouc doit être nettoyée sans saleté.
9. En cas de doute sur la sécurité ou non d’une condition, N’UTILISEZ PAS
le produit.
- 3 -
Utilisation du produit : levage et déplacement de matériaux non poreux
Stockage : Lorsqu'il n'est pas utilisé, le produit doit être stocké dans un
endroit sec, à l'abri de la chaleur et de la lumière directe du soleil, afin
d'éviter la rouille et l'usure.
Sens de fonctionnement :
1. Le principe de fonctionnement est basé sur l'action du levier et de la
pompe. Les ventouses rondes sont pressées sur la surface de l'objet à
soulever. Les poignées du levier sont serrées ensemble pour se mettre en
place. Les tampons en caoutchouc sont ensuite solidement fixés à la
surface par le vide afin que l'objet puisse être soulevé. Pour libérer, il suffit
de retourner les leviers.
2. La surface chargée doit être lisse, relativement plate et non poreuse.
Les surfaces doivent être exemptes d'huile, de graisse ou d'eau, sinon un
glissement peut se produire. Les matériaux non poreux tels que le verre, le
métal, le plastique et la pierre polie en sont de bons exemples.
OPERATION AS BELOW
1. Ouvrez la boîte en plastique
d'aspiration sous vide et vérifiez
si le produit et les accessoires
sont intacts.

- 4 -
2. Lors du fonctionnement,
nettoyez la surface de l'objet à
adsorber avec un chiffon
antistatique pour garantir une
surface lisse.
3. Lors du fonctionnement,
placez la ventouse à vide à plat
sur la surface de l'objet à
adsorber ; appuyez légèrement
sur la ventouse à vide avec
votre main pour assurer un
contact complet entre le tampon
en caoutchouc et la surface de
l'objet. Appuyez ensuite sur le
bouton de gonflage jusqu'à ce
qu'il soit complètement gonflé et
que la ligne d'avertissement
rouge ne soit plus visible.

- 5 -
4. Une fois le gonflage terminé,
vérifiez si la ligne
d'avertissement rouge s'est
rétractée. Si ce n'est pas le cas,
l'objet peut être déplacé.
5. Une fois le processus de
transport terminé, soulevez
doucement la languette de
dégonflage ou appuyez sur le
bouton de dégonflage noir pour
retirer la ventouse.

- 6 -
Articles
Description
1
Nom
Ventouses
2
Modèle
GPS-2
3
Paramètre
8 pouces , poignée en plastique, style circulaire
Articles
Description
1
Nom
Ventouses
2
Modèle
GPS-1
3
Paramètre
8 pouces es
,
Poignée en métal
,
Style circulaire
Articles
Description
1
Nom
Ventouses
2
Modèle
GPS-1-10
3
Paramètre
10 pouces es
,
Poignée en métal
,
Style circulaire


- 2 -
Technisch Support und E-Garantie-Zertifikat www.vevor.com/support
SAUGNÄPFE
BENUTZERHANDBUCH
MODELL: GPS-1/GPS-2/GPS-1-10
We continue to be committed to provide you tools with competitive price.
"Save Half", "Half Price" or any other similar expressions used by us only represents an
estimate of savings you might benefit from buying certain tools with us compared to the major
top brands and does not necessarily mean to cover all categories of tools offered by us. You
are kindly reminded to verify carefully when you are placing an order with us if you are
actually saving half in comparison with the top major brands.

- 1 -
MODELL: GPS-1/GPS-2/GPS-1-10
Have product questions? Need technical support? Please feel free to
contact us:
Technical Support and E-Warranty Certificate
www.vevor.com/support
NEED HELP? CONTACT US!
This is the original instruction, please read all manual instructions
carefully before operating. VEVOR reserves a clear interpretation of our
user manual. The appearance of the product shall be subject to the
product you received. Please forgive us that we won't inform you again if
there are any technology or software updates on our product.
SUCTION CUPS

- 2 -
SAFETY INSTRUCTION AND PRECAUTIONS
WARNUNG:
Lesen Sie dieses Material, bevor Sie dieses Produkt verwenden.
Andernfalls kann es zu schweren Verletzungen kommen.
1. Dieses Produkt ist kein Spielzeug. Erlauben Sie Kindern nicht, mit
diesem Artikel zu spielen.
2. Nur bestimmungsgemäß verwenden. Nicht auf das Produkt stellen.
3. Stellen Sie vor jedem Gebrauch sicher, dass der Griff nicht locker ist.
4. Überschreiten Sie nicht die angegebene Gewichtskapazität.
Sicherheitshinweise:
1. Bewahren Sie das Produkt vor Feuchtigkeit, Nässe, Regen, hohen
Temperaturen, Feuer oder direkter Sonneneinstrahlung geschützt auf.
2. Überprüfen Sie die Ausrichtung und Blockierung aller beweglichen Teile,
defekten Teile oder Montagevorrichtungen sowie andere Bedingungen, die
den ordnungsgemäßen Betrieb beeinträchtigen könnten.
3. Lassen Sie niemals Kinder mit dem Produkt umgehen und verwenden
Sie den Lifter nicht als Rollwagen.
4. Verwenden Sie bei der Wartung nur identische Ersatzteile. Bei
Verwendung anderer Teile erlischt die Garantie.
5. Überschreiten Sie nicht die Tragfähigkeit des Hebegeräts.
6. Der Lifter sollte auf nicht porösen Materialien mit glatten, relativ flachen
Oberflächen verwendet werden.
7. Der Heber kann nur über kurze Distanzen manuell bedient werden.
8. Auf beschädigte Teile prüfen. Vor dem Gebrauch sollten alle Teile, die
beschädigt erscheinen, sorgfältig geprüft werden, um sicherzustellen, dass
sie ordnungsgemäß funktionieren und ihre beabsichtigte Funktion erfüllen.
Die Oberfläche der Gummipolster sollte schmutzfrei gereinigt werden.
9.Wenn Zweifel darüber bestehen, ob ein Zustand sicher oder unsicher ist,
verwenden Sie das Produkt NICHT.
Produktverwendung : Anheben und Bewegen von nichtporösen
Materialien
- 3 -
Lagerung : Bei Nichtgebrauch sollte das Produkt an einem trockenen,
nicht zu heißen Ort und ohne direkte Sonneneinstrahlung gelagert werden,
um Rost und Verschleiß zu vermeiden.
Betriebsrichtung:
1. Das Funktionsprinzip beruht auf Hebel- und Pumpwirkung. Die runden
Saugnäpfe werden auf die Oberfläche des anzuhebenden Objekts
gedrückt. Die Hebelgriffe werden in Position zusammengedrückt. Die
Gummipads werden dann durch Vakuum sicher an der Oberfläche
festgeklemmt, sodass das Objekt angehoben werden kann. Zum Lösen
einfach die Hebel zurückklappen.
2. Die belastete Oberfläche muss glatt, relativ eben und nicht porös sein.
Oberflächen sollten frei von Öl, Fett oder Wasser sein, da es sonst zum
Abrutschen kommen kann. Nicht poröse Materialien wie Glas, Metall,
Kunststoff und polierter Stein sind gute Beispiele.
OPERATION AS BELOW
1. Öffnen Sie die Kunststoffbox
mit dem Vakuumsauger und
prüfen Sie, ob Produkt und
Zubehör intakt sind.

- 4 -
2. Reinigen Sie während des
Betriebs die Oberfläche des zu
adsorbierenden Objekts mit
einem antistatischen Tuch, um
eine glatte Oberfläche zu
gewährleisten.
3. Legen Sie den
Vakuumsauger während des
Betriebs flach auf die
Oberfläche des zu
adsorbierenden Objekts.
Drücken Sie den Vakuumsauger
leicht mit der Hand, um einen
vollständigen Kontakt zwischen
dem Gummipolster und der
Oberfläche des Objekts
sicherzustellen. Drücken Sie
dann den Aufblasknopf, bis er
vollständig aufgeblasen ist und
die rote Warnlinie nicht mehr
sichtbar ist.

- 5 -
4. Nach dem vollständigen
Aufblasen prüfen Sie, ob die
rote Warnleine eingezogen ist.
Ist dies nicht der Fall, kann das
Objekt bewegt werden.
5. Nachdem der
Transportvorgang
abgeschlossen ist, heben Sie
die Entleerungszunge vorsichtig
an oder drücken Sie den
schwarzen Entleerungsknopf,
um den Saugnapf zu entfernen.

- 6 -
Artikel
Beschreibung
1
Name
Saugnäpfe
2
Modell
GPS-2
3
Parameter
8 Zoll es , Kunststoffgriff, Runder Stil
Artikel
Beschreibung
1
Name
Saugnäpfe
2
Modell
GPS-1
3
Parameter
8 Zoll es , Metallgriff, Runder Stil
Artikel
Beschreibung
1
Name
Saugnäpfe
2
Modell
GPS-1-10
3
Parameter
10 Zoll es , Metallgriff, Runder Stil


- 2 -
Tecnico Supporto e certificato di garanzia elettronica www.vevor.com/support
VENTOSE
MANUALE D'USO
MODELLO: GPS-1/GPS-2/GPS-1-10
We continue to be committed to provide you tools with competitive price.
"Save Half", "Half Price" or any other similar expressions used by us only represents an
estimate of savings you might benefit from buying certain tools with us compared to the major
top brands and does not necessarily mean to cover all categories of tools offered by us. You
are kindly reminded to verify carefully when you are placing an order with us if you are
actually saving half in comparison with the top major brands.
- 1 -
MODELLO: GPS-1/GPS-2/GPS-1-10
Have product questions? Need technical support? Please feel free to
contact us:
Technical Support and E-Warranty Certificate
www.vevor.com/support
NEED HELP? CONTACT US!
This is the original instruction, please read all manual instructions
carefully before operating. VEVOR reserves a clear interpretation of our
user manual. The appearance of the product shall be subject to the
product you received. Please forgive us that we won't inform you again if
there are any technology or software updates on our product.
SUCTION CUPS

- 2 -
SAFETY INSTRUCTION AND PRECAUTIONS
AVVERTIMENTO:
Leggere questo materiale prima di utilizzare questo prodotto. La mancata
osservanza di questa precauzione può causare gravi lesioni.
1. Questo prodotto non è un giocattolo. Non permettere ai bambini di
giocare con questo articolo.
2. Utilizzare solo come previsto. Non salire sul prodotto.
3. Prima di ogni utilizzo, assicurarsi che la maniglia non sia allentata.
4. Non superare la capacità di peso indicata.
Istruzioni di sicurezza:
1. Tenere il prodotto lontano da umidità, bagnato, pioggia, alte temperature,
fuoco o luce solare diretta.
2. Controllare l'allineamento e il bloccaggio di tutte le parti mobili, delle
parti rotte o dei dispositivi di montaggio e di altre condizioni che potrebbero
influire sul corretto funzionamento.
3. Non lasciare mai che i bambini tocchino il prodotto e non utilizzare il
sollevatore come carrello.
4. Quando si serve, utilizzare solo parti di ricambio identiche. L'uso di
qualsiasi altra parte eliminerà la garanzia.
5. Non superare la capacità del sollevatore.
6. Il sollevatore deve essere utilizzato su materiali non porosi con superfici
lisce e relativamente piatte.
7. Il sollevatore può essere azionato manualmente solo per brevi distanze.
8. Controllare eventuali parti danneggiate. Prima dell'uso, qualsiasi parte
che appare danneggiata deve essere attentamente controllata per
determinare se funzionerà correttamente e svolgerà la sua funzione
prevista, e la superficie dei cuscinetti in gomma deve essere pulita senza
sporcizia.
9. In caso di dubbi sulla sicurezza o meno di una condizione, NON
utilizzare il prodotto.
Utilizzo del prodotto : sollevamento e spostamento di materiali non
porosi

- 3 -
Conservazione : quando non viene utilizzato, il prodotto deve essere
conservato in un luogo asciutto, non esposto a temperature elevate e alla
luce diretta del sole, per evitare ruggine e usura.
Direzione dell'operazione:
1. Il principio di funzionamento è tramite leva e pompa. Le ventose rotonde
vengono premute sulla superficie dell'oggetto da sollevare. Le
impugnature della leva vengono premute insieme in posizione. I cuscinetti
in gomma vengono quindi fissati saldamente alla superficie tramite vuoto in
modo che l'oggetto possa essere sollevato. Per rilasciare, basta ribaltare le
leve.
2. La superficie caricata deve essere liscia, relativamente piatta e non
porosa. Le superfici devono essere prive di olio, grasso o acqua; altrimenti,
può verificarsi uno scivolamento. Materiali non porosi come vetro, metallo,
plastica e pietra levigata sono buoni esempi.
OPERATION AS BELOW
1. Aprire la scatola di plastica
dell'aspirapolvere e verificare
che il prodotto e gli accessori
siano intatti.

- 4 -
2. Durante il funzionamento,
pulire la superficie dell'oggetto
da assorbire con un panno
antistatico per garantire una
superficie liscia.
3. Durante il funzionamento,
posizionare la ventosa a vuoto
in piano sulla superficie
dell'oggetto da assorbire;
premere leggermente la
ventosa a vuoto con la mano
per garantire il contatto
completo tra il cuscinetto in
gomma e la superficie
dell'oggetto. Quindi premere il
pulsante di gonfiaggio finché
non è completamente gonfiato e
la linea di avviso rossa non è
visibile.

- 5 -
4. Dopo il gonfiaggio completo,
controllare la linea di
avvertimento rossa per vedere
se si è ritratta. Se non si è
ritratta, l'oggetto può essere
spostato.
5. Una volta completato il
trasporto, sollevare
delicatamente la linguetta di
sgonfiaggio o premere il
pulsante di sgonfiaggio nero per
rimuovere la ventosa.

- 6 -
Elementi
Descrizione
1
Nome
Ventose
2
Modello
GPS-2
3
Parametro
8 pollici es
,
Manico in plastica
,
Stile circolare
Elementi
Descrizione
1
Nome
Ventose
2
Modello
GPS-1
3
Parametro
8 pollici es
,
Manico in metallo
,
Stile circolare
Elementi
Descrizione
1
Nome
Ventose
2
Modello
GPS-1-10
3
Parametro
10 pollici es
,
Manico in metallo
,
Stile circolare


- 2 -
Técnico Soporte y certificado de garantía electrónica www.vevor.com/support
VENTOSAS
MANUAL DEL USUARIO
MODELO: GPS-1/GPS-2/GPS-1-10
We continue to be committed to provide you tools with competitive price.
"Save Half", "Half Price" or any other similar expressions used by us only represents an
estimate of savings you might benefit from buying certain tools with us compared to the major
top brands and does not necessarily mean to cover all categories of tools offered by us. You
are kindly reminded to verify carefully when you are placing an order with us if you are
actually saving half in comparison with the top major brands.

- 1 -
MODELO: GPS-1/GPS-2/GPS-1-10
Have product questions? Need technical support? Please feel free to
contact us:
Technical Support and E-Warranty Certificate
www.vevor.com/support
NEED HELP? CONTACT US!
This is the original instruction, please read all manual instructions
carefully before operating. VEVOR reserves a clear interpretation of our
user manual. The appearance of the product shall be subject to the
product you received. Please forgive us that we won't inform you again if
there are any technology or software updates on our product.
SUCTION CUPS

- 2 -
SAFETY INSTRUCTION AND PRECAUTIONS
ADVERTENCIA:
Lea este material antes de utilizar este producto. No hacerlo puede
provocar lesiones graves.
1. Este producto no es un juguete. No permita que los niños jueguen con
él.
2. Utilícelo únicamente para el fin previsto. No se pare sobre el producto.
3. Asegúrese de que el mango no esté suelto antes de cada uso.
4. No exceda la capacidad de peso indicada.
Instrucciones de seguridad:
1. Mantenga el producto alejado de la humedad, la lluvia, las altas
temperaturas, el fuego o la luz solar directa.
2. Verifique la alineación y la unión de todas las partes móviles, las piezas
rotas o los accesorios de montaje y otras condiciones que puedan afectar
el funcionamiento adecuado.
3. Nunca permita que los niños manipulen el producto y no utilice el
elevador como plataforma.
4. Al realizar el mantenimiento, utilice únicamente piezas de repuesto
idénticas. El uso de otras piezas anulará la garantía.
5.No exceda la capacidad del elevador.
6.El elevador debe utilizarse en materiales no porosos con superficies
lisas y relativamente planas.
7. El elevador solo se puede operar manualmente para distancias cortas.
8. Compruebe si hay piezas dañadas. Antes de utilizar el aparato,
compruebe cuidadosamente cualquier pieza que parezca dañada para
comprobar que funciona correctamente y cumple su función prevista.
Además, la superficie de las almohadillas de goma debe limpiarse para
eliminar la suciedad.
9. Si tiene alguna duda sobre si una condición es segura o insegura, NO
utilice el producto.
Uso del producto : Elevación y movimiento de materiales no porosos.

- 3 -
Almacenamiento : Cuando no esté en uso, el producto debe almacenarse
en un lugar seco, a temperatura ambiente y sin exposición directa al sol
para inhibir la oxidación y el desgaste.
Dirección de operación:
1. El principio de funcionamiento es mediante una palanca y una bomba.
Las ventosas redondas se presionan sobre la superficie del objeto que se
va a levantar. Las empuñaduras de la palanca se aprietan hasta quedar en
su posición. A continuación, las almohadillas de goma se sujetan
firmemente a la superficie mediante vacío para poder levantar el objeto.
Para soltarlo, basta con girar las palancas hacia atrás.
2. La superficie cargada debe ser lisa, relativamente plana y no porosa.
Las superficies deben estar libres de aceite, grasa o agua; de lo contrario,
pueden resbalar. Los materiales no porosos, como el vidrio, el metal, los
plásticos y la piedra pulida, son buenos ejemplos.
OPERATION AS BELOW
1. Abra la caja de plástico de
succión al vacío y verifique si el
producto y los accesorios están
intactos.

- 4 -
2. Durante el funcionamiento,
limpie la superficie del objeto a
adsorber con un paño
antiestático para garantizar una
superficie lisa.
3. Al utilizar el aparato, coloque
la ventosa de vacío plana sobre
la superficie del objeto que se
va a adsorber; presione
ligeramente la ventosa de vacío
con la mano para asegurar un
contacto completo entre la
almohadilla de goma y la
superficie del objeto. A
continuación, presione el botón
de inflado hasta que esté
completamente inflado y la línea
roja de advertencia no sea
visible.

- 5 -
4. Una vez que se haya inflado
por completo, verifique que la
línea roja de advertencia no se
haya retraído. Si no se ha
retraído, entonces se puede
mover el objeto.
5. Una vez completado el
proceso de transporte, levante
suavemente la lengüeta de
desinflado o presione el botón
de desinflado negro para quitar
la ventosa.

- 6 -
Elementos
Descripción
1
Nombre
Ventosas
2
Modelo
GPS-2
3
Parámetro
8 pulgadas , mango de plástico, estilo circular
Elementos
Descripción
1
Nombre
Ventosas
2
Modelo
GPS-1
3
Parámetro
8 pulgadas es , mango de metal, estilo circular
Elementos
Descripción
1
Nombre
Ventosas
2
Modelo
GPS-1-10
3
Parámetro
10 pulgadas es , mango de metal, estilo circular


- 2 -
Techniczny Wsparcie i certyfikat gwarancji elektronicznej www.vevor.com/support
PRZYSSAWKI
INSTRUKCJA OBSŁUGI
MODEL: GPS-1/GPS-2/GPS-1-10
We continue to be committed to provide you tools with competitive price.
"Save Half", "Half Price" or any other similar expressions used by us only represents an
estimate of savings you might benefit from buying certain tools with us compared to the major
top brands and does not necessarily mean to cover all categories of tools offered by us. You
are kindly reminded to verify carefully when you are placing an order with us if you are
actually saving half in comparison with the top major brands.

- 1 -
MODEL: GPS-1/GPS-2/GPS-1-10
Have product questions? Need technical support? Please feel free to
contact us:
Technical Support and E-Warranty Certificate
www.vevor.com/support
NEED HELP? CONTACT US!
This is the original instruction, please read all manual instructions
carefully before operating. VEVOR reserves a clear interpretation of our
user manual. The appearance of the product shall be subject to the
product you received. Please forgive us that we won't inform you again if
there are any technology or software updates on our product.
SUCTION CUPS

- 2 -
SAFETY INSTRUCTION AND PRECAUTIONS
OSTRZEŻENIE:
Przeczytaj ten materiał przed użyciem tego produktu. Nieprzestrzeganie
tego może spowodować poważne obrażenia.
1. Ten produkt nie jest zabawką. Nie pozwalaj dzieciom bawić się tym
przedmiotem.
2. Używać wyłącznie zgodnie z przeznaczeniem. Nie stawać na produkcie.
3. Przed każdym użyciem upewnij się, że uchwyt nie jest luźny.
4. Nie przekraczać podanego dopuszczalnego ciężaru.
Instrukcje bezpieczeństwa:
1. Trzymać produkt z dala od wilgoci, deszczu, wysokiej temperatury, ognia
i bezpośredniego działania promieni słonecznych.
2. Sprawdź ustawienie i zamocowanie wszystkich ruchomych części,
sprawdź, czy nie ma uszkodzonych części lub elementów montażowych, a
także inne czynniki, które mogą mieć wpływ na prawidłowe działanie
urządzenia.
3. Nigdy nie pozwalaj dzieciom obsługiwać produktu i nie używaj
podnośnika jako wózka.
4.Podczas serwowania używaj wyłącznie identycznych części zamiennych.
Użycie jakichkolwiek innych części spowoduje utratę gwarancji.
5. Nie przekraczaj udźwigu podnośnika.
6. Podnośnik należy stosować na materiałach nieporowatych o gładkich,
stosunkowo płaskich powierzchniach.
7.Podnośnik można obsługiwać ręcznie tylko na krótkich dystansach.
8. Sprawdź, czy nie ma uszkodzonych części. Przed użyciem należy
dokładnie sprawdzić każdą część, która wydaje się uszkodzona, aby
ustalić, czy będzie działać prawidłowo i spełniać zamierzoną funkcję, a
powierzchnię gumowych podkładek należy oczyścić z brudu.
9. Jeśli masz jakiekolwiek wątpliwości co do bezpieczeństwa danego stanu,
NIE używaj produktu.
- 3 -
Zastosowanie produktu : podnoszenie i przenoszenie materiałów
nieporowatych
Przechowywanie : Gdy produkt nie jest używany, należy go
przechowywać w suchym, niezbyt gorącym miejscu, z dala od
bezpośredniego światła słonecznego, aby zapobiec korozji i zużyciu.
Kierunek operacji:
1. Zasada działania polega na dźwigni i działaniu pompy. Okrągłe
przyssawki są dociskane do powierzchni przedmiotu, który ma zostać
podniesiony. Uchwyty dźwigni są ściskane razem w odpowiedniej pozycji.
Następnie gumowe podkładki są bezpiecznie zaciskane na powierzchni za
pomocą próżni, aby przedmiot mógł zostać podniesiony. Aby zwolnić,
wystarczy odchylić dźwignie.
2. Obciążona powierzchnia musi być gładka, stosunkowo płaska i
nieporowata. Powierzchnie powinny być wolne od oleju, smaru lub wody; w
przeciwnym razie może dojść do poślizgu. Dobrymi przykładami są
nieporowate materiały, takie jak szkło, metal, tworzywa sztuczne i
polerowany kamień.
OPERATION AS BELOW
1. Otwórz plastikowe pudełko z
odkurzaczem i sprawdź, czy
produkt i akcesoria są
nienaruszone.

- 4 -
2. Podczas pracy należy czyścić
powierzchnię adsorbowanego
obiektu szmatką antystatyczną,
aby zapewnić jej gładkość.
3. Podczas pracy umieść
przyssawkę próżniową płasko
na powierzchni obiektu, który
ma zostać zaadsorbowany;
lekko naciśnij przyssawkę
próżniową ręką, aby zapewnić
pełny kontakt między gumową
podkładką a powierzchnią
obiektu. Następnie naciśnij
przycisk nadmuchu, aż zostanie
całkowicie nadmuchana i
czerwona linia ostrzegawcza nie
będzie widoczna.

- 5 -
4. Po całkowitym
napompowaniu sprawdź
czerwoną linię ostrzegawczą,
aby zobaczyć, czy się cofnęła.
Jeśli nie, obiekt można
przesunąć.
5. Po zakończeniu transportu
delikatnie unieś języczek
spuszczania powietrza lub
naciśnij czarny przycisk
spuszczania powietrza, aby
usunąć przyssawkę.

- 6 -
Rzeczy
Opis
1
Nazwa
Przyssawki
2
Model
GPS-2
3
Parametr
8 cale es , plastikowy uchwyt, okrągły styl
Rzeczy
Opis
1
Nazwa
Przyssawki
2
Model
GPS-1
3
Parametr
8 cale es , metalowy uchwyt, okrągły styl
Rzeczy
Opis
1
Nazwa
Przyssawki
2
Model
GPS-1-10
3
Parametr
10 cale es , metalowy uchwyt, okrągły styl


- 2 -
Technisch Ondersteuning en E-garantiecertificaat www.vevor.com/support
ZUIGNAPPEN
GEBRUIKERSHANDLEIDING
MODEL: GPS-1/GPS-2/GPS-1-10
We continue to be committed to provide you tools with competitive price.
"Save Half", "Half Price" or any other similar expressions used by us only represents an
estimate of savings you might benefit from buying certain tools with us compared to the major
top brands and does not necessarily mean to cover all categories of tools offered by us. You
are kindly reminded to verify carefully when you are placing an order with us if you are
actually saving half in comparison with the top major brands.

- 1 -
MODEL: GPS-1/GPS-2/GPS-1-10
Have product questions? Need technical support? Please feel free to
contact us:
Technical Support and E-Warranty Certificate
www.vevor.com/support
NEED HELP? CONTACT US!
This is the original instruction, please read all manual instructions
carefully before operating. VEVOR reserves a clear interpretation of our
user manual. The appearance of the product shall be subject to the
product you received. Please forgive us that we won't inform you again if
there are any technology or software updates on our product.
SUCTION CUPS

- 2 -
SAFETY INSTRUCTION AND PRECAUTIONS
WAARSCHUWING:
Lees dit materiaal voordat u dit product gebruikt. Als u dit niet doet, kan dit
leiden tot ernstig letsel.
1. Dit product is geen speelgoed. Laat kinderen niet met dit artikel spelen.
2. Gebruik alleen zoals bedoeld. Ga niet op het product staan.
3. Controleer voor elk gebruik of de handgreep niet los zit.
4. Overschrijd het vermelde draagvermogen niet.
Veiligheidsinstructies:
1. Houd het product uit de buurt van vocht, nattigheid, regen, hoge
temperaturen, vuur of direct zonlicht.
2. Controleer de uitlijning en binding van alle bewegende onderdelen,
kapotte onderdelen of bevestigingselementen en andere omstandigheden
die de juiste werking kunnen beïnvloeden.
3. Laat kinderen nooit met het product omgaan en gebruik de lift niet als
steekwagen.
4. Gebruik bij het serveren alleen identieke vervangende onderdelen. Bij
gebruik van andere onderdelen vervalt de garantie.
5. Overschrijd de capaciteit van de tillift niet.
6. De lifter moet worden gebruikt op niet-poreuze materialen met gladde,
relatief vlakke oppervlakken.
7. De lift kan alleen handmatig over korte afstanden worden bediend.
8. Controleer op beschadigde onderdelen. Voor gebruik moet elk
onderdeel dat beschadigd lijkt zorgvuldig worden gecontroleerd om te
bepalen of het goed zal werken en de beoogde functie zal vervullen, en het
oppervlak van de rubberen pads moet worden schoongemaakt zonder vuil.
9. Als er twijfel bestaat over de veiligheid of onveiligheid van een bepaalde
situatie, GEBRUIK het product DAN NIET.
Productgebruik : Tillen en verplaatsen van niet-poreuze materialen

- 3 -
Opslag : Wanneer het product niet in gebruik is, moet het op een droge
plaats worden bewaard, met een lage temperatuur en uit de buurt van
direct zonlicht, om roest en slijtage te voorkomen.
Bedieningsrichting:
1. Het werkingsprincipe is door middel van hefboom- en pompwerking. De
ronde zuignappen worden op het oppervlak van het op te tillen object
gedrukt. De hendelgrepen worden samengeknepen in positie. De rubberen
pads worden vervolgens stevig op het oppervlak vastgeklemd door
vacuüm, zodat het object kan worden opgetild. Om los te laten, klapt u de
hendels gewoon terug.
2. Het belaste oppervlak moet glad, relatief vlak en niet-poreus zijn.
Oppervlakken moeten vrij zijn van olie, vet of water; anders kan er slippen
optreden. Niet-poreuze materialen zoals glas, metaal, plastic en gepolijste
steen zijn goede voorbeelden.
OPERATION AS BELOW
1. Open de kunststof
vacuümzuigdoos en controleer
of het product en de
accessoires intact zijn.

- 4 -
2. Reinig tijdens het gebruik het
oppervlak van het te adsorberen
object met een antistatische
doek om een glad oppervlak te
garanderen.
3. Plaats de vacuümzuignap
tijdens het gebruik plat op het
oppervlak van het te adsorberen
object; druk de vacuümzuignap
lichtjes aan met uw hand om
volledig contact te verzekeren
tussen de rubberen pad en het
oppervlak van het object. Druk
vervolgens op de opblaasknop
totdat deze volledig is
opgeblazen en de rode
waarschuwingslijn niet meer
zichtbaar is.

- 5 -
4. Controleer na volledige
inflatie de rode
waarschuwingslijn om te zien of
deze is ingetrokken. Als deze
niet is ingetrokken, kan het
object worden verplaatst.
5. Nadat het transportproces is
voltooid, tilt u voorzichtig de
leeglooptong op of drukt u op de
zwarte leegloopknop om de
zuignap te verwijderen.

- 6 -
Artikelen
Beschrijving
1
Naam
Zuignappen
2
Model
GPS-2
3
Parameter
8 inch es
,
Kunststof handvat
,
Circulaire stijl
Artikelen
Beschrijving
1
Naam
Zuignappen
2
Model
GPS-1
3
Parameter
8 inch es
,
Metalen handvat
,
Circulaire stijl
Artikelen
Beschrijving
1
Naam
Zuignappen
2
Model
GPS-1-10
3
Parameter
10 inch es
,
Metalen handvat
,
Circulaire stijl


- 2 -
Teknisk Support och e-garanticertifikat www.vevor.com/support
SUGKOPPAR
ANVÄNDARMANUAL
MODELL: GPS-1/GPS-2/GPS-1-10
We continue to be committed to provide you tools with competitive price.
"Save Half", "Half Price" or any other similar expressions used by us only represents an
estimate of savings you might benefit from buying certain tools with us compared to the major
top brands and does not necessarily mean to cover all categories of tools offered by us. You
are kindly reminded to verify carefully when you are placing an order with us if you are
actually saving half in comparison with the top major brands.

- 1 -
MODELL: GPS-1/GPS-2/GPS-1-10
Have product questions? Need technical support? Please feel free to
contact us:
Technical Support and E-Warranty Certificate
www.vevor.com/support
NEED HELP? CONTACT US!
This is the original instruction, please read all manual instructions
carefully before operating. VEVOR reserves a clear interpretation of our
user manual. The appearance of the product shall be subject to the
product you received. Please forgive us that we won't inform you again if
there are any technology or software updates on our product.
SUCTION CUPS

- 2 -
SAFETY INSTRUCTION AND PRECAUTIONS
VARNING:
Läs detta material innan du använder denna produkt. Underlåtenhet att
göra det kan resultera i allvarliga skador.
1. Denna produkt är inte en leksak. Tillåt inte barn att leka med detta
föremål.
2. Använd endast på avsett sätt. Stå inte på produkten.
3. Se till att handtaget inte är löst före varje användning.
4. Överskrid inte den angivna viktkapaciteten.
Säkerhetsinstruktioner:
1. Håll produkten borta från fuktiga, våta, regniga, höga temperaturer, eld
eller direkt solsken.
2.Kontrollera att alla rörliga delar, trasiga delar eller monteringsfixturer är
inriktade och fastnade och andra förhållanden som kan påverka korrekt
funktion.
3. Låt aldrig barn hantera produkten och använd inte lyftaren som en
docka.
4. Använd endast identiska reservdelar vid servering. Användning av andra
delar kommer att undvika garantin.
5. Överskrid inte lyftarens kapacitet.
6.Lifter bör användas på icke-porösa material med släta, relativt plana ytor.
7.Lifter kan endast manövreras manuellt för korta sträckor.
8.Kontrollera för skadade delar. Före användning bör alla delar som verkar
skadade kontrolleras noggrant för att fastställa att de kommer att fungera
korrekt och utföra sin avsedda funktion, och ytan på gummikuddar bör
rengöras utan smuts.
9. Om det finns några frågor om ett tillstånd som är säkert eller osäkert,
ANVÄND INTE produkten.
Produktanvändning : Lyfta och flytta icke-porösa material
Förvaring : När produkten inte används bör den förvaras i en torr, inte
hög temperatur, utan direkt solsken för att förhindra rost och slitage.

- 3 -
Driftriktning:
1. Funktionsprincipen är genom spak- och pumpverkan. De runda
sugkopparna pressas mot ytan på föremålet som ska lyftas. Spakgreppen
kläms ihop på plats. Gummikuddarna kläms sedan fast på ytan med
vakuum så att föremålet kan lyftas. För att släppa, fäll bara tillbaka
spakarna.
2. Den belastade ytan måste vara slät, relativt plan och icke-porös. Ytor
bör vara fria från olja, fett eller vatten; annars kan halka inträffa.
Icke-porösa material som glas, metall, plast och polerad sten är bra
exempel.
OPERATION AS BELOW
1. Öppna vakuumsugplastlådan
och kontrollera om produkten
och tillbehören är intakta.
- 4 -
2. Under drift, rengör ytan på
föremålet som ska adsorberas
med en antistatisk trasa för att
säkerställa en slät yta.
3. Placera vakuumsugkoppen
plant på ytan av föremålet som
ska adsorberas under drift. tryck
lätt på vakuumsugkoppen med
handen för att säkerställa full
kontakt mellan gummikudden
och föremålets yta. Tryck sedan
på uppblåsningsknappen tills
den är helt uppblåst och den
röda varningslinjen inte syns.

- 5 -
4. Efter fullständig uppblåsning,
kontrollera den röda
varningslinjen för att se om den
har dragits tillbaka. Om den inte
har dragits tillbaka kan objektet
flyttas.
5. Efter att transportprocessen
är klar, lyft försiktigt upp
tömningstungan eller tryck på
den svarta tömningsknappen för
att ta bort sugkoppen.

- 6 -
Föremål
Beskrivning
1
Namn
Sugkoppar
2
Modell
GPS-2
3
Parameter
8 tum es
,
Plasthandtag
,
cirkulär stil
Föremål
Beskrivning
1
Namn
Sugkoppar
2
Modell
GPS-1
3
Parameter
8 tum es
,
Metallhandtag
,
Cirkulär stil
Föremål
Beskrivning
1
Namn
Sugkoppar
2
Modell
GPS-1-10
3
Parameter
10 tum es
,
Metallhandtag
,
Cirkulär stil