
Deluxe Gelato
& Ice Cream Maker
# DIC200
Instruction Manual | Recipe Guide

Important Safeguards .................................................................... 4-6
Parts & Features ...................................................................................8
Before First Use ...................................................................................9
Assembling the Gelato & Ice Cream Maker ............................10-12
Using the Gelato & Ice Cream Maker .......................................13-14
Disassembling the Gelato & Ice Cream Maker ............................ 15
Cleaning & Maintenance ................................................................. 16
Tips & Tricks ...................................................................................... 17
Recipes .........................................................................................19-23
Customer Support ........................................................................... 34
Warranty ............................................................................................ 35
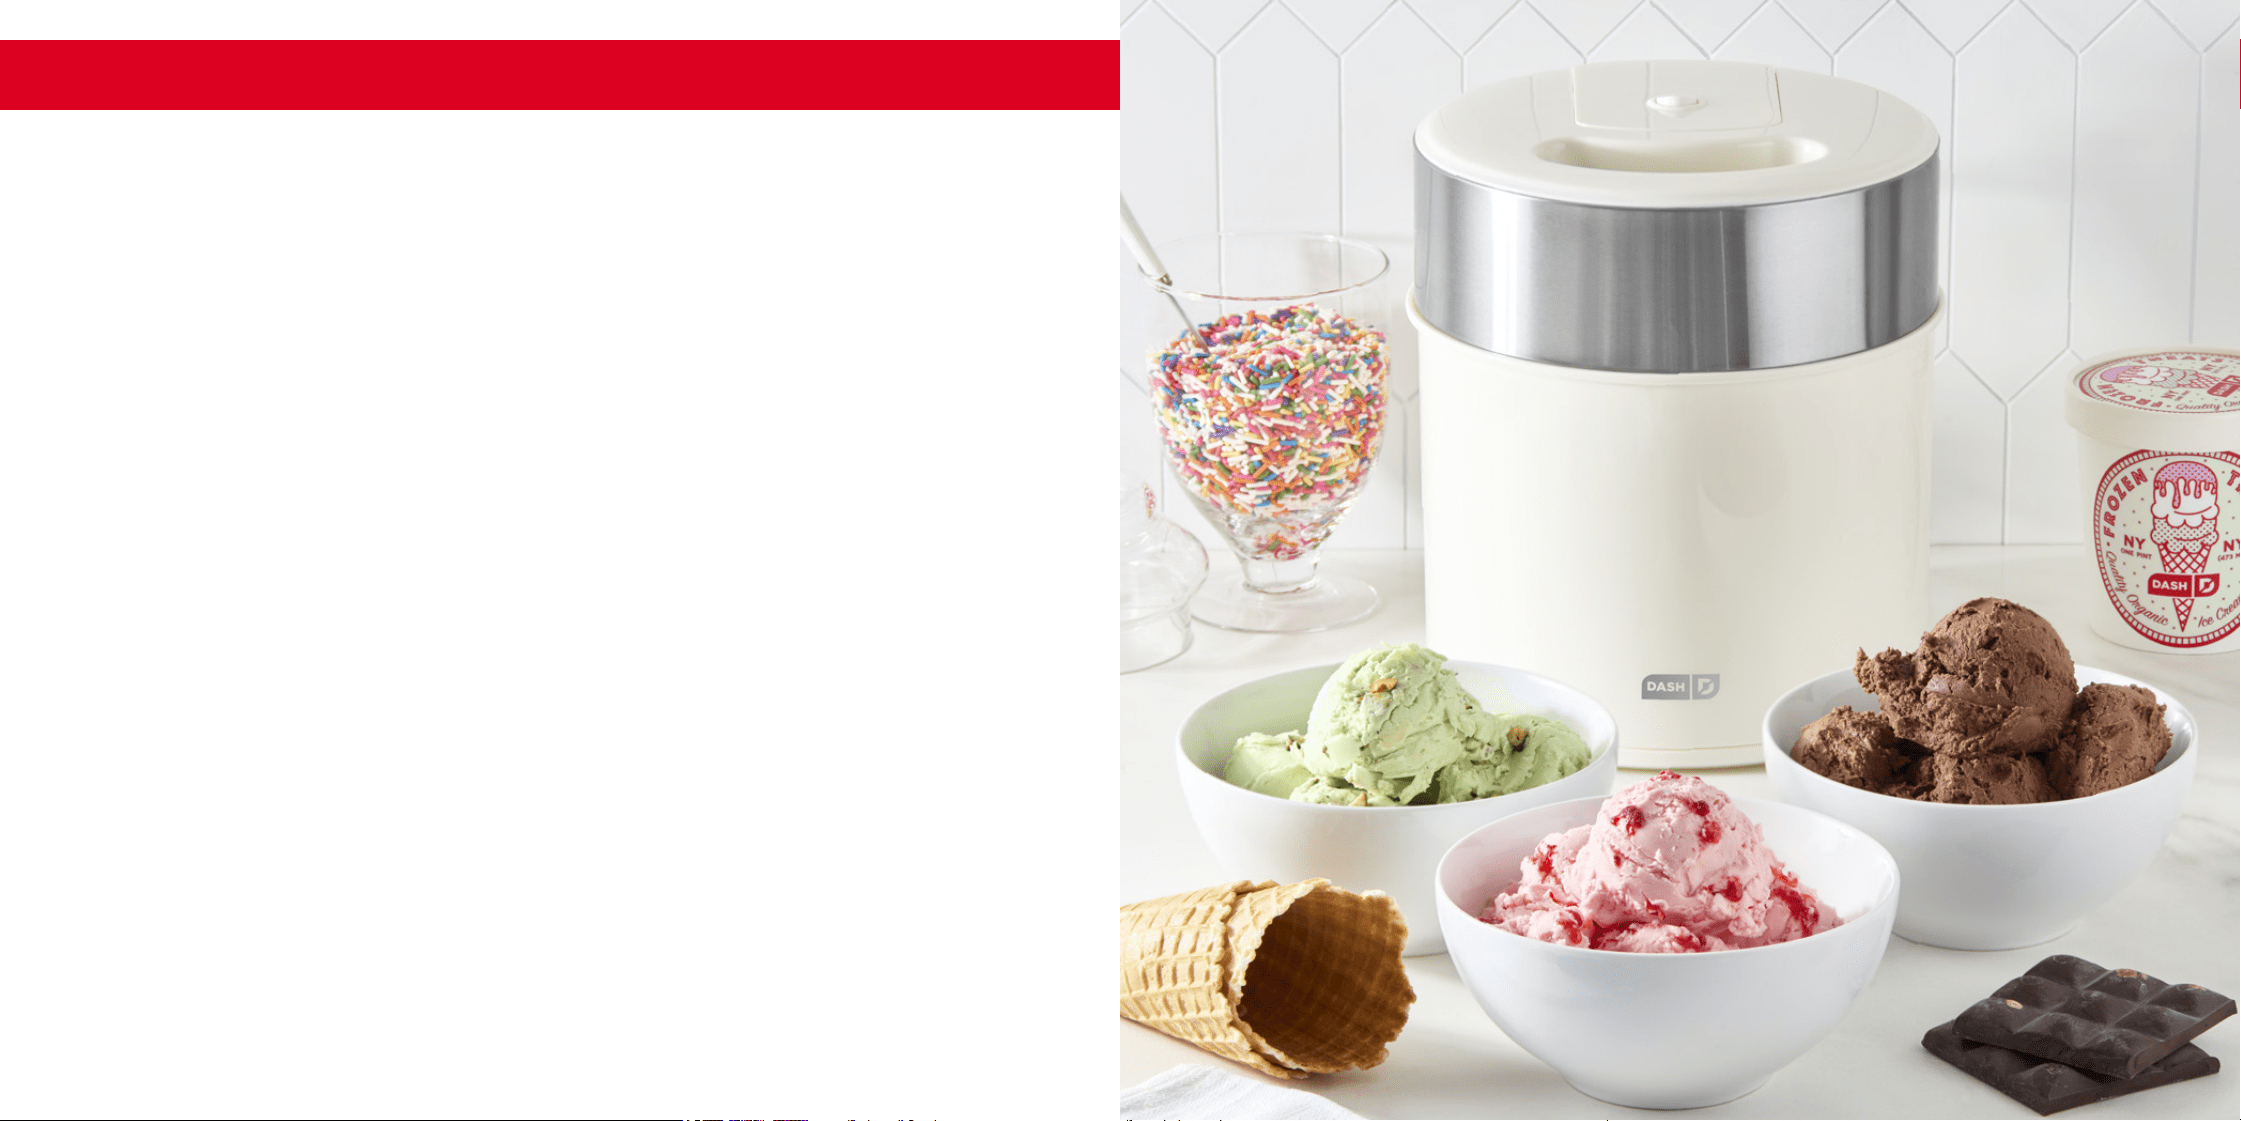
DELUXE Gelato
& ICE CREAM MAKER
Welcome
to the Foodie
Family
We hope you love our
products as much as
our team does.

∙ 4 ∙
• Read all instructions carefully.
• Remove all bags and packaging from the appliance.
• Unplug the machine before tting, removing, or
cleaning parts.
• To protect against the risk of re,
electric shock, or personal injury, do
not place the cord, plug, or unit in
water or other liquids.
• This appliance can be used by persons with
reduced physical, sensory or mental capabilities or
lack of experience of knowledge, if they have been
given supervision or instruction concerning use
of the appliance in a safe way and understand the
hazards involved.
• This appliance is not a toy. Do not let children use
this appliance. Close supervision is necessary when
any kitchen appliance is used by or near children.
Do not let the cord hang down where a child could
grab it.
• Never use an unauthorized attachment.
• Only use the machine for its intended domestic use.
• Make sure all parts are thoroughly clean before
making ice cream or gelato.
• Never freeze ice cream that has been fully or
partially defrosted.
• Any ice cream or sorbet containing raw ingredients
should be consumed within one week.
• Ice cream or sorbet that contains raw or partially
cooked eggs should not be given to young
children, pregnant women, the elderly, or people
who are generally unwell.
• To prevent freezer burn, always ensure that hands
are protected when handling the bowl, especially
when rst removed from the freezer.
• If the freezing solution appears to be leaking from
the bowl, discontinue use. The freezing solution is
non toxic.
• Avoid contact with moving parts. Keep hands, hair,
clothing, spatulas, and other utensils away during
operation to reduce the risk of injury to persons
and/or damage to the machine.
• Do not use outdoors.
• Do not place the machine on hot surfaces such as
stoves, hotplates or near open gas ames.
• Never leave the machine unattended.
• Before use, check if the voltage indicated on the
appliance corresponds with the voltage of your
power net.
• Never use the appliance when the cord or plug is
damaged, after malfunction, or when the appliance
is damaged.
• Turn the appliance OFF, then unplug from the
outlet when not in use, before assembling or
disassembling parts and before cleaning. To
unplug, grasp the plug and pull from the outlet.
Never pull from the power cord.
• For maintenance other than cleaning, please
contact StoreBound directly at 1-800-898-6970
from Monday-Friday or by email at
support@storebound.com.
• StoreBound shall not accept liability for damages
caused by improper use of the appliance.
• Improper use of the appliance can result in
property damage or even in personal injury.
IMPORTANT SAFEGUARDS IMPORTANT SAFEGUARDS
IMPORTANT SAFEGUARDS: PLEASE READ AND
SAVE THIS INSTRUCTION AND CARE MANUAL.
When using electrical appliances, basic safety precautions should always be followed, including:
IMPORTANT SAFEGUARDS: PLEASE READ AND
SAVE THIS INSTRUCTION AND CARE MANUAL.
• Retirez tous les sacs et emballages
de l’appareil.
• Débranchez la machine avant d’installer, de
retirer ou de nettoyer des pièces.
• Pour vous protéger contre les risques
d’incendie, d’électrocution ou de blessures,
ne placez pas le cordon, la che ou l’appareil
dans l’eau ou tout
autre liquide.
• Cet appareil peut être utilisé par des
personnes dont les capacités physiques,
sensorielles ou mentales sont réduites ou
manquant d'expérience ou de connaissances,
à condition qu'elles soient supervisées ou
qu’elles aient reçu des directives relatives à
l'utilisation sécuritaire de l'appareil et qu'elles
comprennent les risques et les dangers en jeu.
• Une étroite surveillance est nécessaire
lorsqu’un appareil est utilisé par ou à
proximité d'enfants.
• N’utilisez jamais un accessoire
non autorisé.
• N’utilisez la machine que pour l’usage
domestique prévu.
• Assurez-vous que toutes les pièces sont
parfaitement propres avant de préparer de la
glace ou de la glace.
• Ne congelez jamais de la crème glacée qui a
été entièrement ou partiellement décongelée.
• Toute crème glacée ou sorbet contenant des
ingrédients crus doit être consommé dans un
délai d’une semaine.
• La crème glacée ou le sorbet contenant des
œufs crus ou partiellement cuits ne doivent
pas être donnés aux jeunes enfants, aux
femmes enceintes, aux personnes âgées ou
aux personnes généralement malades.
• Pour éviter les brûlures du congélateur,
assurez-vous toujours que les mains sont
protégées lors de la manipulation du bol,
en particulier lors de la première sortie du
congélateur.
• Si la solution de congélation semble fuir
du bol, cessez l’utilisation. La solution de
congélation est non toxique.
• Évitez tout contact avec les pièces mobiles.
Gardez les mains, les cheveux, les vêtements,
les spatules et autres ustensiles à l’écart
pendant le fonctionnement an de réduire
le risque de blessures aux personnes et / ou
d’endommager
la machine.
• Ne l’utilisez pas à l’extérieur.
• Ne placez pas la machine sur des surfaces
chaudes telles que des cuisinières, des
plaques de cuisson ou à proximité de ammes
de gaz nues.
• Ne laissez jamais la machine sans surveillance.
• Avant utilisation, vériez si la tension indiquée
sur l’appareil correspond à la tension de votre
réseau électrique.
• N’utilisez jamais l’appareil lorsque le cordon
ou la che sont endommagés, après un
dysfonctionnement ou lorsque l’appareil est
endommagé.
• Éteignez l’appareil, puis débranchez-le
de la prise lorsqu’il n’est pas utilisé, avant
Lors de l’utilisation d’appareils électriques, il faut toujours respecter les précautions de sécurité
de base, notamment:
GARANTIES IMPORTANTES: VEUILLEZ LIRE
ET CONSERVER CE MODE D’EMPLOI ET
D’ENTRETIEN
∙ 5 ∙
∙ 6 ∙
d’assembler ou de démonter des
pièces et avant de le nettoyer. Pour
débrancher, saisissez la che et retirez-
la de la prise. Ne tirez jamais sur le
cordon d’alimentation.
• Pour l’entretien autre que le nettoyage,
veuillez contacter StoreBound
directement au 1-800-898-6970 de
du lundi au vendredi ou par courriel
à support@storebound.com.
• StoreBound décline toute
responsabilité pour les dommages
causés par une mauvaise utilisation de
l’appareil.
• Une mauvaise utilisation de l’appareil
peut entraîner des dommages matériels
ou même des blessures corporelles.
garanties importantes
GARANTIES IMPORTANTES: VEUILLEZ LIRE
ET CONSERVER CE MODE D’EMPLOI ET
D’ENTRETIEN
∙ 8 ∙
∙ 9 ∙
Before First use
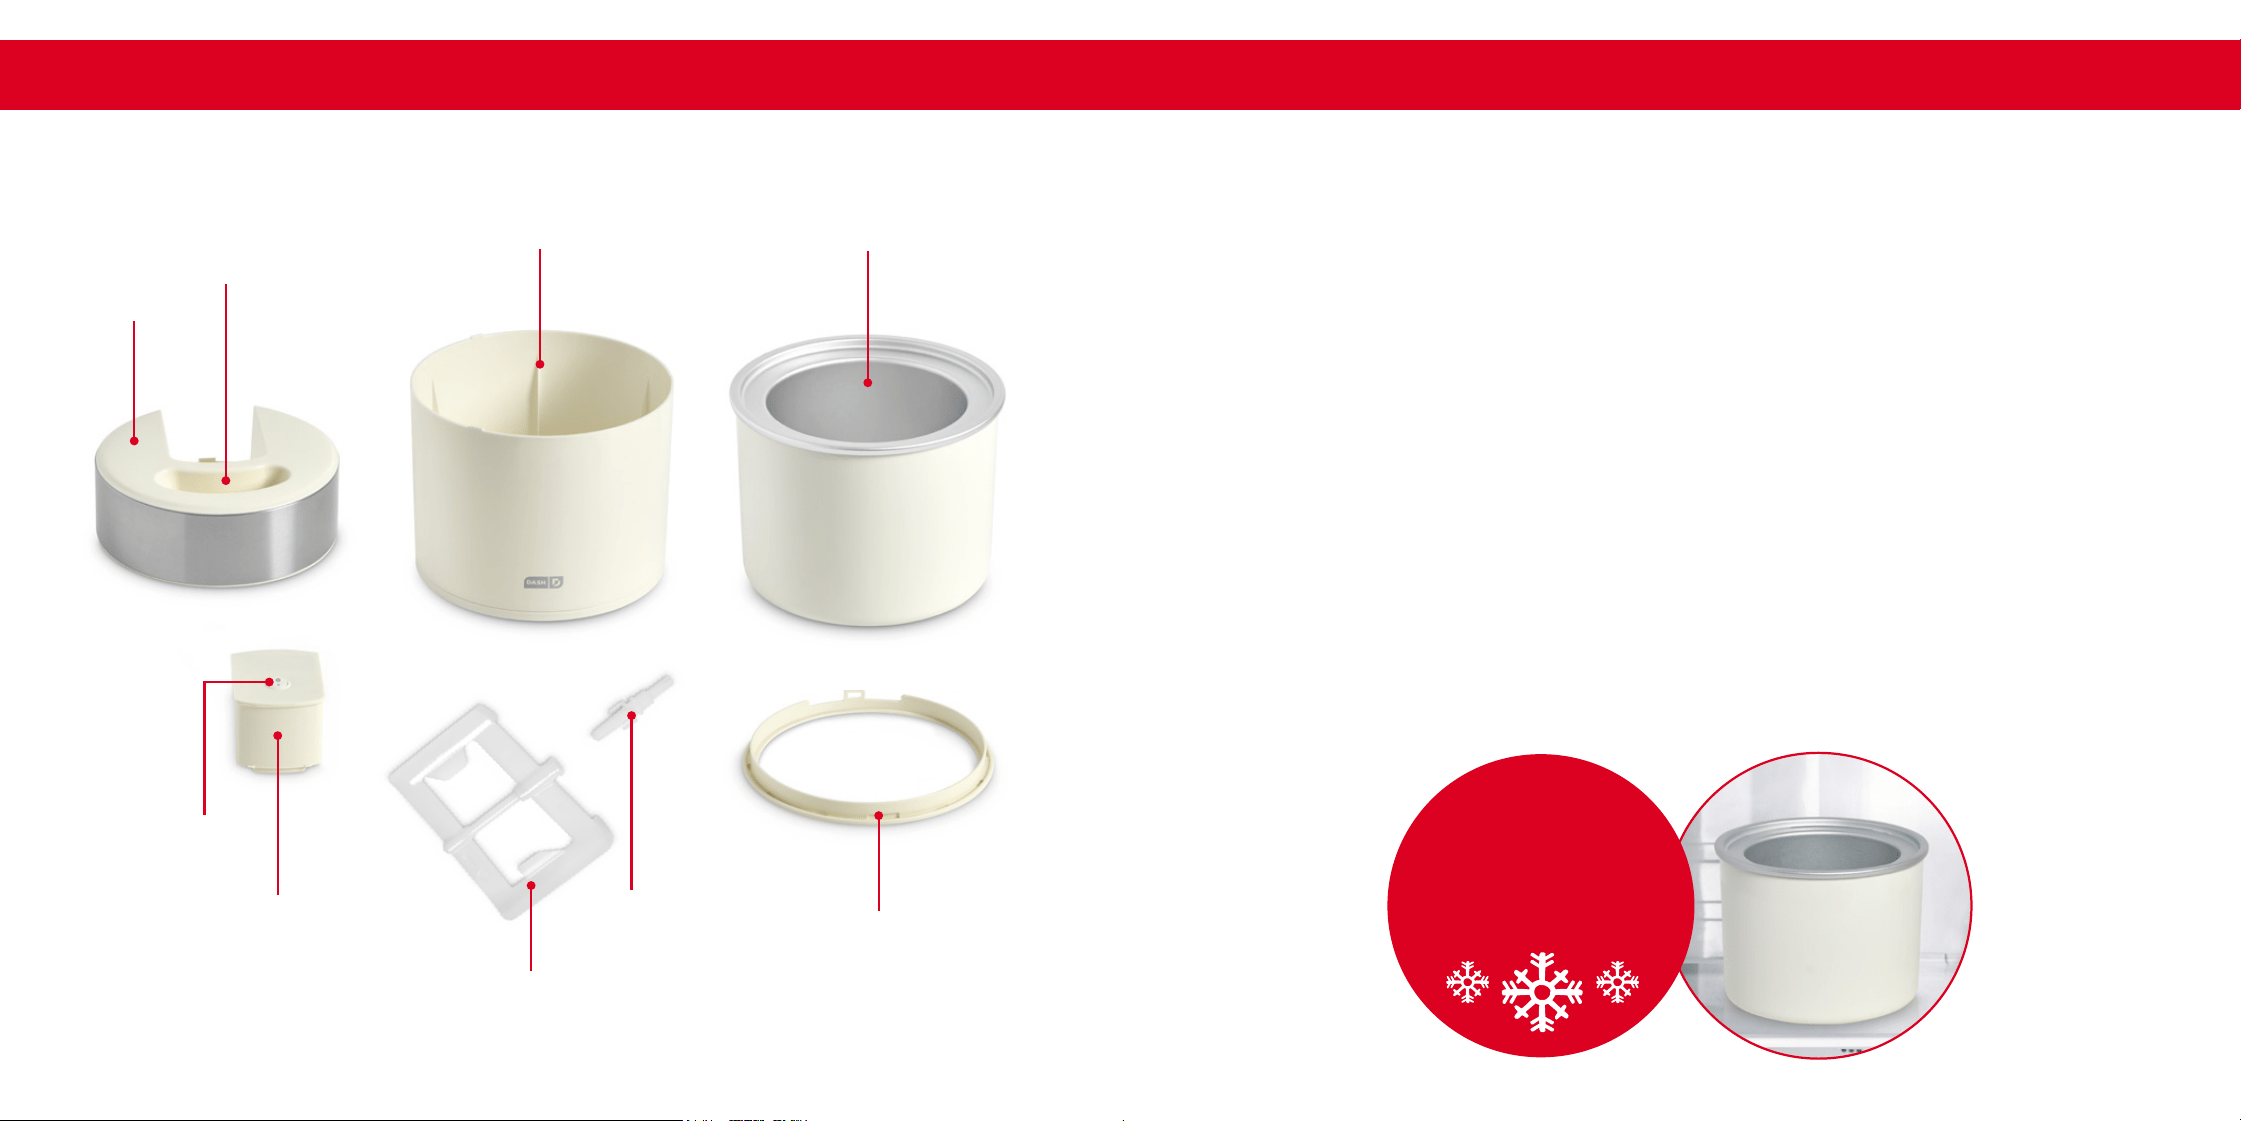
par ts & Features
On/Off
Switch
Motor
Block
Paddle
Ring
Spindle
Lid
Cooling Bowl
Outer Bowl
Ingredient
Chute
• Remove all packaging from the inside and outside of the Gelato &
Ice Cream Maker.
• Check that the Maker has no visible damage and that no parts are missing.
Ensure all parts and pieces are out of the packaging before discarding it.
• Before using for the rst time (or after prolonged storage without use), wash
any parts that will come into contact with food. See “Cleaning & Maintenance”
on page 16.
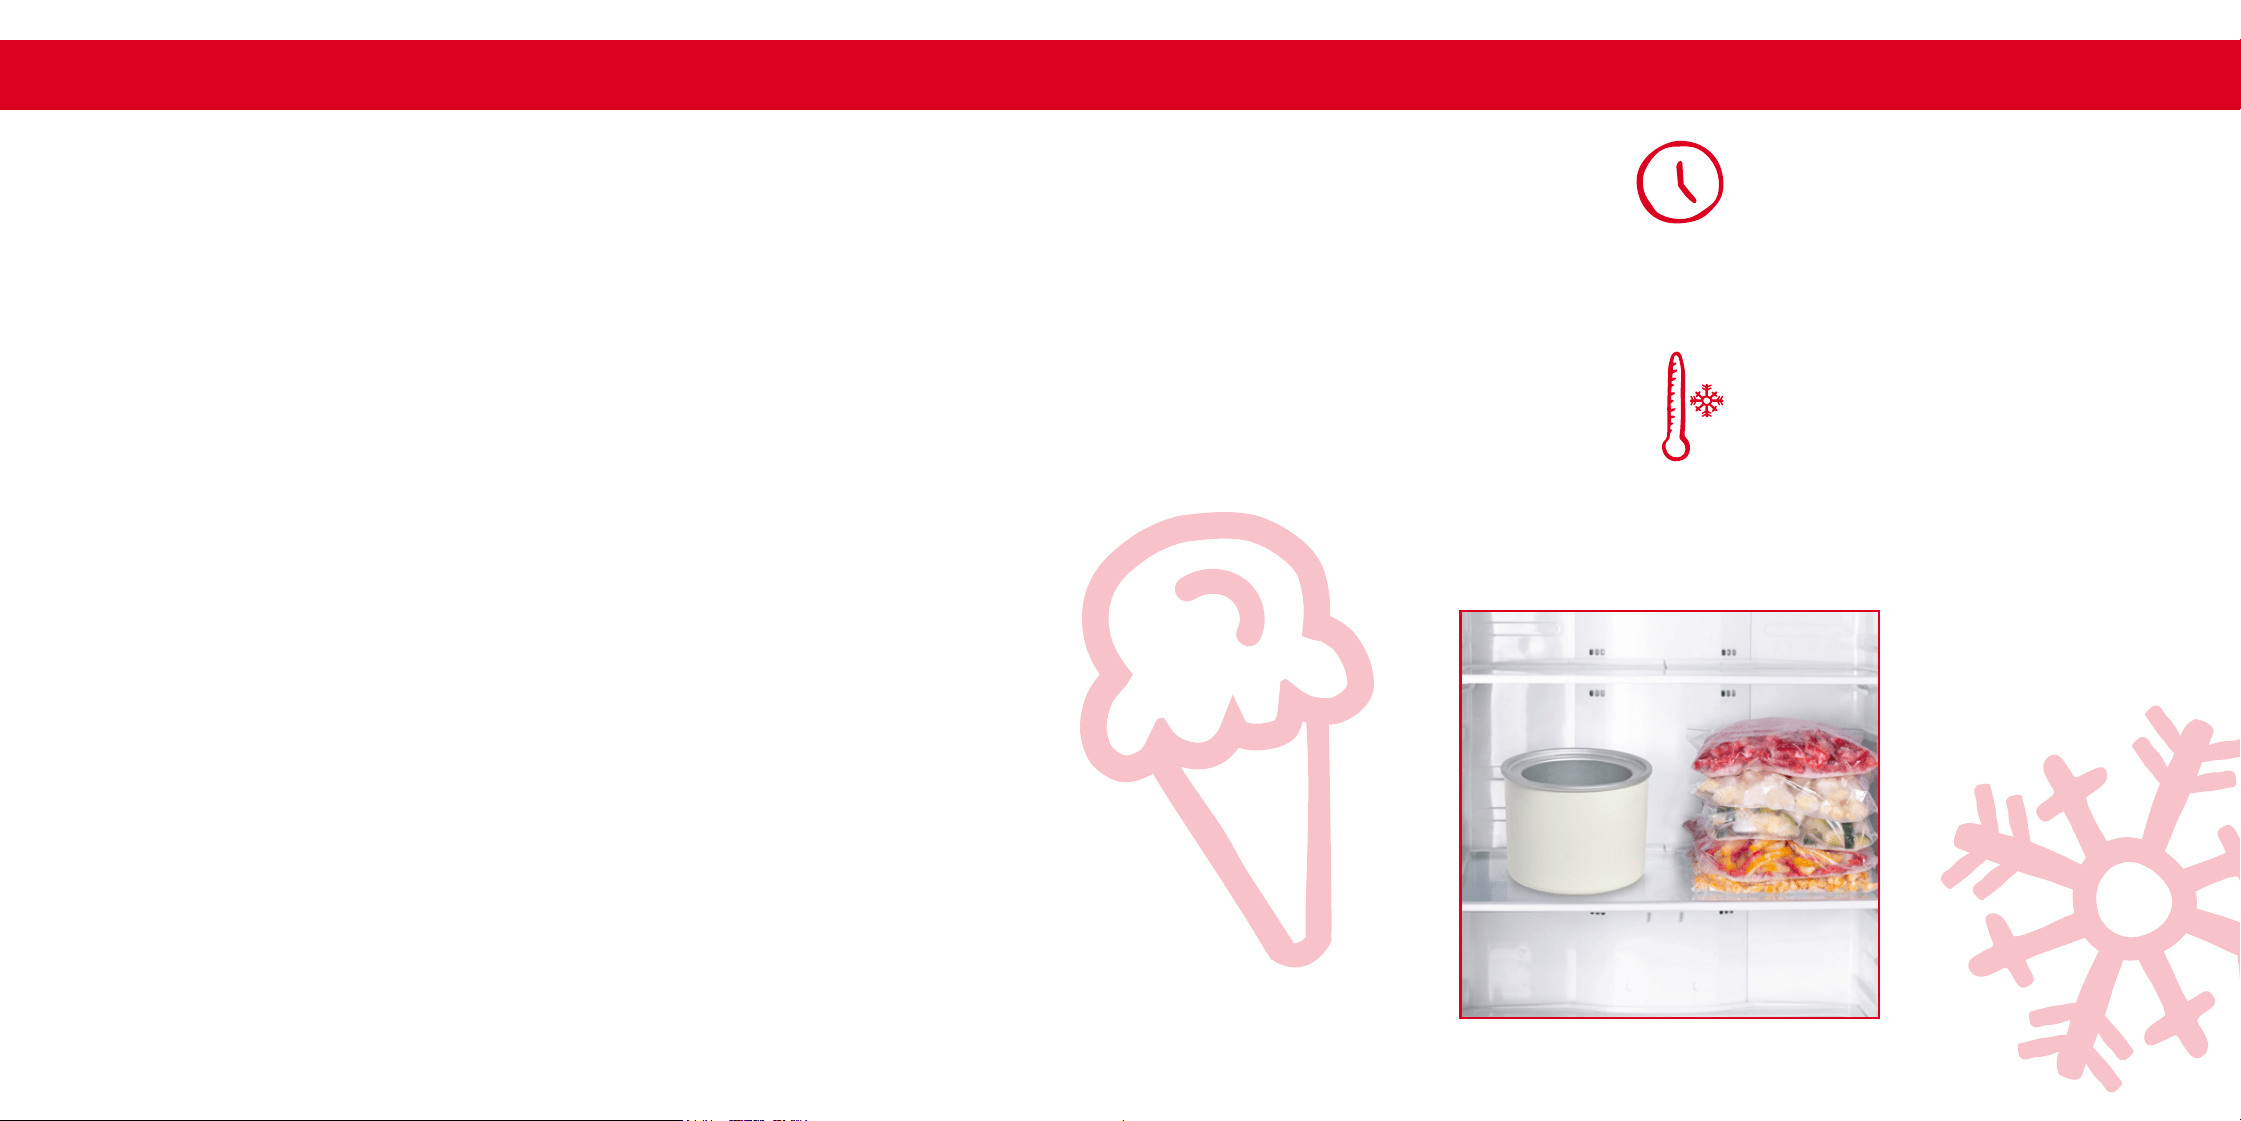
• NOTE: Prior to making ice cream, place the Cooling Bowl in the freezer and
leave it there for at least 24-48 hours. The temperature in the freezer must be
at least 0℉ to allow the ice cream to churn and freeze properly. Remove the
Cooling Bowl from the freezer just prior to preparing ice cream. Do not let the
Cooling Bowl sit at room temperature for any amount of time prior to churning.
• Only use pre-chilled ingredients in the Maker. Do not use room temperature
ingredients. For best results, prep ice cream mixture ahead of time and then
refrigerate for at least two hours to overnight.
SETTING UP THE DELUXE GELATO & ICE CREAM MAKER
24-48
HOURS
Freeze Bowl
∙ 10 ∙
∙ 11 ∙
D
1
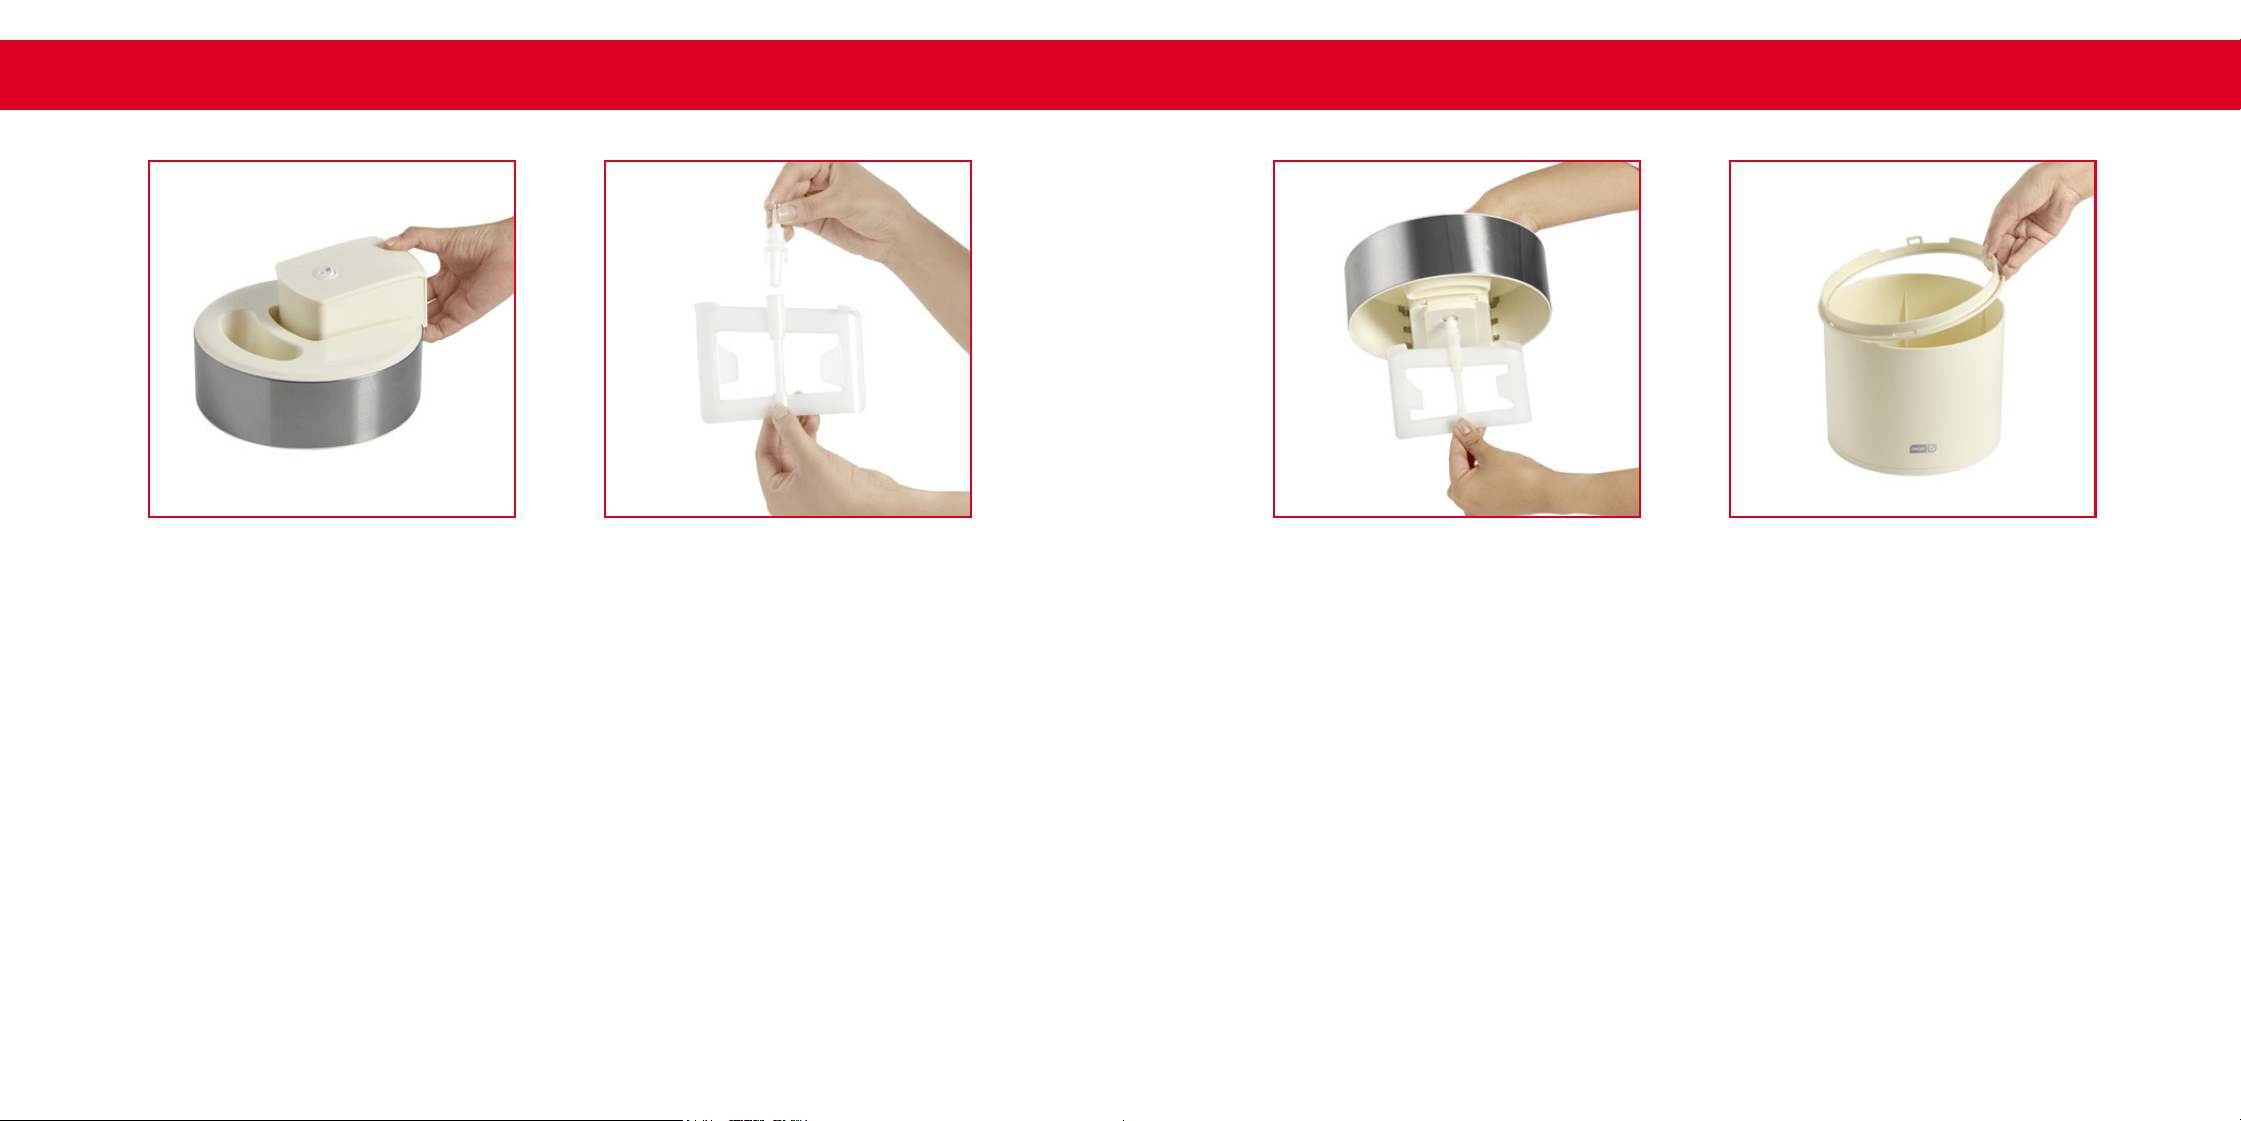
Prior to assembling, ensure the Gelato & Ice Cream Maker is unplugged and
that the On/Off Switch is in the “Off” position. Then, slide the Motor Block
into the Lid until there is a slight “click” indicating it is secure. (photo A).
2
Insert the Spindle into the Paddle. (photo B).
B
ASSEMBLING the GELATO & ICE CREAM MAKER
A
C
3
Insert the Spindle attached to the Paddle into the underside of the
Motor Block. (photo C).
4
Attach the Ring to the Outer Bowl. (photo D).
ASSEMBLING the GELATO & ICE CREAM MAKER
∙ 12 ∙
∙ 13 ∙
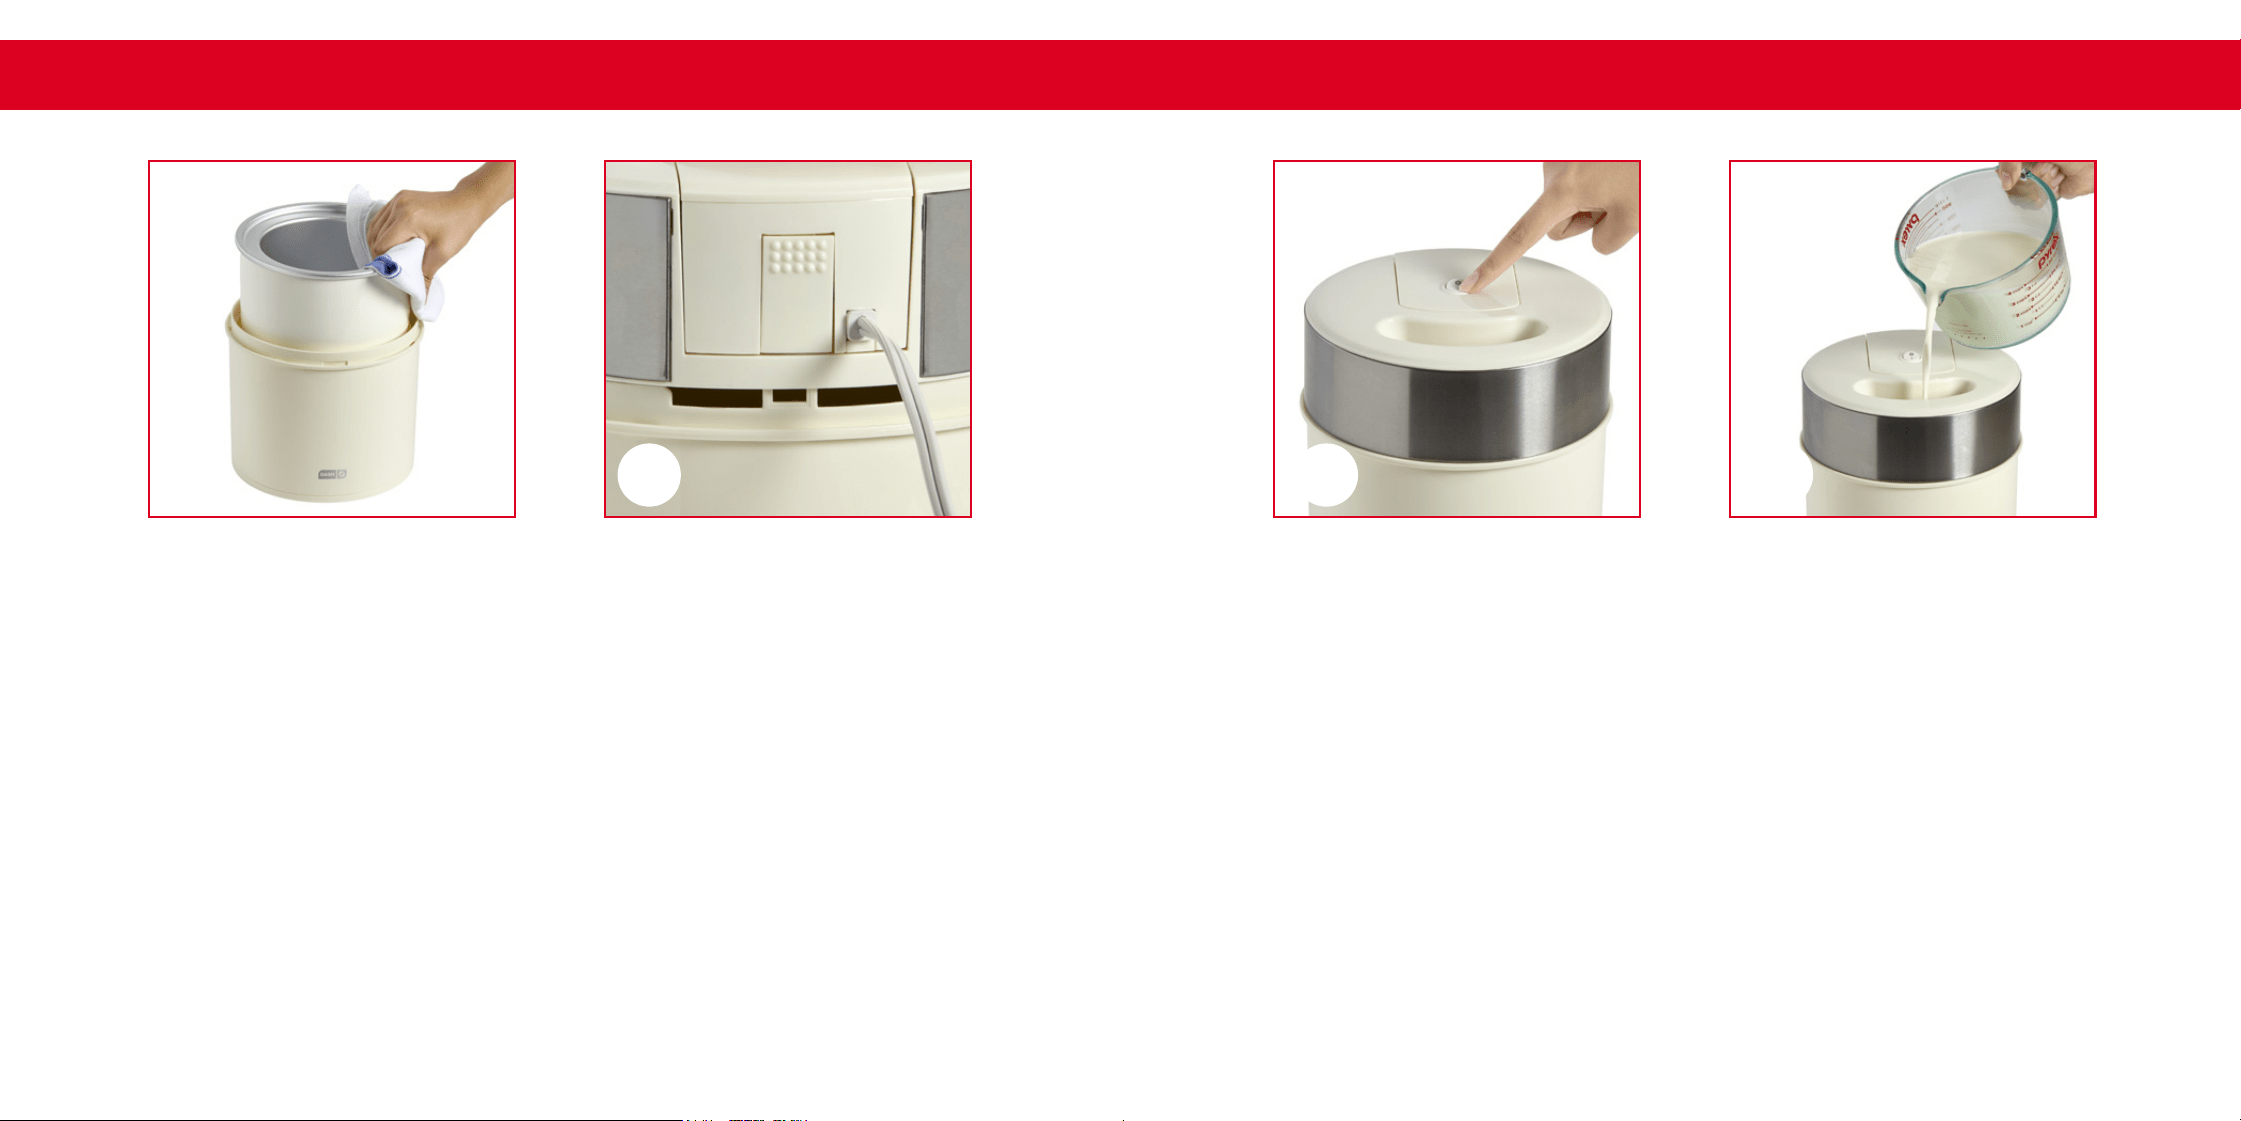
5
After freezing for 24-48 hours, use a cloth or oven mitts to remove the chilled
Cooling Bowl from the freezer and place it inside the Outer Bowl. (photo E).
6
Place the Lid with Motor Block and attached Spindle/Paddle onto the Outer
Bowl so that the arrows on the Motor Block and Bowl align (photo F).
FE
BA
1
Prepare ice cream ingredients as per recipe of choice. Transfer
ingredients to a heat-safe bowl and refrigerate for at least 2 hours or
overnight. Only use chilled ingredients in the Maker. Do not use room
temperature or hot ingredients.
2
Place the properly assembled Maker on a stable surface to prepare
for churning, but do NOT pour mixture into the Maker yet, taking note
that Maker must be turned on and the Paddle turning prior to adding
ingredients to prevent the mixture from freezing to the sides of the
Cooling Bowl (photo A).
ASSEMBLING the GELATO & ICE CREAM MAKER
using the GELATO & ICE CREAM MAKER
∙ 14 ∙
∙ 15 ∙
3
Plug the Maker in and press the Power Button. Once the Paddle begins to
rotate, it’s appropriate to begin pouring the ice cream mixture through the
Ingredient Chute (photo B).
4
Allow the maker to churn until the ice cream reaches the desired consistency
up to 40 minutes depending on the recipe (photo C).
5
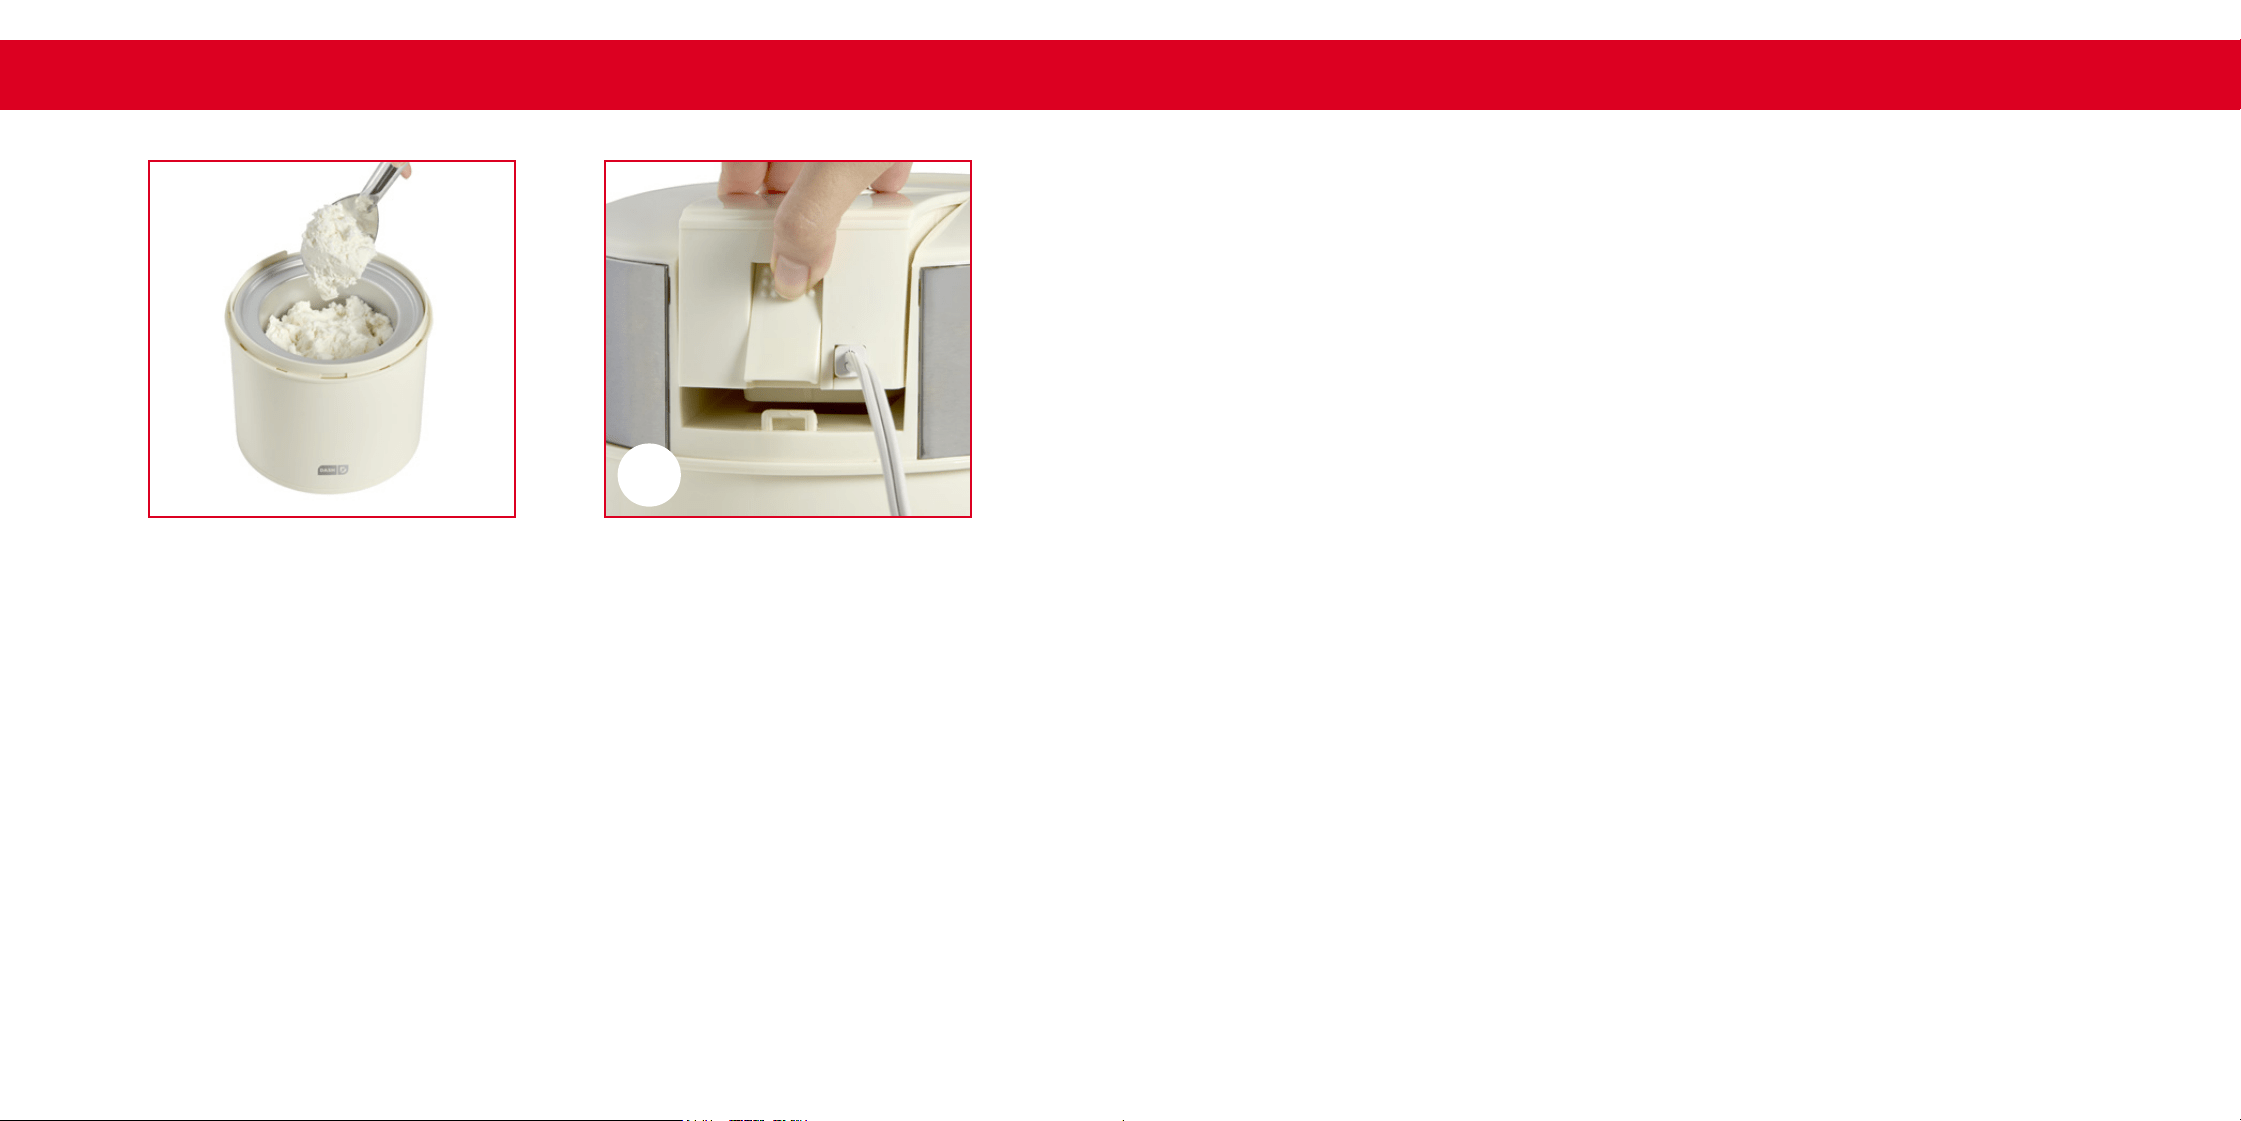
Once churning is complete, turn the Maker off. Press the Lid Lock Button to
release the Lid and remove it (photo D). Use a non-metal utensil to scoop ice
cream out of the Cooling Bowl and transfer it to a freezer-safe container, taking
note that the ice cream will have the texture of soft-serve. For a rmer texture,
place the freezer-safe container of ice cream back in the freezer to chill until it
reaches desired consistency, up to 4 hours.
D
using the GELATO & ICE CREAM MAKER
C
DISASSEMBLING the GELATO & ICE CREAM MAKER
• Once churning is complete, turn the Maker off. Press the Lid Lock Button to
release the Lid and remove it. Use a non-metal utensil to scoop ice cream out
of the Cooling Bowl and transfer it to a freezer-safe container.
• Use gloves or paper towel to detach the Spindle and the Paddle from the
Motor Block, then detach the Spindle from the Paddle.
• Use a cloth or oven mitts to remove the Cooling Bowl from the Outer Bowl.
∙ 16 ∙
∙ 17 ∙
tips & tricks
It is recommended to freeze the Cooling Bowl for 24-48 hours
before preparing ice cream. For best results, ensure ice cream
ingredients have been chilled as well.
The Cooling Bowl is most effective in the rst 20 minutes of
use and needs to be placed in the freezer for 24-48 hours
before being used again.
CAUTION: Do not stop and restart the Gelato & Ice Cream Maker during the
churning process as this may cause the mixture to freeze if it stays in constant
contact with the Cooling Bowl without being moved around by the Paddle.
If the ingredients freeze, this will impede the movement of the Paddle and
prevent churning.
In the unlikely event of the motor overheating, the Maker will automatically
shut off. If this happens, turn the On/Off Switch to Off, unplug the Maker, and
allow it to cool.
• Unplug the Maker and allow the Motor Block to cool completely before cleaning.
• Allow the Cooling Bowl to warm to room temperature before cleaning. Wash the
inside of the Bowl with warm, soapy water but never submerge it in water.
• The Maker is NOT dishwasher safe. Wash the Lid, Paddle, and Outer Bowl in
warm, soapy water.
• DO NOT submerge the Motor Block in water. Wipe with a damp cloth.
• DO NOT use harsh metal sponges as they could damage the Maker and its parts.
• Dry all parts thoroughly after cleaning. Once completely dry, reassemble and
store in a dry place. Never place the Cooling Bowl in the freezer if it is still wet.
cleaning & maintenance
p
i
s
t
a
c
h
i
o
i
c
e
c
r
e
a
m
o
n
p
a
g
e
2
4
!
RECIPE
GUIDE
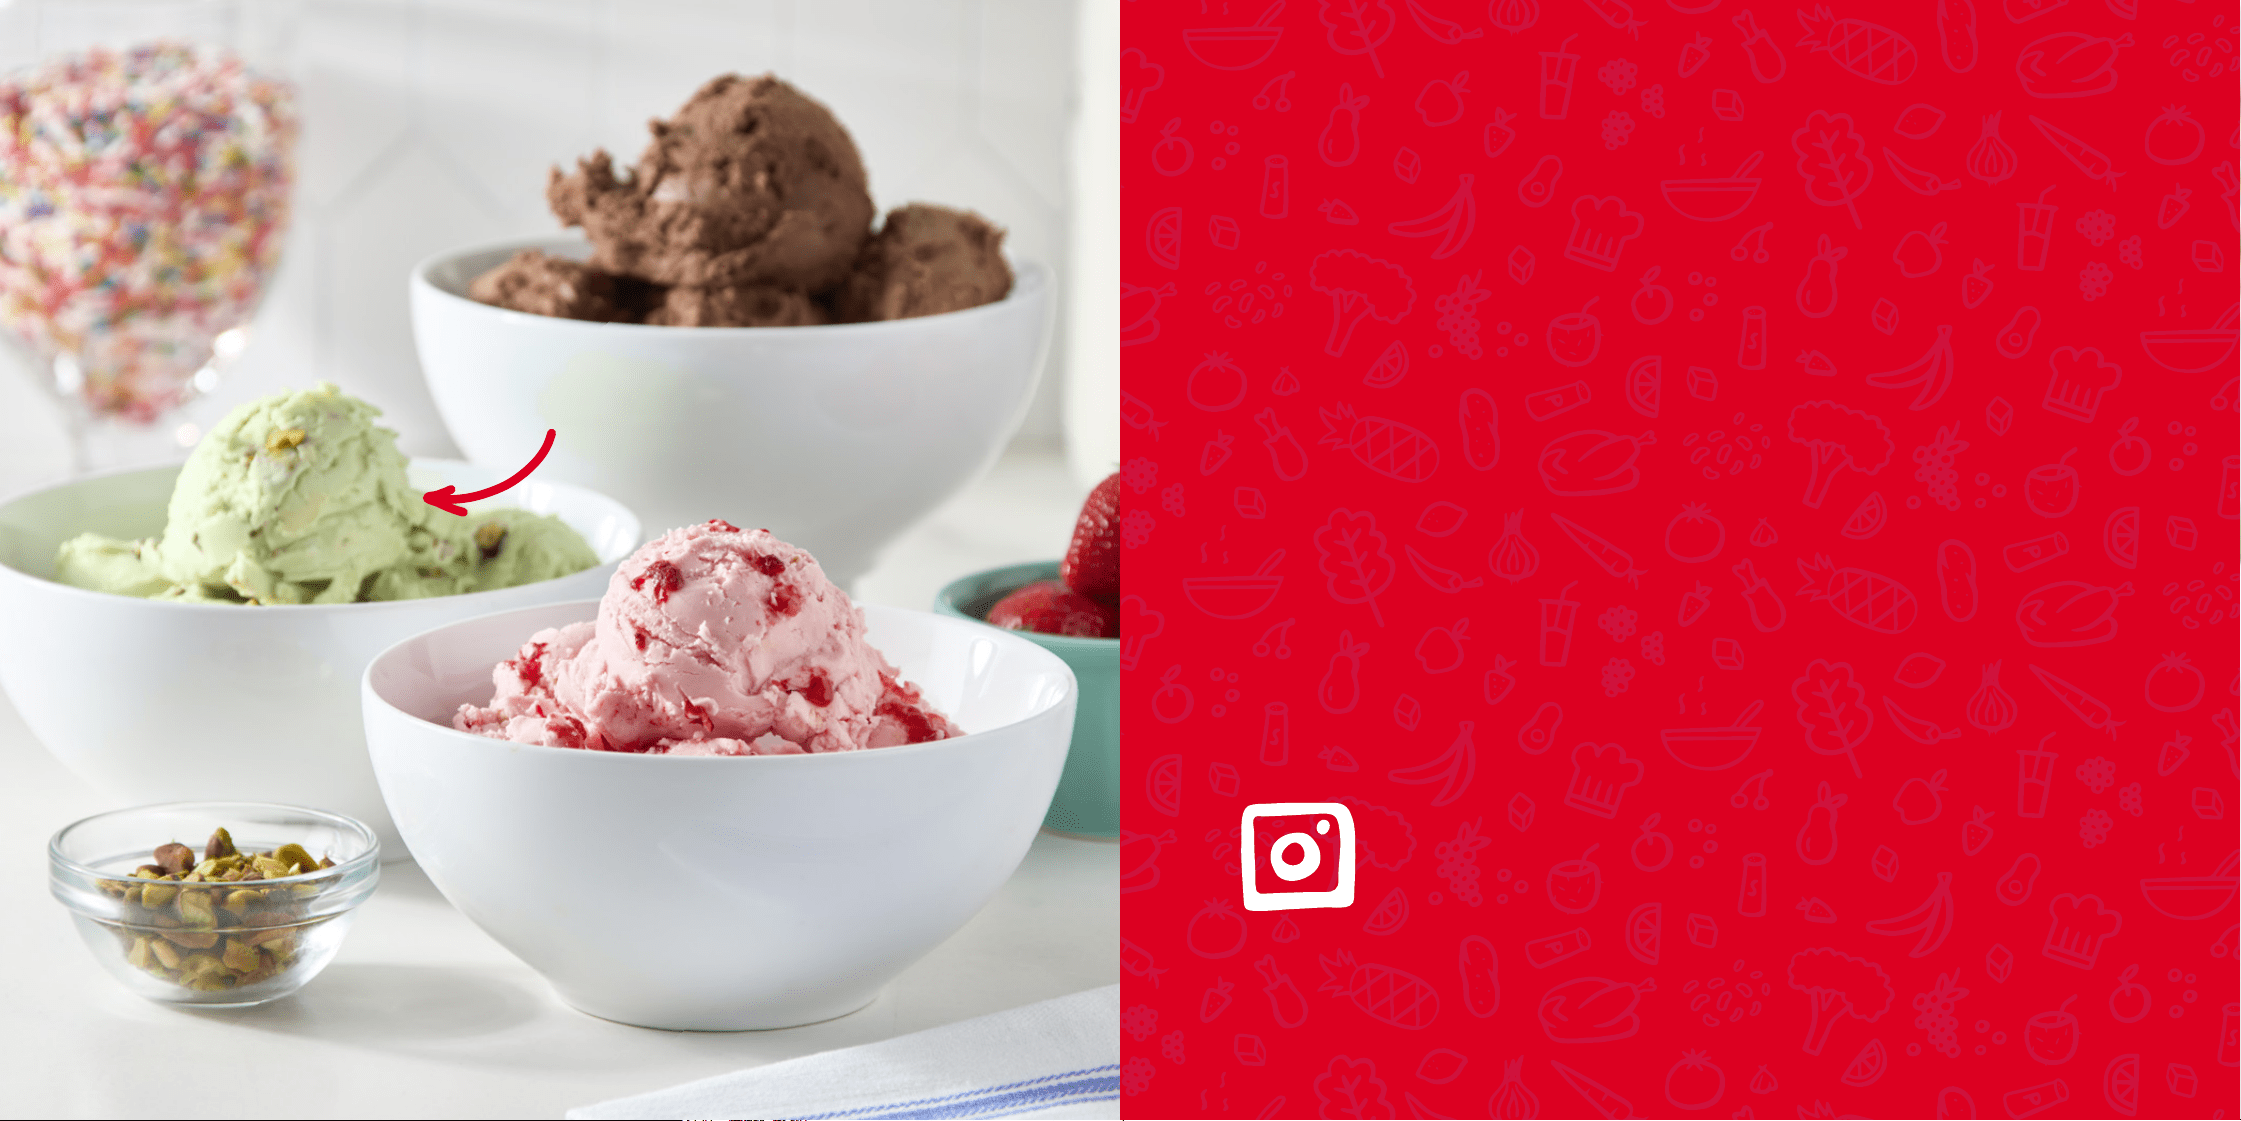
Follow us!
@bydash
|
recipes, videos, & inspiration
@unprocessyourfood
|
veg & vegan-friendly meals
∙ 20 ∙ ∙ 21 ∙
4 large egg yolks
¾ cup sugar
2 cups whole milk
1 cup heavy cream
cup unsweetened cocoa powder
cup chopped dark chocolate
½ teaspoon kosher salt
½ teaspoon pure vanilla extract
Ingredients :
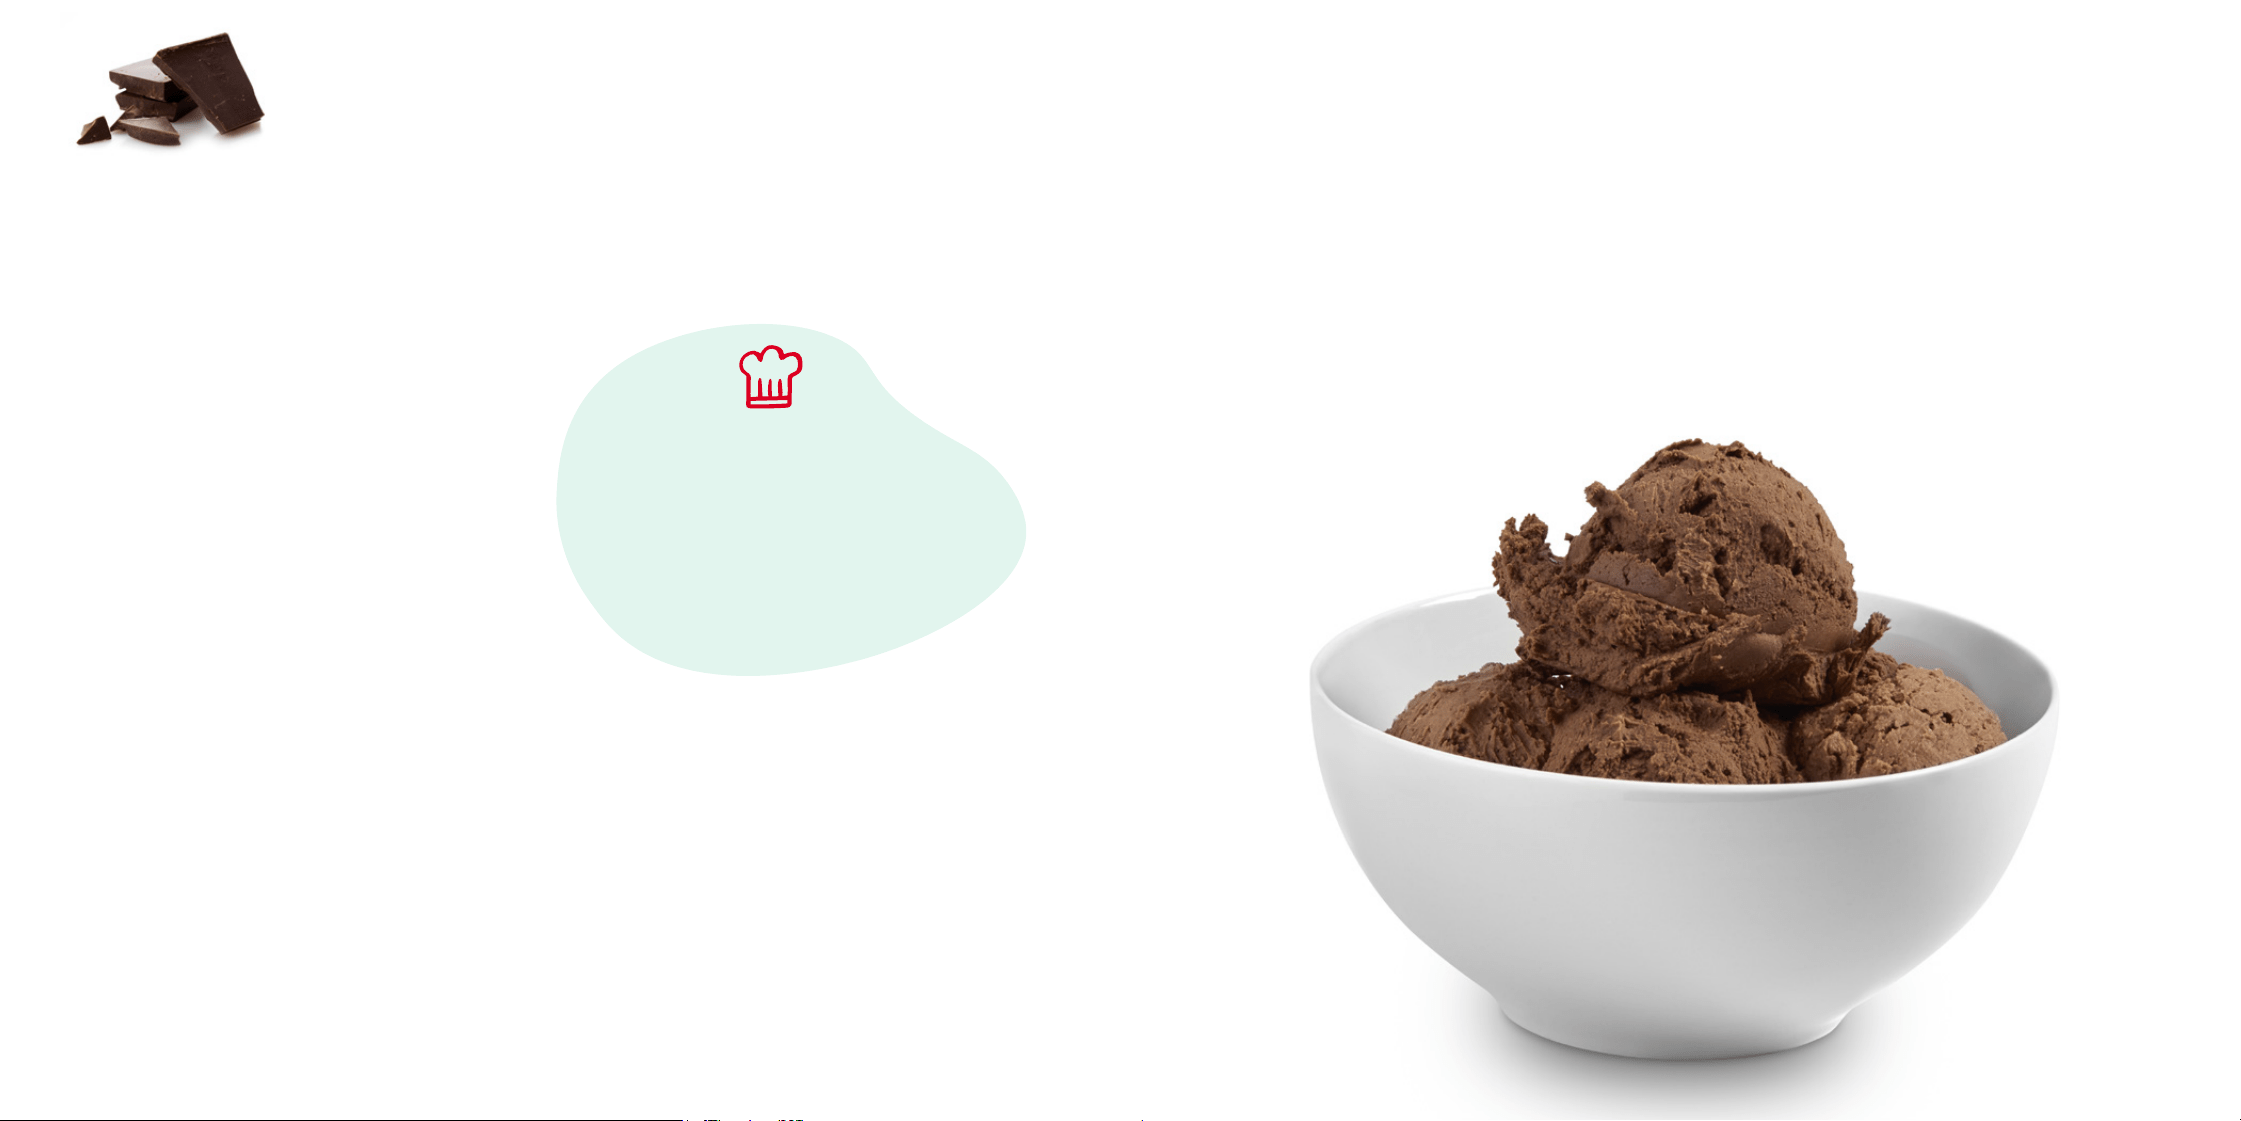
CHOCOLATE GELATO
1. In a medium saucepan, whisk together the egg yolks and sugar until mixture is smooth,
thick, and a pale yellow color. This will take around 30 seconds. Then whisk in the milk,
cream, salt and vanilla until evenly combined.
2. Place the saucepan over medium heat. Whisking almost constantly, cook the mixture until
an instant-read thermometer reads 170ºF, approximately 10 minutes.
3. Remove from heat and whisk in cocoa powder and dark chocolate until well combined.
Allow to cool slightly.
4. Strain the gelato base through a ne mesh strainer into a medium-size bowl, preferably
one with a pouring spout.
5. Place plastic wrap directly against the surface of the liquid to prevent a skin from forming.
Chill until the mixture is very cold, at least 6 hours or up to two days in advance.
Directions :
Bowl Chill Time: 24-48 hours • Ingredients Chill Time: 2 hours • Prep Time: 5-10 minutes
• Inactive Prep Time: 6 hours • Churn Time: 20-25 minutes • Serves: 6-8
¹
3
/
6. When ready to churn, briey whisk the mixture. Power on the Dash Deluxe Gelato & Ice
Cream Maker and begin churning before pouring in ingredients. Pour mixture in through
Ingredient Chute. Once the gelato has churned for about 20-25 minutes, it will likely be a
soft serve consistency.
7. Transfer to a loaf pan (or similar sized pan), cover, and freeze until fully frozen but
scoopable, up to 2 hours.
8. Scoop, serve, and enjoy a chocolate party!
2
3
/
Enjoy within 1-2 weeks for best
flavor and texture. If the gelato
is too firm to scoop directly out
of the freezer, let it sit on the
counter or in the refrigerator
for 5 minutes before serving.
Chef Tip!

∙ 22 ∙ ∙ 23 ∙
3 cups fresh strawberries, trimmed & rinsed
1 cup sugar
¾ cup whole milk
2 tablespoons freshly squeezed lemon juice
½ cup heavy whipping cream
Ingredients :
Strawberry Gelato
1. Place Cooling Bowl in freezer to chill for 24-48 hours prior to making gelato.
2. In a food processor, add trimmed strawberries, lemon juice, and sugar and blend until liqueed.
3. Add milk and blend until mixture is smooth. Set aside.
4. In a mixing bowl, use a wire whisk to whip the cream until it begins to thicken slightly and
becomes the consistency of buttermilk. Add in the strawberry mixture and mix thoroughly.
5. Pour into a heatproof bowl, cover, and chill in refrigerator for 2 at least hours or overnight.
6. When ready to churn, remove the chilled ingredients from the fridge and whisk well.
Remove Cooling Bowl from the freezer. Power on the Dash Deluxe Gelato & Ice Cream Maker
and begin churning before pouring in ingredients. Pour ingredients in through Ingredient Chute,
then churn for 25-30 minutes. The gelato will have the consistency of soft serve after churning.
For rmer gelato, transfer to an airtight freezer-safe container and chill for 2-4 hours more or until
desired consistency.
7. Scoop, serve, and enjoy this berry delicious treat!
Directions :
Bowl Chill Time: 24-48 hours • Ingredients Chill Time: 2 hours • Prep Time: 15-20 minutes
• Churn Time: 30-35 mins • Serves: 6-8
1½ cups heavy cream
1½ cups whole milk
cup sugar
2 teaspoons vanilla extract
teaspoon salt
18-20 cream-filled chocolate sandwich cookies,
divided (or any cookie you prefer)
Ingredients :
Cookies ‘N Cream
1. Place Cooling Bowl in freezer to chill for 24-48 hours prior to making ice cream.
2. In a medium saucepan, combine cream, milk, sugar, vanilla, and salt. Cook over medium-low heat
for 5 minutes or until the sugar dissolves and the mixture is warmed through, whisking consistently.
3. Pour into a heatproof bowl, cover, and chill in refrigerator for 2 at least hours or overnight.
4. When ready to churn, remove the chilled ingredients from the fridge and whisk well. Remove
Cooling Bowl from the freezer. Power on the Dash Deluxe Gelato & Ice Cream Maker and begin
churning before pouring in ingredients. Pour ingredients in through Ingredient Chute, then
churn for 15-20 minutes.
5. While ice cream is churning, prepare cookies crumbles. Place 9-10 cookies in a plastic storage bag
and seal it. Use a rolling pin or a mallet to crush cookies to a very ne almost sandy consistency.
Repeat with remaining cookies.
6. While ice cream is still churning, add crushed cookies through the Ingredient Chute. Continue to
churn for another 8-10 minutes until fully incorporated.
7. The ice cream will have the consistency of soft serve after churning. For rmer ice cream, transfer to
an airtight freezer-safe container and chill for 2-4 hours more or until desired consistency.
8. Scoop and serve to all your little cookie monsters!
Directions :
Bowl Chill Time: 24-48 hours • Ingredients Chill Time: 2 hours • Prep Time: 10-15 minutes
• Churn Time: 30-35 mins • Serves: 6-8
2
3
/
¹
8
/

∙ 24 ∙ ∙ 25 ∙
¾ cup shelled pistachios divided,
roasted & salted
½ cup sugar divided
1½ cups whole milk
1½ cups heavy cream
3 eggs + 2 yolks
¼ + teaspoons almond extract
¼ teaspoon vanilla extract
Green food dye, optional
Ingredients :
PISTACHIO Ice Cream
1. Place Cooling Bowl in freezer to chill for 24-48 hours prior to making ice cream.
2. Use a food processor to grind ½ cup of pistachios along with ¼ cup of sugar until ne,
taking care not to make a butter.
3. In a large saucepan, bring milk, cream, and ¼ cup of sugar to a slow boil. Pour the ground
pistachio mixture into the milk mixture and cook on medium-high heat until it reaches a
slow boil again, whisking every minute or so. Then turn off heat.
4. In a mixing bowl, lightly beat eggs and egg yolks. Temper the eggs by gradually pouring
in a cup or so of the hot milk/pistachio mixture, whisking vigorously to prevent the eggs
from scrambling.
5. Gradually add the yolk mixture back to the saucepan in a slow, steady stream. Cook over
low heat, stirring occasionally with a rubber spatula, until it thickens, about 5-7 minutes.
6. Fit a large mixing bowl with ne mesh strainer. Remove from heat and pour through the
strainer. Press hard to strain any remaining liquid from the nuts. Add almond and vanilla
extracts, whisking to combine.
Directions :
Bowl Chill Time: 24-48 hours • Ingredients Chill Time: 2 hours • Prep Time: 25-30 minutes
• Churn Time: 20-25 minutes • Serves: 6-8
¹
8
/
7. Place the bowl over an ice bath. Cover with plastic wrap, pressing it directly against the
mixture to prevent a skin from forming. Chill in refrigerator for 2 at least hours or overnight.
8. When ready to churn, remove the chilled ingredients from the fridge and whisk well.
Remove Cooling Bowl from the freezer. Power on the Dash Deluxe Gelato & Ice Cream
Maker and begin churning before pouring in ingredients. Pour ingredients in through
Ingredient Chute, then churn for 20-25 minutes. When churning completes, coarsely chop
remaining ¼ cup of pistachios and fold them in. The ice cream will have the consistency of
soft serve after churning. For rmer ice cream, transfer to an airtight freezer-safe container
and chill for 2-4 hours more or until desired consistency.
9. Scoop, serve, and go nuts!

∙ 26 ∙ ∙ 27 ∙
1½ cups heavy cream
1½ cups whole milk
cup sugar
2 teaspoons vanilla extract
teaspoon salt
Ingredients :
Vanilla Ice Cream
1. Place Cooling Bowl in freezer to chill for 24-48 hours prior to making ice cream.
2. In a medium saucepan, combine cream, milk, sugar, vanilla, and salt. Warm over medium-
low heat, whisking often, for 5 minutes or until the sugar dissolves and the mixture is
warmed through.
3. Pour into a heatproof bowl, cover, and chill in refrigerator for 2 at least hours or overnight.
4. When ready to churn, remove the chilled ingredients from the fridge and whisk well.
Remove Cooling Bowl from the freezer. Power on the Dash Deluxe Gelato & Ice Cream
Maker and begin churning before pouring in ingredients. Pour ingredients in through
Ingredient Chute, then churn for 30-35 minutes. The ice cream will have the consistency of
soft serve after churning. For rmer ice cream, transfer to an airtight freezer-safe container
and chill for 2-4 hours more or until desired consistency.
5. Scoop and serve plain or as a base for your creamy creations!
Directions :
Bowl Chill Time: 24-48 hours • Ingredients Chill Time: 2 hours • Prep Time: 10-12 minutes
• Churn Time: 30-35 minutes • Serves: 6-8
¹
8
/
2
3
/
∙ 28 ∙ ∙ 29 ∙
2 cups peeled hazelnuts
3 cups whole milk, divided
½ cup heavy cream
½ cup sugar
6 egg yolks
1 tablespoon vanilla
Ingredients :
Hazelnut Ice Cream
1. Place Cooling Bowl in freezer to chill for 24-48 hours prior to making ice cream.
2. On the stove-top in a dry pan, toast the hazelnuts until deep golden brown, watching
closely so they don’t burn. Let cool slightly then add to a food processor and pulse until
nely chopped into coarse crumbs.
3. In a saucepan, add 2 cups of milk and bring a simmer. Remove from heat and add the
hazelnut crumbs to let steep for 1-2 hours.
4. Fit a large mixing bowl with ne mesh strainer. Pour chilled mixture through the strainer.
Press hard to strain any remaining liquid from the strainer. Transfer from bowl back to
saucepan, add cream and remaining milk, and bring to a simmer.
5. In a separate mixing bowl, add egg yolks, sugar, and vanilla and whisk until thick and pale
in color.
6. Slowly stream some of the hot milk mixture into the egg yolk mixture while whisking
constantly. Return the entire mixture back to the saucepan and cook on low for 8-10
minutes or until thickened.
Directions :
Bowl Chill Time: 24-48 hours • Ingredients Chill Time: Overnight • Prep Time: 2.5 hours
• Churn Time: 25-30 minutes • Serves: 6-8
7. Use the ne mesh strainer on a large bowl to strain the mixture once more. Cover the
bowl with plastic wrap, making sure the plastic wrap is touching it directly to prevent a skin
forming on the top. Place in fridge to chill overnight.
8. When ready to churn, remove the chilled ingredients from the fridge and whisk well.
Remove Cooling Bowl from the freezer. Power on the Dash Deluxe Gelato & Ice Cream
Maker and begin churning before pouring in ingredients. Pour ingredients in through
Ingredient Chute, then churn for 25-30 minutes. The ice cream will have the consistency of
soft serve after churning. For rmer ice cream, transfer to an airtight freezer-safe container
and chill for 2-4 hours more or until desired consistency.
9. Scoop, serve, and enjoy this rich and robust avor!

∙ 30 ∙ ∙ 31 ∙
32 ounces plain Greek yogurt, (full fat)
to ½ cup sweetener of choice (honey or sugar)
1 tablespoon cornstarch*
1 teaspoon vanilla
Ingredients:
Vanilla Frozen Yogurt
with Optional Add-Ins
1. Place Cooling Bowl in freezer to chill for 24-48 hours prior to making frozen yogurt.
2. In a mixing bowl, whisk together all ingredients.
3. Pour into a bowl, cover, and chill in refrigerator for 2 at least hours or overnight.
4. When ready to churn, remove the chilled ingredients from the fridge and whisk well.
Remove Cooling Bowl from the freezer. Power on the Dash Deluxe Gelato & Ice Cream
Maker and begin churning before pouring in ingredients. Pour ingredients in through
Ingredient Chute, then churn for 25-30 minutes. The frozen yogurt will have the
consistency of soft serve after churning. For rmer fro-yo, transfer to an airtight freezer-
safe container and chill for 2-4 hours more or until desired consistency. If the frozen
yogurt is too rm to scoop straight from the freezer, let sit at room temperature for a few
minutes to soften.
Directions:
Bowl Chill Time: 24-48 hours • Ingredients Chill Time: 2 hours • Prep Time: 5-10 minutes
• Churn Time: 25-30 minutes • Serves: 6-8
¹
3
/
Optional Add-ins:
• Chocolate: When mixing ingredients, stir in half a cup of unsweetened cocoa powder
into the yogurt and increase the sweetener to half a cup as well.
• Peanut Butter: When mixing ingredients, add half a cup of peanut or almond butter.
• Coconut: When mixing ingredients, use coconut yogurt instead of plain. Or add ¼
teaspoon of coconut extract to original ingredients. Towards the end of churning, stir in
a handful of shredded coconut or coconut akes.
• Coffee: When mixing ingredients, stir in 1 teaspoon each of instant coffee granules and
pure vanilla extract. Garnish with shaved chocolate or crushed coffee beans.
∙ 32 ∙ ∙ 33 ∙
3½ cups strawberries (trimmed) or preferred fruit
¾ cups sugar
¾ cups water
1 lemon, juiced
Ingredients :
Fruit Sorbet
1. Place Cooling Bowl in freezer to chill for 24-48 hours prior to making sorbet.
2. In a saucepan, heat water and sugar, stirring until sugar dissolves and forms a syrup.
Remove from heat and let cool.
3. In a blender or food processor, add syrup and strawberries and blend until smooth.
Transfer to a bowl, cover, and refrigerate until fully chilled, about 2 hours.
4. When ready to churn, remove the chilled ingredients from the fridge. Stir in lemon juice to
chilled mixture and whisk well.
5. Remove Cooling Bowl from the freezer. Power on the Dash Deluxe Gelato & Ice Cream
Maker and begin churning before pouring in ingredients. Pour ingredients in through
Ingredient Chute, then churn for 20-25 minutes. The sorbet will have the consistency of soft
serve after churning. For rmer sorbet, transfer to an airtight freezer-safe container and chill
for 2-4 hours more or until desired consistency.
6. Scoop, serve, and enjoy some fruity, dairy-free deliciousness!
Directions :
Bowl Chill Time: 24-48 hours • Ingredients Chill Time: 2 hours • Prep Time: 20-25 minutes
• Churn Time: 20-25 minutes • Serves: 6-8
∙ 34 ∙
∙ 35 ∙
Customer support
We're here to help! Our customer support teams in the
US and Canada are at your service Monday - Friday.
Contact us at 1 (800) 898-6970 or suppor[email protected].
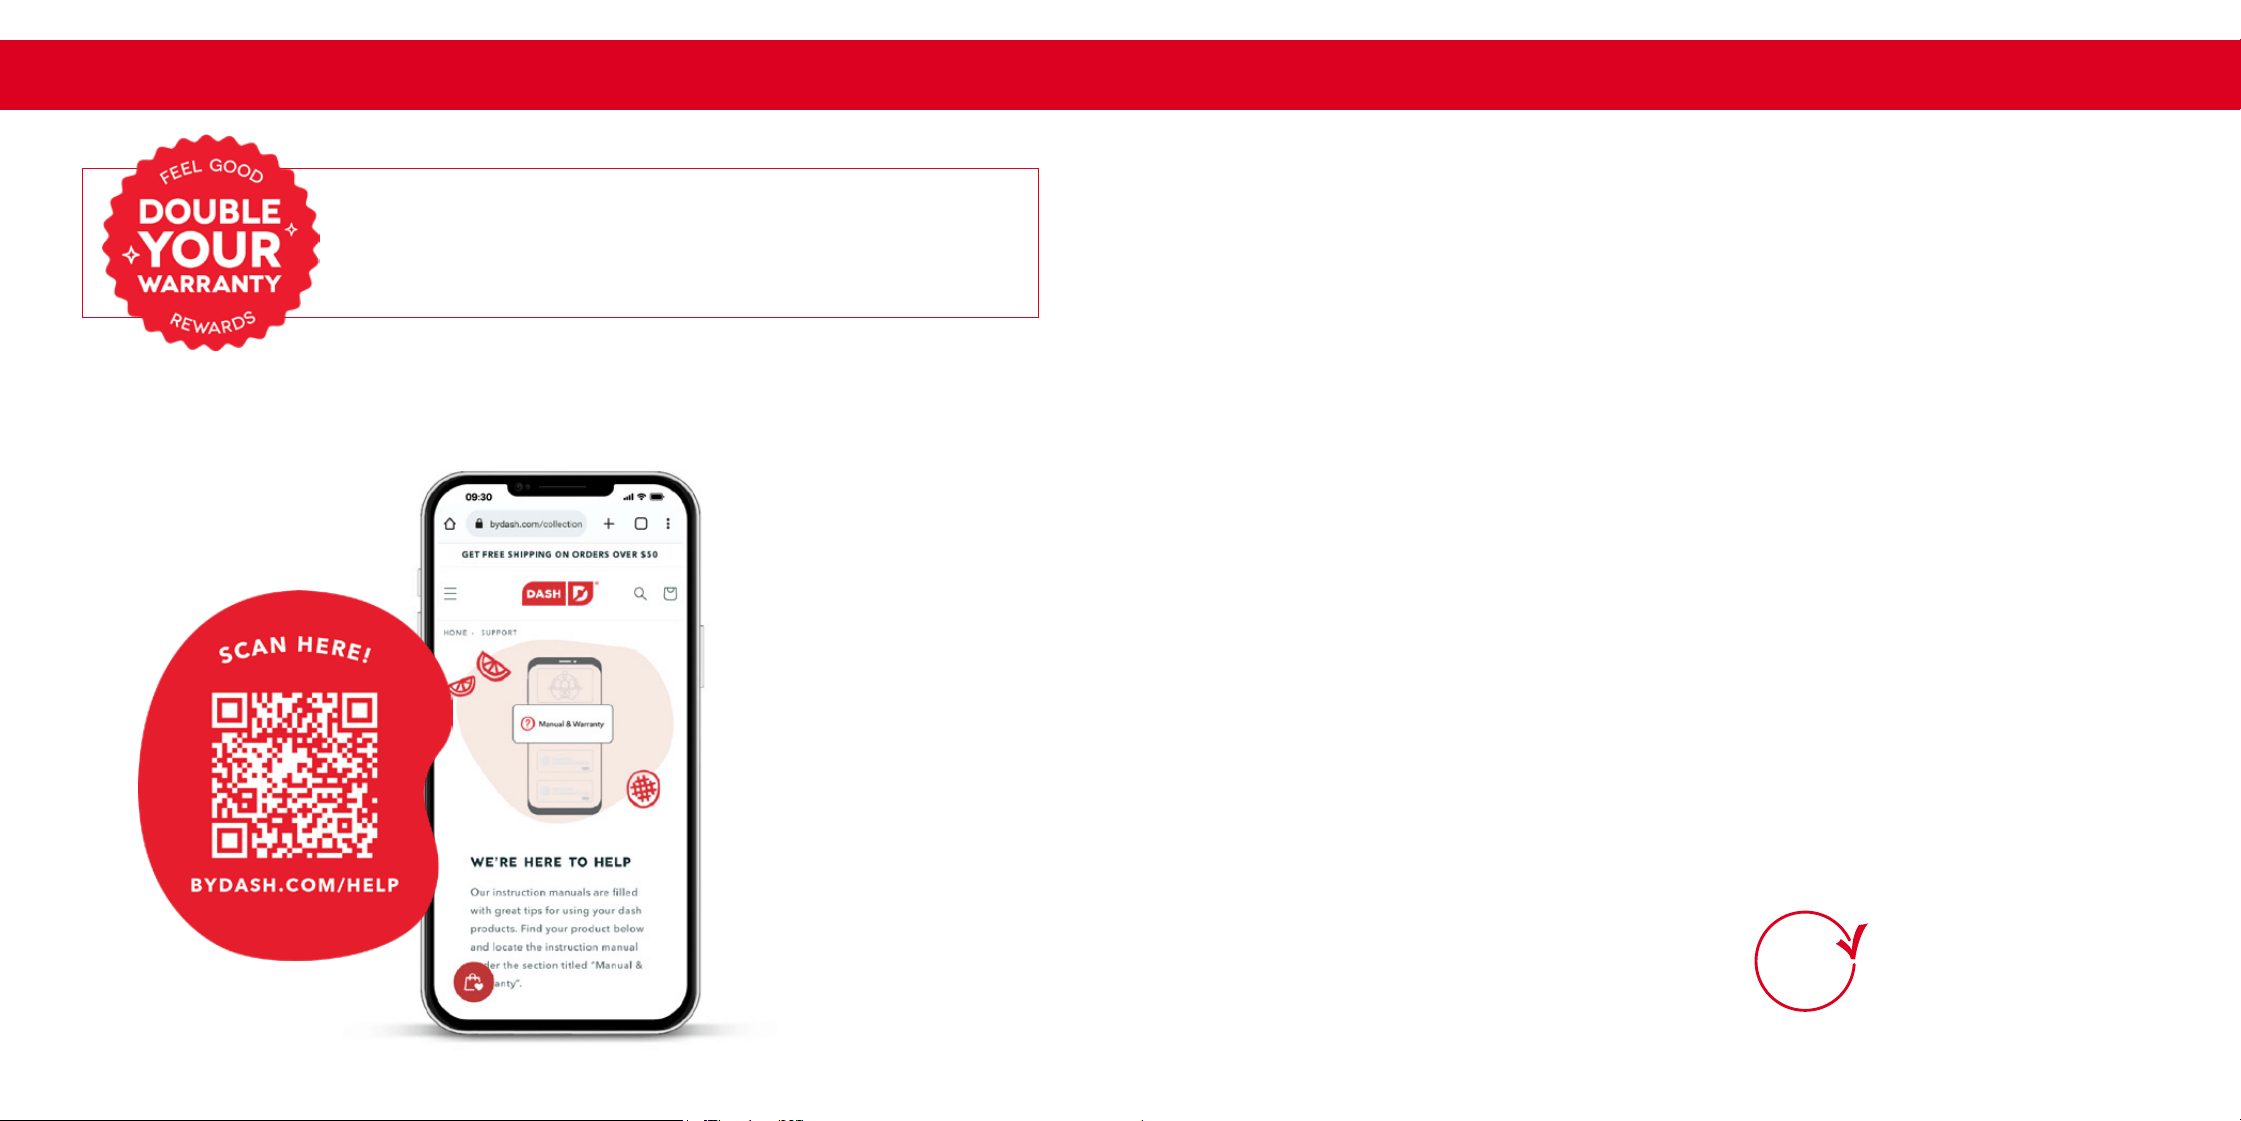
We want you to Feel Good about your Dash products!
Sign up for our Feel Good Rewards program at
bydash.com/feelgood to DOUBLE your warranty, part of our
commitment to quality and customer satisfaction.
feel good
guarantee
™
STOREBOUND, LLC – 2 YEAR LIMITED WARRANTY WITH REGISTRATION ON BYDASH.COM
Your StoreBound product is warranted to be free from defects in material and workmanship for a period of
two (2) years from the date of delivery of goods with product registration on bydash.com, when utilized for
normal and intended household use. Should any defect covered by the terms of the limited warranty be
discovered within two (2) years, StoreBound, LLC will repair or replace the defective part. A limited one (1)
year warranty is provided for products purchased on bydash.com and not registered. To process a warranty
claim, contact Customer Support at [email protected] for further assistance and instruction. A Customer
Support agent will assist you by troubleshooting minor problems. If troubleshooting fails to x the problem,
a return authorization will be issued. Proof of purchase indicating the date and place of purchase is required
and should accompany the return. You must also include your full name, shipping address, and telephone
number. StoreBound will not ship to a PO Box. StoreBound will not be responsible for delays or unprocessed
claims resulting from a purchaser’s failure to provide any or all of the necessary information. Freight costs must
be prepaid by the purchaser.
All replacement inquiries are to be submitted to [email protected] or contact Customer Support at
1-800-898-6970. There are no express warranties except as listed above.
Warranty is voided if used outside of the 50 states of the United States, the District of Columbia or the 10
provinces of Canada. Warranty is voided if used with an electric adapter/converter or used with any voltage
plug other than 120V.
REPAIR OR REPLACEMENT AS PROVIDED UNDER THIS WARRANTY IS THE EXCLUSIVE REMEDY OF THE
CUSTOMER. STOREBOUND SHALL NOT BE LIABLE FOR ANY INCIDENTAL OR CONSEQUENTIAL DAMAGES
OR FOR BREACH OF ANY EXPRESS OR IMPLIED WARRANTY ON THIS PRODUCT EXCEPT TO THE EXTENT
REQUIRED BY APPLICABLE LAW. ANY IMPLIED WARRANTY OF MERCHANTABILITY OR FITNESS FOR A
PARTICULAR PURPOSE ON THIS PRODUCT IS LIMITED IN DURATION TO THE DURATION OF THIS WARRANTY.
Some states do not allow the exclusion or limitation of incidental or consequential damages, or limitations on
how long an implied warranty lasts. Therefore, the above exclusions or limitations may not apply to you. This
warranty gives you specic legal rights and you may also have other rights, which vary from state to state.
Refurbished items or items not purchased through an authorized retailer are not eligible for warranty claims.
REPAIRS
DANGER! Risk of electric shock! The Dash Deluxe Gelato & Ice Cream Maker is an electrical appliance.
Do not attempt to repair the appliance yourself under any circumstances.
Contact Customer Support regarding repairs to the appliance.
TECHNICAL SPECIFICATIONS
Voltage 120V ~ 60Hz
Power Rating 12W
Stock# DIC200_20240918_V2
Warranty
This product has
passed food safety
testing in accordance
with FDA guidelines.
FOOD
SAFE

1-800-898-6970 | @bydash | bydash.com