
What's in the Box
Overview
Recharge Your Power Station
Powering Your Device
Light
LCD Screen Guide
The Anker App for Smart Control
FAQ
Specifications
USB Power Distribution Table

How to Activate Your
C300 DC
Before using C300 DC for the first time, recharge it to activate the power
station.
Ways to Activate:
Charge via USB-C: Use an 18W or higher wall charger.
Charge via MPPT: Use a solar panel with output between 11-28V.
Notes:
· Only the USB-C2 and USB-C3 ports can be used to activate.
· Recommend to use the included 140W USB-C to USB-C charging cable and
your own cell phone charger to activate.
What's in the Box
Anker SOLIX C300 DC
Portable Power Station
140W USB-C to USB-C
Charging Cable
Important Safety
Instructions
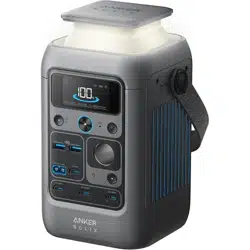
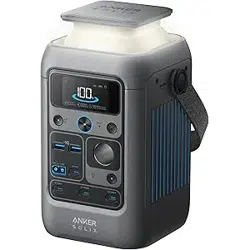
Overview
1
3
4
5
8
14
11
12
13
10
7
6
2
9
1
Retractable Light
2
LCD Screen
3
IOT Button
4
Main Power Button
5
12W USB-A Output Port
6
Solar Input and Car Input
7
15W USB-C Output Port
8
100W USB-C Output Port
9
Handle*
10
Reset
11
Light Button
12
Car Socket
13
Car Socket On / O Button
14
140W USB-C Input / Output Port
• indicates a bidirectional interface.
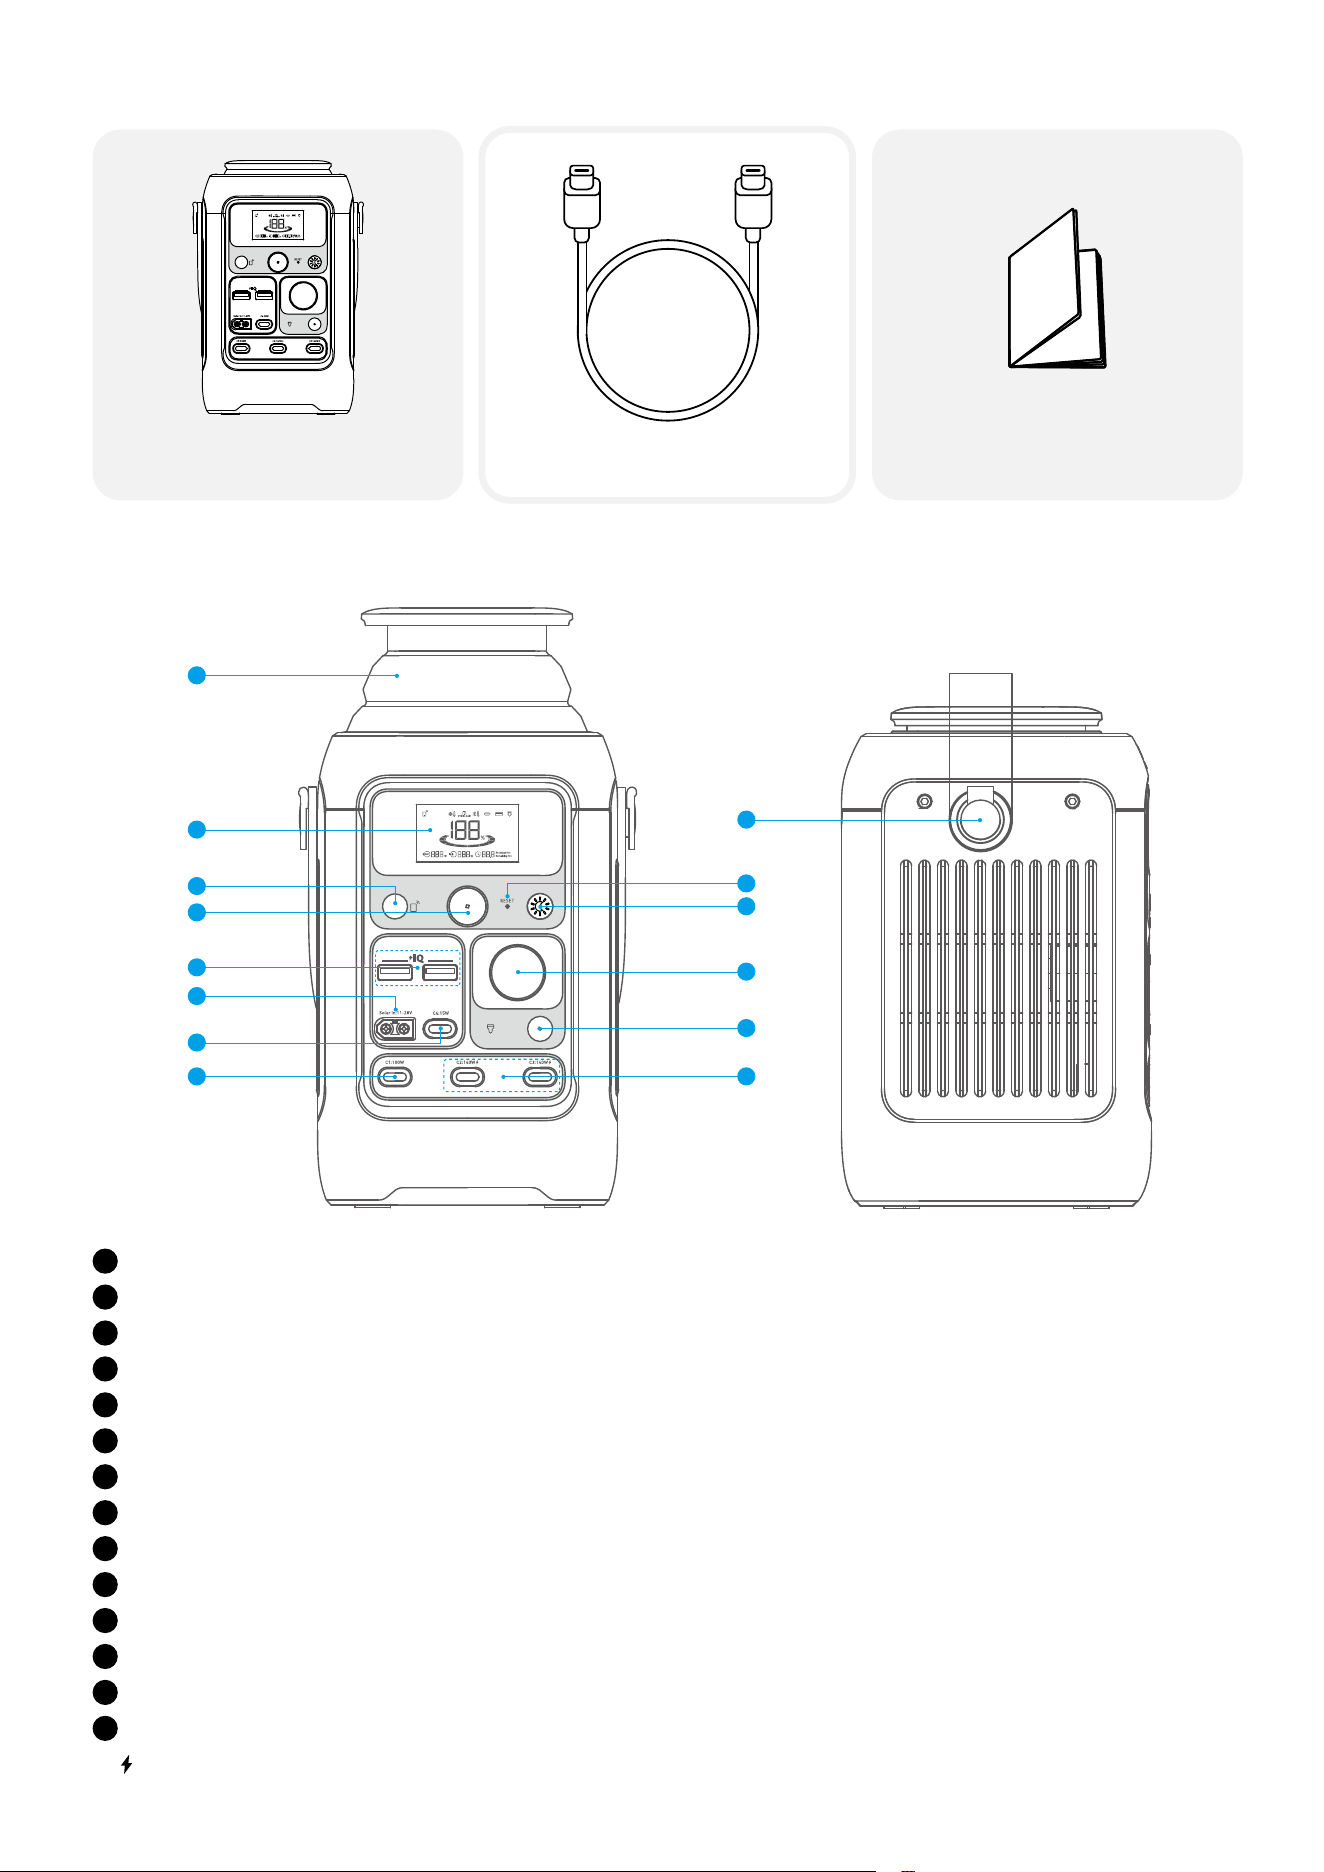
*The handle attachments can also be used for Anker SOLIX adjustable straps (sold separately).
Recharge Your Power Station
Solar Panel Recharging (100W Max)
Recharge your power station with a maximum solar input of 100W by connecting up to one Anker 100W / 60W Solar Panel
as shown in the figure with a solar charging cable*.
The voltage of the solar panel should be 11V-28V, otherwise it will damage the power station.
*The solar charging cable is sold separately.
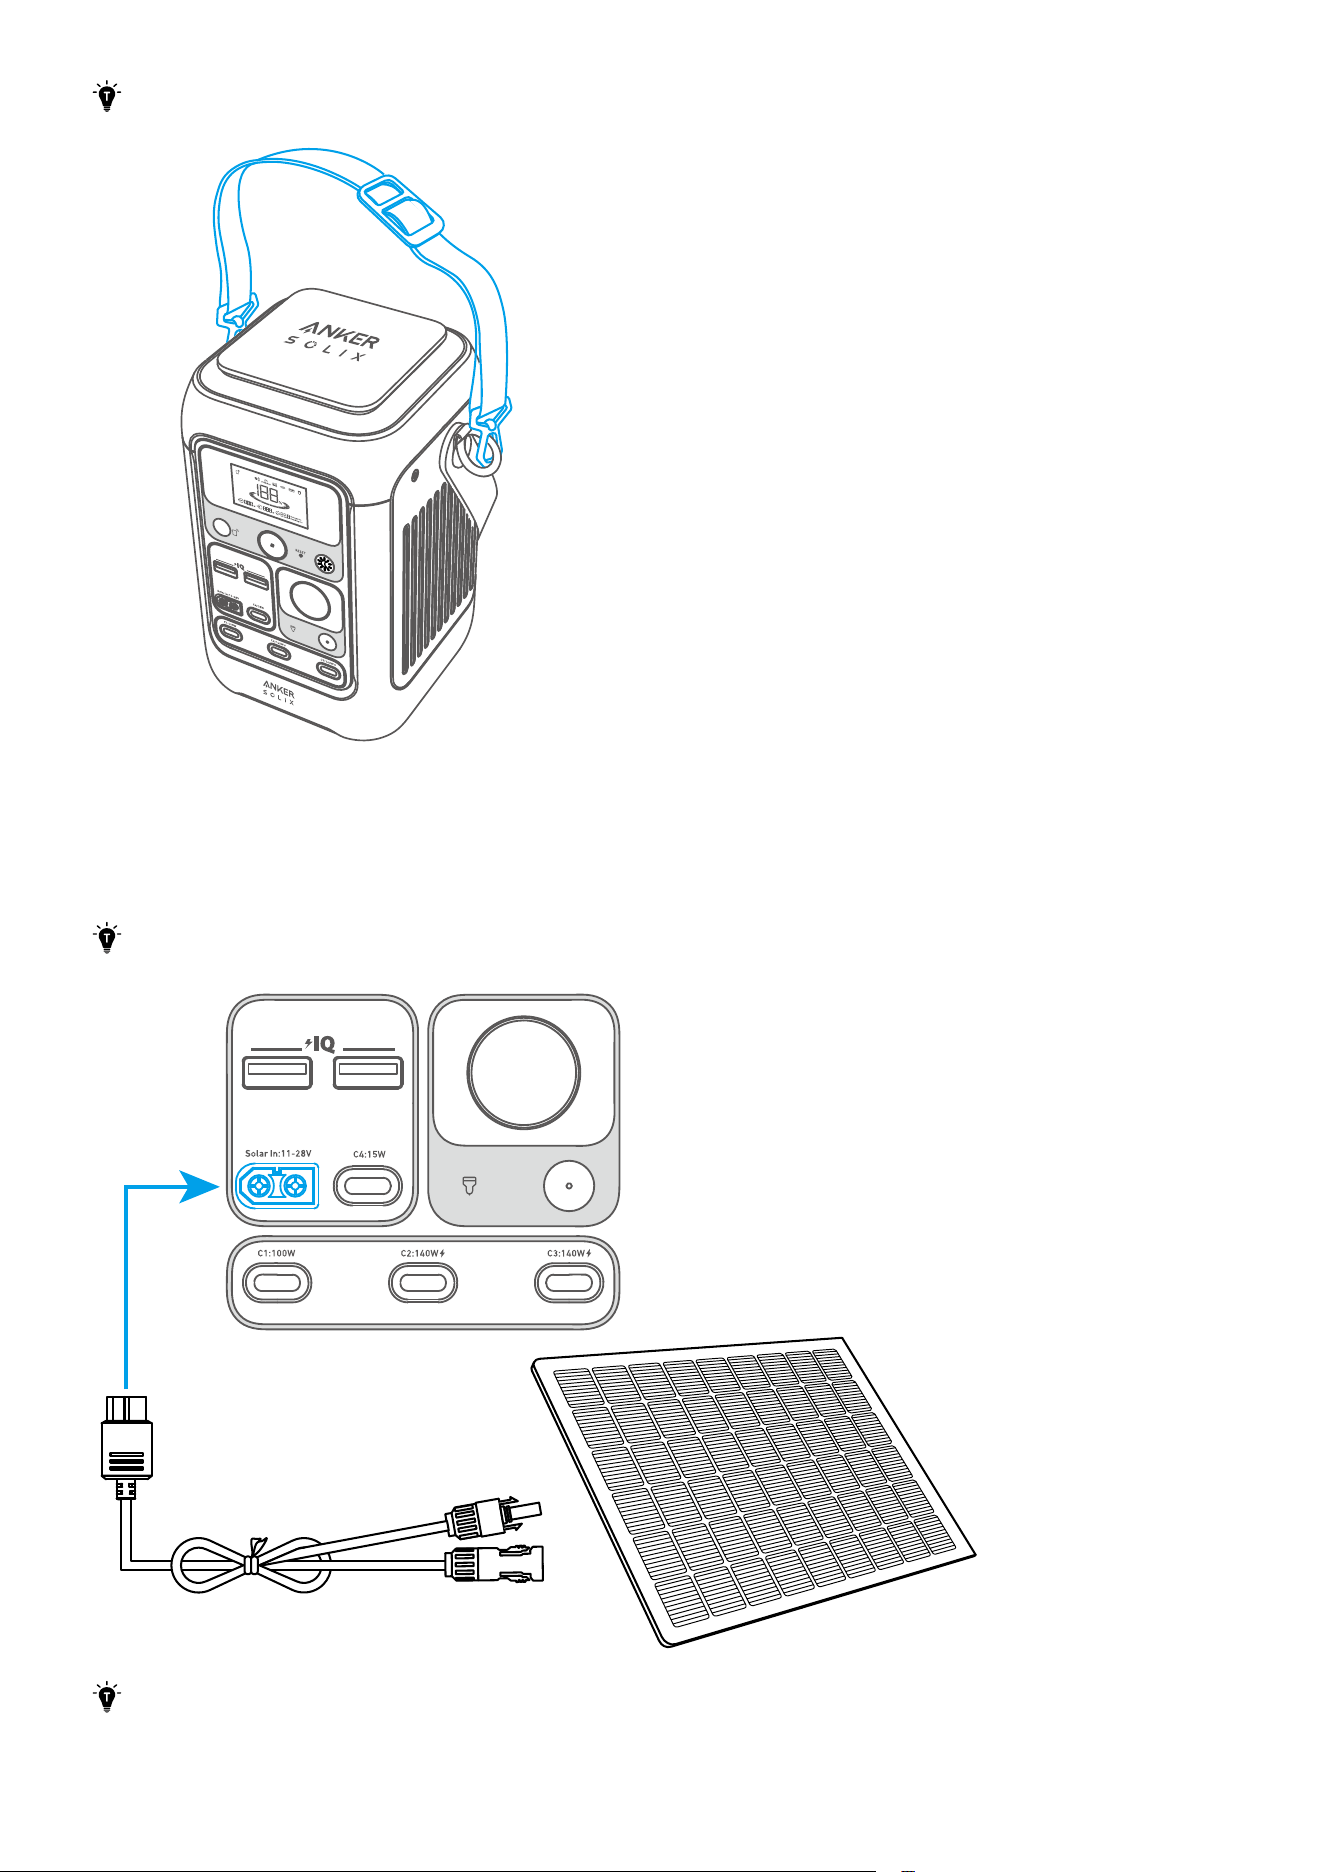
USB-C Recharging (280W Max)
Recharge* your power station by connecting to a wall adapter with a USB-C cable**.
*Two 140W USB-C Input / Output Ports can be used to recharge simultaneously.
**USB-C cables are sold separately. Use a 140W USB-C cable and 140W adapter for the best charging experience.
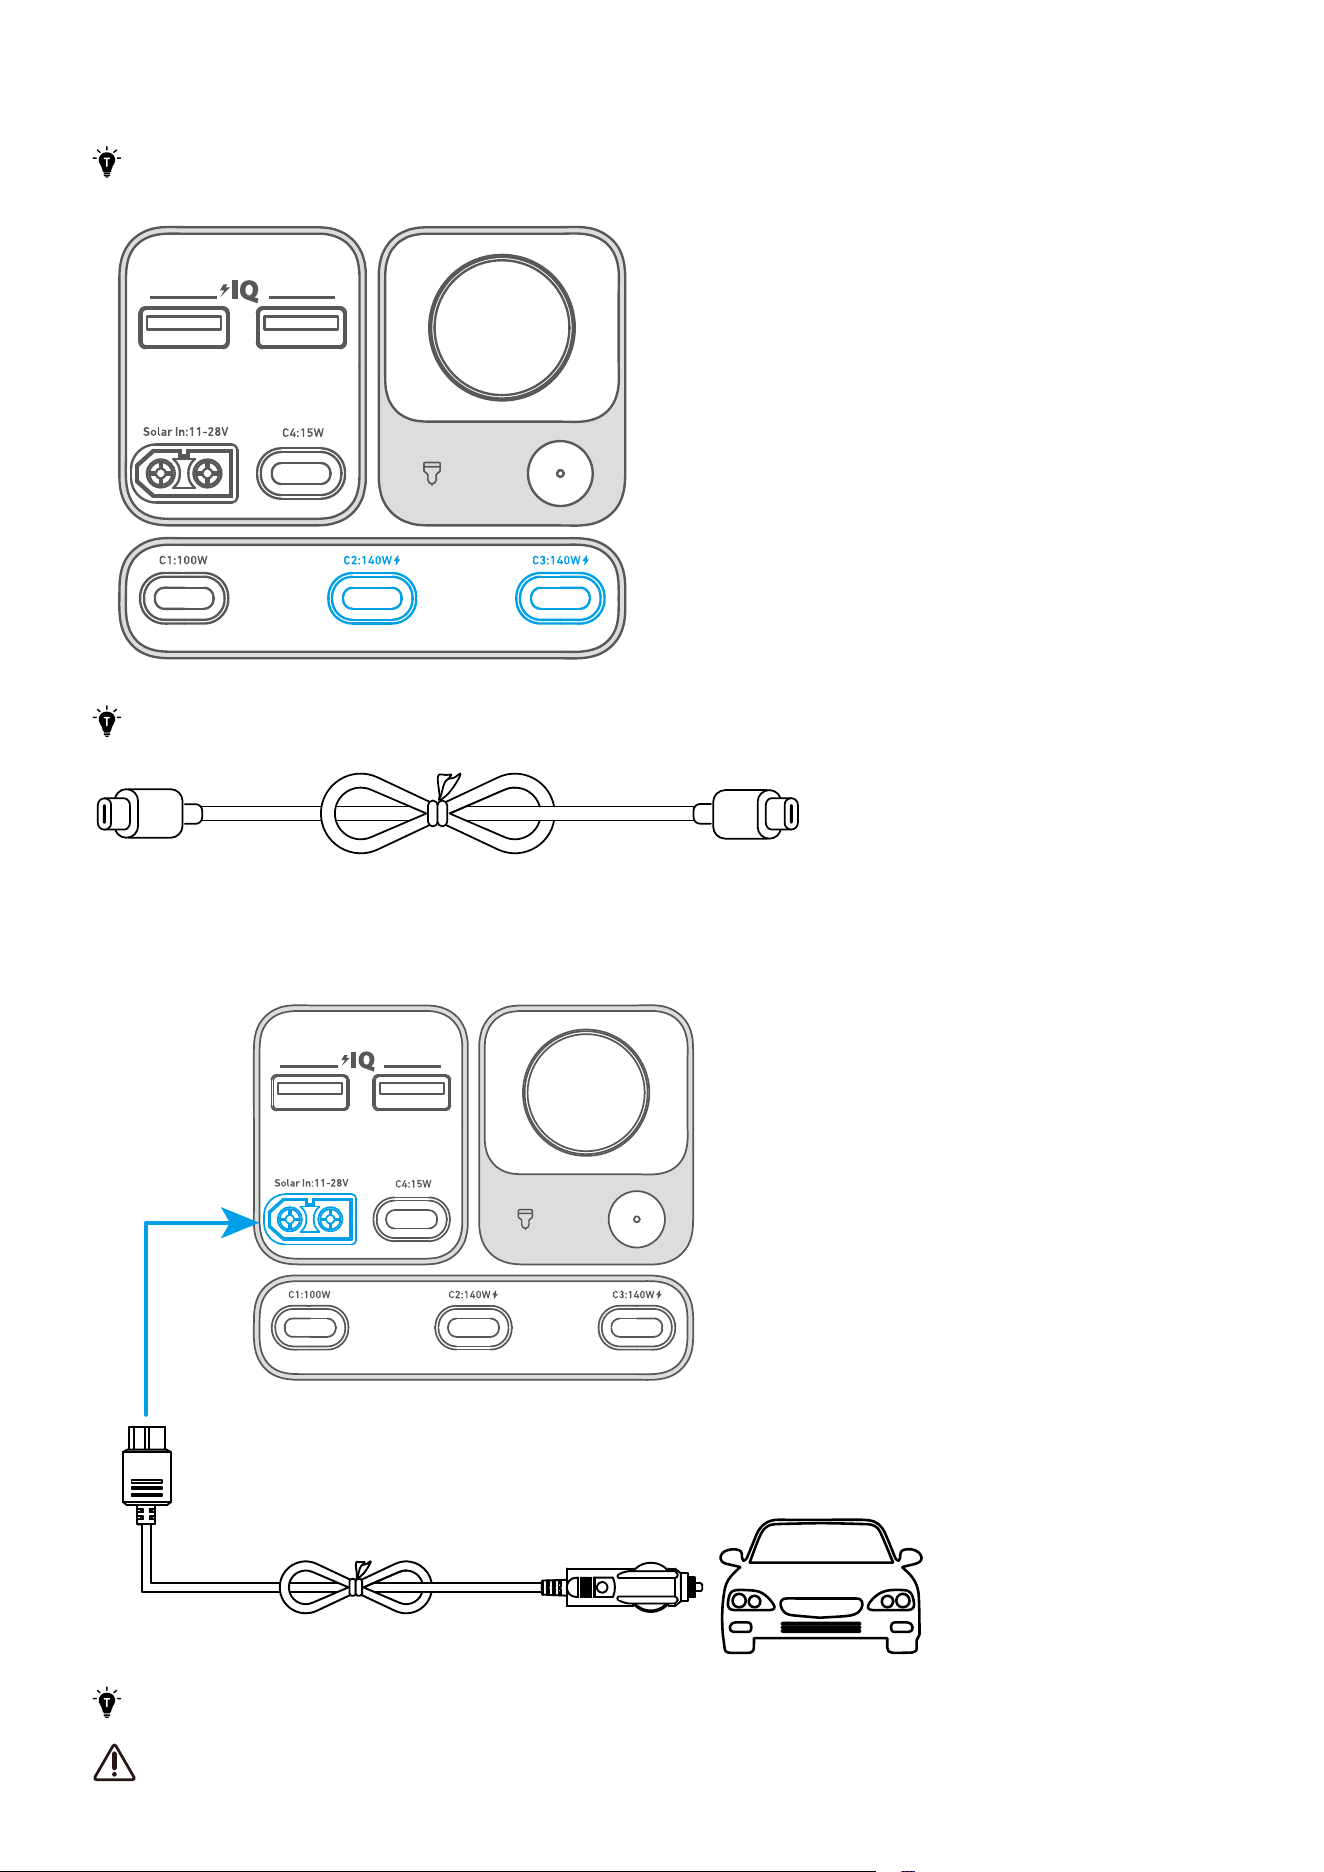
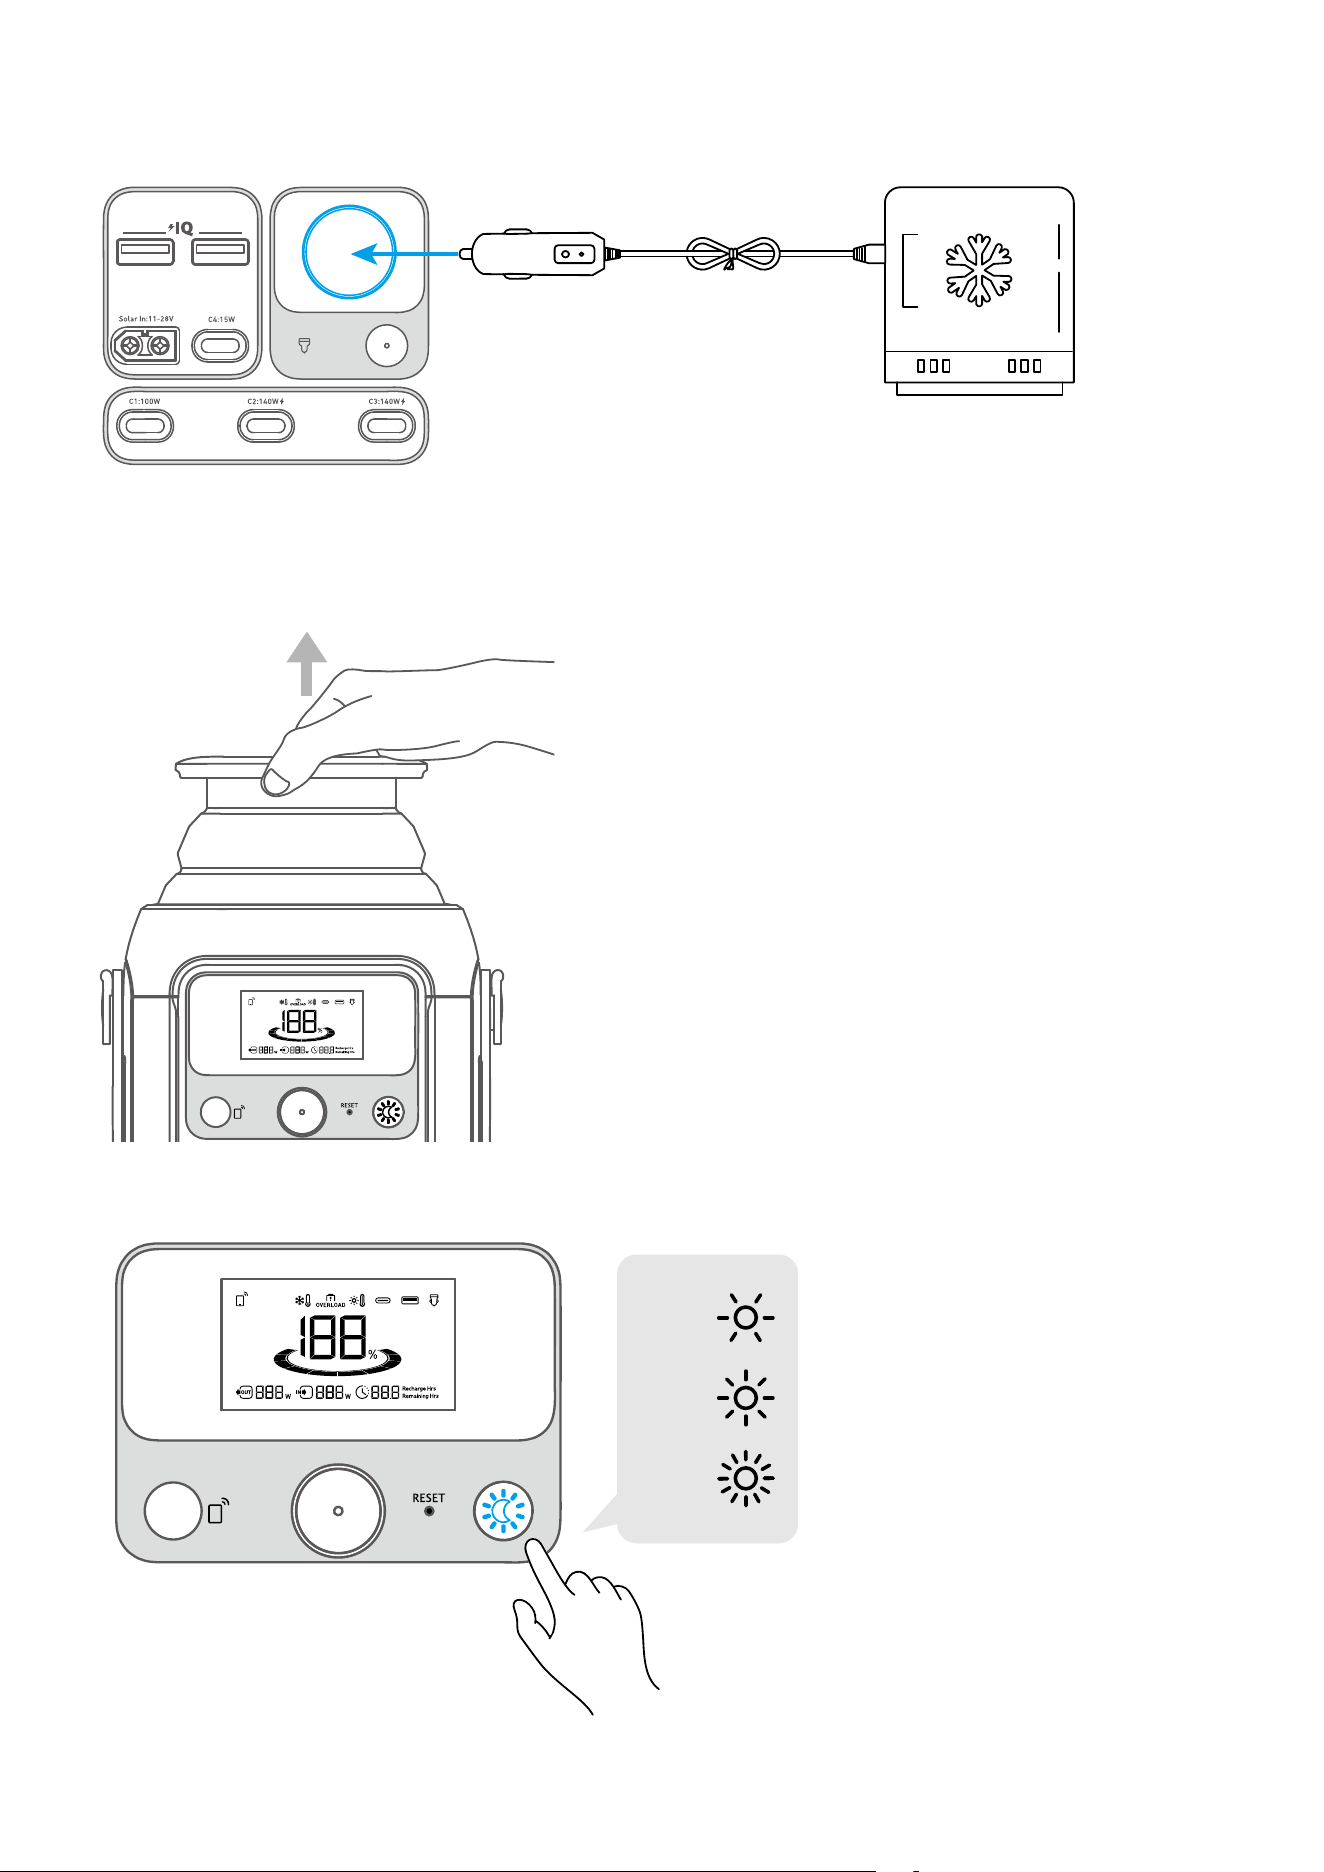
Car Recharging
Recharge your power station by connecting to a car's output port with the car charging cable*.
*Car charging cable sold separately.
When your portable power station only has 1% battery remaining, the "Remaining Battery" indicator will flicker to
remind you to recharge.
Powering Your Device
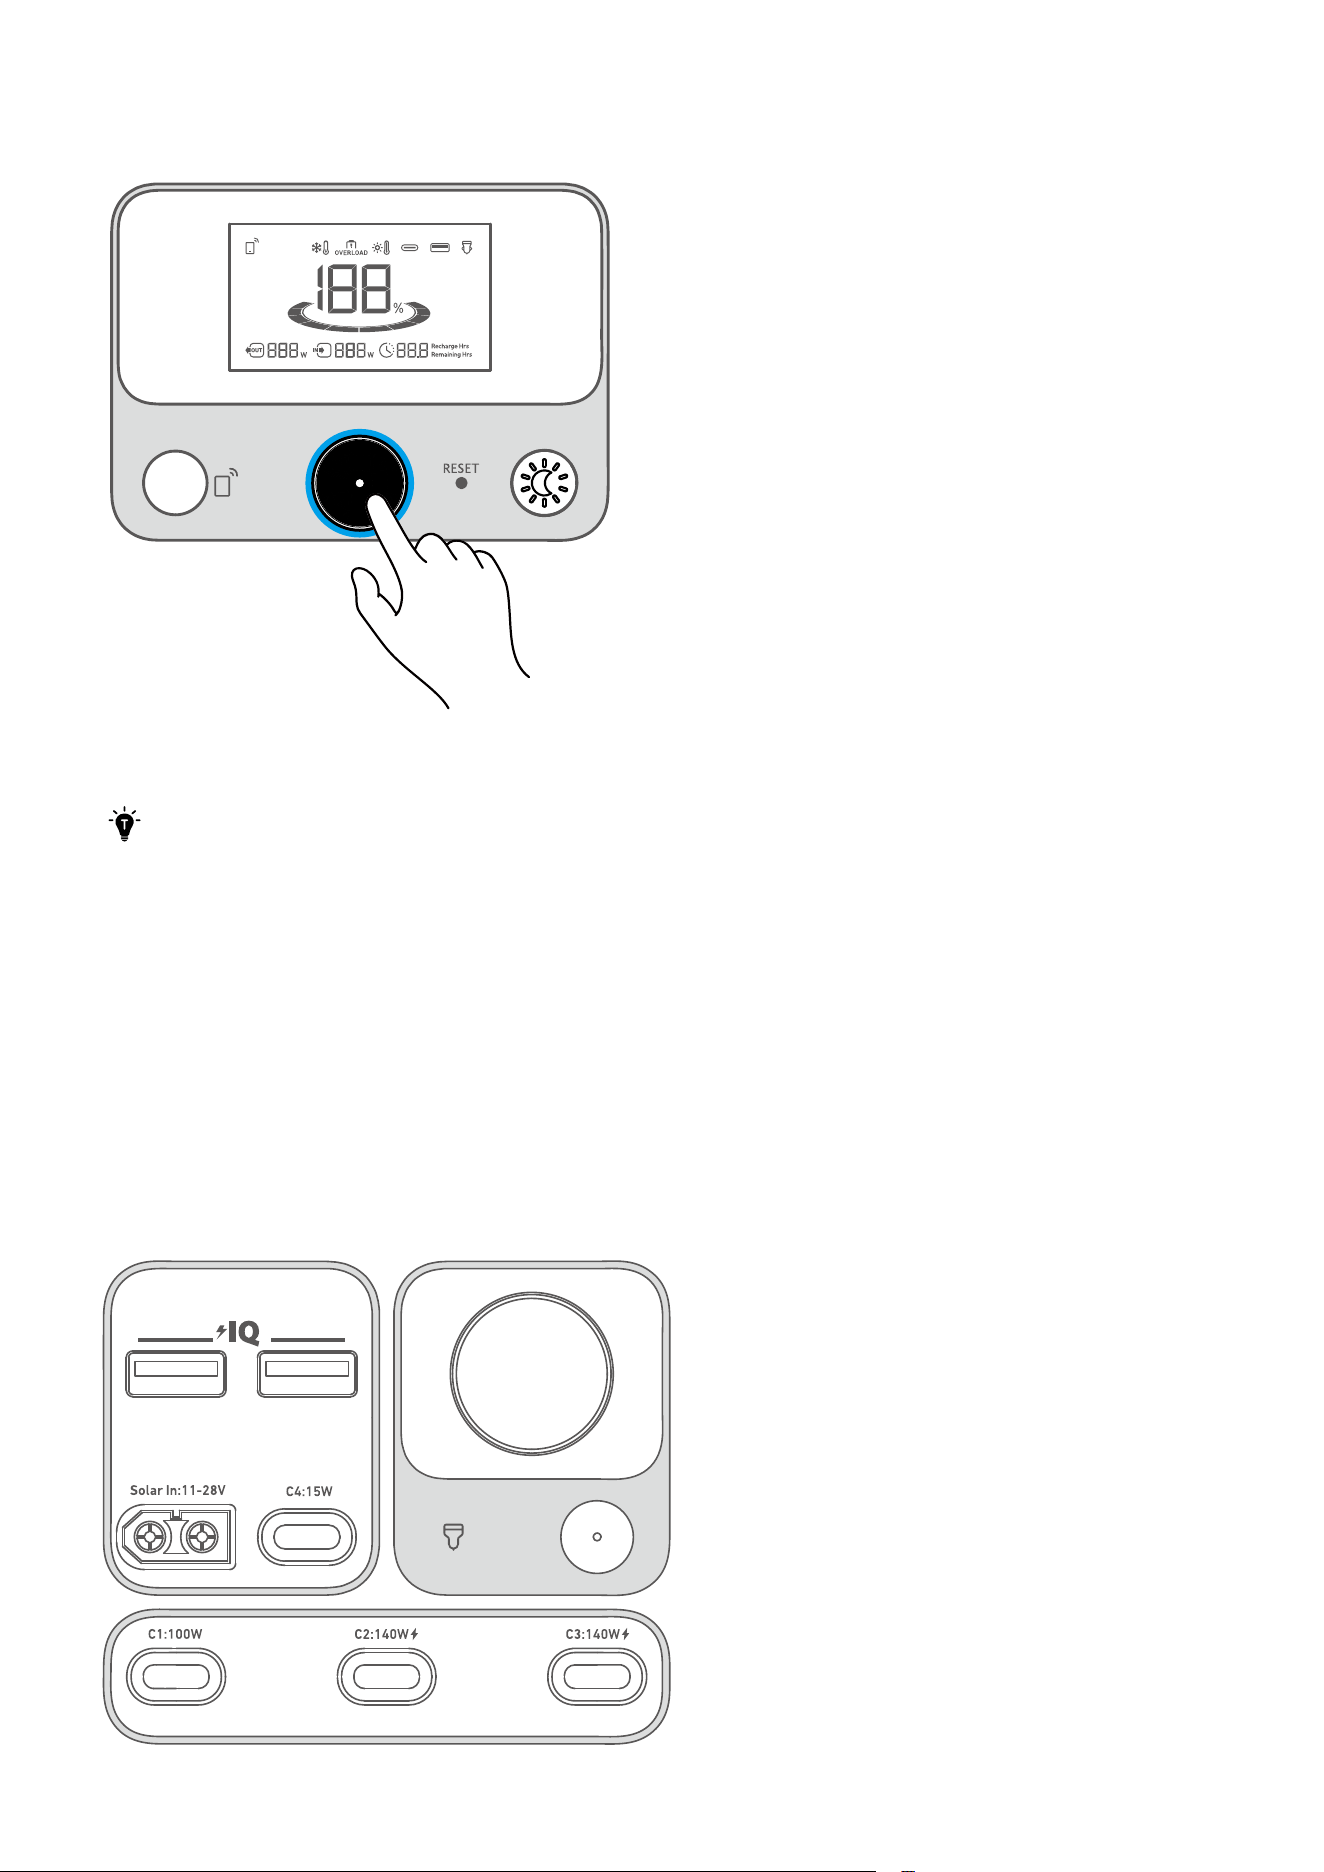
Power On/O
Press the main power button for 3 seconds to turn your power station on or o.
When the "Remaining Battery" indicator shows on the LCD screen, your power station is ready to charge devices.
• When powered on, press the main power button to turn the screen on or o.
• The screen will automatically turn o after 30 seconds of lighting up. The auto-o time can be set in the Anker
app.
• The power station will power o automatically if the output buttons are turned o and no power loads are
detected for 2 hours. The standby duration can be set in the Anker app. We recommend not setting this to ʼnever,"
so that the product can shut down on its own and save power in a long-term unused state.
USB Charging
Connect your devices to the USB ports.
Note: The USB-C2 and USB-C3 output ports are a PS3 classification. There is a risk of fire when connecting additional
equipment to the USB-C ports; safeguards against fire in the connected equipment or accessories should be considered.
Only connect your portable power station to equipment or accessories that comply with clauses 6.3, 6.4 and 6.5 of IEC/
EN IEC/ BS EN IEC 62368-1 standards. Additionally, use a USB-C 5A cable to achieve maximum power (20VDC/5A, 100W;
28VDC/5A, 140W).
Car Socket Charging
Turn on the car socket and connect your devices to start charging.
Light
Pull up the retractable light.
Press the button to switch between brightness levels.
×1
×2
×3

LCD Screen Guide
1
9
10
8
11
12
2
3
4 5 6 7
1
Press the IoT button once to turn on Bluetooth and Wi-Fi, and connect your devices through the app when this icon
appears on the screen.
Press the IoT button for 2 seconds to turn o Bluetooth and Wi-Fi.
Press the IoT button for 7 seconds to reset Bluetooth and Wi-Fi.
2
Low-Temperature Alert: When this icon shows, stop using the power station until the icon disappears.
3
Overload Warning:
This icon appears when a port is overloaded. The port will be turned o to avoid any damage. Please remove the device
causing overload.
4
High-Temperature Alert:
When this icon shows, stop using the power station and let it cool down until the icon disappears.
5
USB-C Input / Output Port
6
USB-A Output Port
7
Car Charging
8
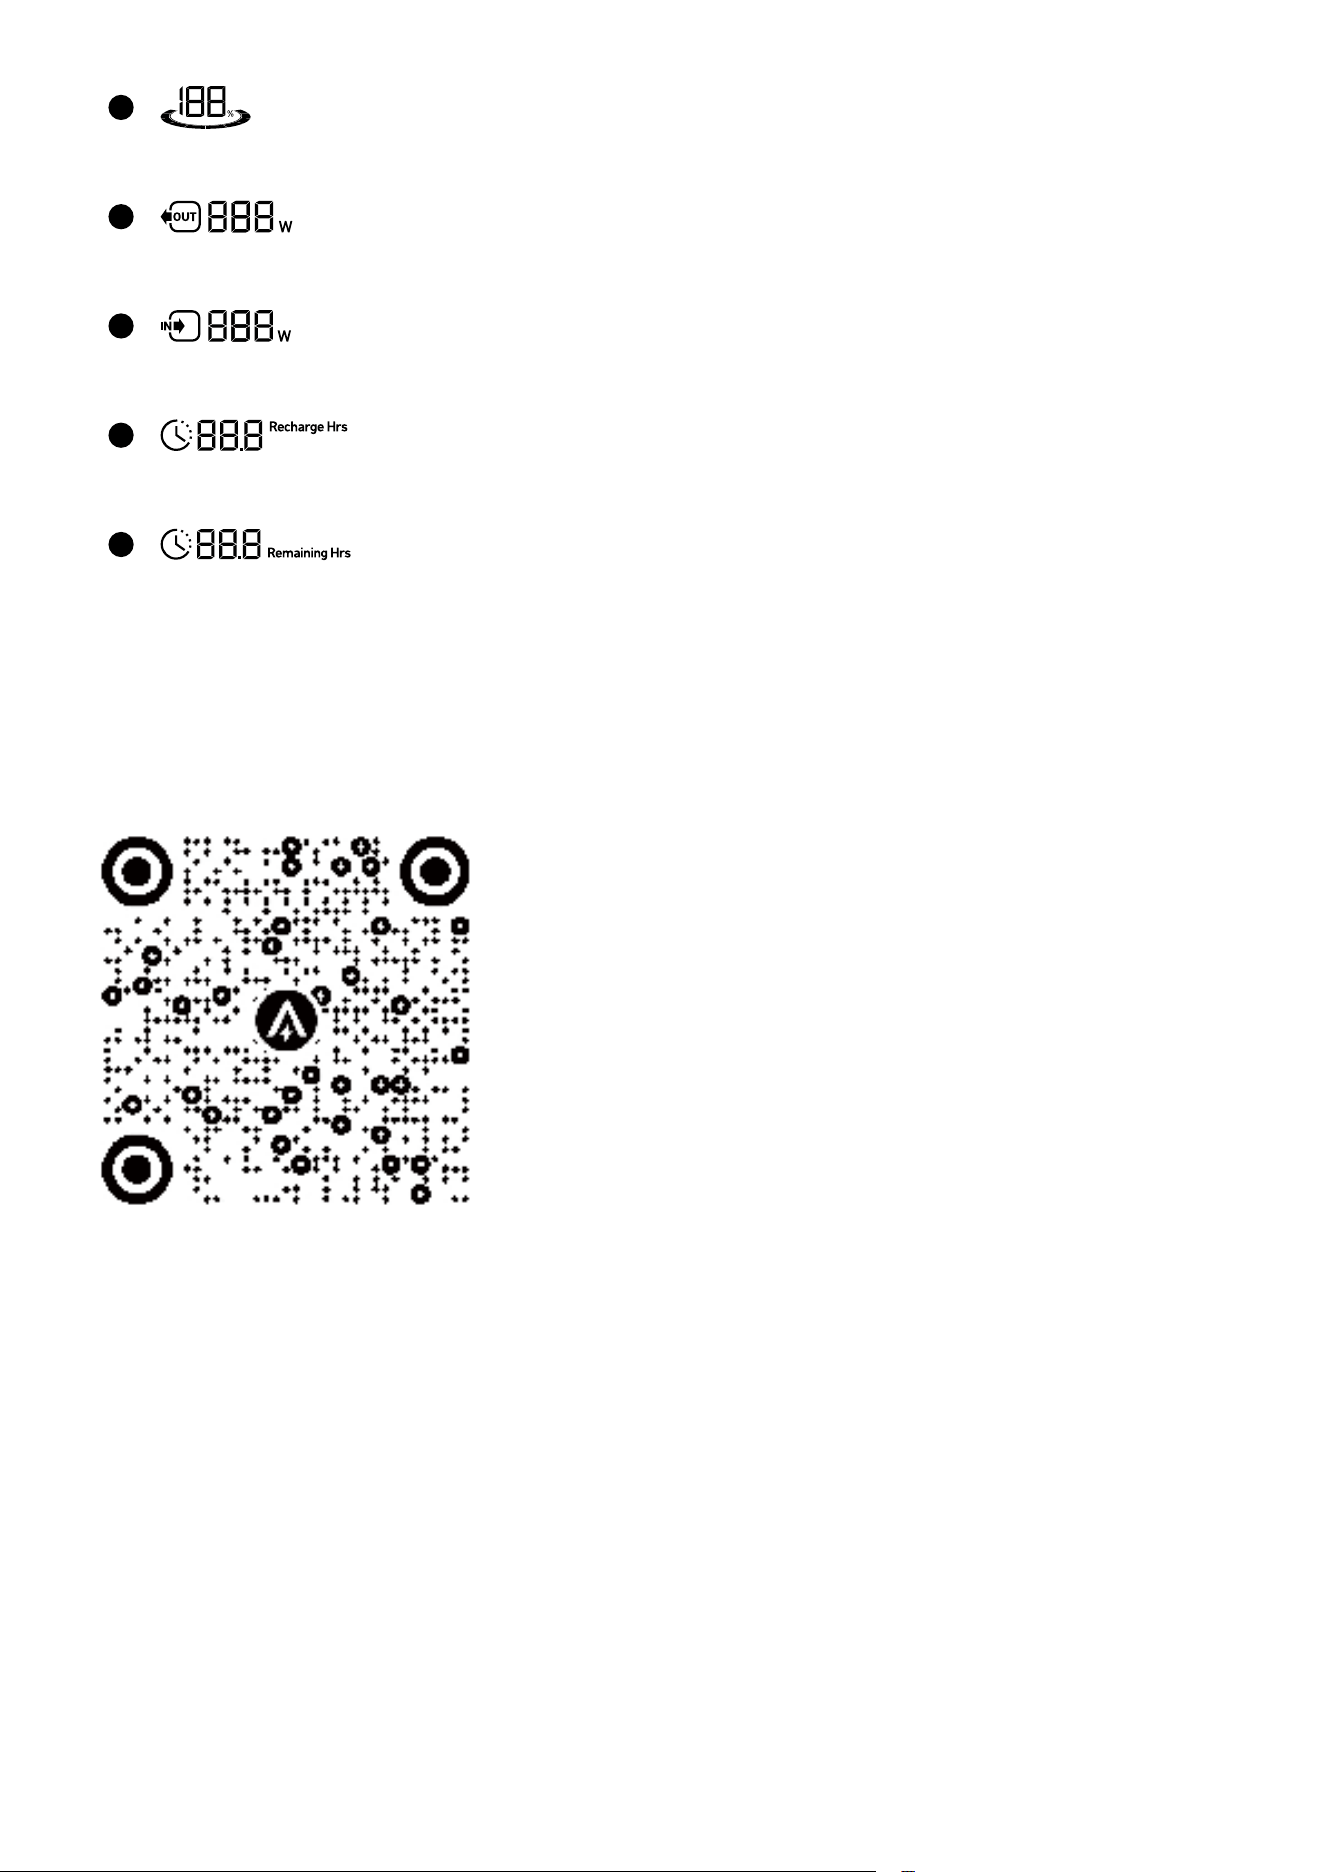
Remaining Battery for Power Station
9
Current Output Power
10
Current Input Power
11
Estimated Time to Fully Recharge
12
Estimated Time for Battery to Deplete
The Anker App for Smart Control
You can remotely control your power station using the Anker app.
1. Download the Anker app from the App Store (iOS devices) or Google Play (Android devices), or by scanning the QR code.
2. Connect the device to a network before using the app for the first time. After connecting successfully, you can connect
your device o-grid.
3. Firmware update: You will be informed once a new firmware version is detected when you connect the power station to
the app. During the update,ensure the power station is connected to Wi-Fi or Bluetooth.
FAQ
Q1: Can Anker SOLIX C300 DC Portable Power Station power a CPAP machine?
Yes.
Q2: What should I do when using a solar charger to charge Anker SOLIX C300 DC Portable Power Station?
The solar input supports an 11-28V solar charger with an XT-60 connector. We recommend using Anker 100W / 60W
Solar Panel for the best compatibility.
Q3: Can the USB-C ports be used to charge Anker SOLIX C300 DC Portable Power Station (input only), or are they output
only?
The USB-C1 and USB-C4 ports are output only. The USB-C2 and USB-C3 supports output and input.
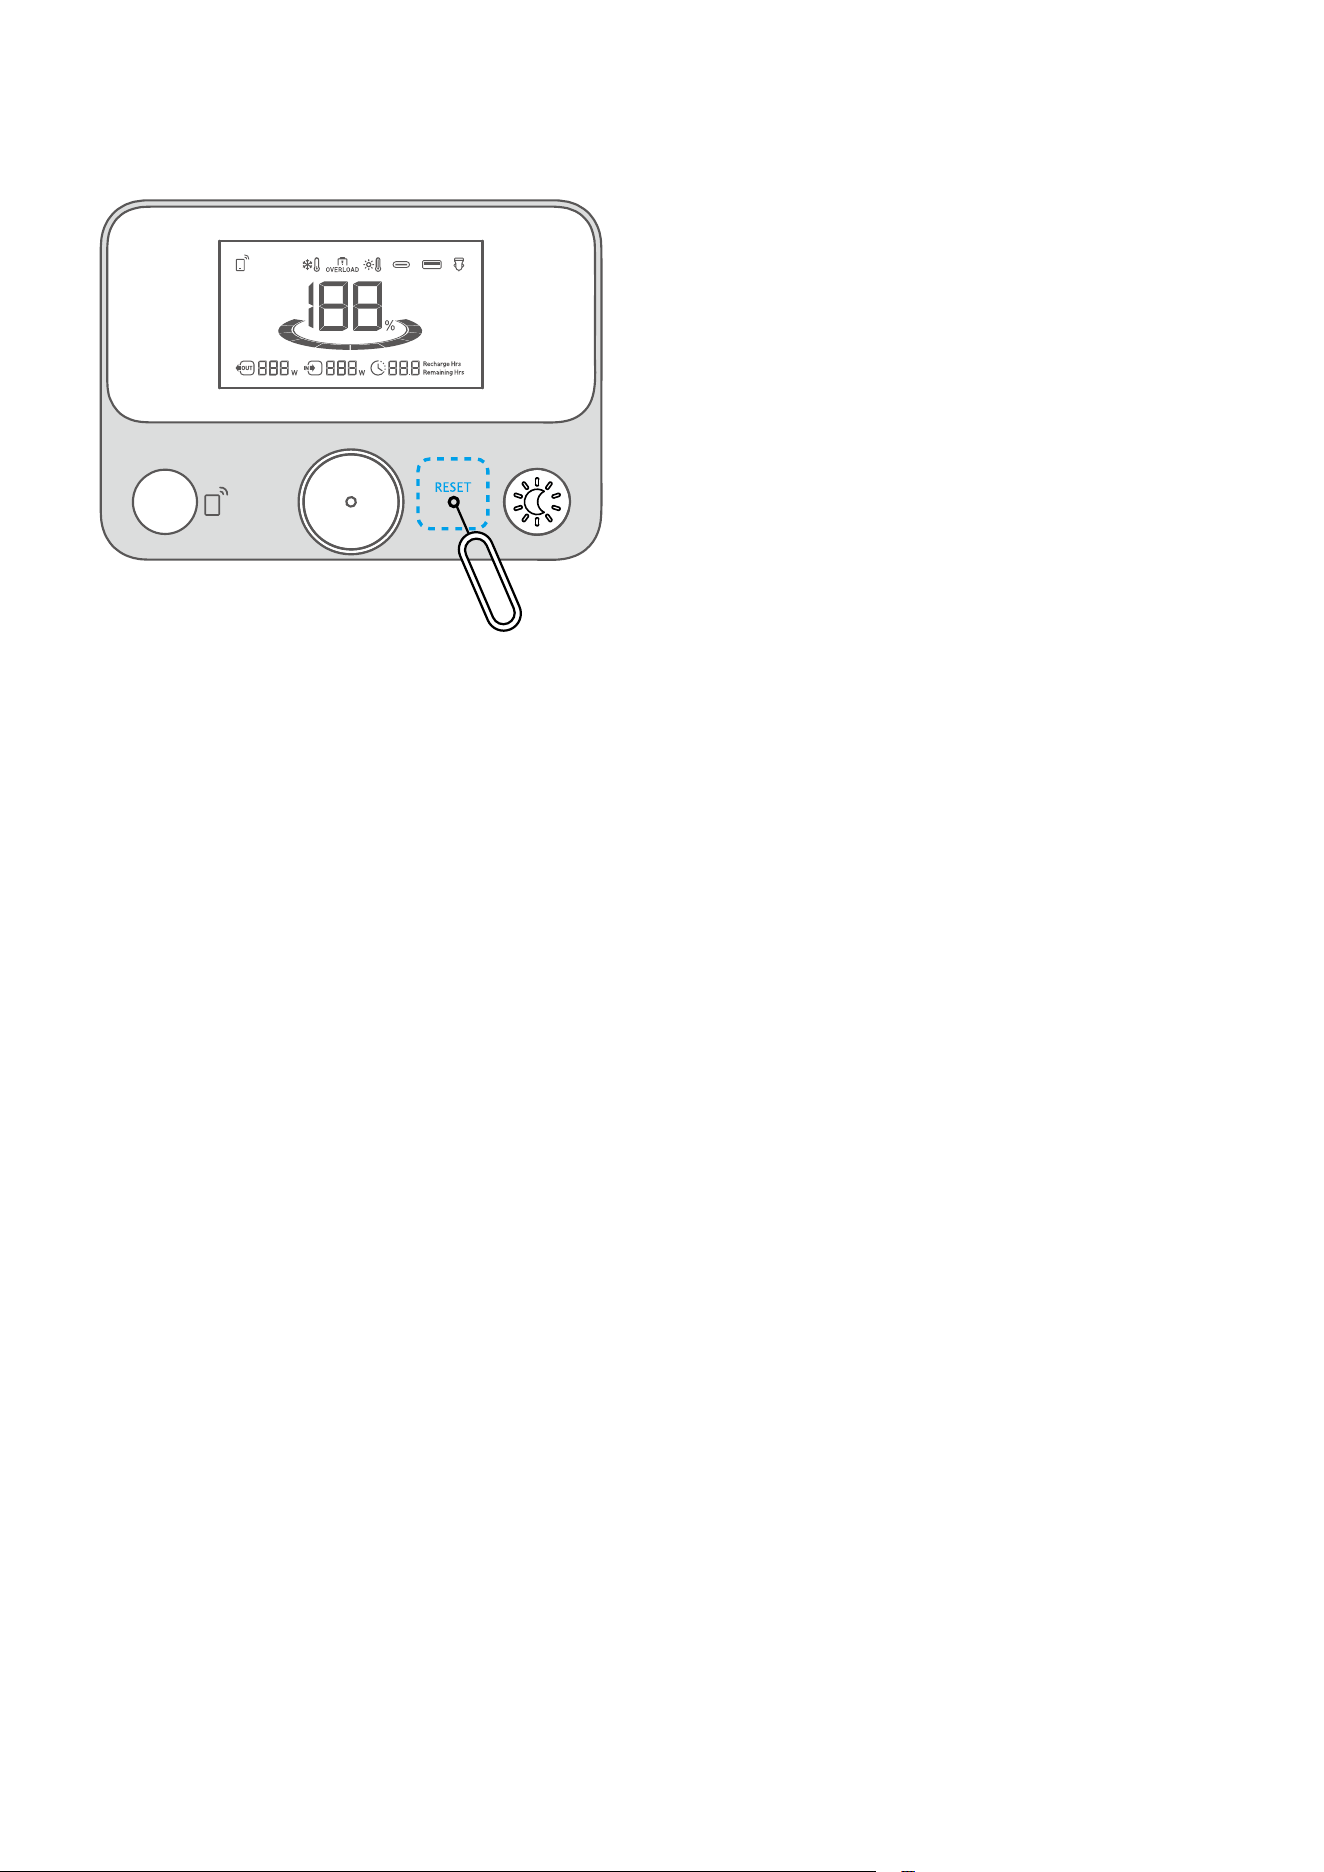
Q4: How do I reset Anker SOLIX C300 DC Portable Power Station?
If your power station isn't working correctly, insert a paper clip or pin into the reset hole for 1 second for a factory reset. If
the power station still doesn't work, please contact support@anker.com.
Q5: Why is the power station not working after it hasn't been used for a long time?
If the power station is stored at a low capacity for a long time, lithium batteries will self-consume power which may lead
to a quick discharge. This often leads to poor conductivity and a reduced battery lifespan that causes the battery not to
work.
Q6: How should I store and maintain the power station?
When storing your portable power station, please make sure that you:
1) Turn o the main power button.
2) Store the power station in a dry and cool environment.
3) Check the remaining battery capacity each week. If the battery level is below 30%, fully charge the power station. Don't
forget to charge it to 100% once every 3 months.
Q7: Does the power station have to be used upright?
Yes, the product needs to be used and stored upright.
Q8: When will the output ports of Anker SOLIX C300 DC Portable Power Station automatically shut down?
The output ports shut down under these two conditions:
1) USB-A and USB-C4 Ports: If there is no input to the power station and the total output current of the connected load is
less than 60mA for two hours, the ports will shut down.
2) USB-C1, C2 and C3 Ports: If there is no input to the power station and the output current of the connected load is less
than 100mA for two hours, the ports will shut down.
Note that the time cannot be changed. To reactivate the ports, unplug the connection cable, then plug it back in.
Q9: Why didn't the Anker SOLIX C300 DC automatically shut down after I set the device timeout to 30 minutes?
Anker SOLIX C300 DC Portable Power Station automatically shuts down under these two conditions:
1) If "Device Timeout" is NOT set to "Never" in the Anker app.
2) If there is no input to the power station and all output ports are o, C300 DC enters sleep mode, then shuts down
according to the set time for device timeout. This timing does not begin when device timeout is set.
To exit sleep mode, please perform the following actions:
1) Charge or discharge C300 DC.
2) Press any button on the power station.
3) Use the Anker app.

Specifications
Cell Capacity 288Wh
Solar Panel Input 11-28V
8.2A Max (100W Max)
USB-C2 Input 9V
3A / 15V
3A / 20V
5A / 28V
5A (140W Max)
USB-C3 Input 9V
3A / 15V
3A / 20V
5A / 28V
5A (140W Max)
Car Charger Output 12V
10A
USB-A Output 5V
2.4A (12W)
USB-C1 Output 5V
3A / 9V
3A / 15V
3A / 20V
5A (100W Max)
USB-C2 Output 5V
3A / 9V
3A / 15V
3A / 20V
5A / 28V
5A (140W Max)
USB-C3 Output 5V
3A / 9V
3A / 15V
3A / 20V
5A / 28V
5A (140W Max)
USB-C4 Output 5V
3A (15W Max)
USB-A and USB-C4 Total Output 5V
4A (20W)
Total Output 300W
Discharging Temperature -20°C-40°C / -4°F-104°F
Charging Temperature 0°C-40°C / 32°F-104°F
Size 12.4×12.0×20.0 cm / 4.88×4.72×7.87 in
Net Weight 2.8 kg / 6.17 lb
USB Power Distribution Table
• Since the total output of USB-A1, USB-A2 and USB-C4 is 20W, the table below treats them as one interface (USB-
A1&A2&C4);
The total output of this product is 300W, please be careful when using multiple interfaces.
1 Port
USB-A1/A2: 12W
USB-C4: 15W
USB-C1: 100W
USB-C2/C3: 140W
Car Charger Output: 120W
2 Ports
USB-C1 + USB-A1&A2&C4: 100W+20W
USB-C2/C3 + USB-A1&A2&C4: 140W+20W
USB-C1 + Car Charger Output: 100W+120W
USB-C2/C3 + Car Charger Output: 140W+120W
USB-C2/C3 + USB-C1: 140W+100W
USB-C2 + USB-C3: 140W+140W

3 Ports
USB-C1 + USB-C2/C3 + USB-A1&A2&C4: 100W+140W+20W
USB-C2 + USB-C3 + USB-A1&A2&C4: 140W+140W+20W
USB-C1 + USB-C2/C3 + Car Charger Output: 100W+100W+120W
USB-C2 + USB-C3 + Car Charger Output: 140W+60W+120W
USB-C1/C2/C3 + USB-A1&A2&C4 + Car Charger Output: 100W/140W/140W + 20W + 120W
USB-C1 + USB-C2 +USB-C3: 30W+100W+140W
4 Ports
USB-C1 + USB-C2/C3 + USB-A1&A2&C4 + Car Charger Output: 30W+100W+20W+120W
USB-C2 + USB-C3 + USB-A1&A2&C4 + Car Charger Output: 30W+100W+20W+120W
USB-C1 + USB-C2 + USB-C3 + USB-A1&A2&C4: 30W + 100W + 140W + 20W
USB-C1 + USB-C2 + USB-C3 + Car Charger Output: 30W + 30W + 100W + 120W
5 Ports USB-C1 + USB-C2 + USB-C3 + USB-A1&A2&C4 + Car Charger Output: 30W+60W+60W+20W+120W