
Table of Contents
What is AXIS Audio Manager Pro? ...................................................................................................................4
What's new? .................................................................................................................................................5
System requirements......................................................................................................................................6
Get started....................................................................................................................................................7
Installation.............................................................................................................................................7
......................................................................................................................................................7
Start the application................................................................................................................................7
Configure the network .............................................................................................................................7
Prepare your devices................................................................................................................................8
Set up your site.....................................................................................................................................10
Activate your license .............................................................................................................................11
Add and organize devices..............................................................................................................................12
Identify a device....................................................................................................................................12
Add users or groups......................................................................................................................................13
Schedule content.........................................................................................................................................14
Schedule announcements.......................................................................................................................14
Schedule music .....................................................................................................................................15
Edit events ...........................................................................................................................................16
Templates.............................................................................................................................................17
Manage templates..........................................................................................................................17
Modify and replace templates..........................................................................................................17
Update templates ...........................................................................................................................17
Use text and strobe......................................................................................................................................18
Visual profiles .......................................................................................................................................18
Set your opening hours.................................................................................................................................19
Paging from the web interface ......................................................................................................................20
Set up paging ..............................................................................................................................................21
Paging with AXIS C6110 Network Paging Console ....................................................................................21
Play an announcement with AXIS C6110 Network Paging Console .............................................................23
Paging with 2N SIP Mic .........................................................................................................................23
Paging with SIP trunk ............................................................................................................................25
Paging with RTP stream .........................................................................................................................26
Set priority for paging............................................................................................................................26
Talkback to an Axis device......................................................................................................................26
Set pre- and post-announcement tones...................................................................................................27
Set volumes ................................................................................................................................................28
Calibrate master volumes.......................................................................................................................28
Create volume controllers ......................................................................................................................28
Set volume levels ..................................................................................................................................29
Control audio with AXIS C8310 Volume Controller....................................................................................29
Monitor your site .........................................................................................................................................31
Event and audit log......................................................................................................................................32
Update AXIS Audio Manager Pro ...................................................................................................................33
Manage your database .................................................................................................................................34
Network diagnostics.....................................................................................................................................35
Integrate with AXIS Camera Station Pro .........................................................................................................36
Migrate to version 5.....................................................................................................................................37
Migrate to version 4.....................................................................................................................................38
API .............................................................................................................................................................40
Security ......................................................................................................................................................41
Certificates...........................................................................................................................................41
SIP.......................................................................................................................................................41
Best practices .......................................................................................................................................42
AXIS Audio Manager Pro
2

IP filtering ............................................................................................................................................42
Need more help?..........................................................................................................................................43
AXIS Audio Manager Pro
3

4
What is AXIS Audio Manager Pro?
With AXIS Audio Manager Pro you can control large and advanced audio installations from a single point. You
can set up zones, audio sources and schedules.
Are you using AXIS Audio Manager Pro 4?
• To upgrade to version 5, see .
Are you using AXIS Audio Manager Pro 3?
• To upgrade to version 4, see .
• For instructions on how to use the product, see AXIS Audio Manager Pro 3 - User Manual.
AXIS Audio Manager Pro


6
System requirements
If you are not using AXIS Audio Manager Pro C7050, then we recommend the following for your server:
• Processor: Intel® Core™ i3
• Memory: 8 GB
• Storage: 128 GB SDD
• Operating system: Microsoft Windows 10, Windows 10 IoT 2016 LTSB, Windows 11, Windows Server
2016, 2019, 2022, 2025
• Virtual Machine Support:
– Platforms: VMware ESXi, Microsoft Hyper-V, and Microsoft Windows Datacenter
– The virtual machine must meet the above specifications and be configured with at least 4 virtual
CPUs (vCPUs).
Recommended browsers for the client:
• Google Chrome
• Microsoft Edge
AXIS Audio Manager Pro
7
Get started
Installation
Install AXIS Audio Manager Pro:
1. Go to axis.com/products/axis-audio-manager-pro.
2. Download and run the installation file.
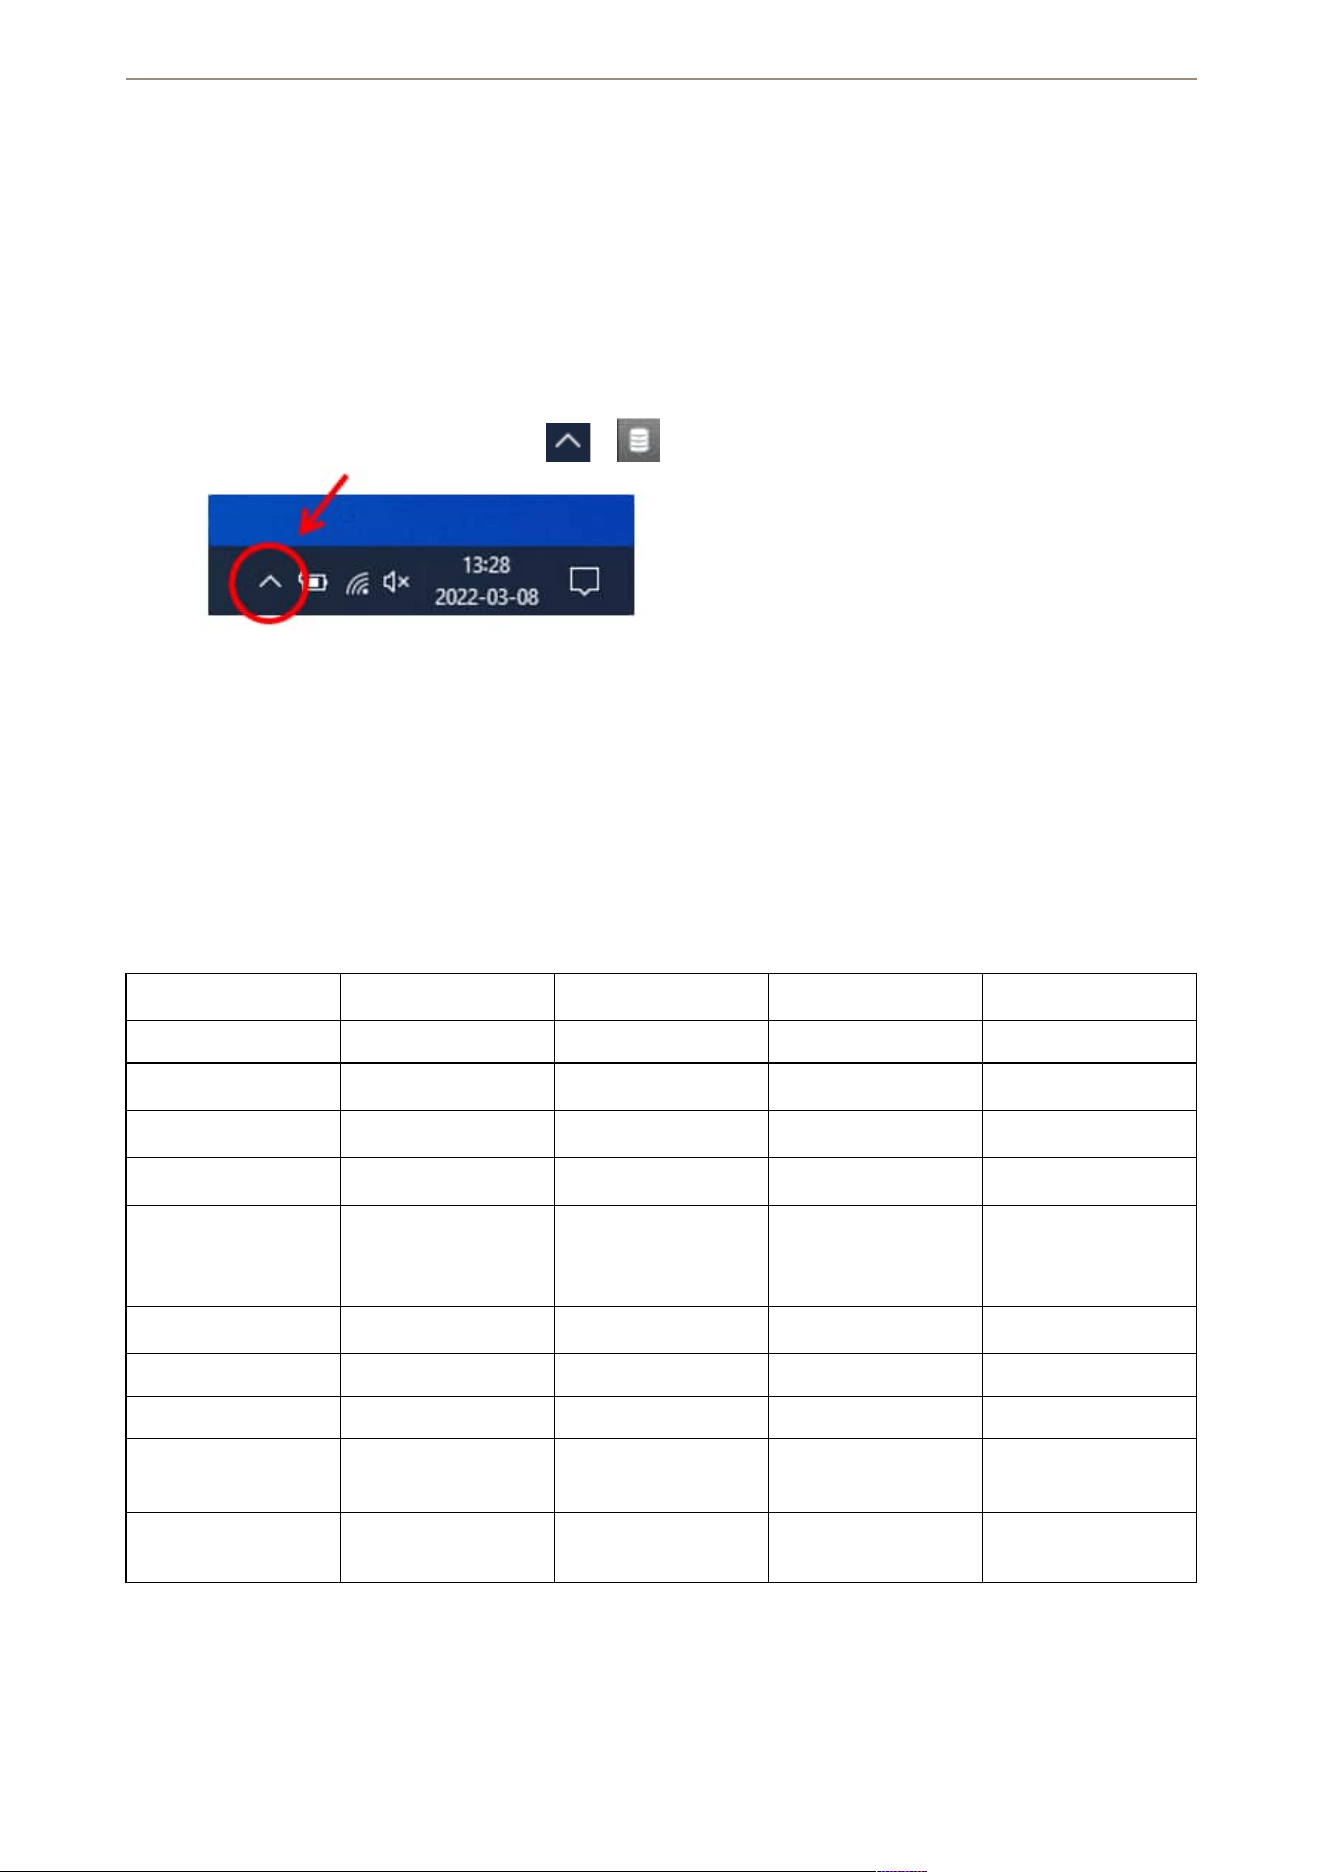
Start the application
1. On the Windows® system tray, click > > Open AXIS Audio Manager Pro Client.
2. Enter password and log in.
Configure the network
All devices must be connected to the same multicast domain as the server that AXIS Audio Manager Pro is
installed on.
Audio streaming between the server and all the devices use multicast. The default range is
239.0.0.0 - 239.0.0.254.
Make sure you have reserved enough bandwidth. The maximum consumption for each multicast stream is 443
kbps.
Port TCP UDP Adjustable Description
443 x x Web UI
1
5433 x x System port
2
6992 x System port
3
6999, 6998 x System port
6999 x System port
(multicast audio
streaming)
7010 x x System port
2
5060 x x x SIP
4
5061 x x SIP TLS
8992 x Internal HTTP proxy
port
30000–31999 x x RTP stream for SIP
calls
1
If the default port is already in use, the user must choose a different port when installing AXIS Audio Manager
Pro.
2
If the default port is already in use, then the next available port will be used.
AXIS Audio Manager Pro

8
3
If the default port is already in use, then the Traceview application for capturing server logs will not be able to
connect to the AXIS Audio Manager Pro server.
4
The default port for the SIP server is 5060. You can choose a different port. If you set up several SIP servers,
you need one port for each server.
Configure the network settings:
1. Go to the AXIS Audio Manager Pro client.
– See
2. If you need to change the multicast range, go to System settings > Audio and streaming and make
the changes.
3. Go to System settings > Network.
4. Under NETWORK INTERFACE, select the same IP address as your server.
AXIS Audio Manager Pro communicates with audio devices over the network. If your server has multiple
network interfaces (for example, one for the corporate LAN and another for the audio network), you
must select the correct interface for audio data. Go to System settings > Network > Network interface
and specify the network interface to use for the following:
– Audio communication between the server and devices
– SIP traffic
Note
If no interface is selected, Windows will choose based on its routing table and interface priority. This may
result in multicast or unicast traffic being sent over the wrong network when multiple interfaces are
available.
5. If you intend to stream content from the web, go to System settings > Proxy and set up your proxy
settings.
Prepare your devices
To watch this video, go to the web version of this document.
Prepare your Axis devices:
1. Run AXIS Device Manager Client.
– To download and install AXIS Device Manager, go to axis.com/products/axis-device-manager.
2. When AXIS Device Manager starts, it will automatically search for devices.
– To start the search manually, click .
– If no devices are found, check your network configuration. See .
– If the application informs you that some devices have an old AXIS OS version, then click the link
to upgrade to the latest version.
– Select the devices you want to add, click Next, and then click Finish.
3. Set a password for the devices:
3.1. Select all your devices and click .
3.2. Enter username and password, and click OK.
4. Install the application files on your devices:
4.1. Select all your devices in the list.
AXIS Audio Manager Pro

9
4.2. Right-click the selection and choose Install Camera Application....
4.3. Browse to this folder on the server:
\Program files\Axis Communications\AXIS Audio Manager Pro\Manager
\Firmware\
4.4. Select the file AXIS_Audio_Manager_Pro_*_mipsisa32r2el.eap and click OK.
This will install the application on the following devices:
– AXIS C8033 Network Audio Bridge
– AXIS C2005 Network Ceiling Speaker
– AXIS C1004-E Network Cabinet Speaker
Note
If you have other types of devices, then you will get an error message, since they use a different application.
This is not a problem. Just close the error message and continue.
The reason we recommend this solution, is that it is simply easier to select all devices than to select only
those that apply to the selected application file.
4.1. Click Next.
4.2. Click No and Next.
4.3. Click Finish.
4.4. Select all your devices again, right-click and choose Install Camera Application....
4.5. Browse to this folder on your computer:
\Program files\Axis Communications\AXIS Audio Manager Pro\Manager
\Firmware\
4.6. Select the file AXIS_Audio_Manager_Pro_*_armv7hf.eap and click OK.
This will install the application on the following devices:
– AXIS C1310–E Network Horn Speaker
– AXIS C1410 Network Mini Speaker
– AXIS C1210-E Network Ceiling Speaker
– AXIS C1211-E Network Ceiling Speaker
– AXIS C1510 Network Ceiling Speaker
– AXIS C1511 Network Ceiling Speaker
– AXIS C1610-VE Network Sound Projector
– AXIS C8110 Network Audio Bridge
– AXIS C8210 Network Audio Amplifier
– AXIS D3110 Connectivity Hub
Note
If you have other types of devices, then you will get an error message, since they use a different application.
This is not a problem. Just close the error message and continue.
The reason we recommend this solution, is that it is simply easier to select all devices than to select only
those that apply to the selected application file.
Note
Are you using one of the devices listed in step 4.10 with AXIS OS 11.x and have problems installing the app?
If so, open the web interface for those devices, go to Apps and make sure Allow root-privileged apps is
turned on. This is particularly important when on-boarding a new device or one that has been reset to
factory default.
4.1. Click Next.
4.2. Click No and Finish.
AXIS Audio Manager Pro

10
4.3. Select all your devices again, right-click and choose Install Camera Application....
4.4. Browse to this folder on your computer:
\Program files\Axis Communications\AXIS Audio Manager Pro\Manager
\Firmware\
4.5. Select the file AXIS_Audio_Manager_Pro_*_aarch64.eap and click OK.
This will install the application on the following devices:
– AXIS D6310 Air Quality Sensor
– AXIS C1710 Network Display Speaker
– AXIS C1720 Network Display Speaker
– AXIS D4200 Network Strobe Speaker
– AXIS D4100-VE MK II Network Strobe Siren (strobe only)
– AXIS XC1311 Explosion-Protected Horn Speaker
– AXIS C1310-E Mk II Network Horn Speaker
– AXIS C1410-E Mk II Network Mini Speaker
– AXIS C1110–E Network Cabinet Speaker
– AXIS C1111-E Network Cabinet Speaker
– AXIS D3110 Mk II Connectivity Hub
4.1. Click Next.
4.2. Click No and Finish.
5. Restart the devices:
5.1. Select all the devices you want to use.
5.2. Right-click the selection and click Restart.
5.3. Click Yes to confirm.
6. Configure the AXIS Audio Manager Pro application on the devices to connect to the server:
6.1. Select all the devices you want to use.
6.2. Right-click the selection and choose Configure Devices > Configure....
6.3. In the search field, type ‘audiomanagerpro’.
6.4. In the Primary server ip address field, enter the IP address of the server that AXIS Audio
Manager Pro is running on.
6.5. Click Next and Finish.
To use a 2N SIP Mic, you need to upgrade to firmware version 1.17.0 or later.
For more information, see the 2N SIP Mic user manual.
Set up your site
Once you have configured the network and prepared your devices, you are ready to set up a site.
Suggested workflow:
1.
2.
3.
4.
5.
AXIS Audio Manager Pro

11
Activate your license
You can use AXIS Audio Manager Pro in trial mode for 90 days. After the free trial period, you need to register
and license the server. You can purchase licenses from an Axis reseller.
Activate your license:
1. In AXIS Audio Manager Pro, go to System settings > License.
2. Click Export system file.
This generates and downloads an .alf file.
3. Go to AXIS License Manager lm.mysystems.axis.com and log in with your MyAxis account
4. Click Upload system file and select the system file to register your AXIS Audio Manager Pro server.
5. Follow the wizard to register the server.
6. Depending on your license model and system size, you may need to redeem and allocate device licenses:
– Subscription license: Redeem licenses under Product Wallet and allocate them to your server
under Product licensing.
– Tied-to-hardware license: If you need more devices than included with the hardware, purchase
and redeem expansion licenses under Product Wallet and allocate them to your server under
Product licensing.
– Legacy AXIS Audio Manager Pro 4 license: When upgrading from version 4, the license includes
unlimited devices. No additional licenses are required.
7. When your server is registered and licensed, go to the System setup tab and download the license file.
This generates and downloads an .adf file.
8. Import the license file into AXIS Audio Manager Pro.
Now your server is licensed.
Note
If you have bought an AXIS Audio Manager Pro C7050 or perpetual software license for AXIS Audio Manager
Pro 4, you can update and continue using AXIS Audio Manager Pro. You need to follow the above steps to
register your server.
For more information about licensing options, visit:
help.axis.com/axis-license-guide
axis.com/axis-subscription
AXIS Audio Manager Pro

12
Add and organize devices
Before you can add a device, make sure it is prepared for use. See .
A device can only be used by the system if it belongs to a physical zone. Physical zones can be created in a
hierarchy. If you click a zone and create a new zone, then the new zone will become a sub-zone. The hierarchy
can be up to ten levels deep.
Before you create a zone structure, you should think about how you want to use your audio system. For
instance, in a school you might want to create one zone called “All classrooms”. In this zone you could create
sub-zones for each classroom. This will give you the possibility to adjust the volume or play content in all the
classrooms simultaneously by working only with the “All classrooms” zone.
Note
By default all audio is streamed with multicast from the server to the devices. If you need to run unicast in
parts of your system you can disable multicast (go to Physical zones and click ). Note that unicast
requires more resources from the server and more network capacity.
1. Go to Physical zones.
2. Under ZONES, click a location in the tree structure.
3. Click to create a new physical zone.
4. To add a device to a physical zone, select its location in the tree structure and click + DEVICE.
Identify a device
You can make a device play a test tone, to make it easy for you to locate the speaker.
1. Go to Physical zones.
2. Click for the device and select how long time the test tone will play.
AXIS Audio Manager Pro

13
Add users or groups
You can add users or groups in AXIS Audio Manager Pro, and manage what they can access.
Before you start, you need to add users or groups to Microsoft Windows®, or to an Active Directory (AD). The
way you add a user or group in Windows® can vary depending on which version of Windows® you use. Follow
the instructions on Microsoft's site. If you use an Active Directory domain network, consult your network
administrator.
Add users or groups in AXIS Audio Manager Pro
1. Go to User management.
2. Click + USER OR GROUP.
You can see the available users and groups from the Windows or AD user list.
3. Select a user or group from the list, or select several at the same time.
4. Assign one or more roles to the selected user or group. There are three roles to choose from:
– Administrator: Can access all functionality, including configurations.
– Content manager: Can access scheduling and manage audio files.
– Playback operator: Can access volume control and select the source for music.
5. Click ADD to assign the role to the selected user or group.
Note
Administrators of the computer that runs AXIS Audio Manager Pro automatically gets administrator
privileges to AXIS Audio Manager Pro. You can’t change or remove the permissions for administrators.
AXIS Audio Manager Pro

14
Schedule content
Scheduling & destinations is where you plan your audio content.
You create a destination to define where to play your audio content. You can add multiple physical zones as
well as individual speakers.
Once you have created your destination, you can add schedules for planning your announcements and music. If
you intend to do paging, you add paging sources to the destination.
Schedule announcements
Example:
In a school, you want a bell to ring in the whole school building at 8:30 and 16:30, every weekday for the rest of
the semester.
1. Go to Announcements.
2. To add sound files to the library, click + AUDIO FILES.
3. To create a playlist, click under PLAYLISTS.
4. Create a destination:
4.1. Go to Scheduling & destinations.
4.2. Under DESTINATIONS, click .
4.3. Name the destination and click CREATE.
5. Create an event:
– Click + EVENT.
– Name the event.
– Under Source type, select Announcement.
– Select what to play:
– Single file — select an audio file from the library.
– Playlist — select a playlist.
– Choose a color for the event.
– Under Time scheduling, select at what time the announcement should be played.
To add an occurrence for the announcement, click + OCCURRENCE.
– Choose a priority for the event.
Select Play later in case of conflict to queue the event in case of conflict. If another event with
higher priority is played at the same time, that event will be played first and the event you
create now will be played afterwards. If you don’t select this checkbox, only the event with
higher priority will be played.
– Under Range of recurrence, select the date when the announcement will be played first.
– Under Repeat, select how often the announcement will be repeated.
– Click SAVE.
– Click to close the schedule view.
6. Go to TARGETS.
7. Select where the announcement will be played.
If you want to use an external output stream, you can set up a new stream under Physical zones.
AXIS Audio Manager Pro

15
Schedule music
First define the content you want to play, by setting up a playlist, web stream, device source or server source.
Then schedule when and where to play the content.
If you want to use a web stream or RTP stream, make sure you have set up your proxy. See .
Create a playlist from audio files:
1. To add audio files to the server, go to Music > Library.
2. You can create folders to organize your audio files.
To create a folder, click CREATE FOLDER.
3. To add an audio file to the library, click + AUDIO FILES.
– Supported formats: mp3, mp4, mpeg, aac, wma, ogg, flac, wav
4. Click PLAYLISTS > .
5. Name your playlist and click CREATE.
6. To add a file from the library, click + FROM LIBRARY.
7. To add a file from the web, click > Add files from URL.
– Supported formats: mp3, mp4, mpeg, aac, wma, ogg, flac, wav
Play a web stream:
1. Go to Music > WEB STREAMS.
2. Click .
3. Under Web stream type, select Internet radio.
4. Name your web stream.
5. Enter a URL for the web stream.
– Supported formats: M3U, M3U8, PLS, ASX
6. Click CREATE.
7. Adjust the stream buffer size.
8. Select an audio quality.
9. Click SAVE.
Play an RTP stream:
1. Go to Music > WEB STREAMS.
2. Click .
3. Under Web stream type, select RTP stream.
4. Name your web stream.
5. Enter a listening port.
6. Click CREATE.
7. Configure the codec settings to match the format of the incoming RTP stream.
8. If the stream source uses a multicast address, turn on Multicast IP address and enter the multicast IP.
9. To restrict access, turn on Source IP address and enter an IP address from which the server will accept
the stream.
10. Click SAVE.
AXIS Audio Manager Pro

16
Stream music from a device using an audio bridge:
1. Connect a device, such as a mobile phone, to the line-in of an audio bridge or amplifier in your system.
2. Go to the device interface of the audio bridge or amplifier by entering the IP address of the device in
your web browser.
3. Go to Device settings > General and select Full duplex or Simplex - microphone only under Audio
mode.
4. Go to Input to adjust the input gain.
5. In AXIS Audio Manager Pro, go to Music > DEVICE SOURCES to see your device sources.
Stream music from audio devices in your Windows® operating system:
1. Go to Music > SERVER SOURCES.
2. Click .
3. Name the source.
4. Under Audio device, select the input device you want to use. Available devices are detected
automatically.
5. Click CREATE.
Schedule your content:
1. Go to Scheduling & destinations.
2. Under DESTINATIONS, click .
3. Name the destination and click CREATE.
4. Click + EVENT.
5. Name the schedule.
6. Under Source type, select Music.
7. Under Select source, select your source (a playlist, web stream, device source or server source).
You can select several sources and switch between them on the dashboard. For more information, see .
8. Define when to play the music and click SAVE.
9. Click to exit the schedule view.
10. Go to TARGETS and define where to play the music.
If you want to use an external output stream, you can set up a new stream under Physical zones.
Edit events
Music and announcements will appear as events in your content schedule.
Edit or delete an event or event series:
1. Click the event in the schedule.
2. Click EDIT or DELETE.
If the event is part of a series you can chose if you want to edit or delete the single event or the series.
Note
If you edit a single event, then the changes will be lost if you edit the series that the event belongs to.
AXIS Audio Manager Pro

17
Templates
Templates provide a convenient way to create and manage schedules efficiently. A template serves as a
predefined schedule for a single day, specifying what should play and when. By using templates, you can quickly
apply consistent schedules across multiple days without having to configure each day individually.
Manage templates
You can create templates tailored to different needs. For example, you might define:
• "Normal weekday" for standard workdays.
• "Weekend" for Saturdays and Sundays.
• "Day off" for holidays or special non-working days.
Once a template is created, it can be applied to any number of days in a schedule for a destination. For example,
you can apply the "Normal weekday" template to all Mondays through Fridays for the entire year, ensuring
consistency without having to set up each day manually.
Create and assign a template:
1. Go to Scheduling & Destinations.
2. Under TEMPLATES, click to create a new template.
3. Choose whether to create a Music or Announcement template.
4. Click + EVENT to add events to the template, and fill in the required details.
5. Once your template is complete, assign it to a destination's schedule. Either click APPLY TO
DESTINATION from within the template, or go to the destination and click APPLY TEMPLATE.
Modify and replace templates
If you need to adjust a scheduled day, you can easily swap templates. Simply remove the currently applied
template and replace it with another. For instance, if a regular workday becomes a holiday, you can replace the
"Normal weekday" template with the "Day off" template. This flexibility allows you to quickly adapt the
schedule as needed without manually configuring details for each affected day.
Update templates
One of the key benefits of using templates is their dynamic nature. If you make changes to a template, those
changes will automatically apply to all instances where the template is used. This means you can update an
entire schedule effortlessly—there’s no need to modify each affected day individually.
A single template can be reused across multiple schedules or locations, making it a powerful tool for
maintaining consistency. However, it is a good practice to create separate templates for different use cases.
Since any change to a template affects all instances where it is applied, having distinct templates for different
scenarios ensures greater flexibility and avoids unintended schedule changes.
Note
Each destination can have only one music template and one announcement template assigned per day. If
your use case requires multiple schedules and templates for the same target area, you can create multiple
destinations that play to the same devices.
AXIS Audio Manager Pro

18
Use text and strobe
Audio alone may not be sufficient to capture attention in noisy environments or for individuals with hearing
impairments. To enhance communication, you can supplement audio messages with visual signals such as strobe
light and text display.
Visual profiles
Visual signals are used to reinforce audio messages. These signals are defined through Visual Profiles, which let
you configure how text and strobe lights behave during announcements and paging. You can create multiple
visual profiles for different message types—for example, a subtle pattern for routine announcements and a more
attention-grabbing pattern for emergency alerts that need to capture immediate attention.
As an administrator, you can configure visual profiles under Visual profiles. Each profile includes the following
settings:
• Text settings:
– Color
– Background color
– Text layout (one-, two- or three-line)
– Scroll speed
– Duration
– Default text message
• Light settings:
– Light pattern
– Color
– Speed
– Brightness
– Duration
You can configure the default visual profiles for announcements and live paging under System Settings > Text,
strobe, and displays.
Note
Visual profiles (text and strobe light patterns) are not used during music playback.
The default visual profile can be overridden for individual audio messages. You can select a different visual
profile, customize the text message, or both—depending on the situation.
This applies to the following cases:
• Scheduled announcements
• Paging from the web paging interface
• Individual paging configurations for one-way or two-way SIP calls
AXIS Audio Manager Pro

19
Set your opening hours
Opening hours are useful for relative scheduling.
Example:
You want a bell to play an announcement every school day ten minutes before the school closes.
Set up the announcement to play ten minutes before closing time. This way the bell will always ring at the correct time even if you
change the closing time, or if the closing time vary from day to day.
1. Go to Opening hours.
2. Set the opening hours of your site and click SAVE.
AXIS Audio Manager Pro

20
Paging from the web interface
From the web interface you can send live or pre-recorded audio messages to your audio site. This feature
enables real-time communication and ensures that important announcements reach the intended audience
efficiently.
You can access the interface through a web browser and use your PC or mobile device’s microphone to make live
announcements. Messages can be broadcasted to the entire site or to specific zones. The interface also supports
two-way communication, allowing direct calls to individual devices for interactive conversations.
To use live announcements and calls, make sure your browser has permission to access the microphone and
speakers when prompted.
By default, playback initiated from the paging interface is assigned HIGH priority. You can review how this
priority interacts with other content under Scheduling & destinations > CONTENT PRIORITIES.
AXIS Audio Manager Pro

21
Set up paging
Before you set up paging, you should prepare the destinations you want to use. A destination contains the zones
and devices that the paging will be sent to.
If you want to page an announcement, you must first create a playlist containing one or several audio files.
• For instructions about how to create destinations and playlists, see .
Paging with AXIS C6110 Network Paging Console
AXIS C6110 is a SIP based device that you can use to send live announcements and prerecorded audio files to
entire sites, or to specific areas. This example explains how to set up AXIS C6110 to page live messages.
1. Set up a SIP server:
1.1. Go to SIP settings.
1.2. Click + SERVER.
1.3. Name the SIP server.
1.4. Enter the domain name or IP address of your server.
1.5. Click CREATE.
2. Set up a client:
2.1. Go to SIP settings.
2.2. Click for the server you just created.
2.3. Go to CLIENTS and click + CLIENT.
2.4. Enter a name, user id and the credentials you want to use for the client.
3. Create a SIP account:
3.1. Open the web interface of your AXIS C6110 Network Paging Console.
3.2. Go to Communication > SIP > Accounts.
3.3. Click + Add account.
3.4. Under Name, User ID, Password and Authentication ID, enter the details you used in step 2.4.
3.5. Select Registered.
3.6. Under Domain, enter the address (IP or domain) for the server.
3.7. Click Save.
Note
When you have connected AXIS C6110 to AXIS Audio Manager Pro as a SIP client, you can find it in the list
under Paging > Paging consoles.
4. Check that your devices are registered on the SIP server:
4.1. Go to Communication > SIP > Accounts.
4.2. Check that the status for the server is OK.
4.3. Go to AXIS Audio Manager Pro > SIP Settings.
4.4. Click for the server you just created.
4.5. Go to CLIENTS.
4.6. Check that the status is REGISTERED for the client.
AXIS Audio Manager Pro

22
Note
If the registration didn't work, check your network settings and SIP account credentials.
5. Set up a paging source for one-way paging:
5.1. Go to Paging sources > PAGING SOURCES.
5.2. Click + SOURCE.
5.3. Name the source.
5.4. Enter a call number.
5.5. Select your destination.
6. Set up a paging source for two-way talkback:
6.1. Go to Paging sources > TALKBACK DEVICES.
6.2. Click + TALKBACK DEVICE.
6.3. Enter a name and a SIP call number.
6.4. To select your talkback device, click SELECT DEVICE.
6.5. Under Device source configuration, select a source type, input gain and an audio profile.
6.6. Select a priority.
6.7. Click SAVE.
7. Create a contact:
7.1. Open the web interface of your AXIS C6110 Network Paging Console.
7.2. Go to Contact list > Contacts.
7.3. Click Add contact.
7.4. Select Device.
7.5. Enter name and location.
7.6. Select SIP.
7.7. Under SIP Address, enter the call number you created for the paging source or talkback device.
7.8. Under SIP Account, select the SIP account you created in step 3.
7.9. Click Save.
8. Configure a button on your AXIS C6110 Network Paging Console:
8.1. Open the web interface of your AXIS C6110 Network Paging Console.
8.2. Go to the location where you want to add the button.
8.3. Click a white button.
8.4. Select Action.
8.5. Select Create a new action.
8.6. Under Action, select Call contact.
Note
Select Page contact if you want to set the pre- and post-announcements for one-way paging on AXIS C6110
Network Paging Console.
8.7. Select the contact you created in step 7.
8.8. Click Save.
9. Start paging a live message:
9.1. Press the configured button on your AXIS C6110 Network Paging Console.
9.2. Start speaking.
AXIS Audio Manager Pro

23
9.3. To stop paging, press Hang up.
Play an announcement with AXIS C6110 Network Paging Console
1. Follow steps 1–7 under .
2. Configure a button on your AXIS C6110 Network Paging Console:
2.1. Open the web interface of your AXIS C6110 Network Paging Console.
2.2. Go to the location where you want to add the button.
2.3. Click a white button.
2.4. Select Action.
2.5. Select Create a new action.
2.6. Under Action, select Announcement.
2.7. Under Label, enter a name for the button.
2.8. Select a contact.
2.9. Under Announcement, select an audio clip from the library of your AXIS C6110 Network Paging
Console.
2.10. Optionally, add pre- and post-announcements.
2.11. Click Save.
Paging with 2N SIP Mic
1. Set up a SIP server:
1.1. Go to SIP settings.
1.2. Click + SERVER.
1.3. Name the SIP server.
1.4. Enter the domain name or IP address of your server.
1.5. Click CREATE.
2. Configure your 2N SIP Mic:
2.1. Click for the SIP server.
2.2. Go to CLIENTS.
2.3. Click + CLIENT.
2.4. Name the client.
2.5. Enter a user ID.
2.6. Enter credentials for authentication.
2.7. Click CREATE.
2.8. Go to the 2N SIP Mic interface.
– The interface is reached by entering the IP address for the mic in a web browser.
2.1. Go to VoIP > SIP Proxy account.
2.2. Under Caller ID, enter the user ID you used for the client.
2.3. Turn on Use SIP account.
2.4. Under SIP Proxy address, enter the server IP address or domain name.
2.5. Turn on Use registration.
2.6. Under Registration server address, enter the server IP address or domain name.
AXIS Audio Manager Pro

24
2.7. Enter the credentials you used for authentication in your SIP client.
2.8. Click APPLY.
3. To configure an Axis SIP device:
Note
If you have an Axis SIP device, such as an Axis intercom device, then you need to set up a SIP client for the
device.
3.1. Go to SIP settings.
3.2. Click for the server you just created.
3.3. Go to CLIENTS and click + CLIENT.
3.4. Name the client, enter a call number under User ID and enter the credentials.
3.5. Go to the device interface of the Axis device.
3.6. Go to System > SIP > SIP settings.
3.7. Click + ACCOUNT.
3.8. Under User ID, enter the call number.
3.9. Under Domain, enter the SIP proxy address.
3.10. Click SAVE.
4. Check that your devices are registered on the SIP server:
4.1. In the 2N SIP Mic interface, go to System status and check that it says Registered under SIP
Proxy line status.
4.2. Return to AXIS Audio Manager Pro.
4.3. Press F5 to refresh the browser.
4.4. Go to SIP settings and click the SIP server.
4.5. Go to CLIENTS.
4.6. Check the status under REGISTRATION INFO.
Note
If the registration didn't work, check your network settings and SIP account credentials.
5. Create a destination.
5.1. Go to Scheduling & destinations.
5.2. Click .
5.3. Enter a destination name and click CREATE.
6. Set up a paging source to define where your paging will be played:
6.1. Go to Paging sources > PAGING SOURCES.
6.2. Click + SOURCE.
6.3. Name the source.
6.4. Enter a call number.
6.5. Select your destination.
7. Configure a button on the 2N SIP Mic for paging a live callout:
7.1. Go to Paging sources > 2N SIP MIC.
AXIS Audio Manager Pro

25
7.2. Click for the mic.
7.3. Turn on the button you want to use for paging.
7.4. Enter a name.
7.5. Select Paging as action.
7.6. Select your paging source.
7.7. Click SAVE.
8. Configure a button on the 2N SIP Mic for paging an announcement:
8.1. Go to Paging sources > 2N SIP MIC.
8.2. Click for the mic.
8.3. Turn on the button you want to use for paging.
8.4. Enter a name.
8.5. Select Play announcement as action.
8.6. Select a destination.
8.7. Select a playlist.
8.8. Select a priority.
9. Start paging a live message:
9.1. Press the configured button on the 2N SIP Mic.
9.2. Start speaking.
9.3. To stop paging, press the same button again.
10. Start paging an announcement:
10.1. Press the configured button on the 2N SIP Mic. The playlist is played once.
Paging with SIP trunk
You can page by calling a number that is redirected by a PBX to AXIS Audio Manager Pro, which will forward the
audio to a destination.
Before you start, you need to have a configured PBX environment, such as Cisco. In AXIS Audio Manager Pro,
you must have created a destination that the audio will be sent to. For more information about destinations, see
.
1. Add a SIP server:
1.1. Go to SIP settings.
1.2. Click + SERVER.
1.3. Name the SIP server.
1.4. Enter the domain name or IP address or your server.
1.5. Enter port number.
1.6. Click CREATE.
2. Add a SIP trunk to the SIP server:
2.1. Click the pen icon for your SIP server.
2.2. Go to TRUNKS.
2.3. Click + TRUNK.
2.4. Name the SIP trunk.
AXIS Audio Manager Pro

26
2.5. Enter the domain name or IP address of your PBX as remote address.
2.6. Enter the SIP port used in the PBX as remote port.
2.7. Select a transport type depending on your network requirements.
2.8. If the PBX requires identification, enter the credentials.
Note
If your PBX doesn’t require identification, then go to SIP settings > ADVANCED to disable it.
2.9. If your PBX server requires registration, select Use registration and enter the details.
2.10. Click CREATE.
3. Add a paging source:
3.1. Go to Paging sources.
3.2. Click + SOURCE.
3.3. Name the paging source.
3.4. Enter a call number that corresponds to the route pattern set in the PBX.
3.5. Select a destination.
3.6. Click Save.
Paging with RTP stream
To page from a third-party device that provides an RTP stream:
1. Go to Paging sources > RTP SOURCES.
2. Click + SOURCE.
3. Name the source.
4. Specify the listening port on which the server will receive the RTP stream
5. Configure the codec settings to match the format of the incoming RTP stream.
6. If the stream source uses a multicast address, turn on Multicast IP address and enter the multicast IP.
7. To restrict access, turn on Source IP address and specify an IP address from which the server will accept
the stream
8. Select a destination.
9. Click SAVE.
Set priority for paging
If you are paging to several destinations at the same time, then the one with the highest priority will be used.
Change the priority order of your destinations:
1. Go to Scheduling & destinations.
2. Under CONTENT PRIORITIES, click Paging.
3. Drag and drop the destinations to change their priority.
Talkback to an Axis device
It is possible to call from a SIP device to an Axis device, so that audio is communicated in both direction.
Talkback can only be used with one device at a time.
Requirements:
AXIS Audio Manager Pro

27
• A SIP device configured to your SIP server (see )
• An Axis device that has both a microphone and a speaker
Set up a talkback device:
1. Go to Paging sources > TALKBACK DEVICES.
2. Click + TALKBACK DEVICE.
3. Enter a name and a SIP call number.
4. To select your talkback device, click SELECT DEVICE.
5. Under Device source configuration, select a source type, input gain and an audio profile.
6. Select a priority.
7. Click SAVE.
To initiate talkback, call the SIP number of the talkback device from your SIP device.
Set pre- and post-announcement tones
You can configure pre- and post-announcement tones to draw more attention to your live announcements. Use
the tones that are available in the Tones folder in the Announcement library, or upload your own audio files.
• To configure default pre- and post-announcement tones, go to System settings > Scheduling and
content.
• To override your default pre- and post-announcement tones for individual paging sources, go to the
specific source under Paging.
AXIS Audio Manager Pro

28
Set volumes
Calibrate master volumes
The system has a master volume for each content type. By default, music is set to a lower volume than other
content types, to make them sound louder as they are usually more important.
You can adjust the volumes for individual speakers as well as groups of speakers by adjusting the volume for the
physical zones.
Example:
In a school you have a physical zone called All classrooms. Inside this physical zone, you have the physical
zones Classroom 1, Classroom 2 and Classroom 3.
If you adjust the volume for All classrooms, then this will affect all the speakers located in all the
classrooms.
If you adjust the volume for Classroom 1, then only the speakers in that classroom will be affected.
The resulting volume for each speaker will be the sum of the following:
• The maximum volume of the speaker (this is different for different products)
• The set volume for the individual speaker
• The sum of all the volumes set for the zones that the speaker belongs to
• The master volume for the content type
If the final sum of all volumes exceed the maximum volume of the speaker, then the maximum volume will be
used.
1. Go to Volume calibration > Master site calibration.
2. Set the master volume for each content type.
3. Play a content type and listen to the sound. Adjust the volume to a suitable level.
4. Click the zones and calibrate the volume for each zone.
– Adjust the volumes of the physical zones by starting at the top of the hierarchy and then further
down in the sub-zones.
5. To adjust the volume for an individual speaker:
5.1. Go to the device interface by entering the IP address of the device in a web browser.
5.2. Go to Audio > Device settings and adjust the gain.
Create volume controllers
A volume controller offsets the volume relative to the calibrated volume. You can select what content types and
what parts of the site that will be affected by the volume controller.
Example:
In a school the calibrated music volume should be used in all rooms, but in the cafeteria it should be possible to
manually adjust the background music volume to compensate for the higher noise level when the number of
people increases during lunch hour.
To solve this, you can create a volume controller named “Music in cafeteria” and assign it to the physical zone
“Cafeteria”. When adjusting the volume for this volume controller, only the music volume in the cafeteria will be
affected.
Create a volume controller:
1. Go to Volume controllers.
2. Click + CONTROLLER.
3. Enter a name.
AXIS Audio Manager Pro

29
4. Select what zones and devices the volume controller should affect:
– To use physical zones as target, click + ZONE.
– To use individual devices as target, click + DEVICE.
5. Select targets and click SAVE.
6. Under Content type, select what types of content that the volume controller will control.
7. Under Volume settings, select the limitations for how much the volume can be adjusted.
8. Click SAVE.
Set volume levels
To change volumes temporarily, go to Volumes.
If this page is empty, you need to create one or several volume controllers. For more information, see .
Adjust the volume for a volume controller:
• Click the speaker icon to mute or unmute the sound.
• Adjust the slider to select an offset value relative to the calibrated volume.
• Indicates what content types this volume controller affetcs.
• Click to reset to default values or to show more detailed information about the volume controller.
Control audio with AXIS C8310 Volume Controller
The numbered buttons on the AXIS C8310 Volume Controller are used for selecting music source. The selected
music source will play in all the targeted zones. The mute and volume buttons only affect the physical zone that
the AXIS C8310 Volume Controller is assigned to.
Before you start:
• Make sure your AXIS Audio Manager Pro has version 4.4.
• Connect your AXIS C8310 Volume Controller to the I/O port of any device that belongs to your site.
– The host device must run AXIS OS version 11.6 or later.
– It might take up to a minute before your AXIS C8310 Volume Controller is detected by
AXIS Audio Manager Pro.
1. Create a volume controller:
1.1. Go to Volume controllers.
1.2. Click + CONTROLLER.
1.3. Enter a name.
1.4. Select what zones and devices the volume controller should affect:
– To use physical zones as target, click + ZONE.
– To use individual devices as target, click + DEVICE.
1.1. Select targets and click SAVE.
1.2. Under Content type, select what types of content that the volume controller will control.
1.3. Under Volume settings, select the limitations for how much the AXIS C8310 Volume Controller
can adjust the volume.
1.4. Click SAVE.
2. Assign your AXIS C8310 Volume Controller to a volume controller and to a destination:
2.1. Go to Accessories.
2.2. Under VOLUME CONTROLLER, click ASSIGN for your AXIS C8310 Volume Controller.
AXIS Audio Manager Pro

30
2.3. Click ASSIGN for a target.
2.4. Under DESTINATION, click ASSIGN for your AXIS C8310 Volume Controller.
2.5. Click ASSIGN for a target.
3. Create a music event:
3.1. Go to Scheduling & destinations.
3.2. Click CALENDAR.
3.3. Click + EVENT.
3.4. Under Sources, select Music.
3.5. Click + SOURCE.
3.6. Choose a source to add.
Note
The first three sources of the currently playing event in the assigned destination will correspond to button 1,
2 and 3 on your AXIS C8310 Volume Controller.
3.7. Under Start of event, select how you want the music to start:
– Start music automatically: Music will start to play automatically at the beginning of
the scheduled time interval.
– Start music manually: In this case the scheduled time works as an interval where
playing is allowed. Music will not play until you actively start it, either by pressing a
number button on your AXIS C8310 or by starting the music from the dashboard.
3.1. For the rest, see chapter .
3.2. Click SAVE.
AXIS Audio Manager Pro

31
Monitor your site
To monitor your site status, go to DASHBOARD.
If a new version of the application is available, a message will appear at the top of the dashboard. To learn more,
click MORE INFORMATION.
Under Health monitoring you can see how many devices that are online, and if any of them have stopped
working. Click a device to investigate.
Under Agenda you can see what is currently playing and find both previous and upcoming events. When an
event is playing you can start or stop the event under STATUS. If the event contains several sources, then you
can switch sources under ACTIONS.
AXIS Audio Manager Pro

32
Event and audit log
The event and audit log provides a detailed record of all activities within your audio system. This log helps you
track changes, monitor system behavior, and troubleshoot issues effectively.
The log captures a wide range of events, including:
• Playback history – What played, where, and when.
• Schedule modifications – Who made changes and when.
• Device status updates – Information on devices going offline or coming back online.
• Volume adjustments – When and where volume changes occurred.
• Configuration updates – Details of system setting modifications.
• User activity – Who logged in and out of the system.
• Paging and SIP calls – Records of paging events and SIP-based communications.
• And much more...
You can search the log history for specific events, making it easy to locate relevant information when needed.
Additionally, logs can be exported in CSV format for external storage or further analysis.
The system retains the last 100,000 log entries. When the limit is reached, older entries are automatically
removed to make space for new ones, ensuring continuous logging without manual intervention.
AXIS Audio Manager Pro

33
Update AXIS Audio Manager Pro
To keep your server secure and up-to-date, we recommend that you update AXIS Audio Manager Pro to the
latest version.
If you’re connected to the internet, you will get notifications when new versions are available in the dashboard,
or if you go to System settings > Updates.
1. If your server is connected to the internet, go to the Windows® system tray and click > >
Install update.
2. If your server isn’t connected to the internet, download the installation file from axis.com/products/axis-
audio-manager-pro and run it on your server.
3. Follow the setup assistant.
4. Wait for the update to finish. When it’s complete, the server will automatically restart.
5. Check if any of your devices requires an AXIS OS upgrade.
AXIS Audio Manager Pro

34
Manage your database
If you want to reinstall or transfer your system, you can backup and restore your database. The backup will
include all your configurations, but not your files.
• On the Windows® system tray, click > > Backup database or Restore database.
You can also clear your database. All configurations will be removed, but your files will remain.
• On the Windows® system tray, click > > Clean and reinitialize database.
AXIS Audio Manager Pro

35
Network diagnostics
Network diagnostics help evaluate the communication status of devices across your site. This feature enables
you to identify network issues such as multicast availability, network latency, and packet loss, ensuring smooth
audio streaming and system stability.
To perform a network test, navigate to System settings > Network > NETWORK DIAGNOSTICS. Here, you can
initiate tests to detect potential issues affecting network performance.
You can select a test duration based on your needs:
• 1 minute – Quick scan for immediate network issues.
• 1 hour – Provides a more detailed analysis.
• 24 hours – Offers a comprehensive view of network performance over an extended period. A longer test
duration provides more reliable results, as intermittent issues may not be detected in a short test.
The test runs in the background without interrupting audio streams. The result is available after the selected
time from dashboard or from where it was started.
AXIS Audio Manager Pro

36
Integrate with AXIS Camera Station Pro
If you are using AXIS Camera Station Pro, you can easily integrate it with AXIS Audio Manager Pro for a
seamless video and audio experience. The two servers can run on the same machine or on separate servers,
depending on your setup.
Once connected, this integration unlocks powerful new features in AXIS Camera Station Pro, such as:
• Paging: one-way, two-way, and pre-recorded audio messages.
• Action rules: trigger audio events based on video analytics or alarms.
• Map integration: combine video and audio zones in a single, intuitive view.
This tight integration between video and audio lets you manage both systems more effectively, creating a
smarter and more responsive security solution. Read more in the AXIS Camera Station Pro user manual.
AXIS Audio Manager Pro

37
Migrate to version 5
If you purchased a software license for AXIS Audio Manager Pro 4 or an AXIS Audio Manager Pro C7050 MkI-III
server, you can simply download and install AXIS Audio Manager Pro 5.0.X.
The installer will update your existing 4.X version and automatically migrate your configurations, audio files,
schedules, and other settings to the new version.
Your perpetual license remains valid for AXIS Audio Manager Pro 5 at no additional cost. However, you must
register your installation with AXIS License Manager within one month of the upgrade. For instructions on how
to register, go to .
Note
If you have an AXIS Audio Manager Pro 4 license and need to reinstall or perform a clean installation of
AXIS Audio Manager Pro 5, you can use a legacy .key file generated for version 4 as your license file.
If the .key file has been lost, go to System settings > License and follow the legacy licensing instructions to
generate a replacement.
AXIS Audio Manager Pro

38
Migrate to version 4
If you already have AXIS Audio Manager Pro 3 running, you can migrate parts of the system to
AXIS Audio Manager Pro 4.
Note
Older versions must first be upgraded to version 3.3, which is the version that can export your system. You
then need to install version 4.0, which is the only version that can import the system. From version 4.0 you
can upgrade to any later version.
Note
Upgrade the AXIS OS version of your devices after the migration is completed.
We recommend that you first install AXIS Audio Manager Pro 4 on a separate server to try it out and get to
know the new interface, before you perform the migration. You can use the demo version for 30 days.
Note
The migration will only include zone structure, devices and sources. You must reconstruct all other
configurations manually. The migration will save your playlists and schedules as text files to facilitate the
reconstruction. You should note down other settings before the migration.
Below is an overview of the migration process. For more detailed information, download the migration guide
under Documentation on the product’s support page:
• axis.com/products/axis-audio-manager-pro/support
Back up your database:
Before you start, we recommend that you create a backup of your database, so that you don’t lose any data in
case something goes wrong when you upgrade your system. The database files can be saved, so that you can
restore the system in another AXIS Audio Manager Pro 3.x system.
1. On the Windows system tray, click > > Stop AXIS Audio Manager Pro.
2. Go to the folder C:\ProgramData\AXIS Communications\AXIS Audio Manager Pro
\Manager on your computer.
3. Copy the database file Manager.db to a backup folder.
4. If you need to restore your database at some point to another system:
4.1. On the Windows system tray, click > > Stop AXIS Audio Manager Pro.
4.2. Place the backed-up files in the folder C:\ProgramData\AXIS Communications
\AXIS Audio Manager Pro\Manager.
4.3. Start the service again and log in with the administrator’s credentials.
Migrate to AXIS Audio Manager Pro 4:
1. First you need to upgrade your current version of AXIS Audio Manager Pro to version 3.3.3 that contains
the export function.
To upgrade to AXIS Audio Manager Pro 3.3.3:
1.1. Go to axis.com/products/axis-audio-manager-pro and download the upgrade file.
1.2. Run the upgrade file and accept all the pre-selected options in the wizard.
2. Export your site:
2.1. Open AXIS Audio Manager Pro 3.3.3.
2.2. Go to Administrator > Export database and click Export.
2.3. Select a folder for the export and click OK.
When the export is completed, a dialog shows what was exported and if there was any issues.
2.4. Some settings are not exported. Make a note of the following:
– All configurations under Audio Sources.
– All configurations under Users.
AXIS Audio Manager Pro

39
– All configurations under Administrator > Network settings.
– All your 2N SIP Mic configurations.
– All your audio files.
– AXIS Audio Manager Pro 4 only supports a zone structure that is up to 10 levels deep.
All devices that are located in deeper zone levels will be placed in a separate folder.
3. Uninstall AXIS Audio Manager Pro 3.3.3.
4. Install AXIS Audio Manager Pro 4.
See
5. Prepare your devices for AXIS Audio Manager Pro 4.
See
6. Import your site to AXIS Audio Manager Pro 4:
6.1. On the Windows system tray, click > > Start AXIS Audio Manager Pro.
6.2. On the Windows system tray, click > > Import old database.
6.3. Click Yes.
6.4. Browse to the export folder and select the file Export.txt.
7. On the Windows system tray, click > > Open AXIS Audio Manager Pro Client.
8. Recreate the configurations that were not exported.
– Playlists — See the file Playlists.txt in the export folder.
To create a playlist, go to an app under APPS > Content & sources.
See
See
– Schedules — See the file Schedules.txt in the export folder.
To create a schedule, go to an app under APPS > Scheduling & destinations.
See
See
– Network settings — See
– SIP devices — See
Note
What used to be called “sessions” in AXIS Audio Manager Pro 3 has now been replaced by a different concept
called destinations. This is found under Scheduling & destinations in the AXIS Audio Manager Pro 4 client.
AXIS Audio Manager Pro

40
API
Under System settings > API > API REQUEST BUILDER, you find a built-in tool that assists in building API
requests. This tool simplifies the process of crafting the required JSON by helping you select the correct IDs and
avoiding common errors such as typos, missing parentheses, or incorrect syntax.
For more information about API, see AXIS Audio Manager Pro API.
AXIS Audio Manager Pro

41
Security
Certificates
Certificates are used to establish a secure connection between server and clients such as web browsers and SIP
phones. When AXIS Audio Manager Pro is installed, a default (self-signed) SSL server certificate is generated.
You can use this self-signed certificate, however, the best practice is to use SSL certificates issued by a public or
private Certificate Authority (CA) for your production environment. Using a trusted certificate will remove the
warning users get in the browser when accessing the web UI when using the default self-signed certificate.
Update and use a new certificate:
1. Go to System settings > Security.
2. Click + CERTIFICATE
Note
Three different upload types are supported for .pfx (PKCS#12) and .pem certificate files. Make sure you select
the right one depending on your certificate format. The server will validate the certificate when uploaded to
avoid mistakes.
Once your certificate is uploaded successfully you can use it by selecting it for specific services.
• For web interface, click System settings > Network > Web access > Certificate.
• For SIP server TLS, click SIP Settings > New or Edit for your existing SIP server > Certificate.
Note
A root certificate (Certificate Authority) is used to generate end-entity certificates, which are the certificates
to upload to AXIS Audio Manager Pro. Root certificates should be installed on client devices (e.g., under
Trusted Root Certification Authorities in Windows) that connect to the AXIS Audio Manager Pro web
interface or SIP server. This ensures the server's certificate is trusted by the clients.
SIP
The Session Initiation Protocol (SIP) is a signalling protocol used for initiating, maintaining, and terminating
communication sessions. In AXIS Audio Manager Pro you can use the widely adopted SIP protocol to make
announcement to zones, or to setup two-way calls to individual devices. To learn more about SIP, read the
whitepaper .
To set up a secure and encrypted SIP communication for AXIS Audio Manager Pro we recommend the following
settings:
1. Enable TLS as a communication protocol.
To ensure a secure communication channel between SIP clients and the server, we recommend using
Transport Layer Security (TLS).
– Go to SIP settings, enable TLS as communication protocol (and disable less secure TCP and UDP
if possible).
2. Require RTP encryption (SRTP).
The media (audio) sent between the SIP client and server can be encrypted to avoid eavesdropping and
audio tampering.
– Go to SIP settings > Media > RTP encryption and set RTP encryption to required.
This will deny all clients placing calls that are not encrypted.
3. Use SIP client authorization and strong passwords
Unauthorized access to SIP extensions poses a risk of unauthorized calls within the SIP system.
Implementing a robust password policy for SIP clients is a measure to mitigate this risk effectively.
3.1. Go to SIP settings > Advanced and check that Require authorization is checked.
3.2. Go to SIP settings > Clients and make sure all clients have strong passwords
AXIS Audio Manager Pro

42
Best practices
Securing any network products and services can be a complex task. There's no universal solution, instead, it
requires assessing risks specific to your organization and implementing controls when the risk is deemed too
high. Here are a few things to think about:
1. Encrypt the communication between the server and devices by ensuring that TLS and stream encryption
are enabled. You can find these settings under System settings > Audio and streaming.
2. Ensure that authorized users use unique and strong passwords with their Windows user accounts.
3. Ensure account security by using strong and unique passwords for SIP and API accounts.
4. Keep the system up to date by regularly installing Windows Security updates, firmware updates for AXIS
speakers, and the latest AXIS Audio Manager Pro server version (enable automatic check from the 4.7
version).
5. Review the physical security including access to servers and network infrastructure.
6. Review the network security including firewalls, network segmentation and traffic monitoring.
7. Consider the need for anti-virus and anti-DDoS solutions for the installation.
8. Encourage responsible use of the service. For example: Lock computers when not used, use updated
browsers, don't click suspicious links, remove users etc.
Read more about cybersecurity, technology and best practices around network audio:
•
•
IP filtering
The IP Filtering page allows administrators to control access to the server by blocking or allowing specific IP
addresses. By creating rules that block (blacklist) or allow (safe list) specific IP addresses, you can strengthen
system security and reduce the risk of attacks, unauthorized access and brute-force login attempts.
In addition to manual configuration, the system automatically blocks IP addresses temporarily after repeated
failed login attempts. This protects against brute-force attacks without requiring administrator intervention.
The IP Filtering page contains two tabs:
• SIP Services: Configure filtering for SIP-based communication.
• Web Services: Configure filtering for web-based connections, such as the management interface or API.
Each tab provides the same structure for managing blocked and safe IP addresses. The Safe List contains IP
addresses that will never be blocked.
Web services > Filter Duration specifies for how long automatically blocked IP addresses remain on the blocked
list.
AXIS Audio Manager Pro


.
T10169049
2025-09 (M35.2)
© 2017 – 2025 Axis Communications AB