

AXISAudioManagerPro
TableofContents
Solutionoverview...........................................3
Systemrequirements.............................................3
Getstarted................................................4
Installation....................................................4
Starttheapplication.............................................4
Congurethenetwork...........................................4
Prepareyourdevices.............................................7
Setupyourrstsite.............................................9
Activateyourlicense.............................................9
Addandorganizedevices.....................................12
Identifyadevice................................................13
Schedulecontent...........................................15
Scheduleannouncements.........................................15
Schedulemusic.................................................18
Editevents.....................................................28
Setyouropeninghours......................................30
Setuppaging..............................................31
Pagingwitha2NSIPMic.........................................31
PagingwithSIPtrunk............................................38
Setpriorityforpaging............................................41
TalkbacktoanAxisdevice........................................
42
Setvolumes................................................44
Calibratemastervolumes.........................................
44
Setvolumelevels...............................................
45
Manageyourdatabase.......................................47
Migratetoversion4.........................................48
Needmorehelp?............................................50
2

AXISAudioManagerPro
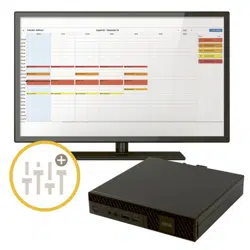
Solutionoverview
Solutionoverview
WithAXISAudioManagerProyoucancontrollargeandadvancedaudioinstallationsfromasinglepoint.Youcansetupzones,
audiosourcesandschedules.
AreyoucurrentlyusingAXISAudioManagerProversion3?
•Toupgradetoversion4,seeMigratetoversion4onpage48
•Forinstructiononhowtousetheproduct,seeAXISAudioManagerPro3-UserManual
Systemrequirements
IfyouarenotusingAXISAudioManagerProC7050,thenwerecommendthefollowingforyourserver:
•Processor:Intel®Core™i3
•Memory:8GB
•Storage:128GBSDD
•Operatingsystem:MicrosoftWindows10,Windows10IoT2016LTSB,WindowsServer2016,2019
•Virtualmachinesupport:VMwareESXi,MicrosoftHyper-V,andMicrosoftWindowsDatacenterwithcongurationand
resourcesallocatedsimilartotheminimumhardwarerequirements.
Recommendedbrowsersfortheclient:
•Chrome
•Firefox
3

AXISAudioManagerPro
Getstarted
Getstarted
Installation
InstallAXISAudioManagerPro:
1.Gotoaxis.com/products/axis-audio-manager-pro.
2.Downloadandruntheinstallationle.
3.SelectacerticateandclickNext.
-Ifyoudon’thaveacerticate,thenselectSelf-signedcerticate.
Note
Whenusingaself-signedcerticateyouwillbepromptedthersttimeyoustartAXISAudioManagerPro4andaskedtoadd
asecurityexceptioninyourbrowser.Allyouneedtodoistoacceptthesecurityexceptionandyouwillnotbepromptedagain.
Ifyouwanttoreplaceyourcerticateinthefuture,goto>>ReplaceexistingSSLcerticate.
Formoreinformationaboutcerticates,seeCerticatemanagement.
4.ClickFinish.
Starttheapplication
1.OntheWindowssystemtray,click>>OpenAXISAudioManagerProClient.
2.Enterpasswordandlogin.
Congurethenetwork
AlldevicesmustbeconnectedtothesamemulticastdomainastheserverthatAXISAudioManagerProisinstalledon.
Audiostreamingbetweentheserverandallthedevicesusemulticast.Thedefaultrangeis239.0.0.0-239.0.0.254.
Makesureyouhavereservedenoughbandwidth.Themaximumconsumptionforeachmulticaststreamis443kbps.
Port
TCP
UDPAdjustableDescription
443
xx
WebUI
1
5433
xx
Systemport
2
6992
x
Systemport
3
6999
x
Systemport
6999
x
Systemport(multicast
audiostreaming)
7010
xx
Systemport
2
5060
xxx
SIP
4
30000–31999
xx
RTPstreamforSIPcalls
1
Ifthedefaultportisalreadyinuse,theusermustchooseadifferentportwheninstallingAXISAudioManagerPro.
2
Ifthedefaultportisalreadyinuse,thenthenextavailableportwillbeused.
3
Ifthedefaultportisalreadyinuse,thentheTraceviewapplicationforcapturingserverlogswillnotbeabletoconnecttothe
4

AXISAudioManagerPro
Getstarted
AXISAudioManagerProserver.
4
ThedefaultportfortheSIPserveris5060.Youcanchooseadifferentport.IfyousetupseveralSIPservers,youneedoneportfor
eachserver.
Congurethenetworksettings:
1.GototheAXISAudioManagerProclient.
-SeeStarttheapplicationonpage4
2.Goto
Systemsettings>
Network.
3.Changethemulticastrangeifneeded.
5

AXISAudioManagerPro
Getstarted
Note
Ifyouwanttosetmulticastorunicastforaphysicalzone,goto
Physicalzones,
clickazone,andthengotoNETWORKCOMMUNICATION.
4.UnderNetworkinterface,selectthesameIPaddressasyourserver.
6

AXISAudioManagerPro
Getstarted
5.Ifyouintendtostreamcontentfromtheweb,goto
Systemsettings>
Proxyandsetupyourproxysettings.
Prepareyourdevices
Towatchthisvideo,gotothewebversionofthisdocument.
help.axis.com/?&piaId=44524§ion=prepare-your-devices
PrepareyourAxisdevices:
1.RunAXISDeviceManagerClient.
-TodownloadandinstallAXISDeviceManager,gotoaxis.com/products/axis-device-manager.
7

AXISAudioManagerPro
Getstarted
2.WhenAXISDeviceManagerstarts,itwillautomaticallysearchfordevices.
-Tostartthesearchmanually,click
.
-Ifnodevicesarefound,checkyournetworkconguration.SeeCongurethenetworkonpage4.
-Iftheapplicationinformsyouthatsomedeviceshaveoldrmware,thenclickthelinktoupgradetothe
latestrmware.
-Selectthedevicesyouwanttoadd,clickNext,andthenclickFinish.
3.Setapasswordforthedevices:
3.1Selectallyourdevicesandclick
.
3.2Enterusernameandpassword,andclickOK.
4.Installtheapplicationlesonyourdevices:
4.1Selectallyourdevicesinthelist.
4.2Right-clicktheselectionandchooseInstallCameraApplication....
4.3Browsetothisfolderontheserver:
\Programfiles\AxisCommunications\AXISAudioManagerPro\Manager
\Firmware\
4.4SelecttheleAXIS_Audio_Manager_Pro_*_mipsisa32r2el.eapandclickOK.
Thiswillinstalltheapplicationonthefollowingdevices:
-AXISC8033NetworkAudioBridge
-AXISC2005NetworkCeilingSpeaker
-AXISC1004-ENetworkCabinetSpeaker
Note
Ifyouhaveothertypesofdevices,thenyouwillgetanerrormessage,sincetheyuseadifferentapplication.Thisis
notaproblem.Justclosetheerrormessageandcontinue.
Thereasonwerecommendthissolution,isthatitissimplyeasiertoselectalldevicesthantoselectonlythose
thatapplytotheselectedapplicationle.
4.4ClickNext.
4.5ClickNoandNext.
4.6ClickFinish.
4.7Selectallyourdevicesagain,right-clickandchooseInstallCameraApplication....
4.8Browsetothisfolderonyourcomputer:
\Programfiles\AxisCommunications\AXISAudioManagerPro\Manager
\Firmware\
4.9SelecttheleAXIS_Audio_Manager_Pro_*_armv7hf.eapandclickOK.
Thiswillinstalltheapplicationonthefollowingdevices:
-AXISC8210NetworkAudioAmplier
8

AXISAudioManagerPro
Getstarted
-AXISC1310–ENetworkHornSpeaker
-AXISC1410NetworkMiniSpeaker
-AXISC8110NetworkAudioBridge
-AXISC1210-ENetworkCeilingSpeaker
-AXISC1211-ENetworkCeilingSpeaker
-AXISD3110ConnectivityHub
Note
Ifyouhaveothertypesofdevices,thenyouwillgetanerrormessage,sincetheyuseadifferentapplication.Thisis
notaproblem.Justclosetheerrormessageandcontinue.
Thereasonwerecommendthissolution,isthatitissimplyeasiertoselectalldevicesthantoselectonlythose
thatapplytotheselectedapplicationle.
4.8ClickNext.
4.9ClickNoandFinish.
5.Restartthedevices:
5.1Selectallthedevicesyouwanttouse.
5.2Right-clicktheselectionandclickRestart.
5.3ClickYestoconrm.
6.ConguretheAXISAudioManagerProapplication:
6.1Selectallthedevicesyouwanttouse.
6.2Right-clicktheselectionandchooseCongureDevices>Congure....
6.3Inthesearcheld,type‘audiomanagerpro’.
6.4InthePrimaryserveripaddresseld,entertheIPaddressoftheserverthatAXISAudioManagerProis
runningon.
6.5ClickNextandFinish.
Tousea2NSIPMic,youneedtoupgradetormwareversion1.15.7orlater.
Formoreinformation,seethe2NSIPMicusermanual.
Setupyourrstsite
Onceyouhaveconguredthenetworkandpreparedyourdevices,youarereadytosetupasite.
Suggestedworkow:
1.Addandorganizedevicesonpage12
2.Setvolumesonpage44
3.Setyouropeninghoursonpage30
4.Schedulecontentonpage15
5.Setuppagingonpage31
9

AXISAudioManagerPro
Getstarted
Activateyourlicense
Note
IfyouhaveanexistinginstallationofAXISAudioManagerPro3,thenyoursystemcanbemigratedto
AXISAudioManagerPro4.0.Inthiscase,youdon’tneedtoactivatethelicense.
Formoreinformation,seeMigratetoversion4onpage48.
YoucanuseAXISAudioManagerPro4indemomodefor30days.Afterthefreetrialperiod,youneedtobuyalicensefroman
Axisreseller.
Activateyourlicense:
1.GotoAXISAudioManagerPro>
Systemsettings>
License.
2.CopytheDeviceID.
3.Gotoaxis.com/products/camera-applications/license-key-registrationandsigninwithyourAxisaccount.
4.UnderTypeintheIDofyourdevice,enteryourdeviceID.
5.SelectIhavealicensecode.
6.Enteryourlicensecode(#####-#####-#####-#####)andclickGenerate.
10

AXISAudioManagerPro
Getstarted
7.Downloadthelicensekeyle.
8.GotoAXISAudioManagerPro>
Systemsettings>
License.
9.ClickUPLOADLICENSEFILEanduploadthelicensekeyle.
11

AXISAudioManagerPro
Addandorganizedevices
Addandorganizedevices
Beforeyoucanaddadevice,makesureitispreparedforuse.SeePrepareyourdevicesonpage7.
Adevicecanonlybeusedbythesystemifitbelongstoaphysicalzone.Physicalzonescanbecreatedinahierarchy.Ifyouclicka
zoneandcreateanewzone,thenthenewzonewillbecomeasub-zone.Thehierarchycanbeuptotenlevelsdeep.
Beforeyoucreateazonestructure,youshouldthinkabouthowyouwanttouseyouraudiosystem.Forinstance,inaschoolyoumight
wanttocreateonezonecalled“Allclassrooms”.Inthiszoneyoucouldcreatesub-zonesforeachclassroom.Thiswillgiveyouthe
possibilitytoadjustthevolumeorplaycontentinalltheclassroomssimultaneouslybyworkingonlywiththe“Allclassrooms”zone.
Towatchthisvideo,gotothewebversionofthisdocument.
help.axis.com/?&piaId=44524§ion=add-and-organize-devices
Setupthezonestructureforaschool.
12

AXISAudioManagerPro
Addandorganizedevices
1.Goto
Physicalzones.
2.Ifyouwanttocreateasubzone,clicktheparentzoneinthetreestructure.
3.Clicktocreateanewphysicalzone.
4.Toaddadevicetothephysicalzone,gotoDEVICESandclick+ADD.
Identifyadevice
Youcanmakeadeviceplayatesttone,tomakeiteasyforyoutolocatethespeaker.
13

AXISAudioManagerPro
Addandorganizedevices
1.GotoPhysicalzones.
2.Click
forthedeviceandselecthowlongtimethetesttonewillplay.
14

AXISAudioManagerPro
Schedulecontent
Schedulecontent
Scheduling&destinationsi-
swhereyouplanyouraudiocontent.
Youcreateadestinationtodenewheretoplayyouraudiocontent.Youcanaddmultiplephysicalzonesaswellasindividualspeakers.
Onceyouhavecreatedyourdestination,youcanaddschedulesforplanningyourannouncementsandmusic.Ifyouintendtodo
paging,youaddpagingsourcestothedestination.
Scheduleannouncements
Youcanschedulewhentoplayaplaylist.Thefullplaylistwillbeplayed.Ifyouwanttoplayonlyoneaudiole,thenyouneedto
createaplaylistcontainingonlythatle.
15

AXISAudioManagerPro
Schedulecontent
1.Goto
Announcements.
2.Toaddsoundlestothelibrary,clickADDAUDIOFILES.
3.Createaplaylist:
3.1UnderPLAYLISTS,click.
3.2Addaudiolestotheplaylist.
4.Createadestination.
16

AXISAudioManagerPro
Schedulecontent
4.1Goto
Scheduling&destinations.
4.2UnderDESTINATIONS,click.
4.3NamethedestinationandclickCREATE.
4.4Denewheretoplayyouraudioforthedestinationbyselectingpagingsources,physicalzonesorindividual
speakers.
5.Click+EDITSCHEDULE.
6.Click+EVENT.
7.UnderSourcetype,selectAnnouncement.
8.FillintheothereldsandclickSAVE.
Example
Inaschool,youwantabelltoringinthewholeschoolbuildingat8:30and16:30,everyweekdayfortherestofthesemester.
17

AXISAudioManagerPro
Schedulecontent
Towatchthisvideo,gotothewebversionofthisdocument.
help.axis.com/?&piaId=44524§ion=schedule-announcements
Schedulemusic
Firstdenethecontentyouwanttoplay,bysettingupaplaylist,webstream,devicesourceorserversource.Thenschedule
whenandwheretoplaythecontent.
IfyouwanttouseawebstreamorRTPstream,makesureyouhavesetupyourproxy.SeeCongurethenetworkonpage4.
Createaplaylistfromaudioles:
18

AXISAudioManagerPro
Schedulecontent
1.Toaddaudiolestotheserver,goto
Music>
Library.
2.Youcancreatefolderstoorganizeyouraudioles.
Tocreateafolder,clickCREATEFOLDER.
3.Toaddanaudioletothelibrary,clickADDCONTENT.
19

AXISAudioManagerPro
Schedulecontent
-Supportedformats:mp3,mp4,mpeg,aac,wma,ogg,ac,wav
4.ClickPLAYLISTS>.
5.NameyourplaylistandclickCREATE.
6.Toaddalefromthelibrary,clickADDTRACKSFROMLIBRARY.
7.Toaddalefromtheweb,clickADDATRACKFROMURL.
-Supportedformats:mp3,mp4,mpeg,aac,wma,ogg,ac,wav
Createaninternetradiostream:
20

AXISAudioManagerPro
Schedulecontent
1.Goto
Music>
WEBSTREAMS.
2.Click.
3.UnderWebstreamtype,selectInternetradio.
4.Nameyourwebstream.
5.EnteraURLforthewebstream.
21

AXISAudioManagerPro
Schedulecontent
-Supportedformats:m3u,pls,asx
6.ClickCREATE.
7.Adjustthestreamdelay.
8.Selectanaudioquality.
9.ClickSAVE.
CreateanRTPstream:
22

AXISAudioManagerPro
Schedulecontent
1.Goto
Music>
WEBSTREAMS.
2.Click.
3.UnderWebstreamtype,selectRTPstream.
4.Nameyourwebstream.
5.Enteralisteningport.
23

AXISAudioManagerPro
Schedulecontent
6.ClickCREATE.
7.Touseunicaststreaming,turnoffMulticastIPaddress.
8.Tousemulticaststreaming,turnonMulticastIPaddressandenteranIPaddress.
9.IfyouwanttoreceivecontentonlyfromoneIPaddressforsecurityreasons,thenturnonSourceIPaddressandenter
theIPaddress.
10.ClickSAVE.
Streammusicfromadeviceusinganaudiobridge:
1.Connectadevice,suchasamobilephone,totheline-inofanaudiobridgeoramplierinyoursystem.
2.GotothedeviceinterfaceoftheaudiobridgeoramplierbyenteringtheIPaddressofthedeviceinyourwebbrowser.
3.GotoDevicesettings>GeneralandselectFullduplexorSimplex-microphoneonlyunderAudiomode.
4.GotoInputtoadjusttheinputgain.
24

AXISAudioManagerPro
Schedulecontent
5.InAXISAudioManagerPro,goto
Music>
DEVICESOURCEStoseeyourdevicesources.
StreammusicfromaudiodevicesinyourWindowsoperatingsystem:
25

AXISAudioManagerPro
Schedulecontent
1.Goto
Music>
SERVERSOURCES.
2.Click.
3.Namethesource.
4.UnderAudiodevice,selecttheinputdeviceyouwanttouse.Availabledevicesaredetectedautomatically.
5.ClickCREATE.
26

AXISAudioManagerPro
Schedulecontent
Scheduleyourcontent:
1.Goto
Scheduling&destinations.
2.UnderDESTINATIONS,click.
3.NamethedestinationandclickCREATE.
4.Click+EDITSCHEDULE.
5.Click+EVENT.
6.Nametheschedule.
7.UnderSourcetype,selectMusic.
8.UnderSelectsource,selectyoursource(aplaylist,webstream,devicesourceorserversource).
9.DenewhentoplaythemusicandclickSAVE.
27

AXISAudioManagerPro
Schedulecontent
10.Click
toexit.
11.UnderDestinations,clickyourdestination.
12.Addphysicalzonesandindividualspeakerstodenewheretoplaythemusic.
Editevents
Musicandannouncementswillappearaseventsinyourcontentschedule.
28

AXISAudioManagerPro
Schedulecontent
Toviewyourevents,goto
Scheduling&destinationsa-
ndclick+EDITSCHEDULE
•Toeditorremoveaneventseries,clicktheeventinthelisttotheright.
•Toeditorremoveasingleevent,clicktheeventintheschedule.
Note
Ifyoueditasingleevent,thenthechangeswillbelostifyouedittheseriesthattheeventbelongsto.
29

AXISAudioManagerPro
Setyouropeninghours
Setyouropeninghours
Openinghoursareusefulforrelativescheduling.
Example
Youwantabelltoplayanannouncementeveryschooldaytenminutesbeforetheschoolcloses.
Setuptheannouncementtoplaytenminutesbeforeclosingtime.Thiswaythebellwillalwaysringatthecorrecttimeevenifyou
changetheclosingtime,oriftheclosingtimevaryfromdaytoday.
1.Goto
Openinghours.
2.SettheopeninghoursofyoursiteandclickSAVE.
30

AXISAudioManagerPro
Setuppaging
Setuppaging
Beforeyousetuppaging,youshouldpreparethedestinationsyouwanttouse.Adestinationcontainsthezonesanddevicesthat
thepagingwillbesentto.
Ifyouwanttopageanannouncement,youmustrstcreateaplaylistcontainingoneorseveralaudioles.
•Forinstructionsabouthowtocreatedestinationsandplaylists,seeScheduleannouncementsonpage15.
Pagingwitha2NSIPMic
1.SetupaSIPserver:
1.1Goto
SIPsettings.
1.2Click+SERVER.
1.3NametheSIPserver.
31

AXISAudioManagerPro
Setuppaging
1.4EnterthedomainnameorIPaddressofyourserver.
1.5ClickCREATE.
2.SetupaSIPclientforyour2NSIPMic:
2.1Click
fortheSIPserver.
2.2GotoCLIENTS.
2.3Click+CLIENT.
2.4Nametheclient.
2.5EnterauserID.
2.6Entercredentialsforauthentication.
2.7ClickCREATE.
3.Congurethe2NSIPMic:
3.1Gotothe2NSIPMicinterface.
-TheinterfaceisreachedbyenteringtheIPaddressforthemicinawebbrowser.
3.2GotoVoIP>SIPProxyaccount.
3.3UnderCallerID,entertheuserIDyouusedfortheclient.
32

AXISAudioManagerPro
Setuppaging
3.4TurnonUseSIPaccount.
3.5UnderSIPProxyaddress,entertheserverIPaddressordomainname.
3.6TurnonUseregistration.
3.7UnderRegistrationserveraddress,entertheserverIPaddressordomainname.
3.8EnterthecredentialsyouusedforauthenticationinyourSIPclient.
3.9ClickAPPLY.
4.CheckthatthepagingdeviceisregisteredontheSIPserver:
4.1Inthe2NSIPMicinterface,gotoSystemstatusandcheckthatitsaysRegisteredunderSIPProxylinestatus.
4.2ReturntoAXISAudioManagerPro.
4.3PressF5torefreshthebrowser.
4.4Goto
Pagingsources>
2NSIPMIC.
33

AXISAudioManagerPro
Setuppaging
4.5CheckthatyourmichasthestatusRegistered.
Note
Iftheregistrationdidn'twork,checkyournetworksettingsandSIPaccountcredentials.
5.Setupapagingsourcetodenewhereyourpagingwillbeplayed:
5.1Goto
Pagingsources>
PAGINGSOURCES.
5.2Click+SOURCE.
5.3Namethesource.
5.4Enteracallnumber.
5.5Selectyourdestination.
6.Congureabuttononthe2NSIPMicforpagingalivecallout:
34

AXISAudioManagerPro
Setuppaging
6.1Goto
Pagingsources>
2NSIPMIC.
35

AXISAudioManagerPro
Setuppaging
6.2Click
forthemic.
6.3Turnonthebuttonyouwanttouseforpaging.
6.4Enteraname.
6.5SelectPagingasaction.
6.6Selectyourpagingsource.
6.7ClickSAVE.
7.Congureabuttononthe2NSIPMicforpaginganannouncement:
36

AXISAudioManagerPro
Setuppaging
7.1Goto
Pagingsources>
2NSIPMIC.
37

AXISAudioManagerPro
Setuppaging
7.2Click
forthemic.
7.3Turnonthebuttonyouwanttouseforpaging.
7.4Enteraname.
7.5SelectPlayannouncementasaction.
7.6Selectadestination.
7.7Selectaplaylist.
7.8Selectapriority.
8.Startpagingalivemessage:
8.1Presstheconguredbuttononthe2NSIPMic.
8.2Startspeaking.
8.3Tostoppaging,pressthesamebuttonagain.
9.Startpaginganannouncement:
9.1Presstheconguredbuttononthe2NSIPMic.Theplaylistisplayedonce.
38

AXISAudioManagerPro
Setuppaging
PagingwithSIPtrunk
YoucanpagebycallinganumberthatisredirectedbyaPBXtoAXISAudioManagerPro,whichwillforwardtheaudiotoadestination.
Beforeyoustart,youneedtohaveaconguredPBXenvironment,suchasCisco.InAXISAudioManagerPro,youmusthavecreateda
destinationthattheaudiowillbesentto.Formoreinformationaboutdestinations,seeSchedulecontentonpage15.
1.AddaSIPserver:
1.1Goto
SIPsettings.
1.2Click+SERVER.
1.3NametheSIPserver.
1.4EnterthedomainnameorIPaddressoryourserver.
1.5Enterportnumber.
1.6ClickCREATE.
2.AddaSIPtrunktotheSIPserver:
39

AXISAudioManagerPro
Setuppaging
2.1ClickthepeniconforyourSIPserver.
2.2GotoTRUNKS.
2.3Click+TRUNK.
2.4NametheSIPtrunk.
2.5EnterthedomainnameorIPaddressofyourPBXasremoteaddress.
2.6EntertheSIPportusedinthePBXasremoteport.
2.7Selectatransporttypedependingonyournetworkrequirements.
2.8IfthePBXrequiresidentication,enterthecredentials.
Note
IfyourPBXdoesn’trequireidentication,thengoto
SIPsettings>
ADVANCEDtodisableit.
40

AXISAudioManagerPro
Setuppaging
2.9IfyourPBXserverrequiresregistration,selectUseregistrationandenterthedetails.
2.10ClickCREATE.
3.Addapagingsource:
3.1Goto
Pagingsources.
3.2Click+SOURCE.
3.3Namethepagingsource.
3.4EnteracallnumberthatcorrespondstotheroutepatternsetinthePBX.
3.5Selectadestination.
3.6ClickSave.
Setpriorityforpaging
Ifyouarepagingtoseveraldestinationsatthesametime,thentheonewiththehighestprioritywillbeused.
41

AXISAudioManagerPro
Setuppaging
Changethepriorityorderofyourdestinations:
1.Goto
Scheduling&destinations.
2.UnderCONTENTPRIORITIES,clickPaging.
3.Draganddropthedestinationstochangetheirpriority.
TalkbacktoanAxisdevice
ItispossibletocallfromaSIPdevicetoanAxisdevice,sothataudioiscommunicatedinbothdirection.
Requirements:
•ASIPdeviceconguredtoyourSIPserver(seePagingwitha2NSIPMiconpage31)
•AnAxisdevicethathasbothamicrophoneandaspeaker
Setupatalkbackdevice:
1.GotoPagingsources>TALKBACKDEVICES.
2.Click+TALKBACKDEVICE.
42

AXISAudioManagerPro
Setuppaging
3.EnteranameandaSIPcallnumber.
4.Toselectyourtalkbackdevice,clickSELECTDEVICE.
5.UnderDevicesourceconguration,selectasourcetype,inputgainandanaudioprole.
6.Selectapriority.
7.ClickSAVE.
Toinitiatetalkback,calltheSIPnumberofthetalkbackdevicefromyourSIPdevice.
43

AXISAudioManagerPro
Setvolumes
Setvolumes
Calibratemastervolumes
Thesystemhasamastervolumeforeachcontenttype.Bydefault,musicissetto20dblowerthanothercontenttypes,tomake
themsoundlouderastheyareusuallymoreimportant.
Youcanadjustthevolumesforindividualspeakersaswellasgroupsofspeakersbyadjustingthevolumeforthephysicalzones.
Example
InaschoolyouhaveaphysicalzonecalledAllclassrooms.Insidethisphysicalzone,youhavethephysicalzonesClassroom
1,Classroom2andClassroom3.
IfyouadjustthevolumeforAllclassrooms,thenthiswillaffectallthespeakerslocatedinalltheclassrooms.
IfyouadjustthevolumeforClassroom1,thenonlythespeakersinthatclassroomwillbeaffected.
Theresultingvolumeforeachspeakerwillbethesumofthefollowing:
•Themaximumvolumeofthespeaker(thisisdifferentfordifferentproducts)
•Thesetvolumefortheindividualspeaker
•Thesumofallthevolumessetforthezonesthatthespeakerbelongsto
•Themastervolumeforthecontenttype
Ifthenalsumofallvolumesexceedthemaximumvolumeofthespeaker,thenthemaximumvolumewillbeused.
44

AXISAudioManagerPro
Setvolumes
1.Goto
Volumecalibration>
Mastersitecalibration.
2.Setthemastervolumeforeachcontenttype.
3.Playacontenttypeandlistentothesound.Adjustthevolumetoasuitablelevel.
4.Clickthezonesandcalibratethevolumeforeachzone.
-Adjustthevolumesofthephysicalzonesbystartingatthetopofthehierarchyandthenfurtherdowninthe
sub-zones.
5.Toadjustthevolumeforanindividualspeaker:
5.1GotothedeviceinterfacebyenteringtheIPaddressofthedeviceinawebbrowser.
5.2GotoAudio>Devicesettingsandadjustthegain.
45

AXISAudioManagerPro
Setvolumes
Setvolumelevels
Tochangevolumestemporarily,goto
Musicvolumes.
•Tomutetheentiresite:
1.GotoSitevolumes.
2.TurnonMutesite.
Nosoundwillbeplayedfromthesystem.
•Tomuteallmusic:
1.GotoSitevolumes.
2.TurnonMutemusic.
Musicwillbemuted,butyoucanstillplayannouncementsandpaging.
•Tosetthevolumeofazone:
1.Clickazone.
2.Adjustthevolume.
46

AXISAudioManagerPro
Manageyourdatabase
Manageyourdatabase
Ifyouwanttoreinstallortransferyoursystem,youcanbackupandrestoreyourdatabase.Thebackupwillincludeallyour
congurations,butnotyourles.
•OntheWindowssystemtray,click>>BackupdatabaseorRestoredatabase.
Youcanalsoclearyourdatabase.Allcongurationswillberemoved,butyourleswillremain.
•OntheWindowssystemtray,click>>Cleanandreinitializedatabase.
47

AXISAudioManagerPro
Migratetoversion4
Migratetoversion4
IfyoualreadyhaveAXISAudioManagerPro3running,youcanmigratepartsofthesystemtoAXISAudioManagerPro4.
Note
Olderversionsmustrstbeupgradedtoversion3.3,whichistheversionthatcanexportyoursystem.Youthenneedtoinstall
version4.0,whichistheonlyversionthatcanimportthesystem.Fromversion4.0youcanupgradetoanylaterversion.
WerecommendthatyourstinstallAXISAudioManagerPro4onaseparateservertotryitoutandgettoknowthenewinterface,
beforeyouperformthemigration.Youcanusethedemoversionfor30days.
Note
Themigrationwillonlyincludezonestructure,devicesandsources.Youmustreconstructallothercongurationsmanually.
Themigrationwillsaveyourplaylistsandschedulesastextlestofacilitatethereconstruction.Youshouldnotedown
othersettingsbeforethemigration.
Belowisanoverviewofthemigrationprocess.Formoredetailedinformation,downloadthemigrationguideunderDocumentation
ontheproduct’ssupportpage:
•axis.com/products/axis-audio-manager-pro/support
Backupyourdatabase:
Beforeyoustart,werecommendthatyoucreateabackupofyourdatabase,sothatyoudon’tloseanydataincasesomething
goeswrongwhenyouupgradeyoursystem.Thedatabaselescanbesaved,sothatyoucanrestorethesysteminanother
AXISAudioManagerPro3.xsystem.
1.OntheWindowssystemtray,click>>StopAXISAudioManagerPro.
2.GotothefolderC:\ProgramData\AXISCommunications\AXISAudioManagerPro\Manager
onyourcomputer.
3.CopythedatabaseleManager.dbtoabackupfolder.
4.Ifyouneedtorestoreyourdatabaseatsomepointtoanothersystem:
4.1OntheWindowssystemtray,click>>StopAXISAudioManagerPro.
4.2Placethebacked-uplesinthefolderC:\ProgramData\AXISCommunications\AXISAudio
ManagerPro\Manager.
4.3Starttheserviceagainandloginwiththeadministrator’scredentials.
MigratetoAXISAudioManagerPro4:
1.FirstyouneedtoupgradeyourcurrentversionofAXISAudioManagerProtoversion3.3.3thatcontainstheexportfunction.
ToupgradetoAXISAudioManagerPro3.3.3:
1.1Gotoaxis.com/products/axis-audio-manager-proanddownloadtheupgradele.
1.2Runtheupgradeleandacceptallthepre-selectedoptionsinthewizard.
2.Exportyoursite:
2.1OpenAXISAudioManagerPro3.3.3.
2.2GotoAdministrator>ExportdatabaseandclickExport.
2.3SelectafolderfortheexportandclickOK.
Whentheexportiscompleted,adialogshowswhatwasexportedandiftherewasanyissues.
48

AXISAudioManagerPro
Migratetoversion4
2.4Somesettingsarenotexported.Makeanoteofthefollowing:
-AllcongurationsunderAudioSources.
-AllcongurationsunderUsers.
-AllcongurationsunderAdministrator>Networksettings.
-Allyour2NSIPMiccongurations.
-Allyouraudioles.
-AXISAudioManagerPro4onlysupportsazonestructurethatisupto10levelsdeep.Alldevicesthatare
locatedindeeperzonelevelswillbeplacedinaseparatefolder.
3.UninstallAXISAudioManagerPro3.3.3.
4.InstallAXISAudioManagerPro4.
SeeInstallationonpage4
5.PrepareyourdevicesforAXISAudioManagerPro4.
SeePrepareyourdevicesonpage7
6.ImportyoursitetoAXISAudioManagerPro4:
6.1OntheWindowssystemtray,click>>StartAXISAudioManagerPro.
6.2OntheWindowssystemtray,click>>Importolddatabase.
6.3ClickYes.
6.4BrowsetotheexportfolderandselecttheleExport.txt.
7.OntheWindowssystemtray,click>>OpenAXISAudioManagerProClient.
8.Recreatethecongurationsthatwerenotexported.
-Playlists—SeethelePlaylists.txtintheexportfolder.
Tocreateaplaylist,gotoanappunderAPPS>Content&sources.
SeeScheduleannouncementsonpage15
SeeSchedulemusiconpage18
-Schedules—SeetheleSchedules.txtintheexportfolder.
Tocreateaschedule,gotoanappunderAPPS>Scheduling&destinations.
SeeScheduleannouncementsonpage15
SeeSchedulemusiconpage18
-Networksettings—SeeCongurethenetworkonpage4
-SIPdevices—SeeSetuppagingonpage31
Note
Whatusedtobecalled“sessions”inAXISAudioManagerPro3hasnowbeenreplacedbyadifferentconceptcalled
destinations.ThisisfoundunderScheduling&destinationsintheAXISAudioManagerPro4client.
49


UserManualVer.M5.7
AXISAudioManagerProDate:October2022
©AxisCommunicationsAB,2017-2022
PartNo.T10169049