THANK YOU
continually create quality products designed to enhance your home. Visit us online to see our full line of products available for your
home improvement needs. Thank you for choosing Hampton Bay!
Item #
1000 000 000
Model # GFT-31312
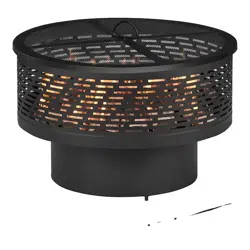
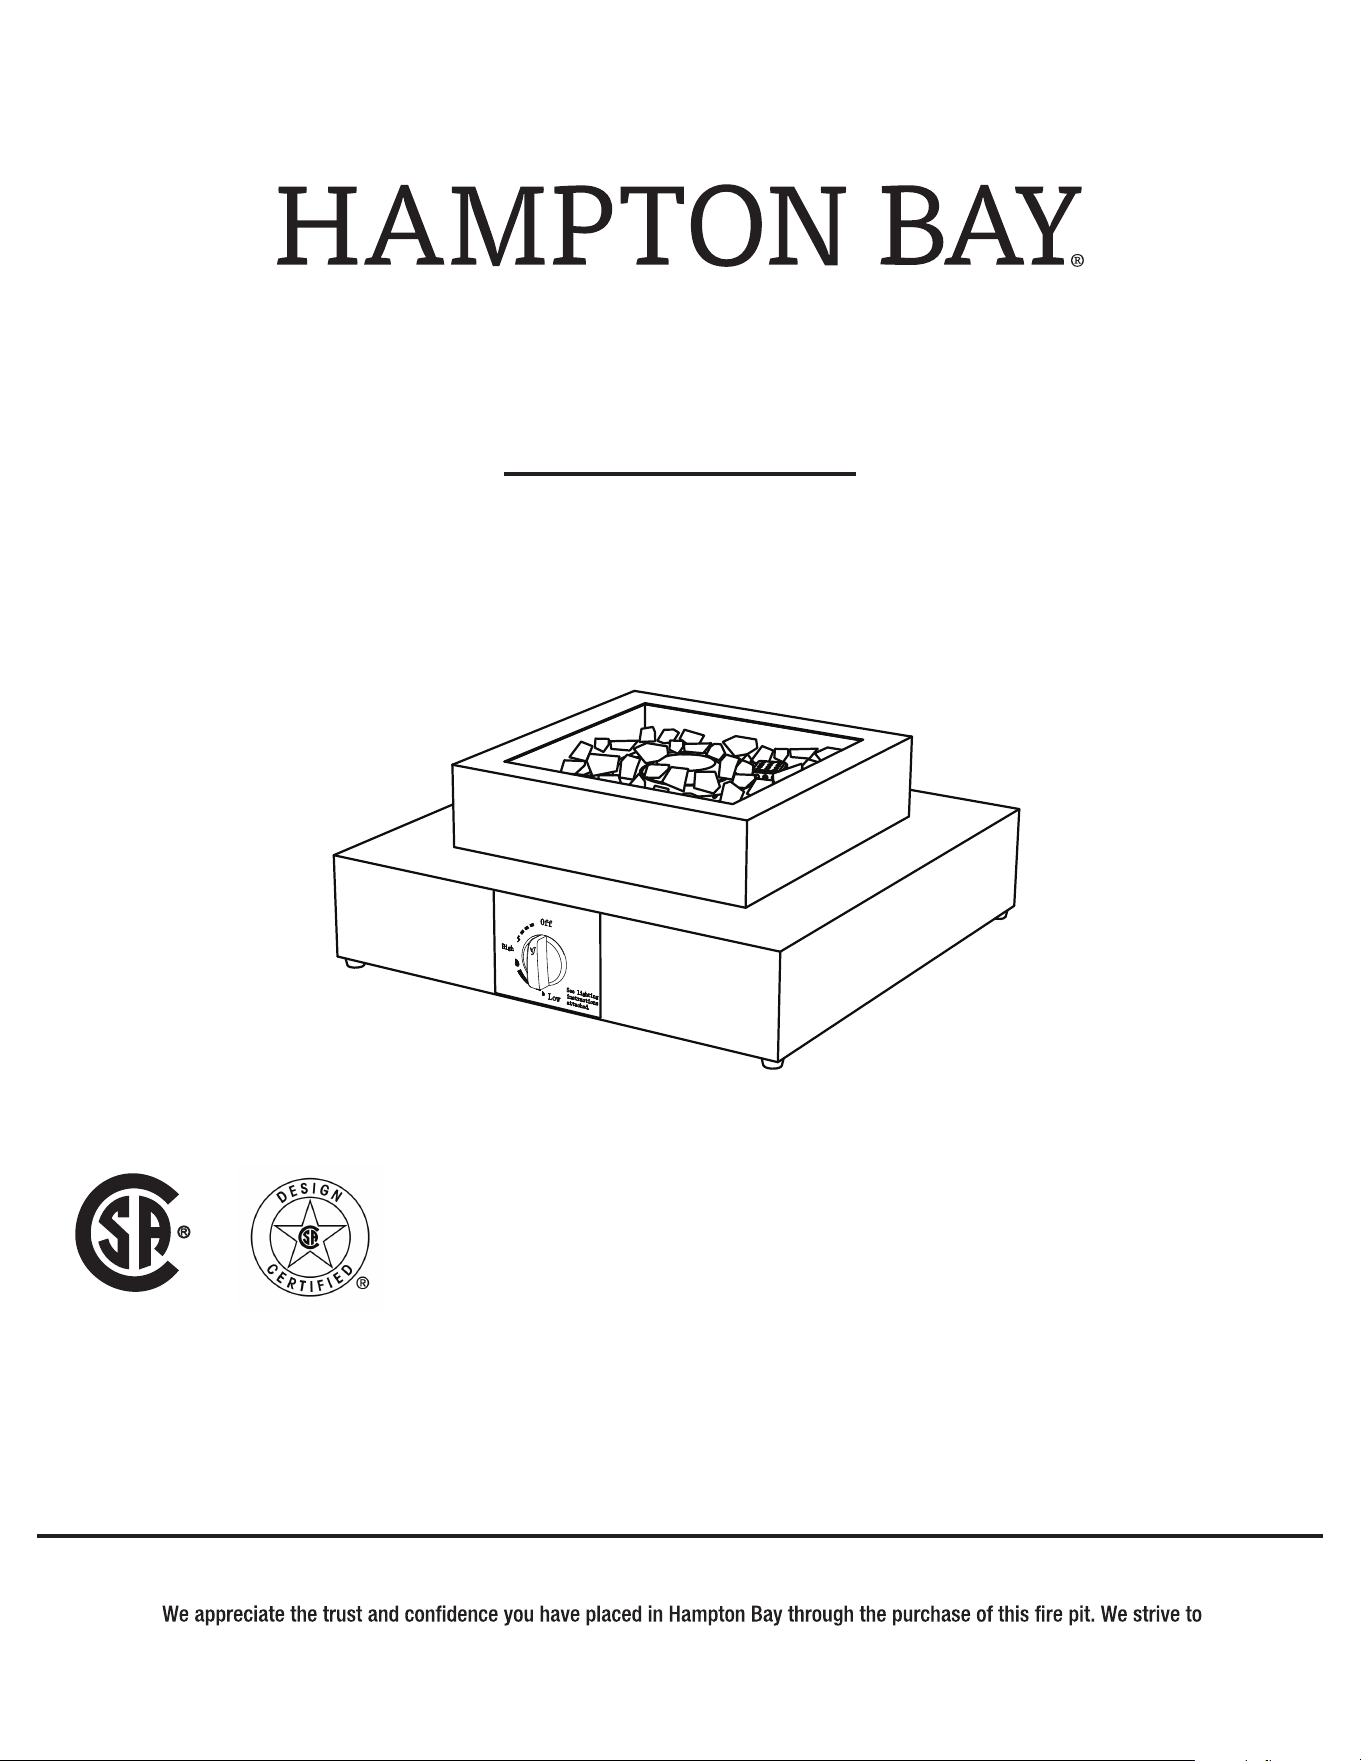
Table Propane Firepit
1-855-HD-HAMPTON
HAMPTONBAY.COM
C
US
R
USE AND CARE GUIDE
Questions, problems, missing parts? Before returning to the store,
call Hampton Bay Customer Service
8 a.m. - 7 p.m., EST, Monday – Friday, 9 a.m. – 6 p.m., EST, Saturday
2
Table of Contents
Read the instruction before use. This appliance must be installed in accordance with such regulations as are enforced.
Table of Contents ................................
..........................2
Safety Information..
.........................................................2
Warranty.........................................................................6
What is Covered....................................................................6
What is Not Covered.........................................................6
Pre-Assembly...……………………...…………………….
6
Planning Assembly.....
.....................................................6
Package Contents............................................................ 6
Assembly..………………………………………………….7
Operating Instructions .................................................9
Maintenance........... .......................................................11
Care and Cleaning........................................................11
Troubleshooting .......................................................... 12
Service Parts................................................................ 13
Safety Information
CAUTION:
Installer: Leave this manual with the appliance.
Consumer: Retain this manual for future reference.
DANGER:
FIRE OR EXPLOSION HAZARD
If you smell gas:
Shut off gas to the appliance.
If odor continues, leave the area immediately.
department.
explosion, which could cause property damage, personal
injury, or death.
CARBON MONOXIDE HAZARD
This appliance can produce carbon monoxide which has no odor.
Using it in an enclosed space can kill you.
Never use this appliance in an enclosed space such as a camper, tent,
car or home.
WARNING:
FOR YOUR SAFETY:
If the information in this manual is not followed exactly, a
personal injury or loss of life.
Do not try to light this appliance without reading the
“LIGHTING” instructions section of this manual.
WARNING: FOR OUTDOOR USE ONLY!
installer, service agency, or the gas supplier.
WARNING:
Improper installation, adjustment alteration, service or
maintenance can cause property damage, personal
injury, or loss of life. Read the installation, operating, and
maintenance instructions thoroughly before installing or
servicing this gas appliance.
WARNING: Do not store or use gasoline, or other
any other appliance. An LP-cylinder not connected for
use shall not be stored in the vicinity of this or any other
appliance.
DANGER
□
□
□
□
3
Safety Information (continued)
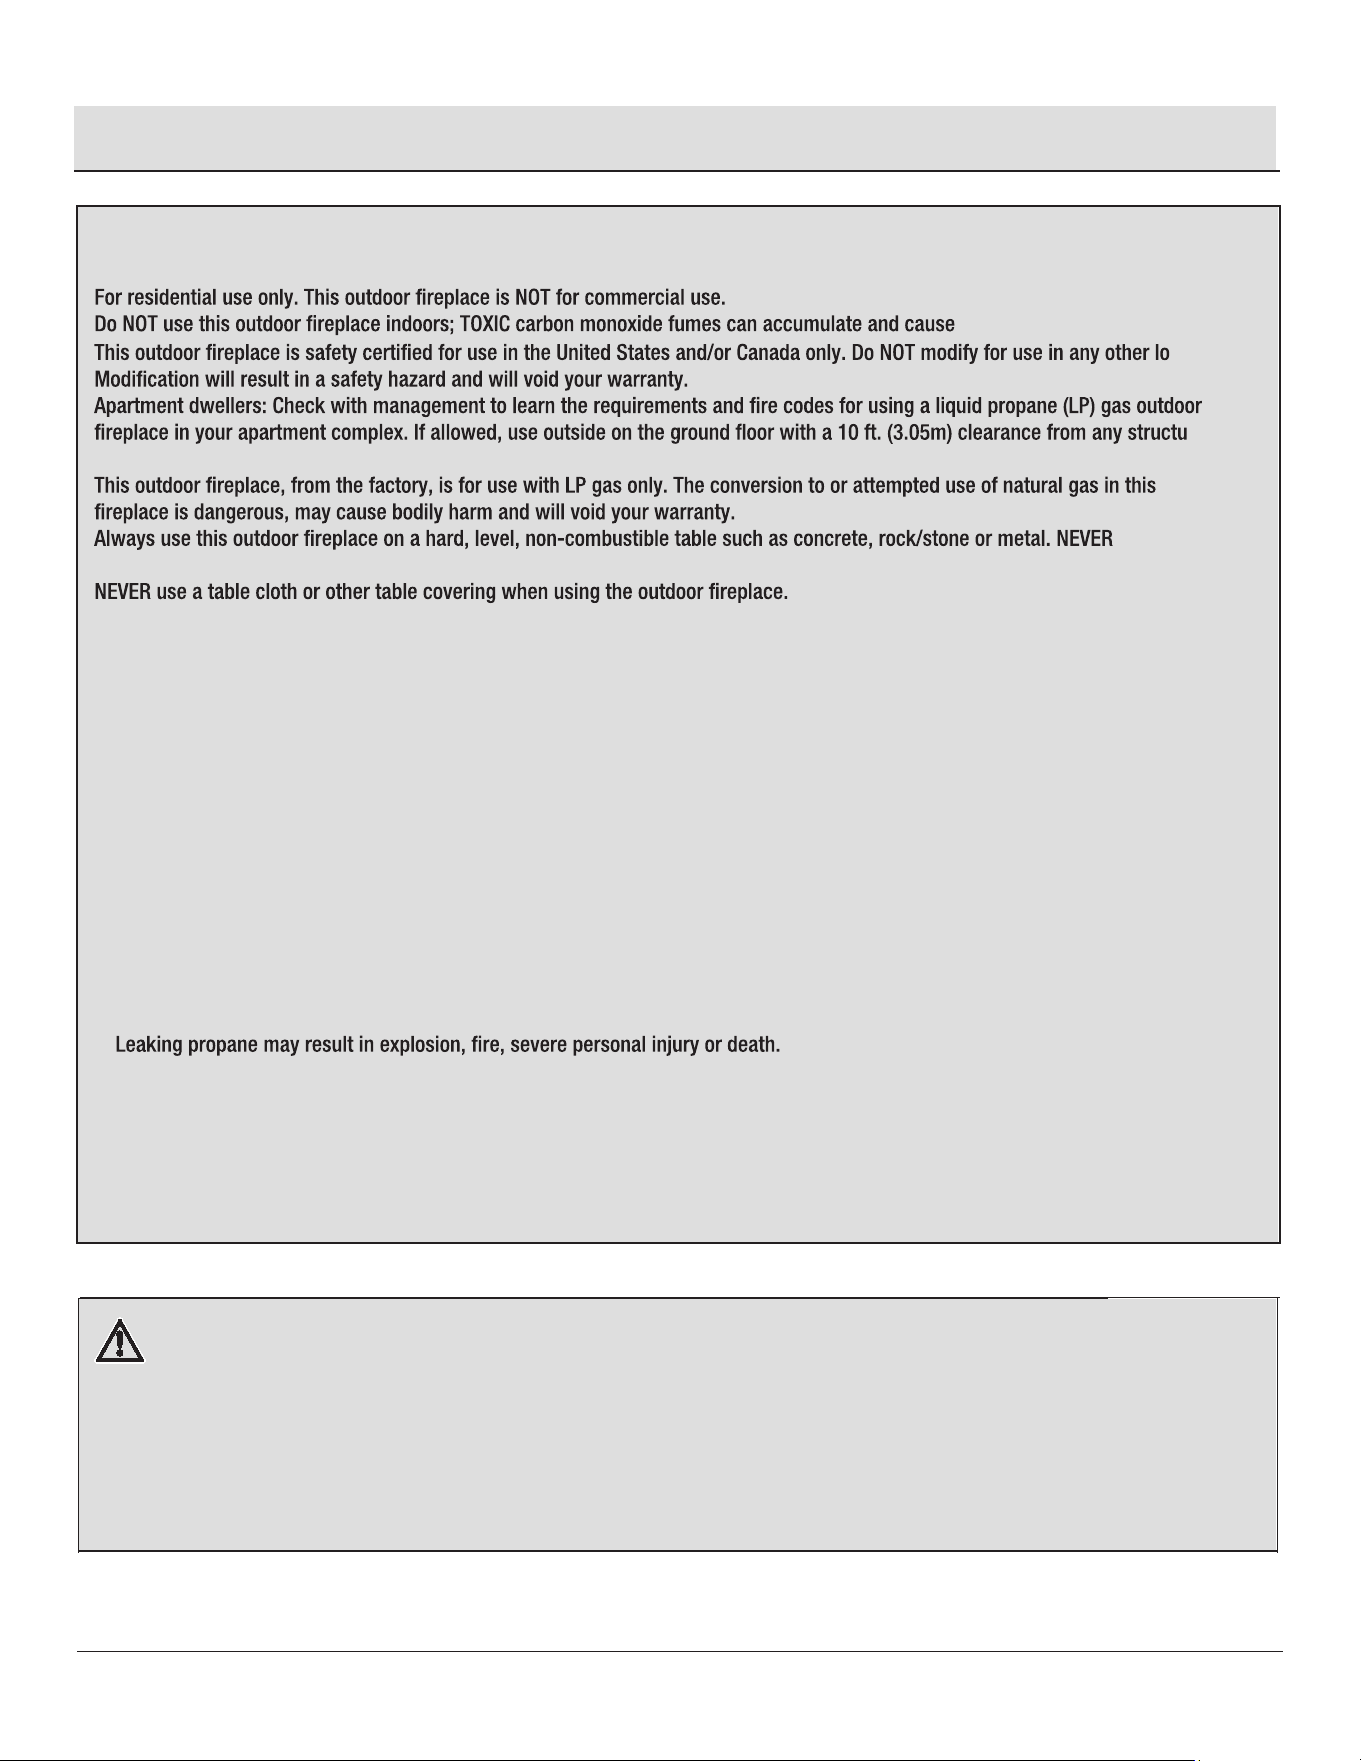
This appliance is for outdoor use only, and should NOT be used in a building, garage or any other enclosed area.
Do NOT operate, light or use this appliance within 10 ft. (3.05m) of walls, structures or buildings.
asphyxiation.
cation.
re. Do
NOT use on or under balconies.
outdoor
use on a wood or
composite table.
LP gas characteristics:
□ LP gas is ammable and hazardous if handled improperly. Become aware of the characteristics before using any LP gas product.
□ LP gas is explosive under pressure, heavier than air, and settles/pools in low areas.
□ LP gas in its natural state has no odor. For your safety, an odorant is added that smells like rotten cabbage.
□
Contact with LP gas can cause freeze burns to skin.
An LP gas tank is needed to operate. Only tank marked “propane” may be used.
□ The LP gas cylinder must be constructed and marked in accordance with the U.S.Department of Transportation (D.O.T) Specications
for LP-Gas Cylinders, or the Standard for Cylinders, Spheres and Tubes for the Transportation of Dangerous Goods and Commission,
CAN/CSA-B339 as applicable.
The LP gas tank must be arranged for vapor withdrawal.
□ Never use an LP gas tank with a damaged body, valve, collar or footing.
□ Dented or rusted LP gas tanks may be hazardous and should be checked by your LP gas supplier prior to use.
□
The LP gas tank should not be dropped or handled roughly.
□ Tanks must be stored outdoors, out of the reach of children and must not be stored in a building, garage or any other enclosed area.
Your LP gas tank must never be stored where temperatures can reach over 125 °F.
□ Do not insert any tool or foreign object into the valve outlet or safety relief valve. You may damage the valve and cause a leak.
□ Never keep an LP gas tank in a hot car or truck. Heat will cause the gas pressure to increase, which may open the relief valve and allow
gas to escape.
□ Do NOT store a spare LP gas tank under or near this appliance.
□ A re causing serious injury or damage to property may occur if the above is not followed exactly.
WARNING: FUELS USED IN LIQUIFIED PROPANE GAS APPLIANCES, AND THE PRODUCTS OF COMBUSTION OF SUCH FUELS, CAN
EXPOSE YOU TO CHEMICALS INCLUDING BENZENE, WHICH IS KNOWN TO THE STATE OF CALIFORNIA TO CAUSE CANCER AND
CAUSE BIRTH DEFECTS OR OTHER
REPRODUCTIVE HARM. For more information go to: www.P65Warnings.ca.gov.
ADVERTENCIA: LOS COMBUSTIBLES USADOS EN EQUIPOS PARA LICUAR GAS PROPANO, ASÍ COMO LOS PRODUCTOS DE SU
COMBUSTIÓN, PUEDEN EXPONERTE A SUSTANCIAS QUÍMICAS, ENTRE ELLAS EL BENCENO, QUE EL ESTADO DE CALIFORNIA
RECONOCE COMO CAUSA DE CÁNCER Y DE MALFORMACIONES CONGÉNITAS Y OTROS DAÑOS AL SISTEMA REPRODUCTOR.
Para más información, visite www.P65Warnings.ca.gov
HAMPTONBAY.COM
Please contact 1-855-HD-HAMPTON for further assistance.
□
4
Safety Information (continued)
ting
Instructions” section, as shipping can loosen connections.
Check for leaks even if your unit was assembled for you by someone else.
for a leak:
□
□ No smoking. Do Not use or permit sources of ignition in the area while conducting a leak test.
□ Conduct the leak test outdoors in a well-ventilated area.
□
□ The use of alcohol, prescription or non-prescription drugs may impair the consumer’s ability to properly assemble or safely operate the
appliance.
□ Strong odors, colds, sinus congestion, etc. may prevent the detection of propane. Use caution and common sense when testing for
leaks.
□
□ If you are unable to stop a leak, disconnect the LP gas supply. Call a gas appliance serviceman or your local LP gas supplier.
Do NOT connect to a remote gas supply.
outdoor
burning.
Do NOT burn solid fuels such as: wood, charcoal briquettes, lump charcoal, manufactured logs, driftwood, trash, leaves, paper, cardboard,
before each use.
r
overhanging trees and shrubs.
ance and
replace any part, control system, or gas control that has been underwater.

5
Safety Information (continued)
Do NOT use in windy conditions.
l the unit
has completely cooled (about 45 minutes), unless you are wearing protective gear (such as insulated pot holders or heat-resistant gloves/
mittens).
Children and adults should be alerted to the hazards of high surface temperatures and should stay away to avoid burns or clothing
ignition.
Young children should be carefully supervised when they are in the area of the appliance.
Any guard or other protective device removed for servicing the appliance shall be replaced prior to operating the appliance.
nually by
burners,
and circulating air passageways of the appliance are kept clean.
If applicable, protective covers must be removed when burner is in operation.
appliance.
If there is evidence of burner damage, the burner must be replaced prior to the appliance being operated.
uent
cleaning may be required. Do NOT operate until all parts have been repaired or replaced.
Use only the regulator assembly provided.
Use only the burner provided.
Do NOT operate this appliance without reading “Operating Instructions” in this manual.
d properly
stored outdoors.
The cylinder must be disconnected when the appliance is not in use.
The pressure regulator is set for 11 in. of water column.
Before pressure testing, close the LP gas tank valve and disconnect the gas regulator. The gas supply piping system must test at
pressures equal to or less than ½ PSI (3.5kPa).
Fire logs, glass, and lava rock are very hot. Keep children or pets at a safe distance from this appliance.
Do NOT store any combustible materials in the base enclosure.
Use protective gloves when assembling this product.
Do NOT force parts together, as this can result in personal injury or damage to the product.
Death, serious injury or damage to property may occur if the safty information above is not followed exactly.
HAMPTONBAY.COM
Please contact 1-855-HD-HAMPTON for further assistance.
6
Warranty
ar
1 YEAR LIMITED WARRANTY
WHAT IS COVERED
We warrant the metal frame to be free of manufacturing defects to the original purchaser for one year.
WHAT IS NOT COVERED
It remains the customer’s responsibility for freight and packaging charges to and from our service center. This warranty does not cover
s warranty. We
reserve the right to make substitutions with similar merchandise, if the model in question is no longer in production.
Contact the Customer Service Team at 1-855-HD-HAMPTON or visit www.hamptonbay.com.
Pre-Assembly
PLANNING ASSEMBLY
Carefully remove all pieces from the carton and make sure that you have all parts (refer to the hardware and package contents list). If you are missing
parts, please contact 1-855-HD-HAMPTON for further assistance.
NOTE: Please read and understand the entire manual
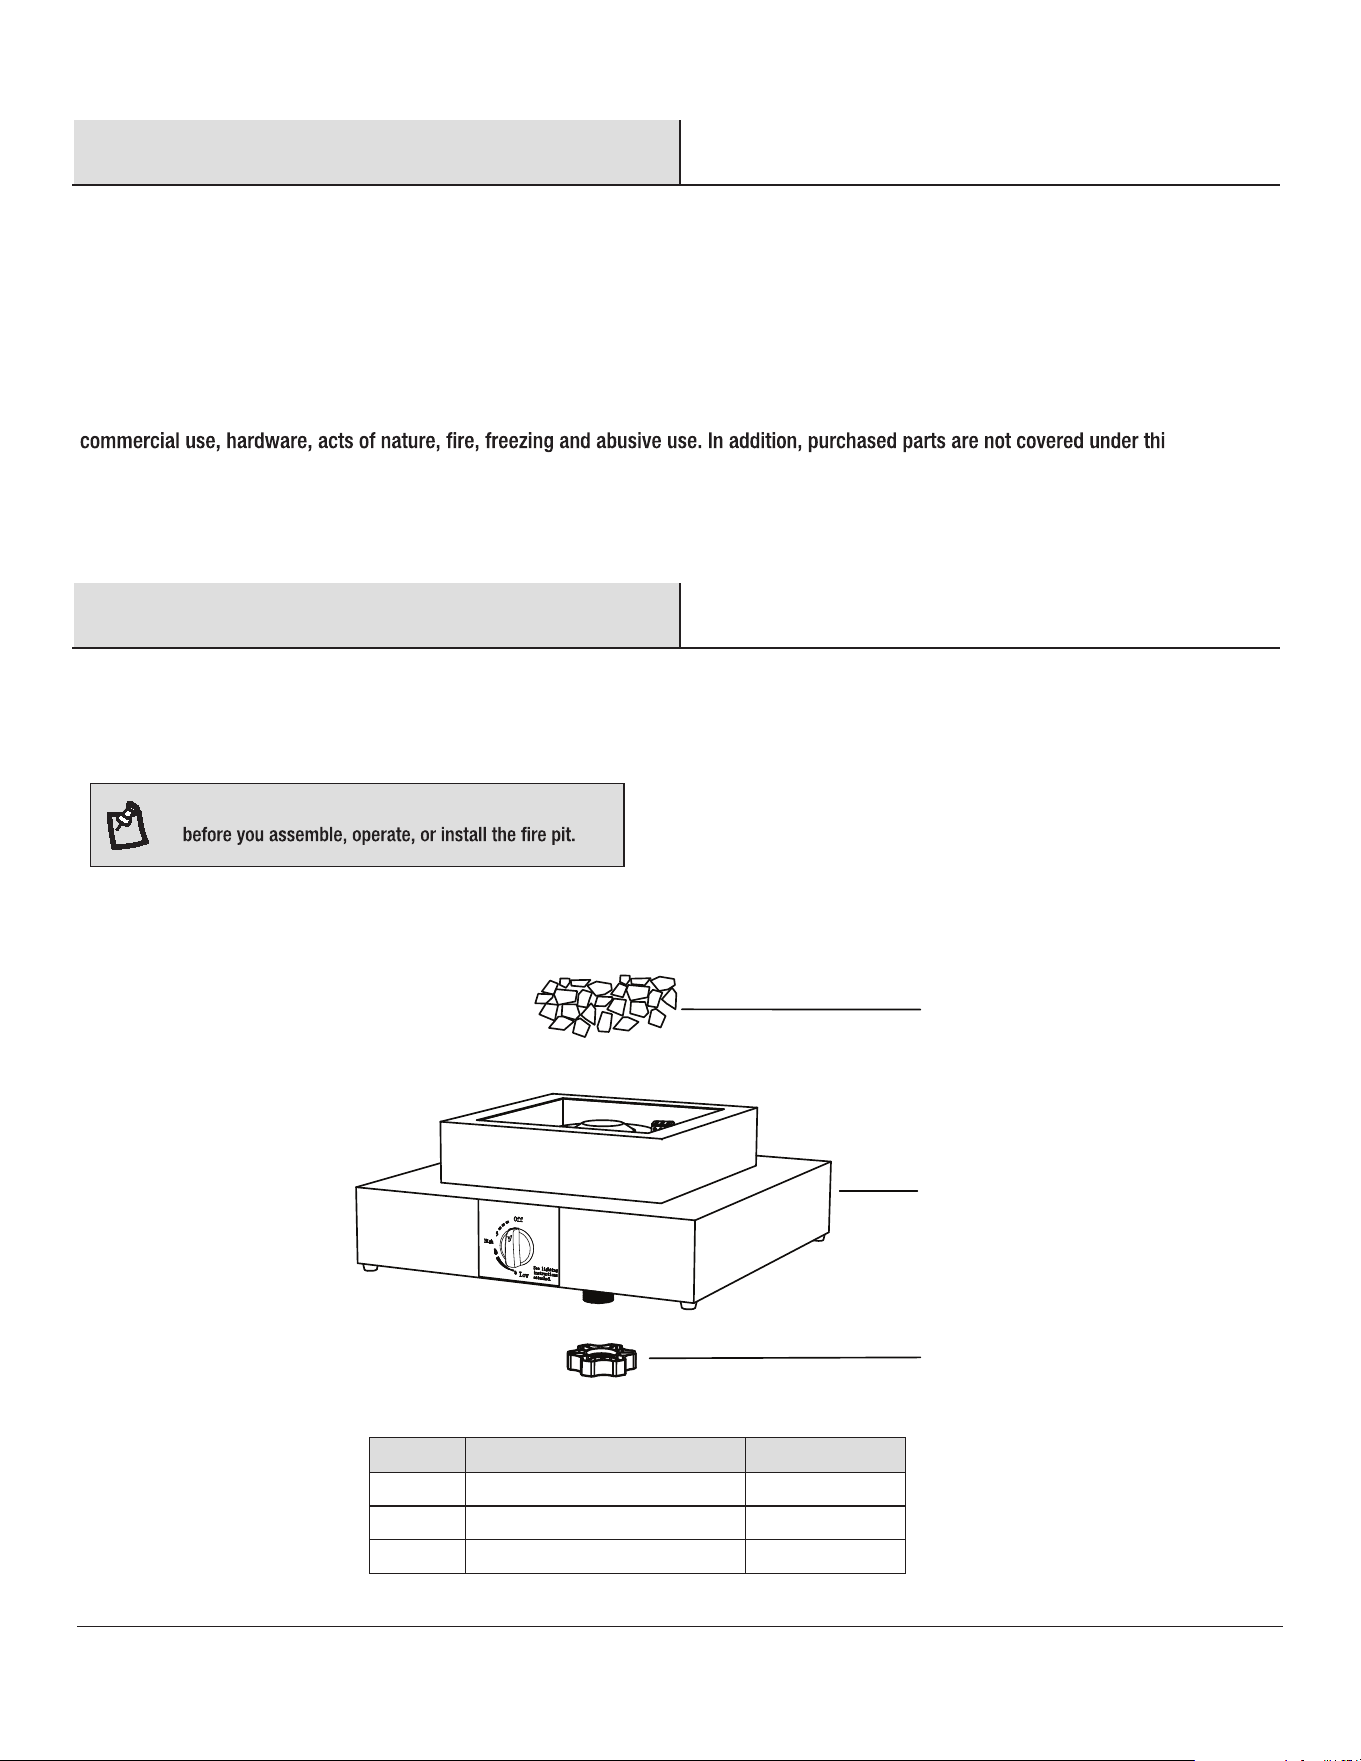
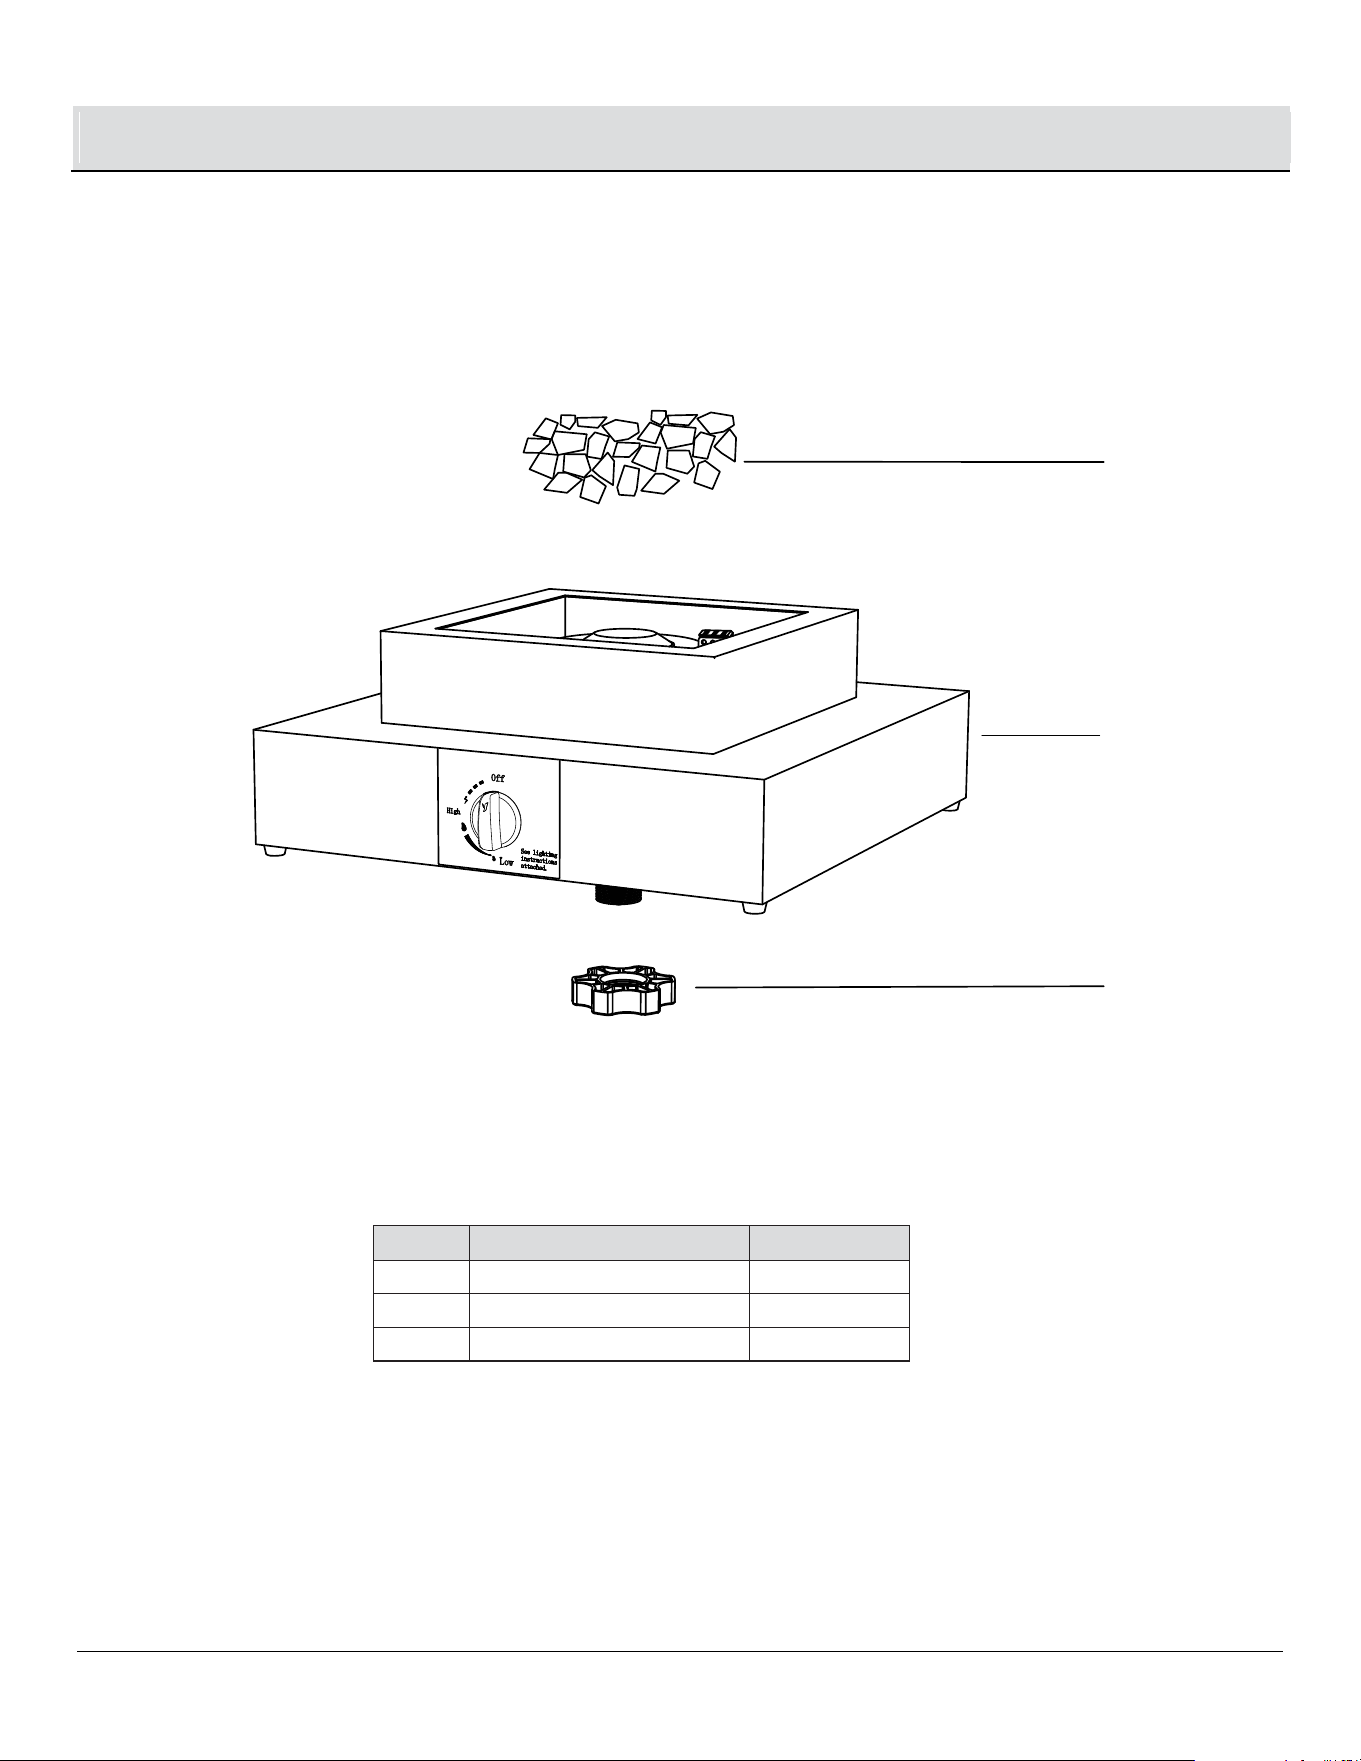
PACKAGE CONTENTS
A
B
C
Part Description Quantity
A Glass Rock 1
B Base 1
C Base Nut 1
1
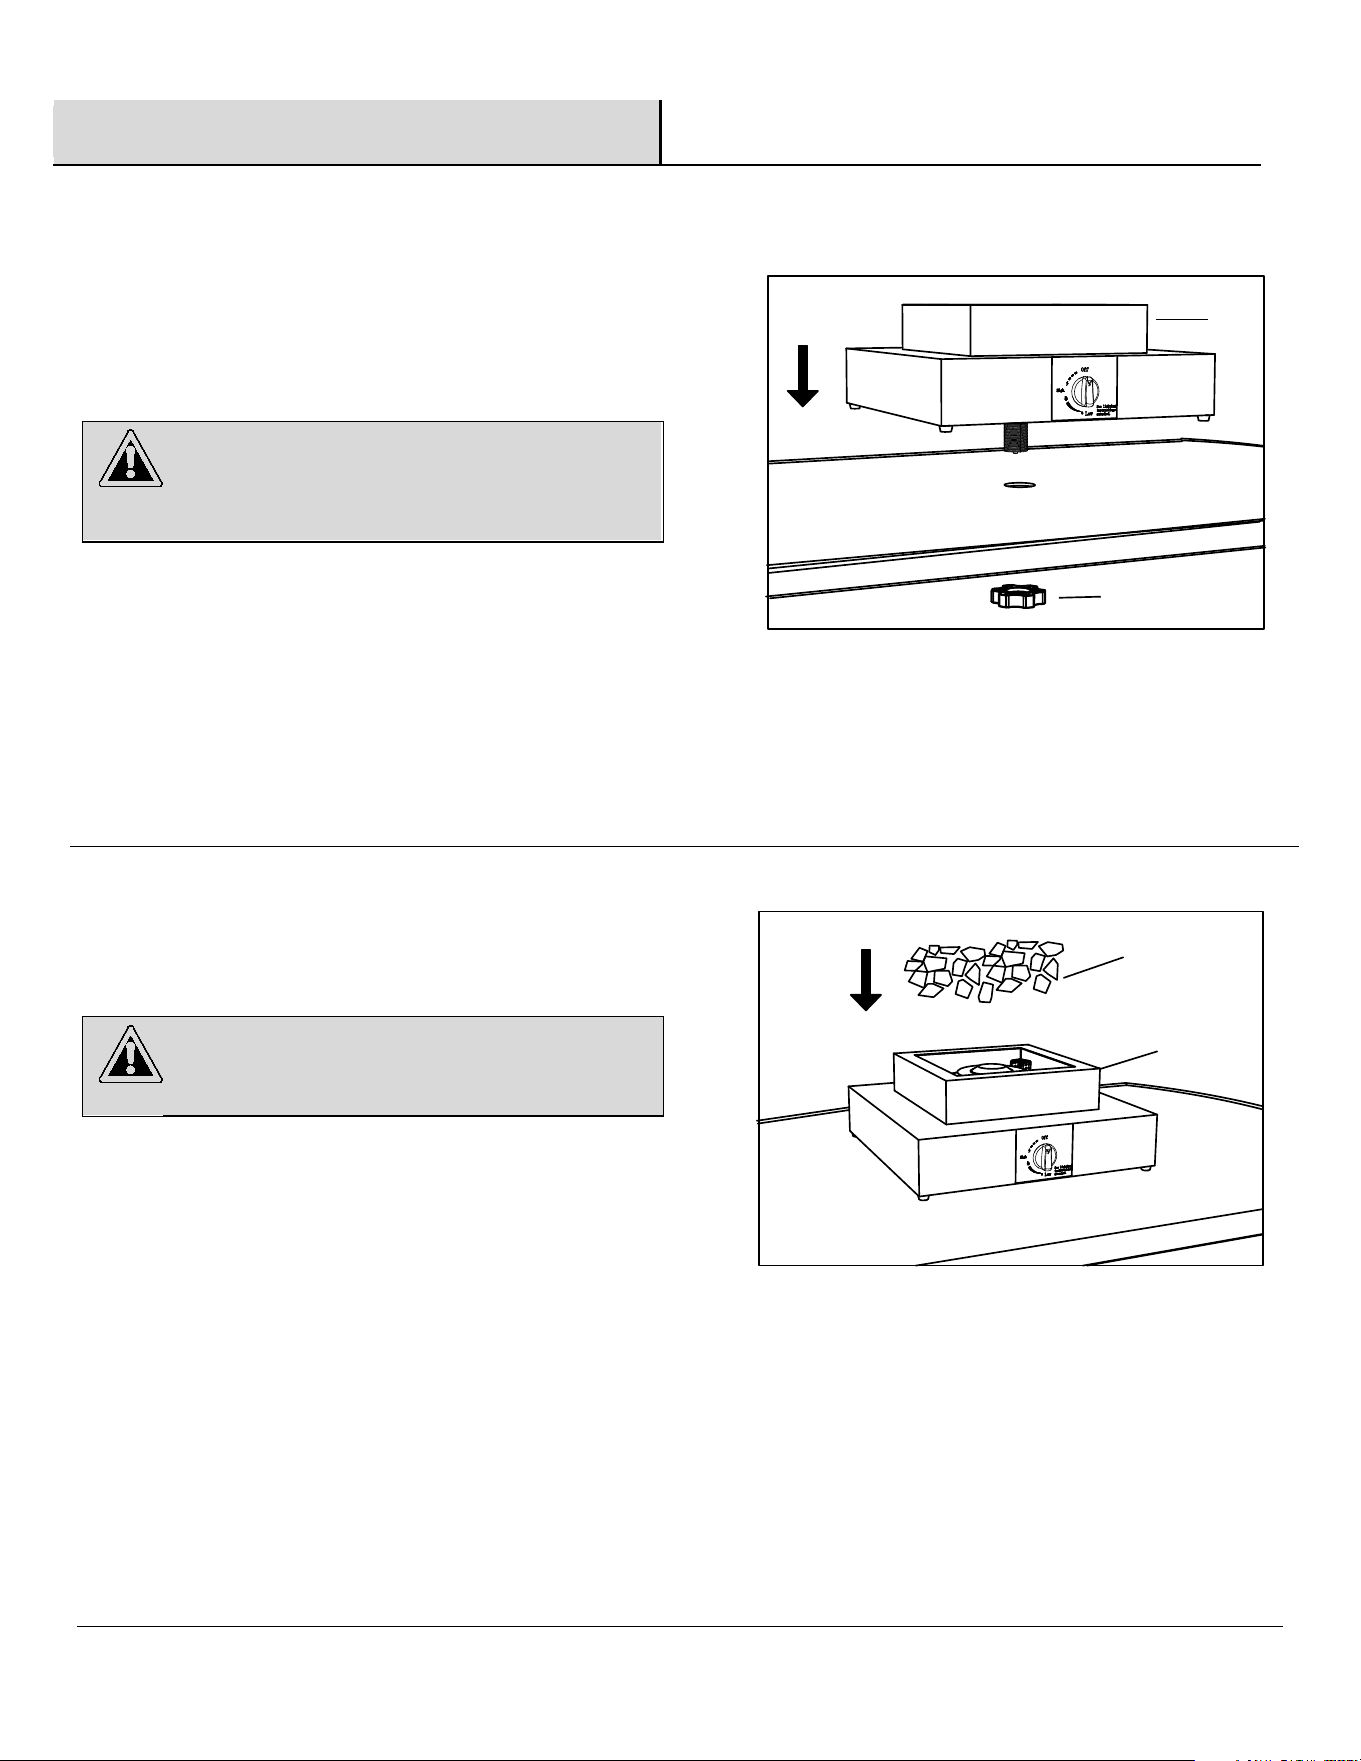
Assembling the base nut
□ Place the base (B) over the umbrella opening on your table and
secure in place by tightening the base nut (C) underneath the
table.
CAUTION:
Assembly
This replace is best suited to t tables that are less than
1.1 in. thick.
Wear gloves during assembly.
2
Placing the glass rock
□ Place the glass rock (A) into the base (B). Leave the burner
exposed.
B
C
A
B
CAUTION:
Do NOT dump glass rock out of package. Carefully place glass
rock by hand so dust does not clog burner.
7
HAMPTONBAY.COM
Please contact 1-855-HD-HAMPTON for further assistance.
8
Assembly (continued)
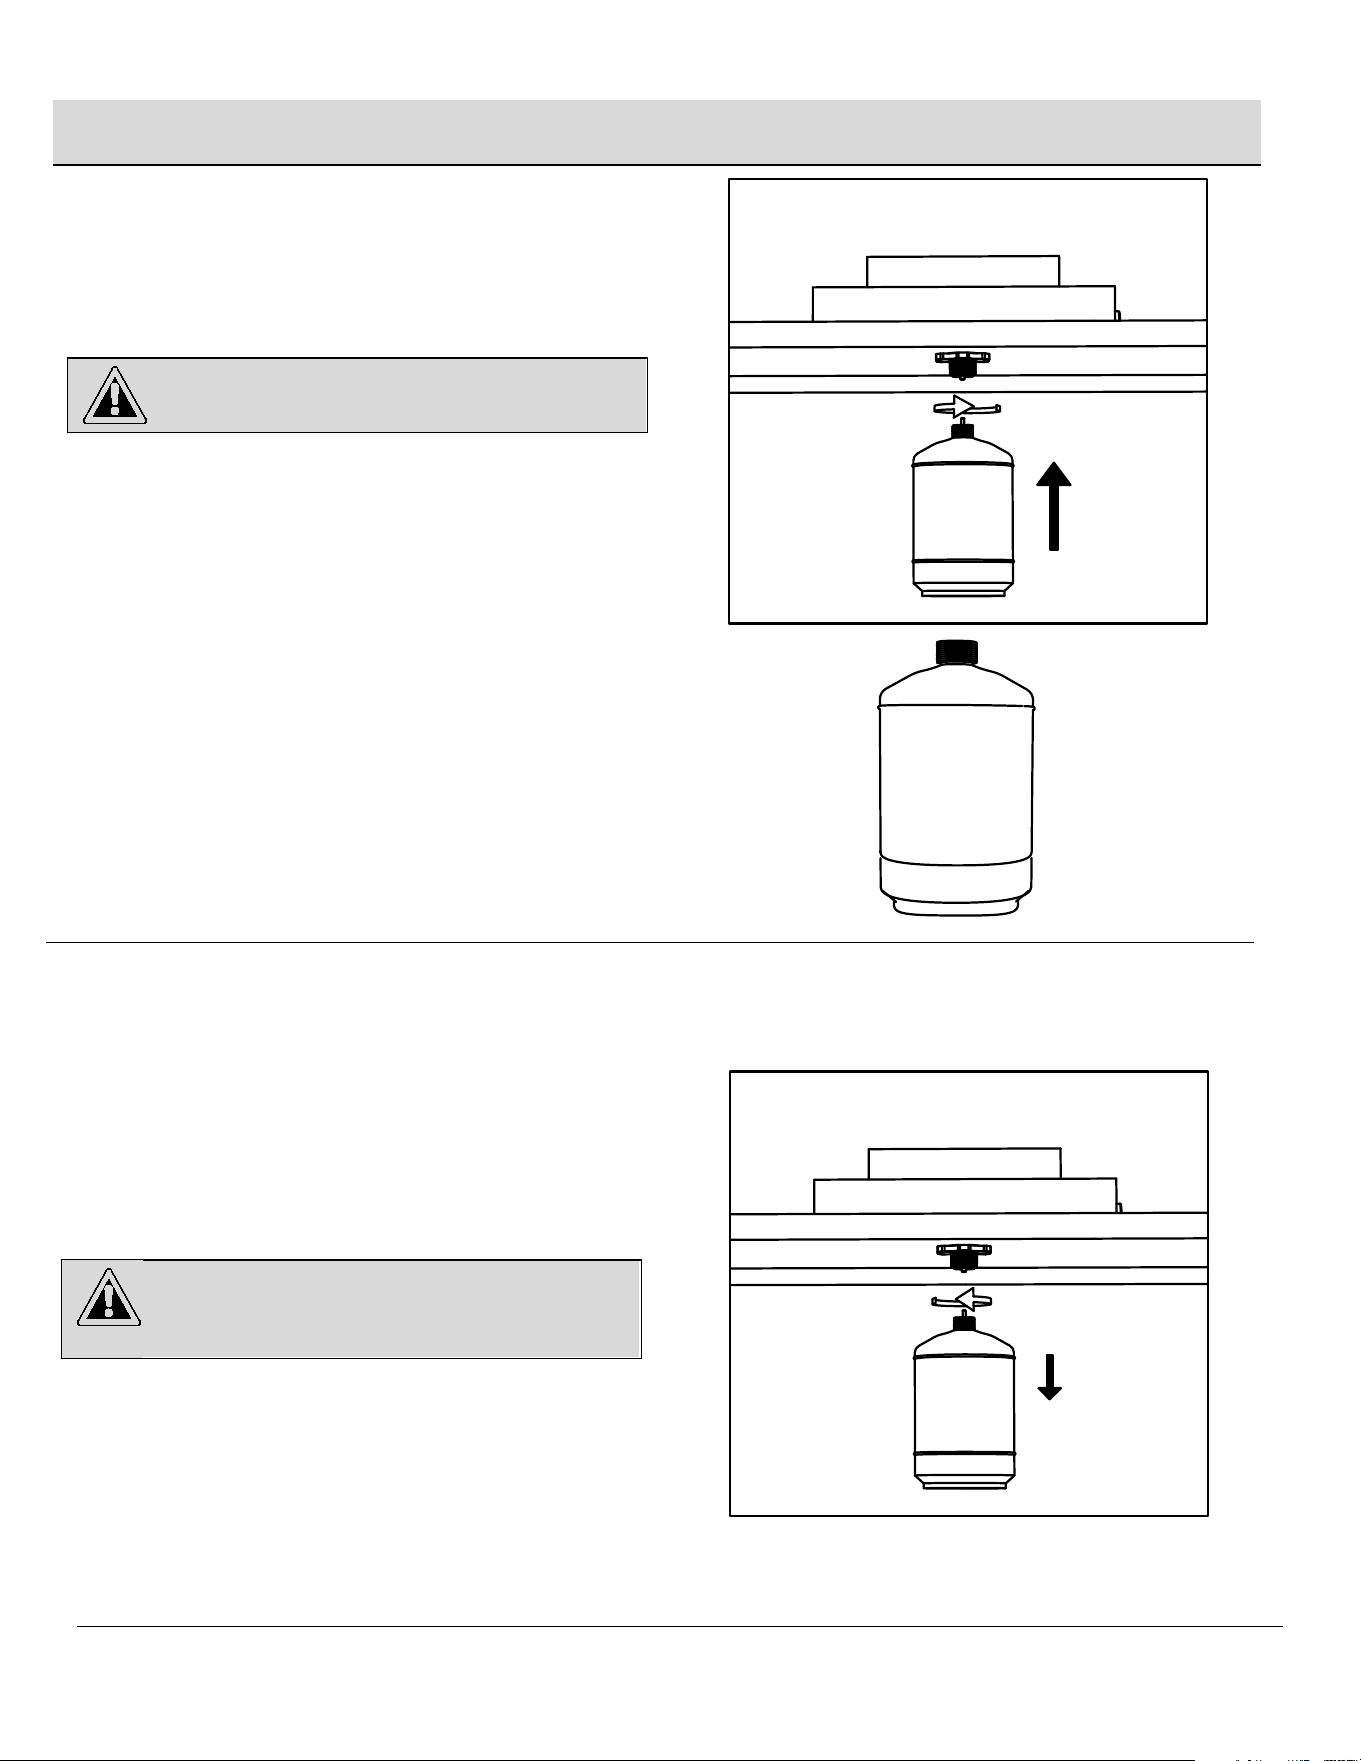
3
Assembling the LP gas tank
□
CAUTION:
The LP gas tank is sold separately. Use a 1lb LP gas tank.
1 lb
453 g
Insert and rotate the gas tank (not included) clockwise into the
bottom of the replace until they t snugly together.
□ Turn the control knob to the “OFF” position.
□ Rotate the LP gas tank counterclockwise until it is detached.
□ Store the LP gas tank in a proper location.
□ Place the protective cover on the LP tank and store the tank
outdoors in a well ventilated area out of direct sunlight.
CAUTION:
LP gas tank must be properly disconnected and removed
prior to moving this outdoor fireplace.
4
Disconnecting the LP gas tank

9
Operation
WARNING:
provided in the “Safety Information” section beginning on page 2. Failure to follow those instructions can cause death, serious
injury or property damage.
BURNER CONNECTIONS
□ Make sure the valve connections are securely fastened to the tank.
□ Please refer to the diagram for proper installation (Figure 1).
TANK/GAS LINE CONNECTION
1, Make 2-3 oz. of leak detection solution by mixing one part liquid dishwashing soap with three parts water.
2, Make sure the regulator/control knob is in the “OFF” position (Figure 2).
3, Apply the leak detection check solution on the “X” locations (Figure 1).
a. If any bubbles appear, remove the LP gas tank and reconnect, making sure the connection is secure.
b. If you continue to see bubbles after several attempts, remove the LP gas tank per the "Disconnecting the LP gas tank" section above,
and contact 1-855-HD-HAMPTON for assistance.
c. If no bubbles appear after one minute, turn the control knob to the “OFF” position, wipe away solution and proceed.
Figure 1
Figure 2
WARNING:
death, serious bodily injury or damage to property.
CHECK FOR LEAKS
HAMPTONBAY.COM
Please contact 1-855-HD-HAMPTON for further assistance.
Off
High
Low
See lighting
instructions
attached.
Before using this outdoor replace, make sure you have read, have understood and are following all information
10
Operation (continued)
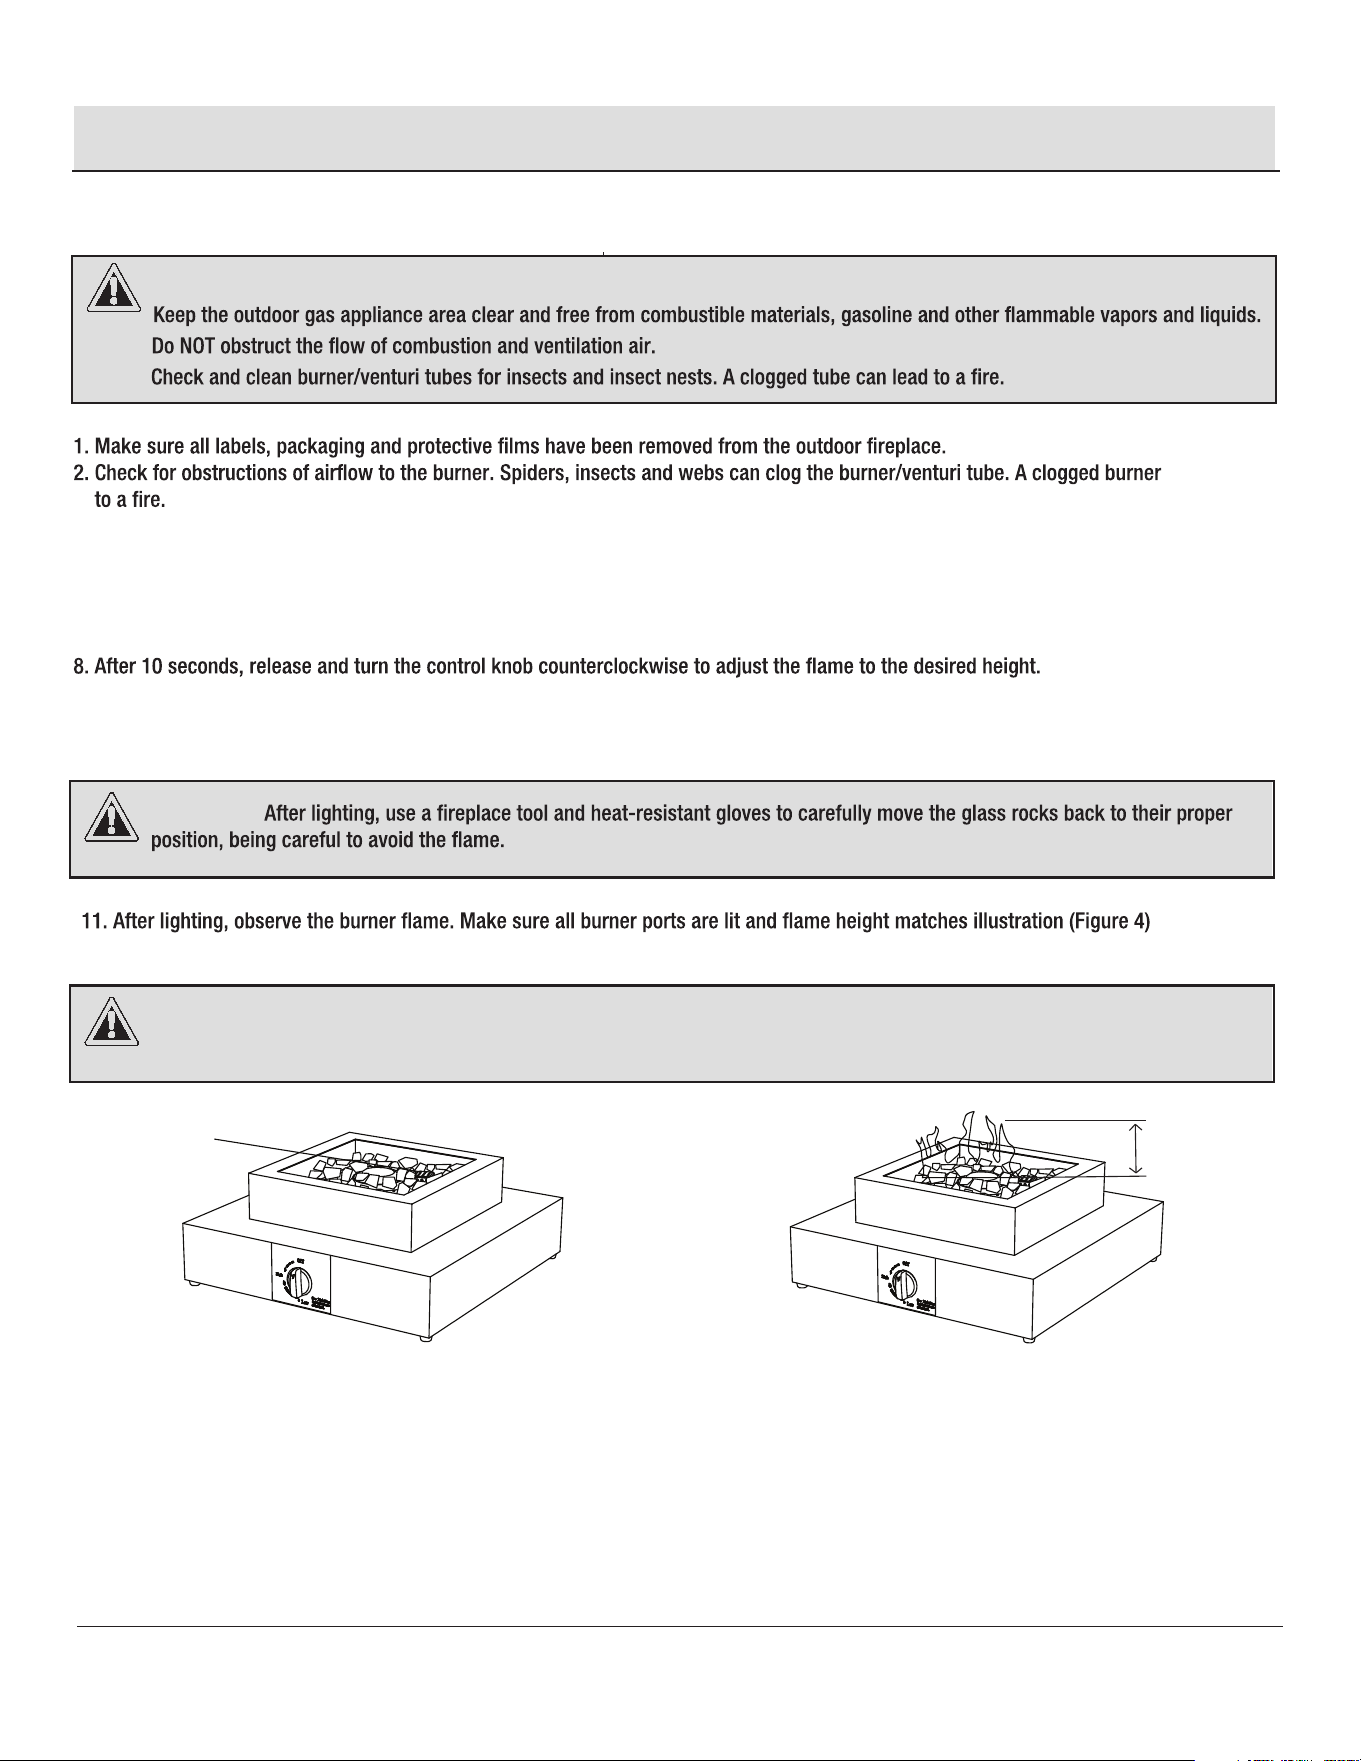
CAUTION:
LIGHTING
CAUTION:
tube can lead
3. Control knob must be in the “OFF” position (Figure 2).
4. Clear small area of glass rocks away from the igniter cover (Figure 3), make sure no glass rock between thermocouple and burner.
5. Connect the LP gas tank per “Assembling the LP Gas Tank” section.
6. Wearing heat-resistant gloves, position a long lit match or long lit butane lighter near the burner.
7. Turn the control knob to HIGH.
9. Remove match/ lighter once the burner is lit.
10. If ignition does not occur in 5 seconds, turn the burner control knob to OFF, wait 5 minutes, fan with a newspaper or magazine, and repeat
the lighting procedure.
.
CAUTION: If ignition does not occur in 5 seconds, turn the control knob to “OFF”, wait 5 minutes, fan with a newspaper or
magazine, and repeat lighting procedure.
Figure 3
Figure 4
TURNING OFF
1. Turn the control knob to the “OFF” position.
Note: A “poof” sound is normal as the last of the LP gas is burned.
2. Disconnect the LP gas tank per “Disconnecting LP Gas Tank” section.
Igniter cover
4 in. - 6 in.
10 -15 cm
11
Maintenance
Care and Cleaning
NOTICE:
□
□ Abrasive cleaners will damage this product.
□
CAUTION:
BEFORE EACH USE:
□
□
□ Keep the ventilation opening(s) of the LP gas tank area free and clear from debris.
□ See care and cleaning below for proper cleaning instructions.
□ Check all gas connections for leaks.
□ Check components for any signs of damage or rust.
□ enturi tube
□ If damage to any component is detected, do NOT operate until repairs are completed.
CLEANING SURFACES
□ Wipe surfaces clean with mild dishwashing detergent or baking soda mixed with water.
□ For stubborn stains, use a citrus-based cleaner and a nylon scrubbing brush.
□ Rinse clean with water.
□ Allow to air dry.
BEFORE STORING
□ Turn the control knob to the “OFF” position.
□ Disconnect the LP gas tank per “Disconnecting the LP gas tank” section.
□ Clean all surfaces.
□ Lightly coat the burner with cooking oil to prevent excess rusting.
□ ts.
□
HAMPTONBAY.COM
Please contact 1-855-HD-HAMPTON for further assistance.
12
Troubleshooting
PROBLEM
PROBABLE CAUSE SOLUTION
The burner will not light with a
match.
Check if the LP gas tank is empty.
□ Replace the tank if it is empty.
□
The LP gas tank is low or empty.
Replace the LP gas tank.
There is an LP gas leak.
The coupling nut and regulator are
not fully connected.
1. Turn the LP gas tank valve to “closed”.
2. Wait 5 minutes for gas to clear.
3. Follow the “Check for Leaks” section.
Turn the coupling nut about one-half to three-quarter additional turn until
solid stop. Tighten by hand only - do NOT use tools.
The burner ports are clogged or
blocked.
The LP gas tank is empty.
There is a sudden drop in gas
The safety device may have been
activated.
Clean the burner/venturi tube.
Replace the LP gas tank.
1. Turn the control knob to “OFF”.
a. Turn the control knob “OFF”.
b. Remove the LP gas tank.
c. Wait one minute.
d. Attach the LP gas tank.
e. Perform a leak check per the “Check for Leaks” section.
full burner.
The burner ports are clogged or
blocked.
Clean burner ports.
A new burner may have residual
manufacturing oils.
There are spider webs or insect
nest in the burner/venturi tube.
There is poor alignment of the valve
to the burner/venturi tube.
There are high or gusting winds.
The LP gas tank is low on gas.
tripped.
Clean the burner/venturi tube.
Ensure the burner/venturi tube is properly engaged with valve.
Spider webs or insect nests are in the
venturi.
Clean the burner/venturi tube.
Clean the burner/venturi tube.
The flame goes out.
Replace the LP gas tank.
the venturi/burner tube).
The burner and/or burner/venturi
tube is blocked.
Clean the burner and/or burner/venturi tube.
weather, with temperatures
below 50°F.
Ice has built up on the outside of the
LP gas tank because the vaporization
process is too slow.
1. Turn off the unit per the “Turning Off” section;
2. Replace the LP gas tank with a spare LP gas tank;
3. Reconnect the LP gas tank per “Installing LP Gas Tank” section;
4. Follow the “Check for Leaks” section;
13
Service Parts
A
B
C
HAMPTONBAY.COM
Please contact 1-855-HD-HAMPTON for further assistance.
Part Description Quantity
A Glass Rock 1
B Base 1
C Base Nut 1

Questions, problems, missing parts? Before returning to the store,
call Hampton Bay Customer Service
8 a.m. - 7 p.m., EST, Monday-Friday
1-855-HD-HAMPTON
HAMPTONBAY.COM
Retain this manual for future use.
9 a.m. - 6 p.m., EST, Saturday