Q2 Projector
USER MANUAL

EN
English P01-19
DE
Deutsch P20-38
FR
Français P39-57
ES
Español P58-76
IT
Italiano P77-95
JP
日本語
P96-114

EN
1
CONTENT
PACKAGE LIST · · · · · · · · · · · · · · · · · · · · · · · · · · · · · 2
PRODUCT STRUCTURE · · · · · · · · · · · · · · · · · · · · · · · · 3
REMOTECONTROL· · · · · · · · · · · · · · · · · · · · · · · · · · · 4
PROJECTORSPECIFICATIONS· · · · · · · · · · · · · · · · · · · · · 5
IMAGE ADJUSTMENT · · · · · · · · · · · · · · · · · · · · · · · · · 6
1.Focus Adjustment 6
2.Projection Mode 6
3.Keystone Correction 6
4.Zoom Mode 8
5.Brightness Adjustment 8
6.Other Setting 9
SETTING UP THE PROJECTOR · · · · · · · · · · · · · · · · · · · · 10
WIRELESS CONNECTION · · · · · · · · · · · · · · · · · · · · · · · 11
1.For IOS System (Airplay) 11
2.For Android System(Miracast) 12
3.Eshare 12
BLUETOOTH SETTINGS · · · · · · · · · · · · · · · · · · · · · · · · 13
Connect Bluetooth Speakers 13
SIGNAL LINES CONNECTION · · · · · · · · · · · · · · · · · · · · · 14
1.USB Multimedia Connecting 14
2.Connecting with Laptop 14
3.Connecting with MacBook or Mac Book Air 14
4.Connecting with Sound bar 15
5.Connecting with Fire TV Stick 15
6.Connecting with XBOX/PS4 15
LANGUAGE SETTING · · · · · · · · · · · · · · · · · · · · · · · · · 16
OTHER SETTING · · · · · · · · · · · · · · · · · · · · · · · · · · · · 16
DATE AND TIME SETTING · · · · · · · · · · · · · · · · · · · · · · · 17
ABOUT US · · · · · · · · · · · · · · · · · · · · · · · · · · · · · · · 18
FAQ · · · · · · · · · · · · · · · · · · · · · · · · · · · · · · · · · · 18

EN
2
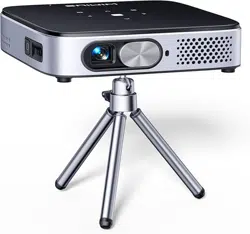
PACKAGE LIST
WiMiUS Q2 Projector Remote Control
Power Cable HDMI to Mini HDMI Cable
AC to USB-A Cable Projector Steady
User Manual

EN
3
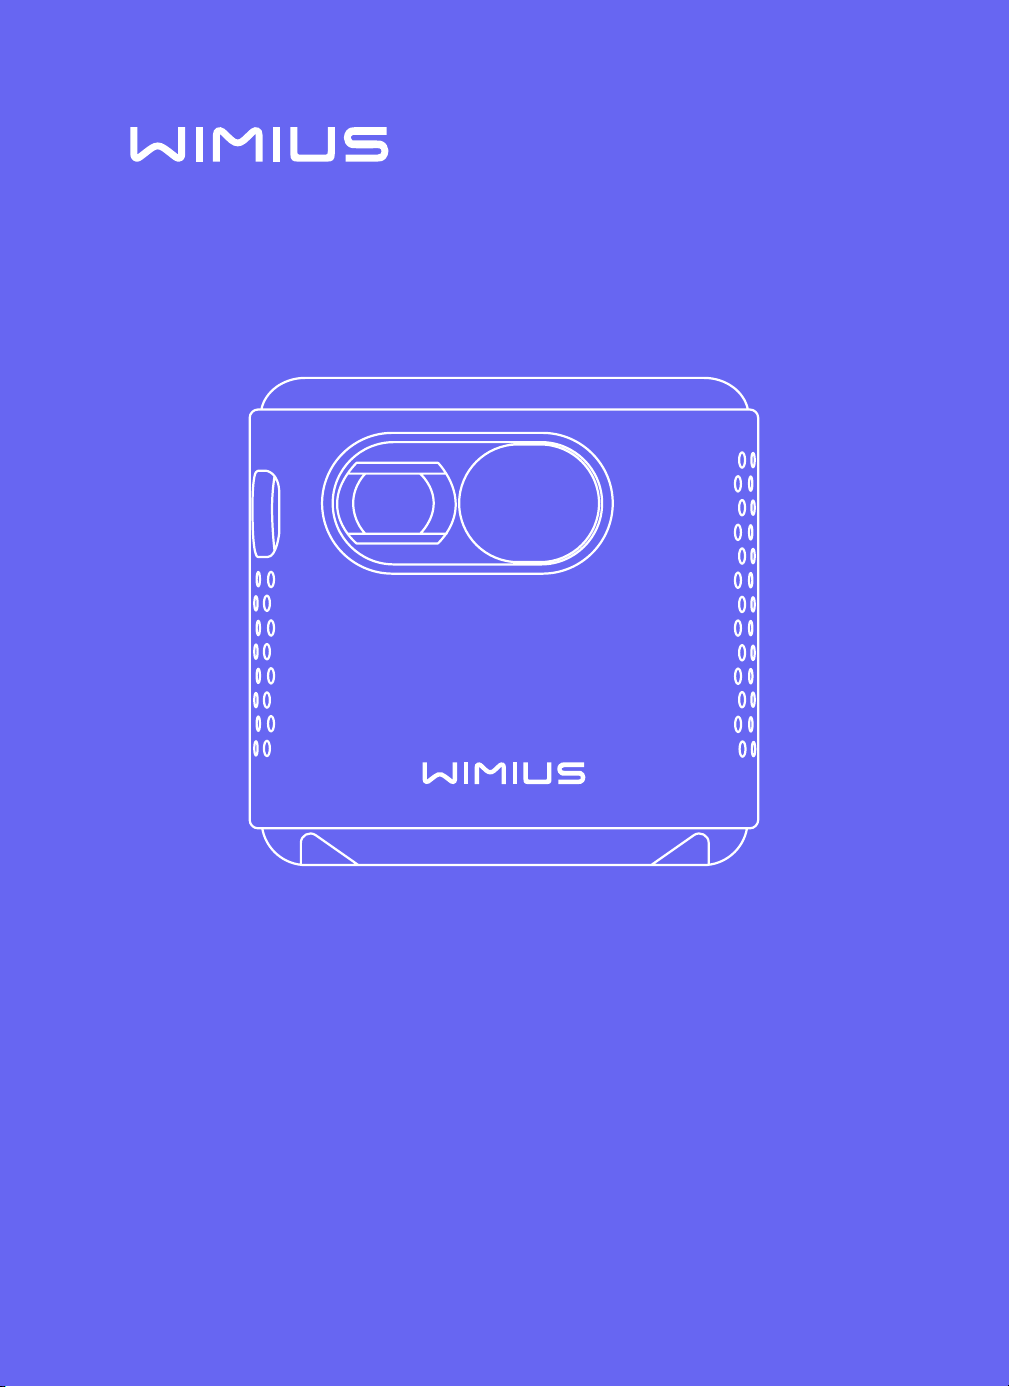
PRODUCT STRUCTURE
Lens
Focusing
HDMI IN
IR
DC-IN
USB
Power ON/OFF
Audio OUT
Volume
Touch Screen
Menu (with lock screen function)
Homepage
Return

EN
4
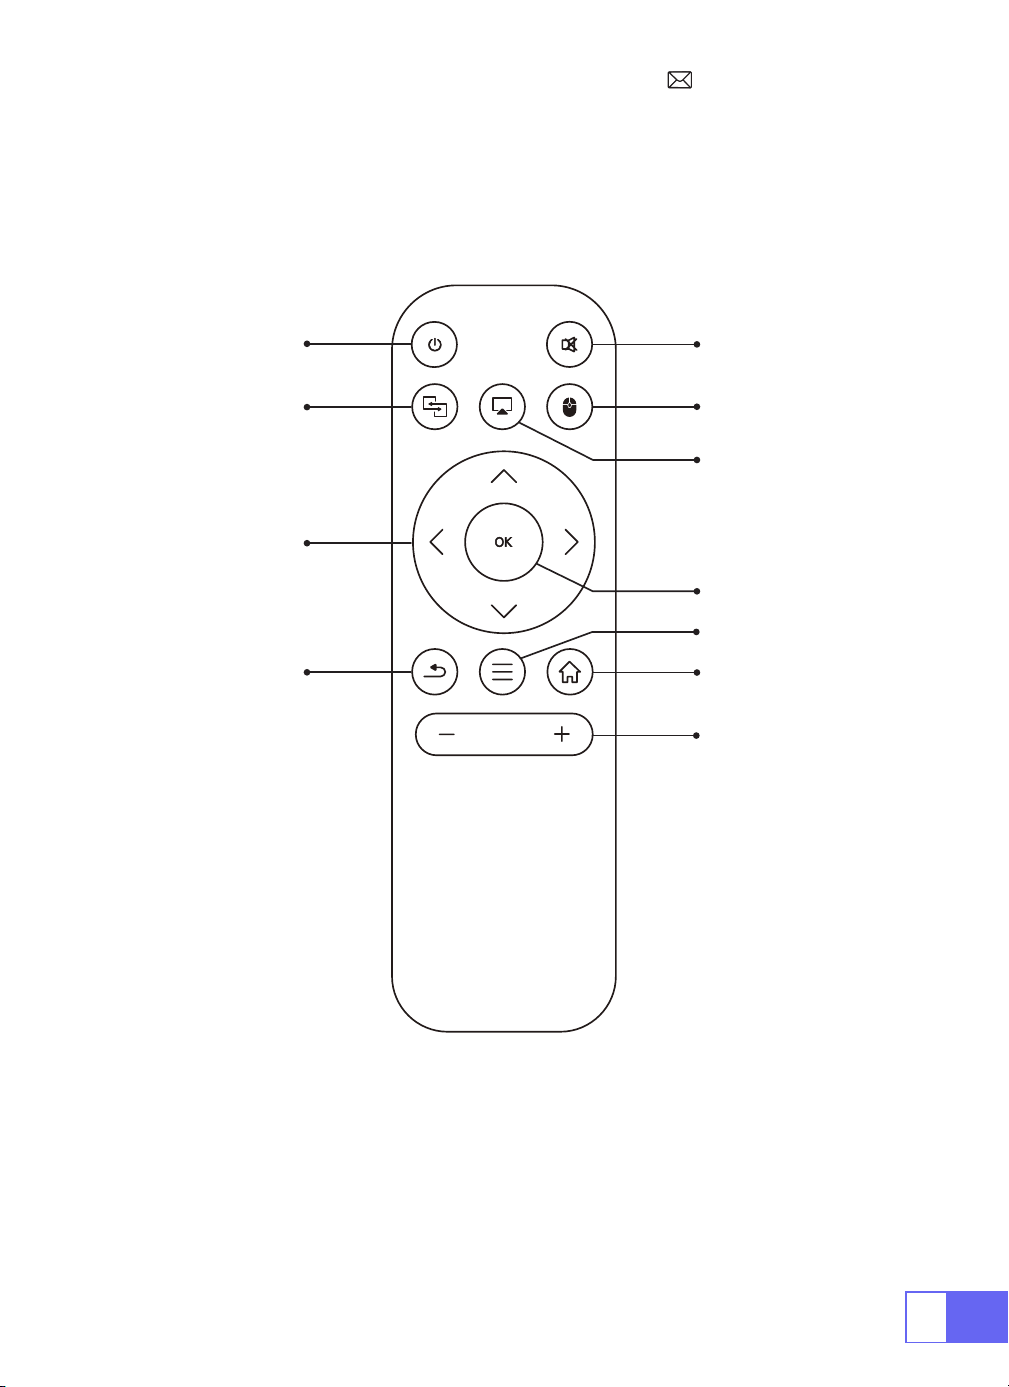
REMOTECONTROL
ON/OFF
Mute
Switch to
mouse control
Home
Menu
VOL+/-
OK
Airplay
Eshare
Directions
Return
Note:
Install 2 pieces of AAA batteries(not included) into the remote
before using.

EN
5
PROJECTORSPECIFICATIONS
Model No.: Q2
Display Technology DLP Light Source LED
Software System Android 7.1 Projector Type Sealed
Installation Type
Front/Rear on Desk,
Front/Rear on Ceiling
Aspect Ratio 16:9/4:3
Product Size 60mm*60mm*58mm Product Weight 210g
Keystone Correction
Auto vertical
correction
Focus Manual
Input Interface HDMI/USB/3.5mm audio out
VideoFormat DAT, MPG, VOB, TS, AVI, MKV, MP4, MOV, 3GP, FLV, WEBM,WMV, ASF, MKV
Audio Format MP1, MP2, MP3, WMA, WAV, OGG, OGA, AAC, M4A, 3GP
Image Format BMP, JPG, PNG
EN
6
IMAGE ADJUSTMENT
1.Focus Adjustment
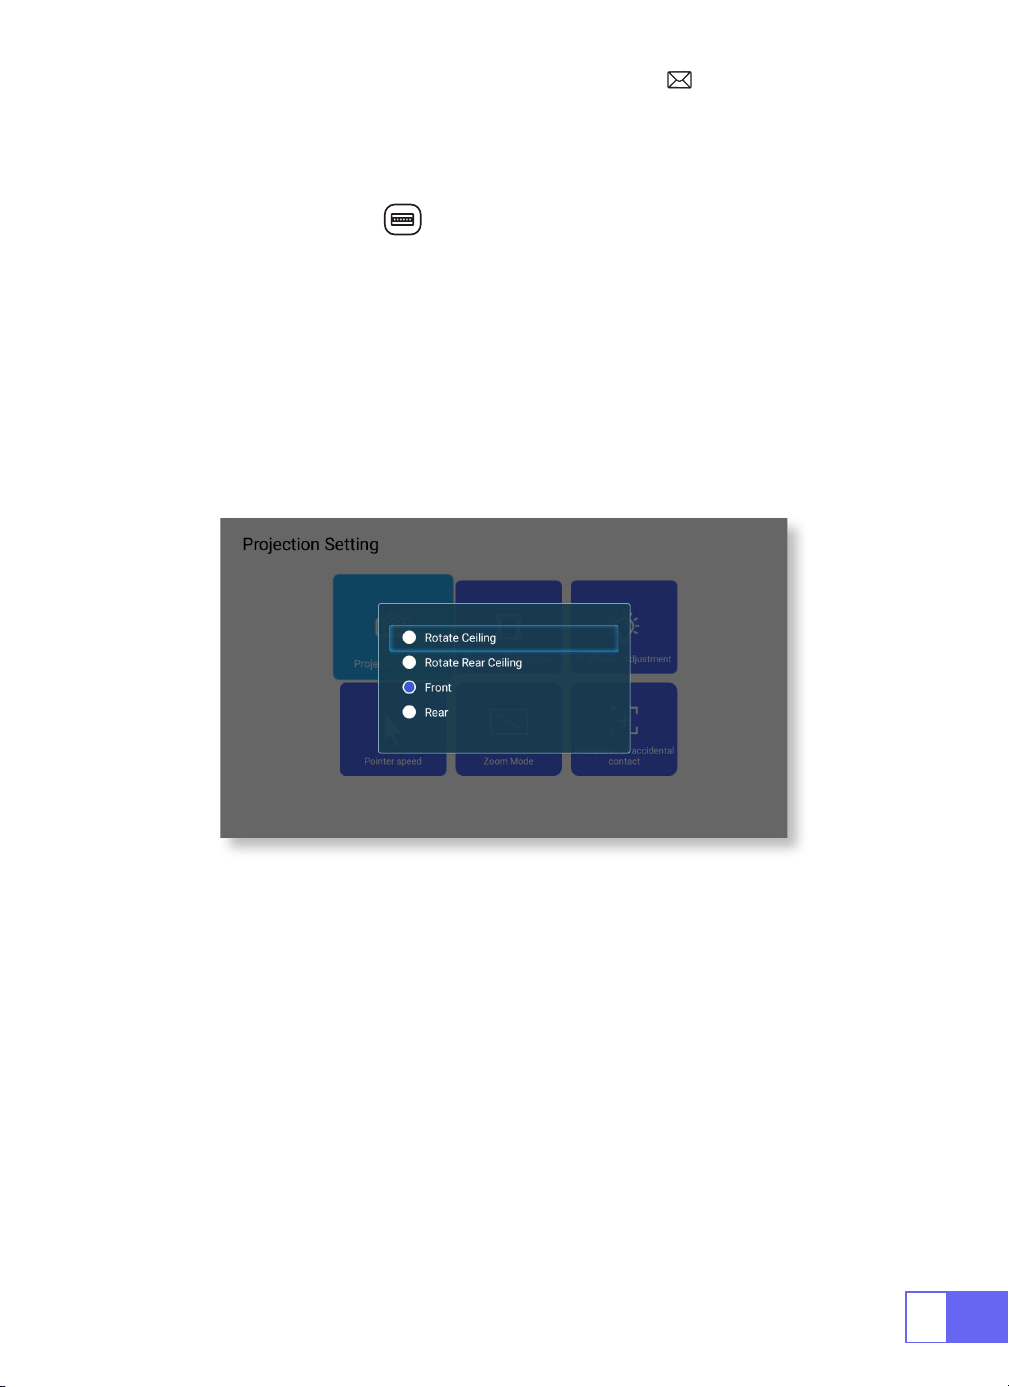
2.Projection Mode
Auto Keystone Correction
3.Keystone Correction
Slide pinion on the left of the device to adjust sharpness.
Select [Settings ] menu -- Select [ Projection] -- Select [Projection Mode],
Press the arrow key to select and press “OK” to confirm the projection
position.
There have 4 modes: Rotate Rear Ceiling / Rear / Front / Rotate Ceiling.
Select [Settings] menu -- Select [Projection] -- Select [Keystone
Correction]--Select [Auto Keystone Correction], and press “OK” to
conrm.
the projector can auto adjust the vertical plane to get the rectangle
image. The tilted angle doesn’t exceed ±30°.
EN
7
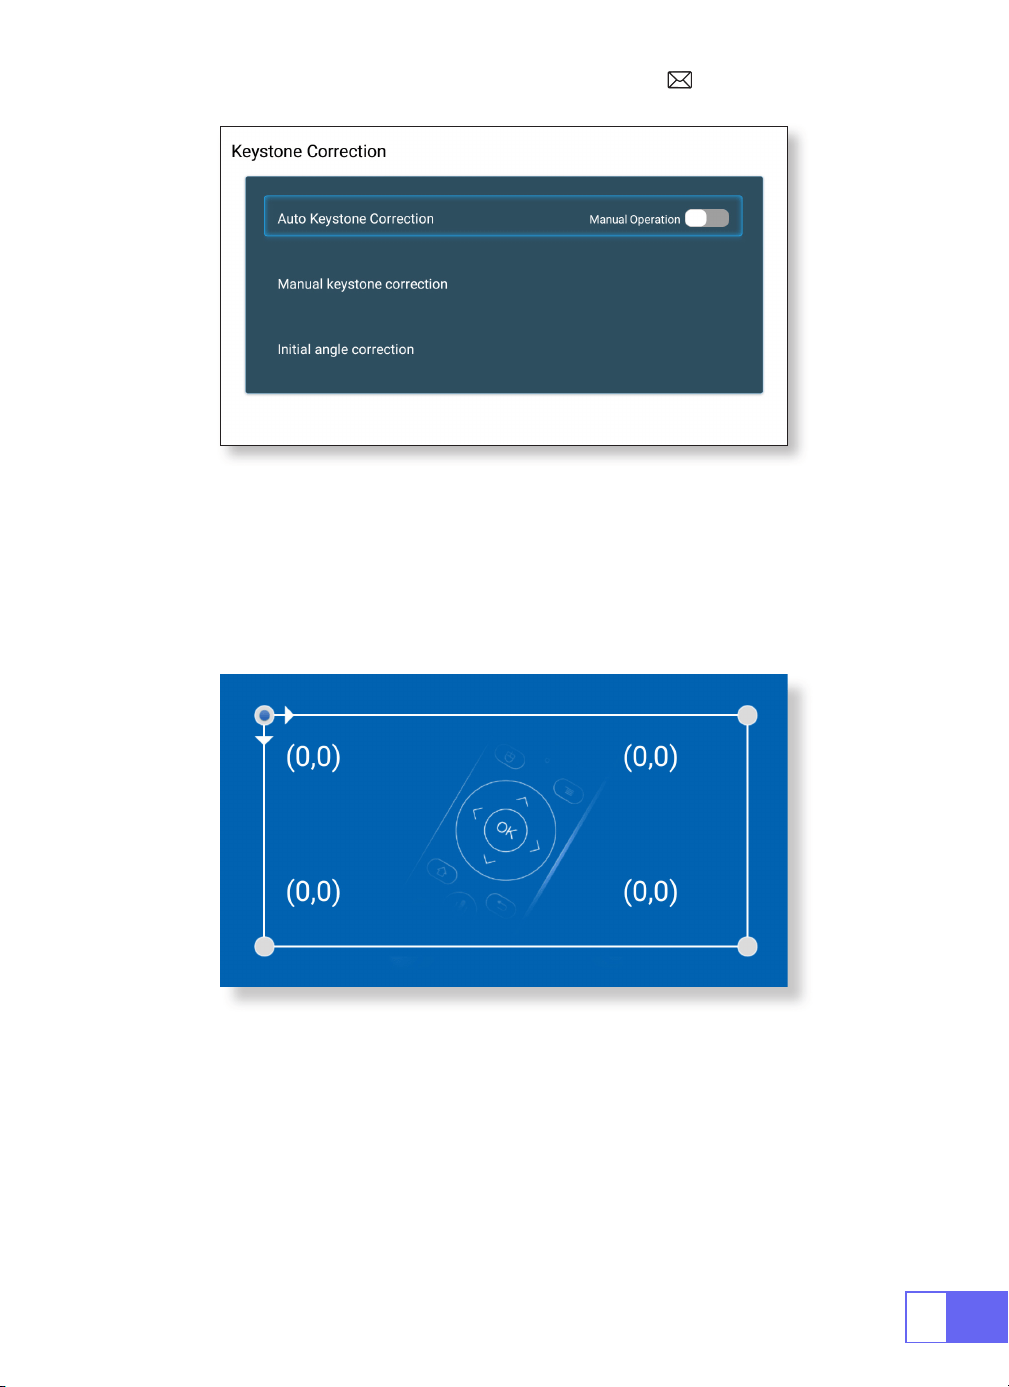
Manual Keystone Correction
Initial Angle Correction
Select [Settings] menu -- Select [Projection] -- Select [Keystone
Correction]--Select [Manual Keystone Correction], press “OK” to pick the
point you want to adjust at rst, and then press the button "
▶
" or "
▼
" to
set the value (Horizontal and Vertical ±30°) needed as shown below.
Place the device on the horizontal plane and press the OK to correct it.
Don’t move the device during the correction.
EN
8
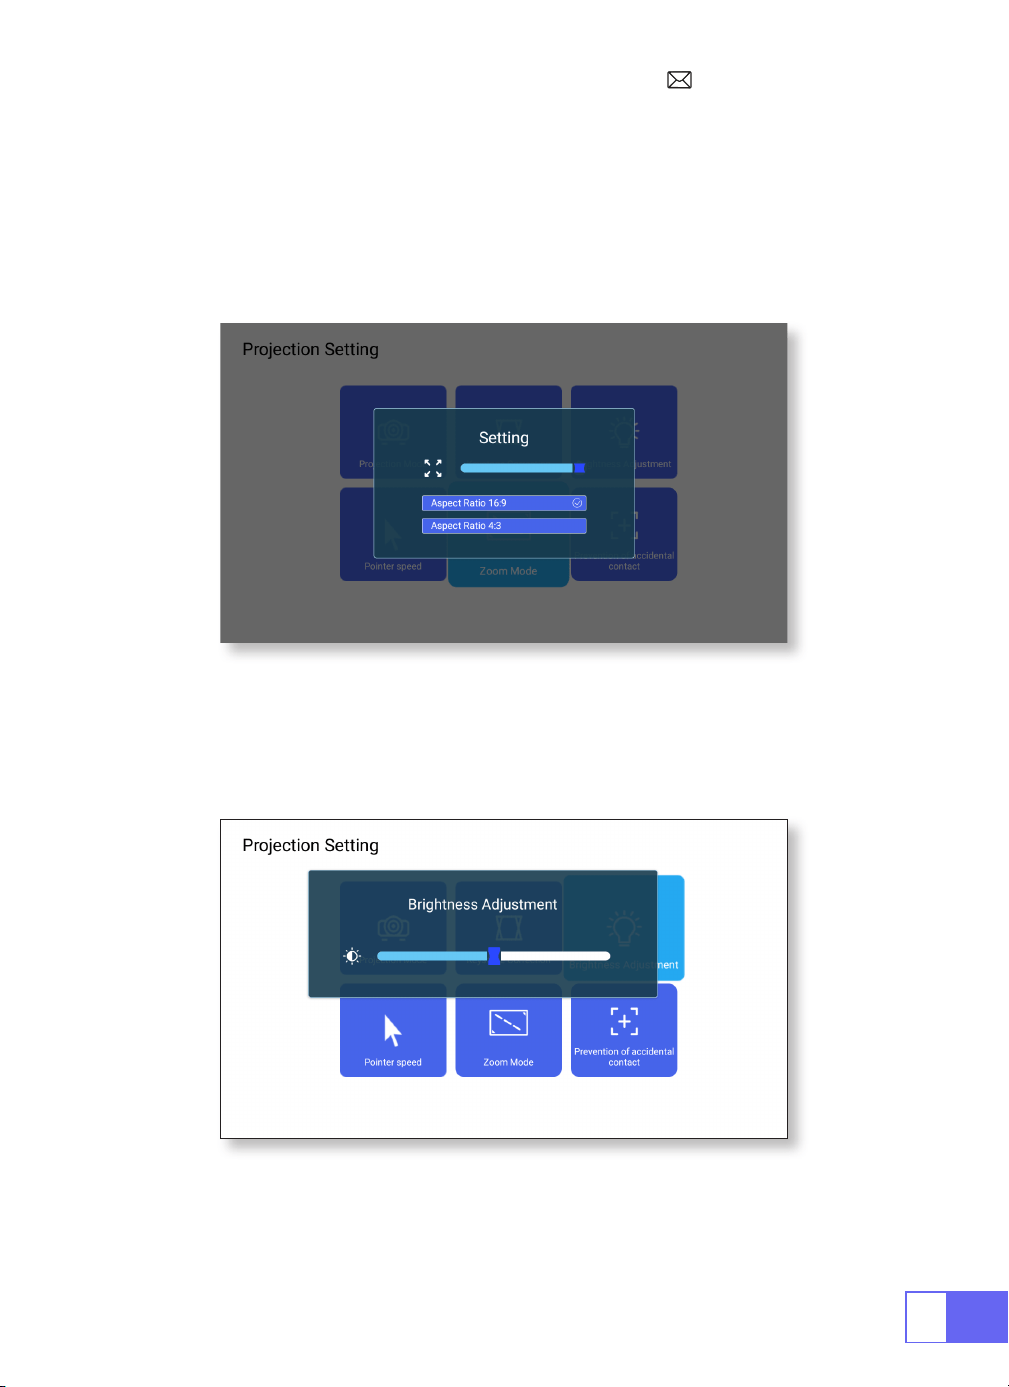
4.Zoom Mode
5.Brightness Adjustment
There has 2 modes of Aspect Ratio: 16:9 or 4:3.
Select [Settings] menu -- Select [Projection] -- Select [Zoom Mode],the
projection screen can be zoomed 50%~100%, Press the button "
◀ ▶
" to
set the value needed.
Select [Settings] menu -- Select [ Projection] -- Select [Brightness
Adjustment], press "
◀
" or "
▶
"to adjust the brightness you need.
EN
9
6.Other Setting
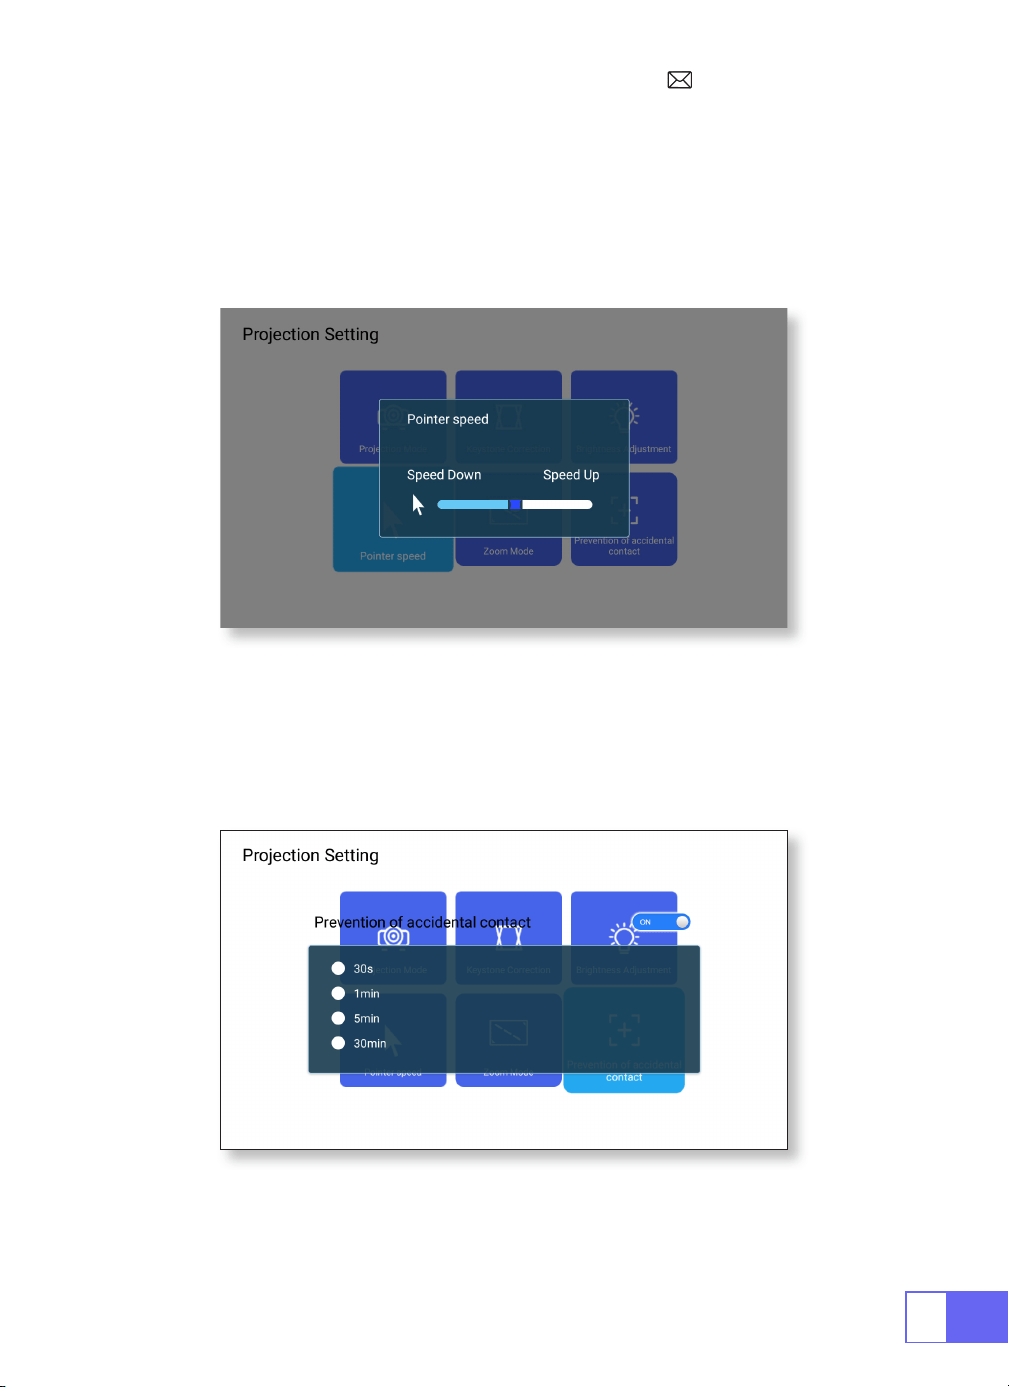
Pointer Speed
Prevention of Accidental Contact
Select [Settings] menu -- Select [ Projection] -- Select [Pointer Speed],
press "
◀
" or "
▶
"to adjust the mouse pointer move speed you need.
Select [Settings] menu -- Select [Projection] -- Select [Prevention
of Accidental Contact], to choose the time period you need, prevent
accidental operation.

EN
10
SETTING UP THE PROJECTOR
Select The Input Signal Source
Choose the “Source” on the home page, select the desired input signal
source (USB/HDMI/AV)
The device will detect the USB stick automatically, need to confirm
whether to open.
When playing a video, you can press the " " button, to set the sound
and mode of playback.
EN
11
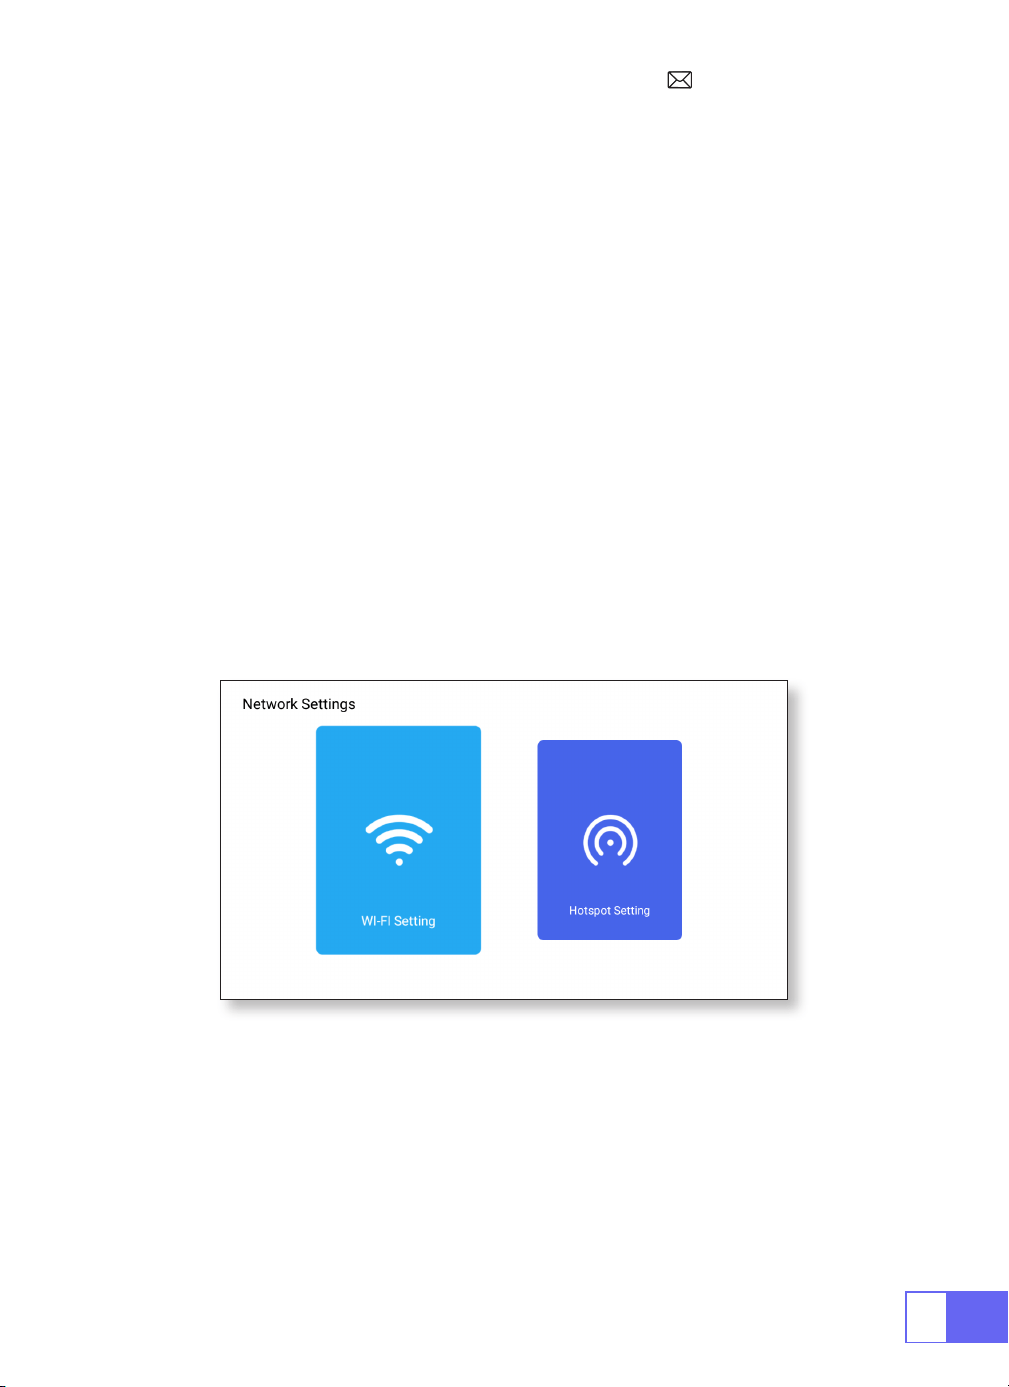
WIRELESS CONNECTION
1.For IOS System (Airplay)
Attention:
Your device and the projector should be in the same Home
WiFi.
1.Turn on the Network setting of projector.
2.Choose your Home WiFi to connect and enter the right password, then
click “Link”, please wait 3 seconds to establish the connection. Once
connected, it will remember the password of the connected WiFi. (or turn
on the Hotspot of projector directly)
3.Turn on the WiFi setting of your mobile device, then connect to the same
Home WiFi (or the Hotspot of projector)
4.Then click “Airplay” on the smartphone
5.Select“Projector-7935”from the search results to connect.
6.Succeed.

EN
12
2.For Android System(Miracast)
3.Eshare
Attention:
Your device and the projector should be in the same Home
WiFi.
1.Turn on the Network setting of the projector.
2.Choose your Home WiFi to connect and enter the right password, then
click “Link”, please wait 3 seconds to establish the connection. Once
connected, it will remember the password of the connected WiFi.
3.Turn on the WiFi setting of your mobile device, then connect to the same
Home WiFi
4.Then click “Miracast” on the smartphone
5.Select“Projector-7935”from the search results to connect.
6.Succeed.
Note:
the Hotspot can’t support Android devices.
Use your phone as the wireless mouse, keyboard, remote control,
transform the way you control and engage with large-screen devices.
1.Connect your device to Home WiFi
2.Vist “http://192.168.43.1:8000” with a web browser or scan the QR-code to
download app.
3.Launch Eshare and click “Projector-7935”to connect.
EN
13
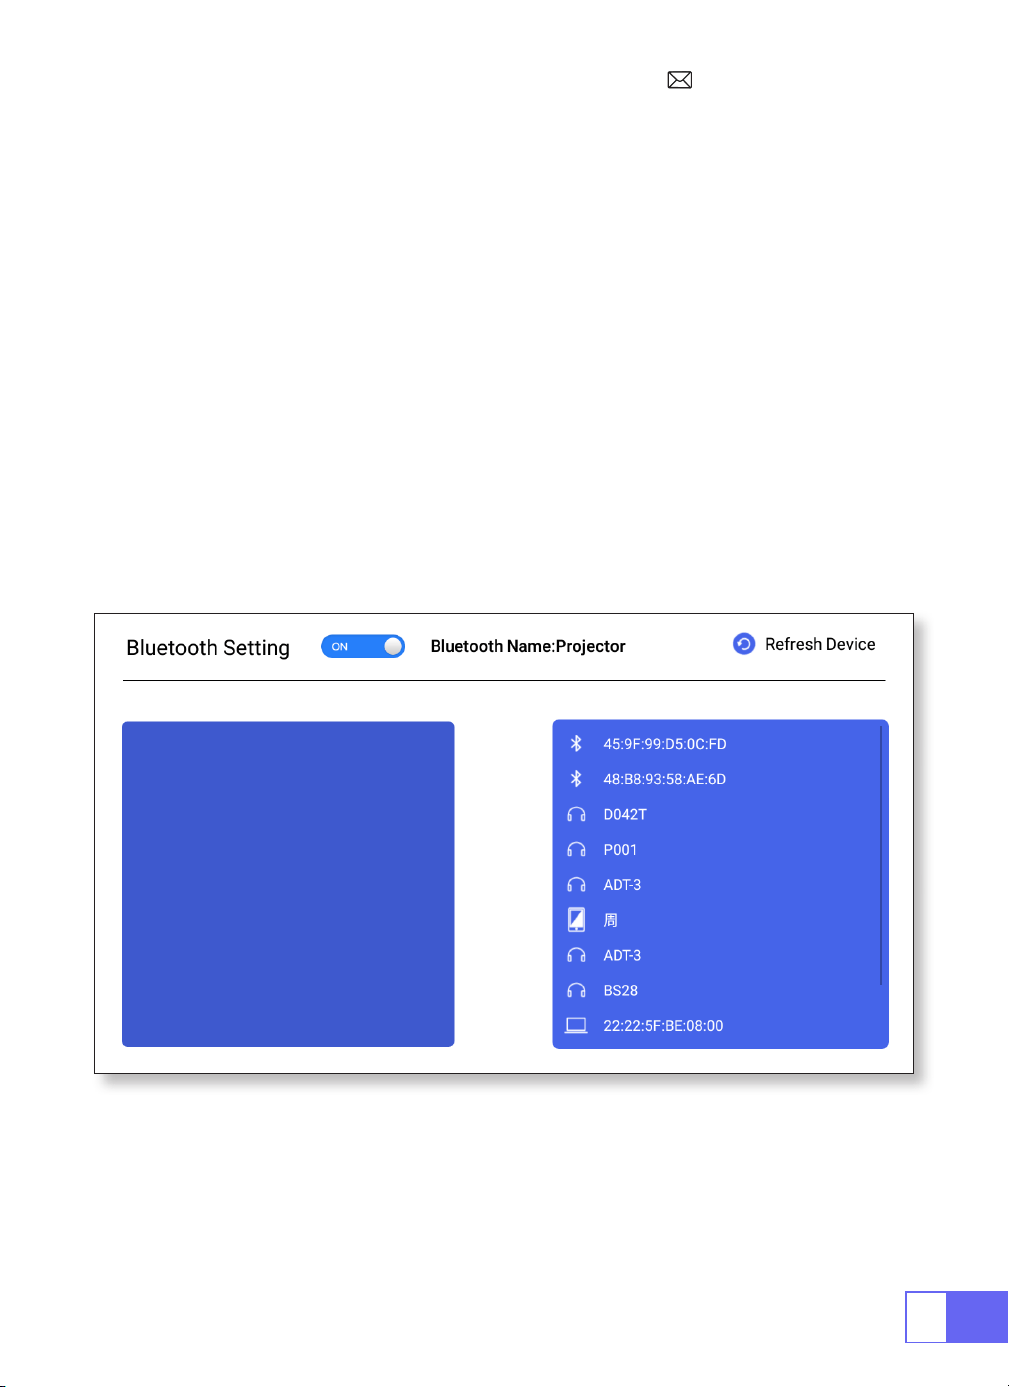
BLUETOOTH SETTINGS
Connect Bluetooth Speakers
1.Turn on your Bluetooth Speaker.
2.Turn on the
[ Bluetooth Settings]
of your projector
3.Select your Bluetooth speaker to connect.
4.Succeed.

EN
14
SIGNAL LINES CONNECTION
1.USB Multimedia Connecting
WiMiUS Q2 projector has 3 interfaces, HDMI ports/USB ports/3.5mm
headphone output. Please select the correct connecting port to connect
your device (PC, Phone, DVD Player, Sound bar, USB, PS4,etc.)
For USB devices, no need to choose the signal source. The machine will
detect them automatically.
•Select the icon at the top right corner of the home page
Note:
Support USB drive storage capacity max. To 32GB, and HDD storage
capacity max to 1TB.
2.Connecting with Laptop
3.Connecting with MacBook or Mac Book Air
•Connect the projector with PC by HDMI cable.
•Choose the media signal channel :“HDMI”.
Choose the media signal channel :“HDMI”.
•
Use a Type-C to HDMI adapter
to connect your MacBook, or a Mini
Display to HDMI adapter to connect with your MacBook Air (adapter not
included).
EN
15
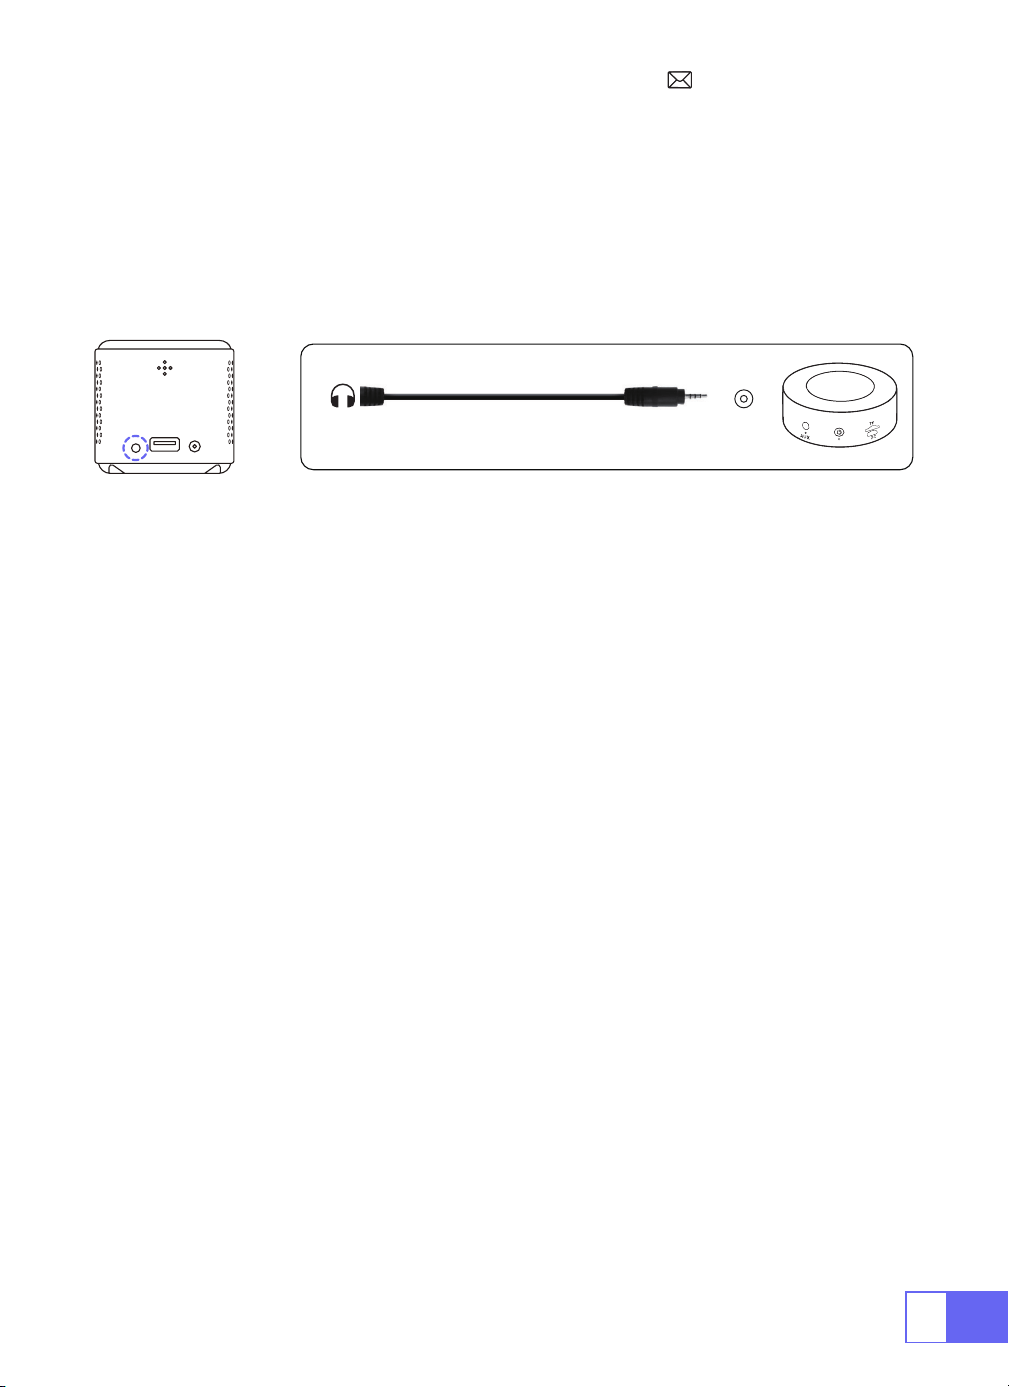
4.Connecting with Sound bar
5.Connecting with Fire TV Stick
6.Connecting with XBOX/PS4
•Use the 3.5mm audio cable coming with the projector to connect with
sound bar.
•Turn on the projector and the sound bar(choose AUX mode).
•
For more details, please contact the seller at [email protected].
•Plug the TV stick into the HDMI port of the projector.
•Choose the media signal channel :“HDMI”.
•Choose the media signal channel :“HDMI”.
•Use HDMI cable to connect to XBOX/PS4.
Audio
out
AUX
port
EN
16
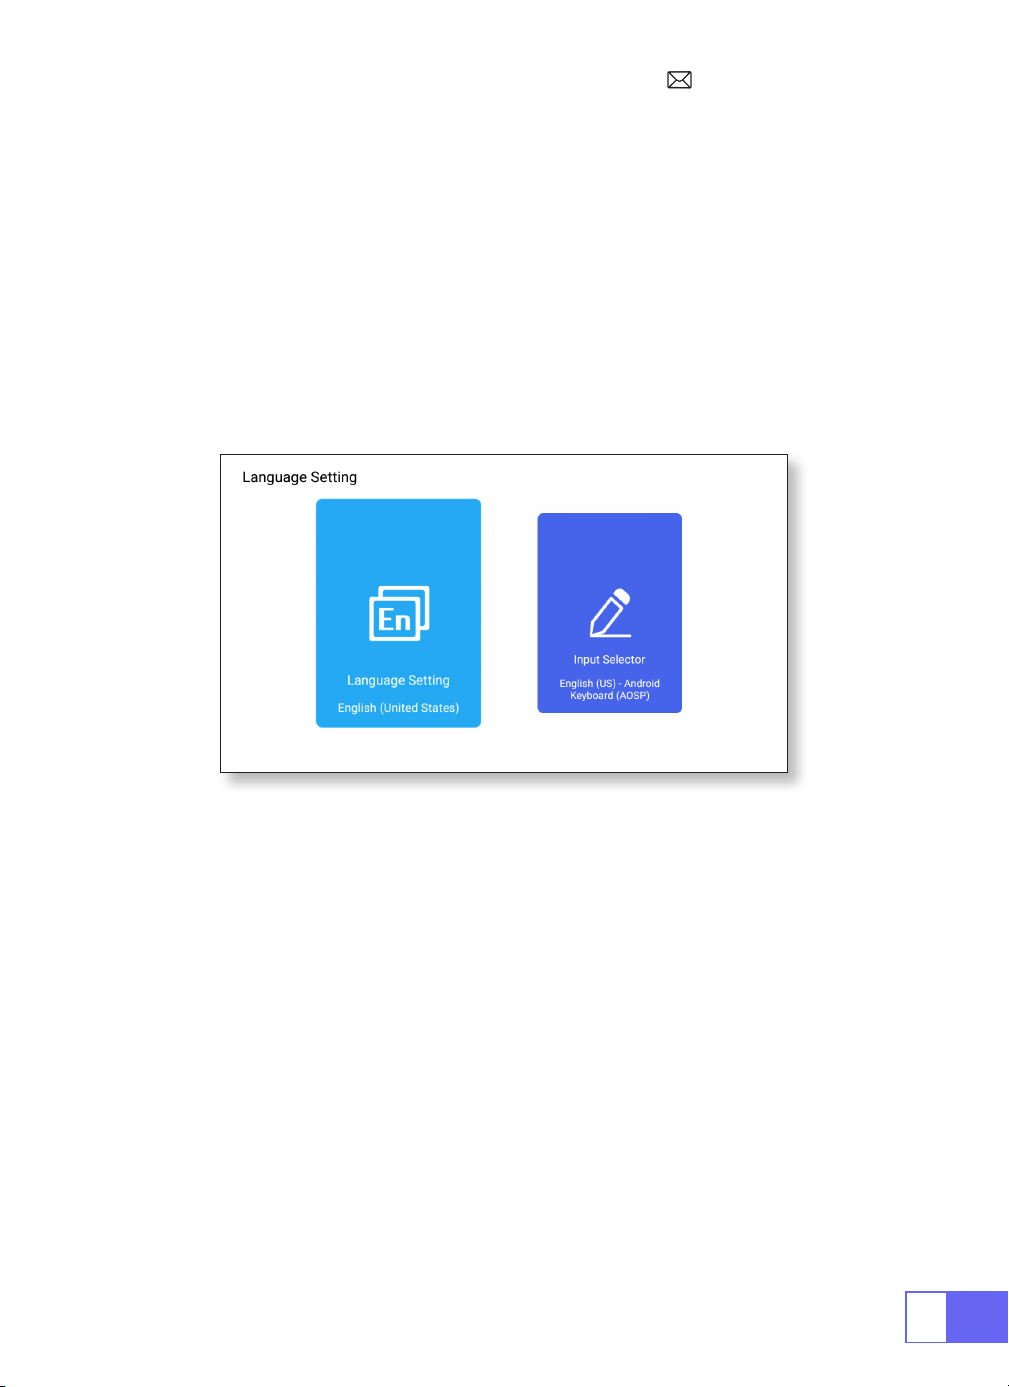
LANGUAGE SETTING
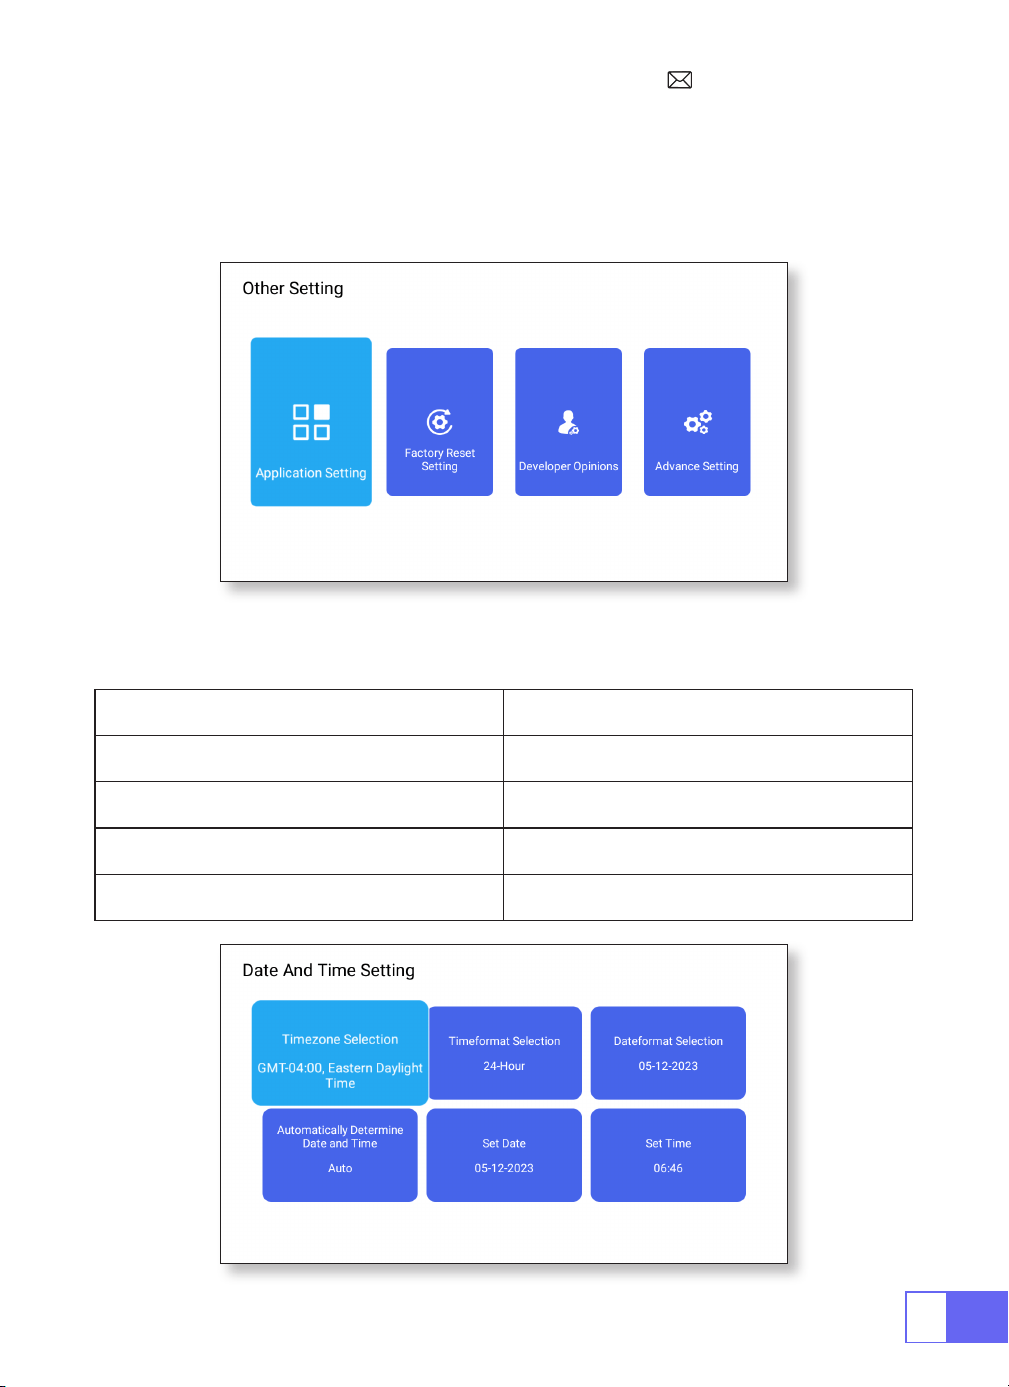
OTHER SETTING
Choose Language
Application Setting
Factory Reset Setting
Input Selector
•There has more than 50 languages for choose, English, French, German,
Italian, Spanish, Japanese, ect.
•In the other settings menu, you can nd the "Application Setting" option,
click it to view all installed applications and congure them.
•reset and delete all data
•Choose the keyboard to install according to your own needs and habits.
EN
17
Developer Opinions
DATE AND TIME SETTING
•It is mainly provided for developers to use during software development
and debugging of devices. Normally it is turned off by default.
Setting Function
Timezone Selection Set the time of your location
Time format Selection 12/24 Hour
Date format Selection Set the date format
Automatically Determine Auto/Manual

EN
18
ABOUT US
About Function
About the machine The detail information of the device
Local upgrade Update via USB
Online upgrade Update Online
FAQ
1.No image on the screen.
a.Is the channel set-up correct?
b.Is there an input signal?
c.Is the input cable plugged well?
d.Under PC mode, is the refresh rate > 75KHz?
2.Blue screen no picture and no sound.
Input device doesn't connect well with the projector.
3.Picture right, no sound.
a.Please turn off the Dolby of the input device, and then it will have sound.
b.The decode system of the video is not supported by the projector.

EN
19
4.Auto-off after working for a while.
a.The projector ventilation is blocked.
b.The voltage is not stable.
c.The over-heat protection system.
5.WiFi connection is not stable?
a.Please check whether the network of your phone is well.
b.Make the distance of phone and projector within 1 meter.
6.Not compatible with your Bluetooth speaker?
a.The projector may not be compatible with some kinds of Bluetooth
speakers.
b.Contact our after-sales email at [email protected] immediately
and tell us the brand and model of your Bluetooth speaker.
7.Black spot on the picture
Contact our after-sales service [email protected] immediately
8.When turning on the power switch, the indicator light does not work.
a.The power might not be connected well.
b.Check the over-heat protection system.
9.Can't play the movies.
a.The format of the video is right?
b.Files are broken?
c.Device broken?
10.Can't access the website successfully to download the application?
Please contact us immediately at our after-sales email address:
and tell us about the page prompt that
appeared during your application download.

DE
20
INHALT
PAKETLISTE · · · · · · · · · · · · · · · · · · · · · · · · · · · · · · 21
PRODUKTSTRUKTUR · · · · · · · · · · · · · · · · · · · · · · · · · 22
FERNBEDIENUNG · · · · · · · · · · · · · · · · · · · · · · · · · · · 23
PROJEKTOR SPEZIFIKATIONEN · · · · · · · · · · · · · · · · · · · · 24
BILDANPASSUNG · · · · · · · · · · · · · · · · · · · · · · · · · · · 25
1.Fokuseinstellung 25
2.Projektionsmodus 25
3.Keystone-Korrektur 25
4.Zoommodus 27
5.Helligkeitseinstellung 27
6.Andere Einstellungen 28
EINRICHTEN DES PROJEKTORS · · · · · · · · · · · · · · · · · · · · 29
Kabellose Verbindung· · · · · · · · · · · · · · · · · · · · · · · · 30
1.Für IOS-System (Airplay) 30
2.Für Android-System (Miracast) 31
3.Eshare 31
Bluetooth-Einstellungen · · · · · · · · · · · · · · · · · · · · · · 32
Verbinden Sie Bluetooth-Lautsprecher 32
SIGNALLEITUNGSVERBINDUNG · · · · · · · · · · · · · · · · · · · · 33
1.USB Multimedia Anschluss 33
2.Mit Laptop verbinden 33
3.Verbinden mit MacBook oder MacBook Air 34
4.Verbindung mit der Soundbar herstellen 34
5.Mit dem Fire TV Stick verbinden 34
6.Verbinden mit XBOX/PS4 34
Spracheinstellungen· · · · · · · · · · · · · · · · · · · · · · · · · 35
Andere Einstellung · · · · · · · · · · · · · · · · · · · · · · · · · · 35
Datums und Uhrzeiteinstellung · · · · · · · · · · · · · · · · · · 36
Über uns· · · · · · · · · · · · · · · · · · · · · · · · · · · · · · · · 37
FAQ · · · · · · · · · · · · · · · · · · · · · · · · · · · · · · · · · · 37

DE
21
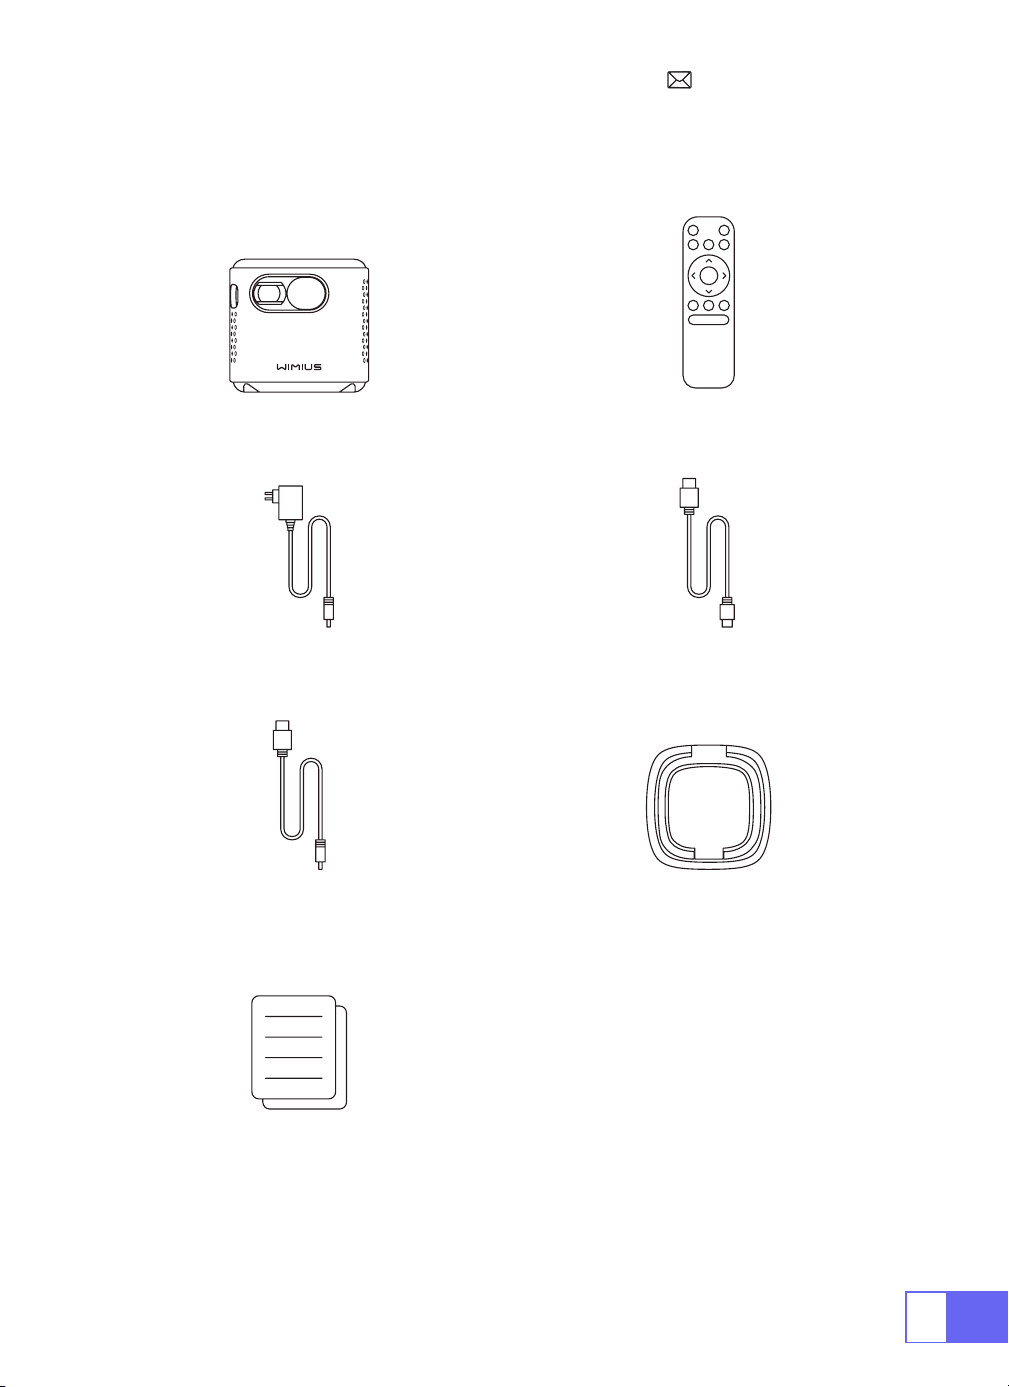
PAKETLISTE
WiMiUS Q2 Beamer Fernbedienung
Stromkabel HDMI auf-Mini HDMI Kabel
AC zu USB-A Kabel Projektor stabil
Benutzerhandbuch

22
PRODUKTSTRUKTUR
Objektiv
Fokus
HDMI IN-Anschluss
IR
DC-IN
USB-Anschluss
Einschalten /
Ausschalten
Audio-OUT-Anschluss
Volumen
Touch-Screen
Menü (mit Sperrbildschirmfunktion)
Home
Zurückkehren
DE
23
FERNBEDIENUNG
AN AUS
Stumm
Wechseln
Sie zur
Maussteuerung
Home
Speisekarte
Lautstärke+/-
OK
Airplay
Eshare
Richtungen
Zurückkehren
Hinweis:
LegenSie2StückAAA-Batterien(nichtimLieferumfangenthalten)
indieFernbedienungein,
bevorSiesieverwenden

DE
24
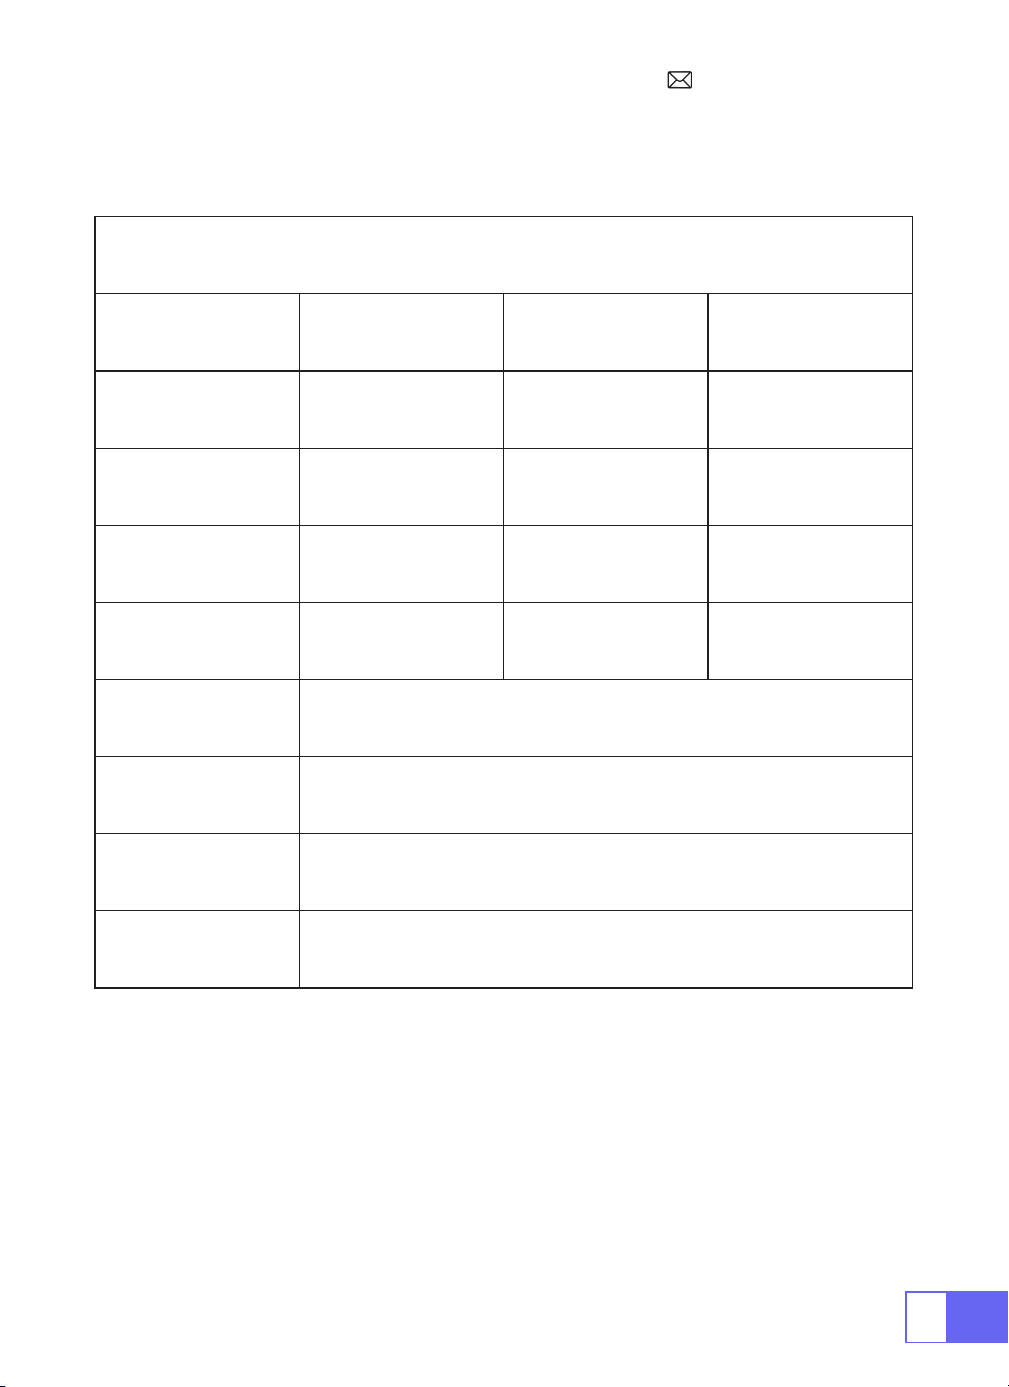
PROJEKTOR SPEZIFIKATIONEN
Modell Nr.: Q2
Display-Technologie LCD Lichtquelle LED
Software System Android 7.1 Projektortyp Versiegelt
Installationstyp
Vorne/hinten auf dem
Schreibtisch, vorne/
hinten an der Decke
Bildseitenverhältnis 16:9/4:3
Produktgröße 60mm*60mm*58mm Produktgewicht 210g
Keystone Korrektur
Automatische
vertikale Korrektur
Fokus manueller Fokus
Eingabeschnittstelle HDMI/USB/3.5mm audio out
Videodatei DAT, MPG, VOB, TS, AVI, MKV, MP4, MOV, 3GP, FLV, WEBM,WMV, ASF, MKV
Audiodatei MP1, MP2, MP3, WMA, WAV, OGG, OGA, AAC, M4A, 3GP
Bilddatei BMP, JPG, PNG
DE
25
BILDANPASSUNG
1.Fokuseinstellung
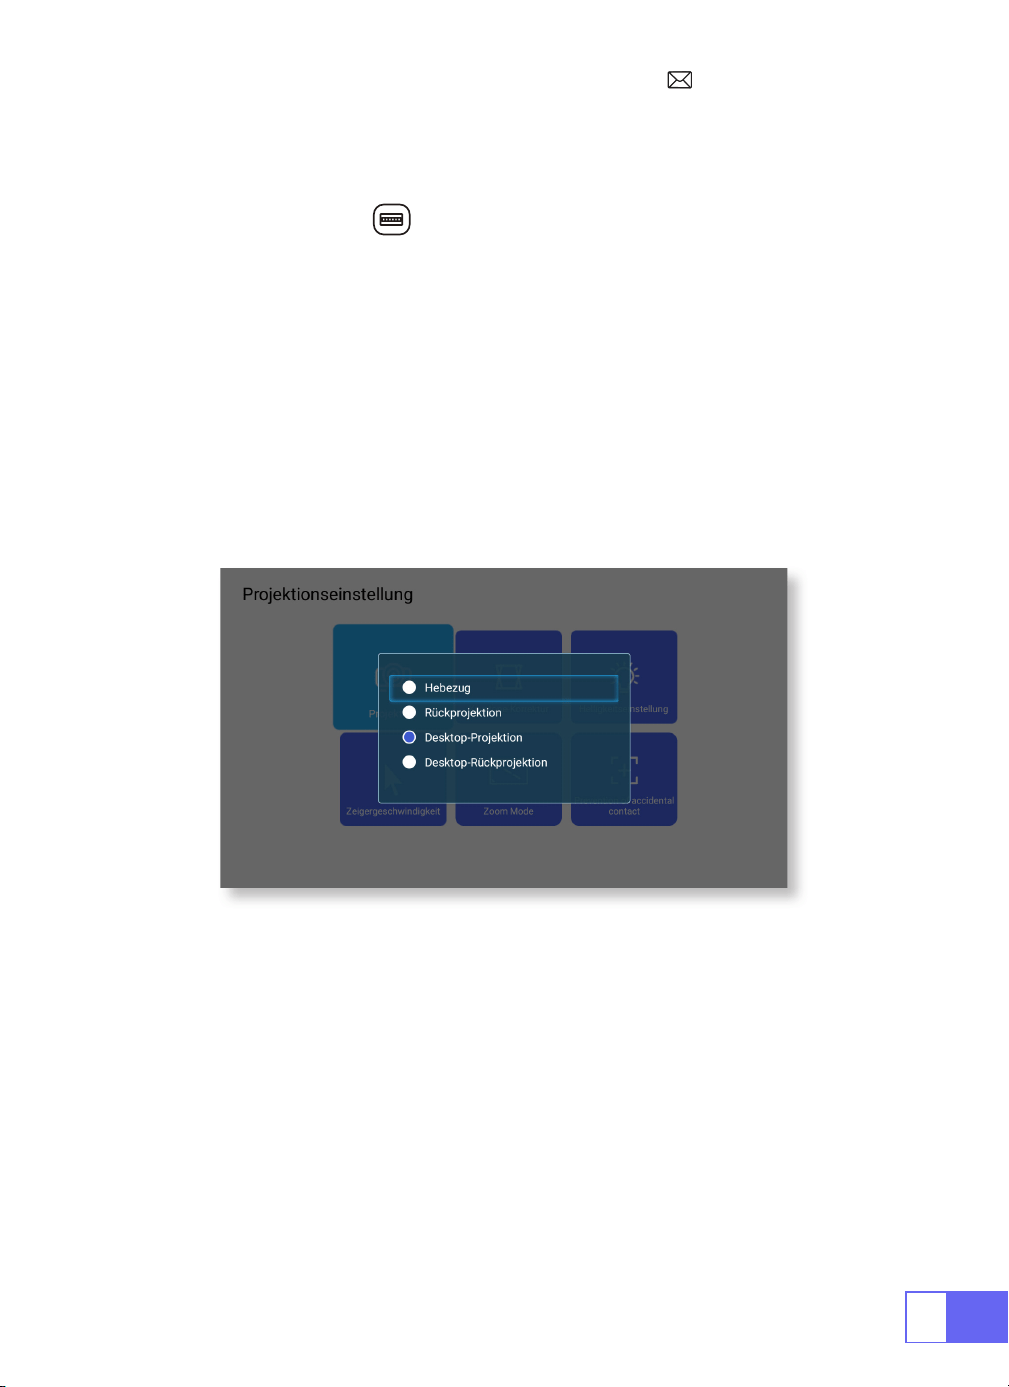
2.Projektionsmodus
Automatische Trapezkorrektur
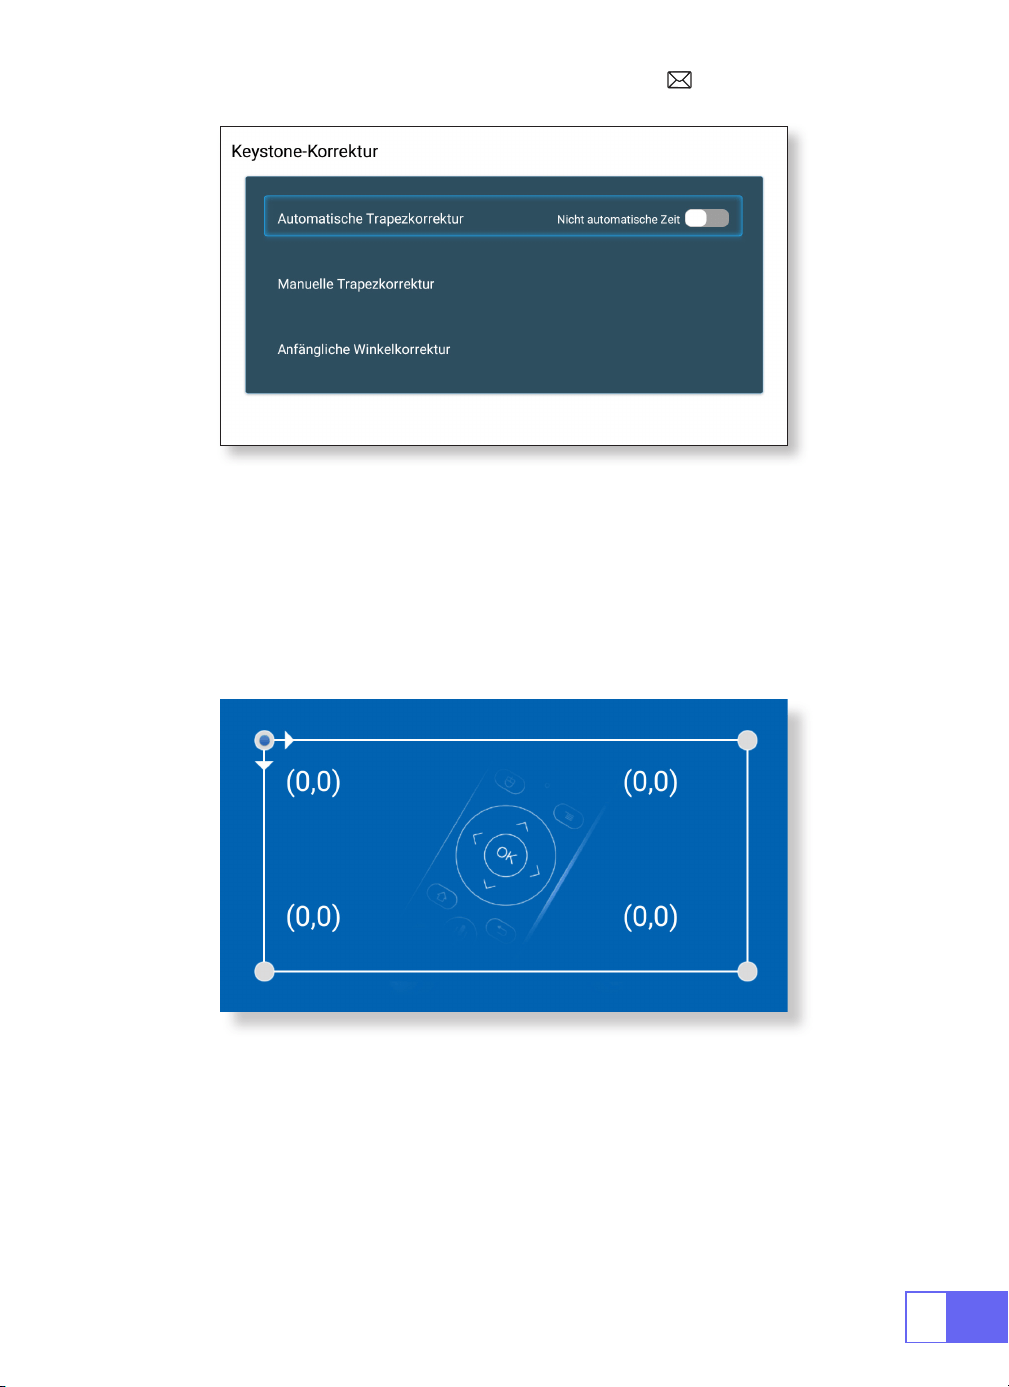
3.Keystone-Korrektur
Schieben Sie das Ritzel auf der linken Seite des Geräts, um die Schärfe
einzustellen.
Wählen Sie das Menü [Einstellungen] – wählen Sie [Projektion] – wählen
Sie [Projektionsmodus], drücken Sie die Pfeiltaste zur Auswahl und
drücken Sie „OK“, um die Projektionsposition zu bestätigen.
Es gibt 4 Modi: Hebezug/Rückprojektion/Desktop-Projektion/Desktop-
Rückprojektion
Wählen Sie das Menü [Einstellungen] – wählen Sie [Projektion] – wählen
Sie [Trapezkorrektur] – wählen Sie [Automatische Trapezkorrektur] und
drücken Sie zur Bestätigung „OK“.
Der Projektor kann die vertikale Ebene automatisch anpassen, um
ein rechteckiges Bild zu erhalten.
Der Neigungswinkel darf ±30° nicht überschreiten.
26
Manuelle Trapezkorrektur
Anfängliche Winkelkorrektur
Wählen Sie das Menü [Einstellungen] – wählen Sie [Projektion] – wählen
Sie [Trapezkorrektur] – wählen Sie [Manuelle Trapezkorrektur], drücken
Sie „OK“, um den Punkt auszuwählen, den Sie zuerst anpassen möchten,
und drücken Sie dann die Taste „
▶
“ oder „
▼
“, um den benötigten Wert
(Horizontal und Vertikal ±30°) wie unten gezeigt einzustellen.
Platzieren Sie das Gerät auf der horizontalen Ebene und drücken Sie OK,
um es zu korrigieren. Bewegen Sie das Gerät während der Korrektur nicht.

DE
27
4.Zoommodus
5.Helligkeitseinstellung
Es gibt zwei Aspect Rotio-Modi: 16:9 oder 4:3
Wählen Sie das Menü [Einstellungen] – wählen Sie [Projektion] –
wählen Sie [Zoom-Modus], der Projektionsbildschirm kann um 50–100 %
gezoomt werden. Drücken Sie die Taste „
◀ ▶
“, um den benötigten Wert
einzustellen.
Wählen Sie das Menü [Einstellungen] – wählen Sie [Projektion] – wählen
Sie [Helligkeitseinstellung] und drücken Sie „
◀
“ oder „
▶
“, um die
gewünschte Helligkeit anzupassen.

28
6.Andere Einstellungen
Zeigergeschwindigkeit
Verhinderung von unbeabsichtigtem Kontakt
Wählen Sie das Menü [Einstellungen] – wählen Sie [Projektion] – wählen
Sie [Zeigergeschwindigkeit] und drücken Sie „
◀
“ oder „
▶
“, um die
gewünschte Bewegungsgeschwindigkeit des Mauszeigers anzupassen.
Wählen Sie das Menü [Einstellungen] – wählen Sie [Projektion] – wählen
Sie [Verhinderung von unbeabsichtigtem Kontakt], um den benötigten
Zeitraum auszuwählen und versehentliche Bedienung zu verhindern.
DE
29
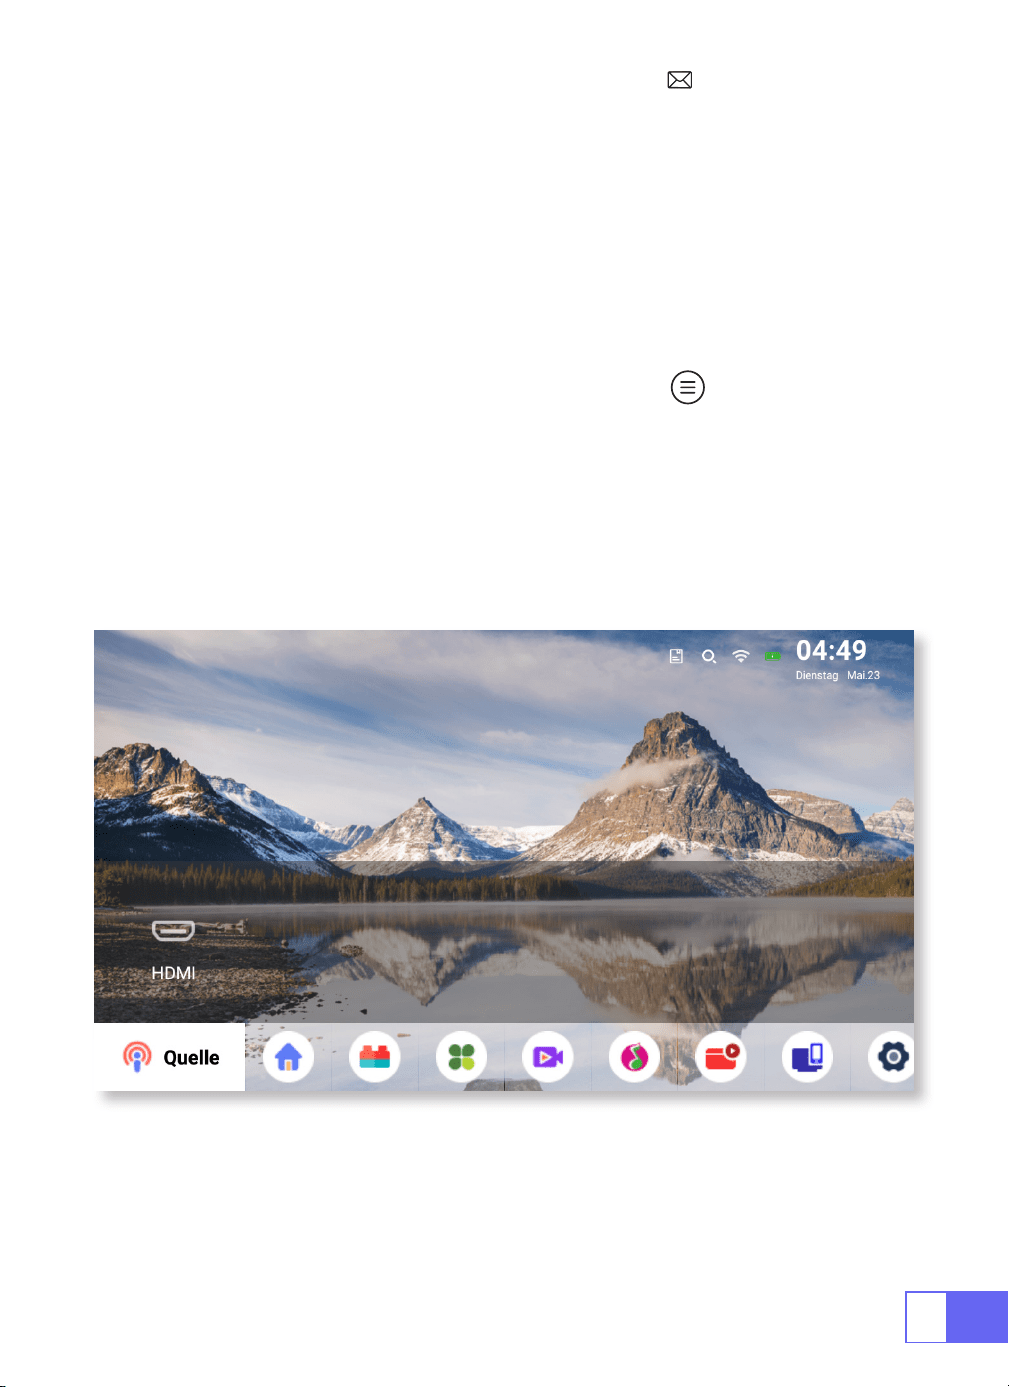
EINRICHTEN DES PROJEKTORS
Wählen Sie die Eingangssignalquelle aus
Wählen Sie auf der Startseite „Quelle“ und wählen Sie die gewünschte
Eingangssignalquelle (USB/HDMI/AV).
Das Gerät erkennt den USB-Stick automatisch und muss bestätigen, ob er
geöffnet werden soll.
Beim Abspielen eines Videos können Sie die Taste „ “ drücken, um den
Ton und den Wiedergabemodus einzustellen.

30
Kabellose Verbindung
1.Für IOS-System (Airplay)
Achtung:
Ihr Gerät und der Projektor sollten sich im selben Heim-WLAN
benden.
1.Schalten Sie die Netzwerkeinstellung des Projektors ein.
2.Wählen Sie Ihr Heim-WLAN aus, um eine Verbindung herzustellen, geben
Sie das richtige Passwort ein und klicken Sie dann auf „Verknüpfen“.
Bitte warten Sie 3 Sekunden, um die Verbindung herzustellen. Sobald die
Verbindung hergestellt ist, merkt es sich das Passwort des verbundenen
WLANs. (oder schalten Sie den Hotspot des Projektors direkt ein)
3.Schalten Sie die WiFi Einstellung Ihres Mobilgeräts ein und stellen Sie
dann eine Verbindung zum gleichen Heim-WLAN (oder zum Hotspot des
Beamer) her.
4.Klicken Sie dann auf dem Smartphone auf
„Airplay“
.
5.Wählen Sie
„Projector 7935“
aus den Suchergebnissen aus, um eine
Verbindung herzustellen.
6.Erfolg haben.

DE
31
2.Für Android-System (Miracast)
3.Eshare
Achtung:
Ihr Gerät und der Projektor sollten sich im selben Heim-WLAN
benden.
1.Schalten Sie die Netzwerkeinstellung des Projektors ein.
2.Wählen Sie Ihr Heim-WLAN aus, um eine Verbindung herzustellen, geben
Sie das richtige Passwort ein und klicken Sie dann auf „Verknüpfen“.
Bitte warten Sie 3 Sekunden, um die Verbindung herzustellen. Sobald die
Verbindung hergestellt ist, merkt es sich das Passwort des verbundenen
WLANs.
3.Schalten Sie die WLAN-Einstellung Ihres Mobilgeräts ein und stellen Sie
dann eine Verbindung zum gleichen Heim-WLAN her
4.Klicken Sie dann auf dem Smartphone auf
„Miracast“
.
5.Wählen Sie
„Projector 7935“
aus den Suchergebnissen aus, um eine
Verbindung herzustellen.
6.Erfolg haben.
Hinweis:
Der Hotspot unterstützt keine Android-Geräte.
Nutzen Sie Ihr Telefon als kabellose Maus, Tastatur oder Fernbedienung
und verändern Sie die Art und Weise, wie Sie Großbildgeräte steuern und
mit ihnen interagieren.
1.Verbinden Sie Ihr Gerät mit dem Heim-WLAN
2.Besuchen Sie
„http://192.168.43.1:8000“
mit einem Webbrowser oder
scannen Sie den QR-Code, um die App herunterzuladen.
3.Starten Sie Eshare und klicken Sie auf
„Projector 7935“
, um eine
Verbindung herzustellen.
32
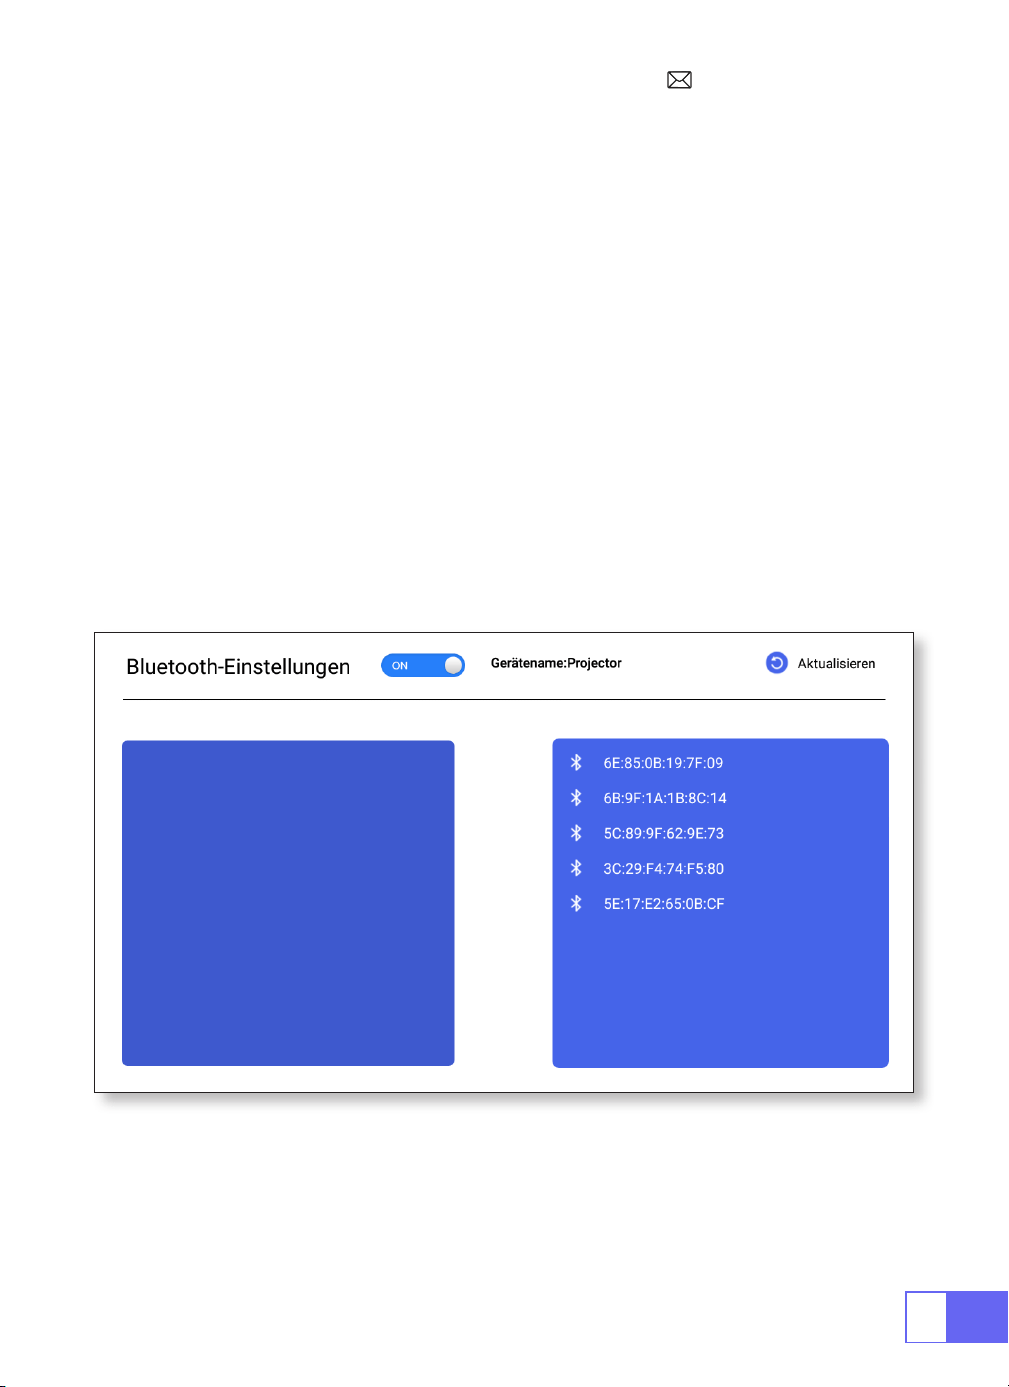
Bluetooth-Einstellungen
Verbinden Sie Bluetooth-Lautsprecher
1.Schalten Sie Ihren Bluetooth-Lautsprecher ein.
2.Schalten Sie die [ Bluetooth-Einstellungen] Ihres Projektors ein
3.Wählen Sie Ihren Bluetooth-Lautsprecher aus, den Sie verbinden
möchten.
4.Erfolg haben.
DE
33
SIGNALLEITUNGSVERBINDUNG
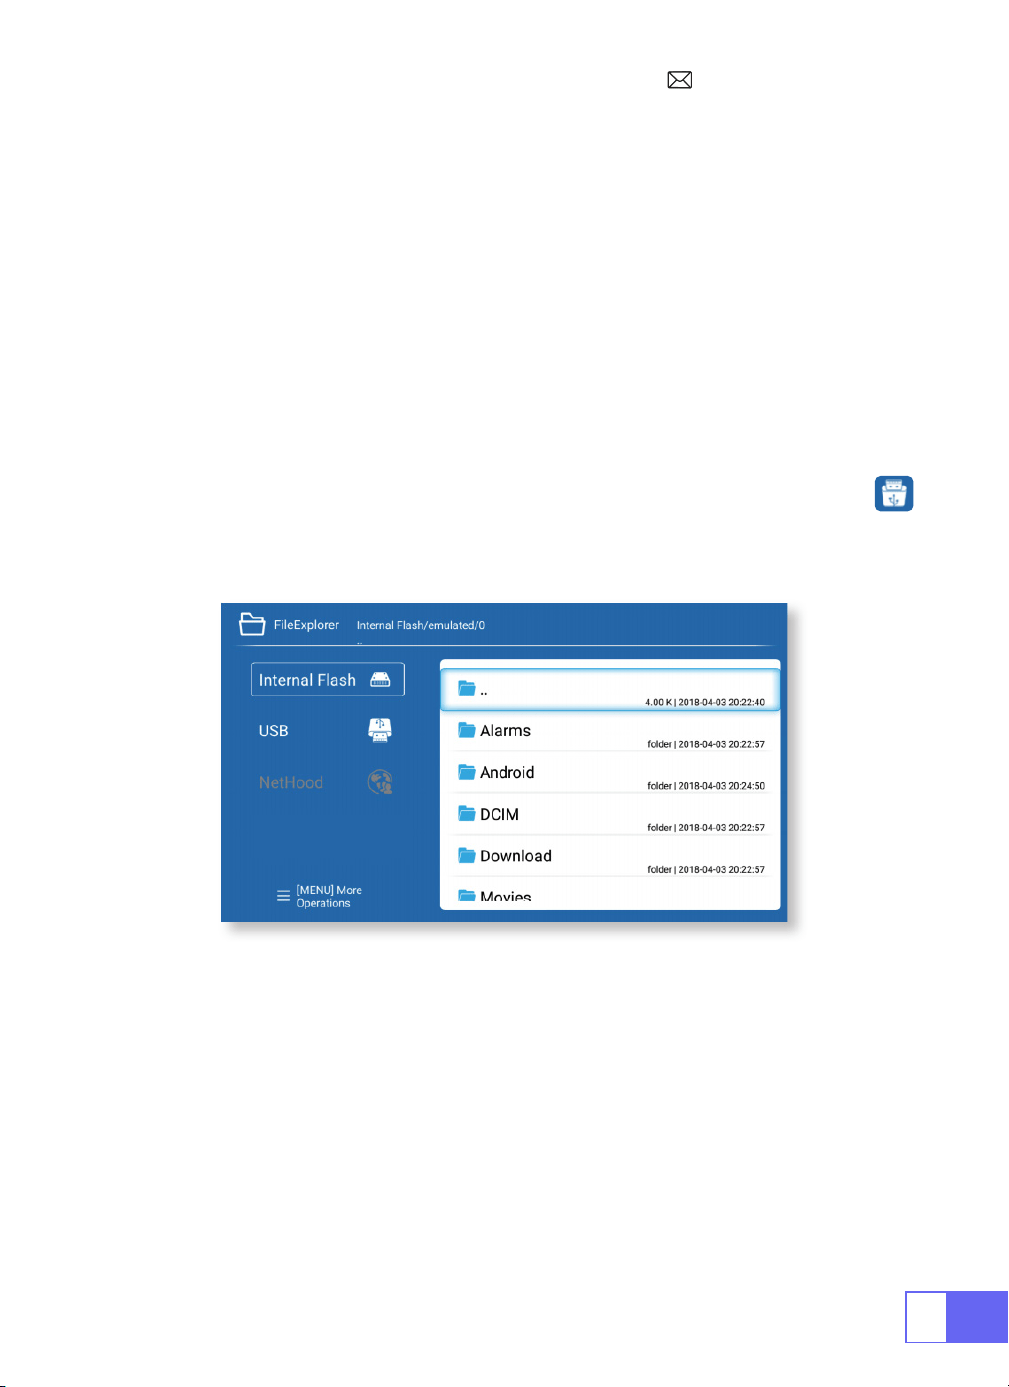
1.USB Multimedia Anschluss
Der WiMiUS Q2 Beamer verfügt über 3 Schnittstellen, HDMI-Anschlüsse/
USB-Anschlüsse/3,5-mm-Kopfhörerausgang. Bitte wählen Sie den
richtigen Anschlussport aus Schließen Sie Ihr Gerät an (PC, Telefon, DVD-
Player, Soundbar, USB, PS4 usw.)
Bei USB-Geräten muss die Signalquelle nicht ausgewählt werden. Das
Gerät erkennt sie automatisch.
•Wählen Sie das Symbol in der oberen rechten Ecke der Startseite aus.
Hinweis: Unterstützt die Speicherkapazität eines USB-Laufwerks von max.
Bis 32 GB und Festplattenspeicherkapazität max. bis 1 TB
2.Mit Laptop verbinden
•Verbinden Sie den Projektor über ein HDMI-Kabel mit dem Laptop.
•Wählen Sie den Mediensignalkanal: „HDMI“
34
3.Verbinden mit MacBook oder MacBook Air
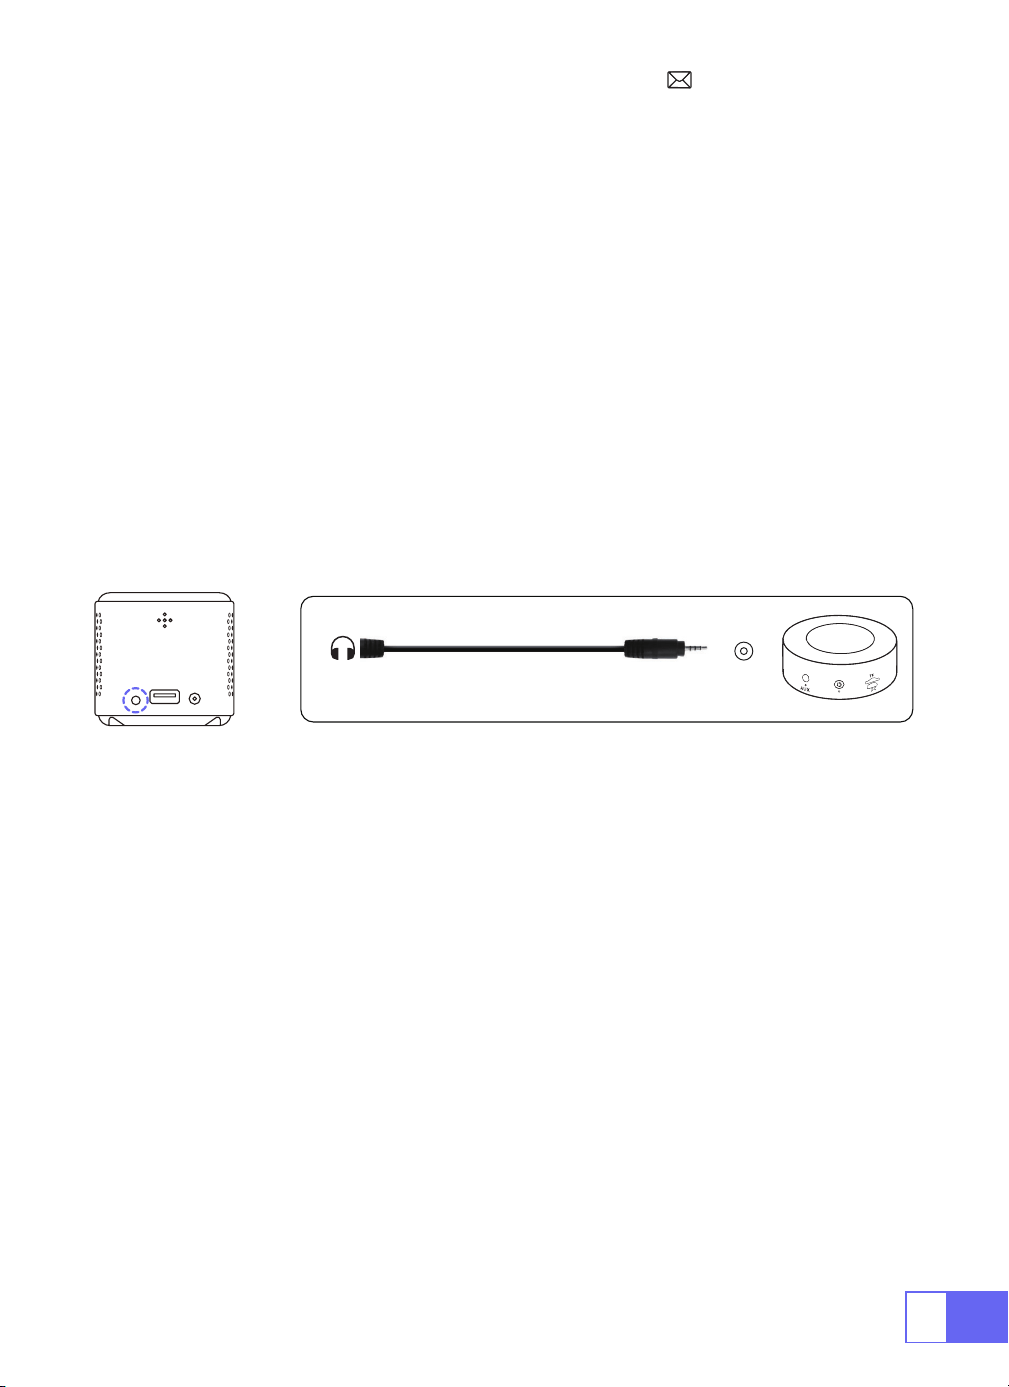
4.Verbindung mit der Soundbar herstellen
5.Mit dem Fire TV Stick verbinden
6.Verbinden mit XBOX/PS4
Wählen Sie den Mediensignalkanal: „HDMI“
•Verwenden Sie einen
Typ-C-zu-HDMI-Adapter
zum Anschließen Ihres
MacBook oder einen Mini-Display-zu-HDMI-Adapter zum Anschließen an
Ihr MacBook Air (Adapter nicht im Lieferumfang enthalten).
•Verwenden Sie zum Anschluss an die Soundbar das mit dem Projektor
gelieferte 3,5-mm-Audiokabel.
•Schalten Sie den Projektor und die Soundbar ein (wählen Sie den AUX-
Modus).
Für weitere Einzelheiten wenden Sie sich bitte an den Verkäufer unter
.
•Schließen Sie den TV-Stick an den HDMI-Anschluss des Projektors an.
•Wählen Sie den Mediensignalkanal: „HDMI“
•Wählen Sie den Mediensignalkanal: „HDMI“
•Verwenden Sie ein HDMI-Kabel, um es mit der XBOX/PS4 zu verbinden
Audio
out
AUX
port

DE
35
Spracheinstellungen
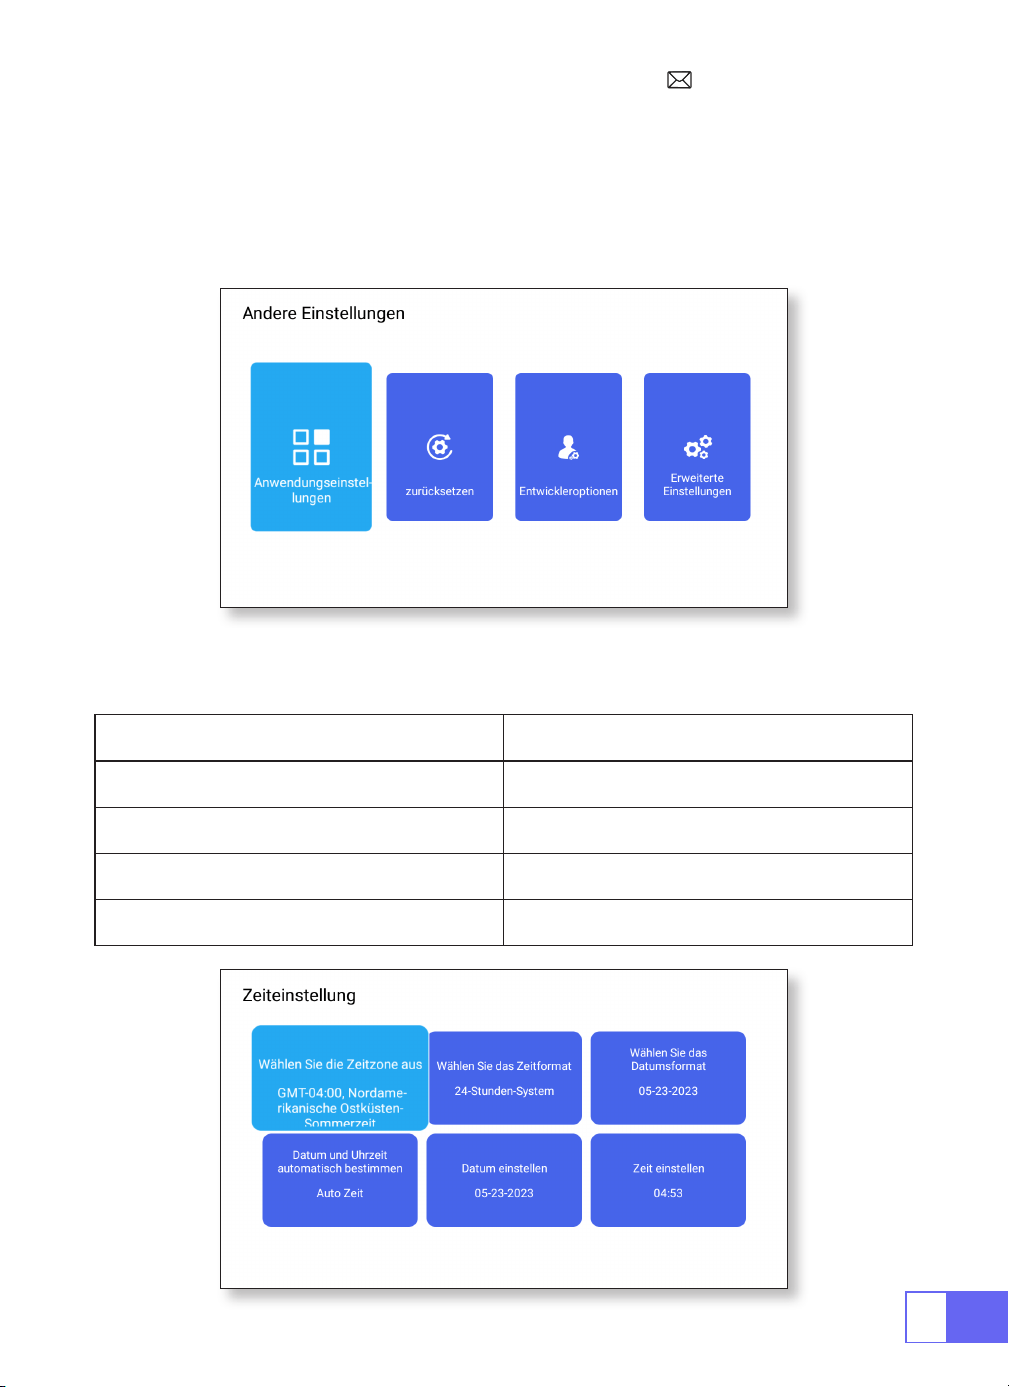
Andere Einstellung
Sprache wählen
Anwendungseinstellung
Werkseinstellung zurücksetzen
Eingabeauswahl
•Es stehen mehr als 50 Sprachen zur Auswahl: Englisch, Französisch,
Deutsch, Italienisch, Spanisch, Japanisch usw.
•Im anderen Einstellungsmenü finden Sie die Option
„Anwendungseinstellungen“. Klicken Sie darauf, um alle installierten
Anwendungen anzuzeigen und zu kongurieren.
•Alle Daten zurücksetzen und löschen
•Wählen Sie die zu installierende Tastatur entsprechend Ihren eigenen
Bedürfnissen und Gewohnheiten aus.
36
Meinungen der Entwickler
Datums und Uhrzeiteinstellung
•Es wird hauptsächlich Entwicklern zur Verwendung während der
Softwareentwicklung und beim Debuggen von Geräten zur Verfügung
gestellt. Normalerweise ist es standardmäßig deaktiviert.
Einstellung Funktion
Zeitzonenauswahl Stellen Sie die Uhrzeit Ihres Standorts ein
Auswahl des Zeitformats 12/24 Stunden
Auswahl des Datumsformats Legen Sie das Datumsformat fest
Automatisch ermitteln Automatisch/manuell
DE
37
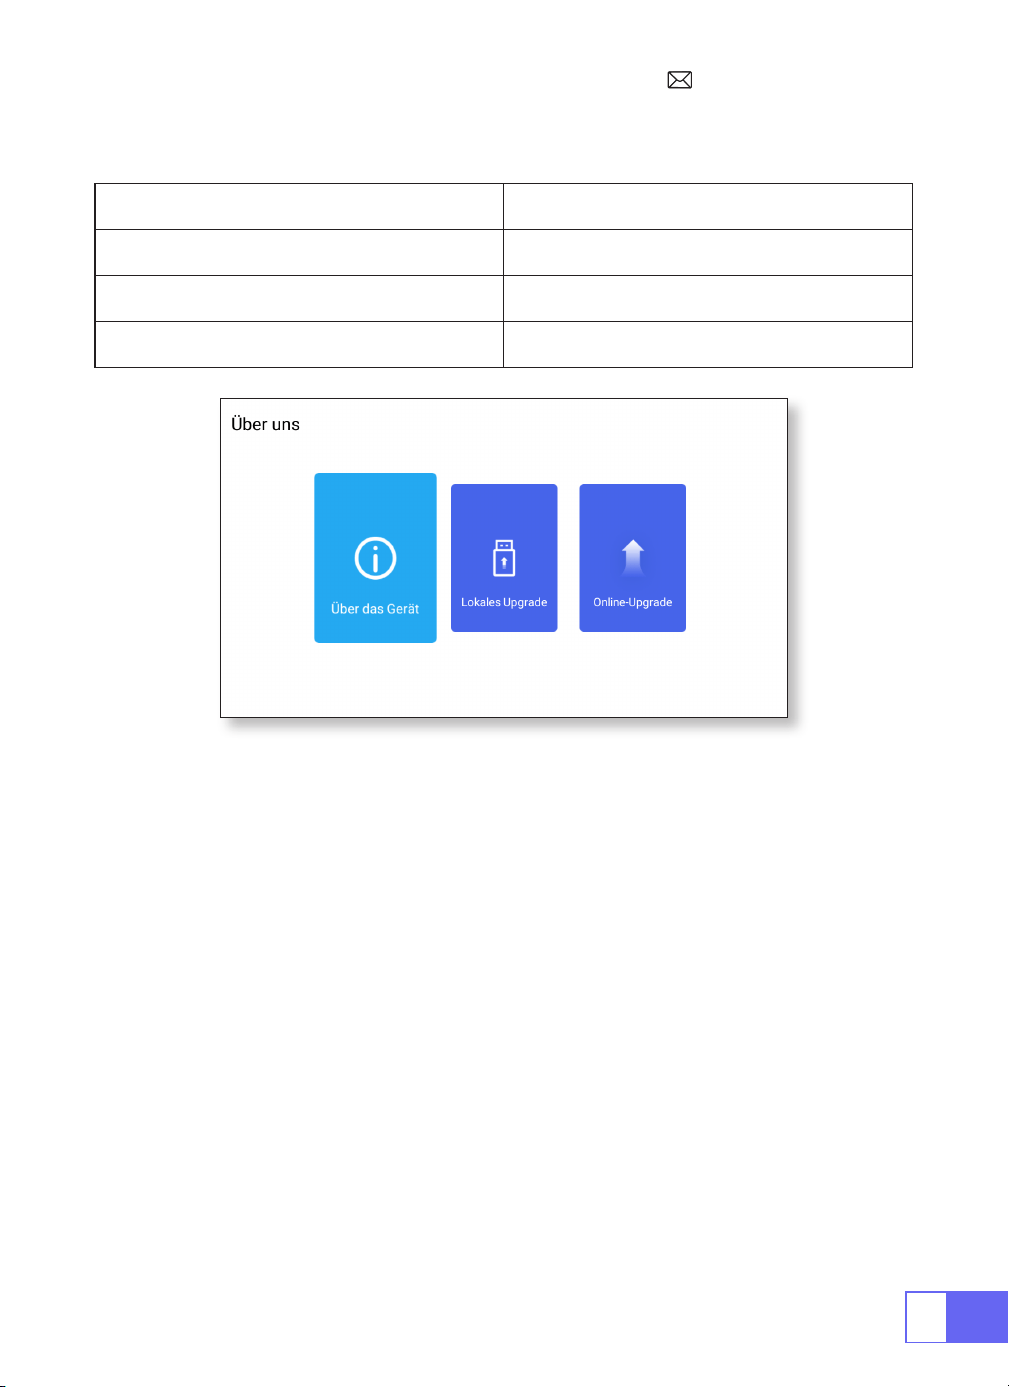
Über uns
Um Funktion
Über die Maschine Die Detailinformationen des Geräts
Lokales Upgrade Update über USB
Online-Upgrade Online aktualisieren
FAQ
1.Die Fernbedienung kommuniziert nicht mit dem Projektor.
1) Ist der Netzschalter auf der Rückseite des Projektors ein- oder
ausgeschaltet?
2) Die Batterien der Fernbedienung sind verbraucht?
3) Etwas behindert das Signal zwischen der Fernbedienung und dem IR
4) Starkes Licht auf IR direkt.
2.Kein Bild auf der Leinwand.
1) Ist die Kanaleinstellung korrekt?
2) Liegt ein Eingangssignal vor ?
3) Ist das Eingangskabel gut eingesteckt ?
4) Ist im PC-Modus die Bildwiederholfrequenz > 75KHz ?

DE
38
3.Blauer Bildschirm, kein Bild, kein Ton.
Sind die Eingangskabel richtig angeschlossen?
4.Bild richtig, kein Ton.
1)Eingangskabel richtig angeschlossen?
2)Lautstärke auf Minimum oder auf Mute.
3)Schalten Sie den AC3/Dolby-Ton aus und stellen Sie ihn auf Stereo-Ton
ein.
5.kann die Filme nicht abspielen.
1) Ist das Format des Videos richtig?
2) Dateien sind defekt?
3) Gerät ist defekt?
6.kann kein Video in der App Netix, Hulu, Prime abspielen.
1)Diese APPs sind mit HDCP eingeschränkt. Dieses Modell unterstützt diese
Funktion nicht. Daher kann es diese APPs nicht unterstützen.
7.Nicht kompatibel mit Ihrem Bluetooth-Lautsprecher?
1)Der Projektor ist möglicherweise nicht mit einigen Versionen der
Bluetooth-Lautsprecher von JBL kompatibel.
2)Wenden Sie sich sofort an unseren Kundendienst unter
und teilen Sie uns die Marke und das Modell
Ihres Bluetooth-Lautsprechers mit.
8.Die WiFi-Verbindung ist nicht stabil?
1)Bitte überprüfen Sie, ob das Netzwerk Ihres Telefons gut ist.
2)Stellen Sie sicher, dass der Abstand zwischen Telefon und Projektor nicht
größer

FR
39
CATALOGUE
LISTE DU PAQUET · · · · · · · · · · · · · · · · · · · · · · · · · · · 40
STRUCTURE DU PRODUIT · · · · · · · · · · · · · · · · · · · · · · · 41
TÉLÉCOMMANDE · · · · · · · · · · · · · · · · · · · · · · · · · · · 42
PROJECTORSPECIFICATIONS· · · · · · · · · · · · · · · · · · · · · 43
RÉGLAGE DE L’IMAGE · · · · · · · · · · · · · · · · · · · · · · · · · 44
1.Ajustement De La Mise Au Point 44
2.Mode de Projection 44
3.Correction Trapézoïdale 44
4.Mode De Zoom 46
5.Réglage De La Luminosité 46
6.Autres Paramètres 47
CONFIGURATION DU PROJECTEUR · · · · · · · · · · · · · · · · · 48
Connexion WiFi · · · · · · · · · · · · · · · · · · · · · · · · · · · · 49
1.Pour le Système iOS ( Airplay ) 49
2.Pour le Système Android (Miracast) 50
3.Eshare 50
Paramètres Bluetooth · · · · · · · · · · · · · · · · · · · · · · · · 51
Connecter Des Haut-Parleurs Bluetooth 51
CONNEXION DES LIGNES DE SIGNAUX· · · · · · · · · · · · · · · · 52
1.Connexion Multimédia USB 52
2.Connexion avec Ordinateur Portable 52
3.Connexion avec MacBook ou Mac Book Air 53
4.Connexion avec la barre de son 53
5.Connexion avec Fire TV Stick 53
6.Connexion avec XBOX/PS4 53
Paramètre De Langue · · · · · · · · · · · · · · · · · · · · · · · · 54
Autres Paramètres· · · · · · · · · · · · · · · · · · · · · · · · · · 54
Réglage De La Date Et De l’Heure · · · · · · · · · · · · · · · · · 55
À propos de nous · · · · · · · · · · · · · · · · · · · · · · · · · · 56
FAQ · · · · · · · · · · · · · · · · · · · · · · · · · · · · · · · · · · 56
FR
40
LISTE DU PAQUET
WiMiUS Q2 Projecteur Télécommande
Câble d'alimentation Câble HDMI vers Mini HDMI
Câble AC vers USB-A Support de Projecteur
Mode d'Emploi

FR
41
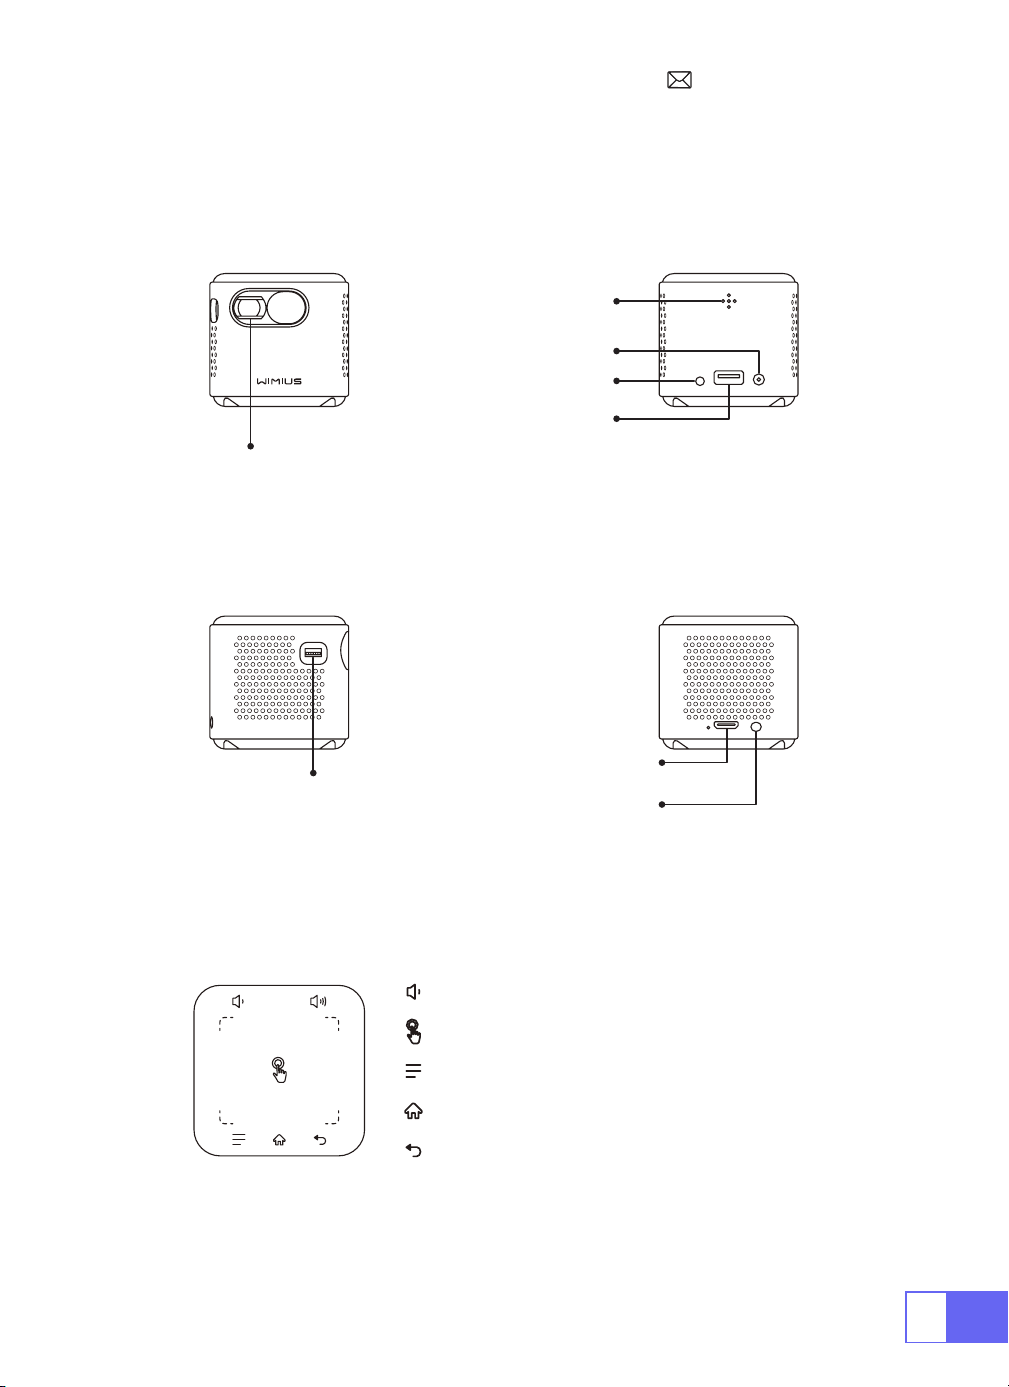
STRUCTURE DU PRODUIT
Lentille
Mise au point
ENTRÉE HDMI
IR
DC-IN
USB
Puissance ON/OFF
Sortie Audio
Volume
Écran Tactile
Menu
(avec fonction écran de verrouillage)
Page d’accueil
Retour

FR
42
TÉLÉCOMMANDE
ON/OFF
Muet
Passer au
contrôle de la
souris
Home
MENU
VOL+/-
OK
Airplay
Eshare
Directions
Retour
Remarque:
Installez 2 piles AAA (non incluses) dans la télécommande
avant de l’ utiliser.
FR
43
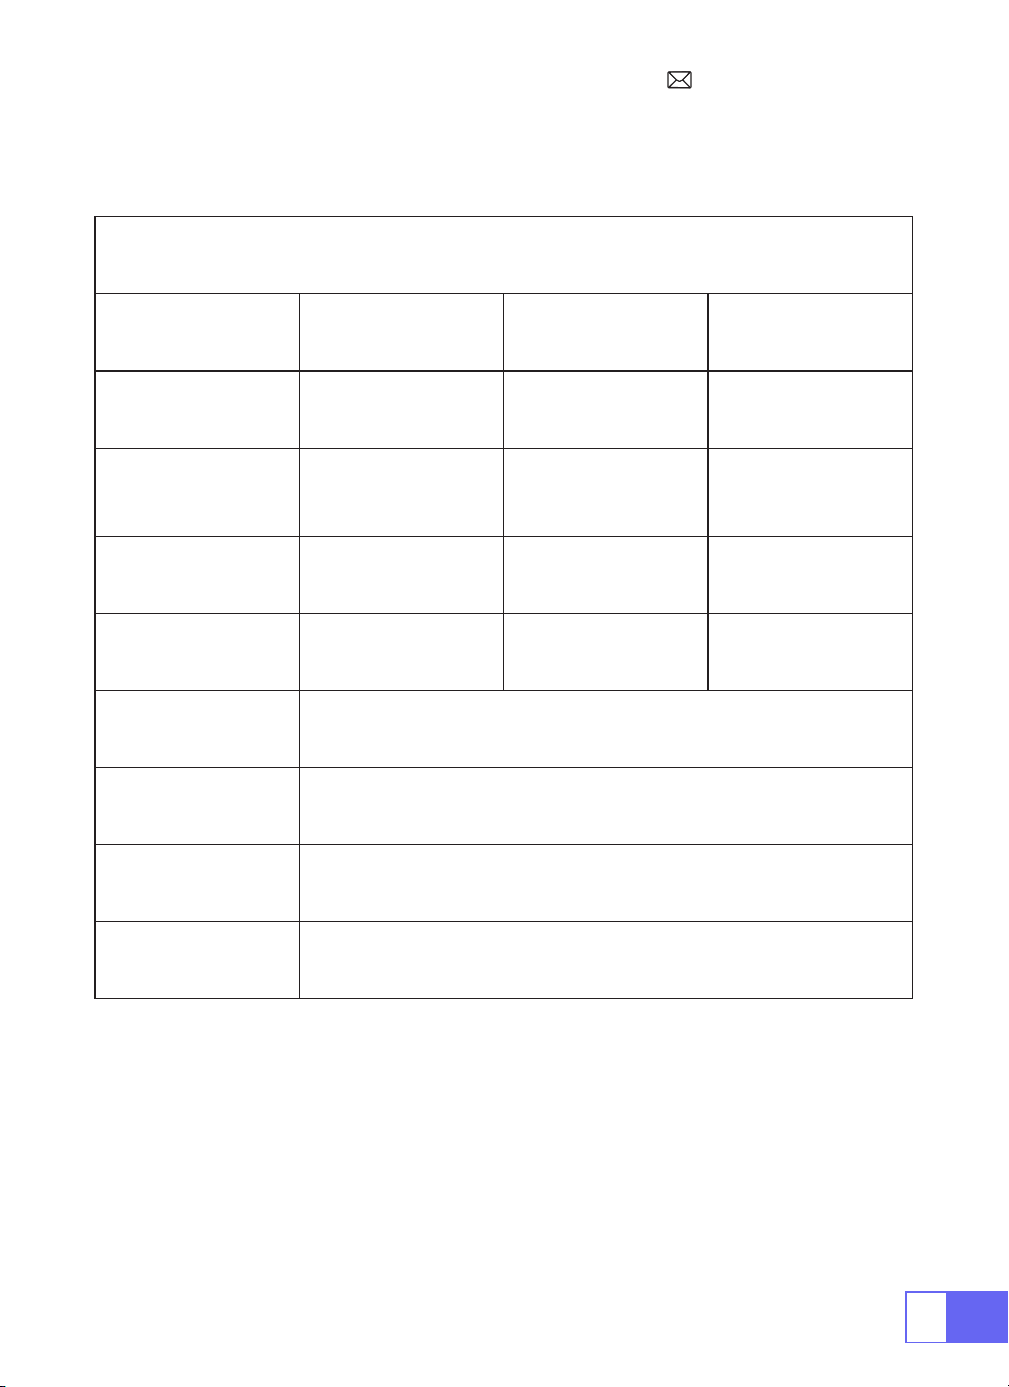
PROJECTORSPECIFICATIONS
Numéro de Nodèle: Q2
Technologie
d'Afchage
DLP Source de Lumière LED
Système Logiciel Android 7.1 Type de Projecteur Scellé
Type d'Installation
Avant/Arrière sur
Bureau, Avant/Arrière
au Plafond
Ratio d'Aspect 16:9/4:3
Taille du Produit 60mm*60mm*58mm Poids du Produit 210g
Correction
Trapézoïdale
Correction Verticale
Auto
Mise au point Manuel
Interface d'Entrée HDMI/ USB/ Sortie Audio 3,5 mm
Format Vidéo DAT, MPG, VOB, TS, AVI, MKV, MP4, MOV, 3GP, FLV, WEBM,WMV, ASF, MKV
Format Audio MP1, MP2, MP3, WMA, WAV, OGG, OGA, AAC, M4A, 3GP
Format d'Image BMP, JPG, PNG
FR
44
RÉGLAGE DE L’IMAGE
1.Ajustement De La Mise Au Point
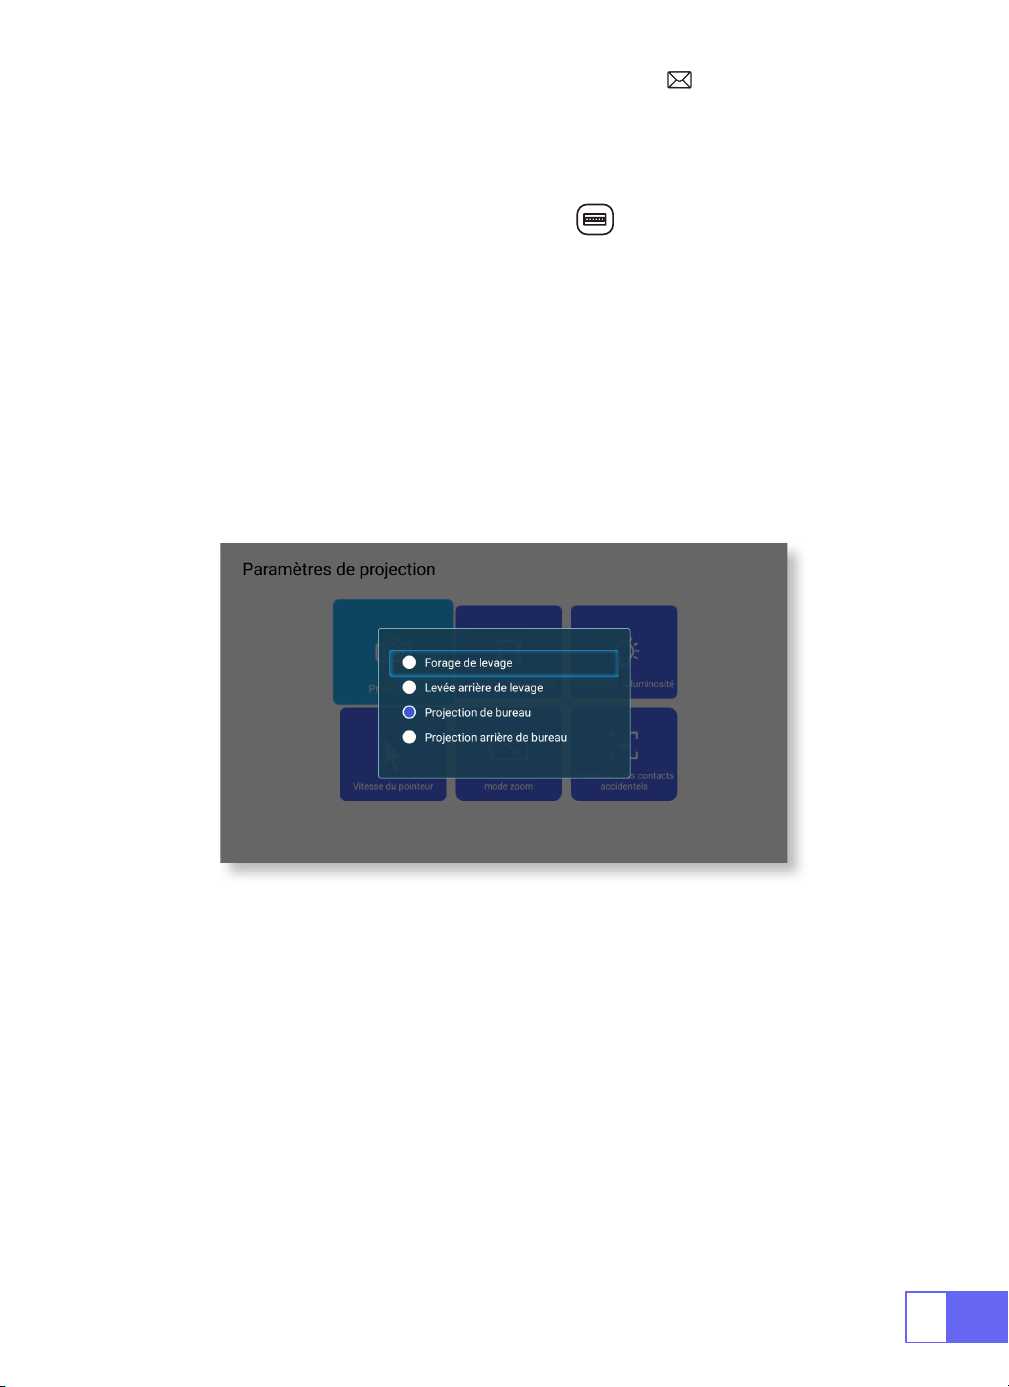
2.Mode de Projection
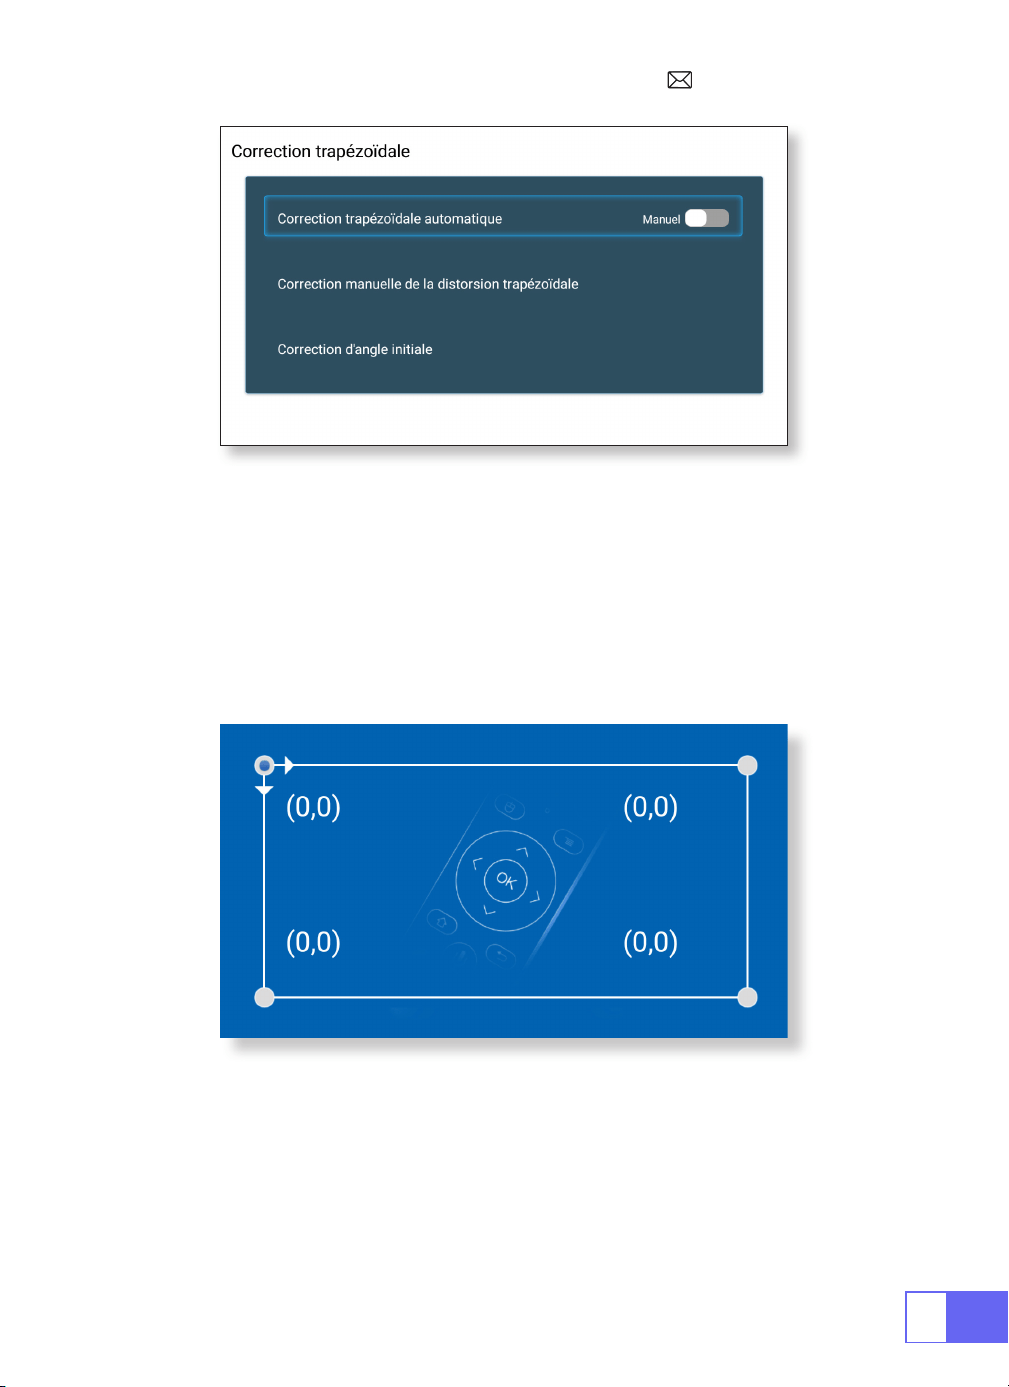
Correction Trapézoïdale Automatique
3.Correction Trapézoïdale
Faites glisser le pignon à gauche de l’appareil pour ajuster la netteté.
Sélectionnez le menu [Paramètres] – Sélectionnez [ Projection] –
Sélectionnez [Mode de Projection], appuyez sur la touche fléchée
pour sélectionner et appuyez sur « OK » pour confirmer la position de
projection.
Il y a 4 modes:
Rotation du plafond arrière / arrière / avant / pivot du plafond
Sélectionnez le menu [Paramètres] – Sélectionner [Projection] –
Sélectionnez [Correction trapézoïdale]—Sélectionnez [Correction
trapézoïdale automatique], appuyez sur « OK » pour conrmer.
Le projecteur peut ajuster automatiquement le plan vertical pour obtenir
l’image rectangulaire. L’angle incliné ne dépasse pas ±30°.
FR
45
Correction Trapézoïdale Manuelle
Correction d’Angle Initiale
Sélectionnez le menu [Paramètres] -- Sélectionnez [Projection] --
Sélectionnez [Correction trapézoïdale]--Sélectionnez [Correction
trapézoïdale manuelle], appuyez sur « OK » pour choisir le point que vous
souhaitez ajuster en premier, puis appuyez sur le bouton "
▼
” ou”
▶
”
pour dénir la valeur (horizontale et verticale ±30 °) nécessaire comme
indiqué ci-dessous.
Placez l’appareil sur le plan horizontal et appuyez sur OK pour le corriger.
Ne déplacez pas l’appareil pendant la correction.

FR
46
4.Mode De Zoom
5.Réglage De La Luminosité
Il y a 2 modes d’Aspect Ratio: 16:9 ou 4:3.
Sélectionnez le menu [Paramètres] – Sélectionnez [Projection] –
Sélectionnez [Mode de zoom], l’écran de projection peut être zoomé
de 50% ~ 100%, appuyez sur le bouton “
◀ ▶
“ pour définir la valeur
nécessaire.
Sélectionnez le menu [Paramètres] – Sélectionnez [ Projection] –
Sélectionnez [Réglage de la luminosité], appuyez sur “
◀
“ ou “
▶
” pour
régler la luminosité dont vous avez besoin.
FR
47
6.Autres Paramètres
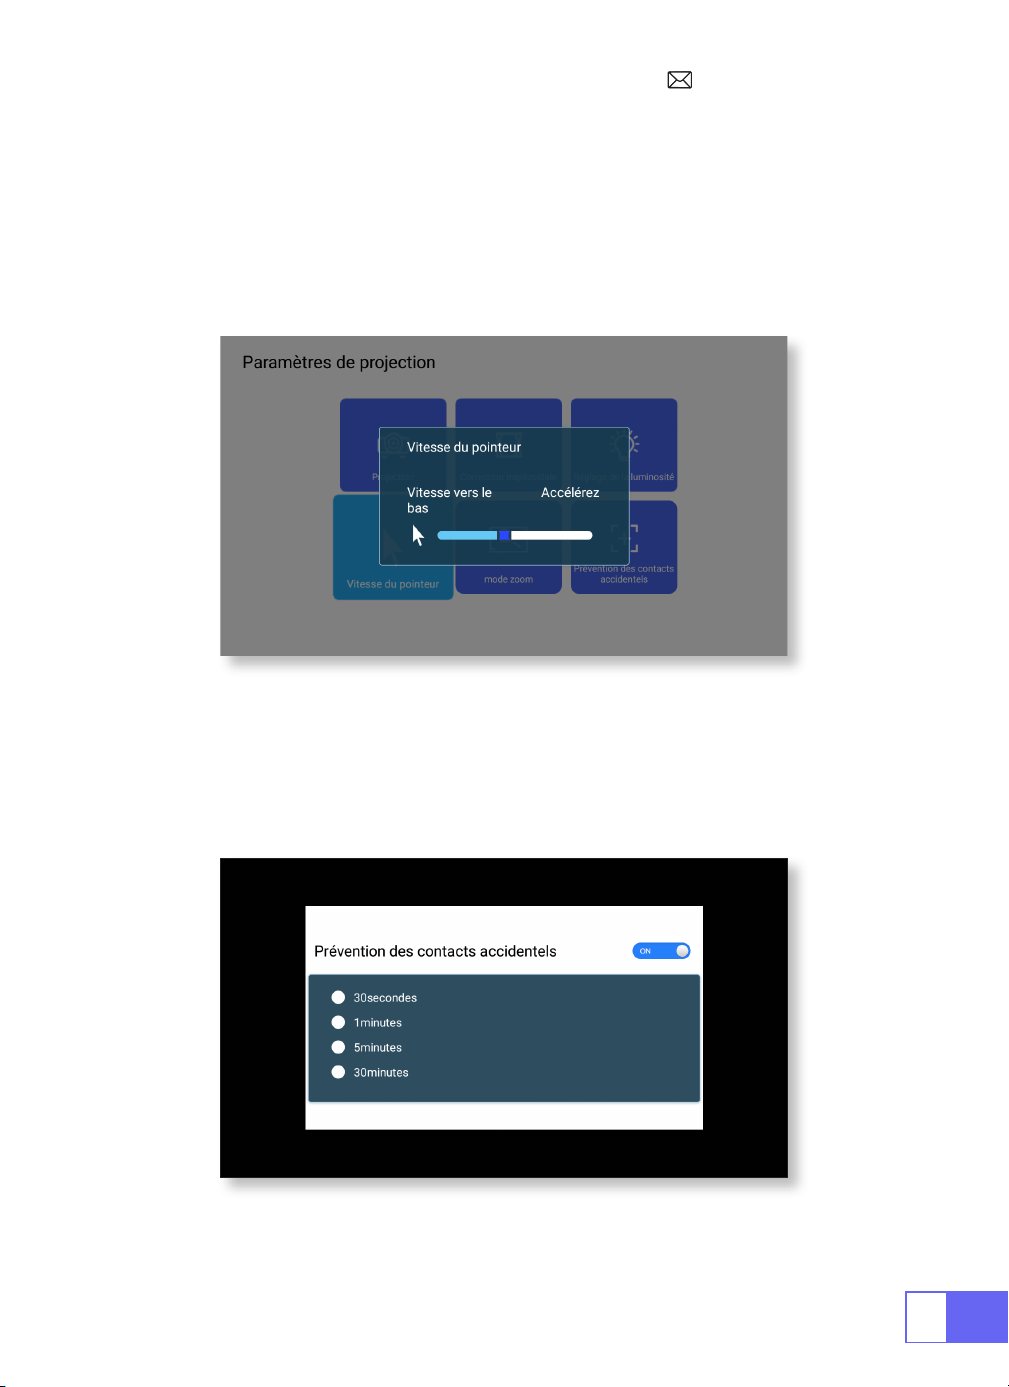
Vitesse Du Pointeur
Prévention Des Contacts Accidentels
Sélectionnez le menu [Paramètres] – Sélectionnez [ Projection] –
Sélectionnez [Vitesse du pointeur], appuyez sur “
◀
“ ou “
▶
” pour régler
la vitesse de déplacement du pointeur de la souris dont vous avez besoin.
Sélectionnez le menu [Paramètres] – Sélectionner [ Projection] –
Sélectionnez [Prévention du contact accidentel], pour choisir la période
dont vous avez besoin, évitez les opérations accidentelles.

FR
48
CONFIGURATION DU PROJECTEUR
Sélectionnez La Source Du Signal d’Entrée
Choisissez la « Source » sur la page d’accueil, sélectionnez la source de
signal d’entrée souhaitée (USB / HDMI / AV)
L’appareil détectera automatiquement la clé USB, doit conrmer s’il
faut l’ouvrir.
Lors de la lecture d’une vidéo, vous pouvez appuyer sur la touche " "
pour dénir le son et le mode de lecture.

FR
49
Connexion WiFi
1.Pour le Système iOS ( Airplay )
Attention:
Votre appareil et le projecteur doivent être sur le même WiFi
domestique.
1.Activez le paramètre Réseau du projecteur.
2.Choisissez votre WiFi maison pour vous connecter et entrez le bon mot
de passe, puis cliquez sur « Link », veuillez attendre 3 secondes pour établir
la connexion. Une fois connecté, il se souviendra du mot de passe du WiFi
connecté (ou allumez directement le Hotspot du projecteur).
3.Activez le paramètre WiFi de votre appareil mobile, puis connectez-vous
au même WiFi domestique (ou au point d'accès du projecteur).
4.Ensuite, cliquez sur
"Airplay"
sur le smartphone.
5.Sélectionnez « Projector-7935 » dans les résultats de la recherche pour
vous connecter.
6.Réussir.

FR
50
2.Pour le Système Android (Miracast)
3.Eshare
Attention:
Votre appareil et le projecteur doivent être dans le même WiFi
domestique.
1.Activez le paramètre Réseau du projecteur.
2.Choisissez votre Home WiFi pour vous connecter et entrez le bon mot de
passe, puis cliquez sur « Lien », veuillez attendre 3 secondes pour établir
la connexion. Une fois connecté, il se souviendra du mot de passe du WiFi
connecté.
3.Activez le paramètre WiFi de votre appareil mobile, puis connectez-vous
au même WiFi domestique.
4.Ensuite, cliquez sur
"Miracast"
sur le smartphone.
5.Sélectionnez « Projector-7935 » dans les résultats de la recherche pour
vous connecter.
6.Réussir.
Remarque:
le Hotspot ne peut pas prendre en charge les appareils
Android.
Utilisez votre téléphone comme souris sans fil, clavier, télécommande,
transformez la façon dont vous contrôlez et interagissez avec les
appareils à grand écran.
1.Connectez votre appareil au WiFi domestique.
2.Visitez « http://192.168.43.1:8000 » avec le navigateur Web ou scannez le
code QR pour télécharger l’application.
3.Lancez Eshare et cliquez sur « Projector-7935» pour vous connecter.
FR
51
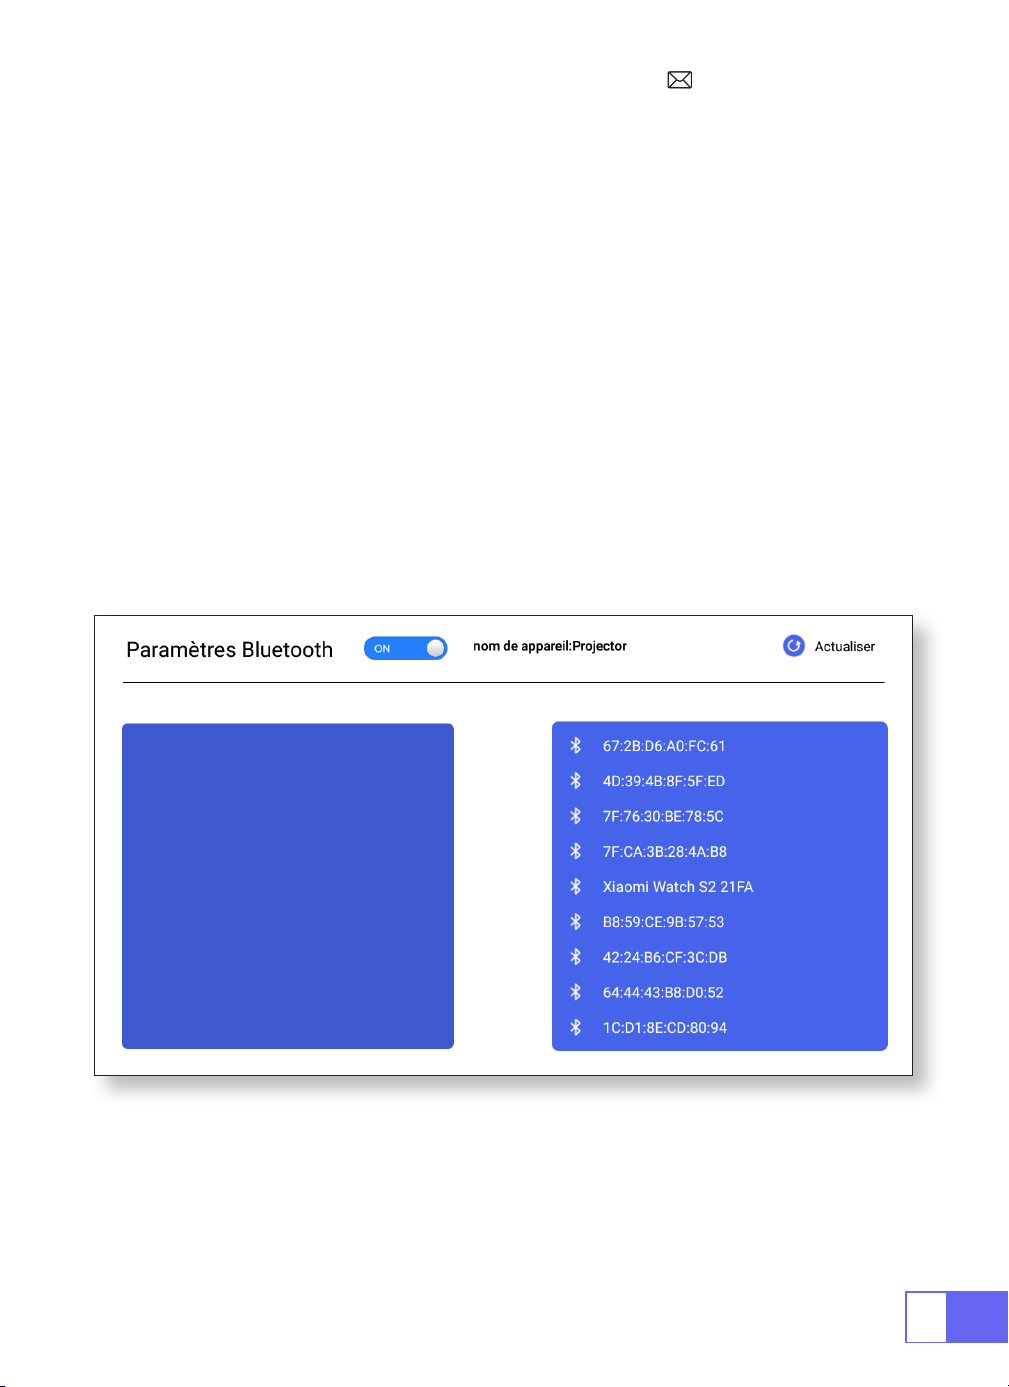
Paramètres Bluetooth
Connecter Des Haut-Parleurs Bluetooth
1.Allumez votre haut-parleur Bluetooth.
2.Activez les
[Paramètres Bluetooth]
de votre projecteur
3.Sélectionnez votre haut-parleur Bluetooth à connecter.
4.Réussir.
FR
52
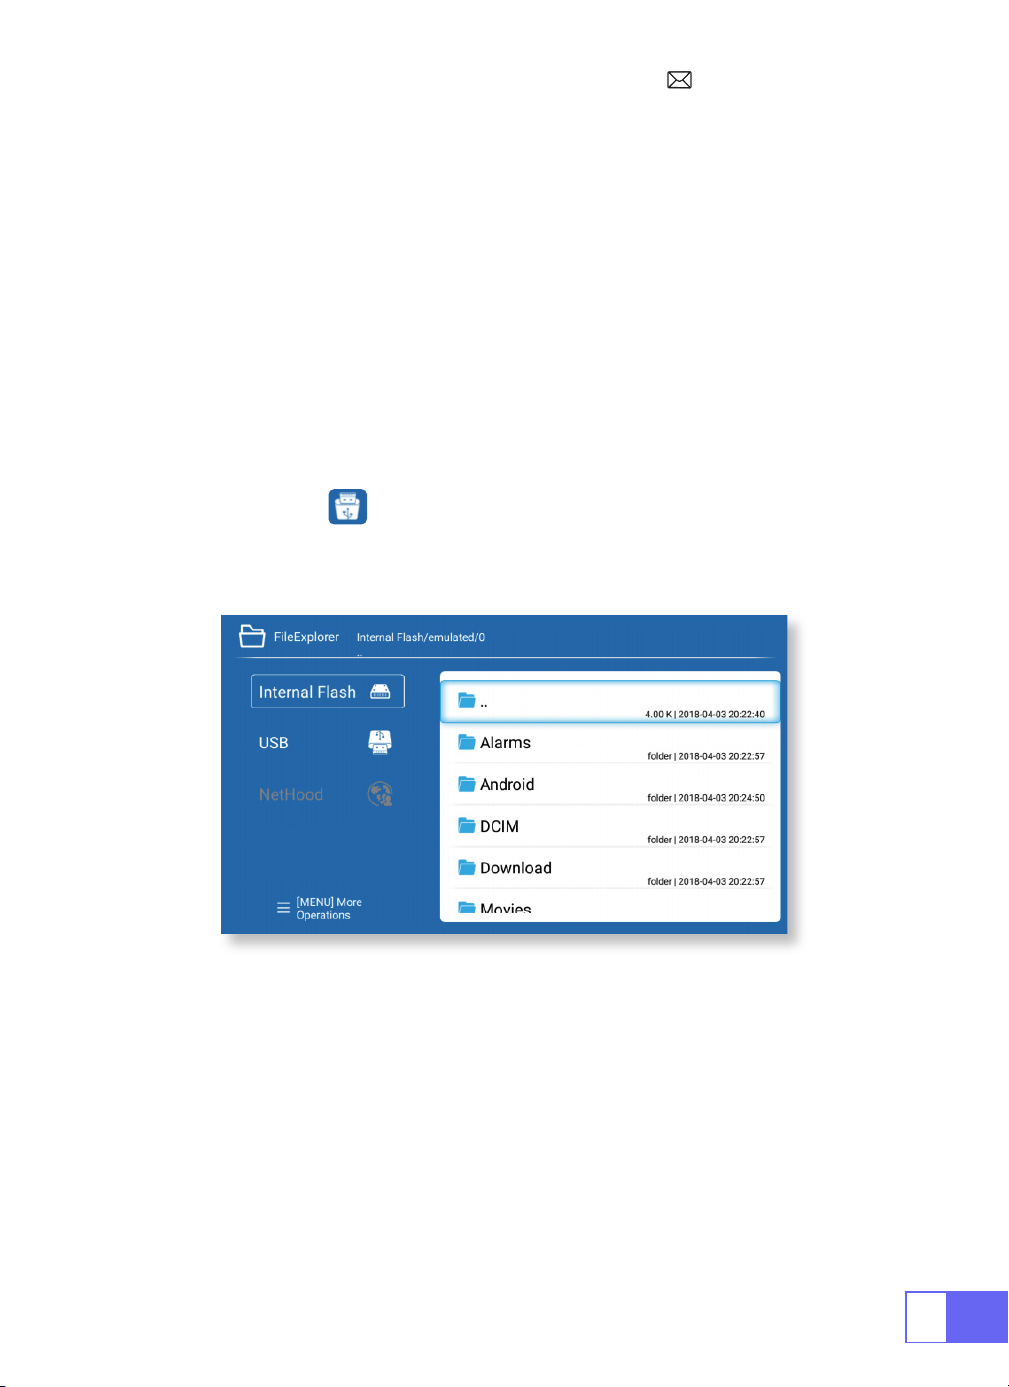
CONNEXION DES LIGNES DE SIGNAUX
1.Connexion Multimédia USB
Le projecteur WiMiUS Q2 dispose de 3 interfaces, port HDMI / port USB /
sortie casque 3,5 mm.
Veuillez sélectionner le port de connexion correct pour connectez votre
appareil (PC, téléphone, lecteur DVD, barre de son, USB, PS4, etc.)
Pour les périphériques USB, pas besoin de choisir la source du signal. La
machine les détectera automatiquement.
•Sélectionnez l’icône dans le coin supérieur droit de la page d’accueil.
Remarque:
Prise en charge de la capacité de stockage du lecteur USB
max. Jusqu’à 32 Go et capacité de stockage du disque dur max. à 1 To.
2.Connexion avec Ordinateur Portable
•Connectez le projecteur au PC par câble HDMI.
•Choisissez le canal de signal multimédia : « HDMI »

FR
53
3.Connexion avec MacBook ou Mac Book Air
4.Connexion avec la barre de son
5.Connexion avec Fire TV Stick
6.Connexion avec XBOX/PS4
Choisissez le canal de signal multimédia: «HDMI »
•Utilisez un adaptateur Type-C vers HDMI pour connecter votre MacBook
ou un adaptateur Mini Display vers HDMI pour vous connecter à votre
MacBook Air (adaptateur non inclus).
•Utilisez le câble audio 3,5 mm fourni avec le projecteur pour vous connecter
à la barre de son.
•Allumez le projecteur et la barre de son (choisissez le mode AUX).
•Plus de détails, veuillez contacter le vendeur à
.
•Branchez le Fire Stick sur le port HDMI du projecteur.
•Choisissez le canal de signal multimédia : « HDMI »
•Choisissez le canal de signal multimédia: « HDMI »
•Utilisez le câble HDMI pour vous connecter à XBOX/PS4
Audio
out
AUX
port

FR
54
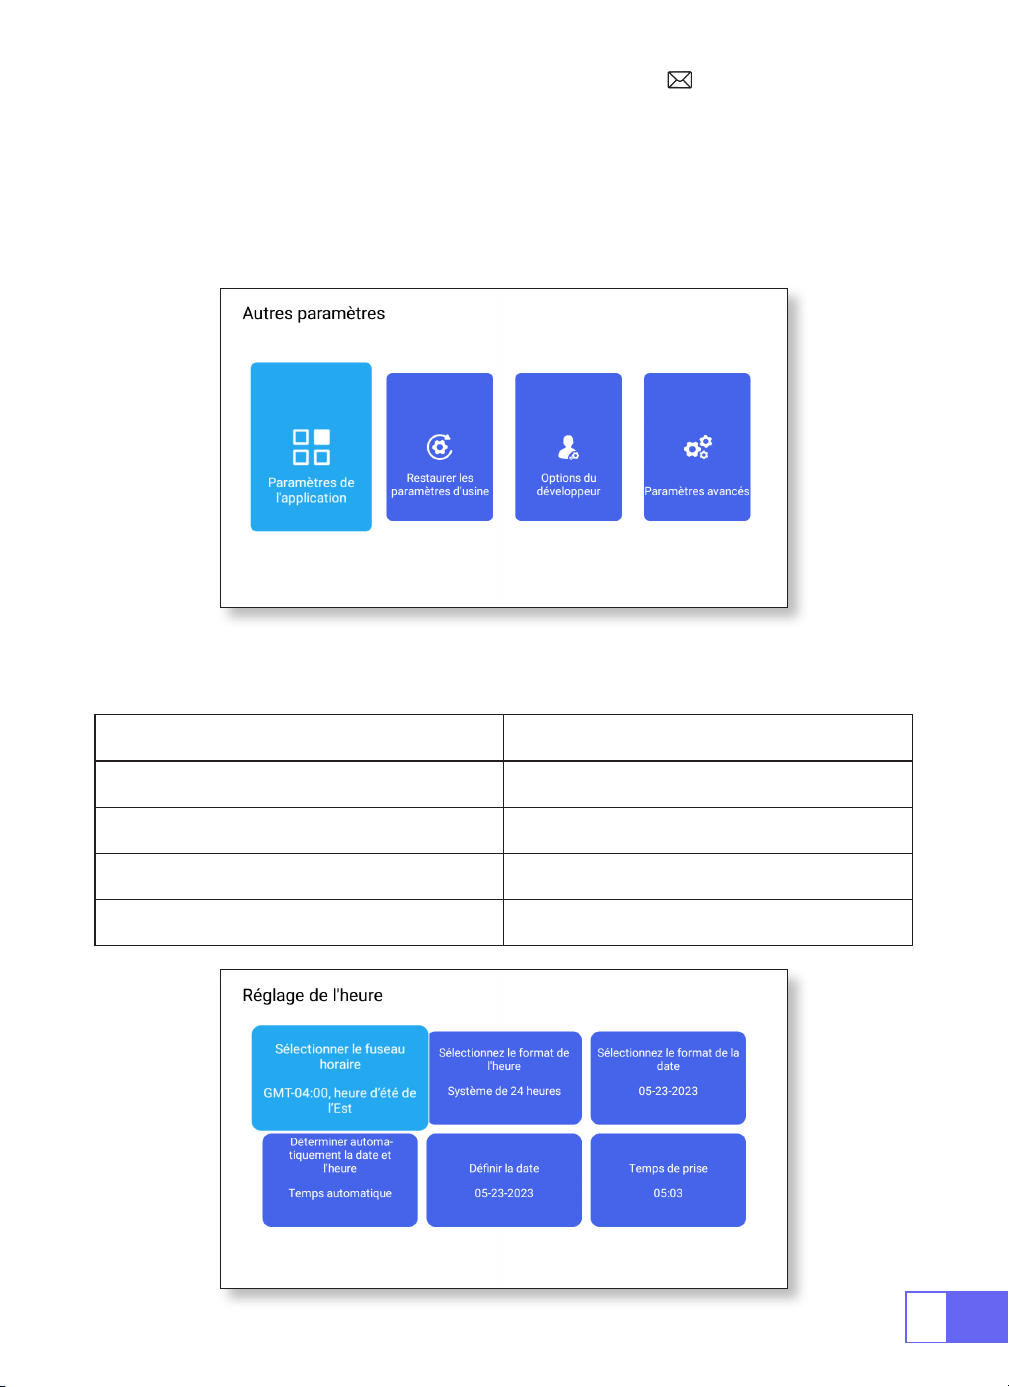
Paramètre De Langue
Autres Paramètres
Choisissez la langue
Paramètre De l’Application
Paramètre De Réinitialisation d’Usine
Sélecteur d’entrée
•Il y a plus de 50 langues pour choisir, anglais, français, allemand,
italien,Espagnol, japonais, ect.
•Dans le menu des autres paramètres, vous pouvez trouver l’option
« Paramètres de l’application », cliquez dessus pour afficher toutes les
applications installées et les congurer.
•Réinitialiser et supprimer toutes les données
•Choisissez le clavier à installer en fonction de vos propres besoins et
habitudes.
FR
55
Avis Des Développeurs
Réglage De La Date Et De l’Heure
•Il est principalement fourni aux développeurs pour l’utiliser pendant le
développement de logiciels et le débogage des appareils. Normalement,
il est désactivé par défaut.
Réglage Fonction
Choisir Fuseau horaire Dénir l’heure de votre emplacement
Sélection du format horaire 12/24 Heure 12/24 Heures
Sélection du format de date Dénir le format de date
Déterminer automatiquement Auto/Manuel

FR
56
À propos de nous
Environ Fonction
À propos de la machine Les informations détaillées de l’appareil
Mise à niveau locale Mise à jour via USB
Mise à niveau en ligne Mise à jour en ligne
FAQ
1.Aucune image sur l'écran.
a.La conguration des canaux est-elle correcte ?
b.Y a-t-il un signal d'entrée ?
c.Le câble d'entrée est-il bien branché ?
d.En mode PC, le taux de rafraîchissement est-il > 75KHz ?
2.Écran bleu pas d'image et pas de son.
Le périphérique d'entrée ne se connecte pas bien au projecteur.
3.Image correcte, pas de son.
a.Veuillez
éteindre le Dolby du dispositif d'entrée, puis il aura du son
.
b.Le système de décodage de la vidéo n'est pas pris en charge par le
projecteur.

FR
57
4.Arrêt automatique après avoir travaillé pendant un certain temps.
a.La ventilation du projecteur est bloquée.
b.La tension n'est pas stable.
c.Le système de protection contre la surchauffe.
5.La connexion WiFi n'est pas stable ?
a.Veuillez vérier si le réseau de votre téléphone fonctionne bien.
b.Faites la distance entre le téléphone et le projecteur à moins de 1 mètre.
6.Non compatible avec votre enceinte Bluetooth ?
a.Le projecteur peut ne pas être compatible avec certains types de haut-
parleurs Bluetooth.
b.Contactez immédiatement notre e-mail SAV à
et indiquez-nous la marque et le modèle de votre enceinte Bluetooth.
7.Point noir sur la photo ?
Contactez immédiatement notre SAV
.
8.Lorsque vous allumez l'interrupteur d'alimentation, le voyant ne
fonctionne pas.
a.L'alimentation n'est peut-être pas bien connectée.
b.Vériez le système de protection contre la surchauffe.
9.Impossible de lire les lms.
a.Le format de la vidéo est-il correct ?
b.Les chiers sont cassés ?
c.Appareil cassé ?
10.Vous ne parvenez pas à accéder au site Web pour télécharger
l'application?
Veuillez nous contacter immédiatement à notre adresse e-mail SAV:
et nous informer de l'invite de page qui est
apparue lors du téléchargement de votre application.

ES
58
CATÁLOGO
LISTA DE PAQUETES · · · · · · · · · · · · · · · · · · · · · · · · · · 59
ESTRUCTURA DEL PRODUCTO · · · · · · · · · · · · · · · · · · · · 60
MANDO A DISTANCIA· · · · · · · · · · · · · · · · · · · · · · · · · 61
PROJECTORSPECIFICATIONS· · · · · · · · · · · · · · · · · · · · · 62
AJUSTE DE IMAGEN · · · · · · · · · · · · · · · · · · · · · · · · · · 63
1.Ajuste De Enfoque 63
2.Modo De Proyección 63
3.Corrección Trapezoidal 63
4.Modo Zoom 65
5.Ajuste De Brillo 65
6.Otro Ajuste 66
CONFIGURACIÓN DEL PROYECTOR · · · · · · · · · · · · · · · · · 67
Conexión Inalámbrica WiFi · · · · · · · · · · · · · · · · · · · · · 68
1.Para Sistema iOS (Airplay) 68
2.Para Sistema Android (Miracast) 69
3.Eshare 69
Conguración De Bluetooth · · · · · · · · · · · · · · · · · · · · 70
Conectar Altavoz Bluetooth 70
CONEXIÓN DE LÍNEAS DE SEÑAL · · · · · · · · · · · · · · · · · · · 71
1.Conexión Multimedia USB 71
2.Conexión Con La Computadora Portátil 71
3.Conexión Con MacBook O Mac Book Air 72
4.Conexión Con La Barra De Sonido 72
5.Conexión Con Fire TV Stick 72
6.Conexión Con XBOX/PS4 72
Conguración De Idioma · · · · · · · · · · · · · · · · · · · · · · 73
Otro Ajuste · · · · · · · · · · · · · · · · · · · · · · · · · · · · · · 73
Conguración De Fecha Y Hora · · · · · · · · · · · · · · · · · · 74
Sobre Nosotros · · · · · · · · · · · · · · · · · · · · · · · · · · · · 75
Preguntas Más Frecuentes · · · · · · · · · · · · · · · · · · · · · 75

ES
59
LISTA DE PAQUETES
Proyector WiMiUS Q2 Mando a Distancia
Cable de alimentación Cable HDMI a Mini HDMI
Cable de AC a USB-A Soporte para proyector
Manual de usuario
ES
60
ESTRUCTURA DEL PRODUCTO
Lente
Enfocar
ENTRADA HDMI
IR
DC-IN
USB
Potencia ON/OFF
Salida de Audio
Volumen
Pantalla Táctil
Menú
(con función de pantalla de bloqueo)
Página principal
Devolver

ES
61
MANDO A DISTANCIA
ON/OFF
Silenciar
Cambiar al
control del
mouse
HOME
MENÚ
VOL+/-
OK
Airplay
Eshare
Direcciones
Devolver
Nota:
Instale 2 pilas AAA (no incluidas) en el control remoto antes de
usarlo.
ES
62
PROJECTORSPECIFICATIONS
Número de Modelo: Q2
Tecnología de
Visualización
DLP Fuente de Luz LED
Sistema de Software Android 7.1 Tipo de Proyector Sellado
Tipo de Instalación
Delantero/Trasero
en el escritorio,
Delantero/Trasero en
el techo
Relación de Aspecto 16: 9/4: 3
Tamaño del Producto 60mm*60mm*58mm Peso del Producto 210g
Corrección
Trapezoidal
Corrección Vertical
Auto
Enfocar Manaúl
Interfaz de Entrada HDMI/USB/Salida de Audio 3,5 mm
Formato de Video DAT, MPG, VOB, TS, AVI, MKV, MP4, MOV, 3GP, FLV, WEBM,WMV, ASF, MKV
Formato de Audio MP1, MP2, MP3, WMA, WAV, OGG, OGA, AAC, M4A, 3GP
Formato de Imagen BMP, JPG, PNG
ES
63
AJUSTE DE IMAGEN
1.Ajuste De Enfoque
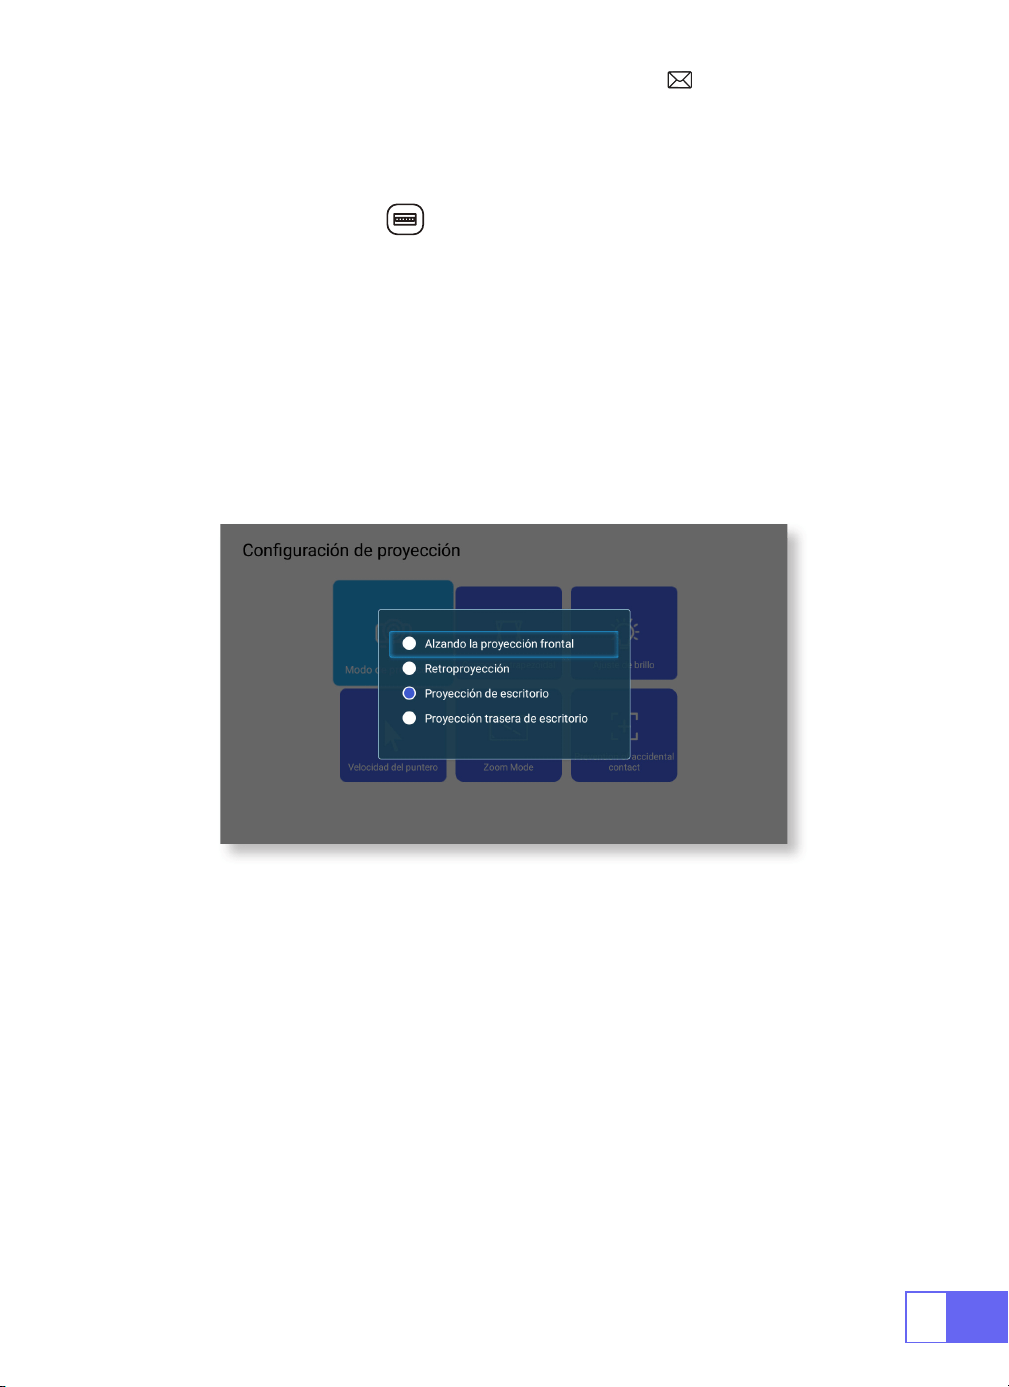
2.Modo De Proyección
Corrección Trapezoidal Automática
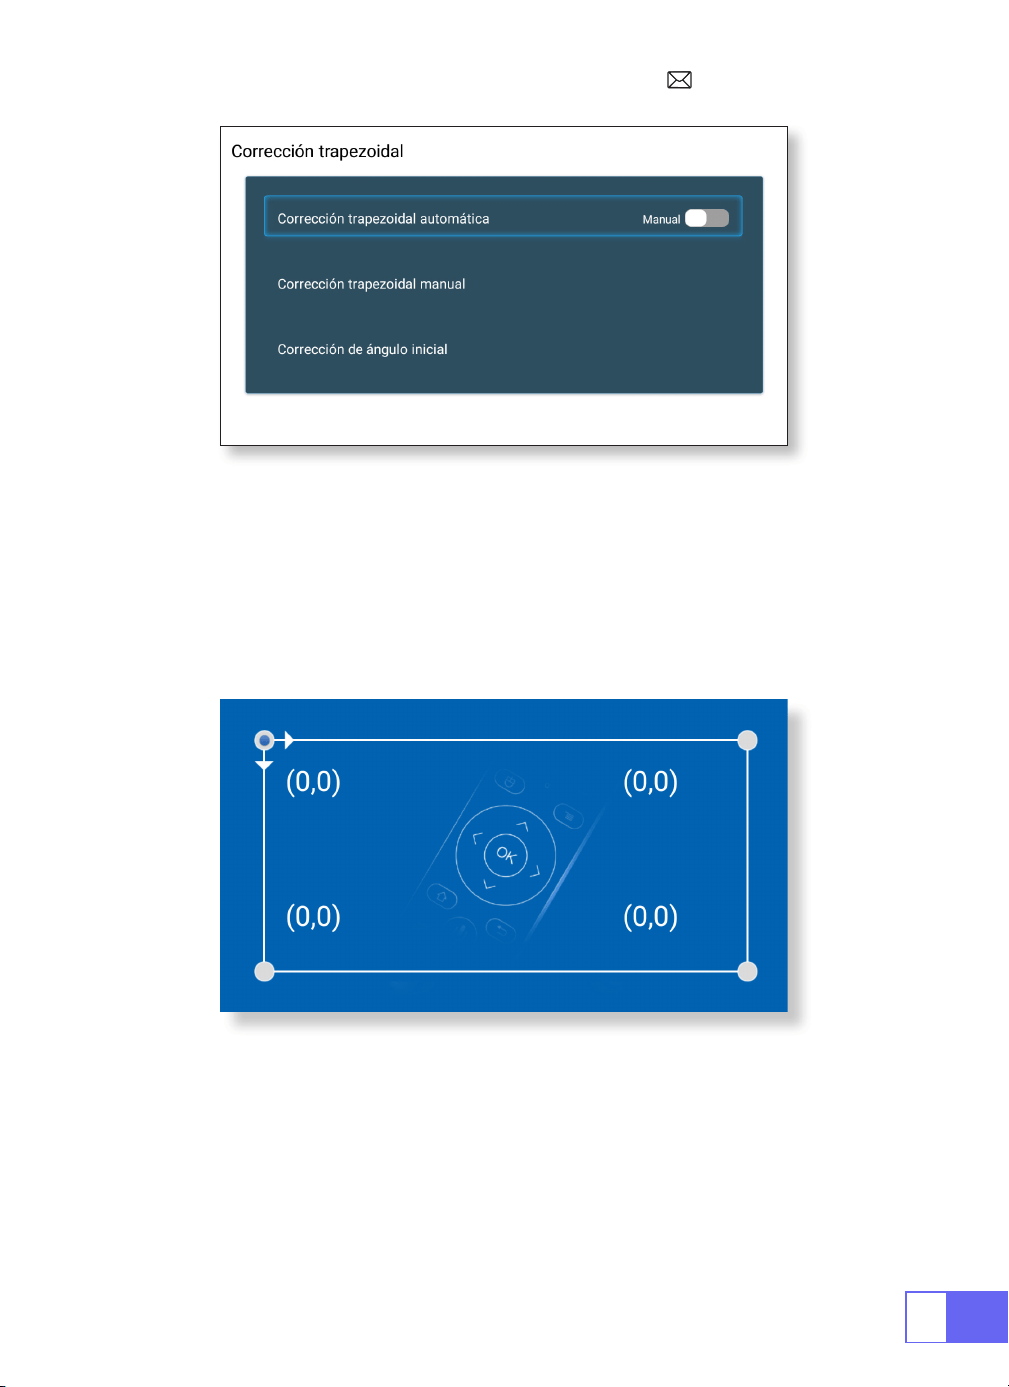
3.Corrección Trapezoidal
Deslice el piñón a la izquierda del dispositivo para ajustar la nitidez.
Seleccione el menú [Conguración] -- Seleccione [Proyección] -- Seleccione
[Modo de Proyección]
, presione la tecla de flecha para seleccionar y
presione "OK" para conrmar la posición de proyección.
Tiene 4 modos:
Girar techo trasero / Trasero / Delantero / Girar techo
Seleccione el menú [Configuración] -- Seleccione [Proyección]
-- Seleccione [Corrección trapezoidal] -- Seleccione [Corrección
trapezoidal automática], presione “OK” para conrmar.
El proyector puede ajustar automáticamente el plano vertical
para obtener la imagen del rectángulo. El ángulo de inclinación no
supera los ±30°.
ES
64
Corrección Trapezoidal Manual
Corrección De Ángulo Inicial
Seleccione el menú [Configuración] -- Seleccione [Proyección]
-- Seleccione [Corrección trapezoidal] -- Seleccione [Corrección
trapezoidal manual], presione "OK" para elegir el punto que desea ajustar
primero y luego presione el botón "
▶
" o "
▼
" para establecer el valor
(Horizontal y Vertical ±30°) necesario como se muestra a continuación.
Coloque el dispositivo en el plano horizontal y presione OK para corregirlo.
No mueva el dispositivo durante la corrección.

ES
65
4.Modo Zoom
5.Ajuste De Brillo
Tiene 2 modos de relación de aspecto: 16:9 o 4:3.
Seleccione el menú [Configuración] -- Seleccione [Proyección] --
Seleccione [Modo de zoom], la pantalla de proyección se puede ampliar
50% ~ 100%, presione el botón "
◀ ▶
" para establecer el valor necesario.
Seleccione el menú [Configuración] -- Seleccione [ Proyección] --
Seleccione [Ajuste de brillo], presione "
◀
" o "
▶
" para ajustar el brillo que
necesita.

ES
66
6.Otro Ajuste
Velocidad Del Puntero
Prevención De Contacto Accidental
Seleccione el menú [Configuración] -- Seleccione [ Proyección] --
Seleccione [Velocidad del puntero], presione "
◀
" o "
▶
" para ajustar la
velocidad de movimiento del puntero del mouse que necesita.
Seleccione el menú [Configuración] -- Seleccione [ Proyección] --
Seleccione [Prevención de contacto accidental], para elegir el período de
tiempo que necesita, para evitar la operación accidental.
ES
67
CONFIGURACIÓN DEL PROYECTOR
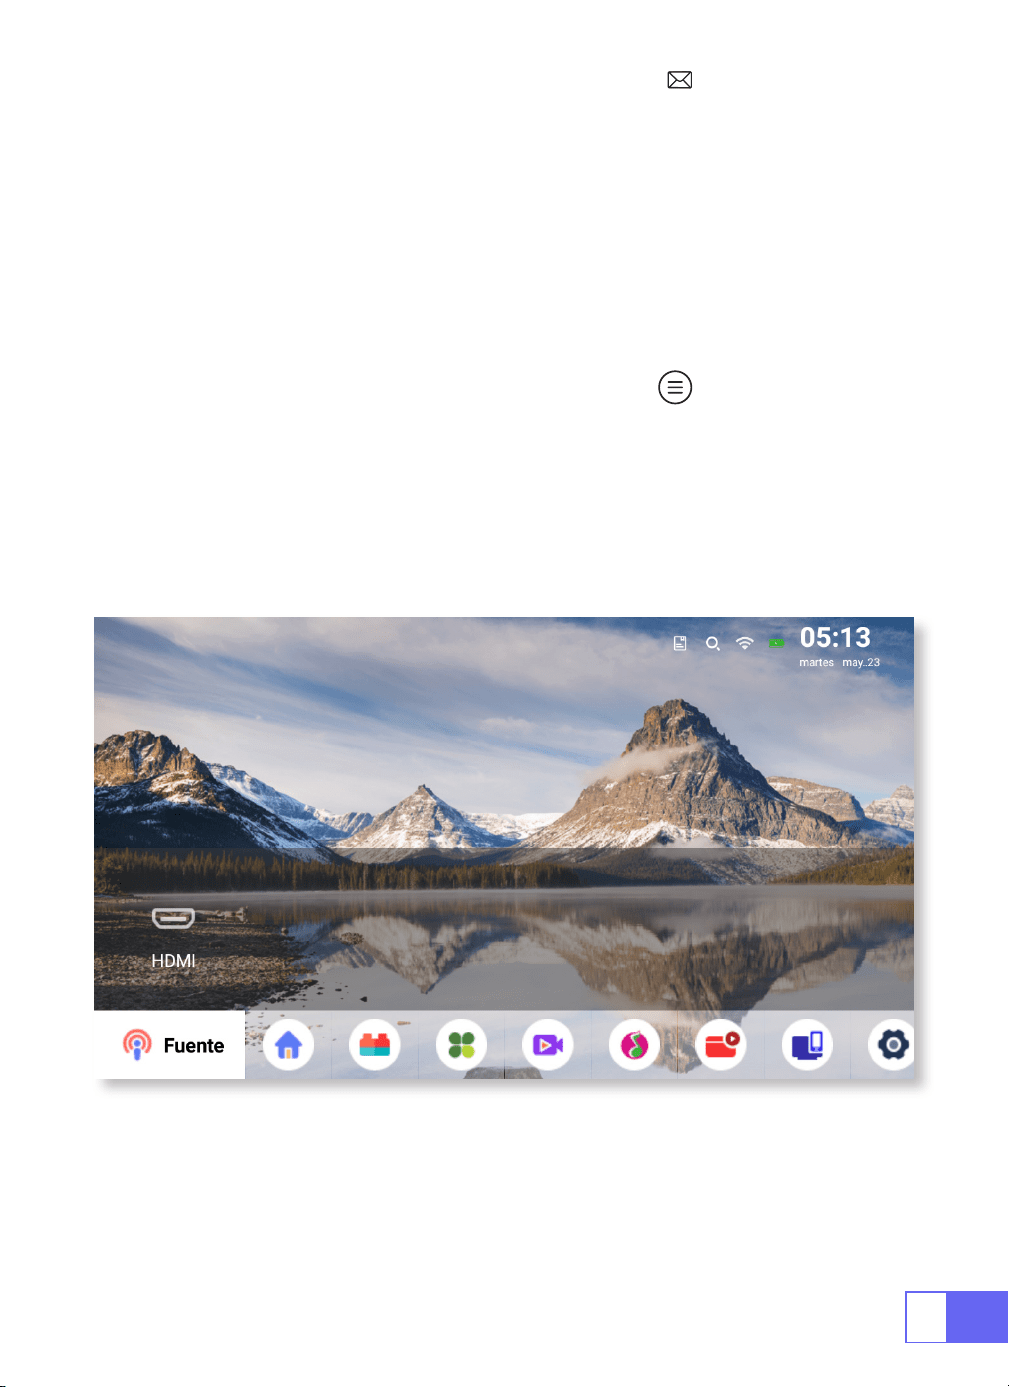
Seleccione La Fuente De La Señal De Entrada
Elija la "Fuente" en la página de inicio, seleccione la fuente de señal de
entrada deseada (USB/HDMI/AV)
El dispositivo detectará la memoria USB automáticamente, necesita
conrmar si se abre.
Al reproducir un video, puede presionar el botón " " para congurar el
sonido y el modo de reproducción.

ES
68
Conexión Inalámbrica WiFi
1.Para Sistema iOS (Airplay)
Atención:
Su dispositivo y el proyector deben estar en el mismo WiFi
doméstico.
1.Active la conguración de red del proyector.
2.Elija su WiFi doméstico para conectarse e ingrese la contraseña
correcta, luego haga clic en "Link", espere 3 segundos para establecer
la conexión. Una vez conectado, recordará la contraseña del WiFi
conectado (o encienda el punto de acceso del proyector directamente).
3.Encienda la conguración WiFi de su dispositivo móvil, luego conéctese
al mismo WiFi doméstico (o al punto de acceso del proyector).
4.Luego haga clic en
"Airplay"
en el teléfono inteligente.
5.Seleccione "Proyector-7935" de los resultados de búsqueda para
conectarse.
6.Éxito.

ES
69
2.Para Sistema Android (Miracast)
3.Eshare
Atención:
su dispositivo y el proyector deben estar en el mismo WiFi
doméstico.
1.Active la conguración de red del proyector.
2.Elija su WiFi doméstico para conectarse e ingrese la contraseña
correcta, luego haga clic en "Link", espere 3 segundos para establecer
la conexión. Una vez conectado, recordará la contraseña del WiFi
conectado.
3.Active la conguración WiFi de su dispositivo móvil, luego conéctese al
mismo WiFi doméstico
4.Luego haga clic en
"Miracast"
en el teléfono inteligente.
5.Seleccione "Proyector-7935" de los resultados de búsqueda para
conectarse.
6.Éxito.
Nota:
El Hotspot no es compatible con dispositivos Android.
Use su teléfono como mouse inalámbrico, teclado, control remoto,
transforme la forma en que controla e interactúe con el dispositivo de
pantalla grande.
1.Conecte su dispositivo a Home WiFi.
2. Visite "http://192.168.43.1:8000" con el navegador web o escanee el
código QR para descargar la aplicación.
3. Inicie Eshare y haga clic en "Projector-7935" para conectarse.
ES
70
Conguración De Bluetooth
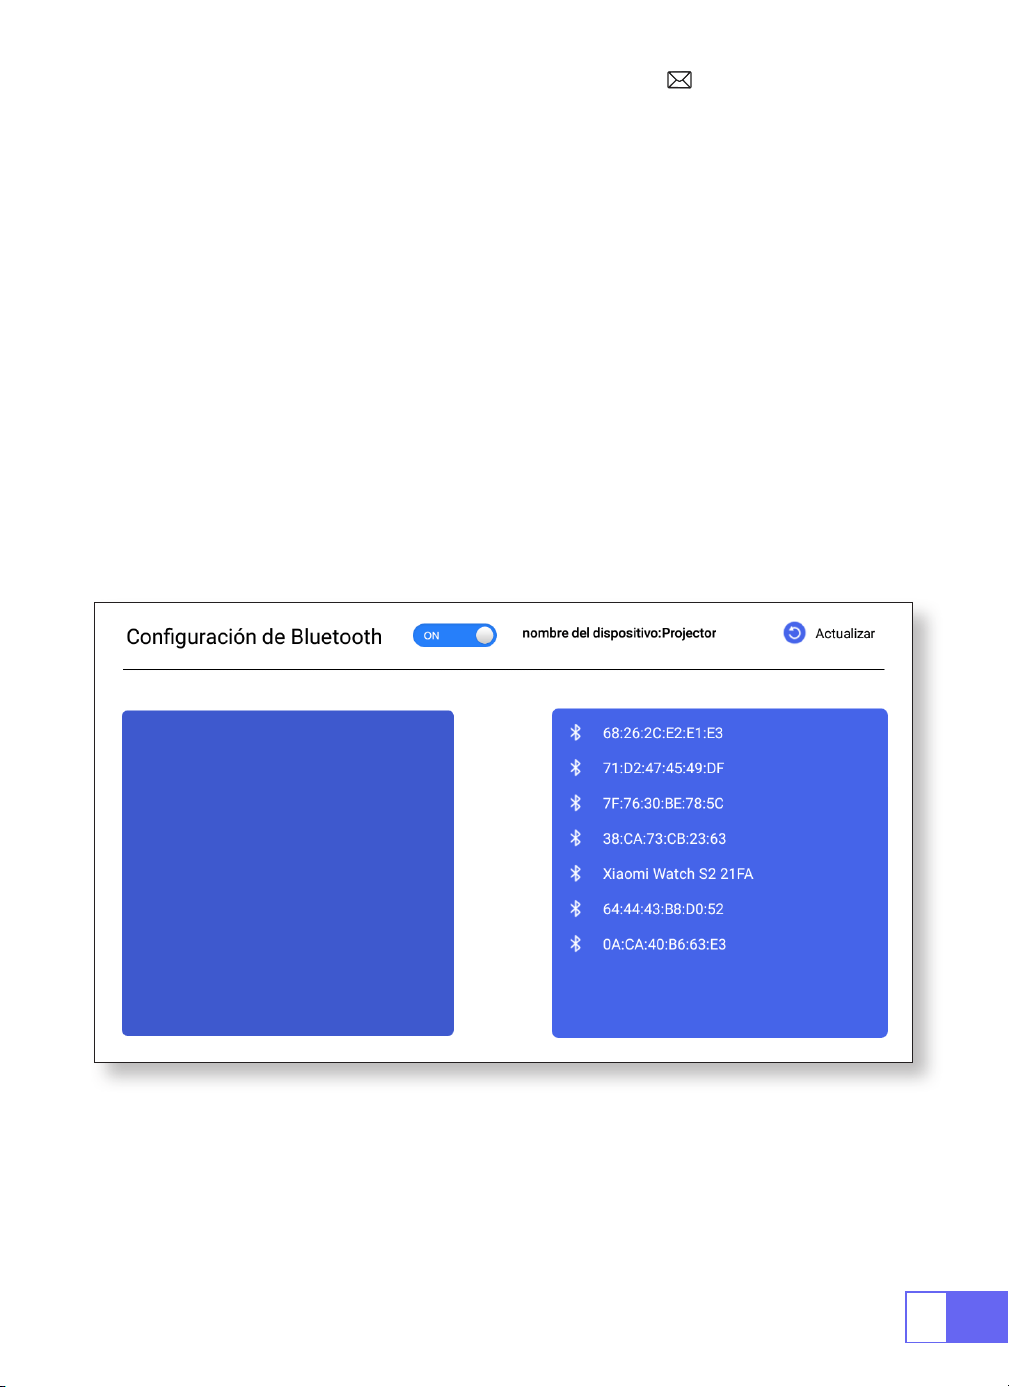
Conectar Altavoz Bluetooth
1. Encienda su altavoz Bluetooth.
2. Active la
[Conguración de Bluetooth]
de su proyector.
3. Seleccione su altavoz Bluetooth para conectarse.
4. Tener éxito.

ES
71
CONEXIÓN DE LÍNEAS DE SEÑAL
1.Conexión Multimedia USB
El proyector WiMiUS Q2 tiene 3 interfaces, puertos HDMI/puertos USB/
salida de auriculares de 3,5 mm. Seleccione el puerto de conexión
correcto para conecte su dispositivo (PC, teléfono, reproductor de DVD,
barra de sonido, USB, PS4, etc.)
Para los dispositivos USB, no es necesario elegir la fuente de la señal. La
máquina los detectará automáticamente.
•Seleccione el icono en la esquina superior derecha de la página de inicio
Nota:
Admite la capacidad de almacenamiento de la unidad USB máx.
Hasta 32 GB y capacidad de almacenamiento HDD máx. a 1 TB.
2.Conexión Con La Computadora Portátil
•Conecte el proyector con la PC mediante un cable HDMI.
•Elija el canal de señal de medios: "HDMI".

ES
72
3.Conexión Con MacBook O Mac Book Air
4.Conexión Con La Barra De Sonido
5.Conexión Con Fire TV Stick
6.Conexión Con XBOX/PS4
Elija el canal de señal de medios: "HDMI".
•Utilice un adaptador de tipo C a HDMI para conectar su MacBook o un
adaptador Mini Display a HDMI para conectar su MacBook Air (adaptador
no incluido).
•Utilice el cable de audio de 3,5 mm que viene con el proyector para
conectar con la barra de sonido.
•Encienda el proyector y la barra de sonido (elija el modo AUX).
•Más detalles, póngase en contacto con el vendedor en
.
•Conecte el dispositivo de TV al puerto HDMI del proyector.
•Elija el canal de señal de medios: "HDMI".
•Elija el canal de señal de medios: "HDMI".
•Use el cable HDMI para conectar a XBOX/PS4.
Audio
out
AUX
port
ES
73
Conguración De Idioma
Otro Ajuste
Elige Lengua
Conguración De La Aplicación
Conguración De Restablecimiento De Fábrica
Selector De Entrada
•Tiene más de 50 idiomas para elegir, inglés, francés, alemán, italiano,
Español, Japonés, etc.
•En el menú de otras configuraciones, puede encontrar la opción
"Configuración de la aplicación", haga clic en ella para ver todas las
aplicaciones instaladas y congurarlas.
•Restablecer y borrar todos los datos
•Elija el teclado para instalar de acuerdo a sus propias necesidades y
hábitos.

ES
74
Opiniones De Los Desarrolladores
Conguración De Fecha Y Hora
•Se proporciona principalmente para que los desarrolladores lo utilicen
durante el desarrollo de software y la depuración de dispositivos.
Normalmente está desactivado por defecto.
Conguración Función
Selección de zona horaria Establece la hora de tu ubicación
Selección de formato de hora 12/24 horas
Selección de formato de fecha Establecer el formato de fecha
Determinar automáticamente Manual de auto

ES
75
Sobre Nosotros
Acerca de Función
Sobre la máquina La información detallada del dispositivo.
Actualización local Actualizar a través de USB
Actualización en línea Actualizar en línea
Preguntas Más Frecuentes
1. No hay imagen en la pantalla.
a. ¿Es correcta la conguración del canal?
b. ¿Hay una señal de entrada?
c. ¿Está bien enchufado el cable de entrada?
d. En modo PC, ¿la frecuencia de actualización es > 75 KHz?
2. Pantalla azul sin imagen ni sonido.
El dispositivo de entrada no se conecta bien con el proyector.
3. Imagen correcta, sin sonido.
a.
Apague el Dolby del dispositivo de entrada y luego tendrá sonido.
b. El sistema de decodificación del video no es compatible con el
proyector.

ES
76
4. Apagado automático después de trabajar durante un tiempo.
a. La ventilación del proyector está bloqueada.
b. El voltaje no es estable.
c. El sistema de protección contra sobrecalentamiento.
5.¿La conexión WiFi no es estable?
a. Compruebe si la red de su teléfono está bien.
b. Haga que la distancia entre el teléfono y el proyector sea de 1 metro.
6. ¿No es compatible con su altavoz Bluetooth?
a. El proyector puede no ser compatible con algunos tipos de altavoces
Bluetooth.
b.Póngase en contacto con nuestro correo electrónico de posventa en
de inmediato y díganos la marca y el modelo
de su altavoz Bluetooth.
7. Mancha negra en la imagen.
Póngase en contacto con nuestro servicio postventa
support01@
wimius.com
inmediatamente.
8. Al encender el interruptor de encendido, la luz indicadora no funciona.
a. Es posible que la alimentación no esté bien conectada.
b.Compruebe el sistema de protección contra sobrecalentamiento.
9. No puedo reproducir películas.
a. ¿El formato del video es correcto?
b. ¿Los archivos están rotos?
c. ¿Dispositivo roto?
10.¿No puede acceder al sitio web correctamente para descargar la
aplicación?
Comuníquese con nosotros de inmediato a nuestra dirección de correo
electrónico de posventa:
e infórmenos sobre el
aviso de la página que apareció durante la descarga de la aplicación.

IT
77
CATALOGO
ELENCO DEI PACCHETTI · · · · · · · · · · · · · · · · · · · · · · · 78
STRUTTURA DEL PRODOTTO · · · · · · · · · · · · · · · · · · · · · 79
TELECOMANDO · · · · · · · · · · · · · · · · · · · · · · · · · · · · 80
SPECIFICHE DEL PROIETTORE· · · · · · · · · · · · · · · · · · · · · 81
REGOLAZIONE DELL'IMMAGINE · · · · · · · · · · · · · · · · · · · · 82
1.Regolazione della Messa a Fuoco 82
2.Modalità di Proiezione 82
3.Correzione Trapezoidale 82
4.Modalità Zoom 84
5.Regolazione della Luminosità 84
6.Altra Impostazione 85
IMPOSTAZIONE DEL PROIETTORE· · · · · · · · · · · · · · · · · · · 86
Connessione Senza Fili · · · · · · · · · · · · · · · · · · · · · · · 87
1.Per Sistema iOS (Airplay) 87
2.Per Sistema Android (Miracast) 88
3.Eshare 88
Impostazioni bluetooth · · · · · · · · · · · · · · · · · · · · · · · 89
Collega gli Altoparlanti Bluetooth 89
COLLEGAMENTO LINEE DI SEGNALE · · · · · · · · · · · · · · · · · 90
1.Collegamento Multimediale USB 90
2.Collegamento con il Laptop 90
3.Collegamento con MacBook o Mac Book Air 91
4.Collegamento con la Soundbar 91
5.Collegamento con Fire TV Stick 91
6.Collegamento con XBOX/PS4 91
Impostazione della Lingua · · · · · · · · · · · · · · · · · · · · · 92
Altra Impostazione· · · · · · · · · · · · · · · · · · · · · · · · · · 92
Impostazione Data e Ora · · · · · · · · · · · · · · · · · · · · · · 93
Chi Siamo · · · · · · · · · · · · · · · · · · · · · · · · · · · · · · · 94
FAQ · · · · · · · · · · · · · · · · · · · · · · · · · · · · · · · · · · 94

IT
78
ELENCO DEI PACCHETTI
WiMiUS Q2 Proiettore Telecomando
Cavo di Alimentazione Cavo da HDMI a Mini HDMI
Cavo da CA a USB-A Staffa del Proiettore
Manuale d'Uso

IT
79
STRUTTURA DEL PRODOTTO
Lente
Messa a Fuoco
Ingresso HDMI
IR
DC-IN
USB
Accensione/
Spegnimento
Uscita Audio
Volume
Touch Screen
Menu (con funzione di blocco schermo)
Pagina Iniziale
Ritorno

IT
80
TELECOMANDO
ON/OFF
Muto
Passa al
controllo del
mouse
Homepage
Menù
VOL+/-
OK
Airplay
Eshare
Tasti freccia
Ritorno
Nota:
installare 2 batterie AAA (non incluse) nel telecomando prima
dell'uso.

IT
81
SPECIFICHE DEL PROIETTORE
Modello No.: Q2
Tecnologia di Display DLP Fonte di Luce LED
Sistema Software Android 7.1 Tipo di Proiettore Sigillato
Tipo di Installazione
Fronte/retro sulla
scrivania, fronte/retro
sul softto
Proporzioni 16:9/4:3
Taglia del Prodotto 60mm*60mm*58mm Peso del Prodotto 210g
Keystone Correzione
Auto vertical
correction
Focus Manaul
Interfaccia di Ingresso HDMI/USB/3.5mm audio out
Formato Video DAT, MPG, VOB, TS, AVI, MKV, MP4, MOV, 3GP, FLV, WEBM,WMV, ASF, MKV
Formato Audio MP1, MP2, MP3, WMA, WAV, OGG, OGA, AAC, M4A, 3GP
Formato Immagine BMP, JPG, PNG
IT
82
REGOLAZIONE DELL'IMMAGINE
1.Regolazione della Messa a Fuoco
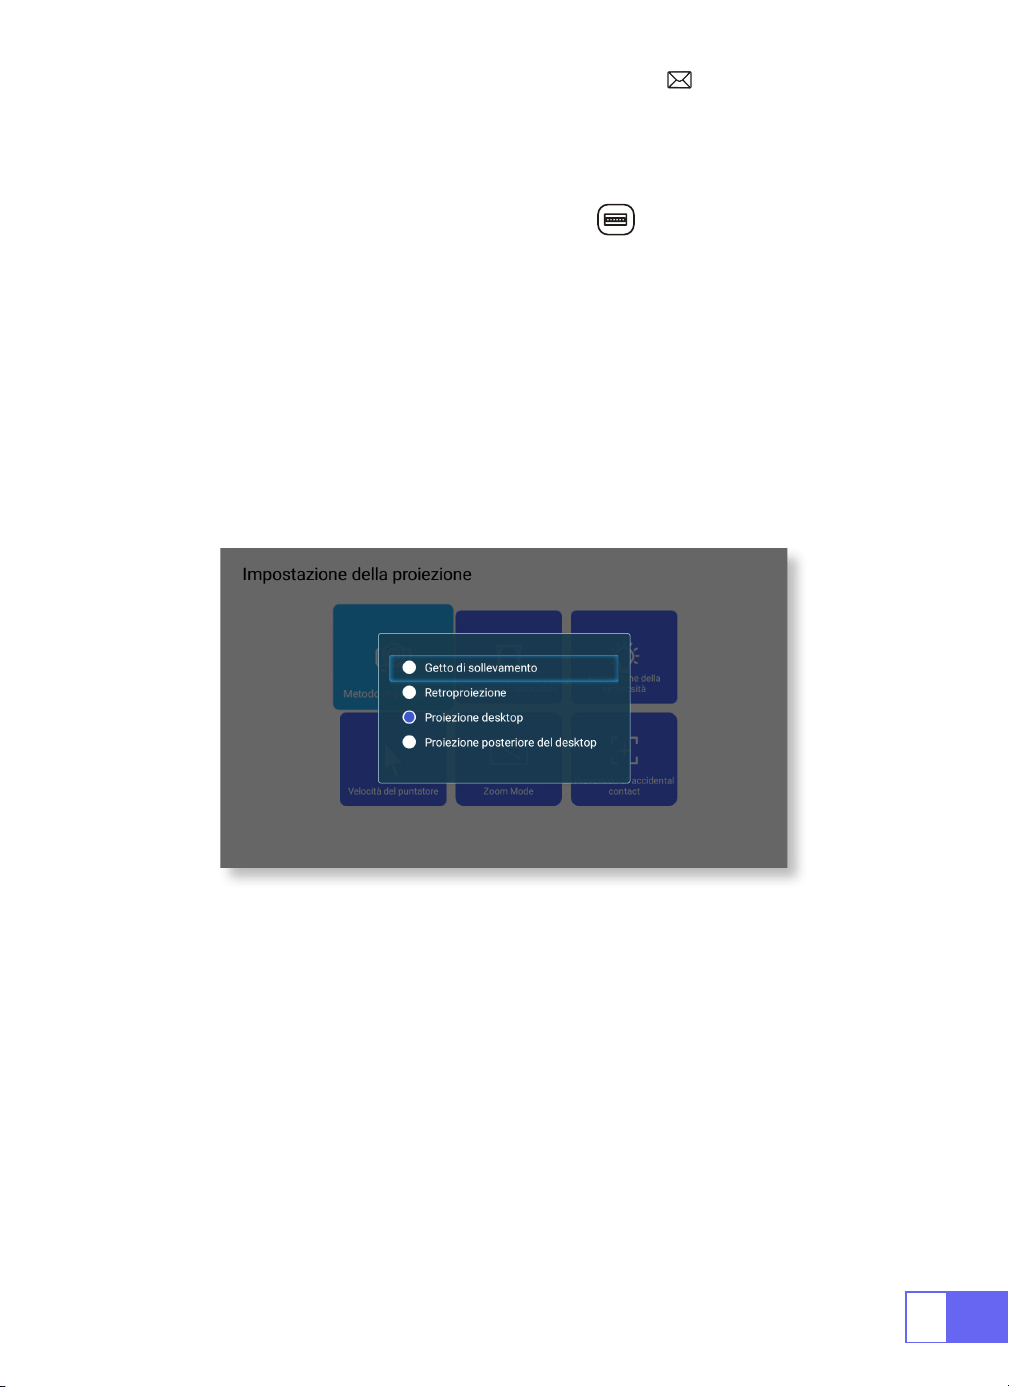
2.Modalità di Proiezione
Correzione Trapezoidale Automatica
3.Correzione Trapezoidale
Far scorrere il pignone sulla sinistra del dispositivo per regolare la
nitidezza.
Selezionare il menu [Impostazioni] -- Selezionare [ Proiezione] -- Selezionare
[Modalità proiezione]
, premere il tasto freccia per selezionare e premere
"OK" per confermare la posizione di proiezione.
Sono disponibili 4 modalità: Frontale a soffitto/Posteriore a soffitto/Frontale
da tavolo/Posteriore da tavolo
Selezionare il menu [Impostazioni] -- Selezionare [Proiezione] --
Selezionare [Correzione Trapezoidale] -- Selezionare [Correzione
Trapezoidale Automatica], premere "OK" per confermare.
il proiettore può regolare automaticamente il piano verticale per ottenere
l'immagine del rettangolo. L'angolo di inclinazione non supera ±30°.

IT
83
Correzione Trapezoidale Manuale
Correzione dell'Angolo Iniziale
Selezionare il menu [Impostazioni] -- Selezionare [Proiezione] --
Selezionare [Correzione Trapezoidale] -- Selezionare [Correzione
Trapezoidale Manuale], premere "OK" per selezionare prima il punto che
si desidera regolare, quindi premere il pulsante "
▶
" o "
▼
" per impostare
il valore (Orizzontale e Verticale ±30°) necessario come mostrato di
seguito.
Posizionare il dispositivo sul piano orizzontale e premere OK per
correggerlo. Non spostare il dispositivo durante la correzione.
IT
84
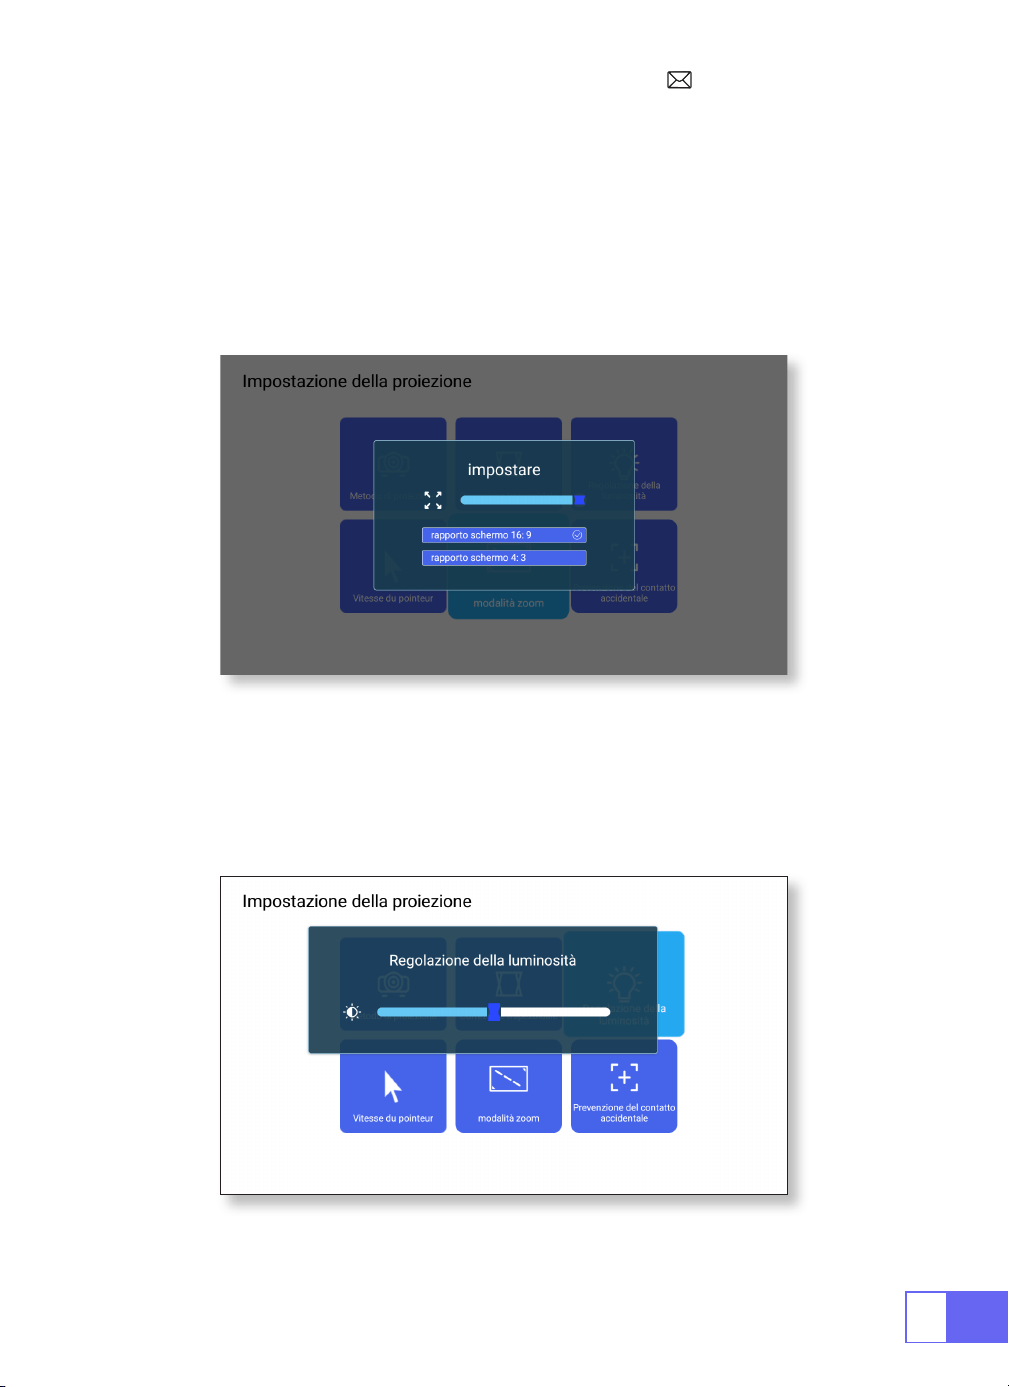
4.Modalità Zoom
5.Regolazione della Luminosità
Ci sono 2 modalità di Proporzioni: 16:9 o 4:3.
Selezionare il menu [Impostazioni] -- Selezionare [Proiezione] --
Selezionare [Modalità Zoom], la dimensione dello schermo di proiezione
può essere regolato dal 100% al 50%, premere il pulsante "
◀ ▶
" per
impostare il valore necessario.
Selezionare il menu [Impostazioni] -- Selezionare [Proiezione] --
Selezionare [Regolazione Luminosità], premere "
◀
" o "
▶
"per regolare la
luminosità desiderata.

IT
85
6.Altra Impostazione
Velocità del Puntatore
Prevenzione del Contatto Accidentale
Selezionare il menu [Impostazioni] -- Selezionare [Proiezione] --
Selezionare [Velocità Puntatore], premere "
◀
" o "
▶
"per regolare la
velocità di spostamento del puntatore del mouse necessaria.
Selezionare il menu [Impostazioni] -- Selezionare [Proiezione] --
Selezionare [Prevenzione del Contatto Accidentale], per scegliere il
periodo di tempo necessario, evitare operazioni accidentali.
IT
86
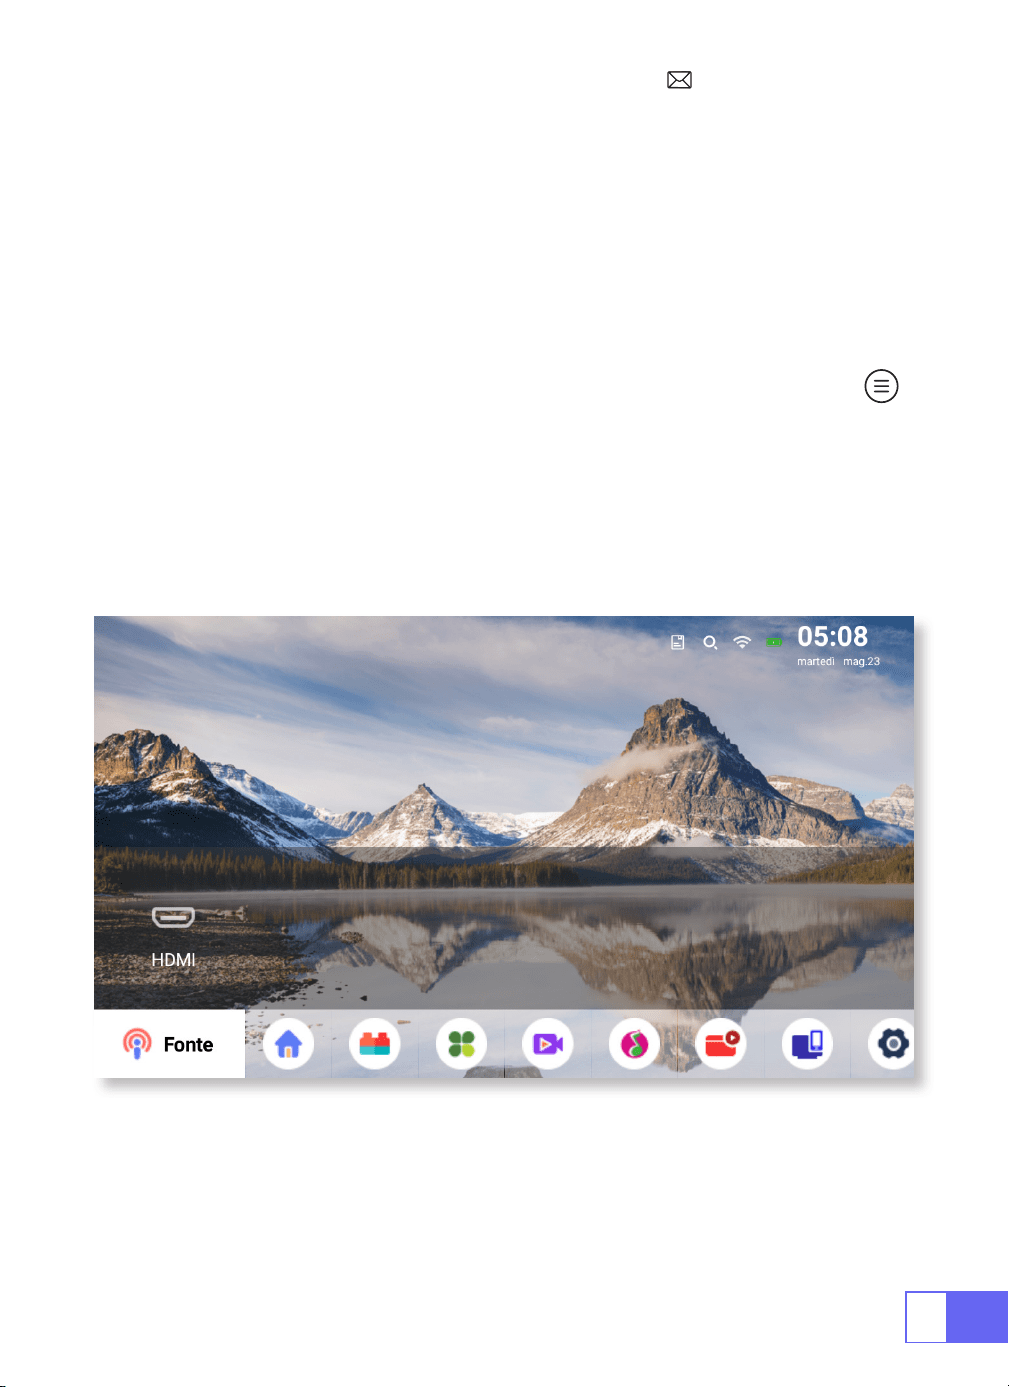
IMPOSTAZIONE DEL PROIETTORE
Seleziona la Sorgente del Segnale di Ingresso
Scegliere la "Sorgente" nella home page, selezionare la sorgente del
segnale di ingresso desiderata (USB/HDMI/AV)
Il dispositivo rileverà automaticamente la chiavetta USB, è necessario
confermare se aprirla.
Durante la riproduzione di un video, è possibile premere il pulsante " ",
per impostare il suono e la modalità di riproduzione.

IT
87
Connessione Senza Fili
1.Per Sistema iOS (Airplay)
Attenzione:
il dispositivo e il proiettore devono trovarsi sullo stesso Wi-Fi
domestico.
1)Attiva l'Impostazione Rete del proiettore.
2)Scegli il tuo WiFi domestico per connetterti e inserisci la password
corretta, quindi fai clic su "Link", attendi 3 secondi per stabilire la
connessione. Una volta connesso, ricorderà la password del WiFi
connesso (o accendi direttamente l'hotspot del proiettore).
3)Attiva l'Impostazione WiFi del tuo dispositivo mobile, quindi connettiti
allo stesso WiFi domestico (o all'hotspot del proiettore).
4)Quindi fai clic su
"Airplay"
sullo smartphone.
5)Seleziona "Proiettore-7935" dai risultati della ricerca per connettersi.
6)Successo.

IT
88
2.Per Sistema Android (Miracast)
3.Eshare
Attenzione:
il dispositivo e il proiettore devono trovarsi sullo stesso Wi-Fi
domestico.
1)Attiva l'Impostazione Rete del proiettore.
2)Scegli il tuo WiFi domestico per connetterti e inserisci la password
corretta, quindi fai clic su "Link", attendi 3 secondi per stabilire la
connessione. Una volta connesso, ricorderà la password del WiFi
connesso.
3)Attiva l'Impostazione WiFi del tuo dispositivo mobile, quindi connettiti
allo stesso WiFi domestico
4)Quindi fai clic su
"Miracast"
sullo smartphone.
5)Seleziona "Proiettore-7935" dai risultati della ricerca per connettersi.
6)Successo.
Nota:
l'hotspot non può supportare il dispositivo Android.
Usa il tuo telefono come mouse wireless, tastiera, telecomando, trasforma
il modo in cui controlli e interagisci con il dispositivo a grande schermo.
1)Connetti il tuo dispositivo al Wi-Fi domestico
2)Visita "http://192.168.43.1:8000" con il browser Web o scansiona il codice
QR per scaricare l'app.
3)Avviare Eshare e fare clic su "Projector-7935" per connettersi.
IT
89
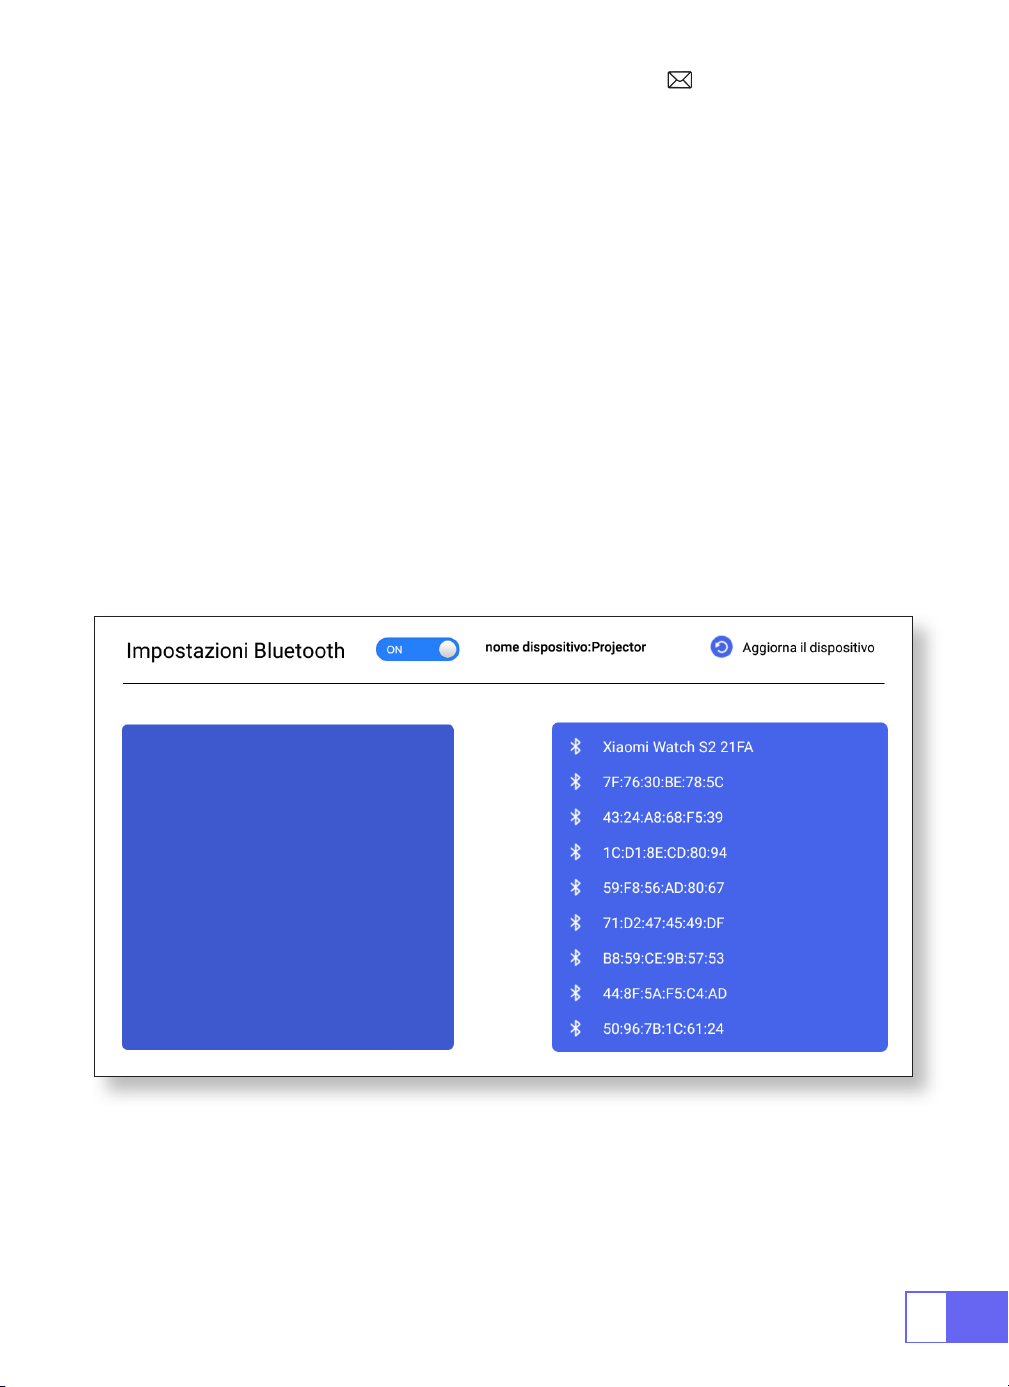
Impostazioni bluetooth
Collega gli Altoparlanti Bluetooth
1)Accendere l'altoparlante Bluetooth.
2)Attivare le
[Impostazioni Bluetooth]
del proiettore.
3)Selezionare l'altoparlante Bluetooth da connettere.
4)Successo.
IT
90
COLLEGAMENTO LINEE DI SEGNALE
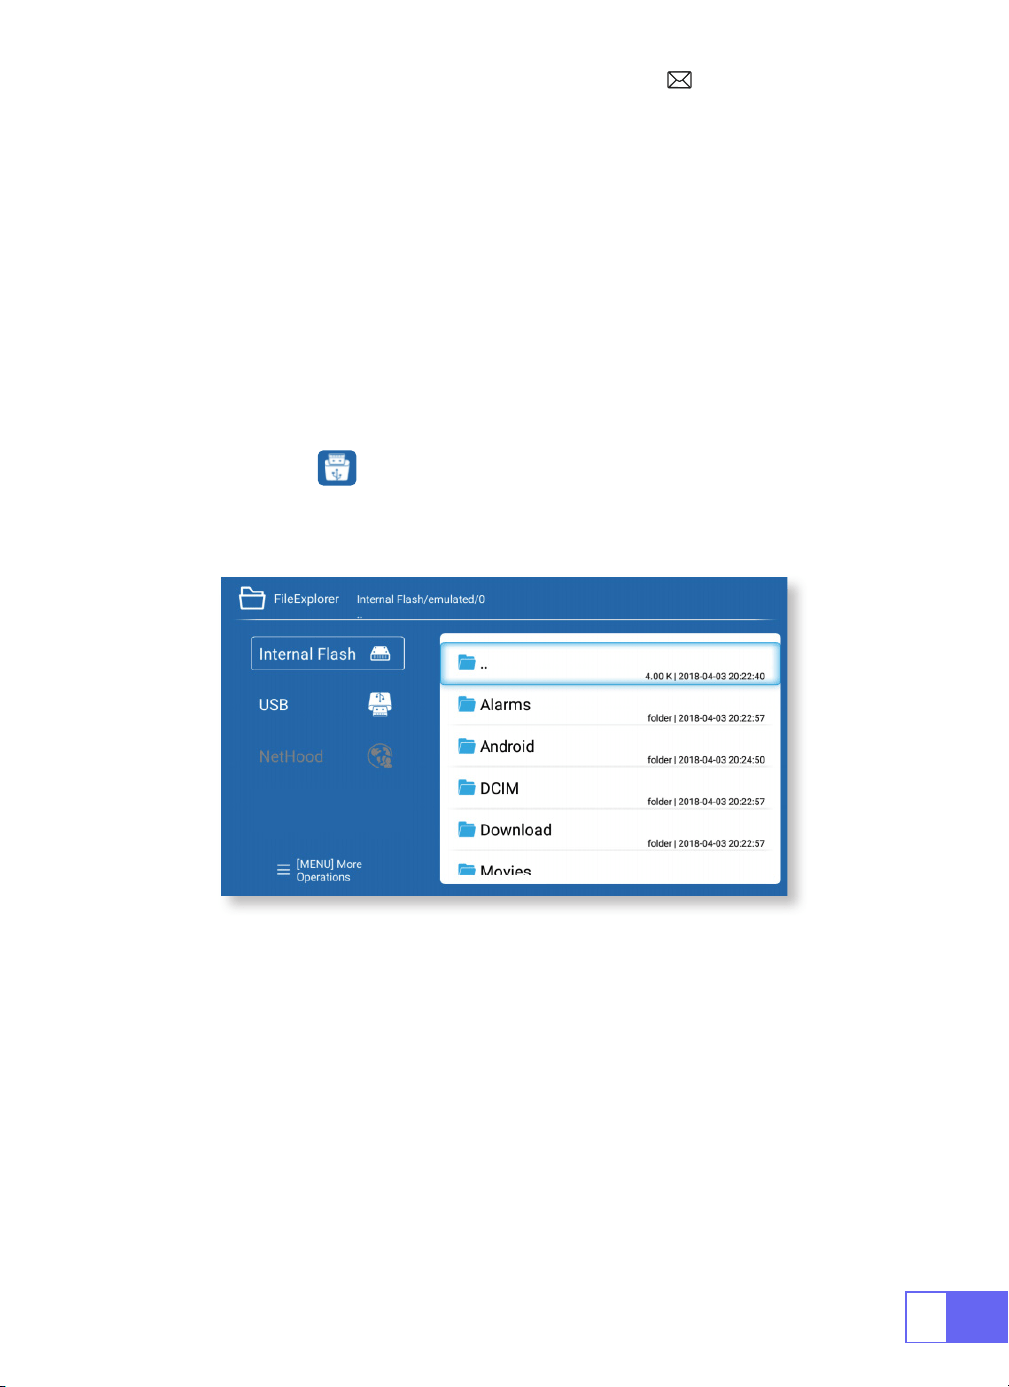
1.Collegamento Multimediale USB
Il proiettore WiMiUS Q2 ha 3 interfacce, porta HDMI/porta USB/uscita cufe
da 3,5 mm. Selezionare la porta di connessione corretta a collega il tuo
dispositivo(PC, telefono, lettore DVD, soundbar, USB, PS4, ecc.)
Per i dispositivi USB, non è necessario scegliere la sorgente del segnale.
La macchina li rileverà automaticamente.
•Selezionare l'icona nell'angolo in alto a destra della home page.
Nota:
supporta la capacità di archiviazione dell'chiavetta USB fino a 32
GB, la capacità di archiviazione dell'HDD no a 1 TB.
2.Collegamento con il Laptop
•Collegare il proiettore al PC tramite cavo HDMI.
•Scegliere il canale del segnale multimediale: "HDMI"

IT
91
3.Collegamento con MacBook o Mac Book Air
4.Collegamento con la Soundbar
5.Collegamento con Fire TV Stick
6.Collegamento con XBOX/PS4
Scegliere il canale del segnale multimediale: "HDMI"
•Usare un
adattatore da Type-C a HDMI
per collegare il tuo MacBook o
usare un adattatore da Mini Display a HDMI per connetterti con MacBook
Air (adattatore non incluso).
•Utilizzare il cavo audio da 3,5 mm per il collegamento con la barra audio.
•Accendere il proiettore e la soundbar (scegliere la modalità AUX).
•Per maggiori dettagli, contatta il venditore all'indirizzo
.
•Inserire la Fire Stick TV nella porta HDMI del proiettore.
•Scegliere il canale del segnale multimediale: "HDMI"
•Scegliere il canale del segnale multimediale: "HDMI"
•Utilizzare il cavo HDMI per il collegamento a XBOX/PS4
Audio
out
AUX
port

IT
92
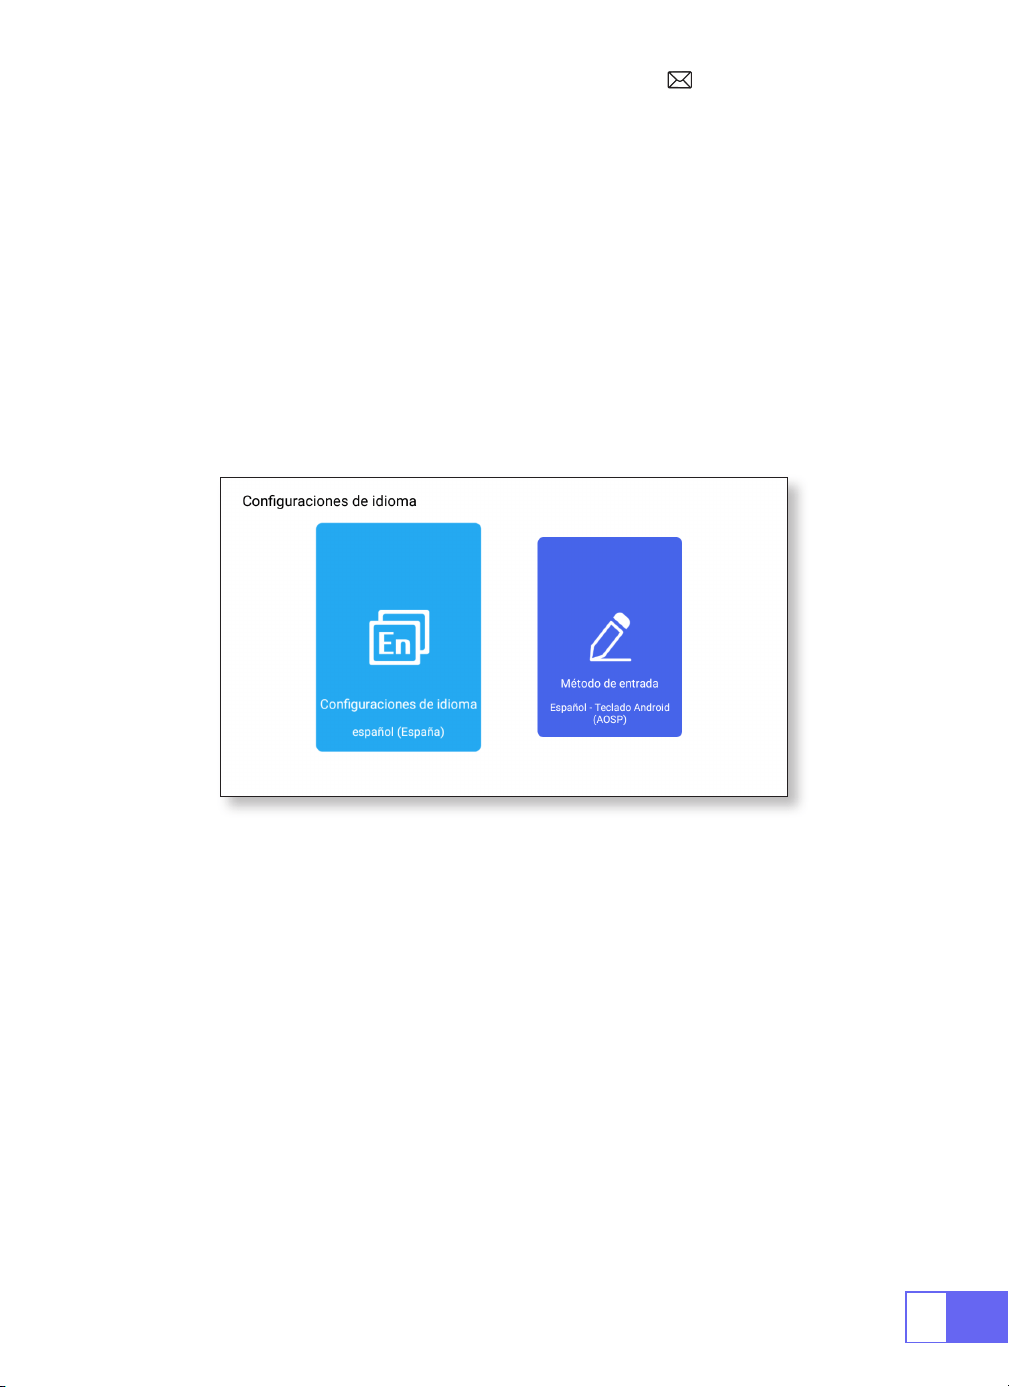
Impostazione della Lingua
Altra Impostazione
Scegliere la Lingua
Impostazione dell'Applicazione
Impostazioni di Ripristino delle Impostazioni di Fabbrica
Selettore di Ingresso
•Ci sono più di 50 lingue tra cui scegliere, inglese, francese, tedesco,
italiano, spagnolo, giapponese, ecc.
•Nel menu delle altre impostazioni, è possibile trovare l'opzione
"Impostazioni applicazione", fare clic su di essa per visualizzare tutte le
applicazioni installate e congurarle.
•Reimpostare ed eliminare tutti i dati
•Scegliere la tastiera da installare in base alle proprie esigenze e
abitudini.
IT
93
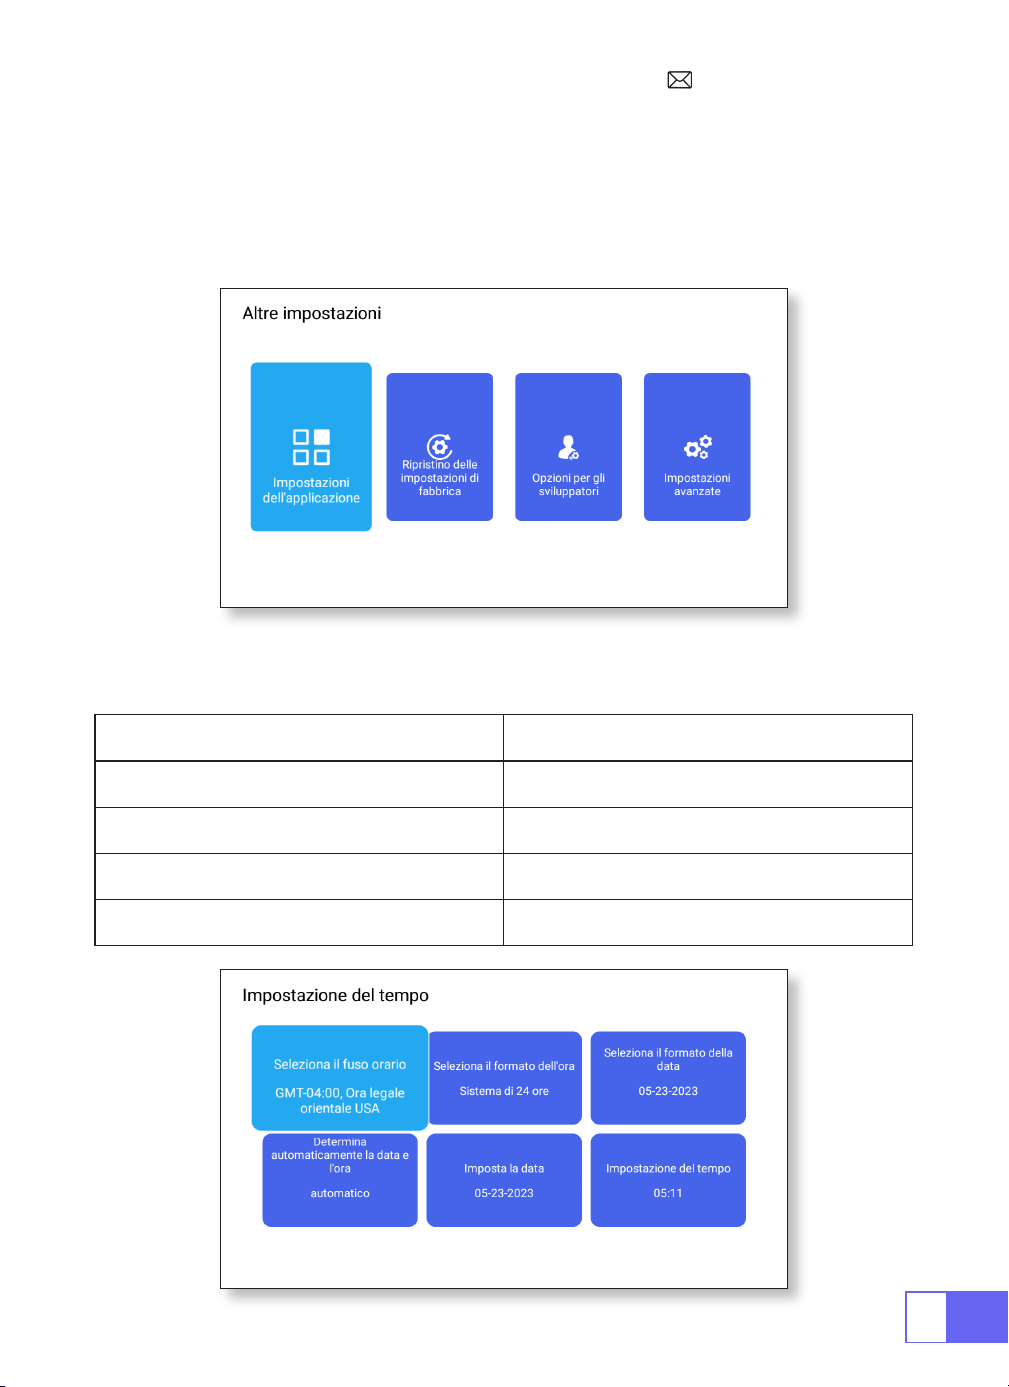
Opinioni degli Sviluppatori
Impostazione Data e Ora
•Principalmente viene fornito agli sviluppatori da utilizzare durante lo
sviluppo del software e il debug dei dispositivi. Normalmente è disattivato
per impostazione predenita.
Impostazione Funzione
Selezione del Fuso Orario Imposta l'ora della tua posizione
Selezione del Formato dell'Ora 12/24 Ore
Formato Data Selezione Imposta il formato della data
Determina Automaticamente Automatico/Manuale

IT
94
Chi Siamo
About Funzione
A Proposito della Macchina Le informazioni di dettaglio del dispositivo
Aggiornamento Locale Aggiornamento tramite USB
Aggiornamento Online Aggiornamento Online
FAQ
1.Nessuna immagine sullo schermo.
a.L'impostazione del canale è corretta?
b.C'è un segnale di ingresso?
c.Il cavo di ingresso è collegato bene?
d.In modalità PC, la frequenza di aggiornamento è > 75 KHz?
2.Schermo blu nessuna immagine e nessun suono.
Il dispositivo di input non si collega bene al proiettore.
3.Immagine corretta ma nessun suono.
a.Si prega di spegnere il Dolby del dispositivo di input, e poi avrà il suono.
b.Il sistema di decodica del video non è supportato dal proiettore.

IT
95
4.Spegnimento automatico dopo aver lavorato per un po'.
a.La ventilazione del proiettore è bloccata.
b.La tensione non è stabile.
c.Protezione da surriscaldamento del sistema.
5.La connessione WiFi non è stabile?
a.Controllare se la rete del telefono funziona correttamente.
b.Mantenere la distanza tra il telefono e il proiettore entro 1 metro.
6.Non è compatibile con il tuo altoparlante Bluetooth?
a.Il proiettore potrebbe non essere compatibile con alcuni tipi di
altoparlanti Bluetooth.
b.Contatta immediatamente la nostra e-mail post-vendita all'indirizzo:
e comunicaci la marca e il modello del tuo
altoparlante Bluetooth.
7.Ci sono punti neri sull'immagine.
Contatta immediatamente il nostro servizio post-vendita:
8.Quando si accende l'interruttore di alimentazione, la spia non funziona.
a.L'alimentazione potrebbe non essere collegata correttamente.
b.Controllare il sistema di protezione da surriscaldamento.
9.Impossibile riprodurre i lmati.
a.Il formato del video è corretto?
b.I le sono rotti?
c.Dispositivo rotto?
10.Non riesco ad accedere correttamente al sito Web per scaricare
l'applicazione?
Contattaci immediatamente al nostro indirizzo e-mail post-vendita:
e comunicaci la richiesta della pagina che è
apparsa durante il download dell'applicazione.

JP
96
カタログ
パッケージ一覧 97
製品構成· · · · · · · · · · · · · · · · · · · · · · ·98
リモコンについて · · · · · · · · · · · · · · · · · · · 99
プロジェクターの仕様· · · · · · · · · · · · · · · · · ·100
イメージ調整 · · · · · · · · · · · · · · · · · · · · · 101
1. フォーカス調整 101
2. プロジェクターモード 101
3. キーストーン補正 101
4. ズームモード 103
5. 輝度調整 103
6. 他の設定 104
プロジェクターの設定· · · · · · · · · · · · · · · · · ·105
ワイヤレス接続 · · · · · · · · · · · · · · · · · · · · 106
1.IOS システム(Airplay)用 106
2.Android システム用(Miracast) 107
3.Eshare 107
Bluetooth の設定 · · · · · · · · · · · · · · · · · · · 108
Bluetooth スピーカーを接続する 108
信号線接続 · · · · · · · · · · · · · · · · · · · · · ·109
1.USB マルチメディア接続 109
2. ノートパソコンとの接続 109
3.MacBook または Mac Book Air と接続する 110
4. サウンドバーと接続する 110
5.Fire TV Stick と接続する 110
6.XBOX/PS4 と接続する 110
言語設定· · · · · · · · · · · · · · · · · · · · · · ·111
他の設定· · · · · · · · · · · · · · · · · · · · · · ·111
日付と時刻の設定 · · · · · · · · · · · · · · · · · · · 112
会社概要· · · · · · · · · · · · · · · · · · · · · · ·113
FAQ · · · · · · · · · · · · · · · · · · · · · · · · 113

JP
97
パッケージ一覧
WiMiUS Q2 プロジェクター リモコン
電源ケーブル HDMI - Mini HDMI ケーブル
AC to USB-A ケーブル プロジェクターステディ
取扱説明書


JP
99
リモコンについて
ON/OFF
ミュート
マウス操作への
切り替え
ホーム
メニュー
VOL+/-
OK
Airplay
Eshare
方向
戻る
ご注意 : 単 4 形乾電池 2 本(別売)をリモコンにセットしてからご使用下さい。

JP
100
プロジェクターの仕様
Model No.: Q2
ディスプレイ技術 DLP 光源 LED
ソフトウェアシステム Android 7.1 プロジェクタータイプ 密閉型
設置タイプ 机上前 / 後、天井前 / 後 アスペクト比 16:9/4:3
製品寸法 60mm*60mm*58mm 製品重量 210g
キーストーン補正 自動垂直補正 フォーカス 手動式
入力インターフェース HDMI/USB/3.5mm 音声出力
ビデオフォーマット
DAT, MPG, VOB, TS, AVI, MKV, MP4, MOV, 3GP, FLV, WEBM,WMV, ASF,
MKV
オーディオフォーマット MP1, MP2, MP3, WMA, WAV, OGG, OGA, AAC, M4A, 3GP
映像フォーマット BMP, JPG, PNG
JP
101
イメージ調整
1. フォーカス調整
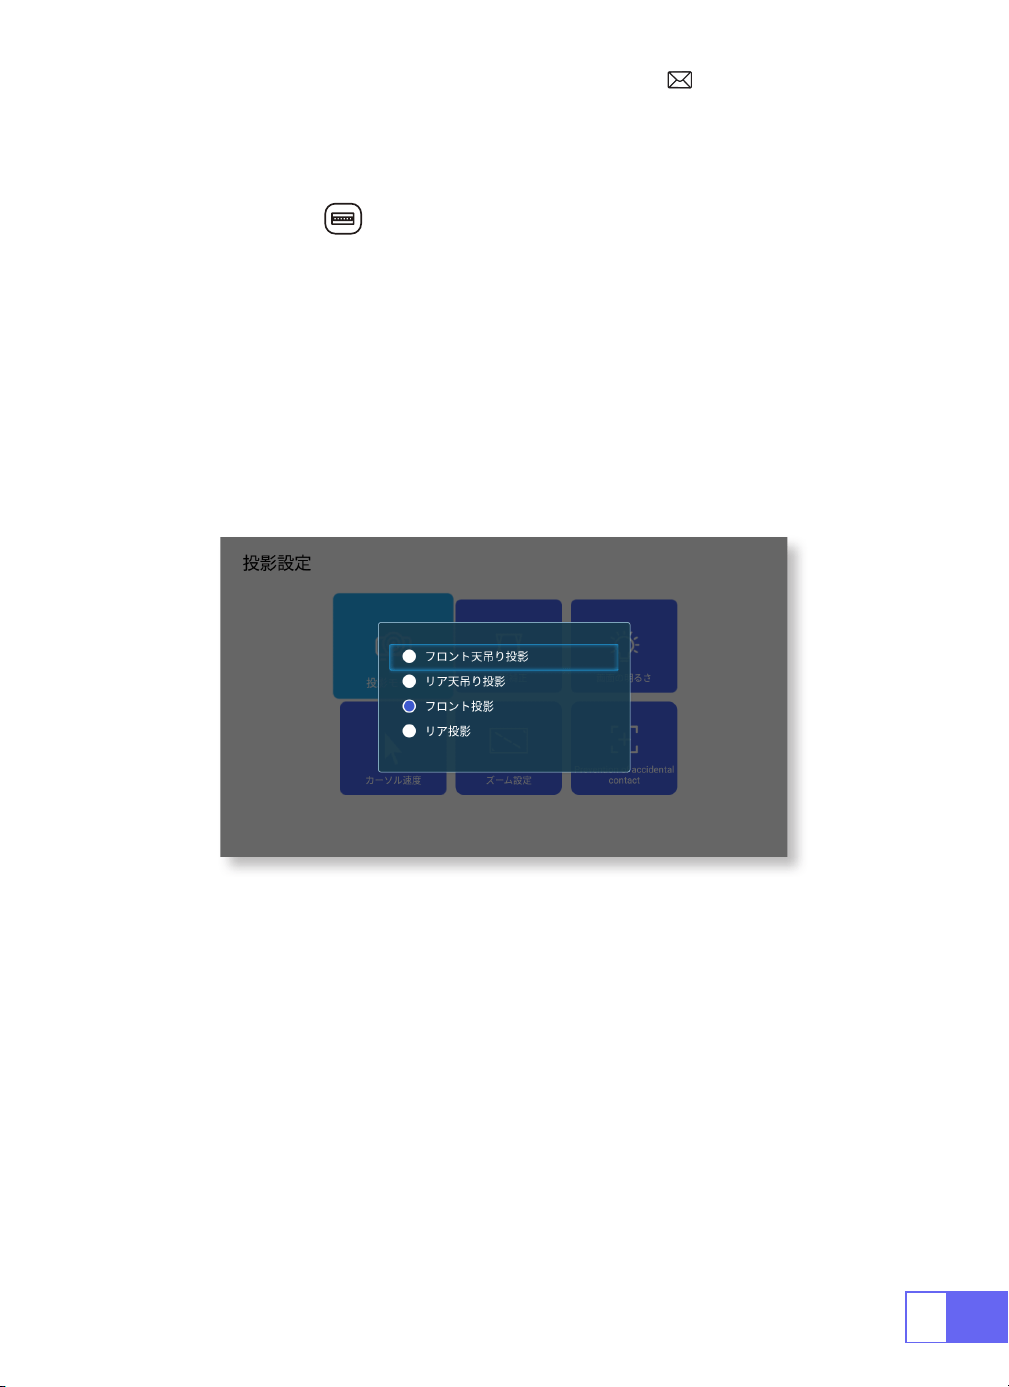
2. プロジェクターモード
自動台形補正
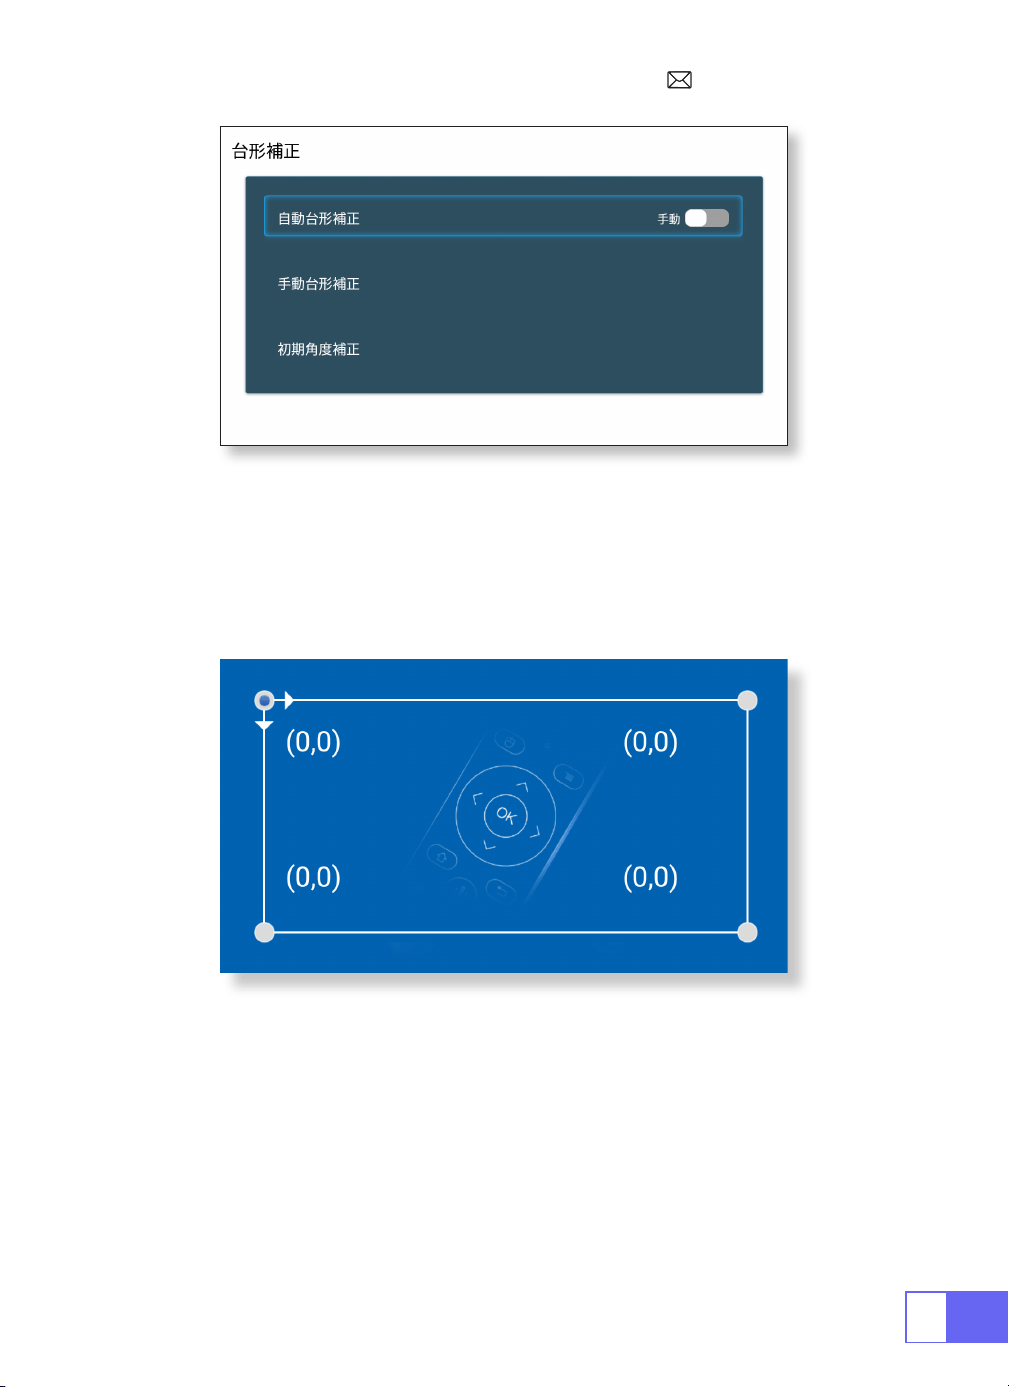
3. キーストーン補正
装置左側のピニオンをスライドさせて、シャープネスを調整します。
[ 設定 ] メニューを選択する -- [ 投影 ] を選択する -- [ 投影モード ] を選択する、
矢印キーを押して選択し、「OK」ボタンを押すと投影位置が確定します。
4 つのモードがあります:背面天井回転 / 背面 / 前面 / 天井回転
[ 設定 ] メニューを選択し、[ 投影 ] を選択し、[ 台形補正 ] を選択し、[ 自動台形補正 ]
を選択し、「OK」を押して確定します。
プロジェクターは、長方形の画像を得るために垂直面を自動調整することができ
ます。傾いた角度は ±30°を超えないようにして下さい。
JP
102
手動キーストーン補正
初期角度補正
設定 ] メニューを選択し、[ 投影 ] を選択し、[ 台形補正 ] を選択し、[OK] を押して、
最初に調整したいポイントを選び、"
▶
" または "
▼
" ボタンを押して必要な値(水
平、垂直 ±30°)を以下のように設定します。
デバイスを水平面に置き、OK を押すと補正されます。補正中はデバイスを動かさ
ないで下さい。

JP
103
4. ズームモード
5. 輝度調整
アスペクト回転の 2 つのモードがあります:16:9 または 4:3。
設定 ] メニューを選択し、[ 投影 ] を選択し、[ ズームモード ] を選択し、投影画面
が50%~100%ズームすることができ、ボタン"
◀
"を押して必要な値を設定します。
設定 ] メニューを選択する -- [ 投影 ] を選択する -- [ 明るさ調整 ] を選択し、"
◀
"
または "
▶
" を押して必要な明るさを調整します。
JP
104
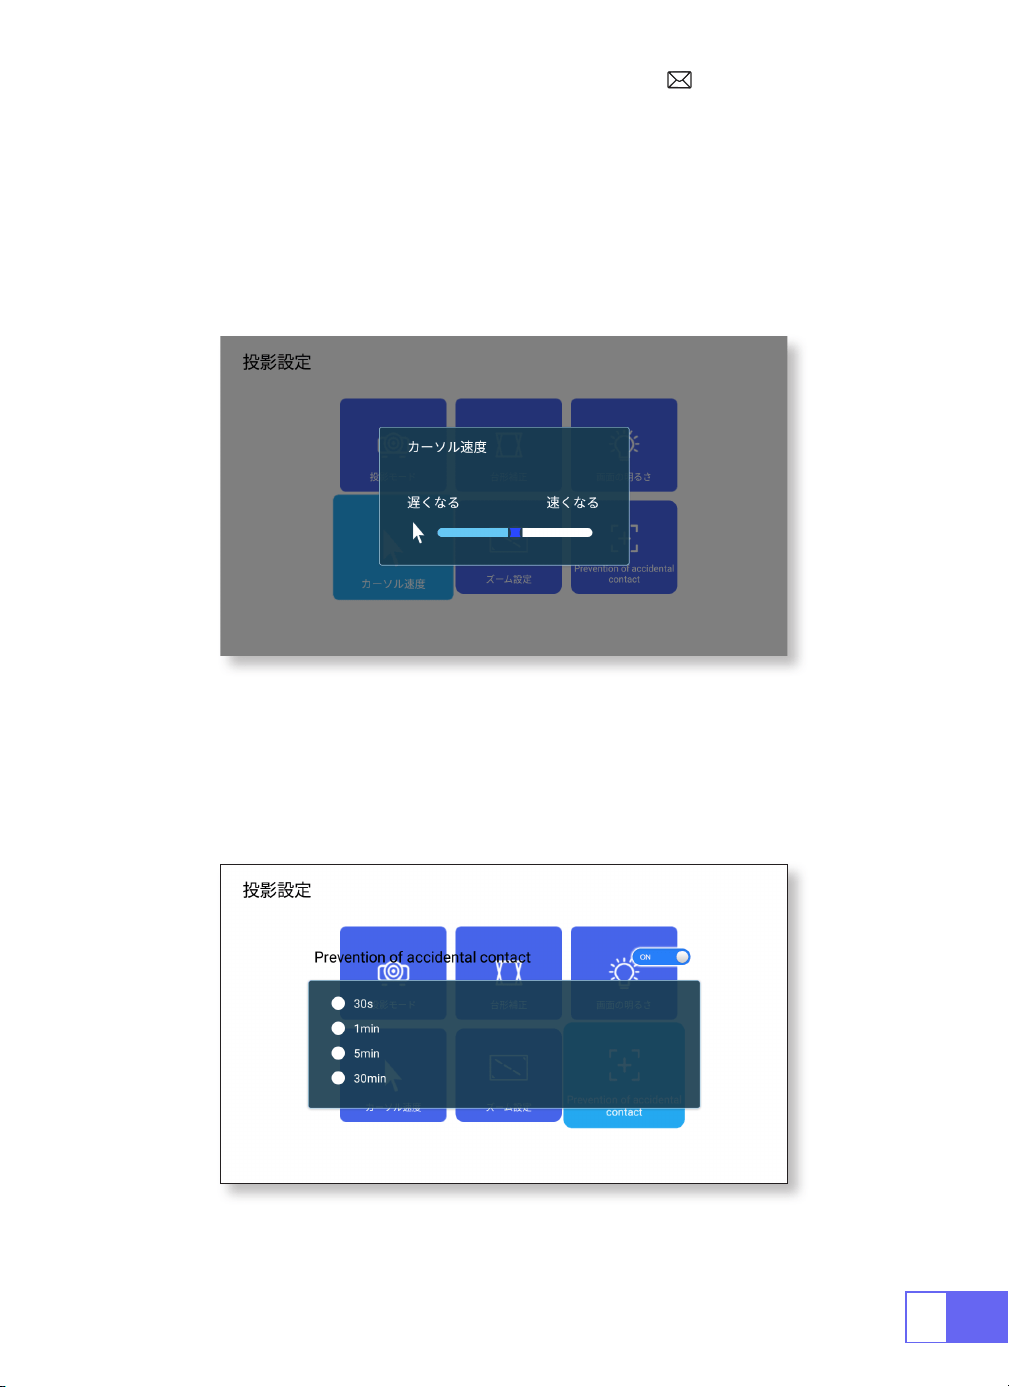
6. 他の設定
ポインターの速度
誤接触防止
設定 ] メニューを選択 -- [ 投影 ] を選択 -- [ ポインタースピード ] を選択し、"
◀
"
または "
▶
" を押してマウスポインターの移動速度を調節します。
設定 ] メニューを選択 -- [ 投影 ] を選択 -- [ 誤操作防止 ] を選択します。
を選択し、必要な期間を選択して、誤操作を防止します。

JP
105
プロジェクターの設定
入力信号のソースを選択する
ホームページの「ソース」を選択し、希望の入力信号ソース(USB/HDMI/AV)を
選択します。
デバイスは自動的に USB スティックを検出し、開くかどうか確認する必要があり
ます。動画再生時に " " ボタンを押すと、音声や再生モードを設定することが
できます。
JP
106
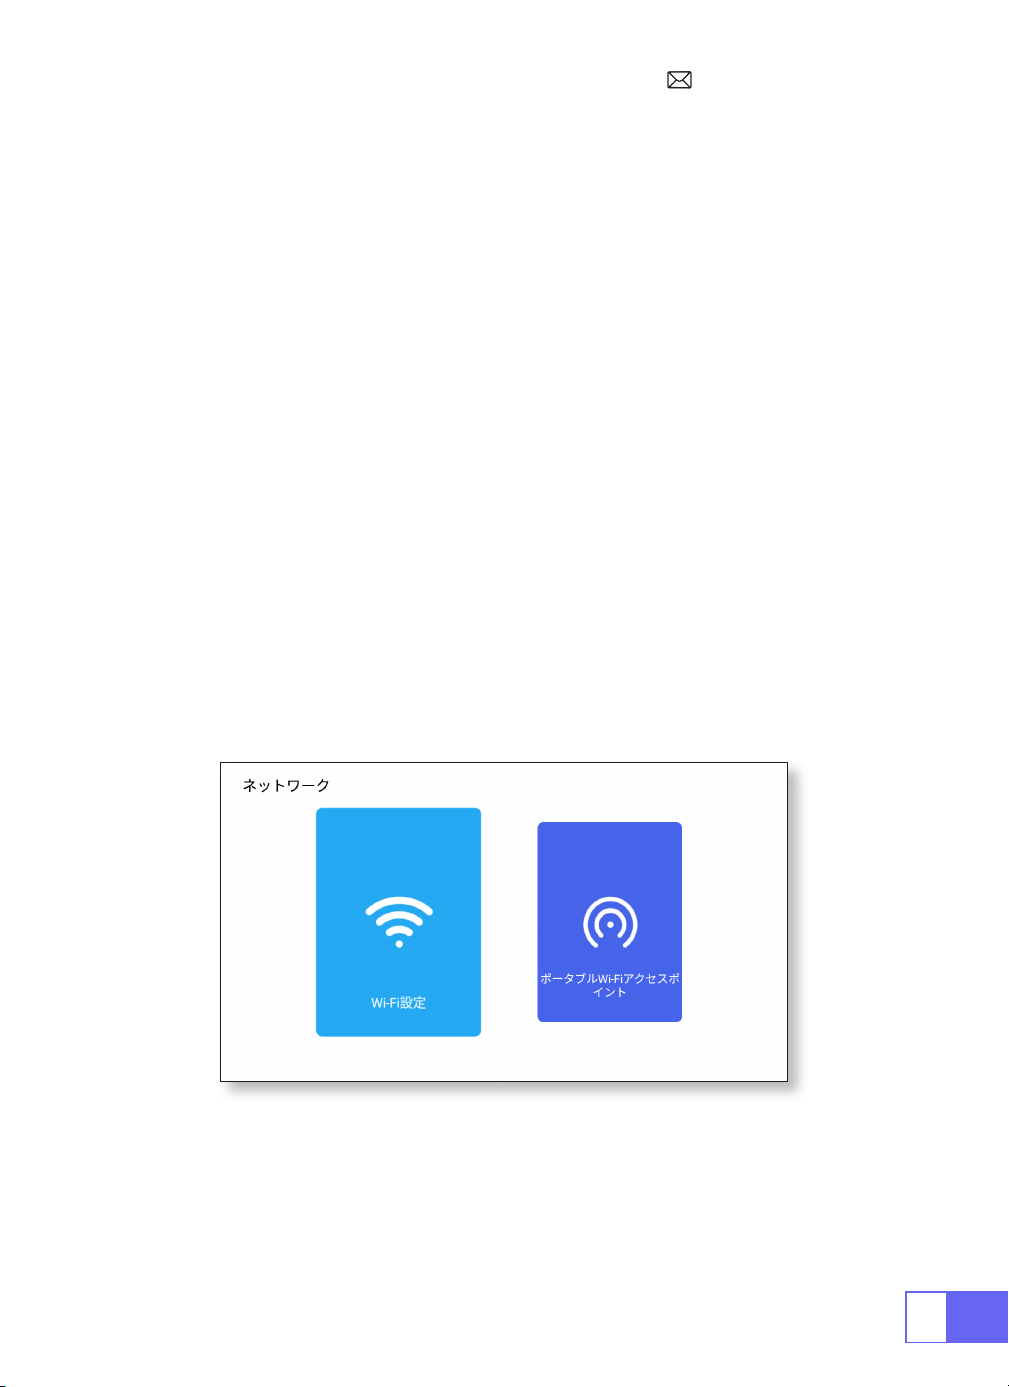
ワイヤレス接続
1.IOS システム(Airplay)用
注意事項 : お使いのデバイスとプロジェクターは、同じホーム WiFi 内にある必要
があります。
1. プロジェクターのネットワーク設定をオンにします。
2. 接続するホーム WiFi を選択し、正しいパスワードを入力し、「リンク」をクリ
ックし、接続まで 3 秒ほどお待ち下さい。一度接続すると WiFi パスワードは記憶
され、今後入力する必要はありません。( またはプロジェクターのホットスポット
を直接オンにする)。
3. モバイルデバイスの WiFi 設定をオンにして、同じホーム WiFi(またはプロジェ
クターのホットスポット)に接続します。
4. 次に、スマートフォンの " Airplay " をクリックします。
5. 検索結果から "Projector-7935 " を選択し、接続します。
6. 完了。

JP
107
2.Android システム用(Miracast)
3.Eshare
注意事項 : お使いのデバイスとプロジェクターは、同じホーム WiFi 内にある必要
があります。
1. プロジェクターのネットワーク設定をオンにします。
2. 接続するホーム WiFi を選択し、正しいパスワードを入力し、「リンク」をクリ
ックし、接続まで 3 秒ほどお待ち下さい。一度接続すると WiFi パスワードは記憶
され、今後入力する必要はありません。
3. モバイルデバイスの WiFi 設定をオンにし、同じホーム WiFi に接続する。
4. その後、スマートフォンの「Miracast」をクリックします。
5. 検索結果から " Projector-7935 " を選択し、接続します。
6. 完了。
注:ホットスポットは Android デバイスに対応していません。
携帯電話をワイヤレスマウス、キーボード、リモコンとして使用することで、様々
な方法で大画面のデバイスを操作できます。
1. デバイスをホーム WiFi に接続する
2. ウェブブラウザで「http://192.168.43.1:8000」にアクセスするか、QR コードを
スキャンしてアプリをダウンロードします。
3.Eshare を起動し、" Projector-7935 " をクリックし、接続する。
JP
108
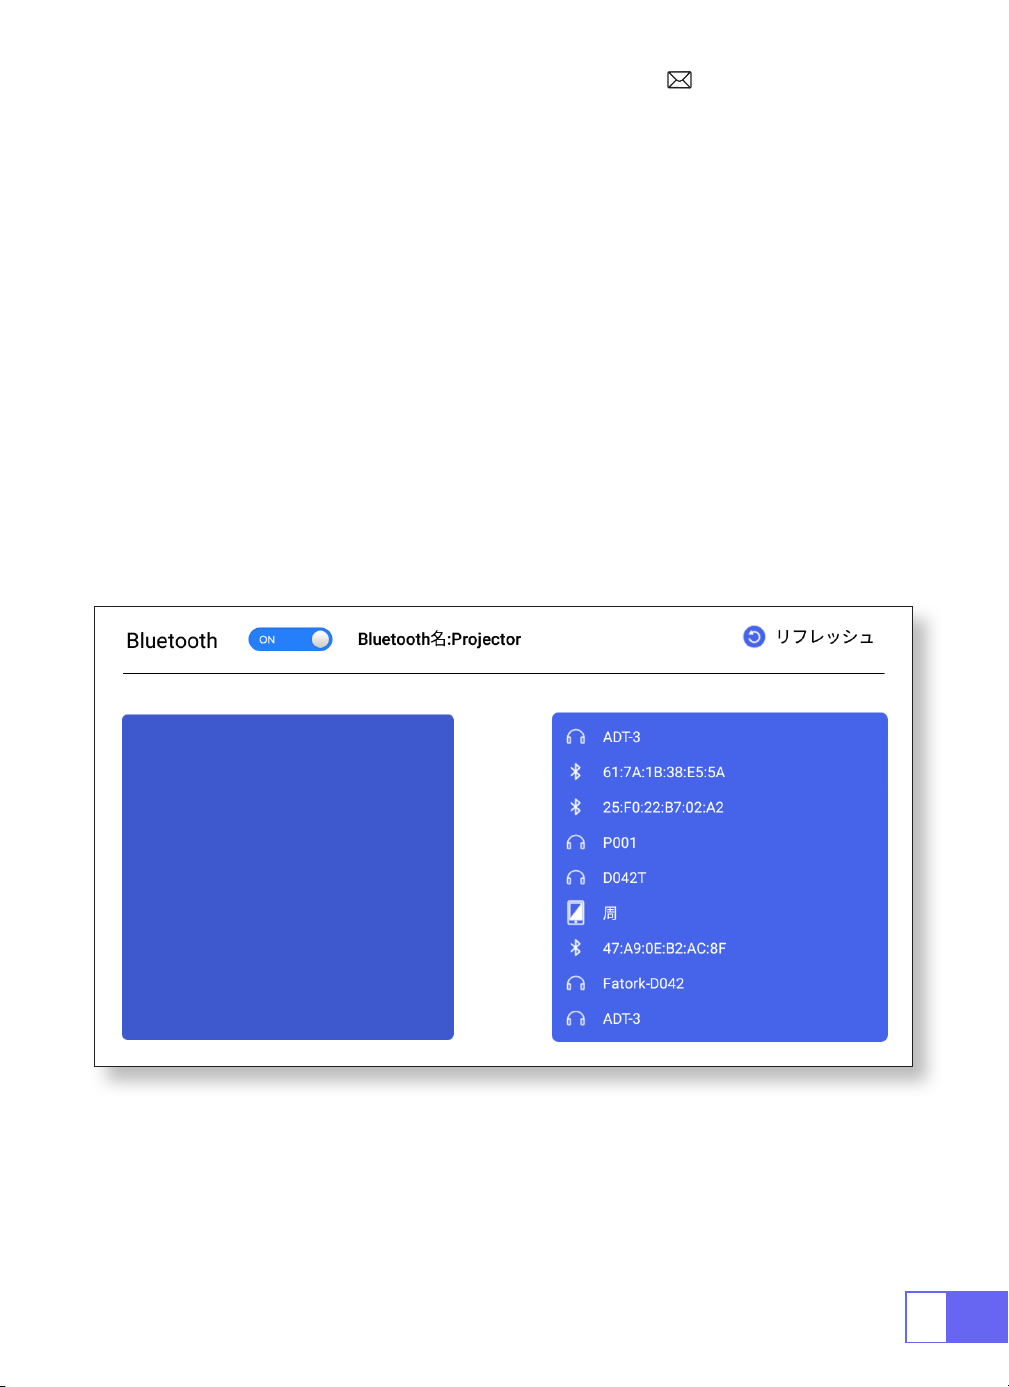
Bluetooth の設定
Bluetooth スピーカーを接続する
1.Bluetooth スピーカーを起動する。
2. プロジェクターの [ Bluetooth 設定 ] を ON にします。
3. 接続する Bluetooth スピーカーを選択する。
4. 完了。
JP
109
信号線接続
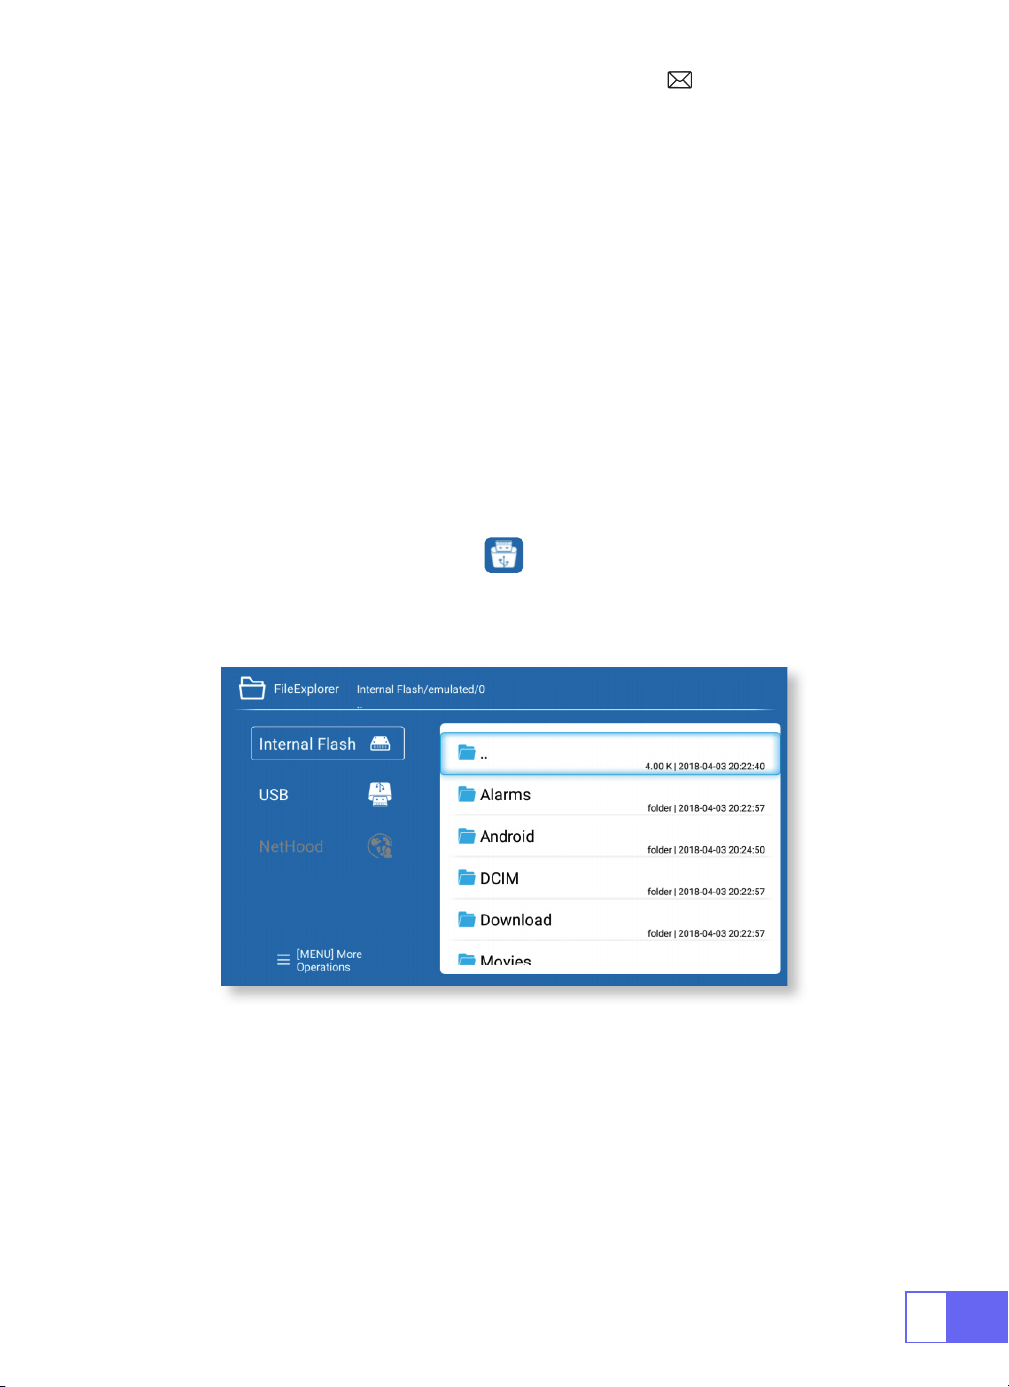
1.USB マルチメディア接続
WiMiUS Q2 プロジェクターは、HDMI ポート /USB ポート /3.5mm ヘッドフォン
出力の 3 つのインターフェースを備えています。お使いのデバイス(PC、電話、
DVD プレーヤー、サウンドバー、USB、PS4 など)を接続するために、正しい接
続ポートを選択してください。
お使いのデバイス(PC、電話、DVD プレーヤー、サウンドバー、USB、PS4 など)
を接続します。
USB 機器の場合、信号ソースを選ぶ必要はありません。本機が自動的に検出します。
• ホームページの右上にあるアイコン を選択する
注)USB ドライブは最大 32GB まで、HDD は最大 1TB まで対応。最大 32GB まで、
最大 1TB までの HDD に対応。
2. ノートパソコンとの接続
• プロジェクターと PC を HDMI ケーブルで接続します。
• メディア信号チャンネルを選択する:"HDMI"

JP
110
3.MacBook または Mac Book Air と接続する
4. サウンドバーと接続する
5.Fire TV Stick と接続する
6.XBOX/PS4 と接続する
メディア信号のチャンネルを選択する:"HDMI"
•Type-C to HDMI アダプターを使用して MacBook に接続するか、Mini Display
to HDMI アダプターを使用して MacBook Air に接続します ( アダプターは別売
り )。
• プロジェクターに付属の 3.5 mm オーディオ ケーブルを使用してサウンド バ
ーに接続します。
• プロジェクターとサウンドバーの電源を入れます (AUX モードを選択します )。
• 詳細については、販売元([email protected])までお問い合わせ下さい。
•TV Stick をプロジェクターの HDMI ポートに接続します。
• メディア信号チャンネルを選択します :「HDMI」
• メディア信号チャンネルを選択します :「HDMI」
•XBOX/PS4 と HDMI ケーブルで接続します。
Audio
out
AUX
port
JP
111
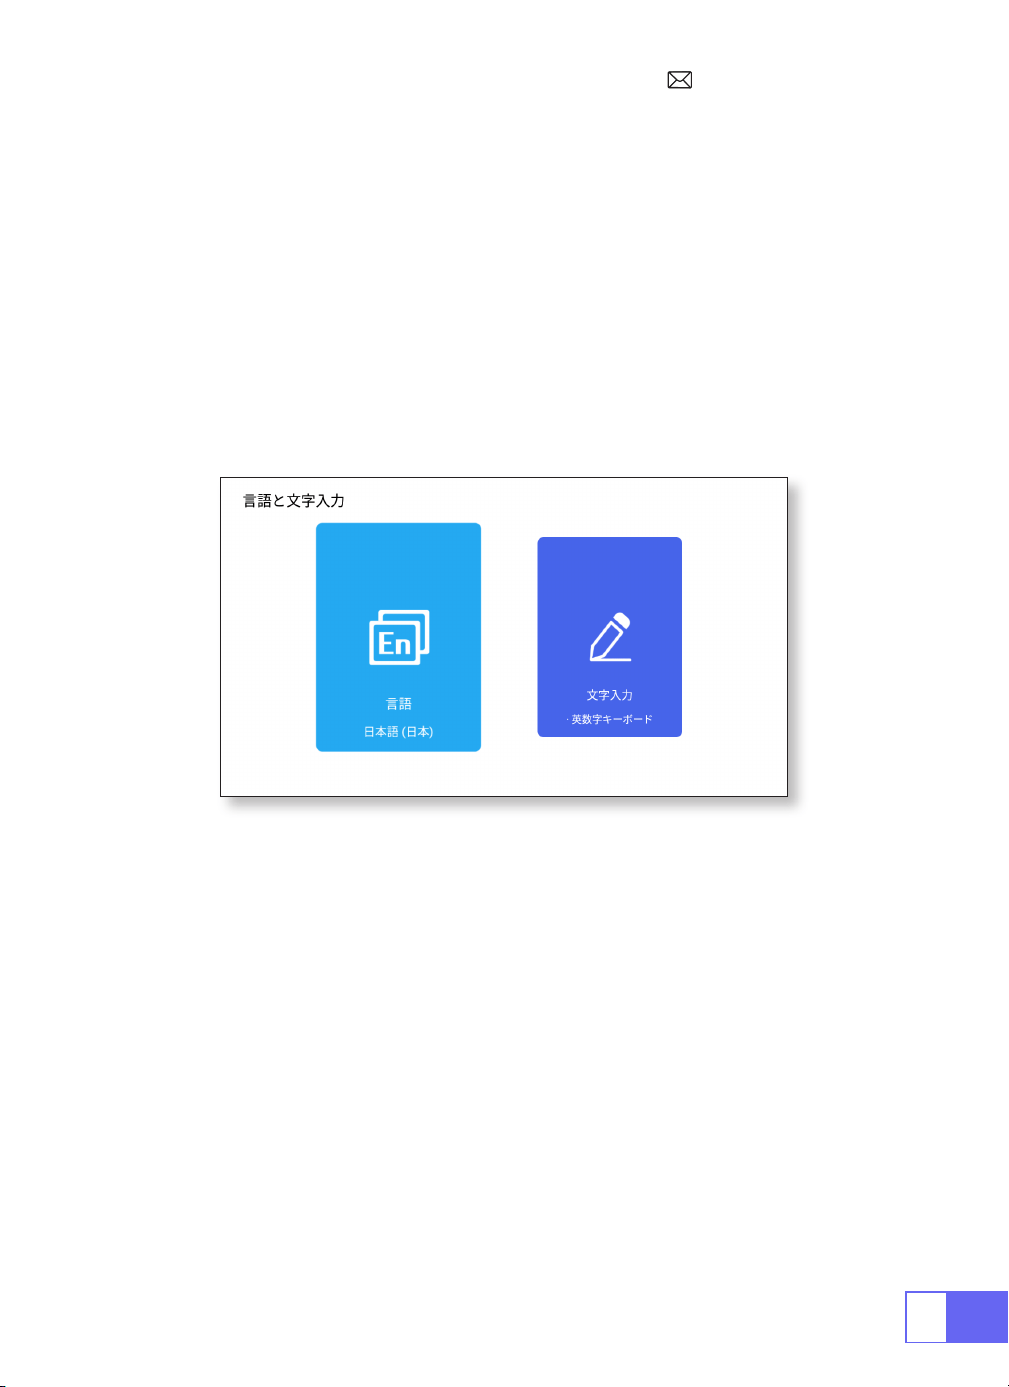
言語設定
他の設定
言語を選択
アプリケーション設定
ファクトリーリセット設定
入力セレクター
•50 以上の言語が選択できます。英語、フランス語、ドイツ語、イタリア語、 ス
ペイン語、日本語など。
• その他の設定メニューにある「アプリケーション設定」をクリックすると、イ
ンストールされているすべてのアプリケーションを表示し、設定することができ
ます。
• リセットして全データを削除
• 自分のニーズや習慣に合わせて、設置するキーボードを選択しましょう。
JP
112
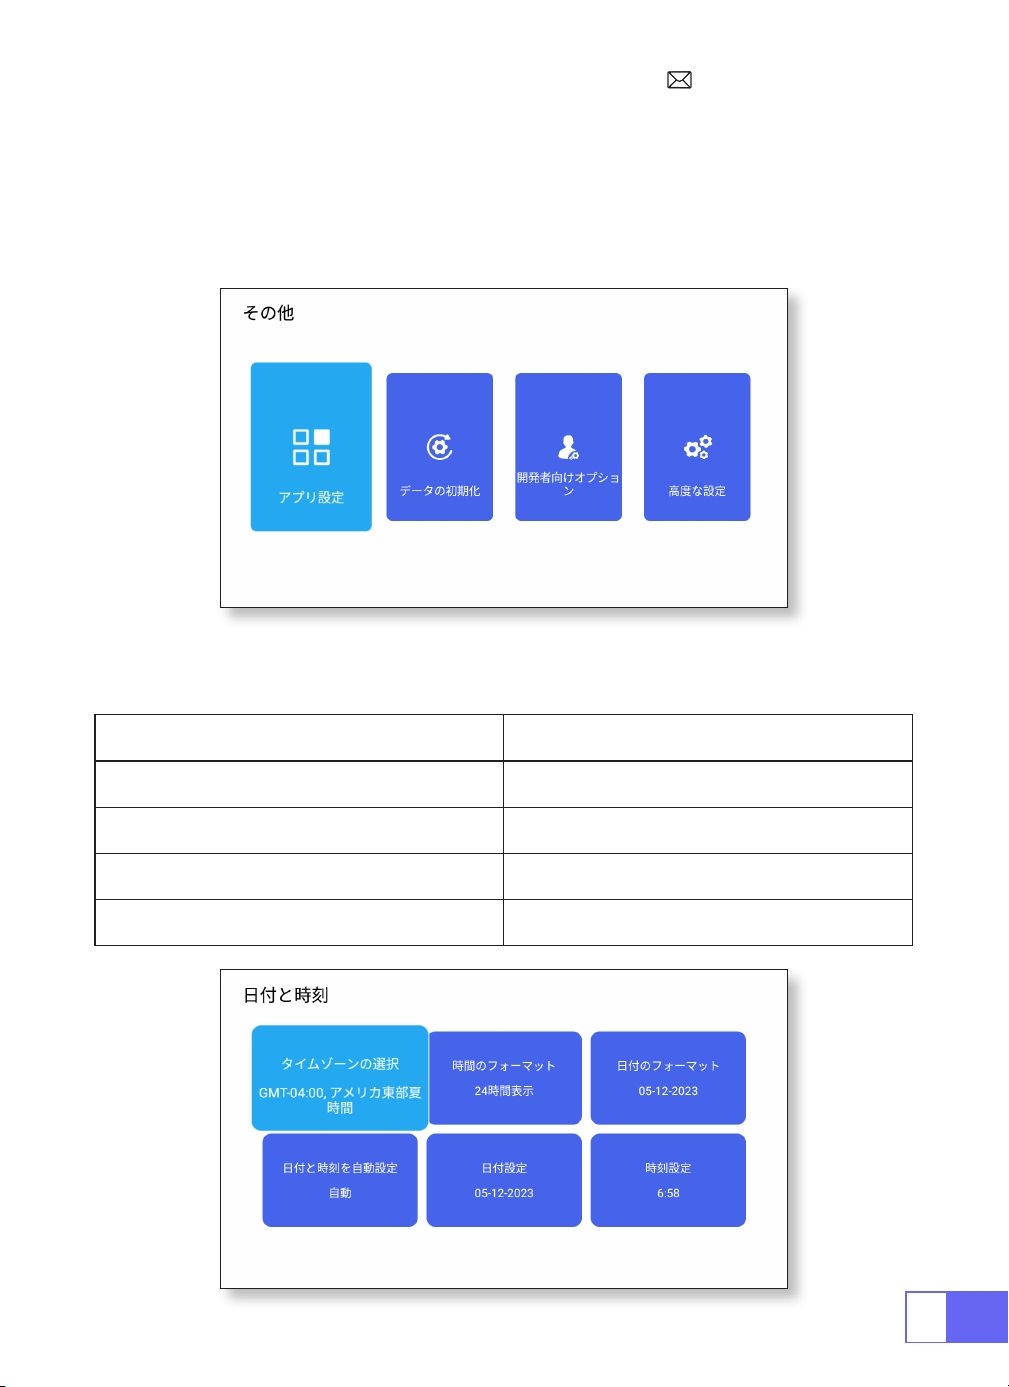
デベロッパーの意見
日付と時刻の設定
• 主に開発者向けに提供され、ソフトウェアの開発時や機器のデバッグ時に使用
します。通常、デフォルトではオフになっています。
設定 機能
タイムゾーンの選択 現在地の時刻を設定する
タイムフォーマット選択 12/24 時間
日付形式選択 日付の形式を設定する
自動判定 オート / マニュアル
JP
113
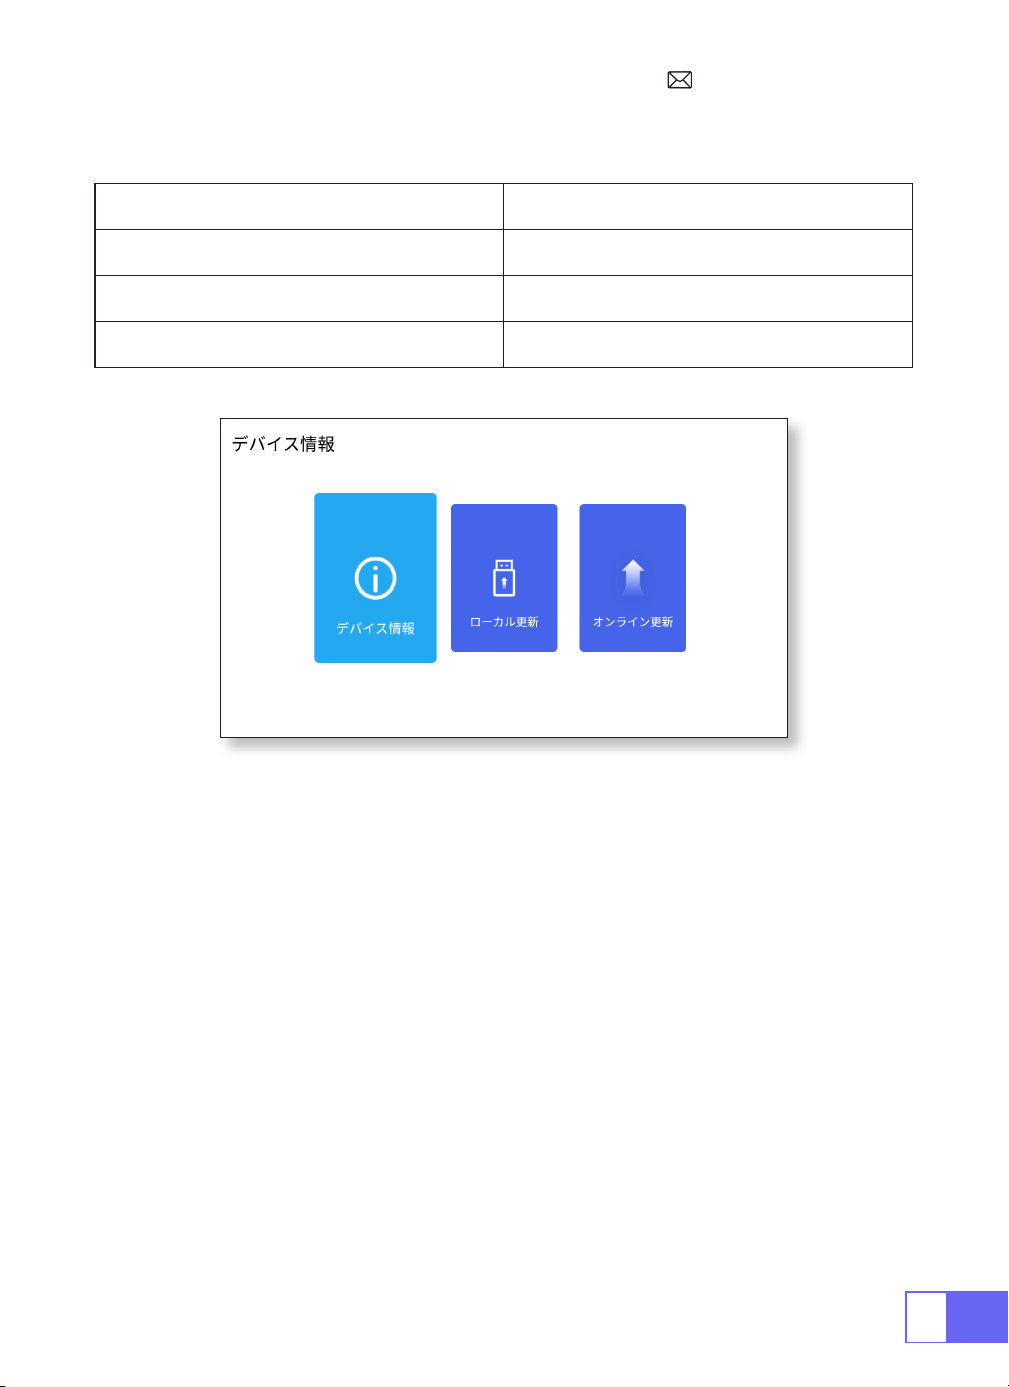
会社概要
概要 機能
製品について デバイスの詳細情報
ローカルアップグレード USB でアップデート
オンラインアップグレード オンラインアップデート
FAQ
1. 画面に映像が映らない。
a. チャンネル設定は正しいですか?
b. 入力信号がありますか?
c. 入力ケーブルはしっかりと接続されていますか?
d. PC モードでは、リフレッシュレートは 75KHz 以上ですか?
2. ブルースクリーンで画像も音声も出ない。
入力デバイスがプロジェクターにうまく接続できません。
3. 映像は正しいが、音が出ない。
a. 入力デバイスのドルビーをオフにしてください、そうすれば音が出ます。
b. ビデオのデコードシステムは、プロジェクターによってサポートされていませ

JP
114
4. しばらく作業すると自動オフになります。
a. プロジェクターの換気が妨げられています。
b. 電圧が安定していません。
c. 過熱保護システム。
5.WiFi の接続が安定しない?
a. お使いの携帯電話のネットワークが良好であるかどうかを確認してください。
b. 携帯電話とプロジェクターの距離を 1 メートル以内にしてください。
6.Bluetooth スピーカーと互換性がありませんか ?
a. プロジェクターは一部の種類の Bluetooth スピーカーに対応していない可能性
があります。
Bluetooth スピーカーのブランドとモデルを教えてください。
8. 電源スイッチを入れたら、表示灯が点灯しない。
a. 電源がうまく接続されていない可能性があります。
b. 過熱保護システムをチェックしてください。
9. 動画が再生できない。
a. ビデオのフォーマットは正しいですか?
b. ファイルが壊れていますか?
c. デバイスが壊れていますか?
10. アプリケーションをダウンロードするために、ウェブサイトに正常にアクセス
できないのですか?
すぐに当社のカスタマーサービスにご連絡ください:[email protected]
アプリケーションのダウンロード中に表示されたページプロンプトについてお教
えください。

FCC Statement
FCC STATEMENT :
This device complies with Part 15 of the FCC Rules. Operation is subject to the following two
conditions:
(1)This device may not cause harmful interference, and
(2)This device must accept any interference received, including interference that may
cause undesired operation.
Warning: Changes or modifications not expressly approved by the party responsible for
compliance could void the user's authority to operate the equipment.
NOTE: This equipment has been tested and found to comply with the limits for a Class B
digital device, pursuant to Part 15 of the FCC Rules. These limits are designed to provide
reasonable protection against harmful interference in a residential installation. This
equipment generates uses and can radiate radio frequency energy and, if not installed
and used in accordance with the instructions, may cause harmful interference to radio
communications. However, there is no guarantee that interference will not occur in a
particular installation. If this equipment does cause harmful interference to radio or
television reception, which can be determined by turning the equipment off and on, the user
is encouraged to try to correct the interference by one or more of the following measures:
Reorient or relocate the receiving antenna.
Increase the separation between the equipment and receiver.
Connect the equipment into an outlet on a circuit different from that to which the receiver is
connected.
Consult the dealer or an experienced radio/TV technician for help.
FCC Radiation Exposure Statement:
This equipment complies with FCC radiation exposure limits set forth for an uncontrolled
environment. This equipment should be installed and operated with minimum distance
20cm between the radiator & your body.
This device contains licence-exempt transmitter(s)/receiver(s) that comply with Innovation,
Science and Economic Development Canada’s licence-exempt RSS(s). Operation is subject
to the following two conditions:
(1) This device may not cause interference.
(2) This device must accept any interference, including interference that may cause
undesired operation of the device.
L’émetteur/récepteur exempt de licence contenu dans le présent appareil est conforme
aux CNR d’Innovation, Sciences et Développement économique Canada applicables
aux appareils radio exempts de licence. L’exploitation est autorisée aux deux conditions
suivantes :
(1) L' appareil ne doit pas produire de brouillage;
(2) L' appareil doit accepter tout brouillage radioélectrique subi, même si le brouillage est
susceptible d' en compromettre le fonctionnement.
This equipment complies with IC exposure limits set forth for an uncontrolled environment.
This equipment shall be installed and operated with minimum distance 20cm between the
radiator & body.

Correct Disposal of this product
This marking indicates that this product should not be disposed with other
household wastes throughout the EU. To prevent possible harm to the
environment or human health from uncontrolled waste disposal, recycle it
responsibly to promote the sustainable reuse of material resources. To return
your used device, please use the return and collection systems or contact
the retailer where the product was purchased. They can take this product for
environmental safe recycling.
We (Manufacturer is responsible for this declaration)
Ekoo Electronic Co.,Ltd.
(Company name)
B09,block B,f2,bldg.b,runfeng Pioneer Park,no.973, minzhi Avenue, Minzhi St., Longhua,
Shenzhen, CN
(Company address)
declare under our sole responsibility that the product
Trade name: WIMIUS
Equipment: Entertainment Projector
Model No. : Q2
to which this declaration relates is in conformity with the essential requirement set out in
the Council Directive on the Approximation of the laws of the Member States relating to RED
Directive(2014/53/EU) & RoHS(2011/65/EU) product is responsible to affix CE marking, the
following standards were applied:
EN 62368-1:2014+A11:2017
EN IEC 62311:2020
ETSI EN 301 489-1 V2.2.3(2019-11)
ETSI EN 301 489-17 V3.2.4(2020-09)
EN 55032:2015
EN 55035:2017
EN 61000-3-2:2019
EN 61000-3-3:2013+A1:2019
ETSI EN 300 328 V2.2.2(2019-07)IEC62321-3-1:2013
IEC62321-4:2013
IEC62321-5:2013
IEC62321-6:2015
IEC62321-7-1:2015
IEC62321-7-2:2017
IEC62321-8:2017
Full Name: George.wang Position: Approbation Manager
Signature: George.wang Place/Date: Shenzhen, China/June 05-2023
Declaration of Conformity