REV051723
drywalls
drywalls.
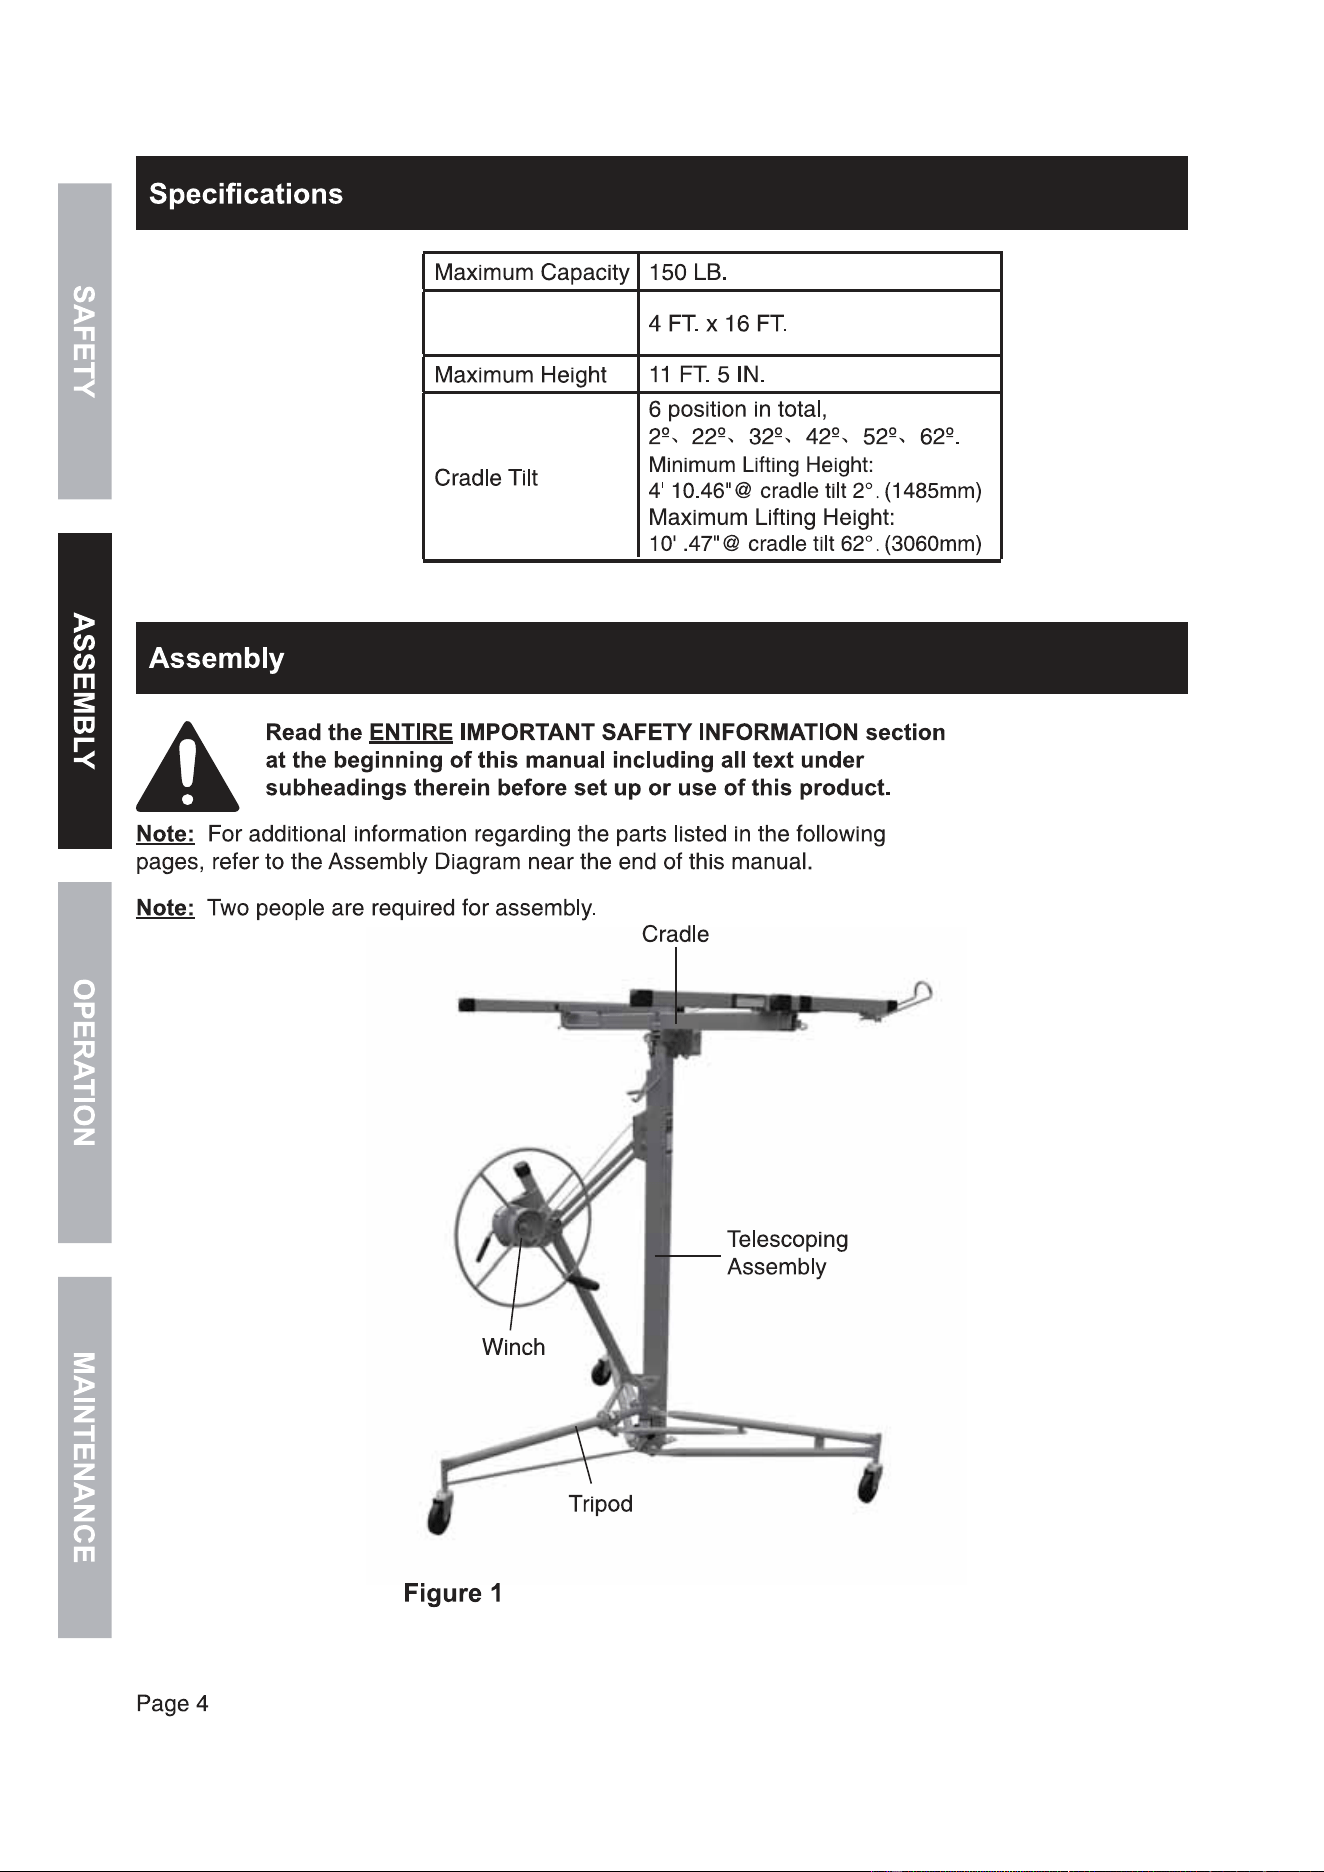
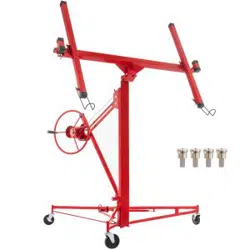
Maximum Drywall
Size

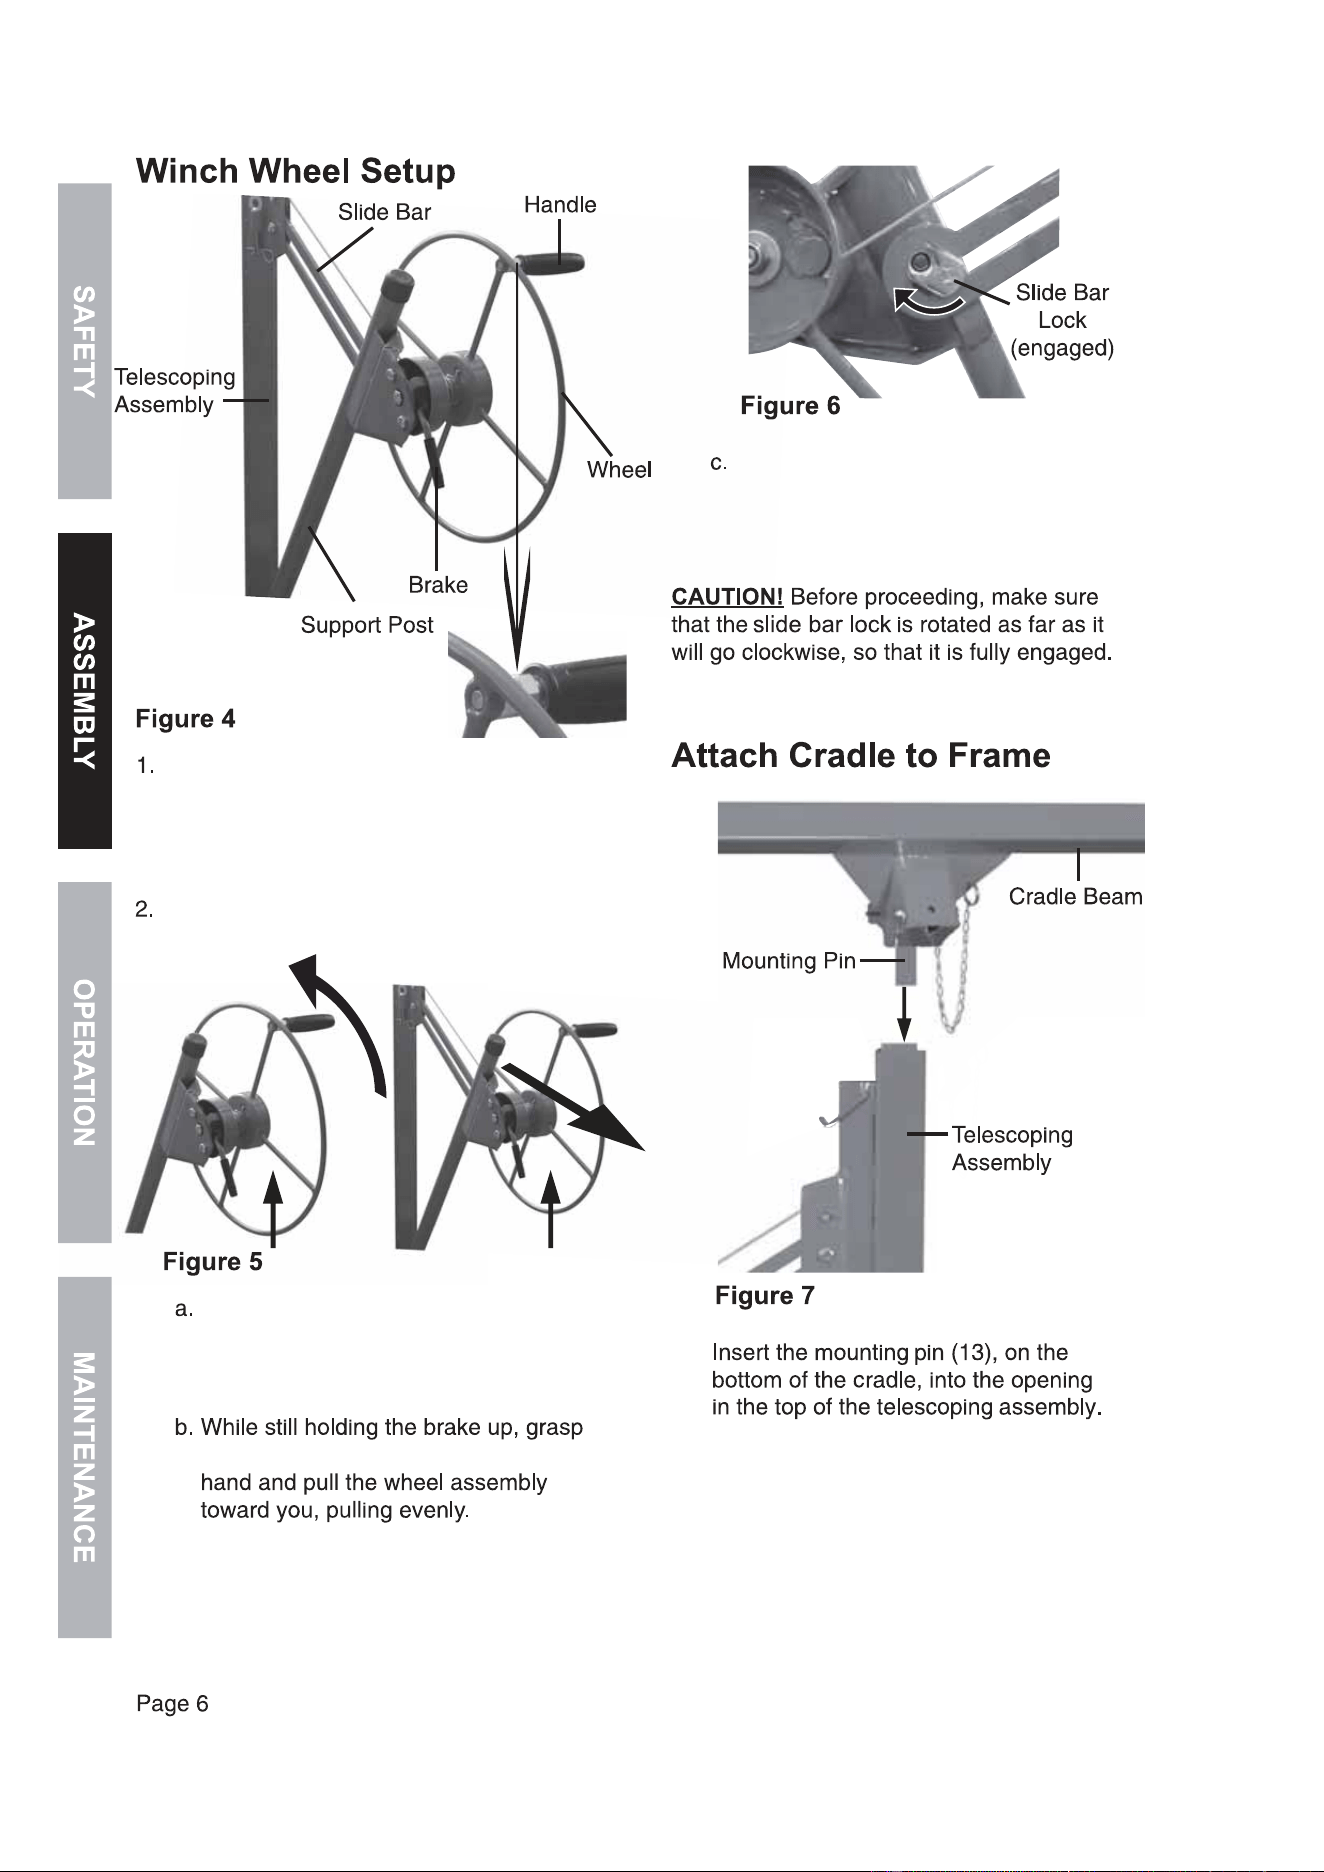
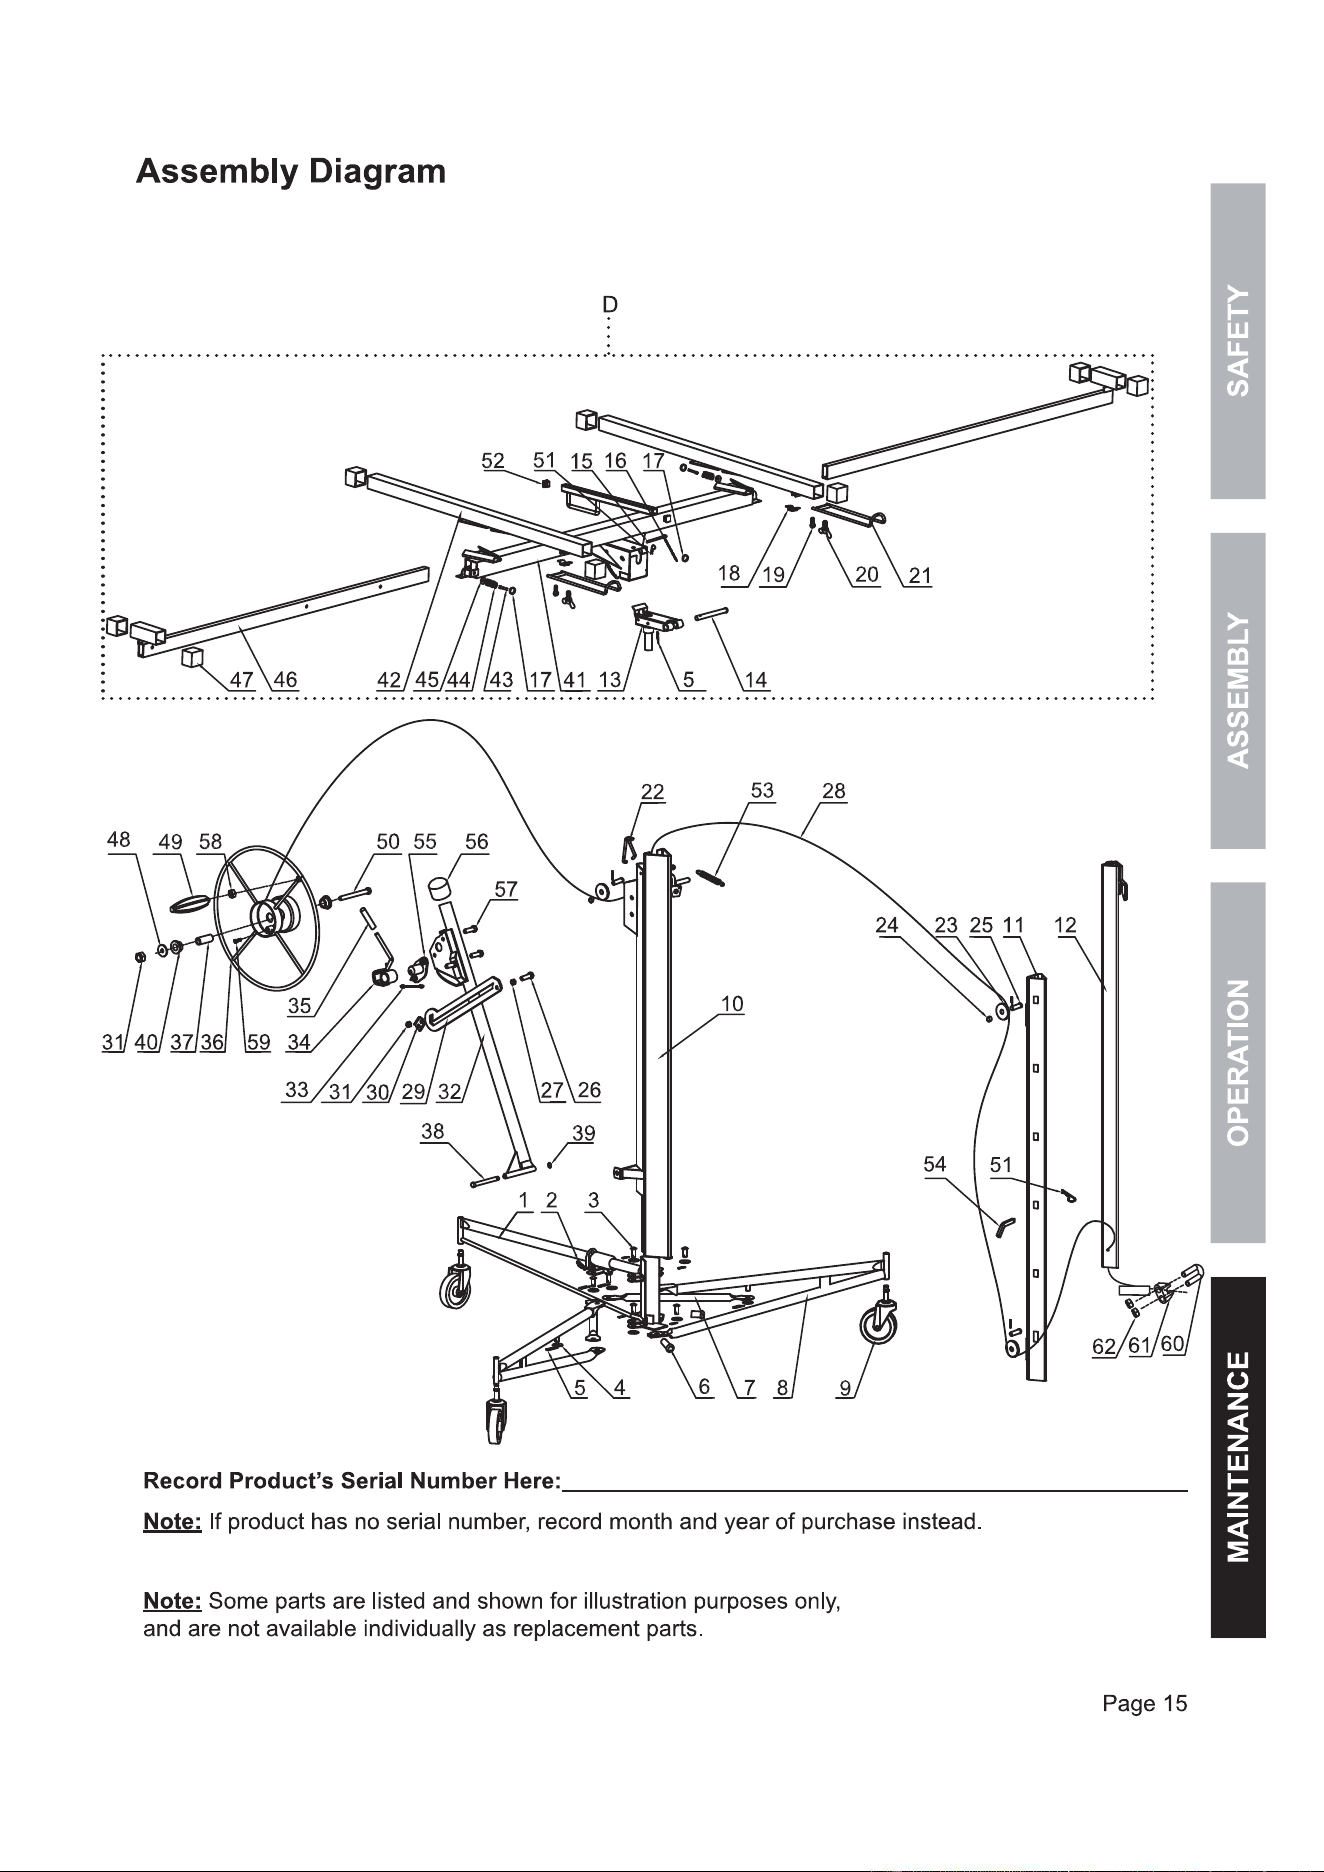
Attach the handle to the wheel using the
threaded shaft and nut. Leave some play
in the nut so that the handle turns freely.
To extend the wheel to its working position:
Hold the brake in your left hand and the
wheel handle in your right hand. Rotate
the wheel forward slightly while you lift
on the brake to release the brake.
the support post with your right
Push the wheel assembly back toward
the frame slightly, to engage the slide
bar lock, securing the winch wheel
assembly in the working position.
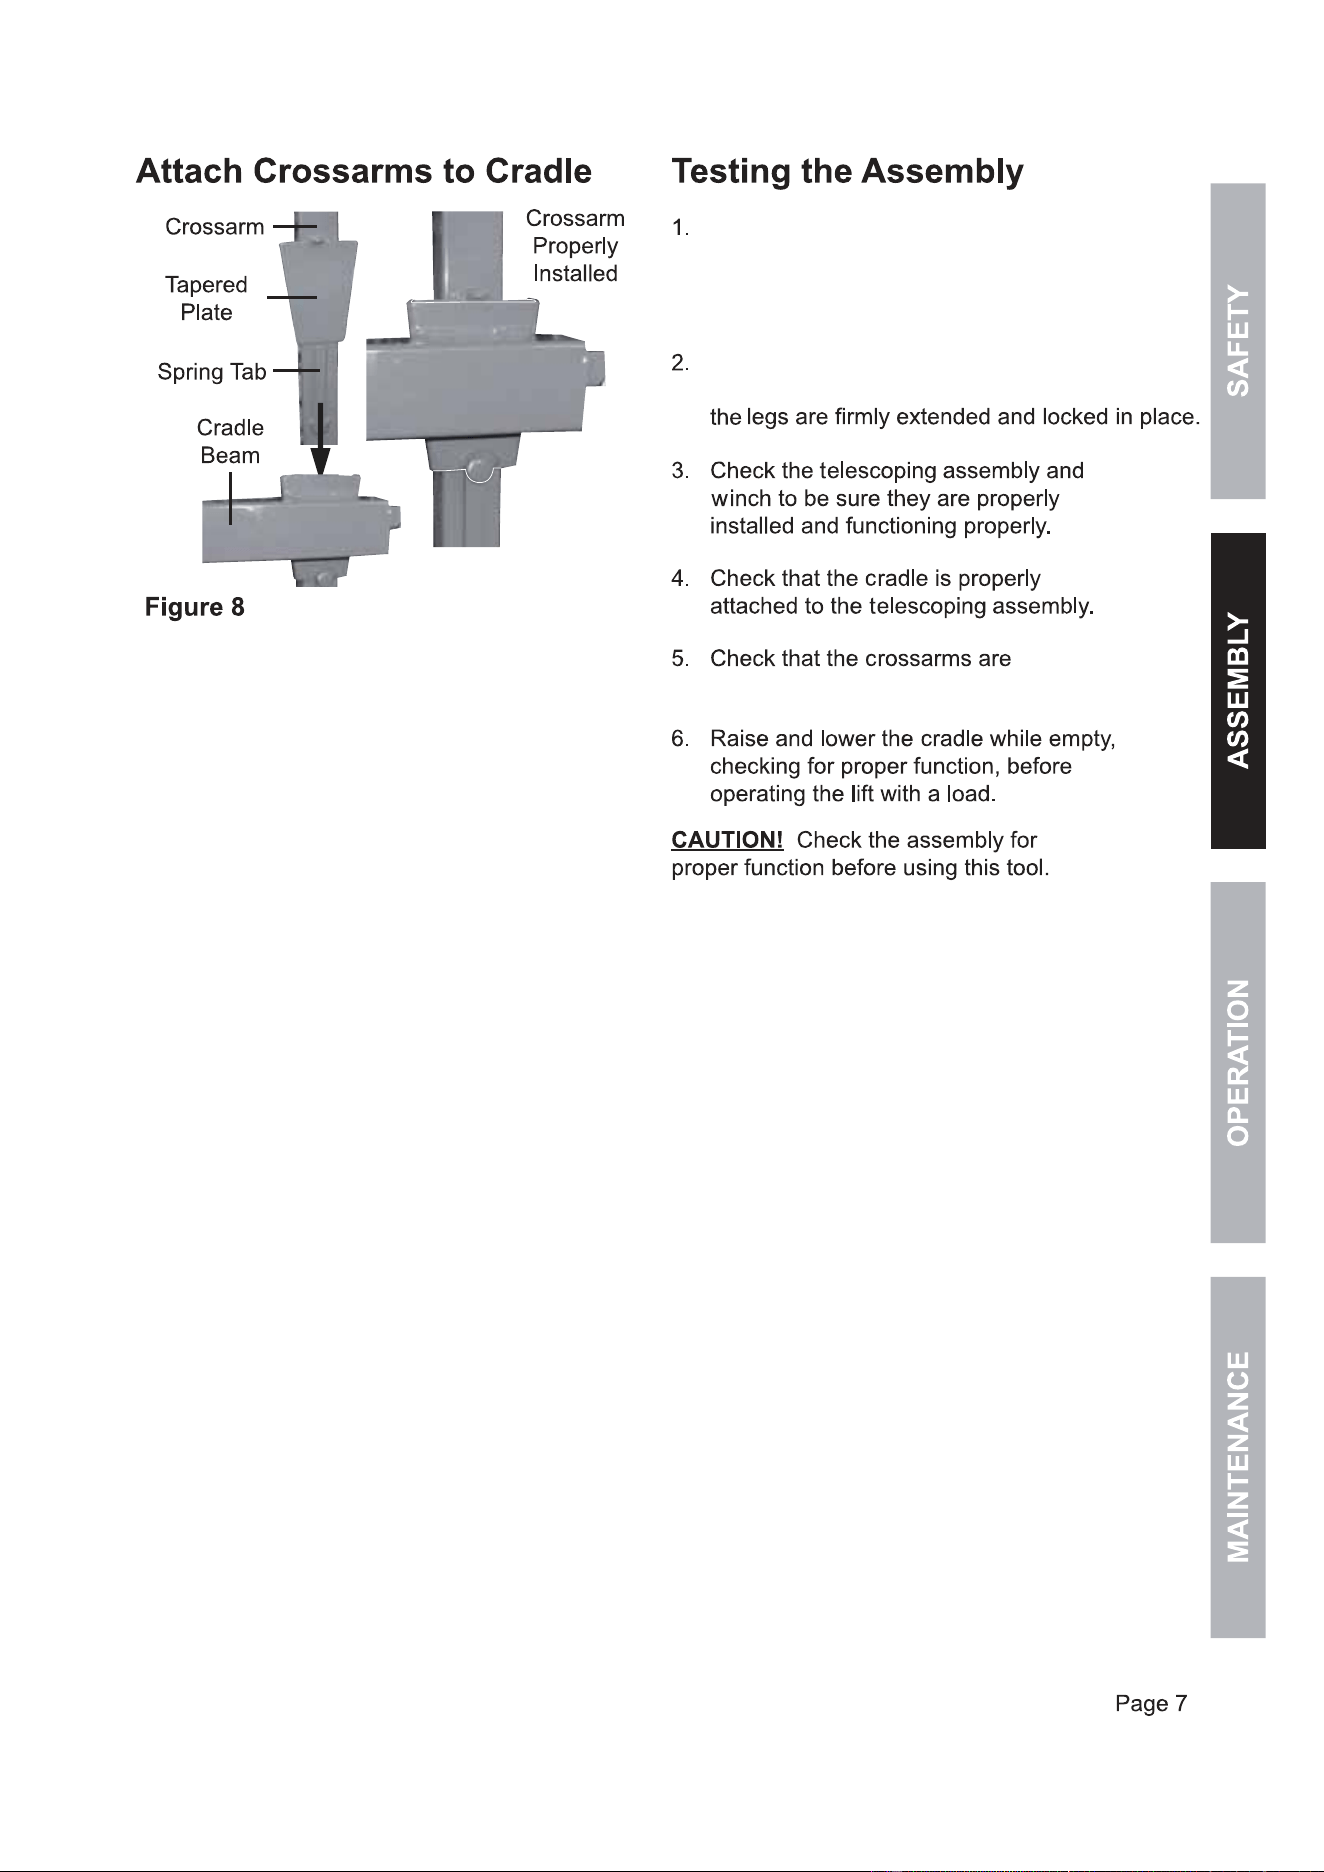
The crossarms are interchangeable. Slide
the tapered plate on each crossarm into
a receiving socket on the cradle beam
until the spring tab locks into place.
Check the tripod base to be sure it is firmly
attached to the telescoping assembly. Be sure
With assembly completed, check the
lift tool to be sure all fasteners are tight,
the wire rope is in place and is
undamaged, and the tool is safe to use.
firmly attached to the cradle.
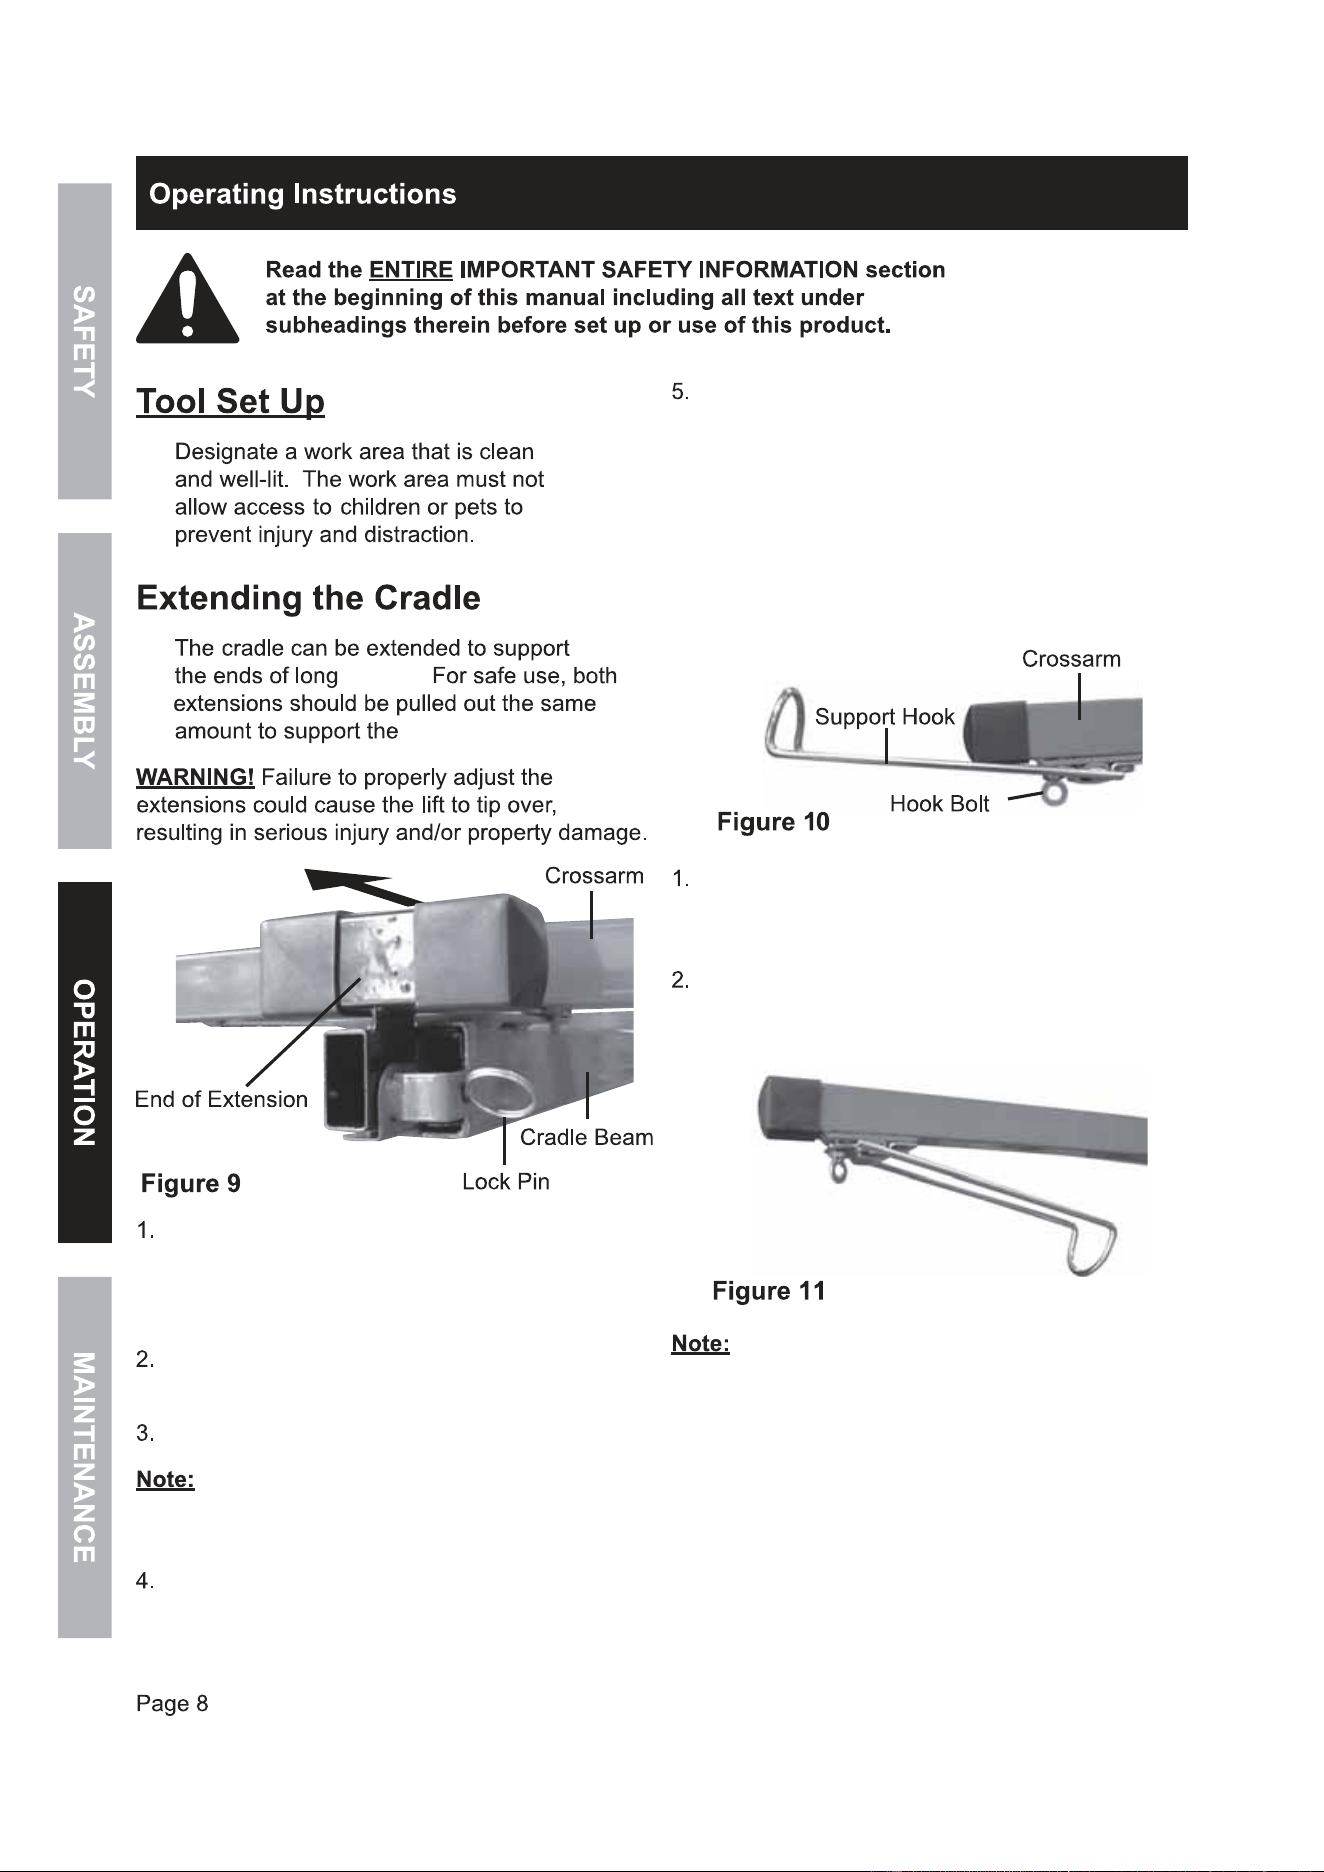
To adjust the extension, pull out the
lock pin and pull the extension out
from the end of the cradle beam until it
lines up with one of the three holes.
Re-insert the lock pin to hold
the extension in place.
Repeat with the other extension.
The lock pin will lock the extension in three
positions. Be sure the lock pin is engaged in one
of these positions whenever using the lift.
Adjust both extensions equally,
and ensure that both are locked
in place using the lock pins.
To avoid damage, always retract
and secure the extensions before
transporting or storing the lift.
The drywall support hooks, located on
one end of the each of the crossarms,
are used to support the drywall.
Loosen the hook bolts of the drywall
support hooks, and rotate them
outward to their open position.
Secure in place by tightening the hook
bolts. These must be in place during
use to safely support the drywall.
Rotate and secure the support hooks
into their closed position when transporting or
storing the lift, to avoid damaging the hooks.
drywall.
drywall equally.
Open the Drywall Support Hooks
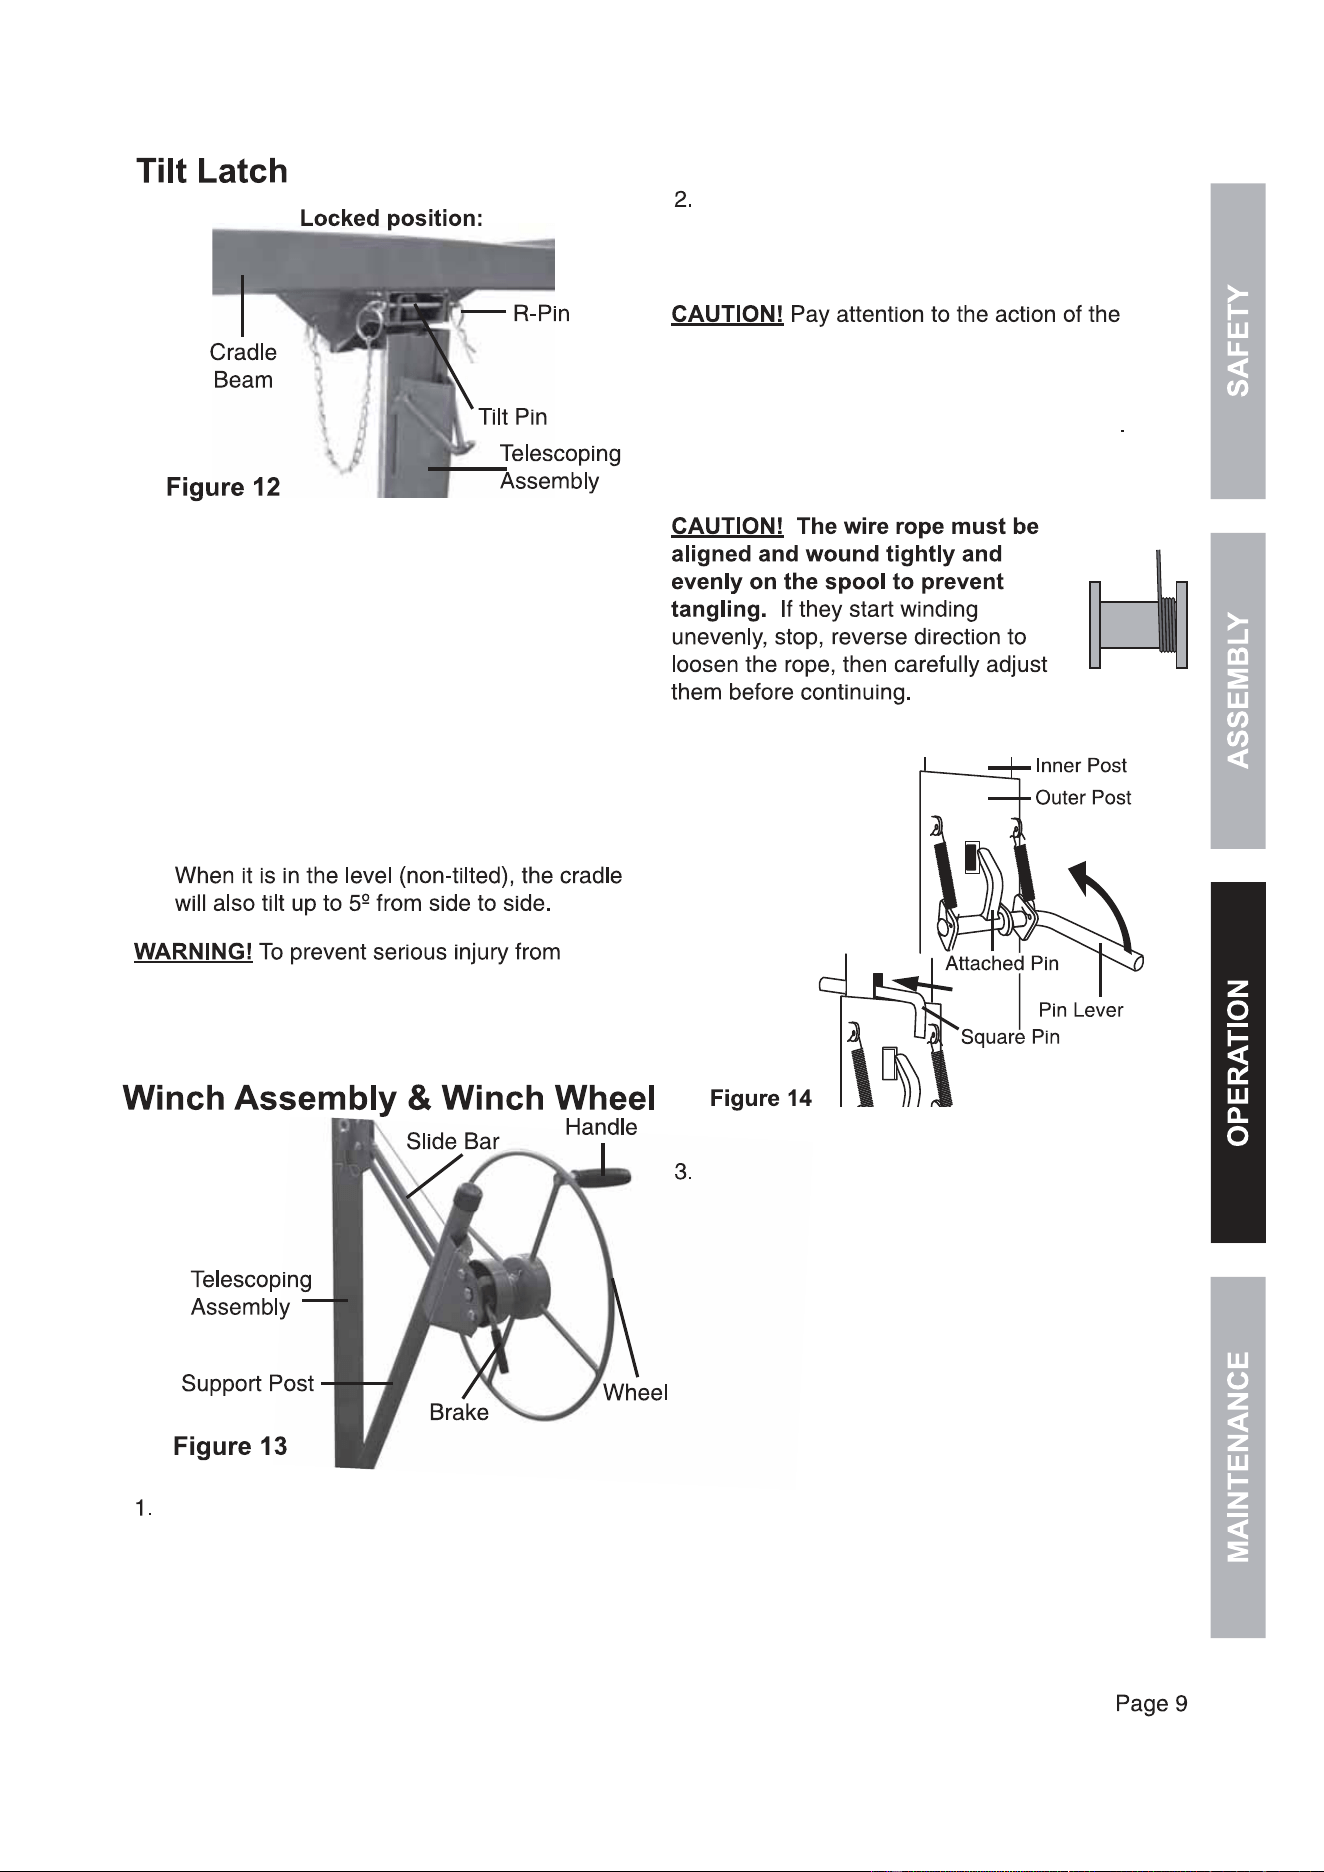
The tilt pin allows the cradle to tilt to
adjust the drywall as needed for installation
on sloped ceilings or walls. When the
cradle is locked with the tilt pin through
the aligned holes in the cradle beam and
telescoping assembly, it will support a
sheet of drywall horizontally for flat
ceiling installation.
To unlock the cradle for different angles,
slide the tilt pin out of the holes, rotate
the cradle to its tilted position.
falling load: Only remove the tilt pin shown
in Figure 12. Do not remove the hinge pin
on the opposite side of the cradle.
The winch wheel is used to raise and lower
the cradle, which holds the drywall. This
is done by means of a wire rope which
wraps around a spool in the winch.
If necessary, you can grasp the end
of the support post for leverage
when raising a sheet of drywall.
wire rope when operating this tool. Do not
allow your hands, clothing, hair or jewelry to
come near the wire rope. If these become
caught in the wire rope, you can be injured.
Do not allow the wire rope to become
tangled or jammed during operation.
Raise the telescoping assembly to a
designated opening in the outer post.
The attached pin / pin lever needs to
be positioned in the hole or the square
pin needs to be above the outer post
to secure the load (See Figure 14).
Rotate the cradle assembly. so the
support hooks are on the opposite
side of the telescoping assembly
from the winch wheel.
Rotate and secure the support hooks to
their open position. (See Figure 10.)
Extend the crossarms as needed
to support the drywall size you are
working with. (See Figure 9.)
Pull the tilt pin out and tilt the
cradle. (See Figure 12.)
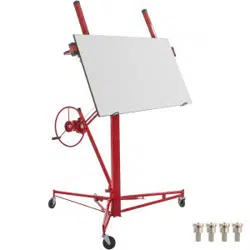
Place the drywall on the cradle, with
the outer side of the drywall (the good
side) facing the cradle. Carefully lean the
drywall on the crossarms, being careful
not to damage the edges of the drywall.
If the drywall will be installed on a flat ceiling,
tilt the cradle back to its horizontal position
and lock in place with the tilt pin. If the
drywall will be installed on a side wall or
sloped ceiling, leave the cradle tilted.
Check to see that the drywall is
secure and balanced.
Lower the cradle if needed.
Carefully roll the lift near to the position
where the drywall will be installed.
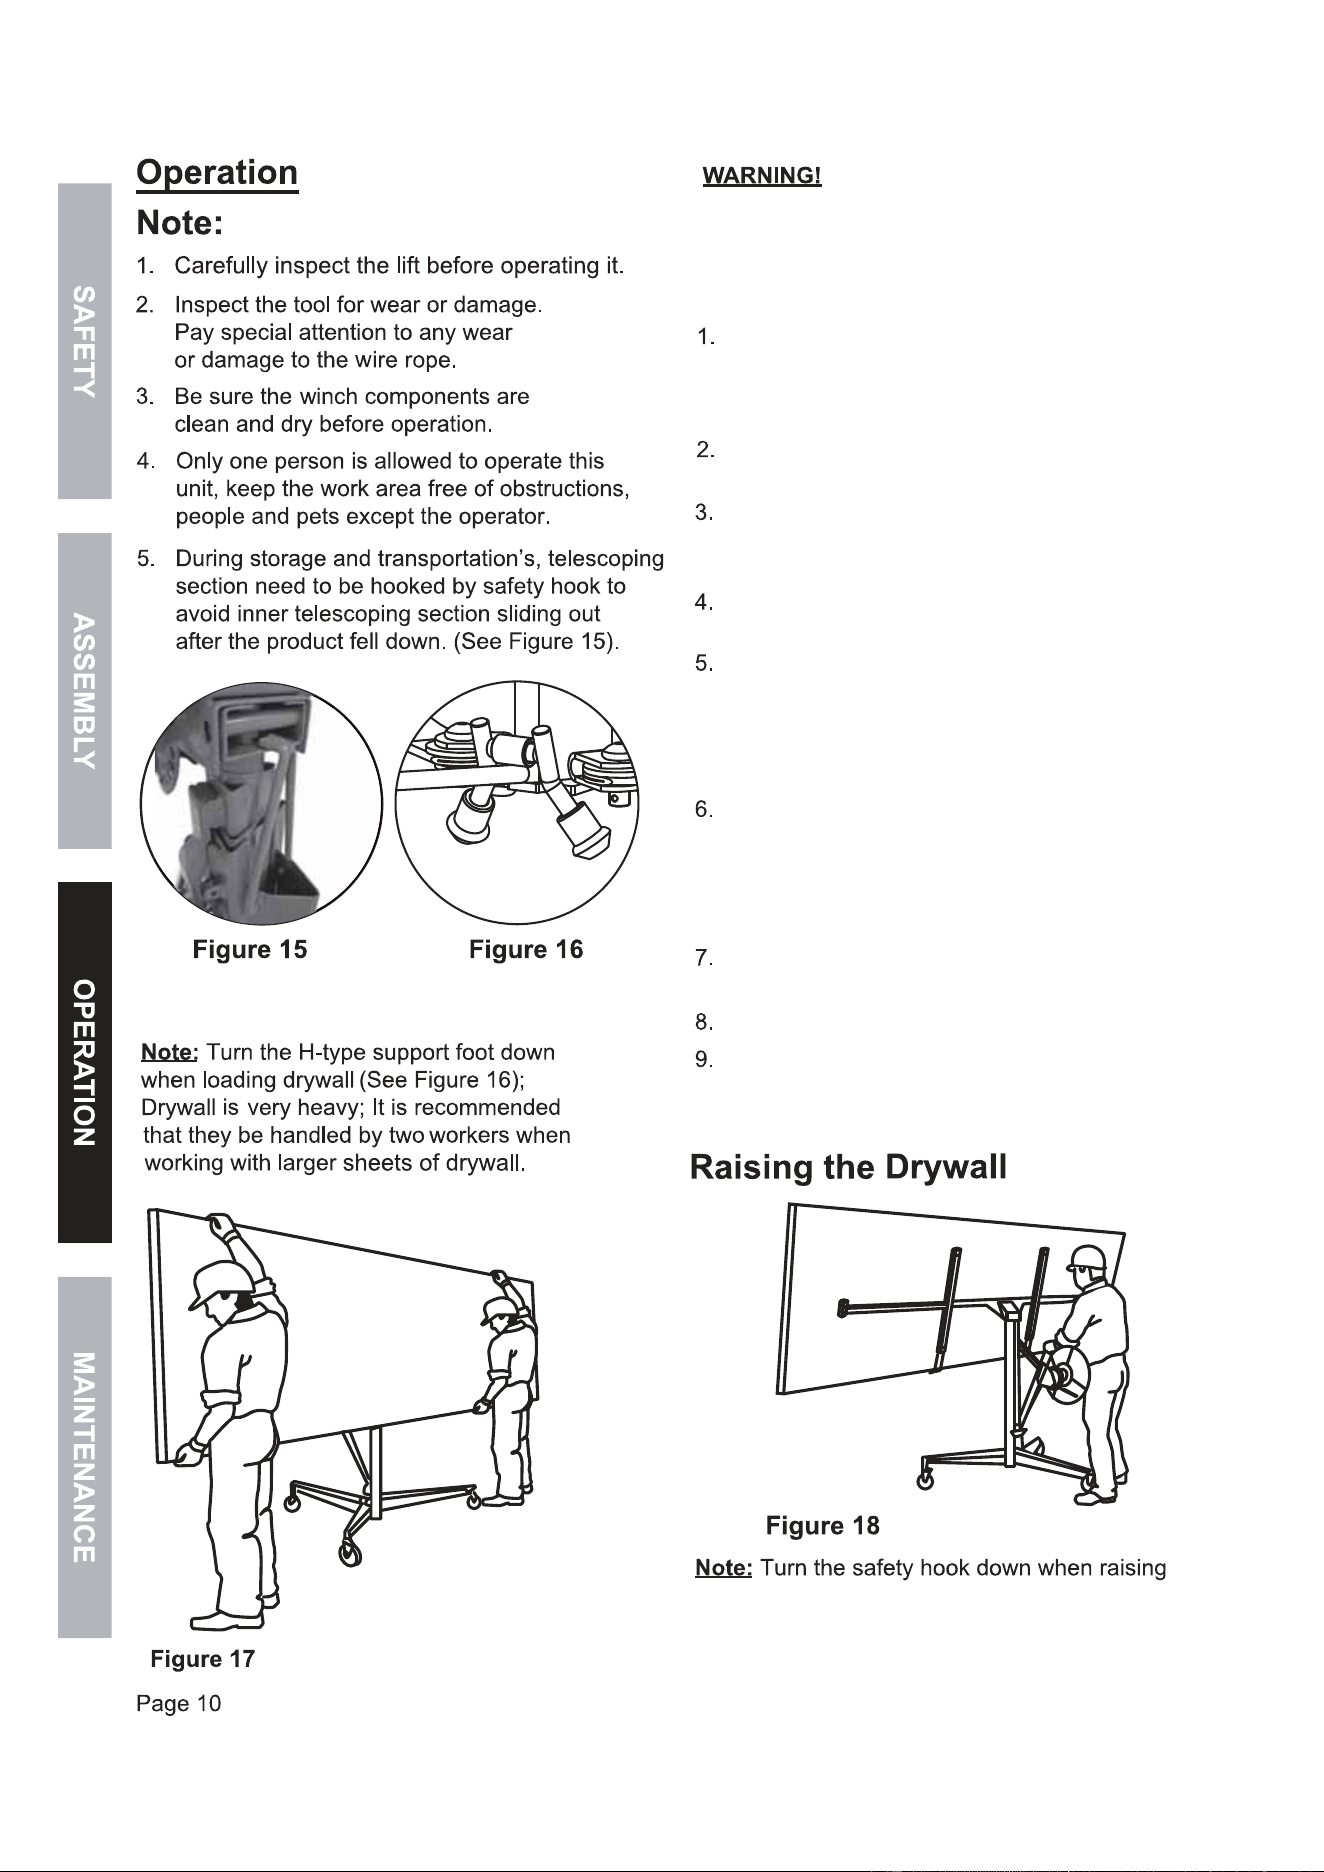
the drywall. (See Figure 15).
Loading a Sheet of Drywall
Never move the unit when weight
is loaded. Only use the lift with a single complete
sheet of drywall. Lifting damaged, broken, cut
or multiple sheets of drywall may cause the drywall
to fall, causing serious injury.
Crank the winch wheel clockwise to raise
the drywall slightly, then stop, checking
that the brake is functioning properly.
Once you have determined that the
brake is functioning properly, resume
raising the drywall to the desired height.
Raise the telescoping assembly so that
the holes of the inner post align with
the attached pin opening, then lock in
place with the pin lever, or, slide the
square pin through the Inner pin holes
above the outer post. See Figure 14.
When lowering the lift, the attached pin
needs to be on one side of the post hole.
Move the attached pin to the side of the
hole for the inner post to lower, operate
the brake handle with your left hand and
rotate the winch wheel counterclockwise
with your right hand to lower the cradle.
handle as the lift is lowering or the cradle
may lower forcefully and cause injury.
After each use, lower the cradle
completely and clean all surfaces
of the lift with a clean cloth.
Fully lower the telescoping assembly.
Retract the extensions and close the support
hooks on the cradle. Secure all in place.
Remove the crossarms, then
remove the cradle.
Remove the telescoping assembly.
Depress the slide lock ring and fold
the tripod base legs together until the
slide lock ring locks in place.
Do not force the drywall beyond
its listed height range. If the pole is
overextended, the lift may become stuck or tip.
Inspect the tool before beginning work
each day. Have the wire rope replaced
immediately as soon as wear is detected.
A wire rope breaking while under
load can cause serious personal injury and
property damage. Broken wire rope strands
are sharp and can cause puncture injuries.
of the winch components. The brake is
friction based and may fail if lubricated.
Occasionally oil the pulley and caster
wheel bearings.
Since the safe operation of this lift
depends on safe maintenance of the steel
wire rope, it is important that you carefully
monitor and maintain the included wire
rope. Have the wire rope replaced by
a qualified technician as soon as it has
any fault, defect or noticeable wear.

Drywall Support Hook