Technical Support and E-Warranty Certificate www.vevor.com/support
POTTERY WHEEL MACHINE
MODEL:GCJX-030
We continue to be committed to provide you tools with competitive price.
"Save Half", "Half Price" or any other similar expressions used by us only represents an
estimate of savings you might benefit from buying certain tools with us compared to the major
top brands and does not necessarily mean to cover all categories of tools offered by us. You
are kindly reminded to verify carefully when you are placing an order with us if you are
actually saving half in comparison with the top major brands.
1
MODEL:GCJX-030
Have product questions? Need technical support? Please feel free to
contact us:
Technical Support and E-Warranty Certificate
www.vevor.com/support
NEED HELP? CONTACT US!
This is the original instruction, please read all manual instructions
carefully before operating. VEVOR reserves a clear interpretation of our
user manual. The appearance of the product shall be subject to the
product you received. Please forgive us that we won't inform you again if
there are any technology or software updates on our product.
POTTERY WHEEL
MACHINE
2
SAFETY INSTRUCTIONS
WARNING:Read all safety warnings, instructions, illustrations and
specifications provided with this electrical equipment. Failure to follow all
instructions listed below may result in electric shock, fire and/or serious injury.
Save all warnings and instructions for future reference.
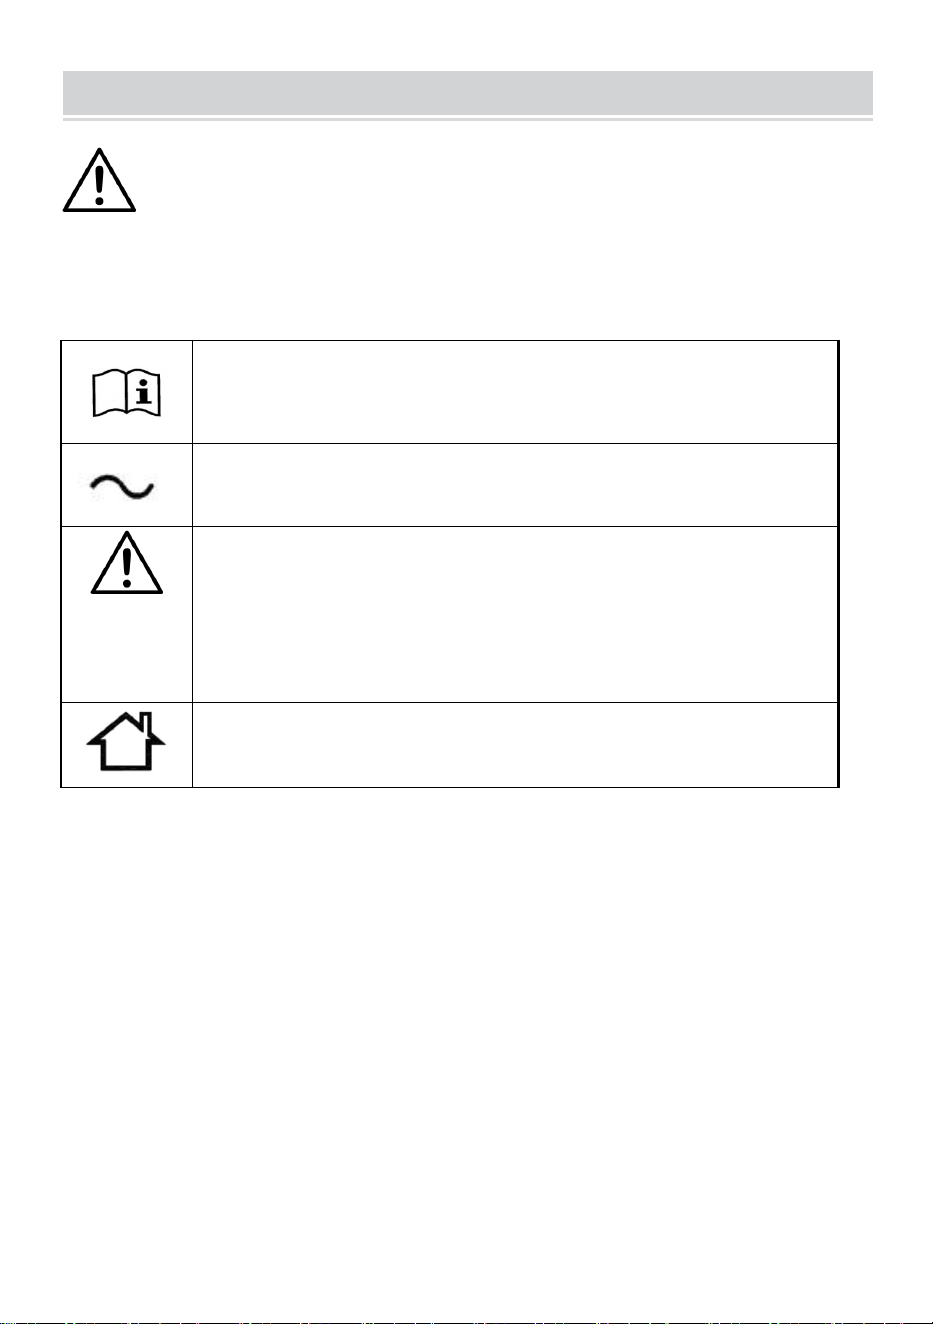
Warning - To reduce the risk of injury, user must read
instructions manual carefully.
Alternating current
This symbol, placed before a safety comment, indicates a kind
of precaution, warning, or danger. Ignoring this warning may
lead to an accident. To reduce the risk of injury, fire, or
electrocution, please always follow the recommendation shown
below.
INDOOR USE ONLY
When using electrical appliances, basic safety precautions should be
followed, including the following.
READ ALL INSTRUCTIONS BEFORE USING THIS APPLIANCE
1.This equipment is only applicable to ceramic drawings and cannot be used for
other purposes. Do not use the equipment brutally.
2.The equipment shall be placed on a cool, ventilated, dry, dust-proof and level
ground.
3.Users must wire and install according to electricity safety standards.
4.Do not change the rotation direction when the motor is running. To change the
rotation direction, stop it first, and start it after the motor completely stops rotating.
5.Please use a towel or sponge to clean the machine body, and do not use a lot of
water to wash it to avoid water immersion in the motor, switch, bearing, and other
parts, causing failure.

3
6.Before use, make sure that the switch and pedal are in the stop position before
inserting the power.
7.When repairing or replacing parts, the switch must be cut off and the power
supply must be unplugged.
8. If the supply cord is damaged, it must be replaced by the manufacturer, its
service agent or similarly qualified persons in order to avoid a hazard.
9.Children should use this equipment with adult(Note: This appliance can be used
by children aged from 8 years and above and persons with reduced physical,
sensory or mental capabilities or lack of experience and knowledge if they have
been given supervision or instruction concerning use of the appliance in a safe
way and understand the hazards involved. Children shall not play with the
appliance. Cleaning and user maintenance shall not be made by children without
supervision).
NOTE: Rotating the switch clockwise will increase the speed, and the power
and sound will gradually increase as well. This is a normal phenomenon.
SAVE THESE INSTRUCTIONS
FCC Information
CAUTION: Changes or modifications not expressly approved by the party
responsible for compliance could void the user's authority to operate the
equipment!
This device complies with Part 15 of the FCC Rules. Operation is subject to the
following two conditions:
1) This product may cause harmful interference.
2)This product must accept any interference received, including interference that
may cause undesired operation.
WARNING: Changes or modifications to this product not expressly approved by
the party.responsible for compliance could void the user's authority to operate the
product.
Note: This product has been tested and found to comply with the limits for a Class
B digital device pursuant to Part 15 of the FCC Rules, These limits are designed

4
to provide reasonable protection against harmful interference in a residential
installation.
This product generates, uses and can radiate radio frequency energy, and if not
installed and used in accordance with the instructions, may cause harmful
interference to radio communications. However, there is no guarantee that
interference will not occur in a particular installation. If this product does cause
harmful interference to radio or television reception,which can be determined by
turning the product off and on, the user is encouraged to try to correct the
interference by one or more of the following measures.
· Reorient or relocate the receiving antenna.
· Increase the distance between the product and receiver.
· Connect the product to an outlet on a circuit different from that to which the
receiver is connected.
· Consult the dealer or an experienced radio/TV technician for assistance.
MODEL AND PARAMETERS
Model
GCJX-030
Maximum Payload(Clay)
1KG
Input
AC 100-240V~ 50/60Hz
Power
20W
Speed
0-300r/min
Sound power level
60dB
5
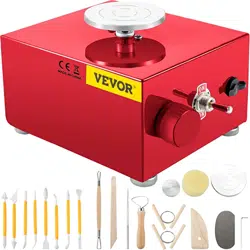
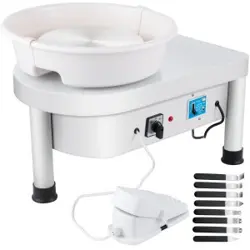
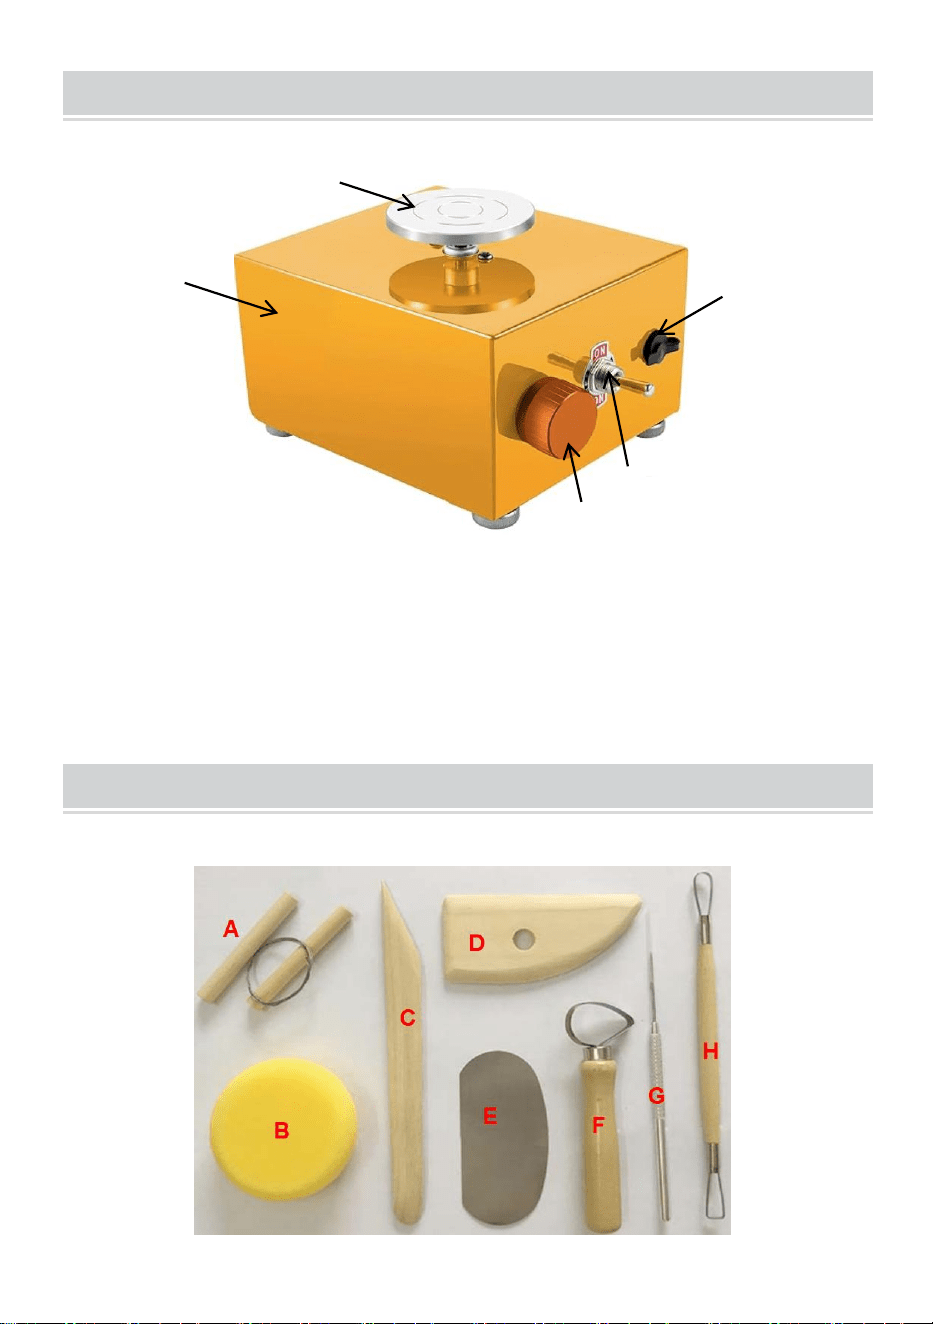
STRUCTURE DIAGRAM
1.Aluminum turntable
2.Equipment body
3.Speed regulation switch
4.Forward/reverse switch
5.Power plug
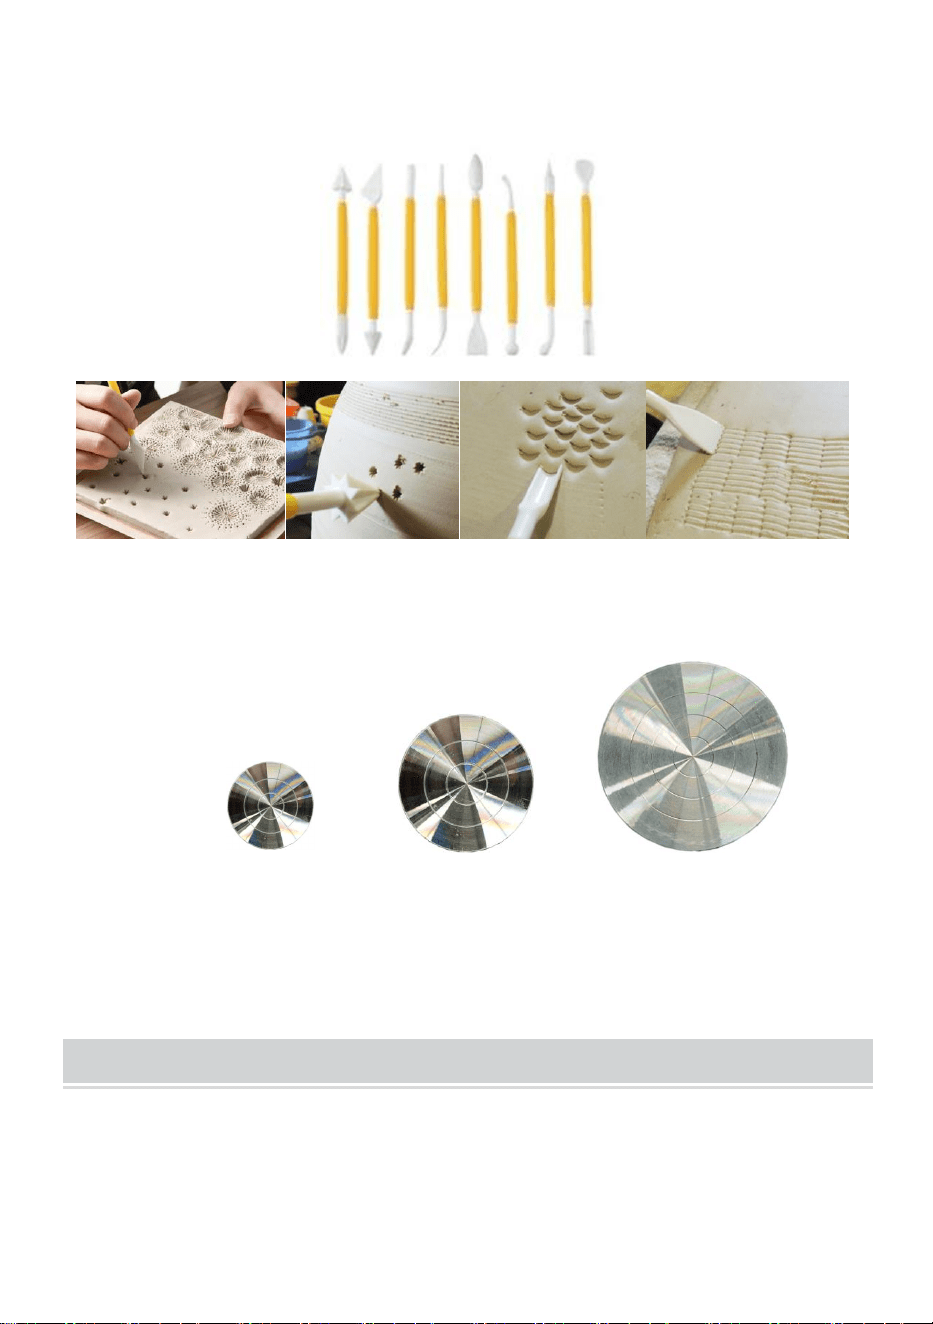
TOOL ACCESSORIES AND USE
1. 8-Piece Tool Set(x1)
1
2
3
4
5
6
A(Clay cutting line): Assist in precisely cutting clay (cutting surface is very
smooth)/repairing and leveling the mouth of the work/taking away the finished
product.
B(Small yellow sponge): Add water or absorb water/trim the surface or mouth
edge to make it smooth.
C(Wooden knife):Trim the bottom for later removal/trimming.
D(Wooden scraper): Trim the opening/shape and remove the excess clay on the
surface to make it smooth.
7
E(Stainless steel scraper): Remove the excess clay on the surface to make it
smooth.
F(Circular large flat wire knife): Trim the surface of the vessel/ control the
thickness/trim out the bottom ring foot.
G(Steel needle): Scrape off excess clay from the mouth edge/remove air
bubbles/punch holes.
H(Ribbon flat wire knife): Finely trim the surface of the utensil or circle the foot.
8
2. Plastic Printing 8-piece Set(x1): Texture decoration, bonding, clay modeling,
and so on(As shown below).
3. Aluminium turntable(Φ45mm+Φ65mm+Φ100mm): The size of the turntable
depends directly on the maximum diameter we can achieve.
(Loosen the bolt with a wrench and replace it)
NOTE: After the work, please clean the sludge on the turntable and basin
in time, wipe it with a dry towel to avoid oxidation on the surface of the
turntable !
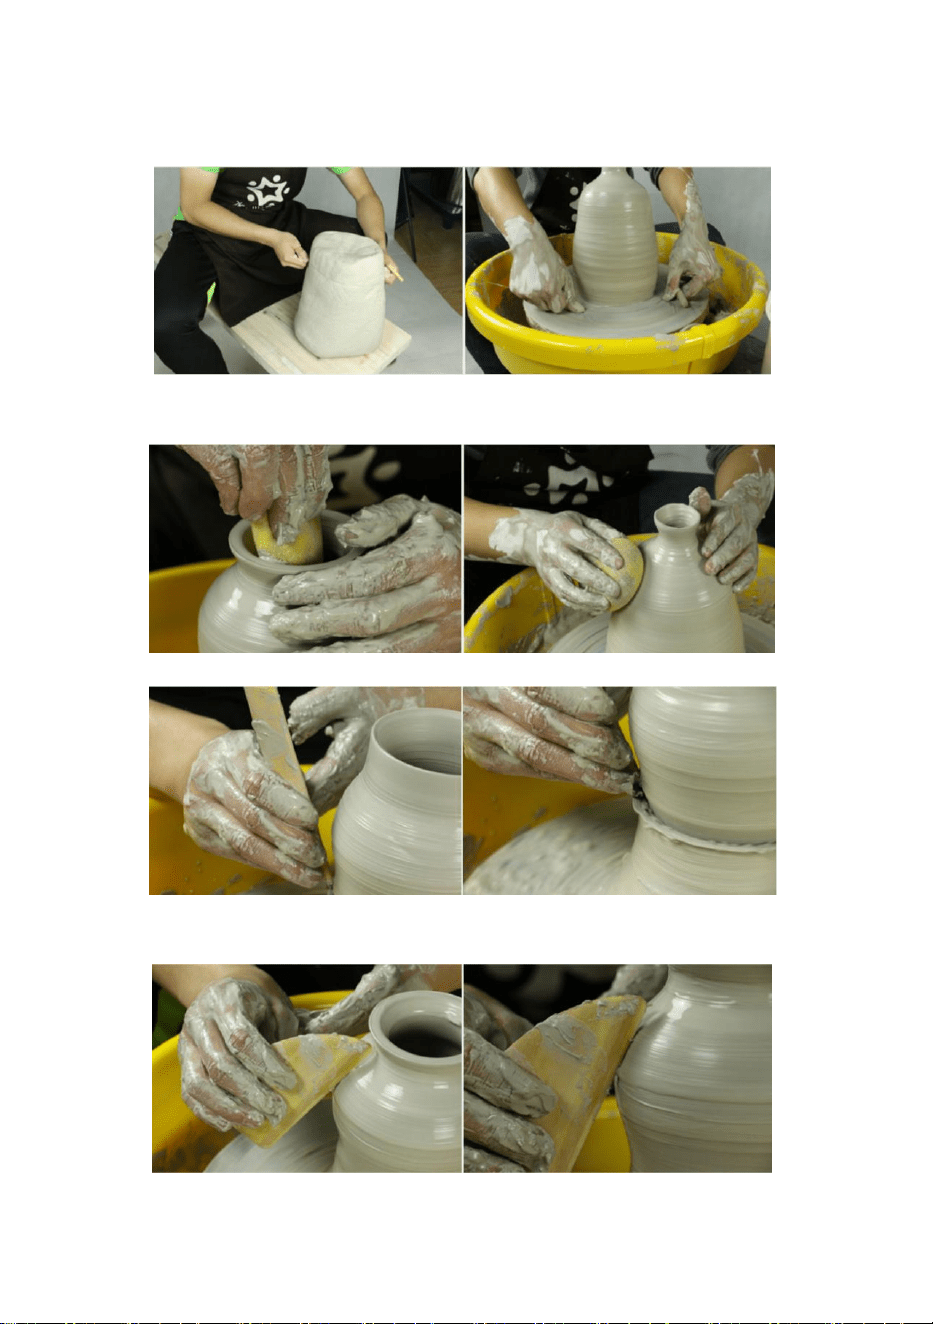
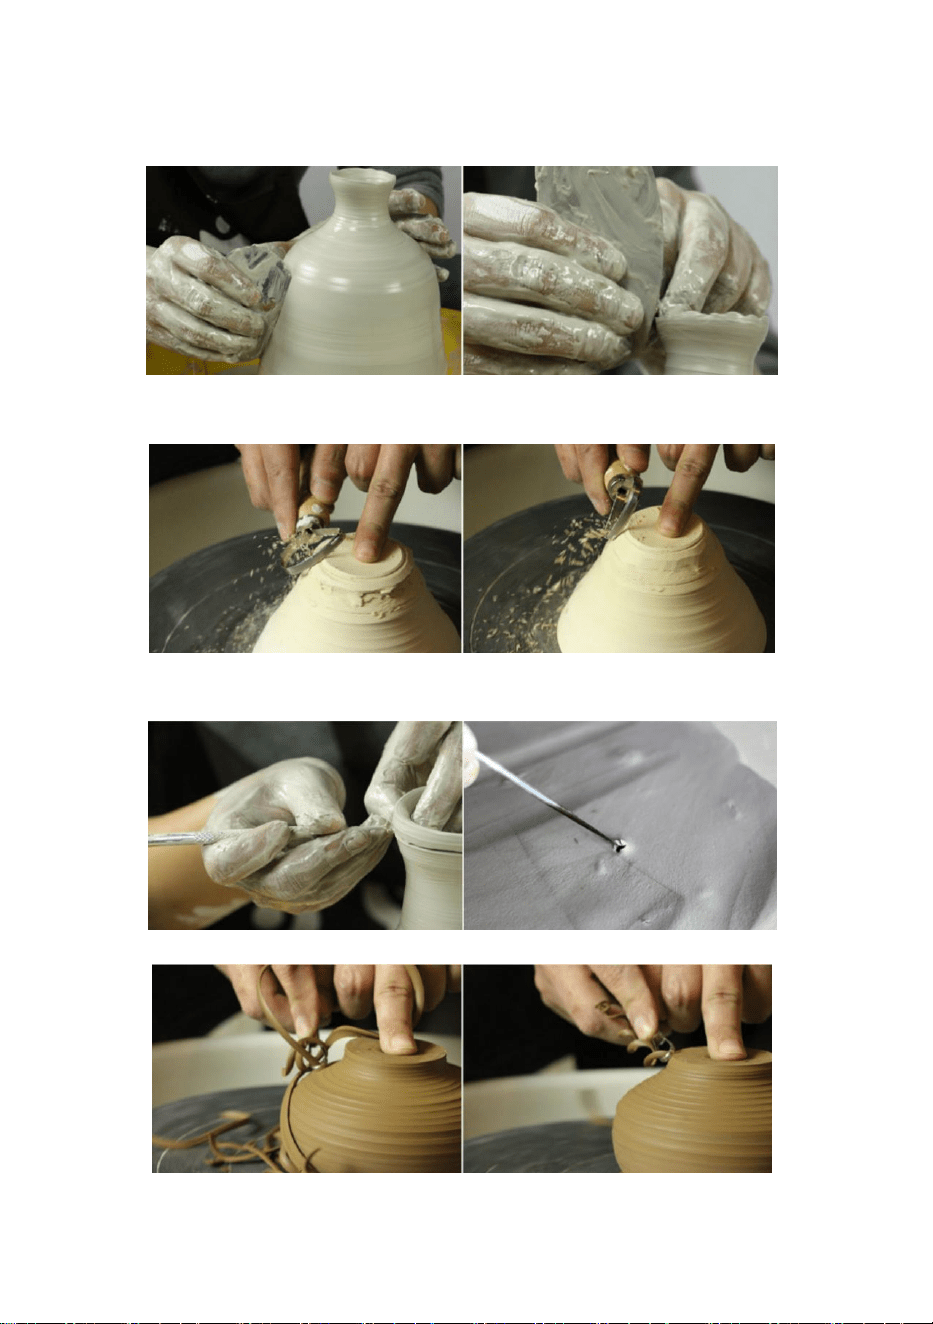
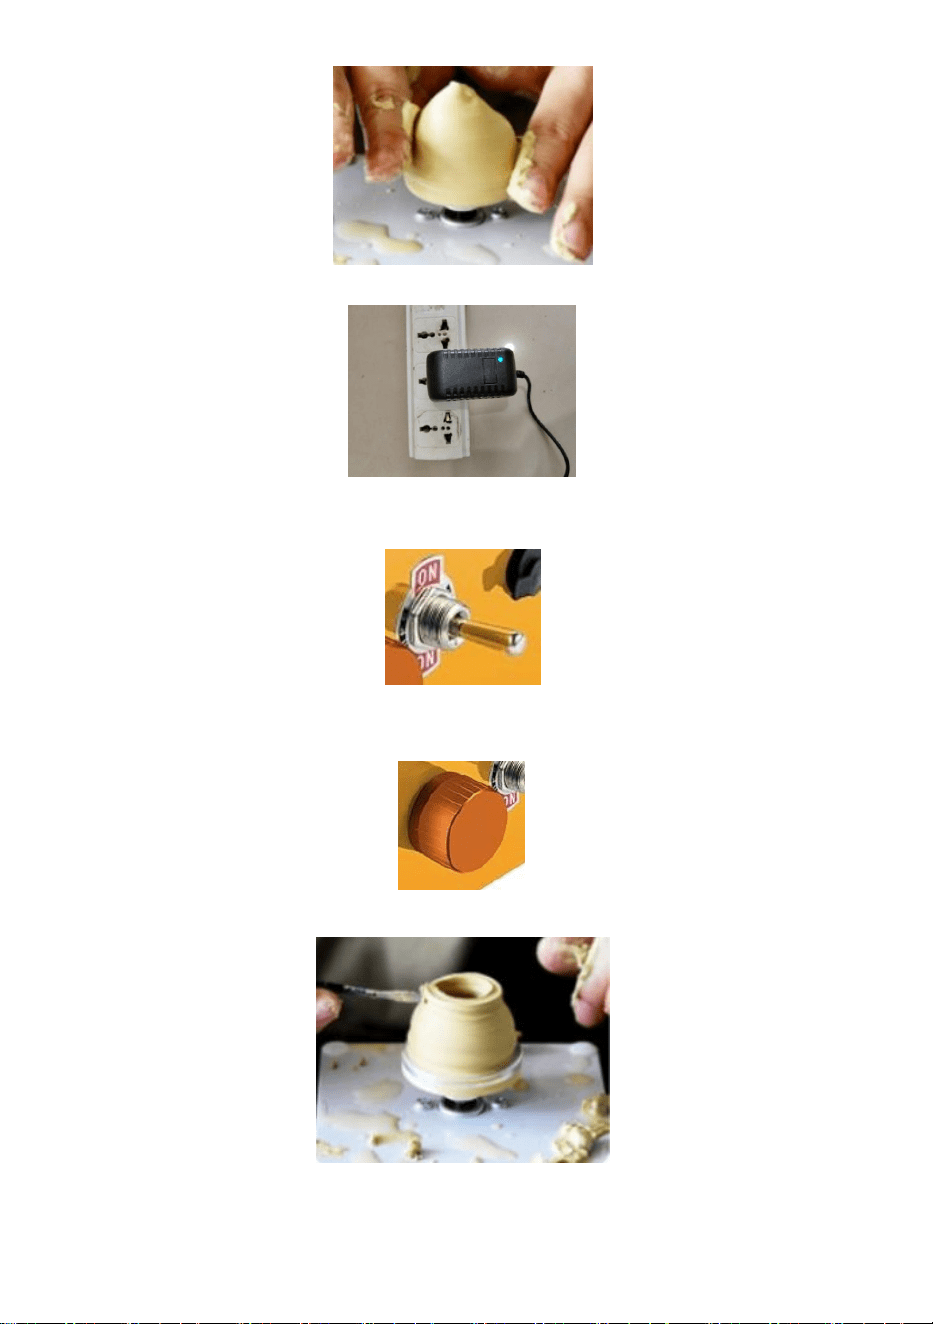
OPERATING STEPS
Step1:Take out a proper amount of clay, knead it into a cone shape, fix it at the
center of the rotary table, and press it (wet your hands).
9
Step2: Plug in the power.
Step3:Choose the direction of forward (clockwise)/reverse (counterclockwise)
rotation according to your needs.
Step4:Turn the knob to adjust the proper speed.
(Clockwise acceleration, reverse deceleration)
Step5:Clay molding with tools.
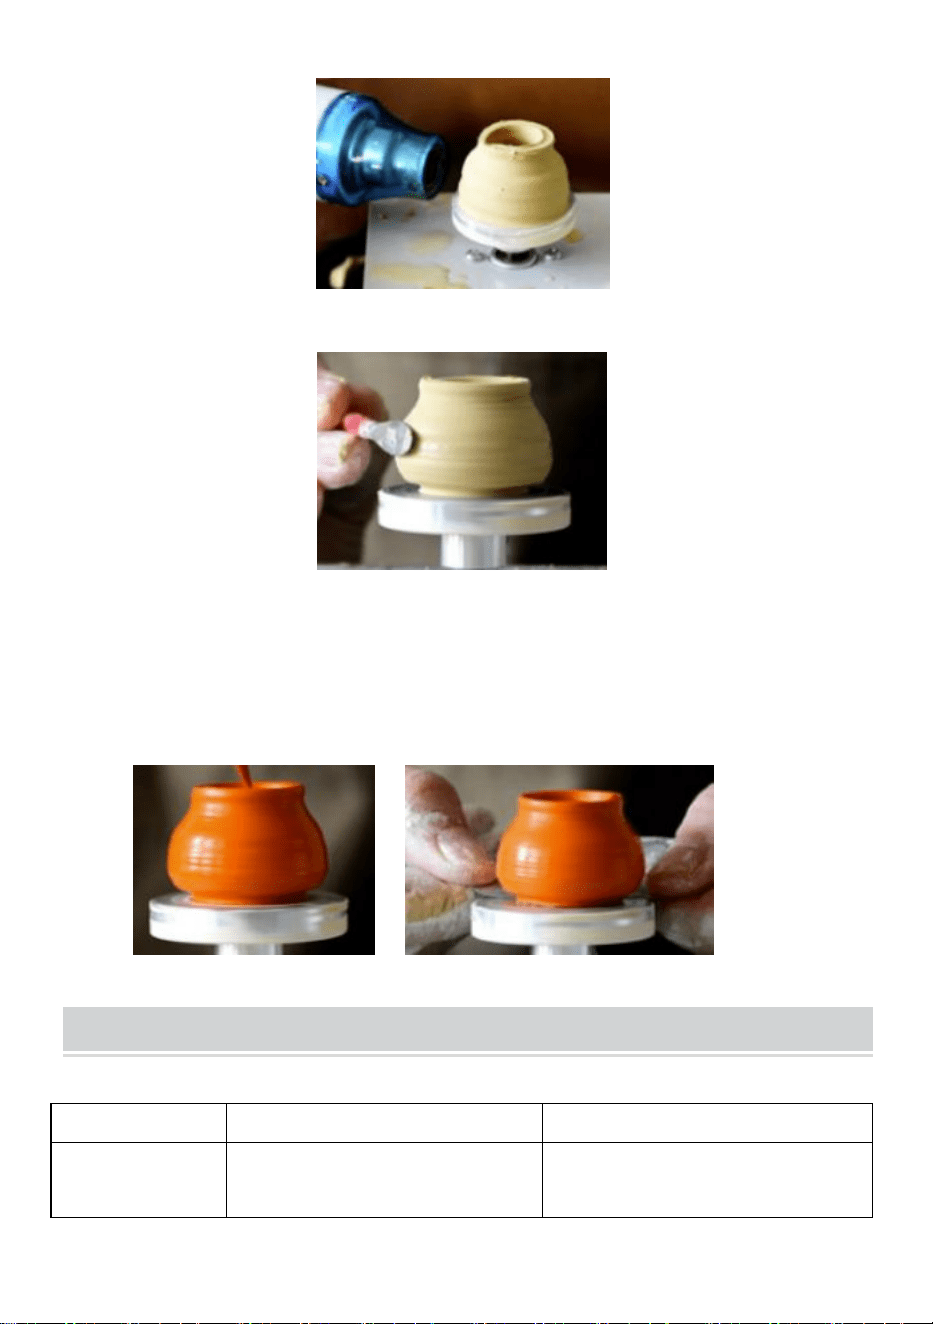
Step6:Dry the body surface quickly with a hot air gun (1-3 minutes).
10
Step7:Clay-mold repairs with tools.
Step8:Creative painting and coloring can be carried out according to their own
needs.
After the work is completed,stop the machine in reverse order.
Remove the molding with a scraper/clay cutting line.
Place in a cool place for a period of time before firing.
SKILLS GUIDANCES
Problem
Reason
Solution
Fracture of clay
Excessive force during lifting
The lifting process should be small
and even.
11
Clay is in a spiral
shape.
The clay molding speed exceeds
the machine speed.
Turn the mold a few times in
advance.
Clay unevenly
stressed presses
Abnormal posture of clay
molding.
Sit firmly and keep your back,
neck, shoulders, upper arms,
forearms, wrists and palms still.
Coordinate your whole body
Strength.
Clay off center
Got wrong and unstable force on
hands when looking for the
center.
The left palm must be placed in
the eight o 'clock position on the
turntable and applied downward
oblique pressure with even force.
The opening is
uneven and
off-center.
1.The center is not found
correctly.
2.Not opening in the center.
3.Hands shake when pressing
down, uneven force.
The opening of the middle tip of
the left finger or thumb must be
assisted by the right finger and
must be pressed down vertically
from the center point.
Hollow at the
bottom
Pressing down too fast and too
hard.
1.The bottom thickness of the hole
should be left about 2cm.
2.Pause the machine, add new
clay, start the machine, and
smooth the surface.
Bubbles.
The clay has not been kneaded
properly.
Pause the machine and prick the
air bubbles with a needle, fill the
hole with clay, then start the
machine to smooth the surface.
Uneven
thickness when
lifted.
Hands are not on parallel lines or
uneven force.
The inner and outer fingertips
must move synchronously in a
straight line when lifting the clay.
12
Mold collapsed.
1.There was too much water and
the clay was too soft to hold.
2.Opening rapidly expands,
deformation and collapse.
3.The wall is thick on the top and
thin on the bottom, which cannot
be supported.
4.Clay is used for too long and its
viscosity decreases.
1. Use as little water as possible
when drawing.
2. Keep your hands moving from
the bottom to the top.
3. Never press down.
4. Rapid prototyping.
Bottom break
1.Knead clay is not uniform, clay
dry and wet is not uniform.
2.Water at the bottom, no water
absorption after forming.
3.When dry, not placed on
absorbent boards.
4.Sun exposure.
5.Too thick at the bottom.
1.Knead the clay evenly.
2.Sponge up the water inside the
vessel when finished.
3.Let dry on a solid board.
4.Keep out of the sun.
5.The bottom thickness is less
than 2cm.
TROUBLESHOOTING INSTRUCTION
Problem
Reason
Solution
Does not work.
The power supply is not
connected.
1.Check whether the power
plug is properly inserted.
2.Check whether the
leakage protector is on.
Shaking of the machine
The machine is not level
with the ground.
Adjust the four feet of the
machine so that the
machine is level with the
ground.
The turntable makes a
sound.
The water basin against the
turntable.
Check whether water basin
is properly installed.

13
Water basin is leaking.
1.The water exceeds the
waterproofing edge of the
basin.
2.The water basin is not
installed properly.
1.Check whether the
storage of mud water
exceeds the waterproof
edge.
2.Check that water basin is
properly installed.
The turntable jumps too
much.
The fastener is loose.
Check whether the fastener
is loose. If not, ask a
professional to debug it.
CLEAN AND CARE RULES
1. After finishing the equipment operation, it is necessary to clean the clay on the
surface of the turntable and wipe the water stains on the surface of the turntable
(Do not rinse directly with water).
2. Check the parts regularly for looseness.
3. If you use it sparingly, run it at least once a month.