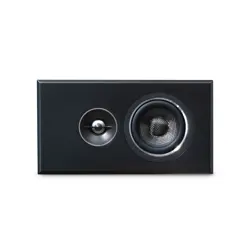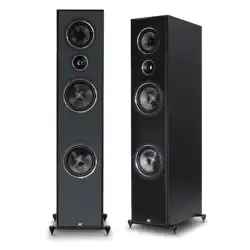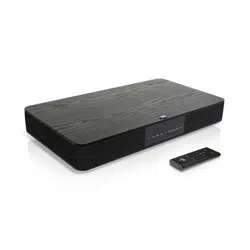
Alpha VS21
VisionSound
Owner’s Manual
IMPORTANT SAFETY INSTRUCTIONS
1. Read these instructions.
2. Keep these instructions.
3. Heed all warnings.
4. Follow all instructions.
5. Do not use this apparatus near water.
6. Clean only with dry cloth.
7. Do not block any ventilation openings. Install in accordance with the manufacturer’s instructions.
8. Do not install near any heat sources such as radiators, heat registers, stoves, or other apparatus (including amplifiers) that produce heat.
9. Do not defeat the safety purpose of the polarized or grounding-type plug. A polarized plug has two blades with one wider than the other. A
grounding type plug has two blades and a third grounding prong. The wide blade or the third prong are provided for your safety. If the provided
plug does not fit into your outlet, consult an electrician for replacement of the obsolete outlet.
10. Protect the power cord from being walked on or pinched particularly at plugs, convenience receptacles, and the point where they exit from the
apparatus.
11. Only use attachments/accessories specified by the manufacturer.
12. Use only with the cart, stand, tripod, bracket, or table specified by the manufacturer, or sold with the apparatus. When a cart is
used, use caution when moving the cart/apparatus combination to avoid injury from tip-over.
13. Unplug this apparatus during lightning storms or when unused for long periods of time.
14. Refer all servicing to qualified service personnel. Servicing is required when the apparatus has been damaged in any way, such as power-supply cord
or plug is damaged, liquid has been spilled or objects have fallen into the apparatus, the apparatus has been exposed to rain or moisture, does not
operate normally, or has been dropped.
15. The apparatus shall not be exposed to dripping or splashing and that no objects filled with liquids, such as vases, shall be placed on the apparatus.
16. To reduce the risk of fire or electric shock, this apparatus should not be exposed to rain or moisture.
17. The mains plug or an appliance coupler is used as the disconnect device, the disconnect device shall remain readily operable.
The lightning flash with arrowhead symbol within an equilateral triangle, is intended to alert you to the presence of uninsulated
“dangerous voltage” within the product’s enclosure that may be of sufficient magnitude to constitute a risk of electric shock to
persons.
The exclamation point within an equilateral triangle is intended to alert you to the presence of important operating and maintenance
(servicing) instructions in the literature accompanying the product.
Notice of FCC Compliance
This product has been tested and found to comply with the limits for a Class B digital device, pursuant to Part 15 of FCC Rules. These limits are designed
to provide reasonable protection against harmful interference in a residential installation. This product generates, uses, and can radiate radio frequency
energy and, if not installed and used in accordance with the instructions, may cause harmful interference to radio communications. However, there is
no guarantee that interference will not occur in a particular installation. If this product does cause harmful interference to radio or television reception,
which can be determined by turning the equipment off and on, the user is encouraged to try to correct the interference by one or more of the follow
measures:
1) Reorient or relocate the receiving antenna.
2) Increase the separation between the equipment and receiver.
3) Connect the equipment into an outlet on a circuit different from that to which the receiver is connected.
4) Consult the dealer or an experienced radio/television technician.
This equipment should be installed and operated with a minimum distance of 20 cm (approx. 8 inches) between the radiator and your body.
This device complies with Industry Canada license-exempt RSS standard(s). Operation is subject to the following two conditions:
1) This device may not cause interference, and
2) This device must accept any interference, including interference that may cause undesired operation of the device.
2
INTRODUCTION
Thank you for your PSB Speakers purchase. Our wide collection of high performance loudspeakers, headphones, and home audio products bring music and
video collections to life. Producing natural musical dynamics and precise imaged sound, PSB Speakers will simply bring you closer to the music you love.
Alpha VS21 VisionSound™ Powered Soundbar is the perfect sound solution for your television. It fuses decades of award-winning speaker research with
the latest in virtual surround technology to bring you an all-in-one powered soundbar system. Place it beneath any flat screen television for surround
sound without the clutter.
By supplying this owner’s guide, we hope you will read through this information to help assure that you are getting the most out of your PSB product.
UNPACKING
The packing materials are designed to protect the soundbar from damage during transport, however if visible or concealed damage is to occur in handling,
it should be reported at once to your authorized PSB dealer, or to the shipping company that delivered your soundbar. We highly recommend retaining all
packaging, as it may be needed to transport the soundbar in the future.
INSTALLING
Alpha VS21 should be positioned underneath the television or display screen on a flat level surface. It can support televisions weighing up to 40 kg
(88lbs).
3
CONNECTING
Remote Control
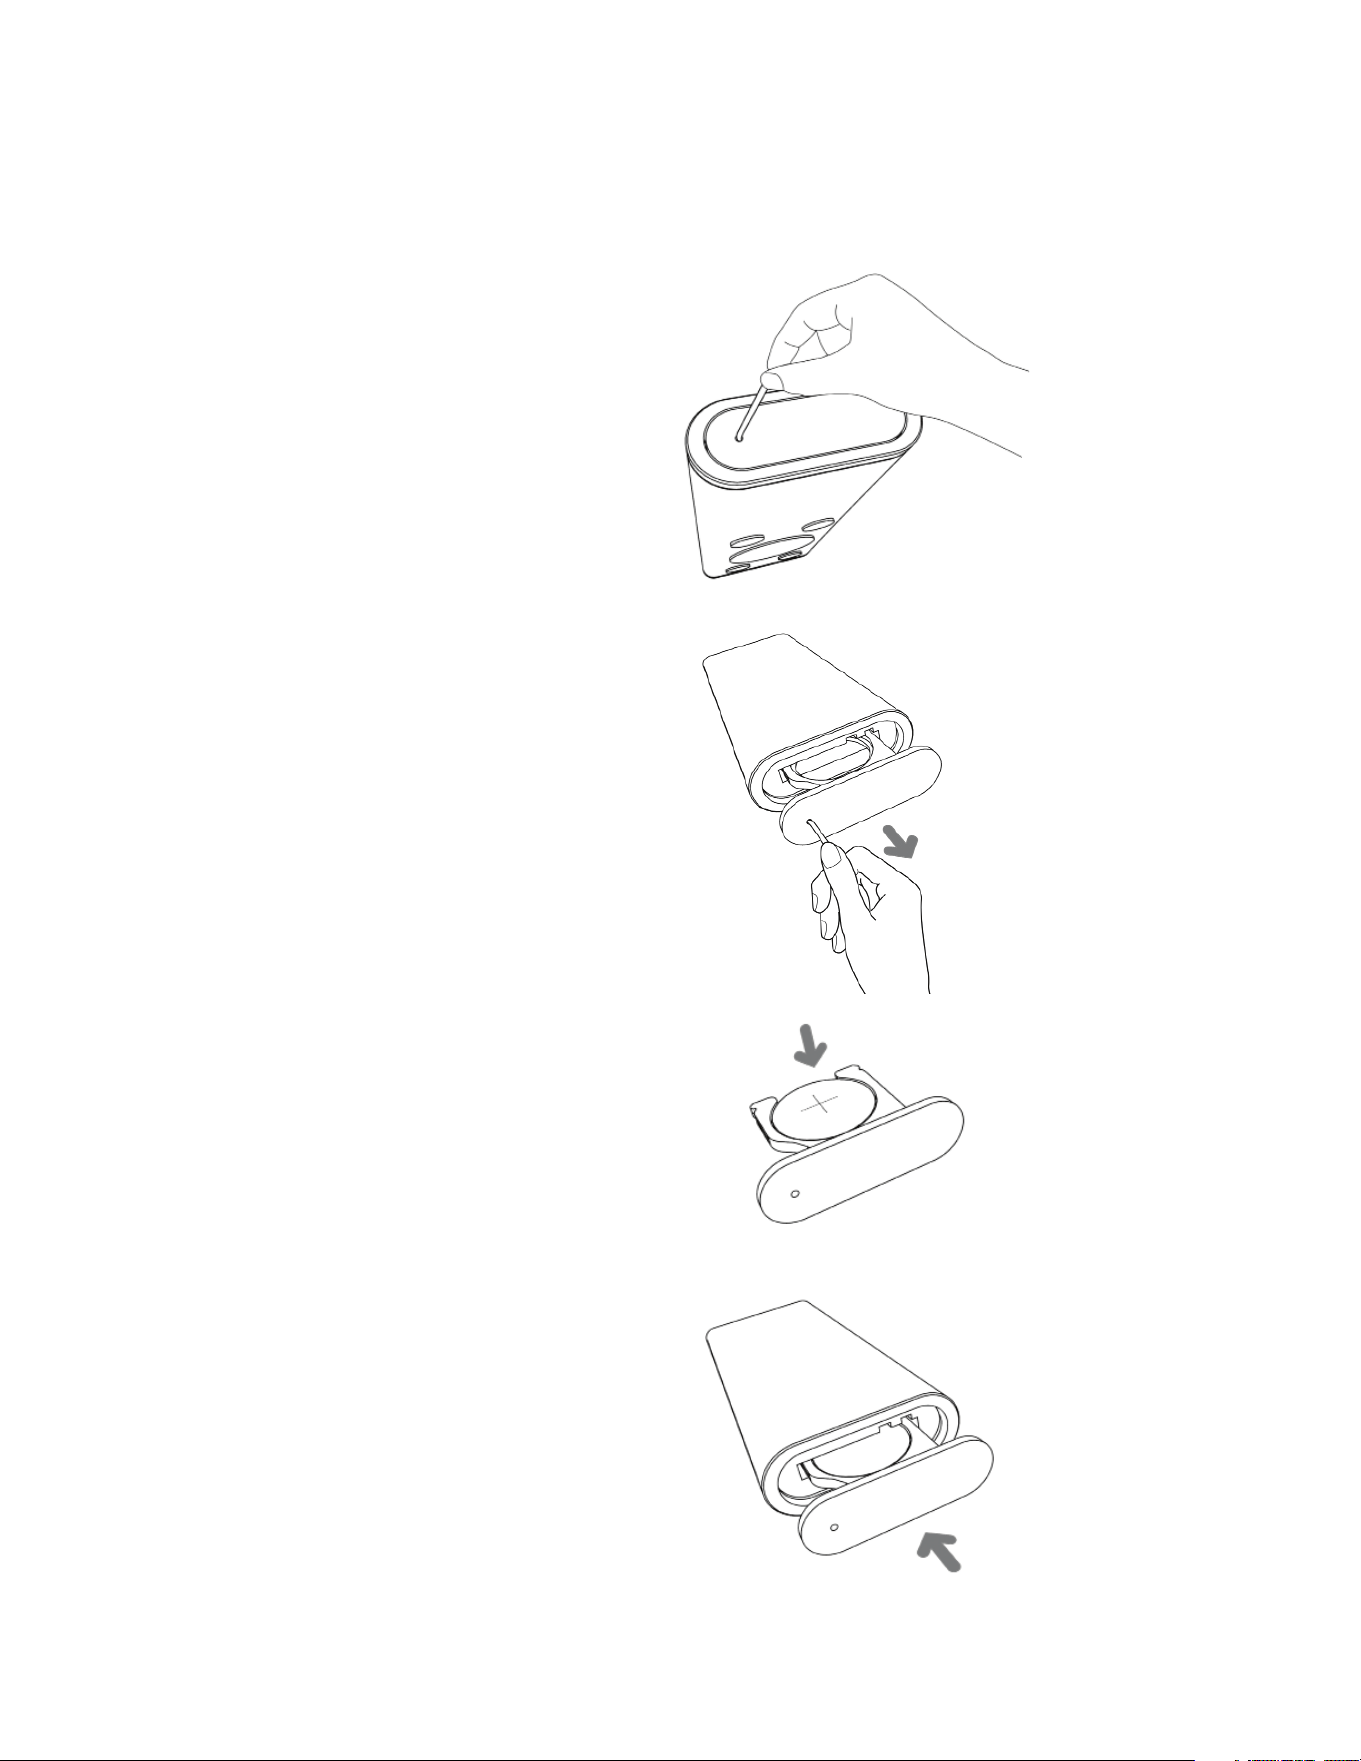
Place the battery supplied in the remote control. Be careful to ensure that it is correctly inserted according to the polarity (+/-). You should only use the
battery specified for this system (CR2025).
Remote Control Battery Insertion Procedure
1) Insert a hook tip into the battery door release hole.
2) Slide out the battery tray.
3) Place the supplied CR2025 battery into the tray.
Ensure the “+” symbol is facing upwards.
4) Slide the tray back until it clicks into place.
Note: The batteries provided are designed for test use and may therefore have a shorter lifespan.
4

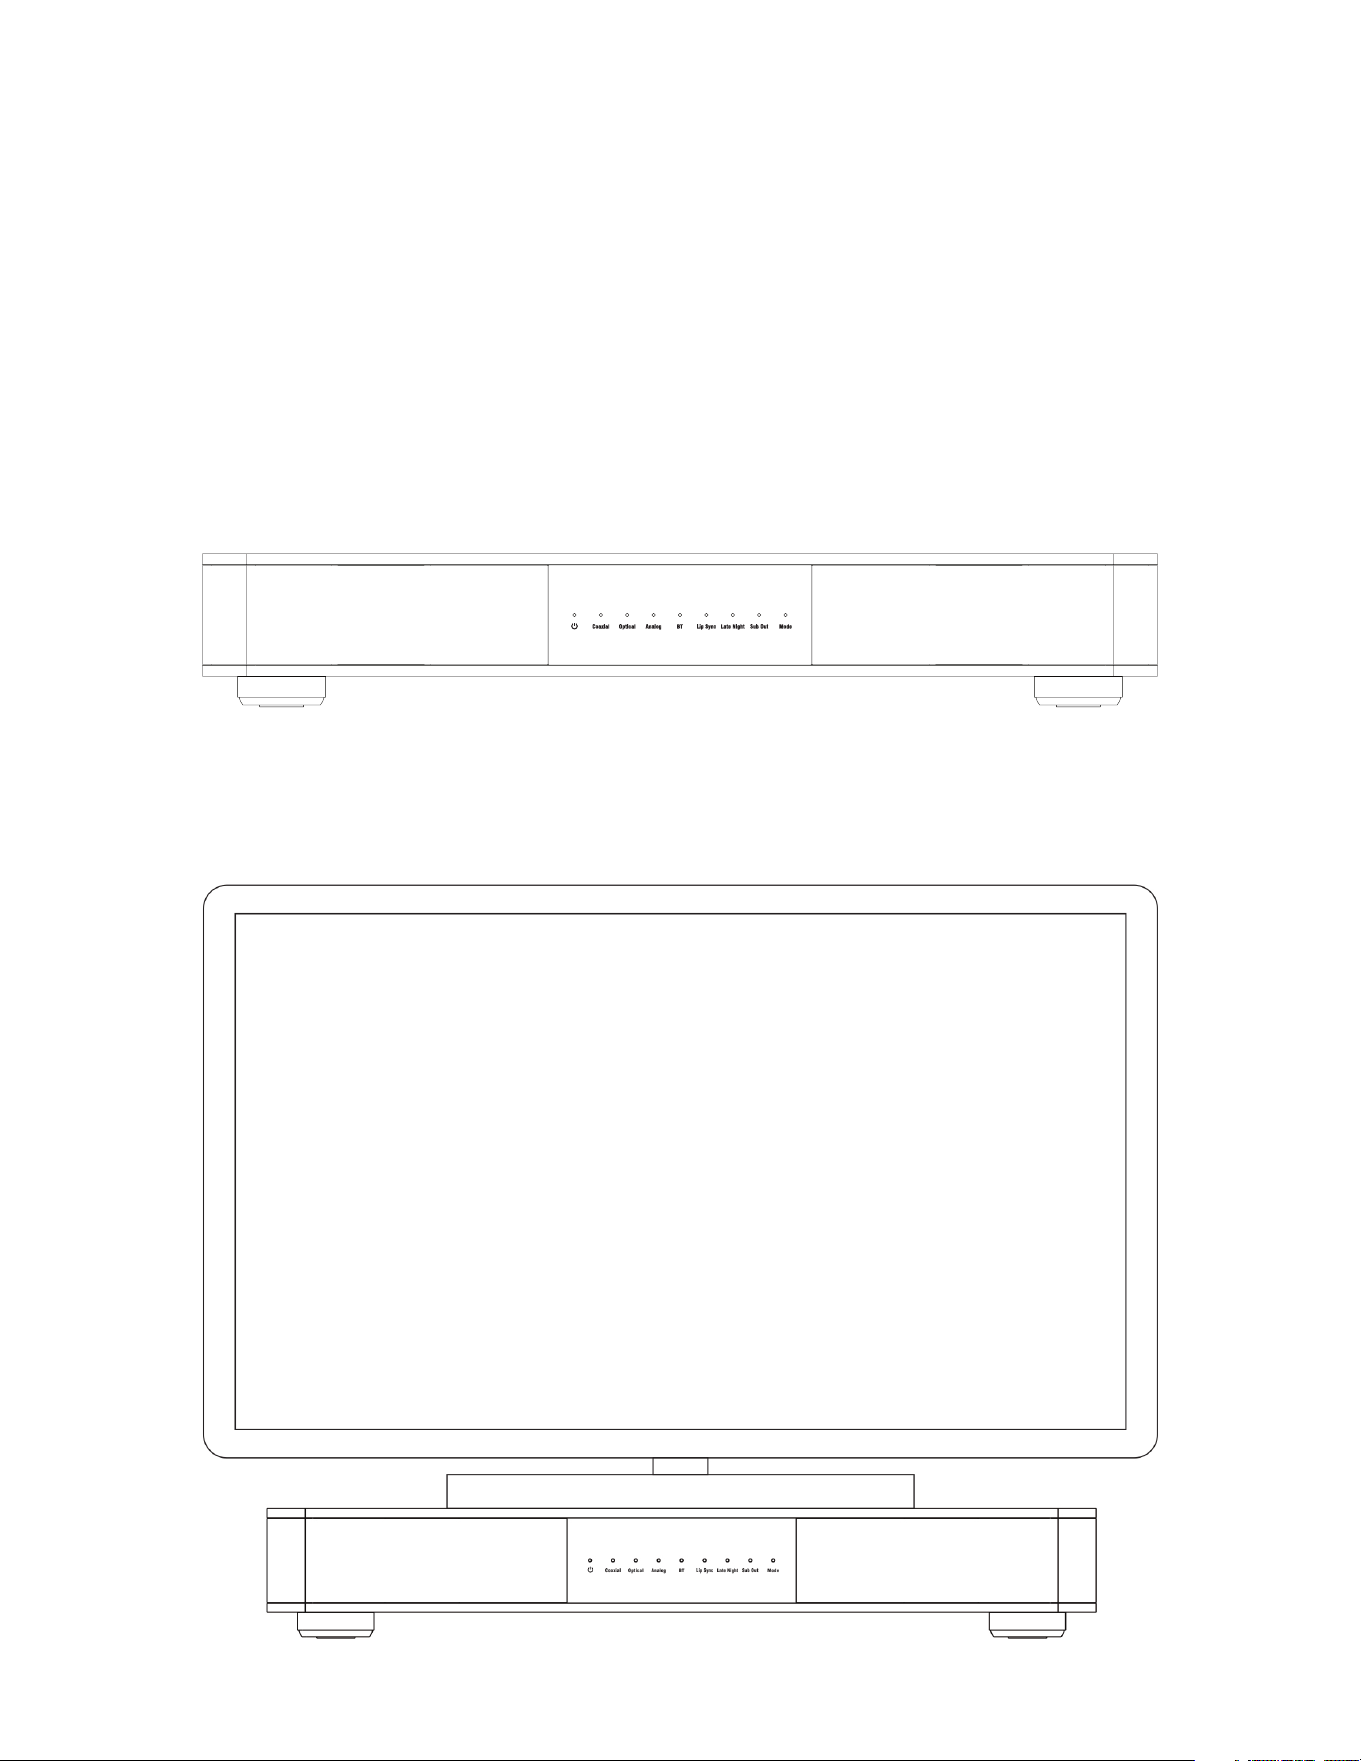
REAR CONNECTION PANEL
1. Input - Analog 5. Service Jack (Mini USB)
2. Input - Coaxial 6. Service Button
3. Input - Optical 7. Power Inlet
4. Sub Out
Before making a connection, ensure that all electrical devices are powered off as severe damage to equipment and/or your ears could result. Alpha VS21
has three optional inputs: Analogue (Auxiliary), Coaxial (Digital), Optical (Digital). For a simple single-wire setup, connect a single wire to any of these
inputs and connect all further devices directly to the TV.
To achieve the best possible sound reproduction, we recommend connecting individual sources such as a satellite receiver, Blu-ray or DVD player directly
to the Alpha VS21.
The following options are possible based on the type of source connections used:
1) Analogue Input (Auxiliary)
For connecting sources such as a portable media player or gaming console.
If your TV only has an audio output marked AUDIO OUT then connect it using the shielded stereo RCA cable plugged into the analogue input on
the VS21 marked ANALOG. Otherwise this input can be used to connect video cameras or game consoles.
2) Coaxial Input (Digital)
For connecting sources such as a DVD or Blu-ray Player.
To transmit the DVD sound signal connect the digital coaxial output from your Blu-ray or DVD player into the jack marked COAXIAL on the
VS21. To transmit the picture signal, your DVD player must also be connected to the TV.
3) Optical Input (Digital)
For connecting sources with optical output using an optical interconnect (Toslink).
Connect the optical interconnect from the media source output to the input marked OPTICAL on the VS21.
4) SUB OUT - Low Pass Filtered Output (Mono)
For connecting an external active subwoofer.
Subwoofer output can be activated using the supplied remote control, which will also redirect part of the low frequency content to the
subwoofer. Connect the Alpha VS21 to the low-level input of the external subwoofer using a subwoofer interconnect cable. See the
CONTROLLING section for remote functions.
5) Service Button
For changing the IR channel for the remote control and resetting the unit to factory default settings.
See “How to Restore to Factory Default” in the CONTROLLING section.
6) Power Inlet
For connecting the unit to a power source.
Note: We recommend that you deactivate the internal loudspeaker of the TV once the VS21 is connected (refer to TV manual for instructions).
5
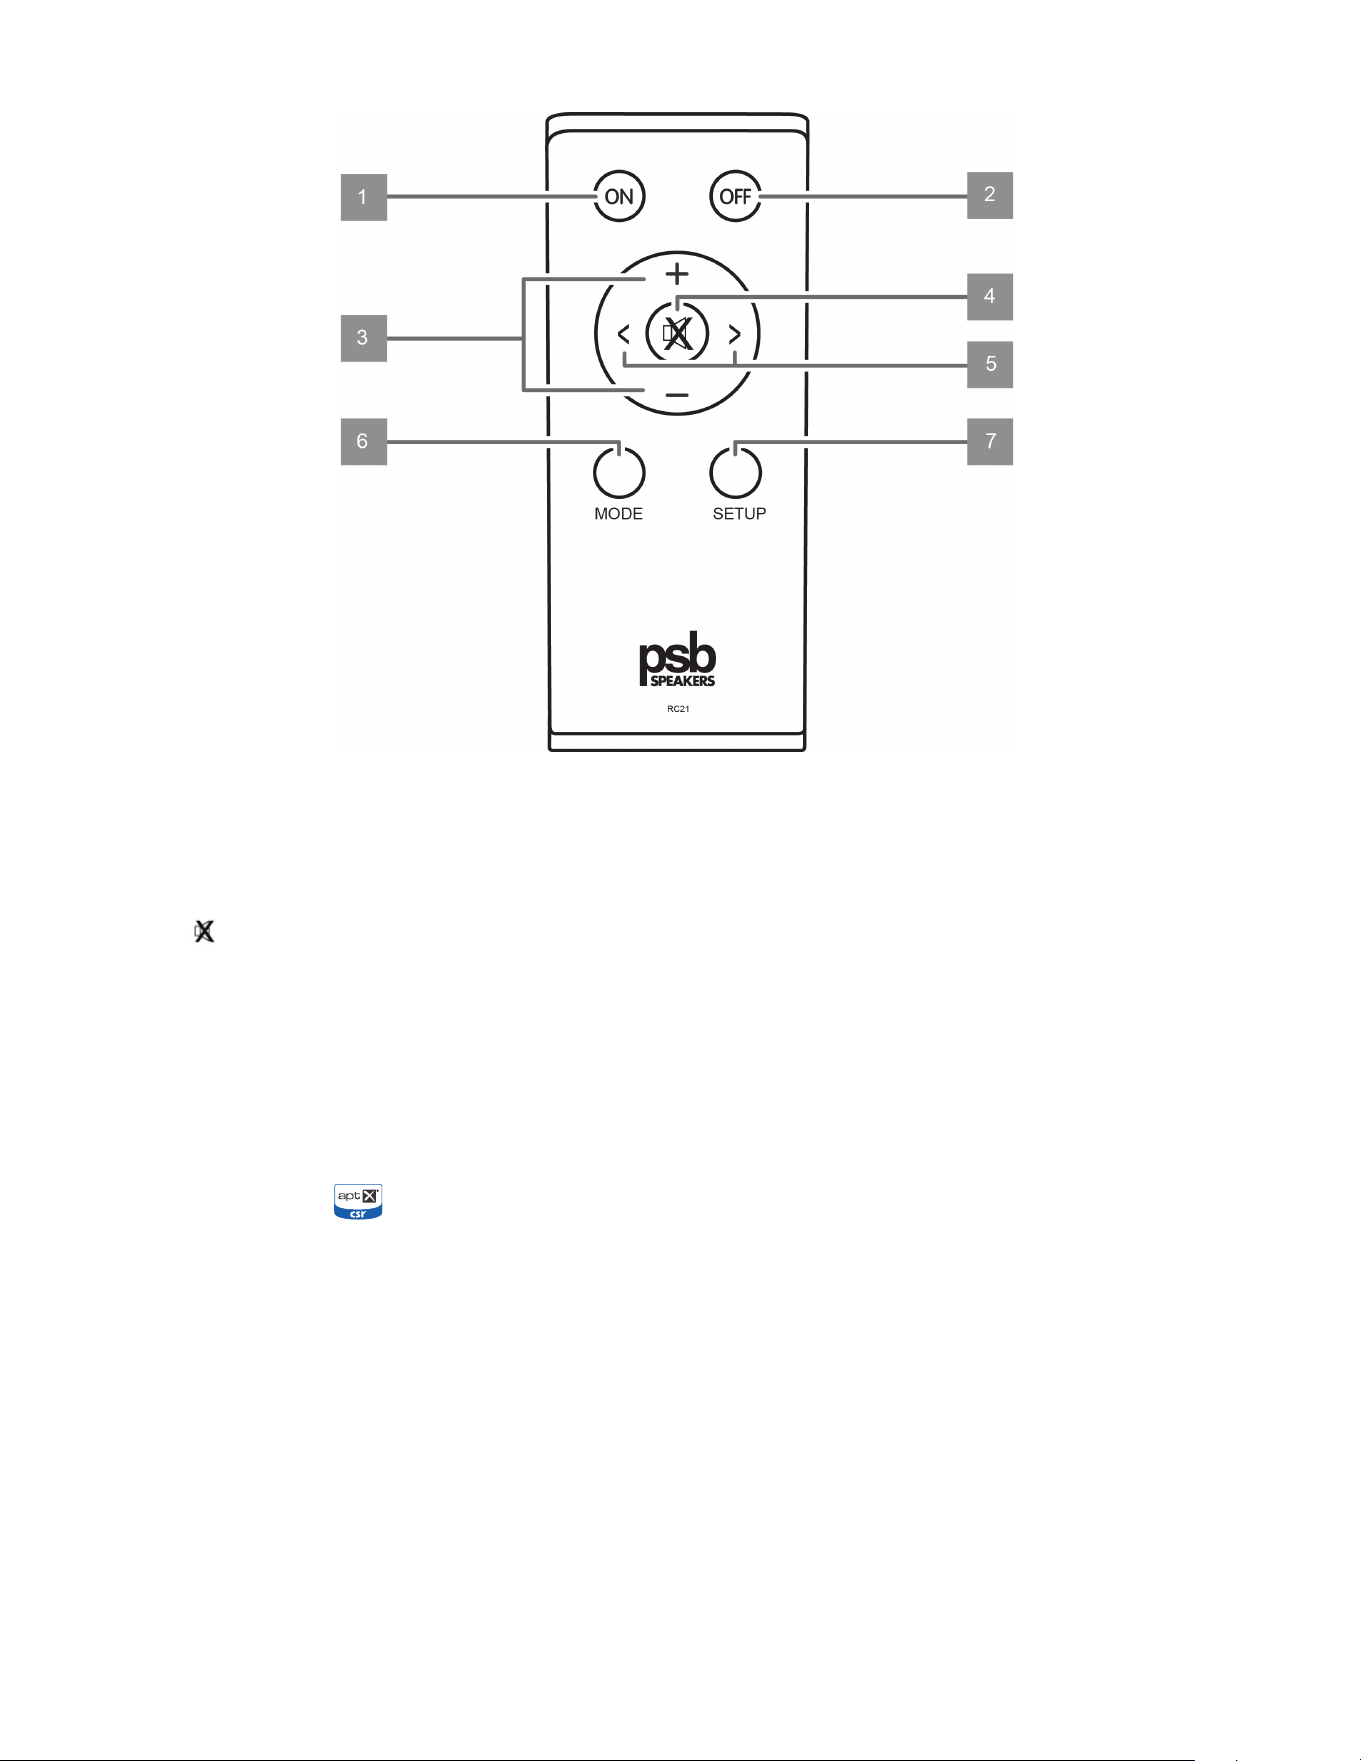
CONTROLLING
1) ON : Switch VS21 from standby mode to operating mode.
2) OFF : Switch VS21 to standby mode.
3) +/- : Increase or decrease audio level. Release mute function.
4) : Temporarily mute audio output or restore audio output from mute.
5) : Toggle and select source.
6) MODE : Select through Stereo (Normal); Dialogue (Enhanced Dialogue Clarity); WideSound™ (Expanded Soundstage); WideSound™ Plus
(Expanded Soundstage with Enhanced Dialogue Clarity) audio settings.
7) SETUP : Select through the Extended VS21 Sound Features (Sub Out Bass Management, Late Night Mode, and Lip Sync Mode).
Note: Any key command on the circular control pad of the remote control will activate the front panel LEDs and display the status of the unit.
Bluetooth Audio Playback
Bluetooth must be activated on the source device and it must support at least Bluetooth 2.0. The device also must be in clear line of sight and within
range (max. 10 m) of the Alpha VS21 for a proper wireless connection and continual music stream/playback.
How to Pair with a Bluetooth-enabled Device
I. Using the on the remote control, toggle between sources and switch the VS21 to the BT input. LED will flash blue-red for two minutes
while in Discovery Mode.
II. Open the Bluetooth settings on your mobile device and start searching for the unique device ID of the VS21 (VS21-XXXX). Once found select the
unique device ID as the playback device, and if the mobile device asks for an access code, enter 0000.
III. Once paired, the LED will be illuminated solid Blue to indicate a successful pairing. Start playback of Bluetooth device upon successful pairing.
IV. If the pairing connection fails, the LED will be solid Red. Repeat the above steps with the remote control and your mobile device to try
connecting again.
Using a Bluetooth-enabled Device
I. Cycle through inputs and select BT to activate Bluetooth discovery. Bluetooth device that was last paired to the VS21 will connect automatically
when Bluetooth is switched on and the front panel Bluetooth LED is Blue.
6

II. Start playback on your mobile device and the sound will automatically start to play.
How to Disable Bluetooth Audio Playback
I. Use the on the remote control to switch to one of the other three sources (Analogue, Coaxial or Optical).
II. Open the Bluetooth settings on your mobile device and turn off the Bluetooth connection or “unpair” the device from the Alpha VS21.
EXTENDED ALPHA VS21 SOUND FEATURES
The menu for extended sound features offers you the ability to correct out-of-sync playback, activate the output for an external subwoofer, and reduce the
dynamic range of source material.
If you press-and-hold the button labeled “SETUP” on the remote control for >5 seconds you will enter the setup menu and the front panel SUB OUT LED
will flash Amber.
SUB OUT (BASS MANAGEMENT)
When Sub Out is activated, the VS21 will high-pass filter the signal at 80 Hz. If Sub Out is off, the VS21 will be in full range.
How to Activate SUB OUT (BASS MANAGEMENT)
I. With the VS21 powered on, press and hold the “SETUP” button on the remote control for >5 seconds to enter the setup menu.
II. Front panel SUB OUT LED will start flashing Green to indicate that the setup menu is active.
III. Use the volume (+/-) buttons on the VS21 remote control to switch the output for the external subwoofer on/(+) or off/(-).
DOLBY
®
LATE NIGHT
With Dolby
®
Late Night you can reduce the dynamic range of Dolby
®
Digital material so that you can still hear quiet parts even when listening at low
volume levels—ideal for watching movies late at night when you don’t want to disturb anyone.
How to Activate Dolby
®
Late Night
I. With the VS21 powered on, press and hold the “SETUP” button on the remote control for >5 seconds to enter the setup menu.
II. Front panel SUB OUT LED will start flashing Amber to indicate that the setup menu is active.
III. Press the “SETUP” button on the remote control once to cycle to Dolby
®
Late Night listening.
IV. Use the volume buttons (+/-) on the VS21 remote control to toggle Dolby
®
Late Night on (+) or off (-).
Note: Effect of Dolby
®
Late Night depends on the encoding of the Dolby
®
Digital source content that you are playing.
LIP SYNC
With Lip Sync you can use the remote control’s volume buttons (+/-) to sync audio playback with displayed video content.
How to Activate Lip Sync
I. With the VS21 powered on, press and hold the “SETUP” button on the remote control for >5 seconds to enter the setup menu.
II. Front panel SUB OUT LED will start flashing Amber to indicate that the setup menu is active.
III. Press the “SETUP” button on the remote control two (2) times in succession to cycle to Lip Sync.
IV. Use the volume buttons (+/-) on the VS21 remote control to delay the audio playback in 10ms increments.
V. For each 10ms step the front panel LIP SYNC LED will flash Amber. If the audio delay is maxed (110ms) the front panel LIP SYNC LED will be
Red.
Note: Default is zero delay.
How to Exit Extended Sound Features
I. Press and hold the “SETUP” button for >5 seconds to exit the Extended Sound Features menu.
II. If the VS21 does not receive any input instruction from the remote control within a period of 20 seconds the menu navigation returns
automatically to normal mode.
7
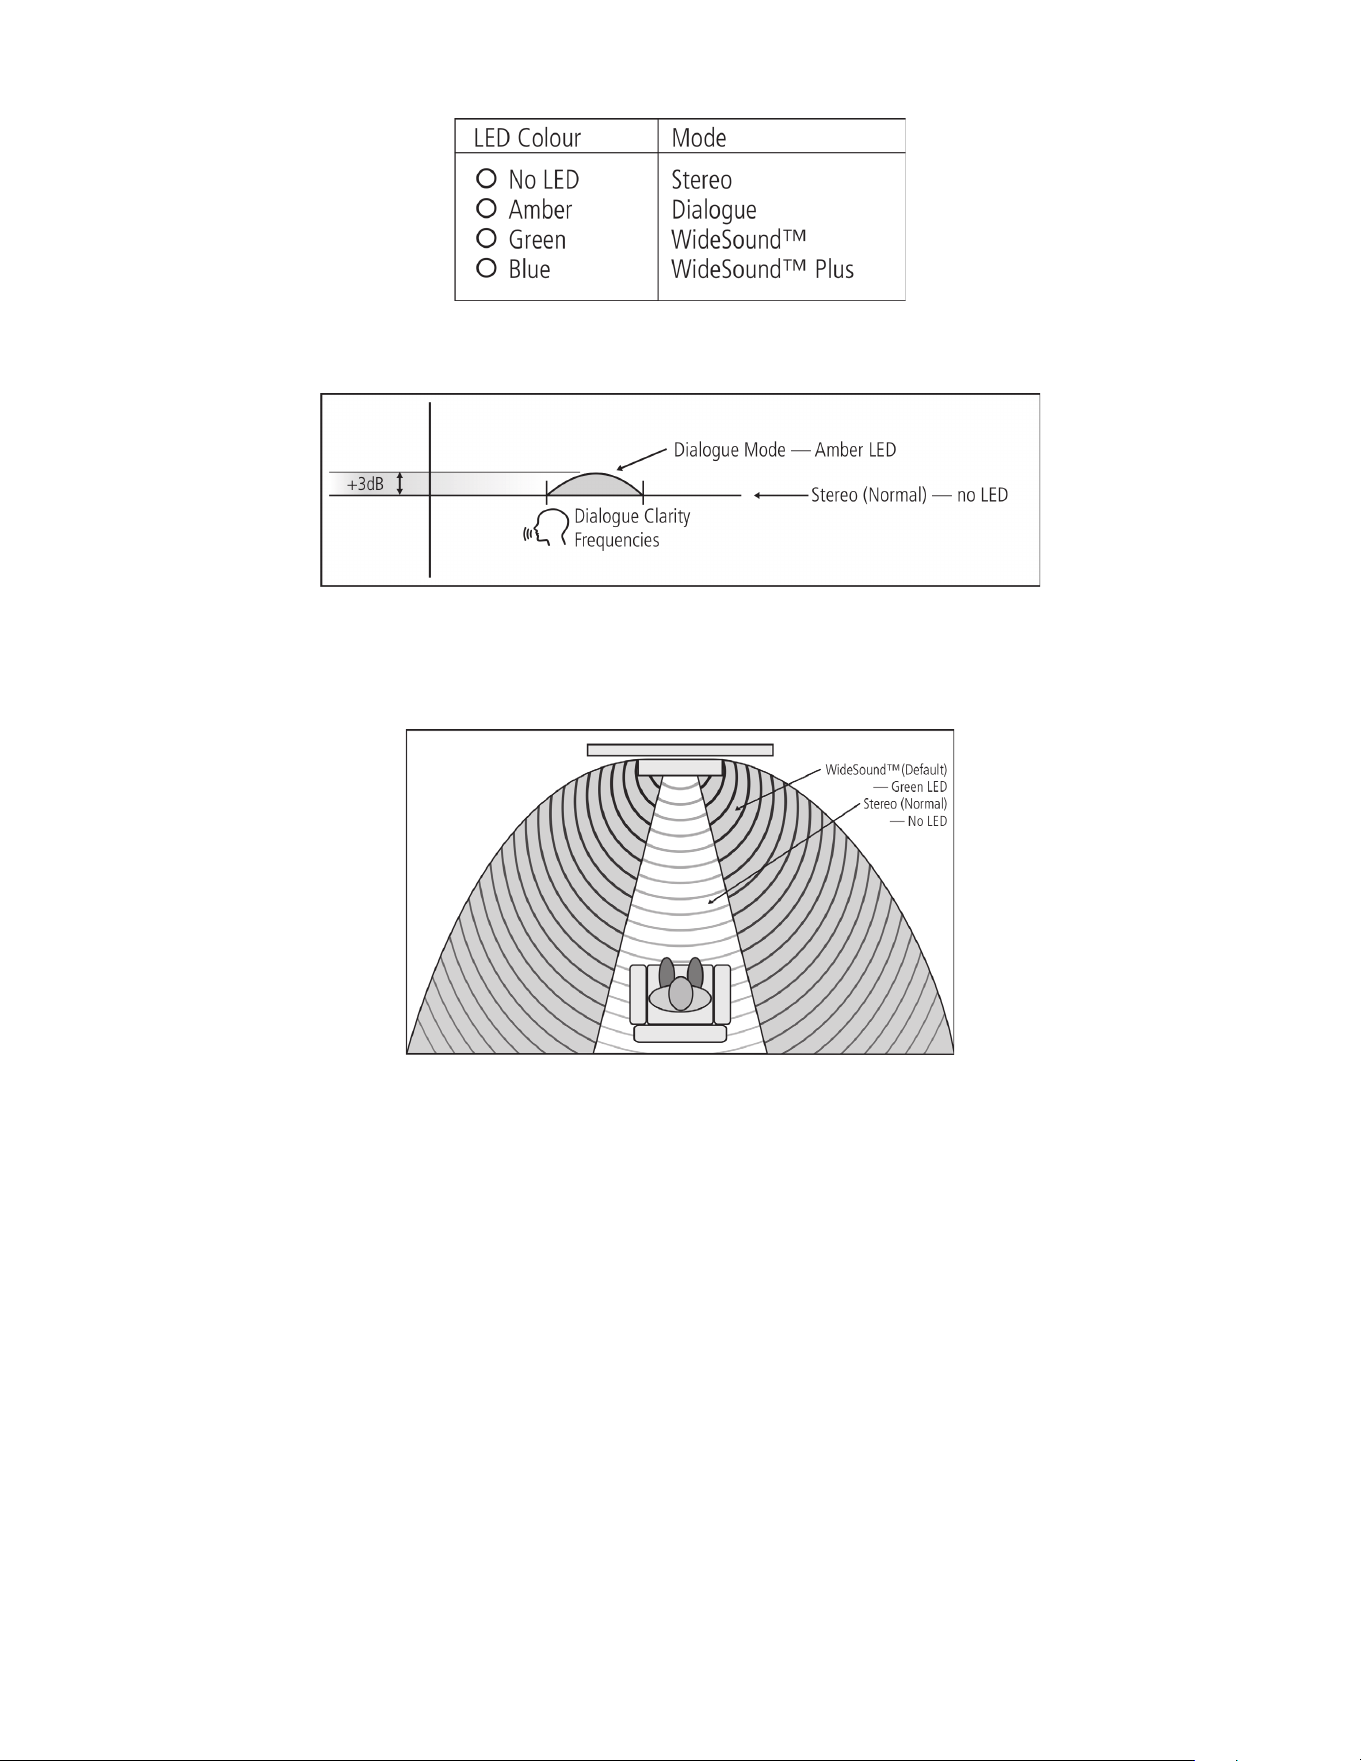
LISTENING MODE SETUP
Dialogue (Enhanced Dialogue Clarity)
Stereo (Normal)
WideSound (Expanded Soundstage)
WideSound Plus (Expanded Soundstage with Enhanced Dialogue Clarity)
How to Activate Various Listening Modes
I. Press the “MODE” button on the remote control once to activate the display and cycle through the four listening modes.
II. Use the
on the remote control to toggle between the different listening modes sources (WideSound
TM
, WideSound
TM
Plus, Stereo,
Dialogue).
Note: WideSound
TM
(Expanded Soundstage) is the factory default when powered on.
STANDBY
With the corresponding end of the mains power cord connected to the AC mains input of the VS21 and the plug connected to a mains power source,
press “ON” on the remote control to turn on the VS21 from standby mode. The front panel power indicator will turn from Amber to Blue. Press “OFF” on
the remote control to return to standby.
AUTO STANDBY
The VS21 will automatically go to standby mode if there is no user interface interaction and no active source input within 20 minutes.
Coax, Optical and Analogue Sources
I. With a coaxial, optical or analogue source selected, the VS21 will automatically go to standby mode and lower the power consumption to
<0.5W, if there is no user interface interaction and no active source input within 20 minutes.
II. Front panel power indicator will change from Blue to Amber to indicate this.
III. To wake up the VS21, press “ON” on the remote control.
8

Bluetooth Source
I. With an active Bluetooth connection, the VS21 will automatically go to standby mode and lower the power consumption to <0.5W, if the
device’s audio streaming has stopped for over 20 minutes.
II. Front panel power indicator will change from Blue to Amber to indicate this.
III. With auto standby disabled, and the streaming of the device’s audio resumes, the VS21 will automatically switch from standby to ON which is
indicated by the front panel power indicator changing from Amber to Blue.
IV. If the device is moved out of range and the Bluetooth connection is lost and not reconnected within 20 minutes, the VS21 will automatically go
to standby mode and lower the power consumption to <0.5W.
V. To wake up the VS21 for Bluetooth listening, press “ON” on the remote control to reactivate Bluetooth Discovery Mode.
VI. At this point a previously paired device (remembers up to 3 devices), if within range, can immediately start streaming audio. For connecting a
new device, follow the Bluetooth pairing instructions in this manual.
Disabling Auto Standby mode
I. After the LED display has timed out, with the unit powered on, press and hold the remote control’s “OFF” button for >5 seconds until the front
panel power indicator flashes Red once.
II. With the auto standby mode disabled, if there is no user interface interaction and no active source input within 20 minutes, the unit will be
muted, to bring the power consumption to <6W.
III. To enable the auto standby mode again, press and hold the remote control’s “OFF” button until the front panel power indicator flashes Blue
once.
How to Perform Factory Reset
I. Press and hold the SERVICE BUTTON on the rear panel until all front panel LEDs flash once.
IR Remote Learning Functions
Alpha VS21 is capable of learning the infrared code of your universal or TV remote control. This will allow you to control the VS21 and your TV with
one remote control. You can integrate the functions of the speaker system to any key of the TV remote control. When selecting the key of choice on the
universal remote for VS21 programming, make sure the functions/commands do not interfere or conflict with other devices like the TV.
Note: IR Remote Learning may not be compatible with all remote controls.
IR Remote Learning Procedure
I. Press and hold the remote control’s “ON” button for >5 seconds to enter Learning Mode. Front panel power indicator will pulse Amber to
indicate this.
II. Once in Learning Mode, with the front panel power indicator pulsing Amber, press the key to be learned on the VS21 remote control.
III. Front panel power indicator will flash Amber three (3) times.
IV. Press the equivalent button on the preferred universal remote control.
V. Front panel power indicator will flash Amber three (3) times to confirm learned commands. Repeat these steps for other functions.
TROUBLESHOOTING
Issue Possible Cause Solution
Will not power on Power cable may not be properly connected to
the power outlet and/or VS21.
Check connection.
Low volume output Volume set too low. Increase (+) the volume to a medium level using the “VOLUME” button.
Also increase the volume of the source device.
No sound reproduction I. Sound format of the source device wrongly
selected (Digital input: Optical and Coaxial).
I. Check the correct setting of your source device (see page 6). Dolby
digital coded output formats cannot be reproduced.
II. Source device not producing audio signal. II. Digital output on the source device not activated (refer to device
manual for instructions).
III. Cable not correctly connected/faulty cable. III. Check the connection of the source device to the VS21 and change the
cable where necessary.
IV. Unsupported audio format (Dolby 6.1, 7.1,
DTS).
IV. Source device (Blu-ray Player) must be upstream from the television
to decode any unsupported content into a two-channel stereo signal.
Television cannot decode higher audio signal.
V. Bluetooth not paired. V. Re-pair the device following the “How to Pair with a Bluetooth-
enabled Device” instructions in the CONTROLLING section of this
manual.
9

Issue Possible Cause Solution
Remote control not
working
Battery is low or missing. Replace the battery. Make note of the correct polarity before inserting the
battery.
Audible distortion in
playback
Interconnect cable from source device to VS21
is too long.
Use a shorter interconnect cable.
No Bluetooth playback I. There is no connection between the VS21
and the Bluetooth-enabled device.
I. Pair/connect your Bluetooth-enabled device as described in the
CONTROLLING section.
II. Bluetooth-enabled device is paired but there
is still no playback.
IIa. Bluetooth-enabled device must be paired/connected again.
IIb. You are out of range (beyond 10 m).
IIc. Set the volume on the Bluetooth-enabled device to max level.
IId. Increase the volume of the VS21.
IIe. Make sure that any device that may cause interference, such as a WiFi
router or laptop, is not setup in direct proximity to the VS21.
IIf. Disable the WiFi signal on your Bluetooth-enabled device to avoid
further interference.
IR Remote Learning not
working
Unsupported remote control IR Remote Learning may not be compatible with all remote controls.
PROTECTING YOUR INVESTMENT
For long lasting enjoyment of your PSB product, you should respect their limits and avoid excessive volume levels for music or movie playback. Excessive
volume levels can damage all types of speakers.
If your speakers are pushed to excessive volume levels, they could be driven into “clipping”, which may result in severe and/or permanent damage. If
listening to your speakers at loud levels, listen carefully for any signs of harsh, distorted midrange and diminishing precision – if detected, turn the volume
down immediately.
NEVER TEST PEAK LISTENING LEVELS OF YOUR SPEAKERS BY TURNING THE VOLUME TO THE MAXIMUM LEVEL.
CARE AND CLEANING
For safe, sanitary use, it is essential to maintain and clean your speakers periodically. However, excessive cleaning may cause damage and jeopardize the
longevity of the product. When not in use, avoid storing in extreme hot or cold temperatures and humidity, and avoid exposure to liquids.
I. Packaging
We highly recommend retaining all product packaging for any necessary transporting. To transport, carefully place the soundbar into its original
packaging and close each panel.
II. Cabinet Care
PSB cabinets have varying materials and finishes, including wood veneers, vinyl, anodized aluminium and high gloss, and should be treated with
the same care you would with similar finishes such as on furniture. Dust lightly with a soft cloth, avoiding abrasive materials that will cause
permanent damage to the cabinet. If necessary, wipe carefully with a cloth slightly dampened with water-based cleaner to remove heavy soil.
III. Drivers and Port Care
During light cleaning, avoid touching speaker diaphragms as it could cause permanent damage to the tweeter and/or drivers. To clean the driver
ports, we suggest using a lint-free cloth.
ENVIRONMENTAL PROTECTION
At the end of its useful life, this product must not be disposed of with regular household waste but must be returned to a collection point for the recycling
of electrical and electronic equipment. The symbol on the product, owner’s manual and packaging, point this out.
10

The materials can be reused in accordance with their markings. Through re-use, recycling of raw materials, or other forms of recycling of old products, you
are making an important contribution to the protection of our environment.
Your local administrative office can advise you of the responsible waste disposal point.
We appreciate your purchase of our product, and thank you for taking the time to read this owner’s guide. We hope you enjoy the exceptional satisfaction
that PSB Speakers have to offer, and wish you many years of enjoyable listening.
Real Sound for Real People.
PSB Speakers
633 Granite Court
Pickering, Ontario L1W 3K1
CANADA
www.psbspeakers.com
888-772-0000 (905) 831-6555
Fax: 905-831-6936