
Espresso
Coffee
Machine

CONTENTS
SAFETY PRECAUTIONS
COMPONENTS
OPERATING INSTRUCTIONS
CLEANING & MAINTENANCE
TROUBLESHOOTING
TECHNICAL SPECIFICATION
.
1
3
4
9
11
12

SAFETY PRECAUTIONS
Please read this manual carefully. Please keep this user manual as well as the appliance
certificate in a safe place for later use or for subsequent owners.
In case the product needs to be repaired while in operation, kindly get in touch with our after-sales
service team. Avoid disassembling the product yourself to prevent any potential dangers.
This appliance may be used by children over the age of 8 years old and by persons with reduced
physical, sensory or mental capabilities or by persons with a lack of experience or knowledge if they
are supervised or instructed by a person responsible for their safety how to use the appliance safely
and have understood the associated hazards.
This appliance is intended for private domestic use and household environment only. Only used
the appliance in enclosed spaces.
This appliance is intended for use up to a maximum height of 2000 meters above sea level.
Warnings and important instructions appearing in this guide are not meant to cover all possible
conditions and situations that may occur. Common sense, caution, and care must be exercised when
installing, maintaining, or operating your appliance.
Risk of suffocation!
Children may put packaging material over their heads or wrap themselves up in it and suffocate.
- Keep packaging material and small parts away from children.
- Children may breathe in or swallow small parts, causing them to suffocate.
Risk of electric shock!
If the appliance or the power cord is damaged, this is dangerous:
- Never operate a damaged appliance.
- Never pull on the power cord to unplug the appliance. Always unplug the appliance at the mains.
- If the appliance or the power cord is damaged, immediately unplug the power cord or switch off
the fuse in the fuse box.
Improper repairs are dangerous:
- Repairs to the appliance should only be carried out by trained specialist staff.
- Only use genuine spare parts when repairing the appliance.
- If the power cord of this appliance is damaged, it must be replaced by the qualified technician.
1

Penetrating moisture may cause an electric shock.
- Before cleaning, pull out the mains plug or switch off the fuse in the fuse box.
- Do not use wet sponge cloths, steam- or high-pressure cleaners to clean the appliance.
- The appliance must not be immersed in water.
Risk of scald!
The appliance becomes very hot during use! Allow the appliance to cool down before removing
or attaching parts, moving, relocating or cleaning it.
- Never touch the hot appliance parts like the steam/hot water outlet, the metal part of the
portafilter or the filter during or shortly after use.
- After prolonged use, the cup warmer gets so hot that you might scald yourself on it!
Never point the steam/hot water wand towards persons, animals or steam and moisture sensitive
furniture!
- The escaping steam or the water is very hot and could cause scalding!
Use caution
Never take the portafilter off while the appliance performs a brewing process or steams milk -
the appliance is pressurized!
Do not leave the espresso machine unattended when in use. This applies especially when
children are nearby.
Only cups and tamper may be placed on the cup warmer. Do not place any other items on the
appliance.
Keep the appliance and accessories clean.
If the appliance is to be left unattended, cleaned, moved, assembled, or stored, always switch OFF
the espresso machine with the ON/OFF button. Switch off at the power outlet and unplug.
Ensure the product is properly assembled before first use.
Do not use any other liquid apart form cold mains/tap water. We do not recommend the use of highly
filtered, demineralised or distilled water as this may affect the taste of the coffee and how the
espresso machine is designed to function.
SAVE THESE INSTRUCTIONS
2
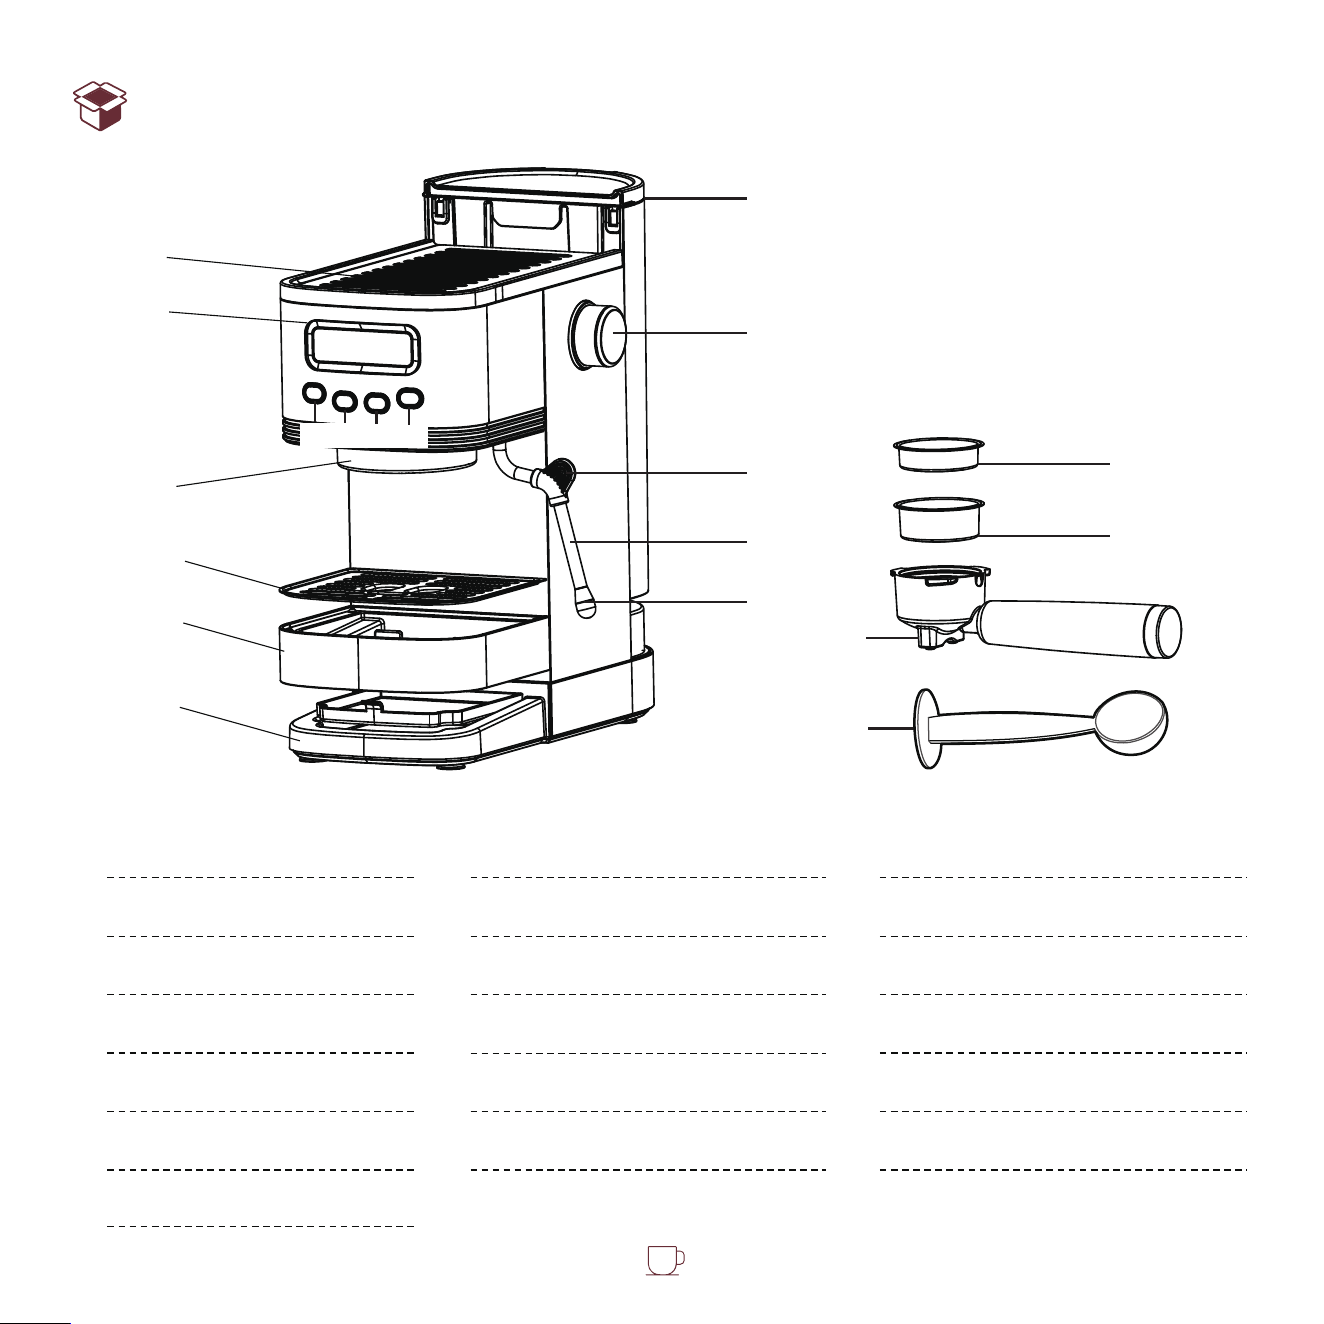
COMPONENTS
1
2
7
8
9
10
11
12
13
19
18
17
16
15
14
3
4
5
6
Cup Warmer
Display Screen
ON/OFF Button
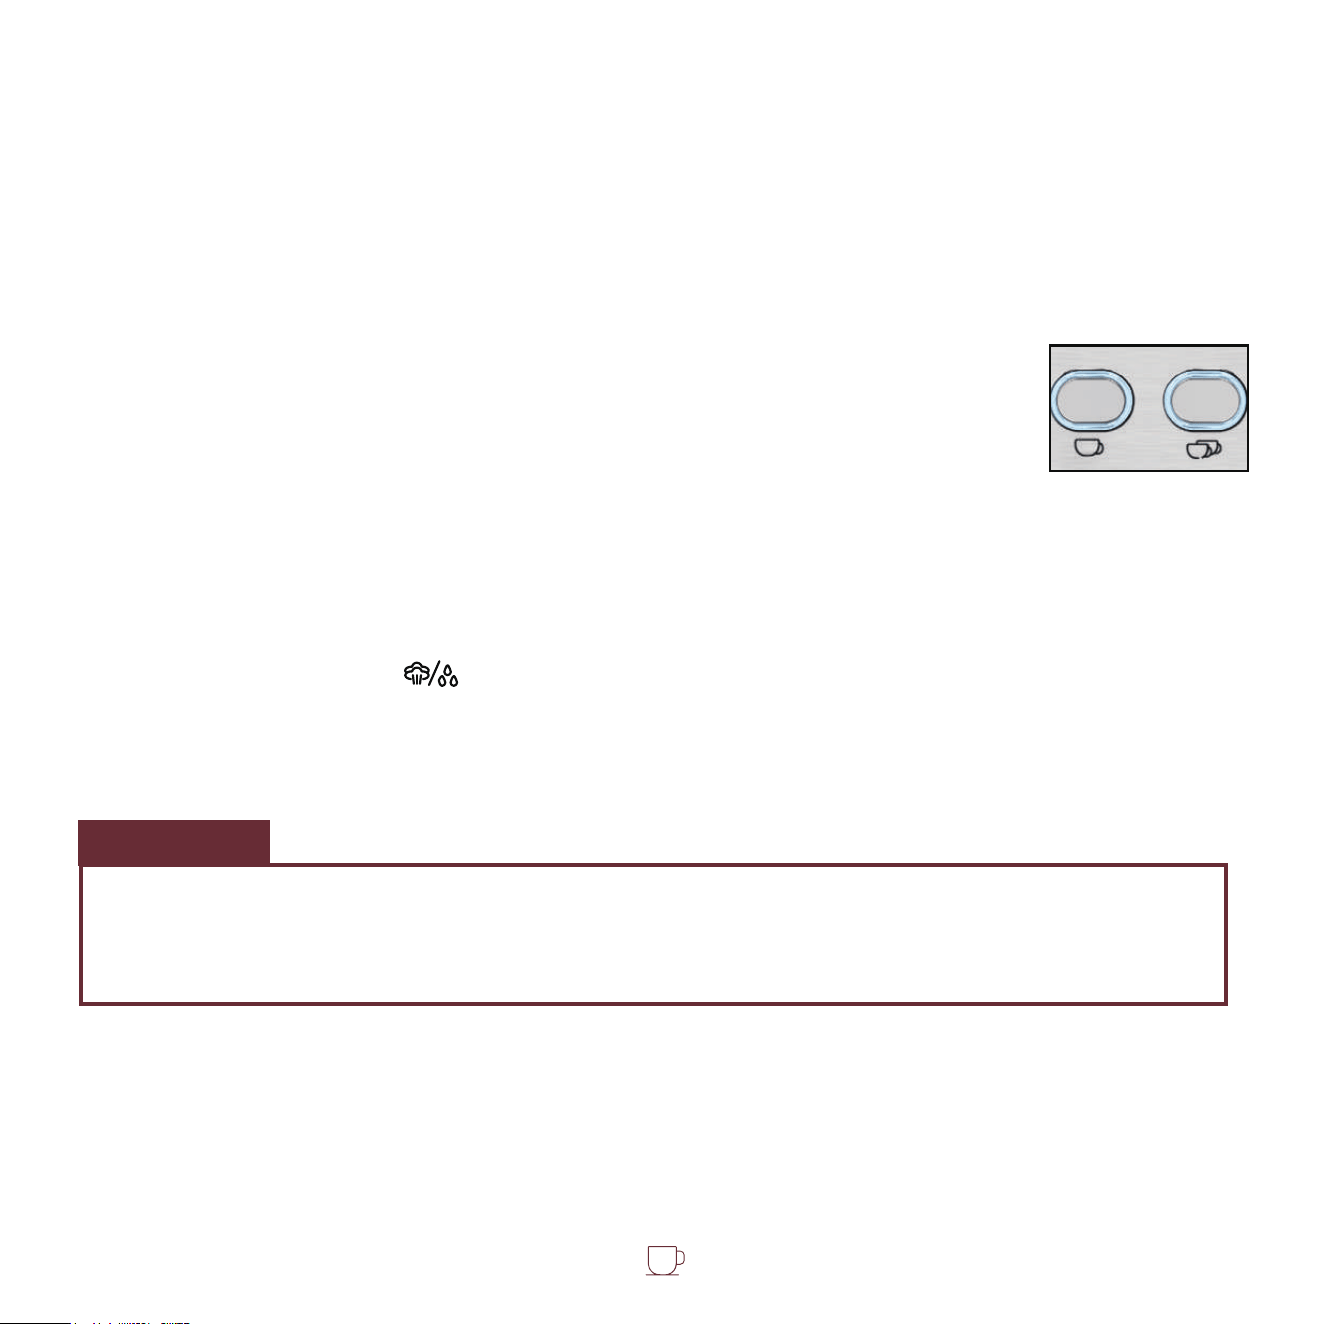
1-Shot Button
2-Shot Button
Steam/Temp. Button
Brew Head
Drip Plate
Drip Tray
Inner Drip Tray
Single Shot Filter
Double Shot Filter
Portafilter
Removable Water Reservoir
Steam Knob
Thermo-insulated Handle
Steam Wand
Steam Nozzle
Measure Spoon with Tamper
❸ ❹ ❺ ❻
3
1
2
7
8
9
10
16
17
18
19
11
12
13
14
15
OPERATING INSTRUCTIONS
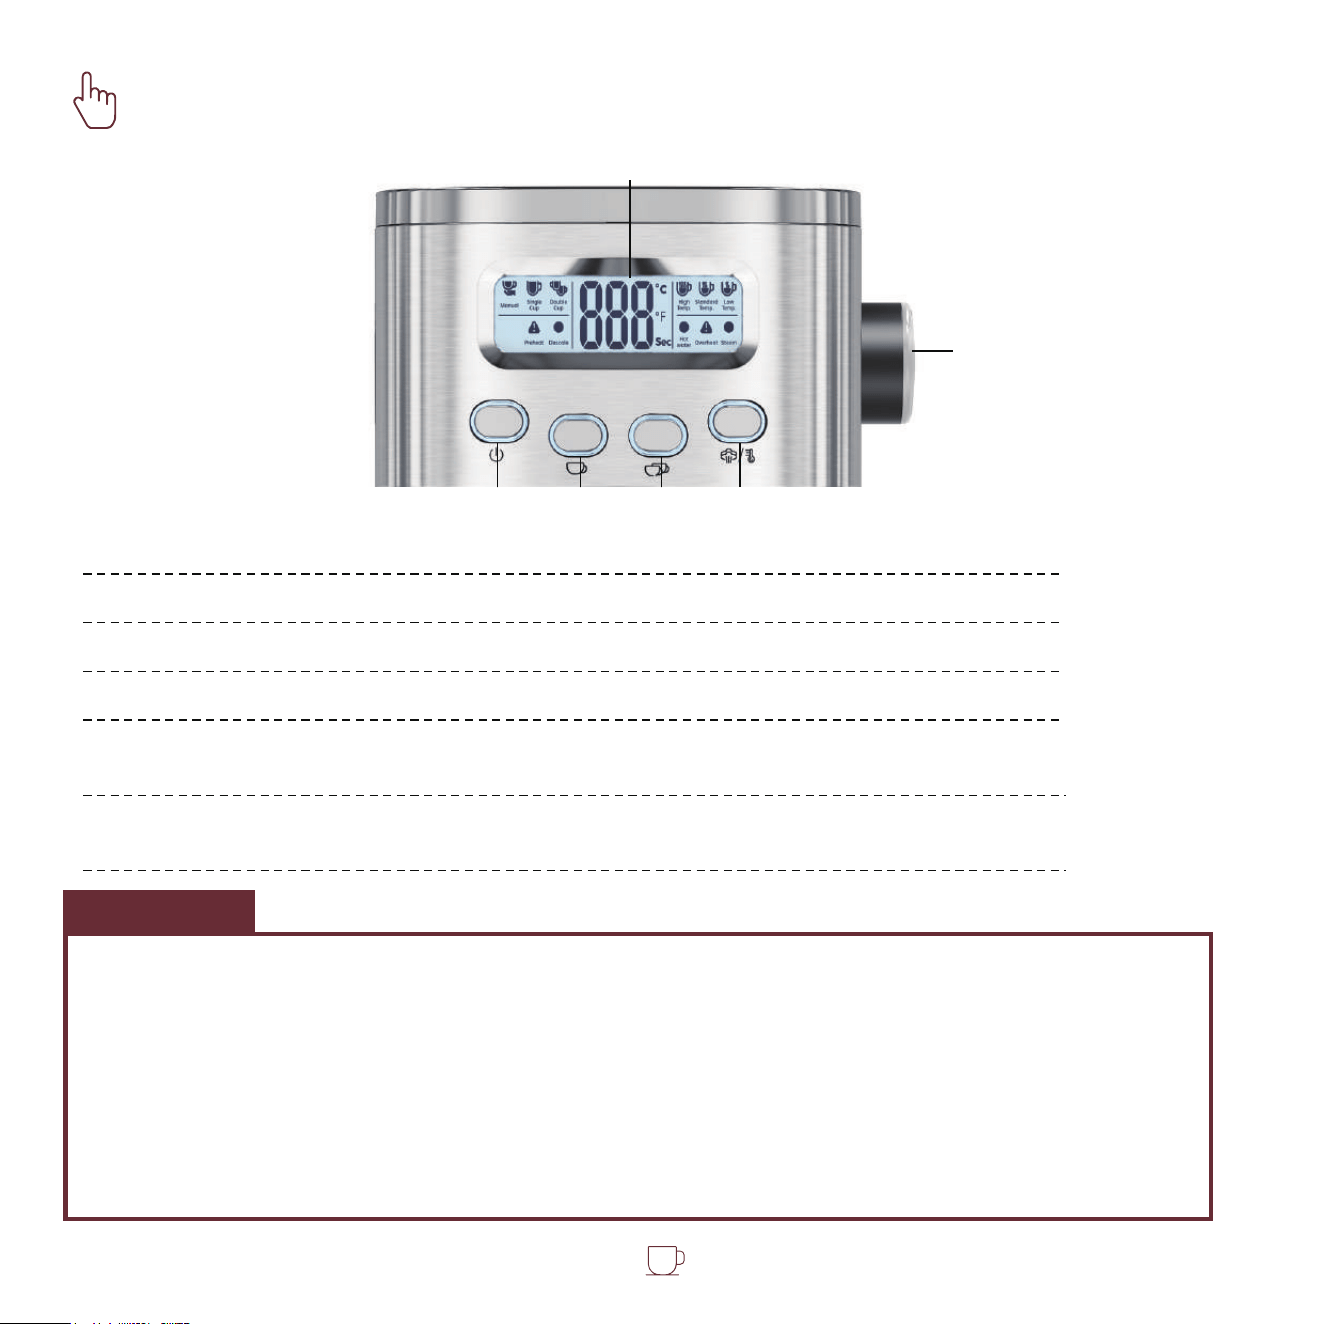
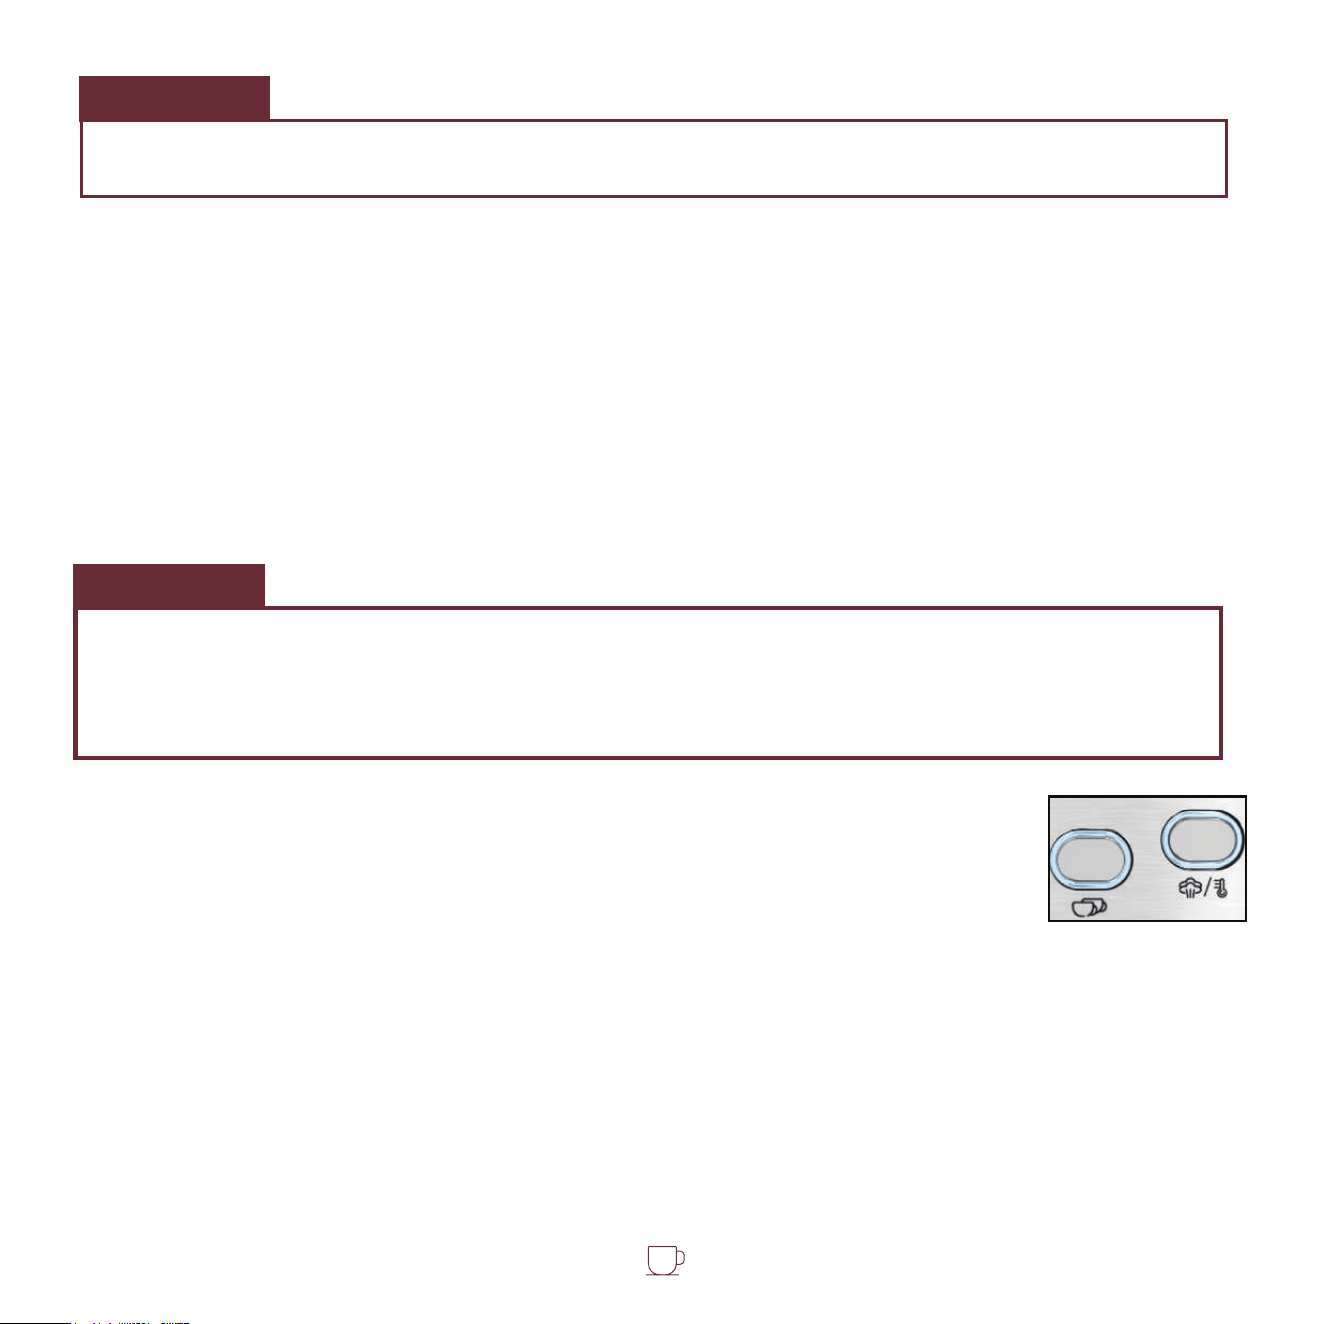
Control Panel
LCD Display
Display the working status
Press to turn ON/OFF the machine
Press to enter/quit steam mode
Hold down for 3 seconds to set the temperature
Press for single shot brewing
Press for double shot brewing
Rotate counter-clockwise to make steam
or hot water. Return it when finished
ON/OFF Button
1-Shot Button
2-Shot Button
Steam/Temp. Button
Steam Knob
A
B
C
D
E
F
A
B C D E
F
1. Manual brewing:
Press the 1-Shot button twice to start the manual frothing. Press the button again to stop
brewing. Max brewing time: 60 seconds.
2. Temperature setting:
Hold down the Steam/Temp. button for 3 seconds to enter the temperature setting.
Then press the button to toggle among High / Standard / Low temperature.
After selecting, wait for 5 seconds to exit the setting mode automatically.
NOTE
4
Before First Use
1. There may be a loud noise and a little shake when the machine pumps the water out the
first time. This is normal. The machine is releasing some air from the system. The noise will be
weak in the future using.
2. The filter could be a bit snug and difficult to remove from the portafilter when you need to
replace it. You can use a different filter to help pry it out.
NOTE
1. To ensure the first cup of coffee tastes excellent, please prepare the coffee maker as follows:
2. Remove the plug at the bottom of the water reservoir.
3. Fill the water reservoir with ambient temperature water up to the “MAX” mark.
4. Place an empty cup/mug under the steam wand.
5. Connect the machine to a power source, press the ON/OFF button. The power indicator turns on and
the machine starts to preheat. The preheating takes about 2 minutes.
6. Once the preheating is finished, all buttons will light up.
7. Rotate the steam knob to position, the machine will start to make hot water.
8. Let the hot water come out of the steam wand for 8 seconds, then return the steam knob to the OFF
position. This process lets the water flow into the empty pump for the first time. DISCARD the used
water.
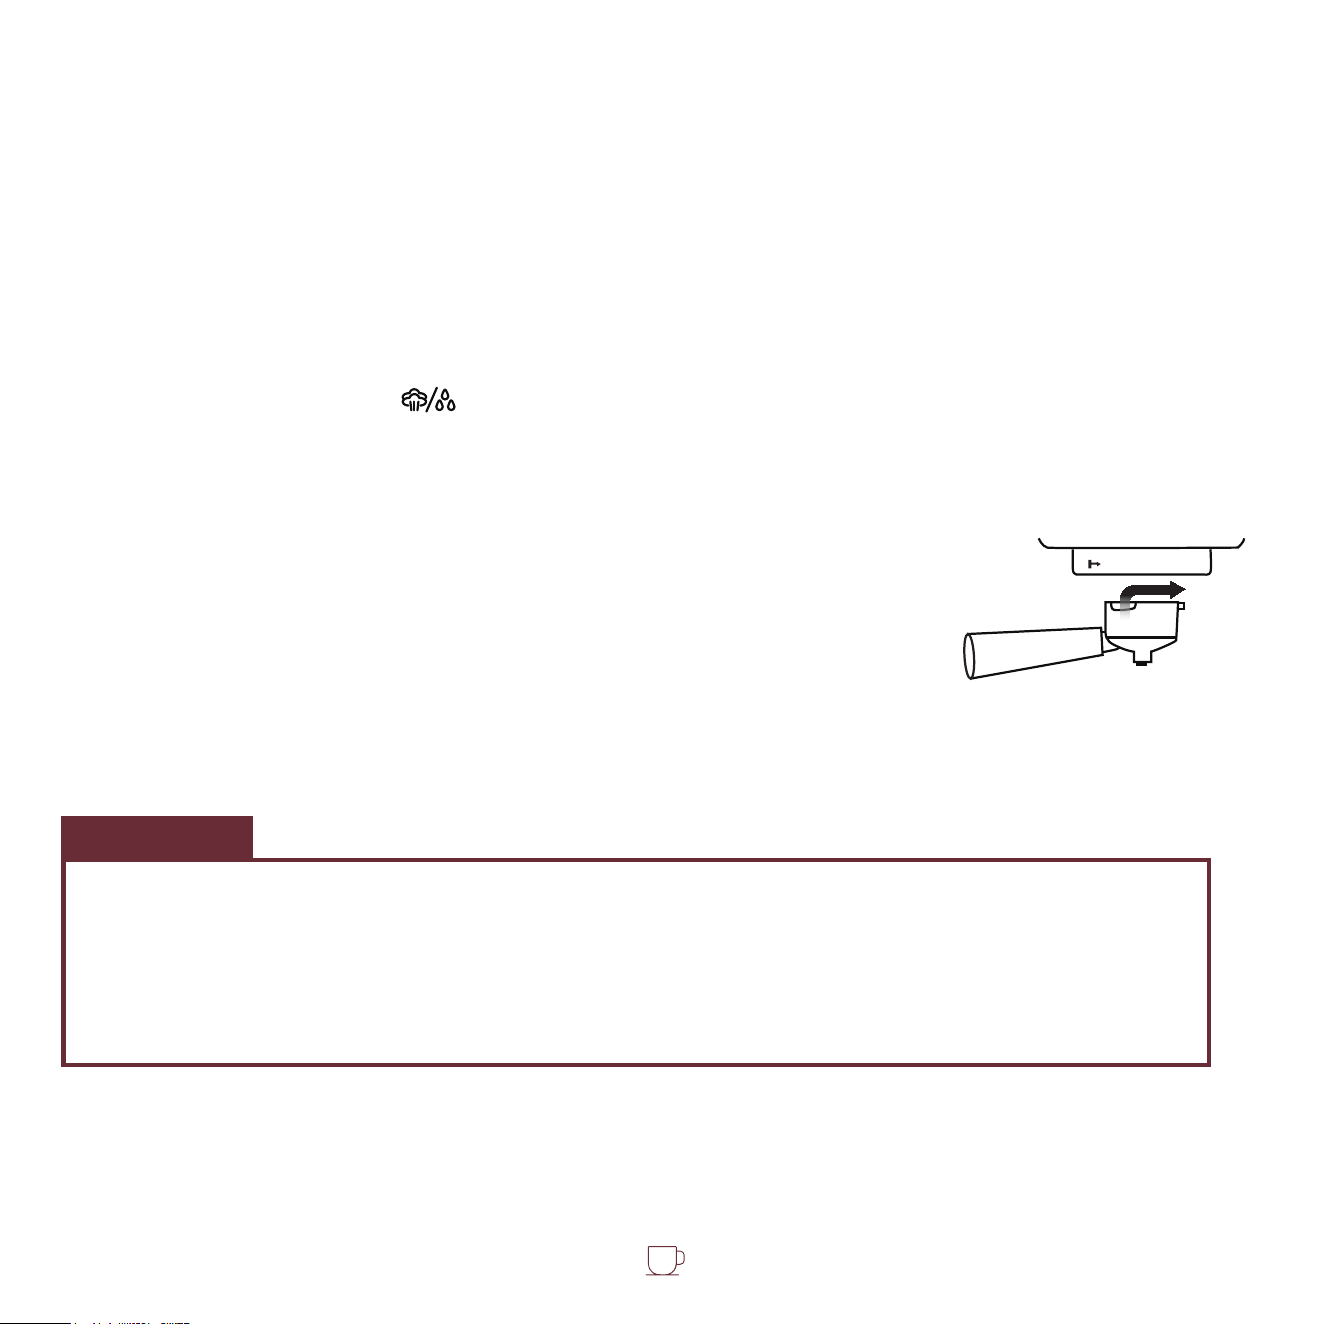
9. Place the brewing filter without any ground coffee into the portafilter.
Place the portafilter at a 45° angle to the left and slot it into the brew
head, then rotate it to the right to lock it in place. The portafilter should
be installed at a right angle to the machine or with a slight tilt to the right.
10. Place an empty cup/mug under the portafilter. Press the 1-Shot or 2-Shot button to brew. After the
brewing cycle, DISCARD the used water.
t Lock
5
Making Espresso
Frothing Milk / Making Cappuccino or Latte
Using cold portafilter, filters, and cups can lower the extraction temperature, impacting the espresso
quality. It is advisable to run a brewing cycle without ground coffee to preheat them before extraction.
1. Remove the portafilter by turning it clockwise. Place the brew filter into the portafilter, making sure it
fits properly.
2. Use the measure spoon, add ground coffee to the brewing filter then tamp the ground coffee down
tightly with the spoon.
3. Make sure the steam knob is on OFF position.
4. Follow the Operating Instruction to set the temperature, and then press the 1-Shot or 2-Shot button
according to your favor.
Check out the Quick Start Guide (brochure) for more brewing advices.
Before starting, it is important to slightly move the steam wand outwards in order to insert the steam
nozzle underneath the milk pitcher and facilitate the movements required to froth the milk correctly.
1. Press the Steam/Temp. button. If the temperature is too low to produce steam, the Preheat icon will
be flashing and the machine will be preheating.
2. The Preheat icon will disappear once the preheating is done, leaving only the Steam icon displayed.
3. Rotate the steam knob in a counter-clockwise direction to remove any condensation from the wand
before turning it off.
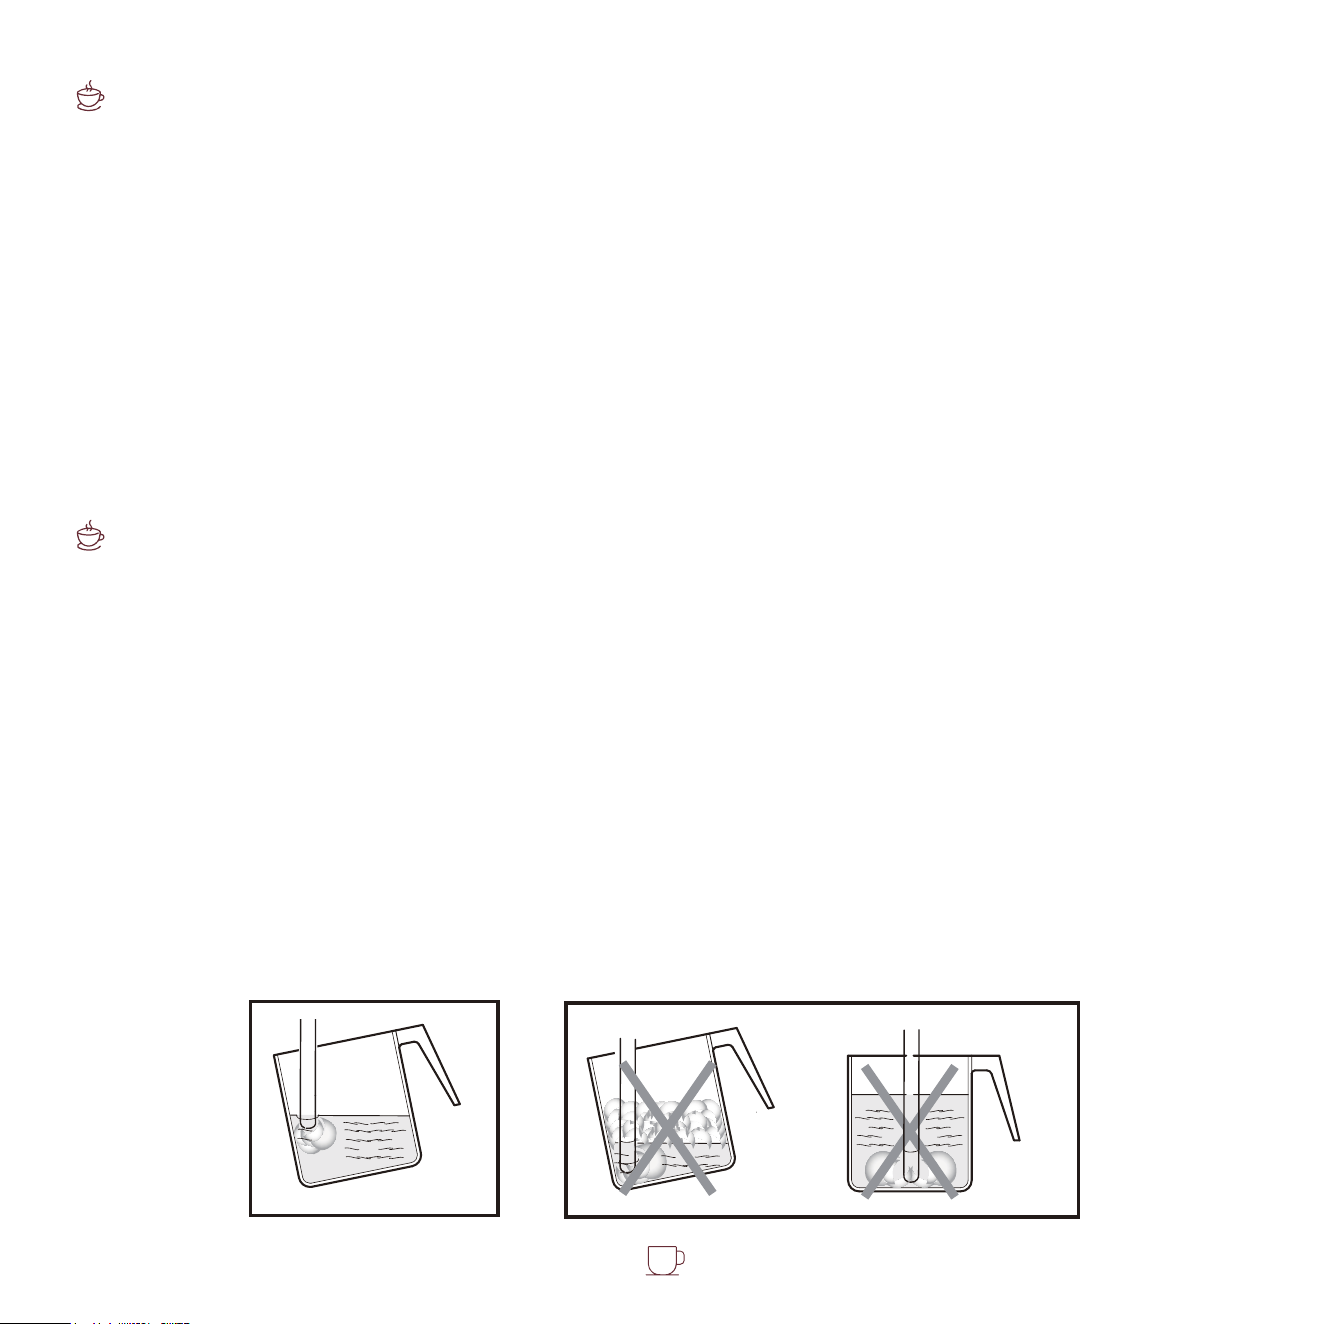
4. Place the milk pitcher (half-filled with cold whole milk) beneath the steam wand. Ensure the steam
nozzle is positioned just under the surface of the milk, avoiding both too deep and too shallow
placements. Maintain a strong vortex by positioning the steam wand centrally but towards the edge of
the milk pitcher, at the correct angle.
NO
OK
NO
6

NOTE
WARNING:
- When finished steaming, be sure to rotate the knob to OFF, and press the Steam/Temp. button to
return to standby mode.
- After steaming, the machine is under overheat protection. You should cool it down before making
another coffee. See section Overheat Protection.
The steam wand is very HOT during and after use. To prevent burns, use only the rubber tip on the steam
wand to move it.
5. Rotate the steam knob to position. The steam will come out of the steam wand.
6. After reaching the desired frothing consistency, push the steam nozzle further into the milk to ensure
thorough heating.
7. After frothing, rotate the knob to the OFF position. Press the Steam/Temp. button again to quit the
steam mode.
8. Rotate the steam knob to make hot water to clean any leftover milk from the wand. Return the knob
when finished.
Check out the Quick Start Guide (brochure) for more brewing advices.
Place a cup under the steam wand. Rotate the knob to position. Hot water will come out from
the steam wand. Return knob to OFF when done.
Making Hot Water
7
WARNING:
If you still want to brewing coffee without cooling down the machine, press again the 1-Shot or 2-Shot
button
and the machine will start brewing. (We do not recommend it because the coffee will have a burnt
taste.)
To reset the machine to the default mode, keep pressing the 1-Shot button and
2-shot button at the same time for 3 seconds. All the buttons will flash 3 times. The
machine will return to default settings.
Restoring Default Mode
Wait before making coffee after frothing milk, as the boiler temperature is high and the machine is
under overheat protection. If you press the 1-Shot or 2-Shot button, the Overheat icon will light up.
please proceed as follows to cool down the machine:
1. Rotate the steam knob to position to make hot water.
2. Let hot water come out from the steam wand to cool down the boiler.
3. When the hot water stops, and the Overheat icon disappears, the boiler has been cooled down.
4. Return the knob to OFF. Now the machine is ready to use.
Overheat Protection
(5 SECONDS)
If no operation is chosen within 15 minutes in standby mode, the machine will automatically power
down, turning off all buttons. To restart, simply press the ON/OFF button once more.
Auto Shut-Off
Customize the Volume
This machine allows you to customize the volume of 1-shot and 2-shot coffee.
1. When the machine has finished preheating (all buttons lights up), press and hold the 1-Shot or
2-Shot button for 3 seconds. The machine will start to brew.
2. When the desired amount is reached, press the button again.
3. When setting finished, the machine will beep for 3 times indicating that the volume is recorded.
4. Adjustable volume range: 10-60 seconds.
8
WARNING:
DO NOT wash any of the parts in the dishwasher.
To avoid burns, the filter must only be removed when the portafilter has cooled down sufficiently.
DO NOT clean with alcohol or solvent cleanser.
NEVER immerse the housing in water to clean.
Rotete the knob to OFF and allow the coffee machine to cool down sufficiently before cleaning.
Regularly clean the housing of the coffee machine with a damp sponge, then clean the water reservoir, drip tray
and drip plate and dry them.
Clean portafilter with cleanser or warm water.
Clean all attachments and dry thoroughly.
Cleaning the Appliance
If you find that the filter is blocked with a very fine powder while brewing coffee, immerse the filter in boiling water
for 10 minutes to unclog it, then rinse it with running water.
Cleaning the Portafilter and Filters
Immediately after frothing milk, turn steam knob on to purge out any residual milk from the wand.
Clean the wand with a damp cloth. If the hole of the steam nozzle becomes blocked, ensure the
steam knob is at OFF position. Turn off the machine and allow to cool. Use a pin to unblock the
hole.
Cleaning the Steam Wand
Regularly remove any coffee grounds from the brew head using a brush, and wash with hot water:
Insert the portafilter into it without using coffee grounds. Place a cup under the brew head and press the coffee
brewing button twice to fill the cup. Then remove the portafilter from the brew head and clean it with a dry cloth.
Cleaning the Brew Head
CLEANING & MAINTENANCE
9
NOTE
WARNING:
Do not try to disassemble the brew head. It will damage the brew head and lead to leakage.
Please also refer to the instructions on the descaling agent. Please use a household descaling agent, or
you can use citric acid instead of a commercial descaling agent - in this case use 100 parts of water to
3 parts of citric acid.
Descaling
To make sure your coffee machine operates efficiently, to clean the internal pipes, and to preserve the
flavor of your coffee, the coffee machine needs to be descaled, cleaned and maintained periodically.
Also, after 500 times of brew cycle, it is necessary to run a descaling cycle. Otherwise, the Descale
warning will appear at every time start-up.
Please proceed below steps to descaling the machine:
1. Fill the water with descaling agent (4 parts water to 1 part descaling agent) into the water reservoir
up to the “MAX” marking.
2. Place a cup/mug or other suitable receptacle on the drip tray and keep pressing
the 2-Shot button and Steam/Temp. button together for 5 seconds. The machine
will start the descaling cycle and run for 7 minutes then stop automatically.
3. Repeat the previous steps until the water with descaling agent is running out.
4. Next, repeat the process two more times using only CLEAN TAP WATER without any descaling agent.
(5 SECONDS)
10
TROUBLESHOOTING
The water reservoir is not fixed. Reassemble the water reservoir.
Problem Possible Cause Solution
No water
Water reservoir is empty.
Fill the water reservoir up to Max mark.
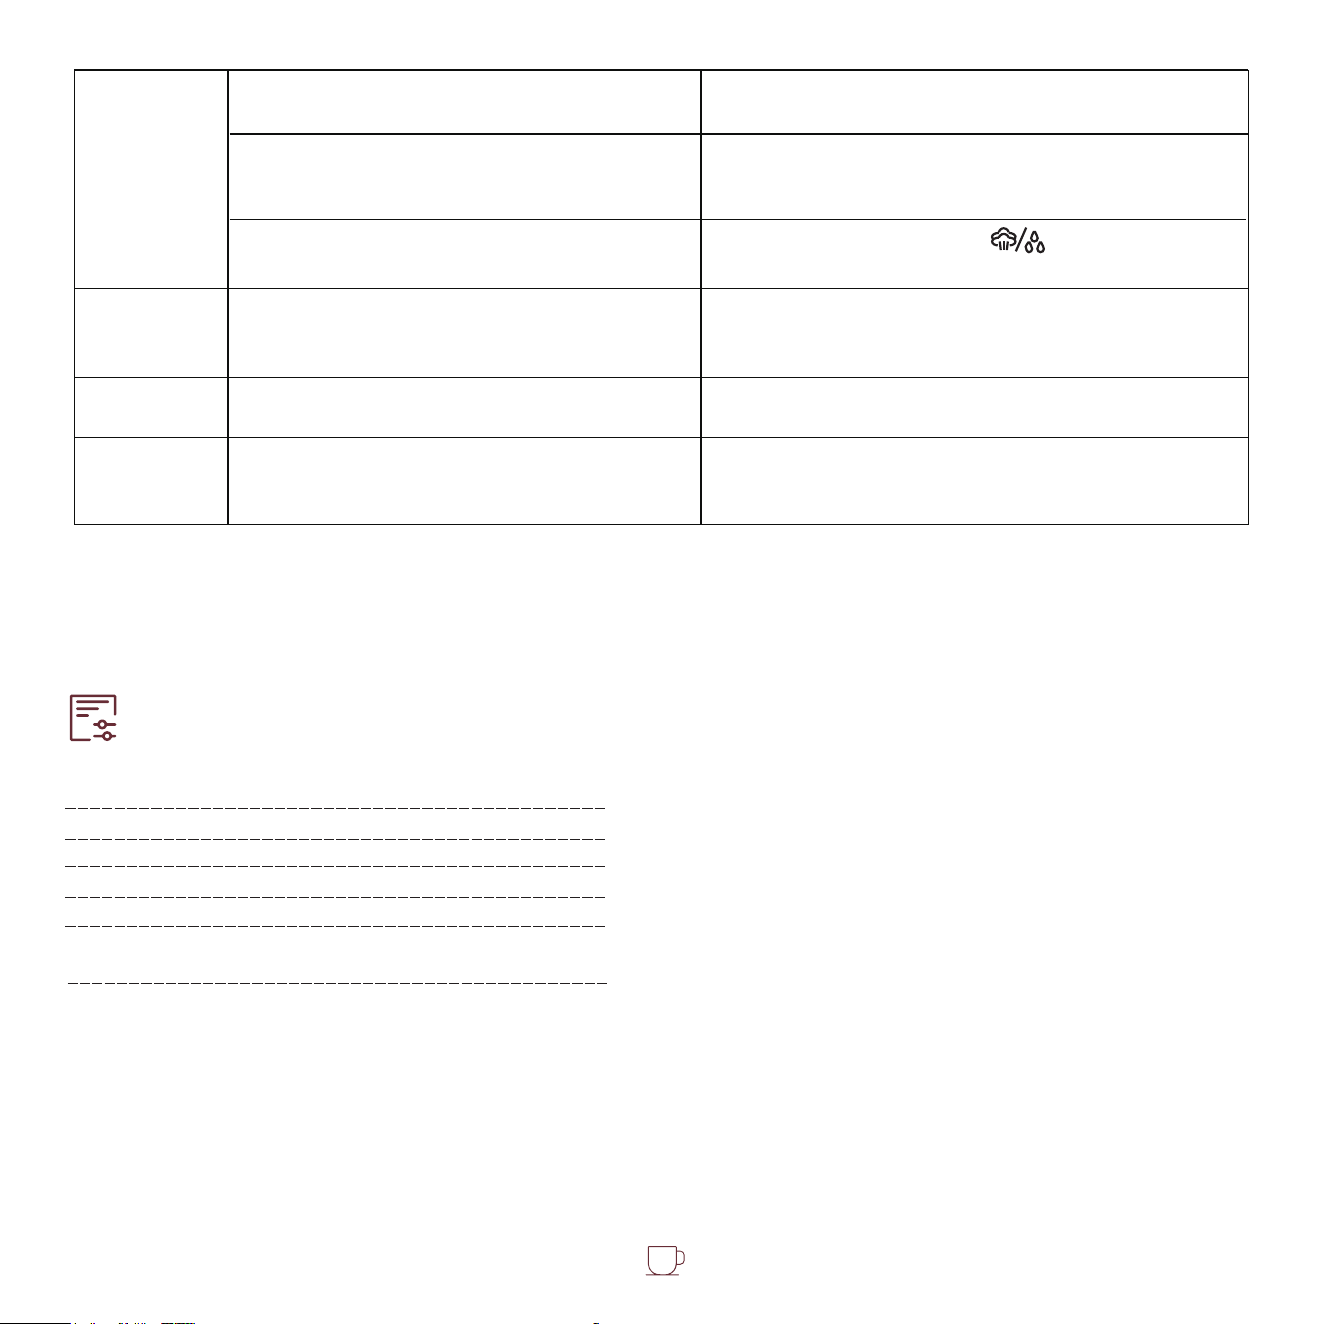
No steam
Water reservoir is empty.
Fill the water reservoir up to Max mark.
Steam nozzle is clogged.
The water reservoir is not fixed. Reassemble the water reservoir.
Still no water after 12 seconds operation
or the machine is idle for too long.
Fill the water reservoir and make hot water once.
Remove the steam nozzle from steam wand and
clean it with a pin.
Less steam
Whether the whole milk is used.
Use whole milk.
Less grease
Ground coffee is too coarse. Replace the ground coffee.
Ground coffee is not tamped sufficiently.
Make coffee right after milk frothing.
Whether the refrigerated milk is used.
Keep milk chilled at 2-5°C (35.6~41°F).
Steam/Temp. button is not activated or the
preheating is not finished.
The steaming starts before the machine
reaches its heating temperature.
The Steam Knob does not rotate to the
Max position.
The steam nozzle is inserted too deep into
the milk.
The coffee powder on the edge of the filter
is not cleaned after filling the ground coffee.
Clean the coffee powder on the edge of the
filter with a brush.
Submerge the steam nozzle into the milk surface
at a depth of 1CM.
Tamp the ground coffee with an appropriate
pressure.
Make sure the machine cools down before using.
Gently rotate the Steam Knob until steam
sprays out when milk frothing.
Press the Steam/Temp. button and wait for the
indicator to switch from flashing to staying
constantly lit.
Make double shot brewing or wait for preheat-
ing finished before milk frothing.
Poor milk
froth
Coffee
spills out of
the filter.
11
Please do not attempt to disassemble the unit yourself to prevent any potential dangers or damage to
the appliance.
Too much ground coffee.
The ground coffee is too fine.
No water in the boiler (inside the machine).
The notch of the filter is too close from the
brew head.
Brewing coffee in low temperature mode.
The Overheat Protection is still active even
the hot water stops.
Choose standard or high temperature mode.
Turn off the machine, return the knob to OFF,
and restart the machine.
The ground coffee must be of a standard quality
and quantity, neither too coarse nor too fine.
The ground coffee should be specific for
espresso machines and should not be ground
too finely.
Attach the portafilter to the brew head and
turn it left and right until the filter falls down.
Rotate the steam knob to position to let the
water come out of the steam wand about 180 ml.
Coffee is
brewed
slowly or in
small quantity
The filter
stuck in the
brew head
The coffee
is too cold
The control
panel is
unresponsive
TECHNICAL SPECIFICATION
Model
Voltage
Power
Espresso pressure
Capacity of water reservoir
Product size
CM1669
120V~ 60Hz
1350W
20 Bar
1.3 L / 44 OZ
330x165x308 mm
13.0x6.5x12.1 inch
Manufacturer: Foshan Shunde QINGZHOU Electric Appliances Co., Ltd.
Add.: Room 2901, Building 18, Vanke Jinyu Riverside Plaza, No. 13 Desheng Middle Road, Daliang
Street, Shunde District, Foshan City, Guangdong Province, China
Contact: Emily Tel: +1 (838) 910 8317 E-Mail: [email protected]
12

12
You will automatically get 1 year of warranty, and upgrade to full replace-
ment guarantee.
If anything goes wrong with your product, we will provide you with a brand
new unit as a replacement, or provide you with a full refund.
If there is a problem with your parts and accessories, you can replace them
for free.
13
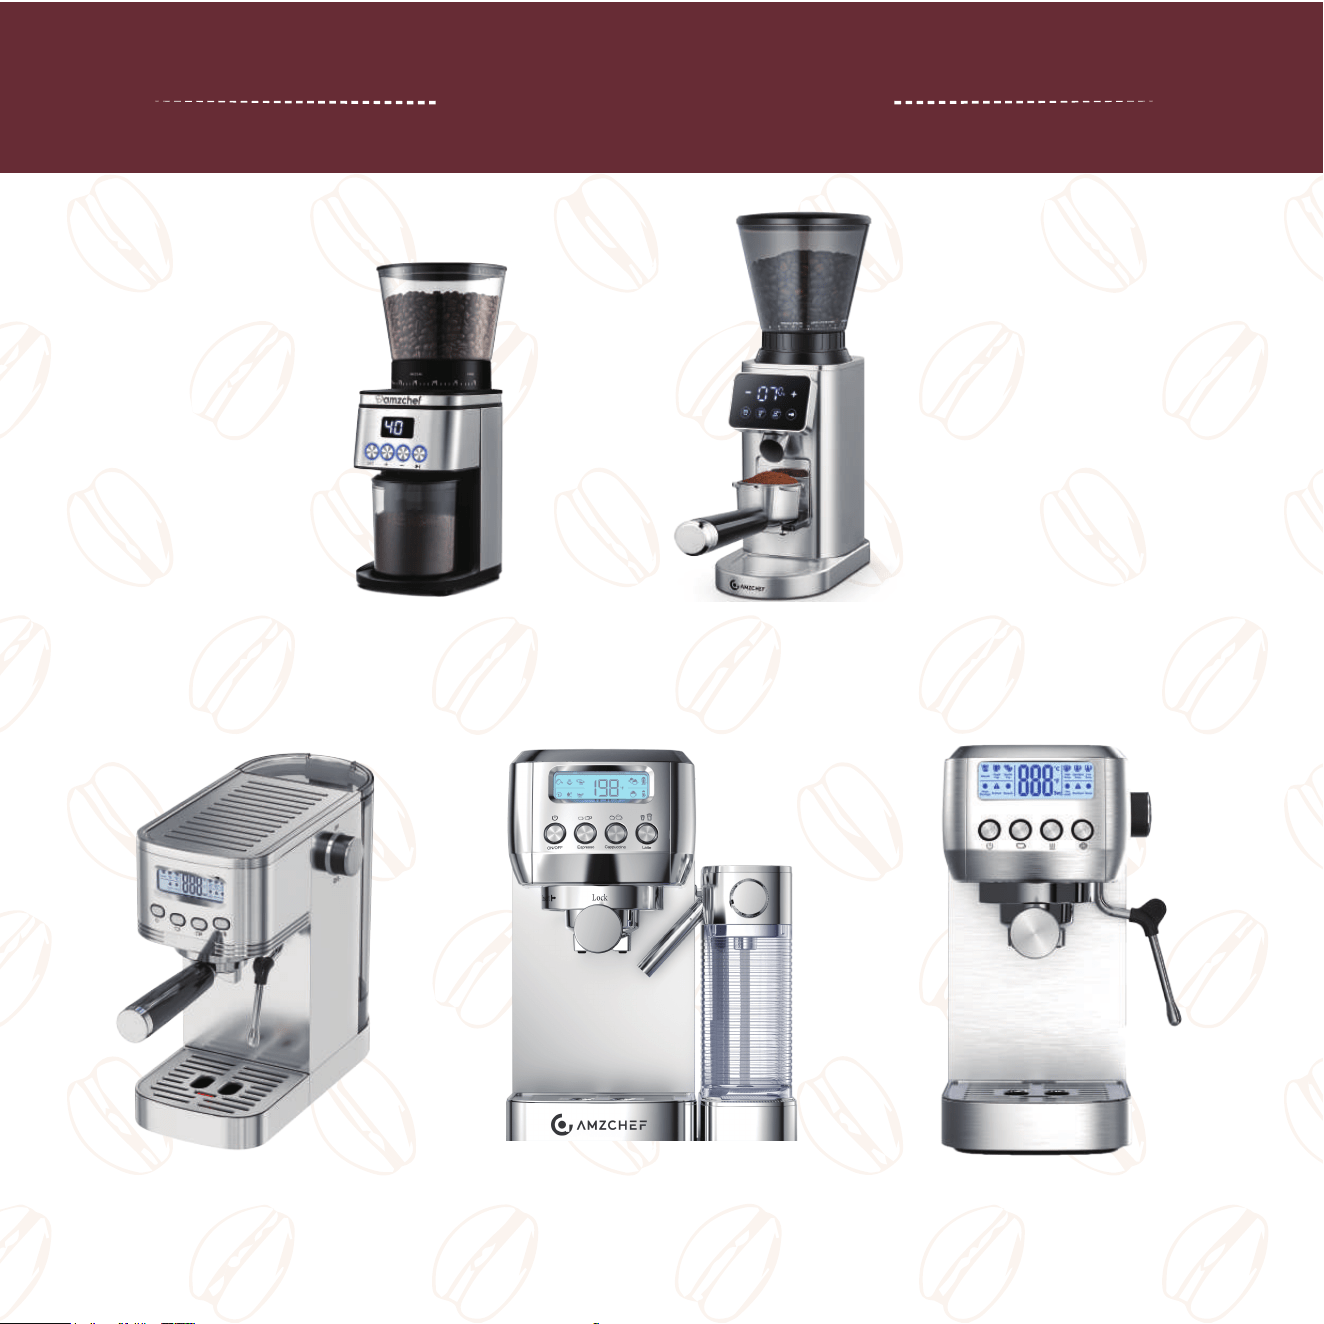
Coffee Family
Espresso Coffee Machine
CM1666
Coffee Grinder
BG709S
Coffee Grinder
CG209
Espresso Coffee Machine
CM1669
Espresso Coffee Machine
CM1636