Welcome
Thank you for purchasing a Basement Watchdog product.
We at Glentronics strive for excellence in every product we
design and manufacture. Should you need our help anytime
during the life of your product, please visit our website at
www.BasementWatchdog.com or call us at 800-991-0466
.
Getting set up and connected is simple
1. Determine your Basement Watchdog pump system
2. Attach your WiFi module to your Basement Watchdog
system
3. Accessories available
4. Wi-Fi water alarm
5. Mount your WiFi Module
6. Basement Watchdog CONNECT mobile app
7. Connect to your Wi-Fi network
8. Registering your module
Other important information
9. Test the setup
10. The Glentronics CONNECT website
11. Explanation of the lights
12. Resetting the module and troubleshooting
Before you begin
View the installation video at
www.BasementWatchdog.com/videos
What you need:
• Active Internet service provider (2.4GHz only)
• Wi-Fi network name
• Wi-Fi network password
• Wi-Fi-capable device (computer, tablet or smartphone)
• Recommended: Battery backup for your Wi-Fi router/
modem (battery built into router or UPS)
This is a Wi-Fi-based device that remotely alerts the user of
potential water problems in their home. It uses the internal
Wi-Fi chip to connect to the user’s Wi-Fi network through their
router. When connected to a backup sump pump system, the WiFi
Module sends an email, text, or push notication to the user’s
phone, tablet or computer when a potential problem exists with
the connected sump pump system. In the past, the user must be
home to be notied of a problem with water or the sump pump
system. With this device, the user can receive alerts while away
from home.
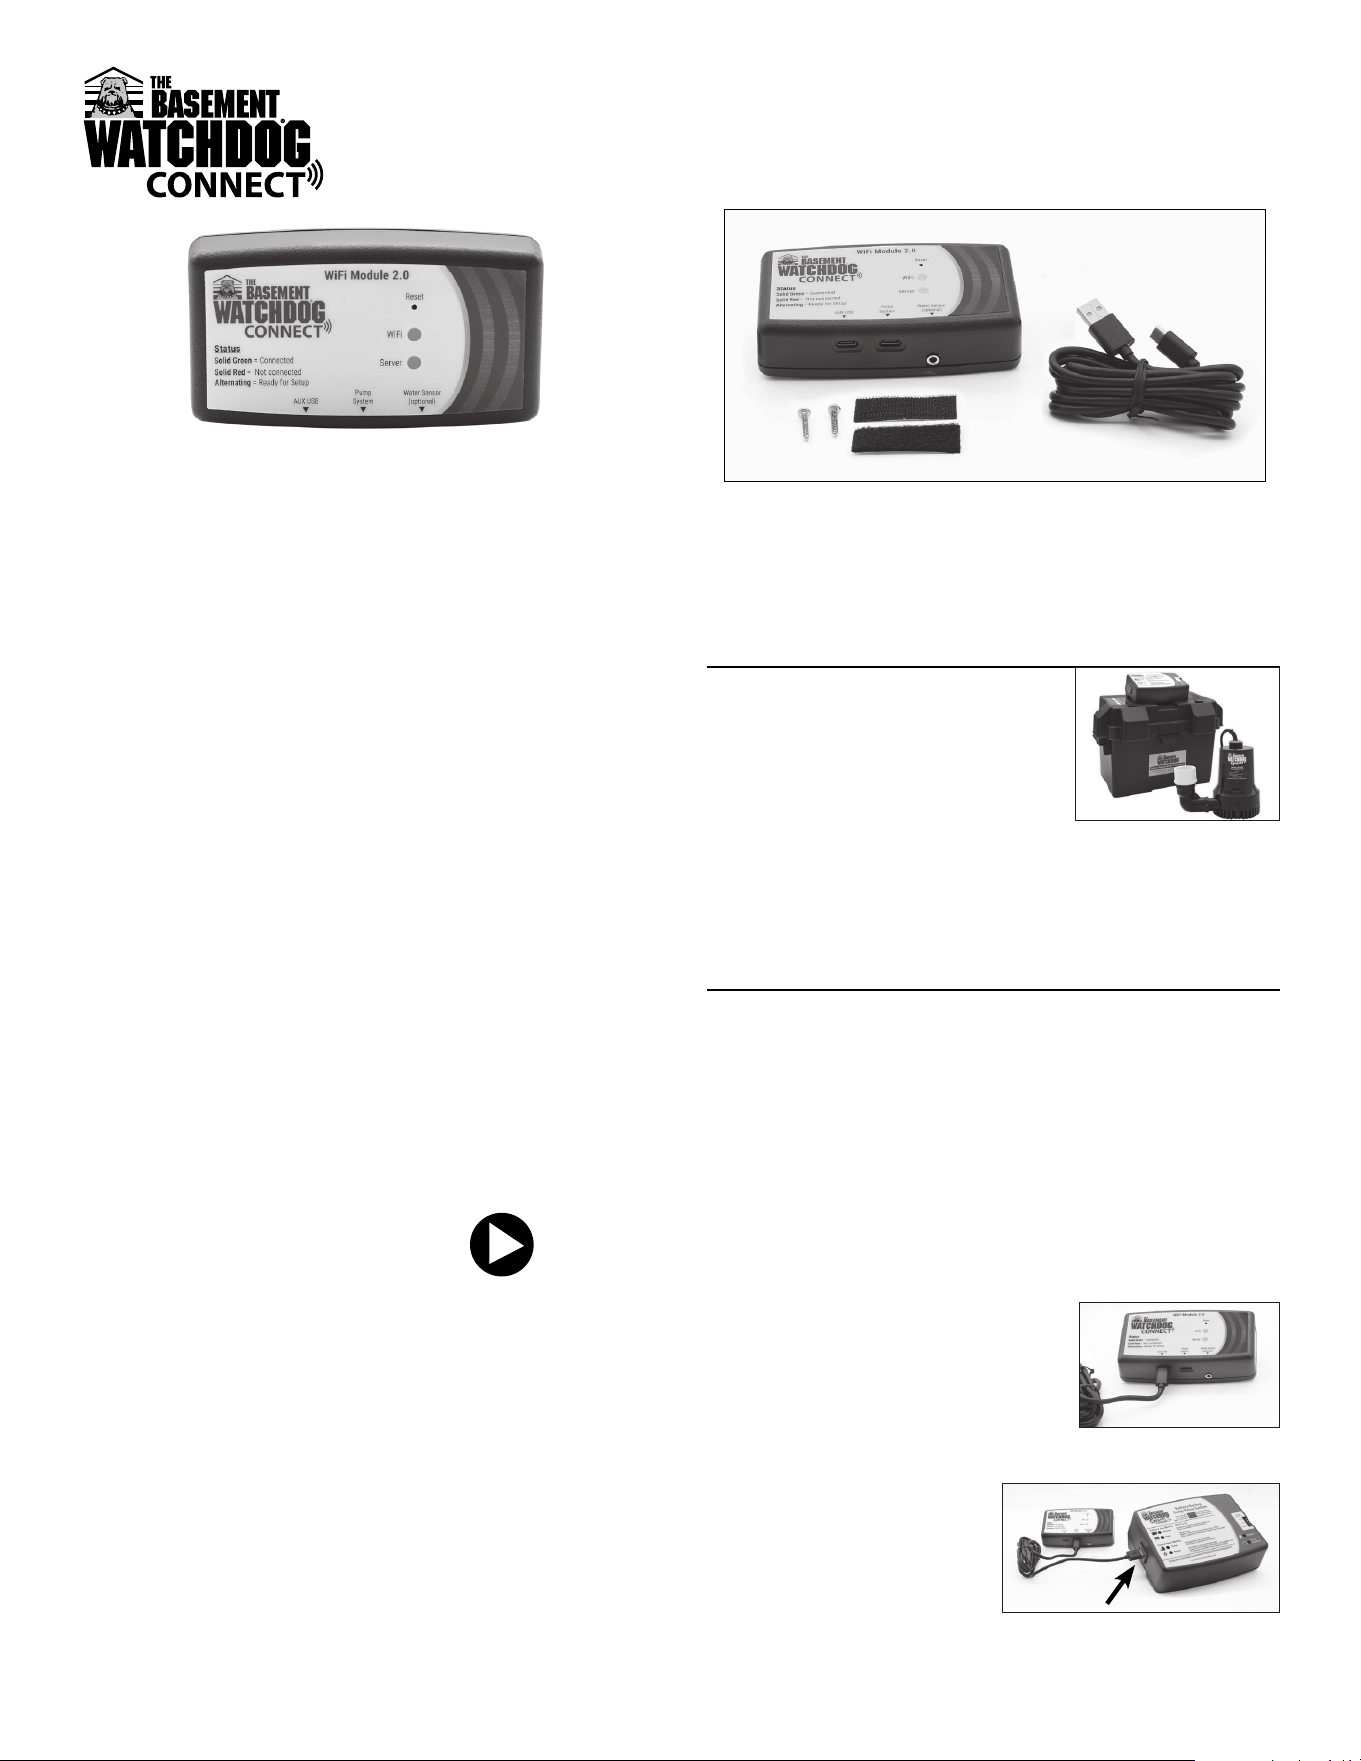
This WiFi Module includes:
• WiFi Module • USB-A/USB-C cable • Mounting hardware
(1) Determine what Watchdog pump you are
attaching to and how to attach
(see diagram sheet for visual help)
1-1. If you are attaching to a
Basement Watchdog CONNECT
backup system with a USB port:
Go to Section 2A
1-2. If you are using the module as a
Wi-Fi water alarm:
Go to Section 4
(2) Attach the WiFi Module to your
Basement Watchdog system
(see diagram sheet for visual help)
Note: The controller itself must be receiving power in order to
power the WiFi Module. The WiFi Module must receive 5V DC +/-
5% from the controller of the backup system.
2A. Attaching the WiFi Module to your Basement Watchdog
system
This section will explain how to connect the WiFi Module to your
backup sump pump system using the included USB-A/USB-C
cable. Once the cable is connected, the module will send a
specic email, text or push notication explaining exactly which
alarm is activated on the sump pump system.
2A-1. Using the USB-A/USB-C cable.
Insert the USB-C end of the cable
into the data port labeled “pump
system” located on the bottom of
the module.
2A-2. Connect the standard
USB-A end into the USB
port on the backup sump
pump controller.
Note: When using the Pump System connection, no other cable is
necessary; this cable also will power the WiFi Module.
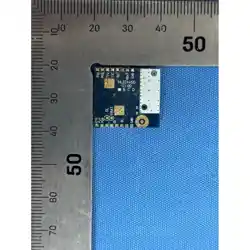
WiFi2 Module
Instruction Manual
1
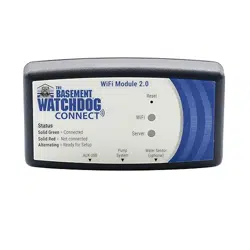
2-3. The red and green lights on the WiFi
Module will start alternating.
(a) This means the unit is ready for
setup.
Note: To receive notication during a power outage, you must
have a Wi-Fi router/modem with a built-in battery backup or an
uninterruptible power supply (UPS) powering the equipment.
Proceed to Section 5 (Mounting your WiFi Module)
(3) Accessories
When connected it is possible to add a high water detector using
either a High Water Accessory (BW-WS) or 360˚ Sensor (BW-
WS360). If water reaches the water detector, the WiFi Module will
send a text, email or push notication to the designated devices
stating that high water is present.
3-1. If you will be using this in a sump pit,
sewage pit, or other area that can
handle a 3/8" depth, you need the
following accessory:
(a) High Water Accessory (BW-WS)
This accessory can be ordered by calling
Glentronics at 800-991-0466.
Once you have the part:
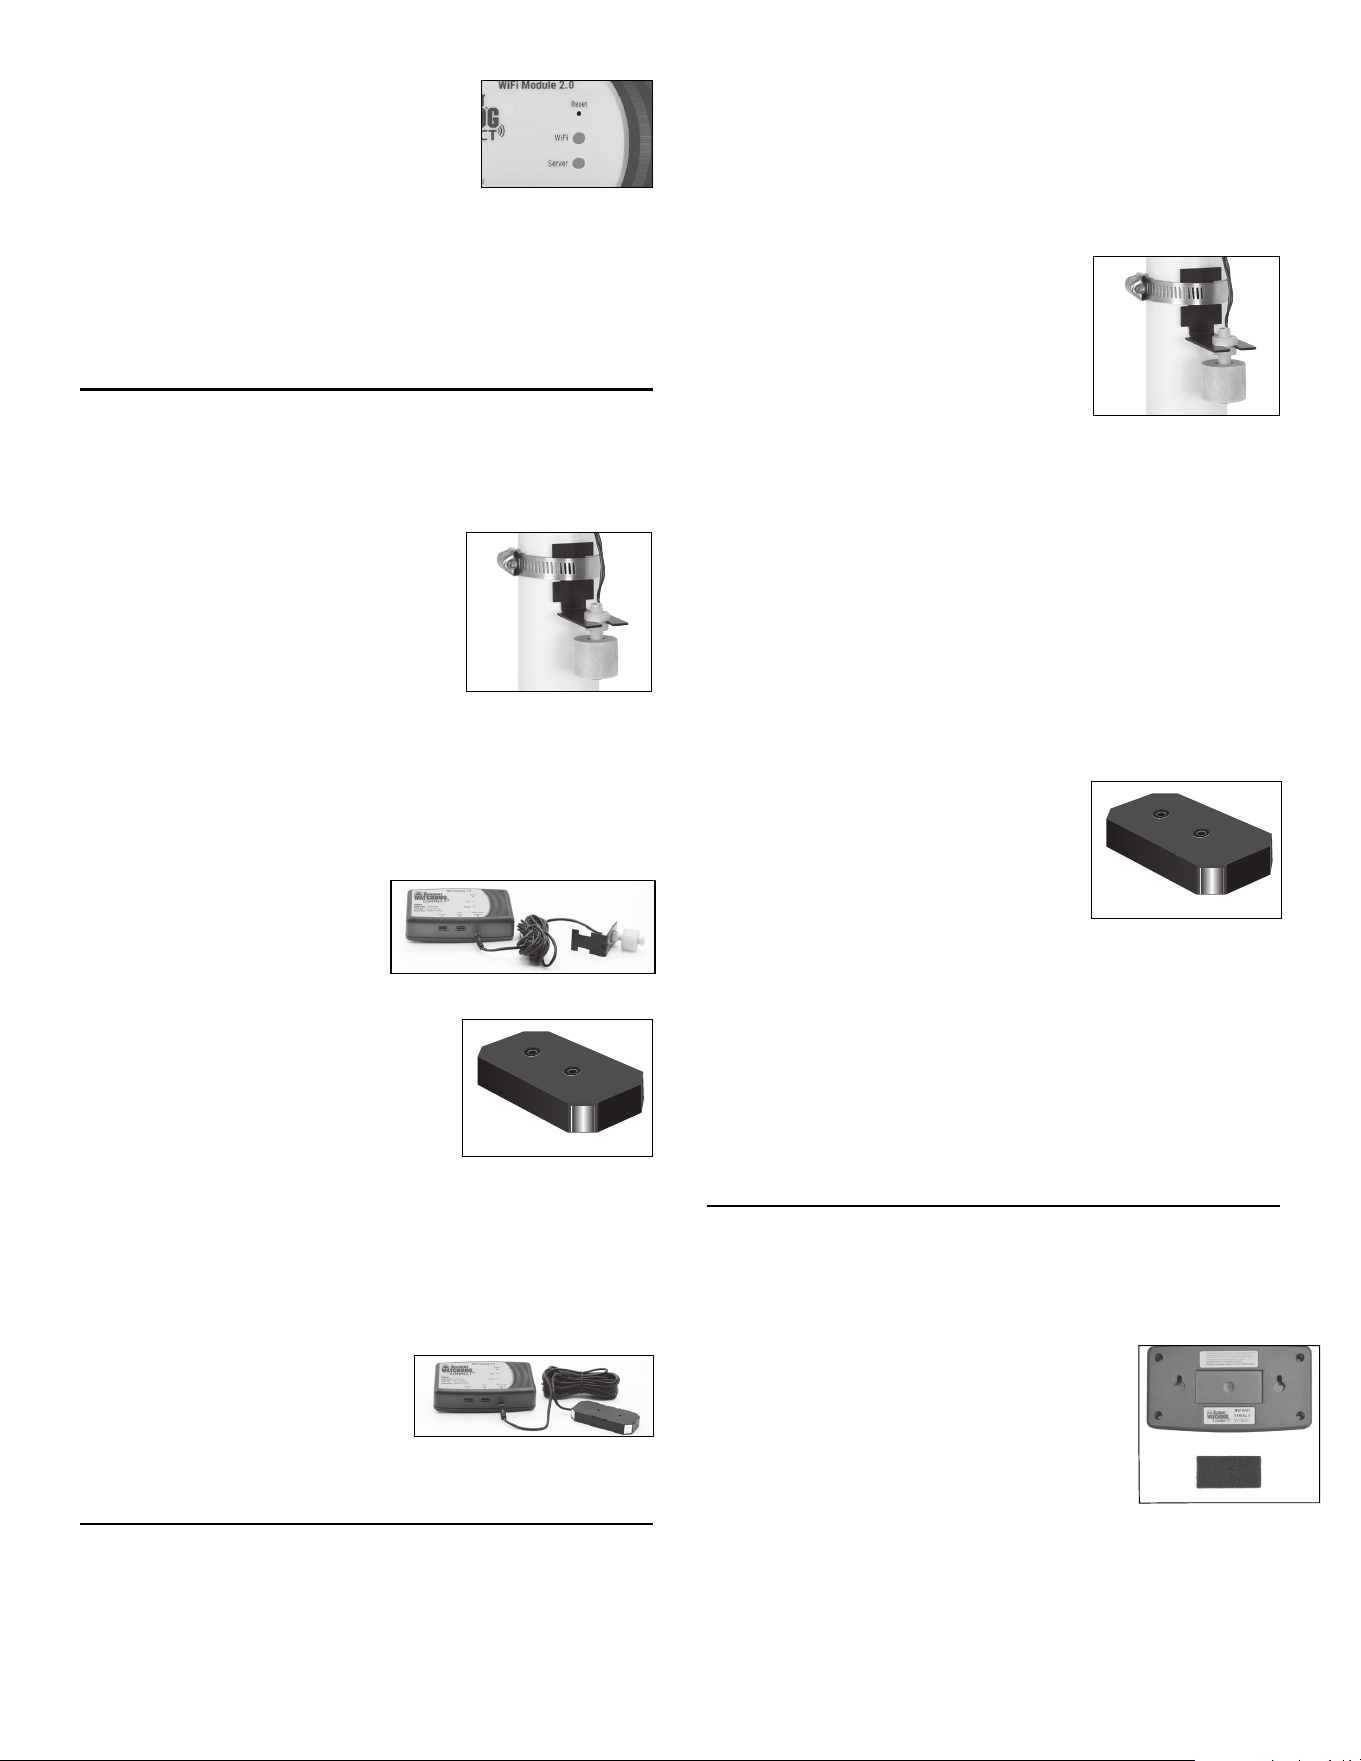
(a) Mount the High Water Accessory (BW-WS) with the float
ball below the ‘L’ bracket. If using in a sump or sewage
pit, use the included stainless-steel hose clamp.
(b) Plug the device into
the 3.5mm jack on the
bottom of the WiFi
Module.
Proceed to Section 5 (Mounting your WiFi Module)
3-2. If you will be using this in an area
where you need to be aware when a
minimal water buildup occurs, you
need the following accessory:
(a) 360˚ Sensor (BW-WS360)
This accessory can be ordered by calling
Glentronics at 800-991-0466.
Once you have the part:
(a) Mount the 360˚ Sensor (BW-WS360) with the sensor
pads down and secure in place using the holes in the
sensor panel.
(b) Plug the sensor into the
3.5mm jack on the bottom
of the WiFi Module.
Proceed to Section 5 (Mounting your WiFi Module)
(4) When using as Wi-Fi water alarm only
The Basement Watchdog WiFi Module also can be used as a
standalone Wi-Fi water alarm (additional accessories and charger
required). If water reaches the water detector, the WiFi Module
will send a text, email or push notication to the designated
communication channels, stating that high water is present.
(a) If you will be using this in a sump pit, sewage pit, or
other area that can handle a 3/8" depth, proceed to
Section 4-1.
(b) If you will be using this in an area where you need to
know when a minimal water buildup occurs, proceed to
Section 4-2.
4-1. If you will be using this in a sump
pit, sewage pit, or other area that
can handle a 3/8" depth, you
need the following two accessories:
(a) High Water Accessory (BW-WS)
(b) USB-A Charger (1015016)
These accessories can be ordered by calling Glentronics at
800-991-0466.
Once you have the parts:
(a) Mount the High Water Accessory with the float ball
below the ‘L’ bracket. If using in a sump or sewage pit,
use the included stainless-steel hose clamp.
(b) Plug the charger into a outlet and insert the cord into a
port on the bottom of the WiFi Module.
Proceed to Section 5 (Mounting your WiFi Module)
4-2. If you will be using this in an area where you need to
know when a minimal buildup of water occurs, you need
the following two accessories:
(a) 360˚ Sensor (BW-WS360)
(b) USB-A Charger (1015016)
These accessories can be ordered by
calling Glentronics at 800-991-0466.
Once you have the parts:
(a) Mount the 360˚ Sensor (BW-WS360) with the sensor
pads down and secure in place using the holes in the
sensor panel.
(b) Plug the charger into an outlet and the cord into the
port on the bottom of the module.
Proceed to Section 5 (Mounting your WiFi Module)
(5) Mounting your WiFi Module
You may use either method below to mount your WiFi Module.
5-1. Using the Velcro, mount your WiFi Module:
(a) Peel and stick one side of the Velcro into the recessed
rectangle on the back of the module.
(b) Peel and stick the other piece of Velcro
where you want to mount the module
(a 6' USB-A to USB-C is included, but
you may choose to use a longer cord):
• Top of the battery box
• Top of the backup control box
• To the wall
5-2. Using the included #6 pan head screws, mount the module
to the wall or stud:
(a) Install the screws into the wall or stud (3 inches apart)
(b) Mount the module to the screws using the keyhole
screw mount on the back of the module
BW-WS
BW-WS360
BW-WS
BW-WS360
2
Proceed to Section 6 for connecting with mobile app or Section 7
for connecting without the mobile app
(6) Basement Watchdog CONNECT mobile app
The mobile app is free and available to download from the
Google Play and the Apple stores. Search for “Basement
Watchdog” in the app stores. Use the mobile app to receive
push notications when your sump system has an issue. You
also can register your WiFi Module, view status, change contact
information, view product information, and access customer
support using the app.
Using the Basement Watchdog CONNECT mobile app
The main page of the mobile app has three options and this
section will explain how to use each one. Use this app to stay
connected to your sump pump and for easy access to product
information and customer support.
6-1. Basement Watchdog CONNECT page
Once you complete registration and log into your account, you
will have multiple options:
(a) Module Status
This page displays the status of the unit that is
connected to your WiFi Module.
(b) Edit Alert Settings
This page allows the user to edit the contact
information where alerts are sent, such as email
address and mobile number.
(c) User Prole
This page stores the user’s prole and can be edited
at any time. This page also is used to change the
password.
(d) Add Device
Use this to add another WiFi Module to your account.
(e) Log O
Use this to log o from your account.
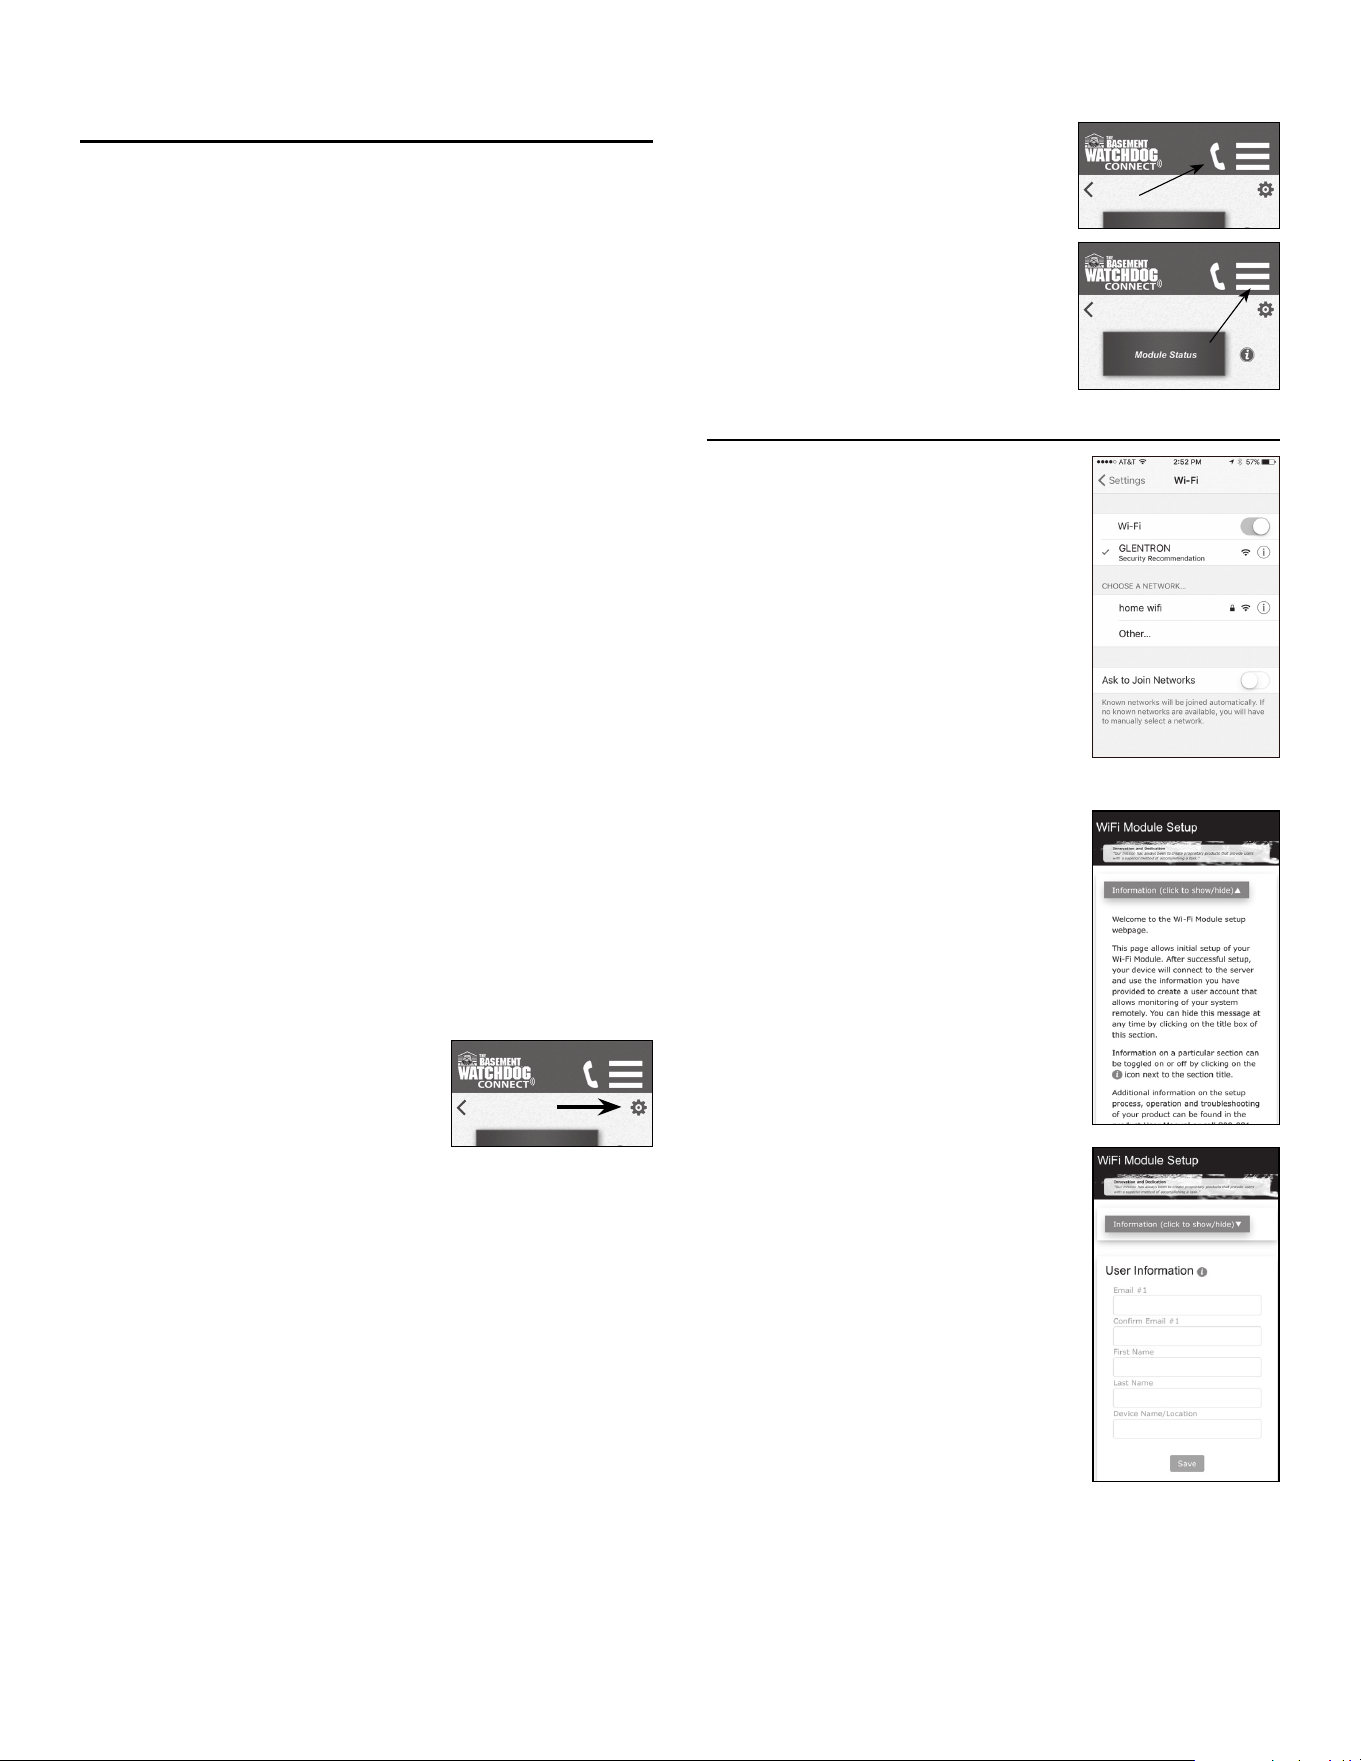
(f) Settings Icon
Use this to change notication
methods. You have three
options for notication:
• in-app, push notication
• text/SMS notication
• email notication
All notication methods are enabled as a default.
Note: At least one notication method must be enabled.
6-2. Product Information page
Use this page to view information on Basement Watchdog
products such as backup pumps, sump pumps and
accessories.
6-3. Customer Support page
Use this page to get support for your Basement Watchdog
Product:
(a) Online Support — will take you to the Frequently Asked
Questions (FAQ) page
(b) Phone Support — will automatically enter our toll-free
phone number into your phone
(c) E-mail Support — will automatically enter our email
address.
6-4. Menu bar at the top of the screen
The menu bar is always visible at the top of screen in order to
make navigation easy
(a) Phone Icon — will automatically
enter our toll-free phone
number into your phone.
(b) Menu Icon — use this to select
the three main options of the
mobile app: Basement
Watchdog CONNECT, Product
Information or Customer
Support.
(7) Connect to your Wi-Fi network
7-1. Open up your Wi-Fi settings menu
and connect to the GLENTRON
network (this network is being
broadcast by your WiFi module).*
If the WiFi Module Setup page does
not open up automatically, launch a
web browser and type 192.168.1.1
into the URL eld.
* Note: You may get a popup screen saying
Internet connection is not available. It
is okay to proceed and connect to the
GLENTRON network.
7-2. The WiFi Module Setup window
will appear
• Scroll down to User Information.
7-3. Fill out the user information elds .
• Click ‘save’.
When you see, “User conguration
data complete,” click OK.
7-4. Scroll down, click on Available Networks button. Select your
network from the dropdown menu .
7-5. A Network Switch text box will appear.
• Conrm your network and click OK.
3
7-6. A Secure Network text box will appear.
• Enter your network password and click OK.
• Make sure your password is correct. If it is entered
wrong, you’ll need to repeat this section.
7-7. The ‘RED’ and ‘GREEN’ lights will stop alternating if the
connection is successl.
• This may take 1–2 minutes.
• If lights do not stop alternating, reset your WiFi Module
by holding the reset button with a paper clip until both
red lights are on. Then repeat all of Step 4.
Proceed to Section 8 (Registering your Wi Module)
(8) Registering your WiFi Module
This will explain how to complete the registration process and
how to access the Glentronics CONNECT website. This website
will be used to edit your stored information and to view the status
of the sump pump system that is connected to the module. The
registration process must be completed only once with the same
email used as email #1. Aer the registration is complete, the
same email can be used to set up other WiFi Modules and they
automatically will be added to the same account.
8-1. You will receive an email from GlentronicsConnect.com at the
email address you provided. Check your junk/spam folder in
case the email is not in your main mailbox.
8-2. Click on the link and complete the registration. (Note: This
link will expire in 24 hours; if link expires before you complete
Section 8, please repeat all steps of Section 7.)
(a) Veri all information entered during setup.
(b) Create a password. The password must be at least 10
characters, include uppercase and lowercase letters, and
at least one number.
(c) Fieen minutes aer registration, the module will
conduct a request for an over-the-air soware update.
If an update is required, the module will automatically
update. This may take a few minutes; during this time the
unit may be unresponsive.
8-3. Launch the app to familiarize yourself with the interface. You
can open the app to check on the status of
your system from anywhere, 24/7.
(9) Testing the setup
9-1. Disconnect the power to the sump pump system connected
to your WiFi Module:
(a) Within a few minutes you will receive a notication.
(b) It will state “AC power is lost”.
9-2. Plug the sump pump system back into AC power:
(a) Within a few minutes you will receive another notication
indicating the system is operating properly.
9-3. You can perform this test with other warnings from your sump
pump system and you will receive a notication with the
corresponding alarm information.
We recommend that you look through Sections 10 and 11 for your
knowledge and understanding.
(10) The Glentronics CONNECT website
This section will explain in detail each page on the Glentronics
CONNECT website. Use this site to stay connected to your
backup sump pump system. It can be accessed by going to www.
glentronicsconnect.com and using your credentials to log in.
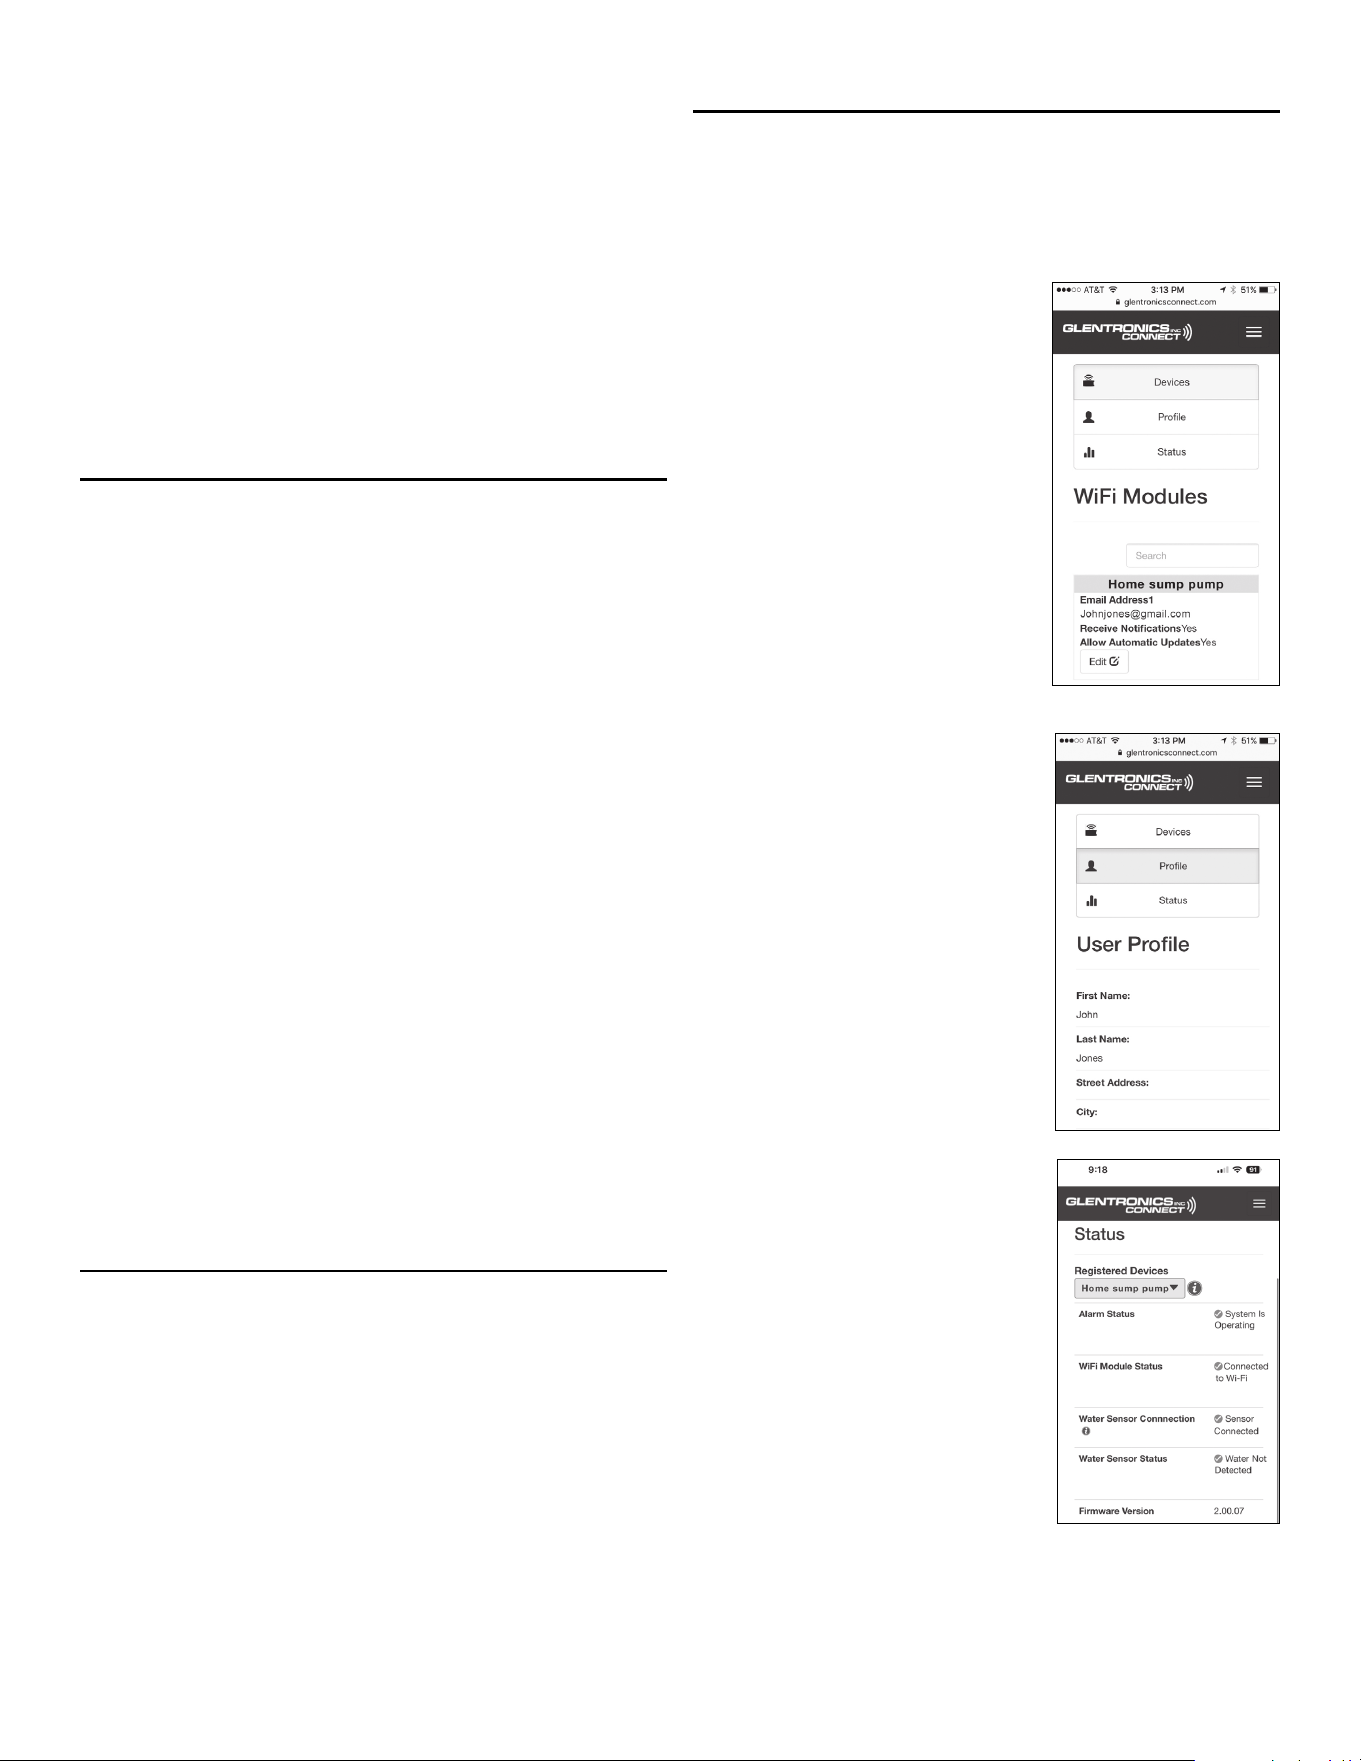
10-1. The Devices tab to the WiFi Modules page
This page will allow the user to
edit the information entered
during the setup process. It will
also allow enabling of the
following options:
(a) Receive notications —
enabled as a default. Can
disable if the user does not
want to receive notications.
(b) Allow automatic updates —
disabled as a default. Can
enable if the user wants to
allow automatic rmware
downloads. If enabled, when
new rmware is available, the
WiFi Module will automatically
download it within 24 hours.
10-2. The Prole tab to the
User Prole page
This page will store the user’s
information and can be edited at
any time. This page also is used to
change the password.
10-3. The Status tab to the Status page
This page will display the status of
the pump that is connected to your
WiFi module. The latest registered
WiFi module will display the status
on the screen. If more than one
WiFi module is registered, they
can be selected by clicking on the
dropdown list above the alarm
status. This page will display an
error if the sump pump sytem that
is connected to the sump pump
system has an issue. If more
details are available, an
information icon will appear next
to the error. Click the icon to view
more information.
Alarm Status: This displays the state of the pump system attached
to the WiFi module connected with the USB cable.
4

WiFi Module Status: This describes the state of the connection
between the module and the router.
(a) The WiFi Module is designed to check in with our server
every 5 minutes. If the module misses 3 consecutive
check-ins (aer 15 minutes) the status will change from
‘connected’ to ‘connection is lost’. The unit could be
losing connection for a variety of reasons, such as a weak
Internet connection or loss of power.
Note: When a notication changes, you will see that change on the
page within approximately 30 seconds.
(11) Explanation of the lights
This section will explain what the lights on the WiFi module mean.
11-1. Alternating red and green (WiFi and Server) lights:
(a) The module is ready for set up
11-2. WiFi light:
(a) Solid green = module is connected to the router
(b) Solid red = module has lost connection to the router
(c) Rapid blinking green = the module is in the process of
sending a message
11-3. Server light:
(a) Solid green = connected with Glentronics server
(b) Solid red = connection with Glentronics server lost
(12) Resetting the module & troubleshooting
This section explains how to clear the module if it is changing
ownership.
12-1. If the module is changing hands or you are moving
and leaving it for the new homeowners, you should reset the
unit to avoid receive notications from that unit.
(a) Using a paperclip, press and hold the reset button on the
WiFi module for approximately 5 seconds.
(b) This will cause the LEDs to alternate again. Leave it in
this mode.
(c) The next user will register the module to their email
address.
Warning
Changes or modications not expressly approved by Glentronics
could void the user’s authority to operate the equipment.
5

FCC Guidelines
NOTE: This equipment has been tested and found to comply with
the limits for a Class B digital device, pursuant to part 15 of the FCC
Rules. These limits are designed to provide reasonable protection
against harml interference in a residential installation. This
equipment generates, uses and can radiate radio frequency energy
and, if not installed and used in accordance with the instructions,
may cause harml interference to radio communications.
However, there is no guarantee that interference will not occur
in a particular installation. If this equipment does cause harml
interference to radio or television reception, which can be
determined by turning the equipment o and on, the user is
encouraged to try to correct the interference by one or more of the
following measures:
— Reorient or relocate the receiving antenna.
— Increase the separation between the equipment and receiver.
— Connect the equipment into an outlet on a circuit dierent from
that to which the receiver is connected.
— Consult the dealer or an experienced radio/TV technician for
help.
• Contains FCC ID: 2AC7Z-ESP32WROOM32E
• To satis FCC RF Exposure requirements for mobile and base
station transmission devices, a separation distance of 20 cm or
more should be maintained between the antenna of this device
and persons during operation. To ensure compliance, operation
at closer than this distance is not recommended. The antenna(s)
used for this transmitter must not be co-located or operating in
conjunction with any other antenna or transmitter.
Additionally, For Canada:
• This device complies with Industry Canada license- exempt RSS
standard(s). Operation is subject to the following two conditions:
(1) this device may not cause interference, and (2) this device must
accept any interference, including interference that may cause
undesired operation of the device.
• Le présent appareil est conforme aux CNR d’Industrie Canada
applicables aux appareils radio exempts de licence. L’exploitation
est autorisée aux deux conditions suivantes: (1) l’appareil ne
doit pas produire de brouillage, et (2) l’utilisateur de l’appareil
doit accepter tout brouillage radioélectrique subi, même si le
brouillage est susceptible d’en compromettre le fonctionnement.
• Contains transmitter module IC: ESP32-WROOM-32E
Troubleshooting guide
Problem Solution
WiFi light is solid
red
Check your router and internet connection.
Then, power cycle the module. Unplug the
module from the wall and disconnect from
the battery. Let it sit for a minute and then
reconnect both power sources.
Press the Reset button with a paper clip and
restart the setup process.
The red/green
lights keep
alternating
aer the setup
process
Press the Reset button with a paper clip and
restart the setup process.
Server light is
solid red
Communication error. Power cycle the
module. Unplug the module from the wall
and disconnect from the battery. Let it sit
for a minute and then reconnect both power
sources. If Server light is still red in 24
hours, call Glentronics support at 800-991-
0466.
6

LIMITED WARRANTY
By opening this package and using this GLENTRONICS, INC. product, you are agreeing to be bound by the terms of the GLENTRONICS, INC.
limited warranty (“warranty”) as set out below. Do not use your product until you have read the terms of the warranty. If you do not agree to
the terms of the warranty, do not use the product and return it within the return period stated on your purchase receipt from the retail store
or authorized distributor where you purchased it for a rend.
To the extent permitted by law, this warranty and the remedies set forth are exclusive and in lieu of all other warranties, remedies and
conditions, whether oral, written, statutory, express or implied. GLENTRONICS, INC. disclaims all statutory and implied warranties,
including without limitation, warranties of merchantability and tness for a particular purpose and warranties against hidden or latent
defects, to the extent permitted by law. GLENTRONICS, INC. will not be liable for any incidental, special or consequential damages for
breach of any express or implied warranties on this product. In so far as such warranties cannot be disclaimed, GLENTRONICS, INC. limits
the duration and remedies of such warranties to the duration of this express warranty and, AT GLENTRONICS, INC.’s option, the repair or
replacement services described below. Some states (countries and provinces) do not allow limitations on how long an implied warranty (or
condition) may last, so the limitation described above may not apply to you.
Any and all causes of action arising from, led as a result of or in reference to, this warranty or the products described under this warranty
shall be governed by and construed under the laws of the State of Illinois. Any cause of action arising from, led as a result of or in reference
to, this warranty or the products described under this warranty shall be led only in the Circuit Court of the 18th Judicial District, Lake
County, Waukegan, Illinois, or in the Northern District of Illinois if led in Federal Court. The maximum liability for any product described in
this warranty shall be the cost of product replacement only.
If any term is held to be illegal or unenforceable, the legality or enforceability of the remaining terms shall not be aected or impaired.
What is covered by this warranty?
GLENTRONICS, INC. warrants to the end purchaser that its pumps, switch, control unit products and accessories are free from defective
materials and workmanship for the periods indicated below:
All parts and labor (excluding installation) for a period of:
• 1 year from the date of installation
The defective product must be returned directly to the factory, postage prepaid with the original bill of sale or receipt to the address listed
below. GLENTRONICS, INC., at its option, will either repair or replace the product and return it postage prepaid.
What is NOT covered by this warranty?
This warranty does not cover the cost or value of damaged property, including expressly any property that has been aected by water
overflow, seepage or flooding. If GLENTRONICS, INC. determines that a product is deemed defective under this warranty agreement, it will
repair or replace the PRODUCT ONLY. GLENTRONICS, INC. will not cover the cost to reinstall the product, nor will GLENTRONICS, INC. pay the
cost of having a plumber or contractor repair or replace the product.
GLENTRONICS, INC. will not repair or replace a product that was installed incorrectly. A product shall be considered “installed incorrectly”
when it deviates in any way from the instructions described in this manual.
This warranty does not cover product problems resulting from user abuse; misuse, neglect, improper maintenance, improper connection or
installation, damages caused by lightning strikes; excessive surges in AC line voltage; water damage to the controller; other acts of nature,
or failure to operate in accordance with the enclosed written instructions.
How to Obtain Warranty Service
Within thirty (30) days of the product’s defective performance, the unit must be shipped, freight prepaid, or delivered to GLENTRONICS,
INC. to provide the services described hereunder in either its original carton and inserts, or a similar package aording an equal degree of
protection. Products not received by GLENTRONICS, INC. at the address indicated below within thirty (30) days of the product’s defective
performance will not be considered for warranty service. Products received aer one (1) year from the date of installation, fall outside of
the timeframe for warranty service and will not be eligible for warranty service. The product must be returned to GLENTRONICS, INC. for
inspection in order to be considered for warranty service. If the product is not returned to GLENTRONICS, INC. or the product is inspected
by any person, plumber, contractor or business other than GLENTRONICS, INC., this warranty shall no longer be valid. Prior to defective
operation, the unit must not have been previously altered, repaired or serviced by anyone other than GLENTRONICS, INC., or its agent;
the serial number on the unit must not have been altered or removed; the unit must not have been subject to accident, misuse, abuse or
operated contrary to the instructions contained in the accompanying manual. The dealer’s dated bill of sale, or installer’s invoice must be
retained as evidence of the date of purchase and to establish warranty eligibility.
Where are Products Sent for Warranty Service?
Glentronics, Inc., 645 Heathrow Drive, Lincolnshire, IL 60069
How Can I Obtain More Information?
Visit our website at www.BasementWatchdog.com or by calling us at 800-991-0466.
(10/2023)
7