
Meet your new BISSELL® product!
Go to support.BISSELL.com for a walkthrough of your new
purchase, including videos, tips, support, and more. Want to
get started right away? This guide has all the information you
need to set up your new product. Let’s take a look...
A
B
G
D
E
I
C
F
H
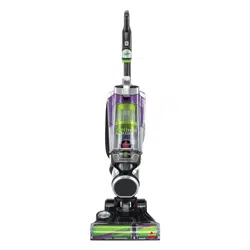
Product Overview
A. Carpet Type Control
B. Hose
C. Quick Release Extension Wand
D. Wand Release Button
E. Power Switch
F. Dirt Tank Release Button
G. Pre-Motor Filter
H. Dirt Tank
I. Post-Motor Filter
Pet Hair Eraser
®
ALLERGEN LIFT-OFF
®
UPRIGHT VACUUM
MODEL 39883
Important Safety Instructions ........................ 2
What’s in the Box? ............................................... 2
Assembly ................................................................. 3
Using the Vacuum ................................................ 3
Emptying the Dirt Tank .....................................4
Maintaining the TurboEraser® Pet Tool ....... 5
Cleaning and Replacing the Filters .............. 5
Replacing the Brush Roll and Belt ................ 6
Clearing a Clog ......................................................6
Protecting the Vacuum’s Motor ..................... 7
Resetting the Brush Motor ............................... 7
Troubleshooting .................................................... 7
Warranty .................................................................. 7
2 BISSELL.com
WARNING
TO REDUCE THE RISK OF FIRE, ELECTRIC SHOCK OR INJURY:
• Do not leave vacuum cleaner when it is plugged in. Unplug from outlet
when not in use and before servicing.
• Do not use outdoors or on wet surfaces.
• Do not allow to be used as a toy. Close attention is necessary when
used by or near children.
• Do not use for any purpose other than described in this user guide.
Use only manufacturer’s recommended attachments.
• Do not use with damaged cord or plug. If appliance is not working as
it should, has been dropped, damaged, left outdoors, or dropped into
water, have it repaired at an authorized service center.
• Do not pull or carry by cord, use cord as a handle, close a door on cord,
or pull cord around sharp edges or corners. Do not run appliance over
cord. Keep cord away from heated surfaces.
• Do not unplug by pulling on cord. To unplug, grasp the plug,
not the cord.
• Do not handle plug or vacuum cleaner with wet hands.
• Do not put any object into openings. Do not use with any opening
blocked; keep openings free of dust, lint, hair, and anything that may
reduce air flow.
• Keep hair, loose clothing, fingers, and all parts of body away from
openings and moving parts.
• Turn OFF all controls before plugging or unplugging vacuum cleaner.
• Use extra care when cleaning on stairs.
• Do not use to pick up flammable or combustible materials
(lighter fluid, gasoline, kerosene, etc.) or use in areas where they may
be present.
• Do not use vacuum cleaner in an enclosed space filled with vapors
given off by oil-based paint, paint thinner, some moth-proofing
substances, flammable dust, or other explosive or toxic vapors.
• Do not use to pick up toxic material (chlorine bleach, ammonia, drain
cleaner, etc.).
• Do not pick up anything that is burning or smoking, such as cigarettes,
matches or hot ashes.
• Do not use without filters in place.
• Do not pick up hard or sharp objects such as glass, nails, screws,
coins, etc.
• Use only on dry, indoor surfaces.
• Keep appliance on a level surface.
• Do not carry the vacuum cleaner while it is running.
• Before using your vacuum, make sure the dirt tank is in locked position
and that all filters, both pre- and post-filters, are in place. DO NOT
operate your vacuum without these filters.
• Plastic film can be dangerous. To avoid danger of suffocation, keep
away from children.
• Do not plug in your vacuum UNTIL you are familiar with all instructions
and operating procedures.
• To reduce the risk of electrical shock, turn power switch OFF and
disconnect polarized plug from electrical outlet BEFORE performing
maintenance or troubleshooting checks.
• Unplug before connecting or disconnecting the TurboBrush tool.
• Always turn off the appliance before connecting or disconnecting foot.
THIS APPLIANCE HAS A POLARIZED PLUG To reduce the risk
of electric shock, this appliance has a polarized plug (one blade is wider than the other). This plug will fit in a polarized outlet only
one way. If the plug does not fit fully in the outlet, reverse the plug. If it still does not fit, contact a qualified electrician to install a
proper outlet. Do not change the plug in any way.
IMPORTANT SAFETY INSTRUCTIONS
READ ALL INSTRUCTIONS BEFORE USING YOUR APPLIANCE.
When using an electrical appliance, basic precautions should be observed, including the following:
SAVE THESE INSTRUCTIONS
THIS MODEL IS FOR HOUSEHOLD USE ONLY. COMMERCIAL USE OF THIS UNIT VOIDS THE MANUFACTURER’S WARRANTY.
Do not wash the pleated filter. Replace with a new pleated filter every 6 months.
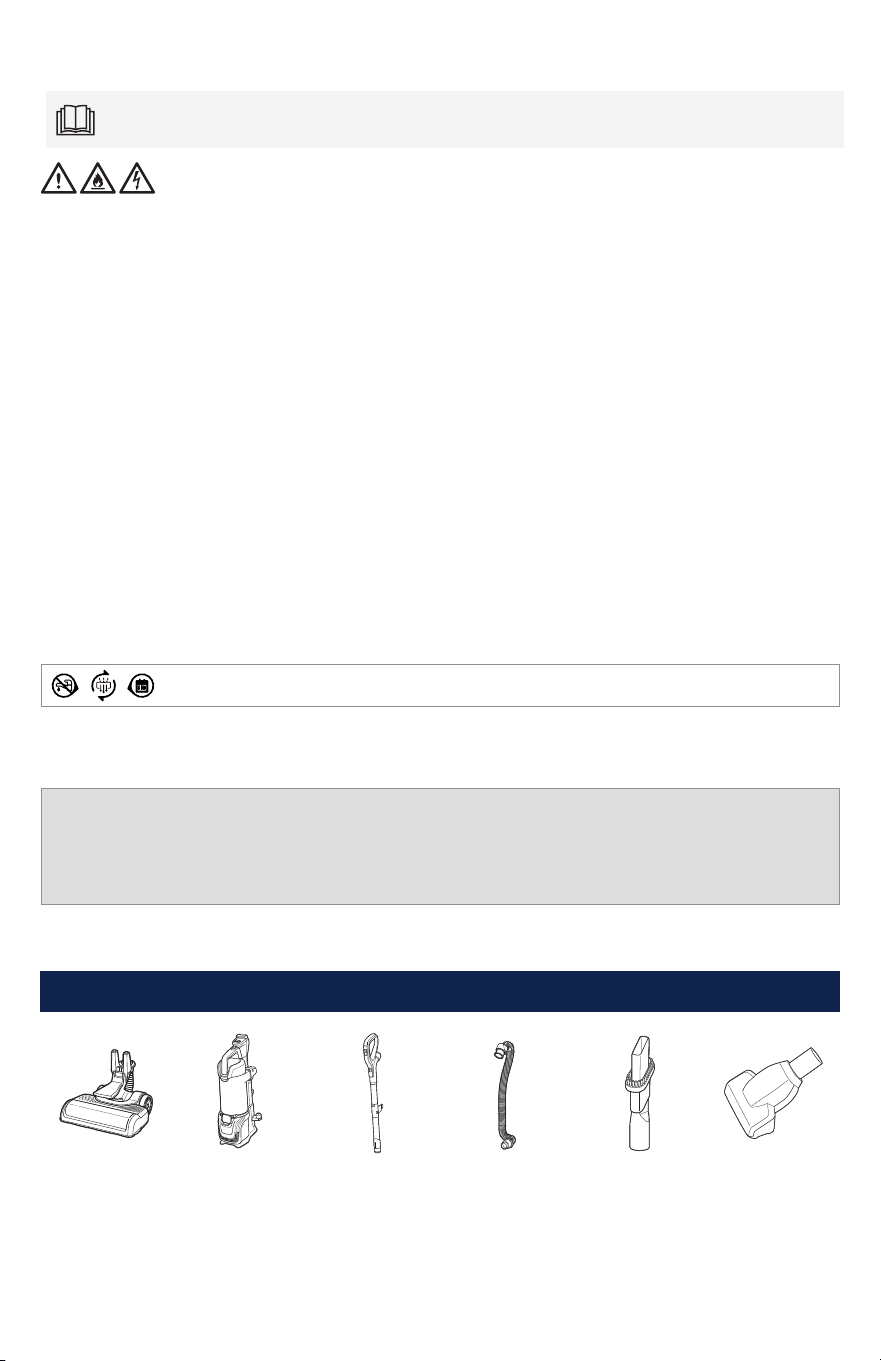
Foot Lift-Off® Pod Wand Hose 2-in-1 Dusting
Brush and
Crevice Tool
TurboEraser®
Pet Tool
What’s in the Box?
BISSELL.com 3
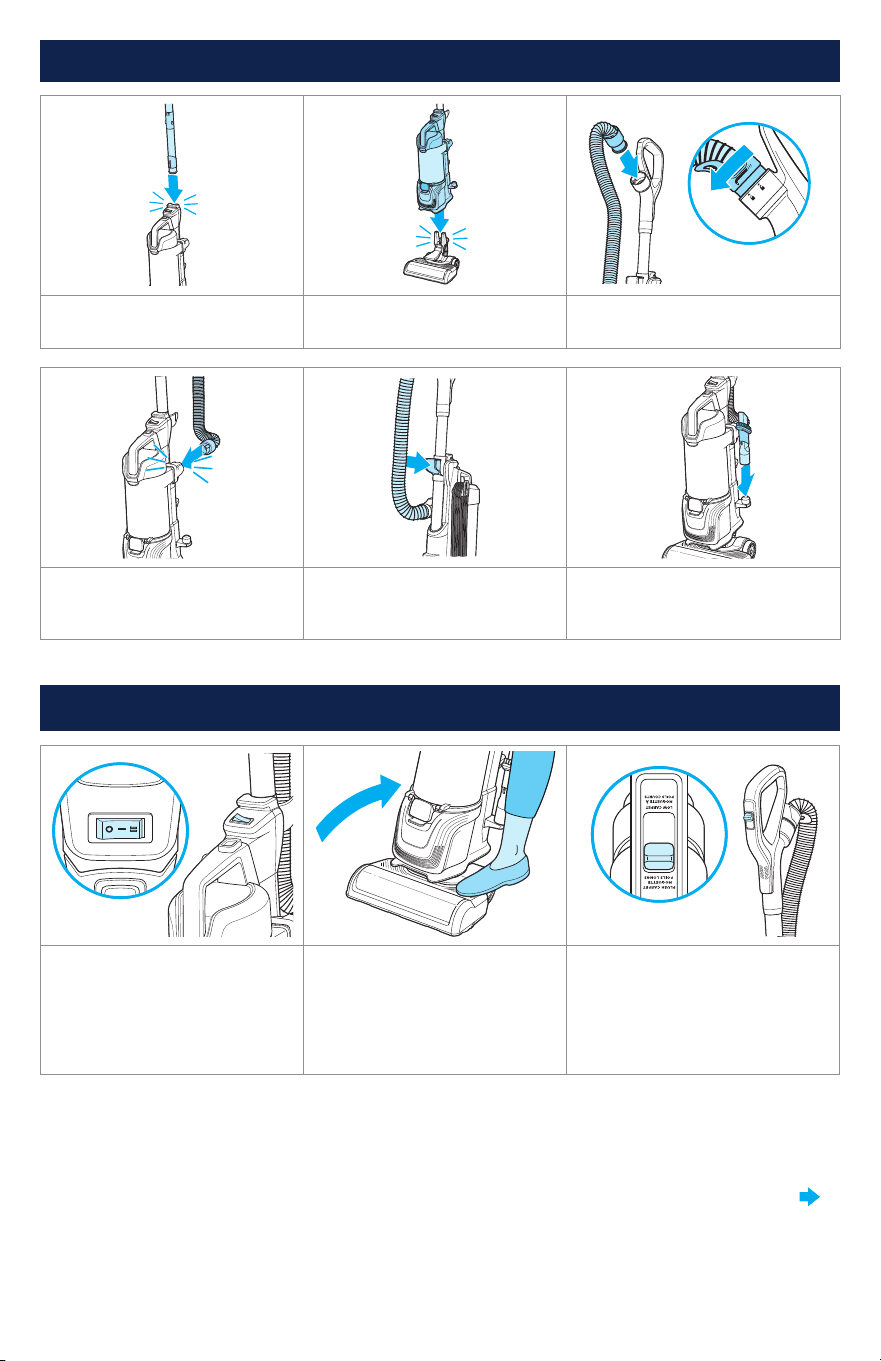
Assembly
1. Insert handle into body until
it clicks into place.
2. Attach Lift-Off® pod to foot. 3. Attach hose to wand by
twisting clockwise
4. Insert hose connector into
machine until it clicks.
5. Insert hose into hose clip.
The hose should sit on the
vacuum without any twists.
6. Attach tool to tool holder.
Using the Vacuum
1. Power ON. Turn brush roll
ON (
II
) for carpet cleaning
and OFF (
I
) when vacuuming
hard or delicate surfaces like
hardwood, tile, small rugs, or
frieze carpets with long fibers.
2. Step gently on base and
pull the handle back to recline.
Note: The brush roll shuts
OFF when vacuum is locked in
upright position.
3. Use the carpet type control
for optimized cleaning on high
pile and low pile carpet.The
control can be moved to the
middle position for medium pile
carpeting
Note: Certain carpets and low humidity conditions may generate small static discharges. Static
discharges are entirely harmless and are not associated in any way with the main power supply.
CONTINUED ON NEXT PAGE
4 BISSELL.com
WARNING To reduce the risk of injury from moving parts while the vacuum is turned ON, always move the
vacuum via the rolling wheels by using the upper handle at the back of the vacuum. Do not carry the vacuum while it is running.
Always place vacuum on floor with handle in upright position when using tools.
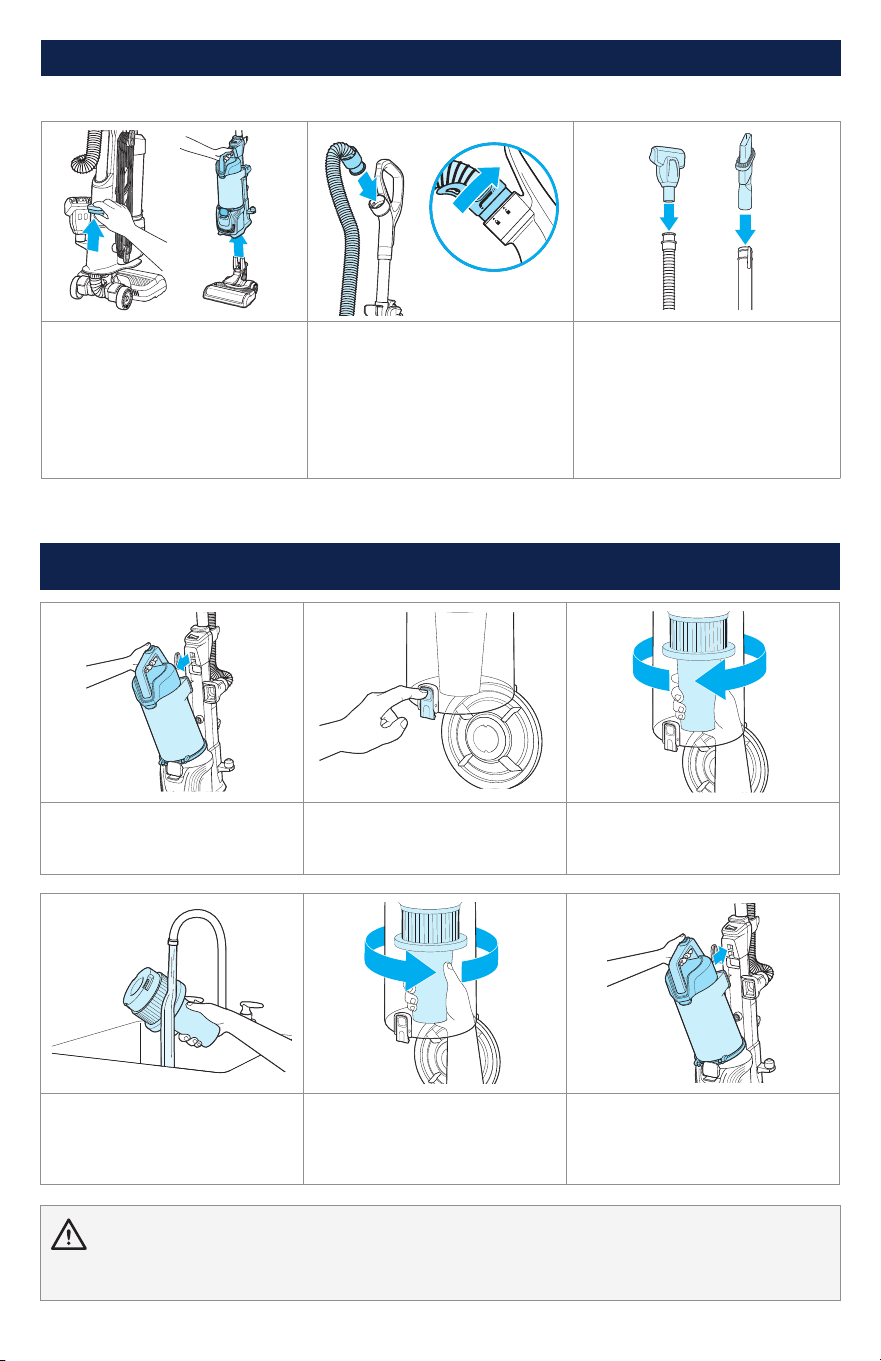
Emptying the Dirt Tank
1. Press the dirt tank release
button and pull out to remove
dirt tank.
2. Hold the dirt tank over a
trash bin. Press the bottom
release button to empty.
3. Twist separator counter-
clockwise and pull down to
remove from tank.
4. Clean separator with warm
water and mild detergent.
Let dry for 24 hours before
reinstalling.
5. Twist separator clockwise
to reinstall.
6. Place dirt tank back on
vacuum and press firmly until it
clicks into place.
Above Floor Cleaning
1. Push the Lift-Off® Release
Button and lift up to remove
the pod from the foot.
2. The hose can be removed
from the extension wand. Twist
hose cuff counter-clockwise
and remove from handle.
3. Attach desired tool.
Note: For optimal use, attach
the TurboEraser® Pet Tool to
the hose instead of wand.
Reinstall wand by sliding until
it clicks into place. Reattach
hose to handle if needed.
When finished using the machine, wrap cord around cord wrap for storage. Store unit indoors in a dry
location in an area where the product is not likely to get damaged.
Using the Vacuum (continued)
BISSELL.com 5
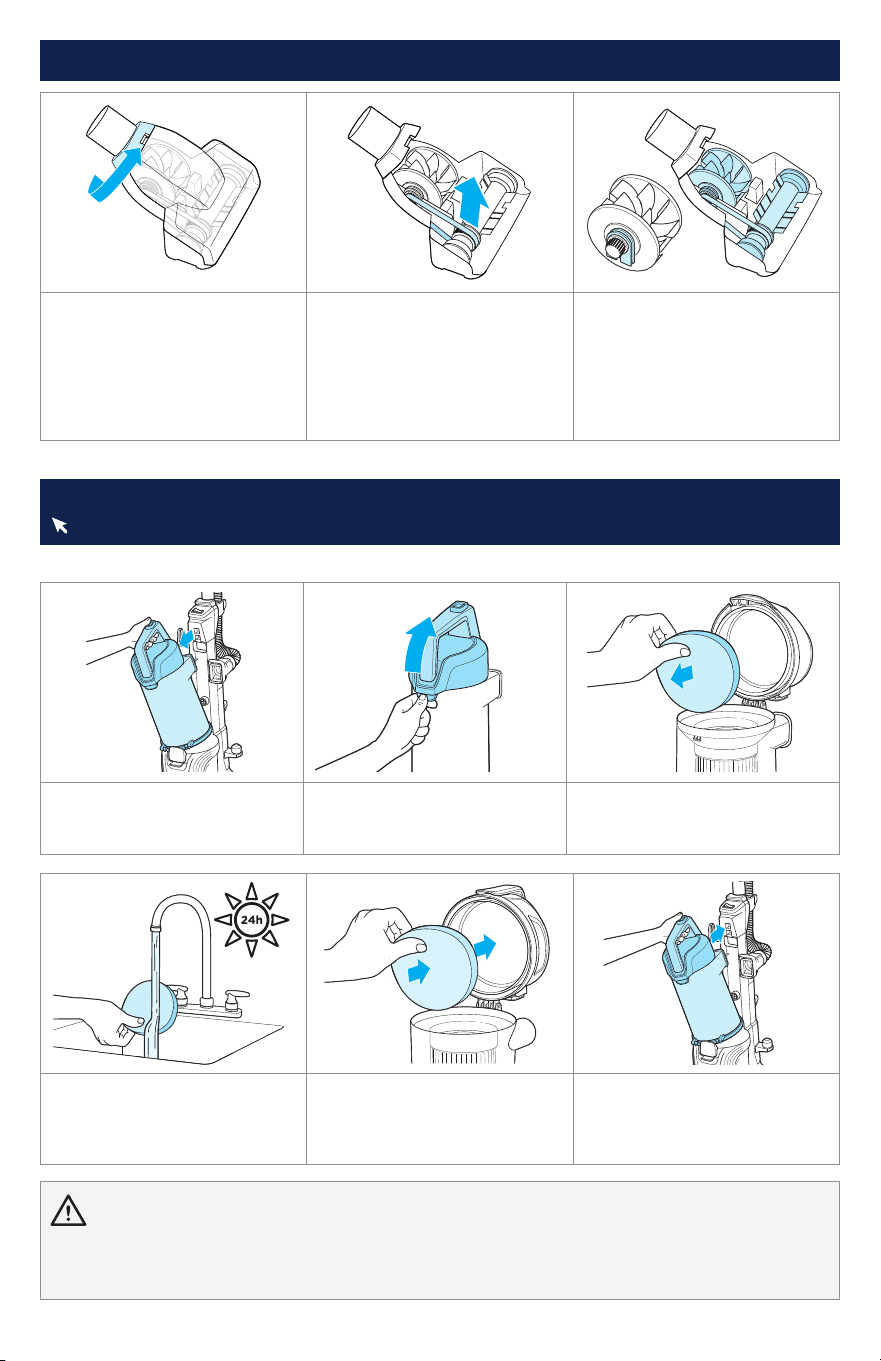
Pre-Motor Filter
1. Press the dirt tank release
button and pull out to remove
dirt tank.
2. Lift release latch to access
filter.
3. Remove foam filter from lid.
24h
4. Hand wash in warm water
and rinse well; mild detergent
may be used if desired. Let dry
for 24 hours before reinstalling.
5. Reinstall foam filter and
close lid.
6. Place dirt tank back on
vacuum and press firmly until
it clicks into place.
Cleaning and Replacing the Filters
Visit BISSELL.com to find replacement filters.
WARNING
• To reduce the risk of electric shock, turn power OFF and disconnect plug from electrical outlet before performing maintenance or
troubleshooting checks.
• Do not operate vacuum with damp or wet filters or without all filters in place.
Maintaining the TurboEraser® Pet Tool
1. Twist gray collar counter-
clockwise, until slot appears,
then separate faceplate.
2. Remove brush roll, belt
and paddle wheel. Inspect
for damages and replace if
necessary.
3. To reassemble, align two
clips on each end of paddle
wheel with belt on and pop
back into place. Place brush roll
with belt back in. Faceplate will
not close properly if all parts
are not aligned correctly.
6 BISSELL.com
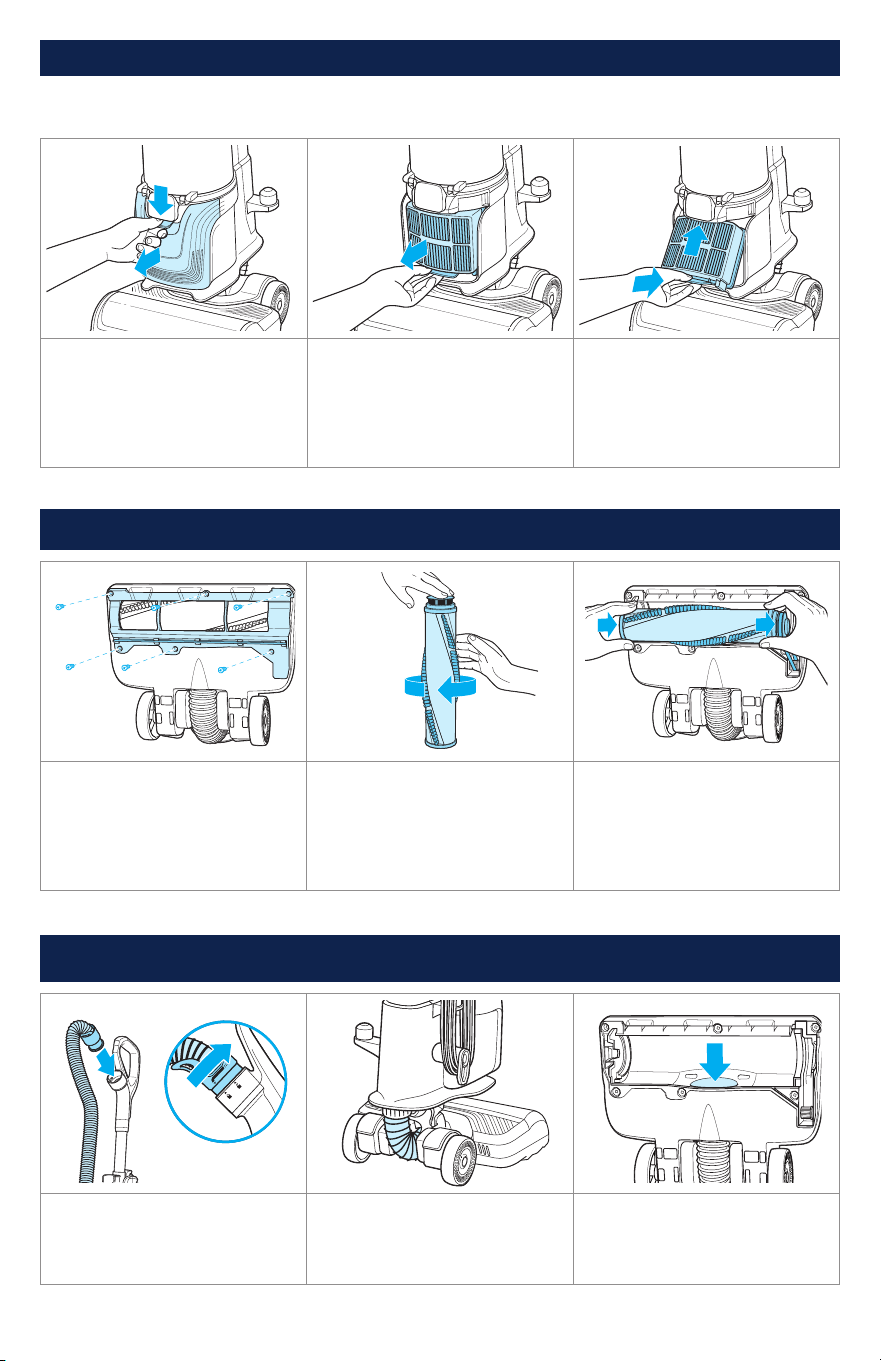
Replacing the Brush Roll and Belt
1. Unplug vacuum, turn over
and unscrew six (6) Phillips-
head screws to remove the
bottom cover. Lift brush roll
straight out and clean debris.
2. Inspect brush roll by placing
on its end and spinning; it
should spin freely multiple
times with one flick. If not,
replace it. Check belt for wear
or cuts and replace if needed.
3. Replace brush roll and belt
by looping belt over the gear
and brush roll. Line up endcaps
and pull brush forward into
place. Return bottom cover
back on and replace screws.
Clearing a Clog
1. Twist hose counter-clockwise
to remove from vacuum. Press
hose release button on tank
and clear any debris.
2. Check the foot hose on the
back. If necessary, twist the
hose cuff from the foot hose
and check for clogs.
3. Check the air passageway
on the bottom of your vacuum.
Remove the bottom cover and
the brush. Remove any debris.
1. Press down on tab to
remove post-motor filter cover
and pull away from vacuum.
2. Press tab on bottom of filter
and pull out to remove from
vacuum. Remove debris from
filter by tapping on the side of
a trash container. This pleated
filter should NOT be washed.
3. When reassembling, be
sure to lock the filter back into
place by aligning the top of
the filter first, then clicking the
bottom into place.
Post-Motor Filter
For optimal performance, replace the filter every 6 months.
Cleaning and Replacing the Filters (continued)

WARNING To reduce the risk of electrical shock:
• Turn power switch OFF and disconnect polarized plug from electrical outlet before performing maintenance or troubleshooting checks.
• Before using your vacuum, make sure that the dirt tank is in locked position and that all filters, both pre- and post-filters, are in
place. DO NOT operate your vacuum without these filters.
• Do not operate vacuum with damp or wet filters. Allow components to dry before reassembling the dirt tank.
• Do not use without filters in place.
Protecting the Vacuum’s Motor
There is an internal thermal protector in your vacuum that protects it from overheating. It controls
the main vacuum motor only, not the brush motor. When it activates, the main motor will stop.
The front lights and brush roll will stay on but there won’t be any suction. If this happens, follow
these steps:
1. Turn vacuum OFF and unplug from electrical outlet.
2. Check for the source of overheating problem (full dirt tank, dirty filters or a clog) and fix by
following the steps in the “Vacuum won’t pick up dirt” troubleshooting section.
3. When the motor cools for approximately 60 minutes, the thermal protector automatically resets
and cleaning may continue. If the vacuum will not turn ON or the thermal protector continues to
activate, contact BISSELL® Consumer Care.
Warranty
Limited 5-year warranty, may vary by state. Visit support.BISSELL.com or call 1-800-237-7691 for
complete warranty information.
Terms and Conditions
Your purchase is subject to the BISSELL Terms and Conditions, which includes dispute resolution
through arbitration and class waiver. For complete terms or to opt out from arbitration or class waiver,
visit BISSELL.com/terms-of-use or call 1-800-237-7691.
Resetting the Brush Motor
There is a circuit to protect the brush motor. If something becomes lodged in the foot and the brush
shuts off, turn the cleaner off and unplug from the outlet. Remove the obstruction. The brush will
automatically reset when the cleaner is plugged in and turned back on.
Note: Any other maintenance or servicing not included in this manual should be performed by an
authorized service representative.
Troubleshooting
For a comprehensive walkthrough of your product and support tips visit support.BISSELL.com.
Problem Possible Cause Remedies
Noise change when
vacuuming over hard
or sharp object
Blockage/object
caught in brush roll.
Clear object from brush roll.
Vacuum won’t pick
up dirt
Filters are dirty. Clean filters. See page 5.
There is a clog in the
vacuum.
Remove the foot and extension wand from
the vacuum. Check for clogs in each of these
sections. Clear clogs before reassembling.
Dirt tank is not seated
correctly.
Remove the tank and reseat properly.
WARNING To reduce the risk of electric shock, turn power OFF and disconnect plug from electrical outlet
before performing maintenance or troubleshooting checks.

©2025 BISSELL Inc. All rights reserved.
Part Number 1647552 10/24 v3
Need more support?
Head to support.BISSELL.com to troubleshoot, register your product,
order spare parts, view your warranty, and more.
INFO REGISTER VIDEOS PARTS SUPPORT
Every purchase makes it possible for BISSELL to continue
our support of BISSELL Pet Foundation® and its mission of
saving pets in need. Since 2011, BISSELL has donated over
$26 million in support of BISSELL Pet Foundation®.
When you purchase a BISSELL® product, you help save pets,
too. Our products are engineered to clean even the toughest
messes so pets can stay at home and out of shelters.
Visit BISSELLsavespets.com to learn more.
WE
PROUDLY
SUPPORT