Slide End of Wand into top of base. It will “Click” when inserted correctly.
Insert end of Hose into vacuum base by sliding the arms in and down first. Press down hard on the bottom tab with both your thumbs to “click” in.
Push Cord Wrap in firmly until you hear “Click”.
Wrap power cord around cord wraps
You have the option to store just the LED Lighted Crevice Tool or both that and the Pet TurboEraser Tool. Pick the single tool caddy or double tool caddy and push hard to slide it on the base of vacuum.
Press Tank Release Button and pull container away from vacuum.
Pull tab out on front of dirt container and pull handle up to open.
IMPORTANT REMINDER
Your vacuum came in floor cleaning mode, to use your tools, be sure to turn the Vacuum Suction Knob to align arrow with “hose/tool suction.” See page 9 for further instructions.
Remove the yellow foam filter (nonFebreze®) and replace with black Febreze® filter (included separately) last. Be sure black filter faces out, covering white mesh filter.
Place dirt container back on vacuum.
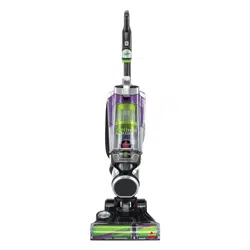
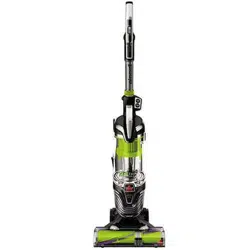
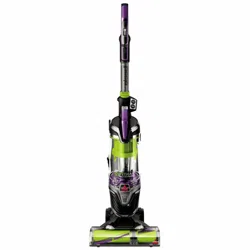
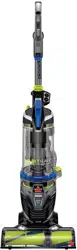
Product View
Operations
NOTE: Be sure the green suction knob on side of vacuum is turned to “Floor Suction” before use.
Step gently on base and pull back on handle to recline.
Turn vacuum on by pressing Power Switch on (I - ON and O - OFF). Press Brush roll switch to run the PowerBrush for carpet cleaning (brush roll is on when light on switch is illuminated). See page 15 to maintain the brush roll.
NOTE: The brush roll will automatically shut off when vacuum is locked in upright position, recline to reactivate.
Turn Height Adjustment Knob to desired carpet cleaning level.
Utilize the clip on the back of your vacuum to hold the hose in place. Pull out when using hose with tool attachments.
NOTE: For optimal carpet cleaning performance, adjust to the lowest practical setting. If your vacuum is difficult to push, adjust to the next higher setting.
NOTE: In the unlikely event that hair wrapped around your brush roll, run vacuum back and forth on clean carpet several times to help release any wrapped hair.
NOTE: Turn off the brush roll when vacuuming hard or delicate surfaces that may be caught by the rotating brush. This could include hard wood, tiled floors, small area rugs or frieze carpets that have long delicate fibers or threads.
Brush roll Safety Feature
If red light illuminates around height adjustment knob, you have tripped your brush roll motor safety feature.
Put vacuum in upright position and turn it off.
It may have tripped because of use on premium soft carpet. Turn Height Adjustment Knob to the “high carpet” setting. Also check if debris is clogged in brush roll. Clear debris if necessary
Turn vacuum back on and try again
Above Floor Cleaning: Handle
To use tools and the hose/wand; turn the green knob aligning arrow with “hose/tool suction.”
Press Handle Release Button to release handle from wand.
Pull straight up and out.
2-in-1 Pet Brush has white soft bristles for those gentle uses and rubber knobs for embedded pet hair.
Use the collar with the white soft bristles side for delicate surfaces.
Un-click the collar and flip around to use the rubber fingers for removing pet hair from your furniture. Listen for 2 “clicks” when reattaching.
Once done using Handle, slide back on to Wand until it “clicks.”
Be sure to turn the green knob back to “Floor Suction” mode after using tools.
Above Floor Cleaning: Wand
To have more reach, press down on Wand Release Latch and pull out the handle.
Attach desired tool to end of wand.
Above Floor Cleaning: Hose
Grab Hose Connector, twist counter clockwise and pull hose out.
Attach desired tool to end of hose
Push hose back in, aligning tabs; twist clockwise to lock into place. Be sure the hose relief is on bottom.
LED Lighted Crevice Tool
Pull tabs out of battery door area before use to activate. Connect to handle, wand or hose and the LED Light will automatically come on.
To replace LED battery, unscrew the small screw with a Phillips head screw driver. Pull cover off to reveal two batteries (CR1632 3V). Slide and pull out each battery and replace with new. Be sure the “+” sign on battery is facing out.
Dispose of used battery promptly. Keep away from children. Do not disassemble and do not dispose of in fire.
NOTE: When the small tab on the connection point of Crevice tool comes into contact with the handle, wand, or hose; that triggers the LED light to come on. When using with the Wand, be sure it does not pop through the opening at the end of the Wand.
Vacuum Motor Protection
An internal thermal protector has been designed into your vacuum to protect it from overheating. When the thermal protector activates, the main vacuum motor will stop operating. If this happens, proceed as follows.
Turn vacuum OFF and unplug from electrical outlet.
Check for the source of overheating problem (full dirt cup, dirty filters or, a clog) and fix by following the maintenance instructions.
When the motor cools for approximately 30 minutes, the thermal protector automatically resets and cleaning may continue. If the vacuum will not turn on or the thermal protector continues to activate, your vacuum may need servicing. Call BISSELL Consumer Care.
NOTE: The thermal protector controls the main vacuum motor only, not the brush motor. If the thermal protector activates, the brush will continue to operate normally; however, there will be no suction.
Removing/Emptying Dirt Tank
Vacuum tank is full. Time to empty!
Press Tank Release Button. Grab handle to pull Dirt Container away from vacuum.
Holding Dirt Container over a trash bin, press Tank Empty Button.
Snap bottom back into place.
Place tank back on the vacuum.
Be sure you place the front of the tank first and push back to “click” into place.
Cleaning & Replacing Top Pre-Motor Filters
Press Tank Release Button and pull away from vacuum
Pull tab out on front of dirt container and pull handle up to open filter location.
Remove pre-motor filters from top of dirt container lid by pulling out.
Both the Pre-Motor Mesh and Foam filters are washable.
Clean with mild detergent, rinse and squeeze all excess water. Allow filters to dry completely before reinserting.
Place dry pre-motor filters back in the top of dirt container placing the thick foam filter last.
Cleaning & Replacing Bottom Post-Motor Filter
Press Tank Release Button and pull away from vacuum.
With dirt container removed, pull tab up to access post-motor filter.
Twist filter counter-clockwise to unlock and remove from vacuum.
Lift to remove filter.
When reassembling, place filter back in unit and twist clockwise to “click” into place.
The pleated filter may NOT be washed. If dust/debris accumulates, gently tap the filter on inside of a trash bin.
Cleaning Inner Cyclone Separator
Push Empty Tank Button to access Inner Cyclone Separator.
Twist counter-clockwise to remove seperator from dirt container and pull down.
Tap separator against inside of trash bin and rinse under warm water if necessary. Be sure to let it completely dry before placing back in Dirt Container.
Maintain the Pet TurboEraser® Tool
Twist gray collar counter-clockwise, until slot appears, and then separate faceplate.
Remove brush roll, belt, and paddle wheel. Inspect for damages and replace if necessary
To reassemble, align two clips on each end of paddle wheel with belt on and pop back into place.
Place brush roll with belt back in. Faceplate will not close properly if all parts are not aligned correctly
To put faceplate back on, align the tabs in the top of the cover and place it down to “click” into place.
Replace the Brush & Belt
Unplug vacuum, turn over and unscrew 9 Silver Phillips head screws to remove bottom cover.
Pull roller straight out and slide belt off motor gear. Replace roller and/ or belt.
Inspect brush roll by placing it on its end and spin. The brush roll should spin freely, multiple times by one flick. If it doesn’t, replace brush roll.
Inspect belt, replace if it appears damaged.
1. Place belt back on brush roll.
2. Pinch belt around brush roll & hook back around the silver motor gear.
3. Rotate brush roll into place and line up end caps.
4. Re-attach bottom cover with 9 screws.
NOTE: If an object becomes lodged in foot and brush shuts off, turn vacuum off and unplug from electrical outlet. Remove obstruction and brush will automatically reset when vacuum is plugged and turned back on.
Troubleshooting
Problem
Possible causes
Remedies
Brush roll doesn’t rotate
Brush roll switch is turned off
Make sure Brush roll switch is on
Vacuum is locked in upright position
Recline vacuum and switch on the Brush roll
Vacuuming on Premium Soft Carpet
Turn Height Adjustment Knob to the “high carpet” setting. Turn vacuum off and back on
Brush roll safety feature triggered (blue changes to red light illuminating around height adjustment knob)
Unplug, check for debris, and remove the debris
Brush roll has lodged debris or other entanglements, keeping the brush from rotating
Unplug, check for debris, and remove the debris
Vacuum won’t pick up dirt
Vacuum Suction Knob is in “hose/ tool suction” mode
Turn knob aligning arrow with “Floor Suction”
Filters are dirty
Remove and rinse pre-motor filters. Allow enough time for them to dry properly before reinserting. Remove and dust off post-motor filter
There is a clog in the vacuum
Remove debris and any other entanglements that may be restricting the brush rolls rotation
Dirt Container is not seated correctly
Press the Tank Release to release the Dirt Container and reseat properly
There is a crack or hole in the Main Hose
If there is a crack or hole, order a new Main Hose from the BISSELL website
Main Hose is not connected
Locate the Main Hose and reconnect by pushing the hose connection to secure the latch
There is a clog in the hose or wand
Check inside of hose for clogs by disconnecting from handle. Disassemble wand and check for clogs
Hair wrapped around brush roll
Run vacuum back and forth on clean carpet several times to release wrapped hair
Dirt is escaping from the vacuum
Dirt Container is full
Empty the Dirt Container
Filters are missing
Check to see if all of the Pre-Motor and Post-Motor filters are in place
Hose won’t pick up dirt
Vacuum Suction Knob is in “Floor Suction” mode
Turn knob aligning arrow with “hose/ tool suction”