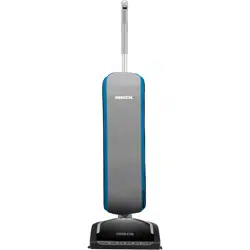
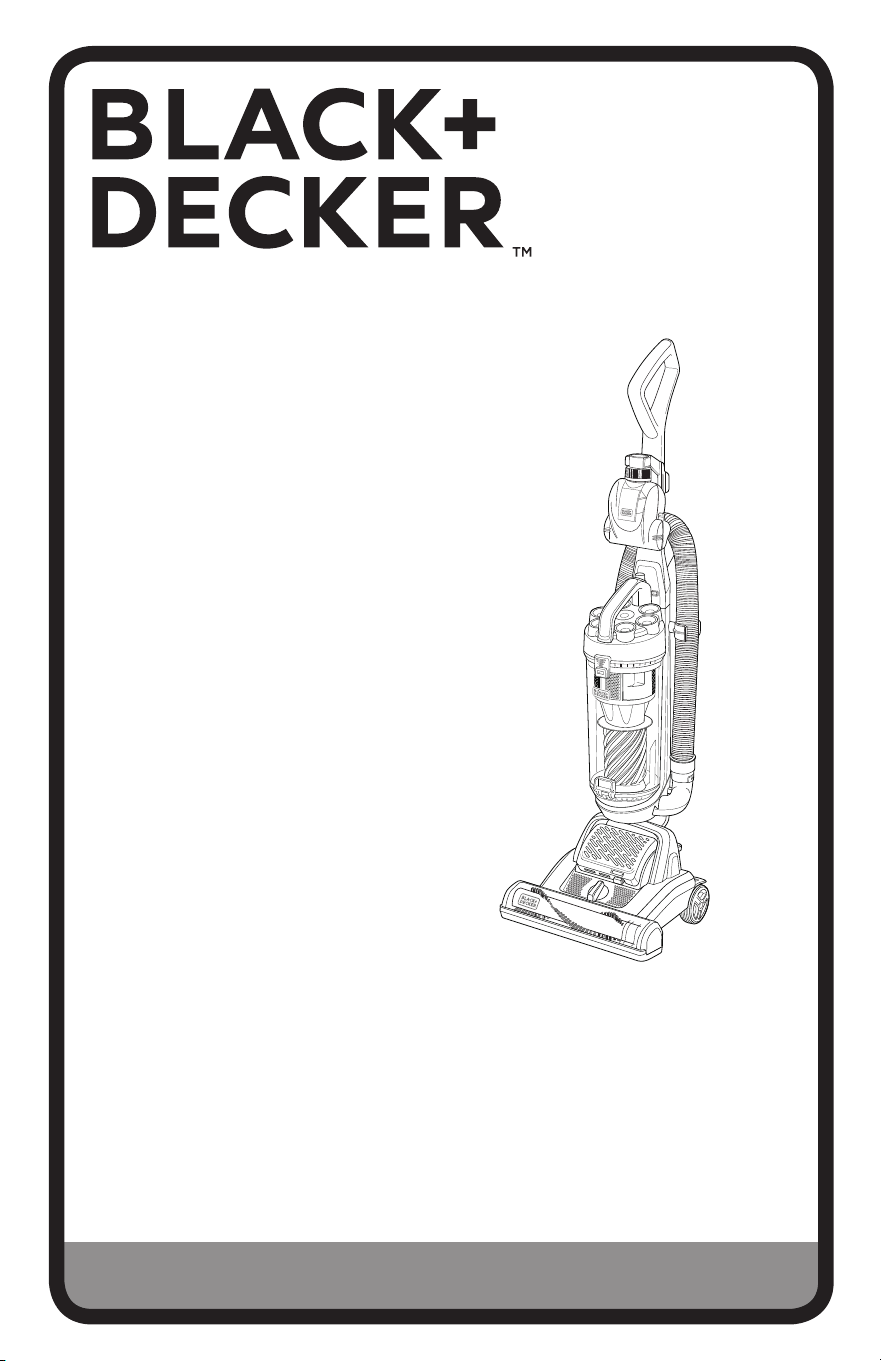
INSTRUCTION MANUAL
POWERSWIVEL™ UPRIGHT VACUUM
CLEANER
Thank you for choosing BLACK+DECKER!
PLEASE READ BEFORE RETURNING THIS PRODUCT FOR
ANY REASON.
If you have a question or experience a problem with your BLACK+DECKER
purchase, call 1-800-524-6716 from 9 a.m. to 5 p.m. EST Mon. - Fri. to speak
with an agent.
Please have the model number available when you call.
SAVE THIS MANUAL FOR FUTURE REFERENCE.
MODEL NUMBER
BDPSC101
BDPSC102
BDPSC103
BDPSC104
BDPSC105
BDPSC106
To register your new product, visit
www.BlackandDecker.com
2
When using an electrical appliances,
basic precautions should always be
followed, including the following:
READ ALL INSTRUCTIONS
BEFORE USING THE
APPLIANCE.
WARNINGS: Before
using this appliance, read and follow
all warnings and instructions in this
manual, even if you are familiar with
this product.
This appliance is not intended for use by
persons (including children) with reduced
physical, sensory or mental capabilities,
or lack of experience and knowledge,
unless they have been given supervision
or instruction concerning use of the appliance
by a person responsible for their safety.
Young children should be supervised to
ensure that they do not play with the
appliance.
POLARIZATION INSTRUCTION
To reduce the risk of electric shock, this
appliance has a polarized plug (one blade
is wider than the other). This plug will fit in
a polarized outlet only one way. If the plug
does not fit fully in the outlet, reverse the
plug. If it still does not fit, contact a quali-
fied electrician to install the proper outlet.
Do not change the plug in any way.
Safety Direction
Please read this instruction manual
carefully before first use. It is advisable
to keep this instruction manual for future
reference.
DO NOT vacuum water, wet objects,
liquids, ashes, hot coals, cigarette butts,
matches or any hot, smoking or burning
objects, etc.
DO NOT pick up flammable or
combustible materials (i.e. lighter fluid,
petrol, kerosene, etc.) or use in the
presence of explosive liquids or vapor.
DO NOT pick up toxic material (i.e.
chlorine bleach, ammonia, drain cleaner,
etc.)
DO NOT vacuum Toner (for laser printer,
copy machines etc.) as there is a risk
of fire and explosion.
DO NOT vacuum plaster, cement etc. as
the filter can become blocked.
DO NOT use the vacuum without all the
filters fitted.
DO NOT store or use the appliance near
high temperature areas.
DO NOT run over the power cord with the
vacuum cleaner.
DO NOT use the vacuum cleaner if it is
blocked. Turn off and clear all
blockages before continuing.
SAFETY GUIDELINES - DEFINITIONS
It is important for you to read and understand this manual.
The information it contains relates to protecting YOUR SAFETY and PREVENTING
PROBLEMS. The symbols below are used to help you recognize this information.
DANGER: Indicates an imminently hazardous situation which, if not
avoided, will result in death or serious injury.
WARNING: To avoid all risks of fire, electrocution or injury, when using
an electrical appliance, make sure you follow the safety measure below:
READ CAREFULLY ALL THE RECOMMENDATIONS BEFORE USING YOUR
VACUUM CLEANER
CAUTION: Indicates a potentially haz ard ous situation which, if not
avoided, may result in minor or mod er ate injury.
NOTICE: Used without the safety alert symbol indicates potentially hazardous
situation which, if not avoided, may result in property damage.
IMPORTANT SAFETY INSTRUCTION

3
DO NOT use the vacuum cleaner with
blocked filters. Clean or replace filters
before continuing. (refer to User
Maintenance section).
DO NOT use the vacuum cleaner if the
appliance malfunctions, abnormal
noise, smell, smoke, is dropped or
damaged in any manner or any breakage
is found during operation.
DO NOT misuse the cord. Never pull the
appliance by the cord or pull to
disconnect it from the outlet. Instead,
grasp the plug and pull to disconnect.
DO NOT use the vacuum cleaner to pick
up large objects, hard or sharp objects
such as glass, nails, screws, coins, etc.
that are likely to cause damage.
DO NOT Leave Unattended when plugged
in and / or switched on.
DO NOT use vacuum cleaner if it has
been dropped, damaged, left outdoors,
or dropped into liquid (water etc.)
DO NOT close door on cord, or pull cord
around sharp edges or corners.
DO NOT handle the plug or vacuum
cleaner with wet hands.
DO NOT put any objects into openings.
DO NOT use with any openings blocked
and do not restrict airflow.
DO NOT operate the appliance with
a damaged cord or plug.
If the supply cord is damaged, it must be
replaced by the manufacturer, its
service agent or similarly qualified persons
in order to avoid a hazard.
DO NOT use without filters in place.
DO NOT attempt to modify this product in
any way.
DO empty the Dust Canister and clean the
filters regularly for optimal
operation of the vacuum.
DO keep hair, loose clothing, fingers, feet
and body parts away from openings
or moving parts.
DO disconnect the appliance from the
mains supply before connecting the
flexible suction hose.
DO turn off controls before you connect or
disconnect the appliance to or from
the mains supply.
DO disconnect the appliance from the
power supply when not in use, before
changing the filters, cleaning the filters or
connecting / disconnecting the
accessories.
DO use only on dry, indoor surfaces.
DO use only as described in this manual.
Use only manufacturer’s
recommended attachments.
DO Keep cord away from heated surfaces.
DO Keep all openings free of dust, lint.
hair, and anything that may reduce airflow.
DO use extra care when vacuuming on
stairs.
DO keep your work area well lit.
DO store your appliance indoors in a cool.
dry area.
DO ensure children and babies cannot
play with plastic bags or any packaging
materials.
DO operate the appliance from a power
source of the same voltage, frequency
and rating as indicated on the product
identification plate.
If this appliance is used by a third party,
DO supply the instruction manual with it.
No liability can be accepted for any
damage caused by non-compliance with
these instructions or any other improper
use or mishandling of appliance.
This product has not been designed for
any uses other than those specified in
this manual.
DO NOT modify the polarized plug to fit
a non‐polarized outlet or extension cord.
Keep appliance on a level surface.
ONLY for domestic use.
Industrial or commercial use invalidates
the warranty.
4
READ AND SAVE THESE INSTRUCTIONS
Symbols
• The label on your tool may include the following symbols.
The symbols and their definitions are as follows:
V ....................volts
A .....................amperes
Hz ...................hertz
W ....................watts
min .................minutes
or AC ...... ...alternating current
or DC ....direct current
n
o ...................no load speed
.................Class I Construction
...................earthing terminal
(grounded)
..................safety alert symbol
................ ...Class II Construction (double insulated)
.../min or rpm...revolutions or reciprocation per minute
• When using an extension cord, be sure to
use one heavy enough to carry the current
your product will draw. An undersized cord
will cause a drop in line voltage resulting in
loss of power and overheating.
The following table shows the correct size
to use depending on cord length and
nameplate ampere rating. If in doubt, use
the next heavier gauge. The smaller the
gauge number, the heavier the cord.
IMPORTANT SAFETY INSTRUCTION CONT.
Minimum Gauge for Cord Sets
Volts Total Length of Cord in Feet
120V 0-25 26-50 51-100 101-150
(0-7,6m) (7,6-15,2m) (15,2-30,4m) (30,4-45,7m)
240V 0-50 51-100 101-200 201-300
(0-15,2m) (15,2-30,4m) (30,4-60,9m) (60,9-91,4m)
Ampere Rating
More Not more American Wire Gauge
Than Than
0 - 6 18 16 16 14
6 - 10 18 16 14 12
10 - 12 16 16 14 12
12 - 16 14 12 Not Recommended
Transporting your Vacuum
To move your vacuum cleaner from room
to room, unplug the unit and either push the
appliance or carry using the carry handle.
Never pull or carry the vacuum cleaner by its cord.
Never carry or pull the vacuum cleaner by the flexible hose.
5
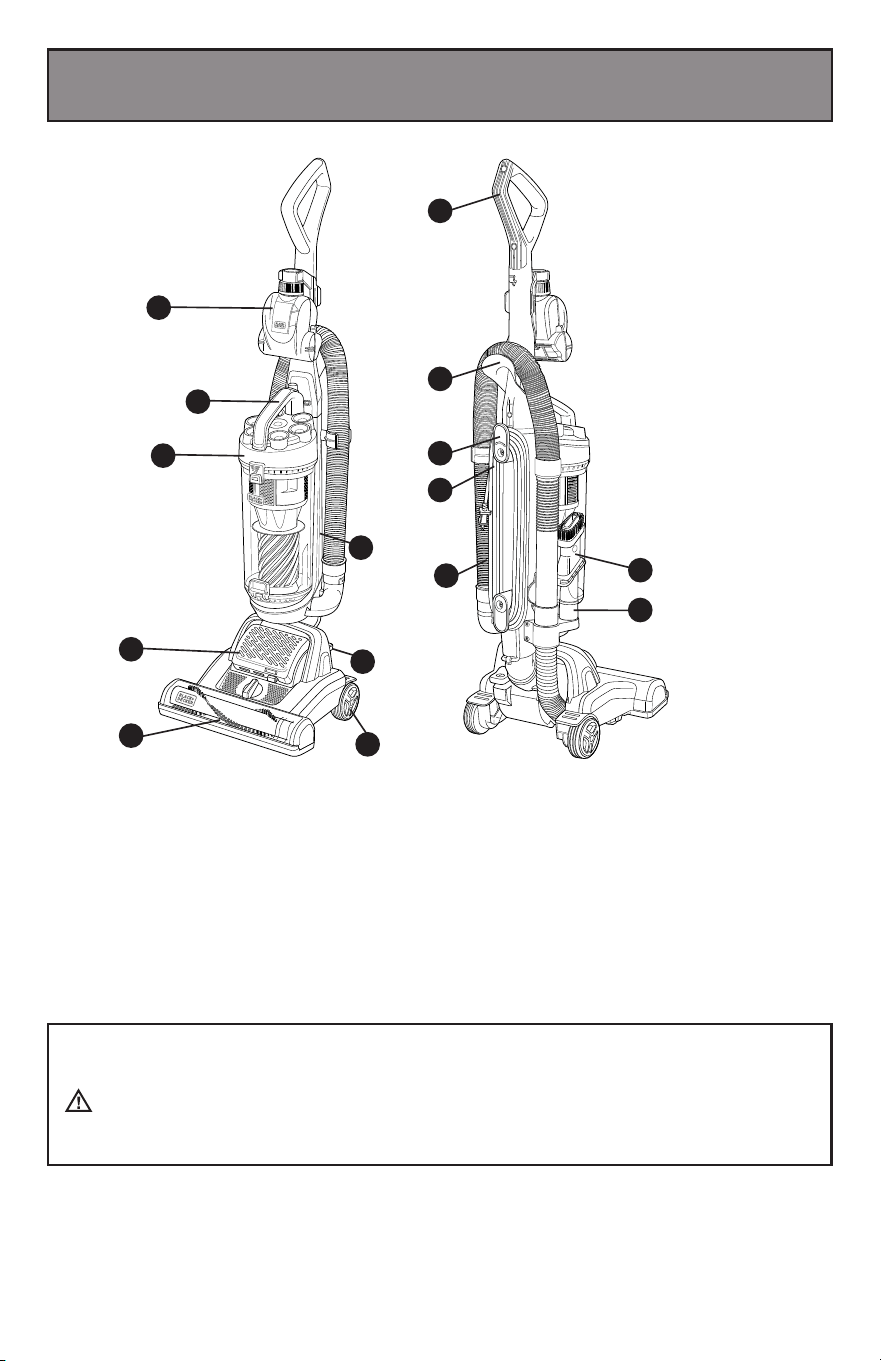
Product View
1. On board pet tool
2. Dust cup clamp
3. Dust cup assembly
4. Air outlet
5. Power on/off
6. Wheel
7. Nozzle
8. Power cord
9. Power cord wrap
10. Hose holder
11. Handle hose
12. Tool holder
13. Handle
14. 3 in 1 crevice tool accessory
1
The pet hair cleaning tool (1) is for use when vacuuming pet hair and/or ground-in
debris from carpeted or upholstery surfaces.
WARNING: Injury to pets. Do not use pet hair cleaning
tool directly on animals.
2
3
4
5
6
4
7
14
12
11
8
9
10
13
6
1
2
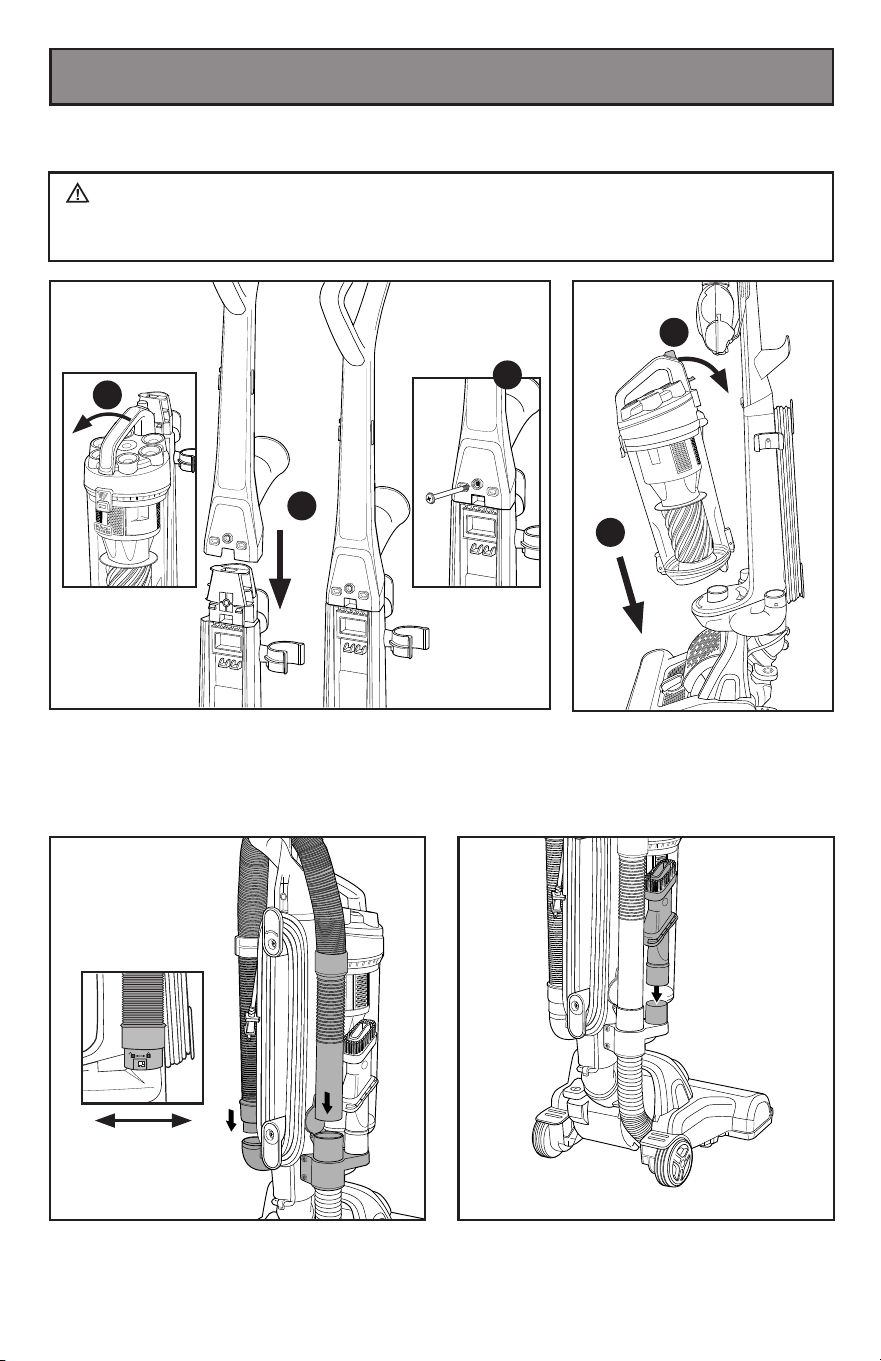
Assembly
Please Note: Always remove the plug from the power socket before fitting or
removing accessories. Ensure all Filters are fitted, and fitted correctly before using.
Insert the handle hose end into the
conector hose and rotate clockwise to
join. Then insert the handle into the
other hose of the body.
Place the dust cup back onto
the machine and push until
it clicks into place.
Insert the 3-in-1 crevice tool accessory
into the on-board storage reservoir, as
shown.
2
1
WARNING: DO NOT plug in your vacuum cleaner until you have
completely assembled it per the following instructions and are familiar with all
instructions and operation procedures.
Remove the screw from the handle. Remove the dust
cup before installing handle.
Insert the handle into the vacuum body, then rotate the
screw into body as shown. IMPORTANT: The handle
must be inserted rst before re-placing the dust cup.
3
1
1
2
2
Place the dust cup back onto
the machine and push until
it clicks into place.
7
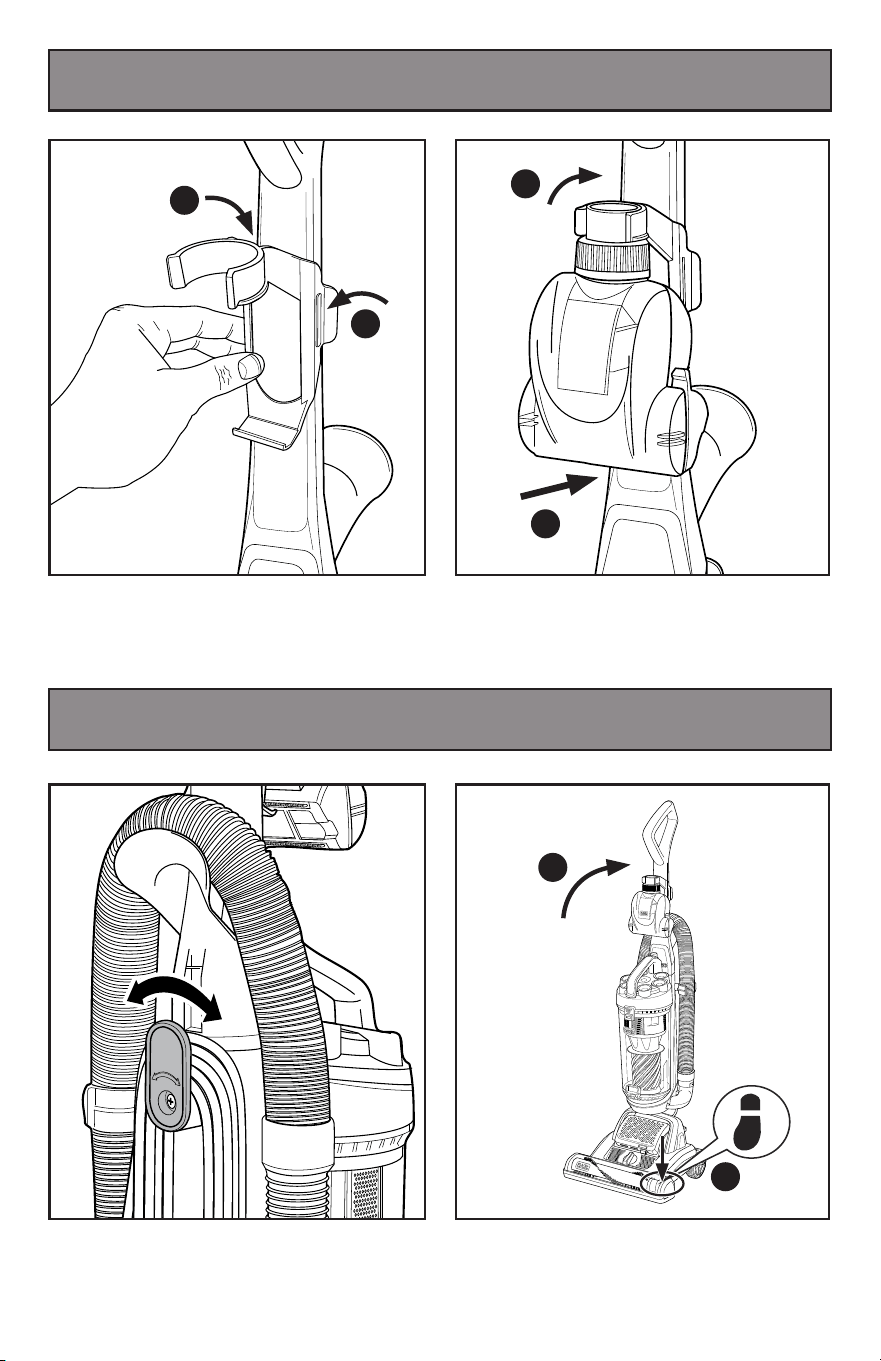
Install the Pet Tool Holder by aligning one
side of the holder with the guides. Once
the guides are aligned in the guide slot,
press until the other side locks into place.
Twist the quick release cord hook to
release the power cord.
Place the Pet Tool on the Pet Tool Holder
by aligning the bottom hook with the Pet
Tool and then pressing the Pet Tool hose
connector into the holder.
Step on the brush cover and pull back on
handle, to engage for operation.
Assembly
Operation
1
2
8
Operation
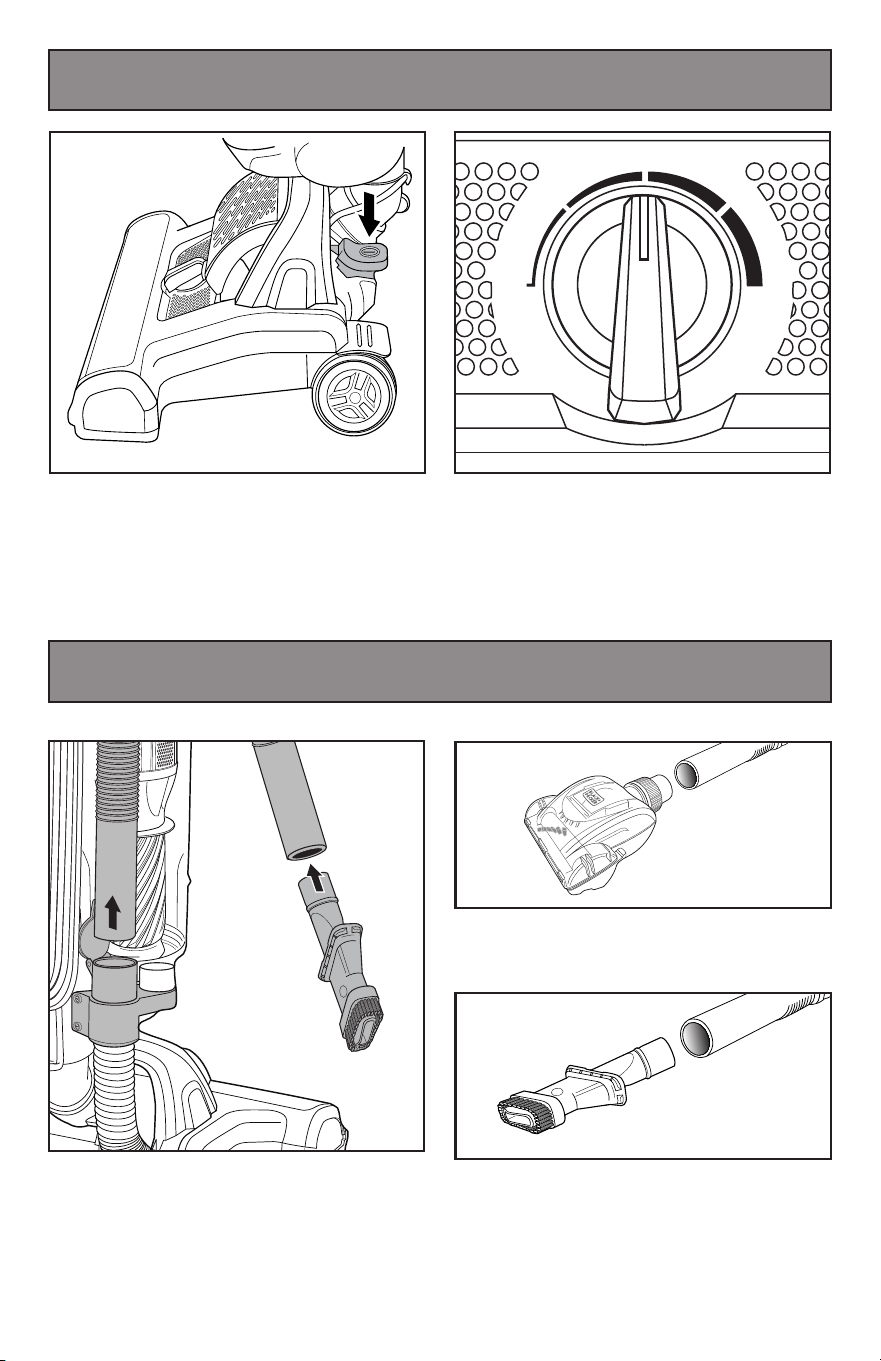
Operation
The handle hose can be used
immediately or with the addition of
attachments.
You can insert the 3-in-1 crevice tool into
the hose handle to extend the distance.
Remove hose handle and 3-in-1 crevice
tool accessory from the machine.
LOW
HARD
FLOOR
HIGH
Plug in your machine and push ON/OFF
button to switch on.
The unit has five height adjust for different
ground, for example hard floor, low carpet,
high carpet and so on. When adjusting
the height of the unit, the machine is in
the upright position.
9
Operation
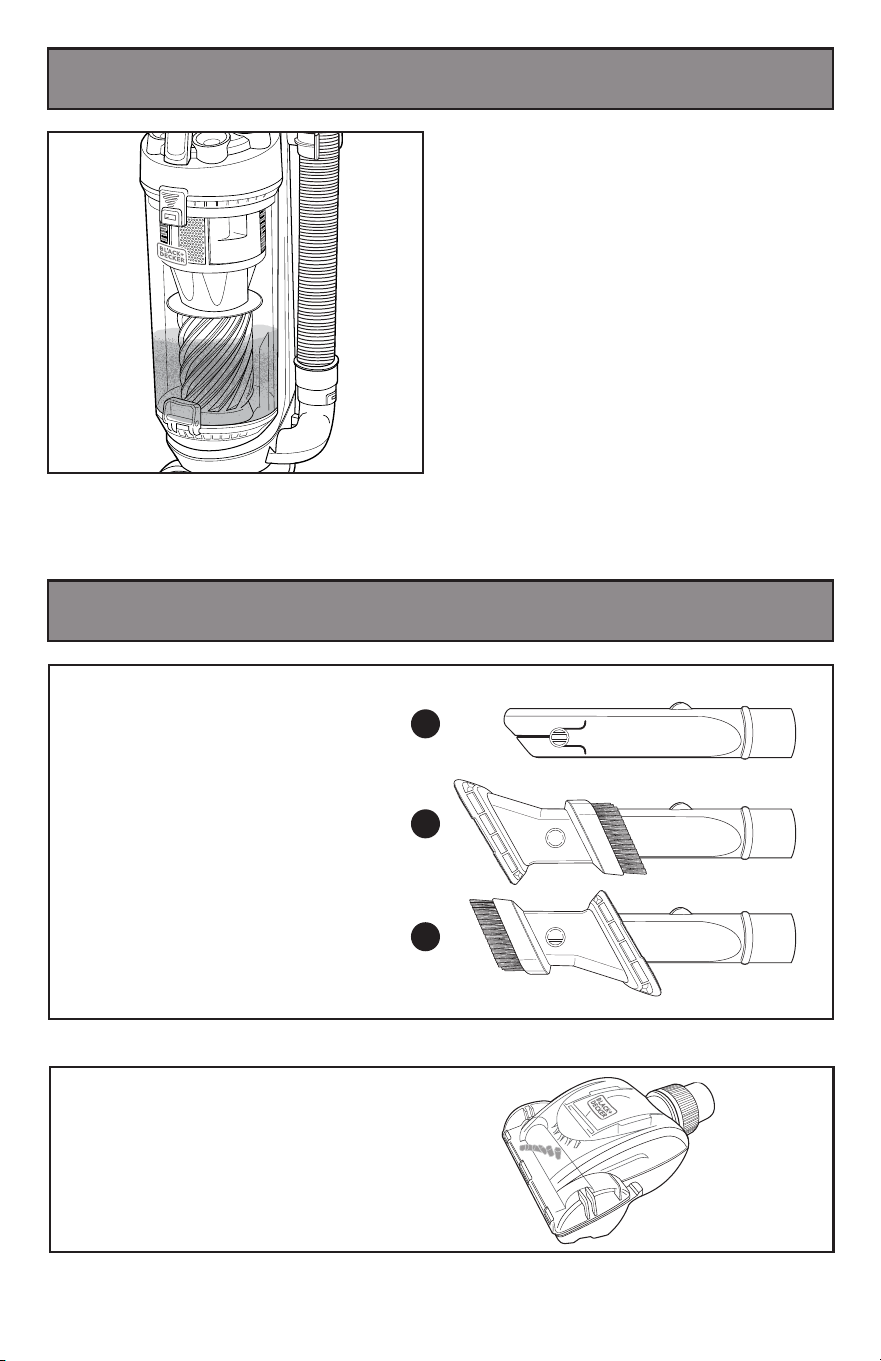
Accessories
1
2
3
The 3-in-1 accessory/crevice tool
allows for vacuuming in narrow
and hard-to-reach places.
3-in-1 Crevice Tool
Accessory
TURBO
Pet Tool
For vacuuming pet hair off of all surfaces.
Don’t over fill the dust cup. Overfilling the
dust cup can clog your filter.
10
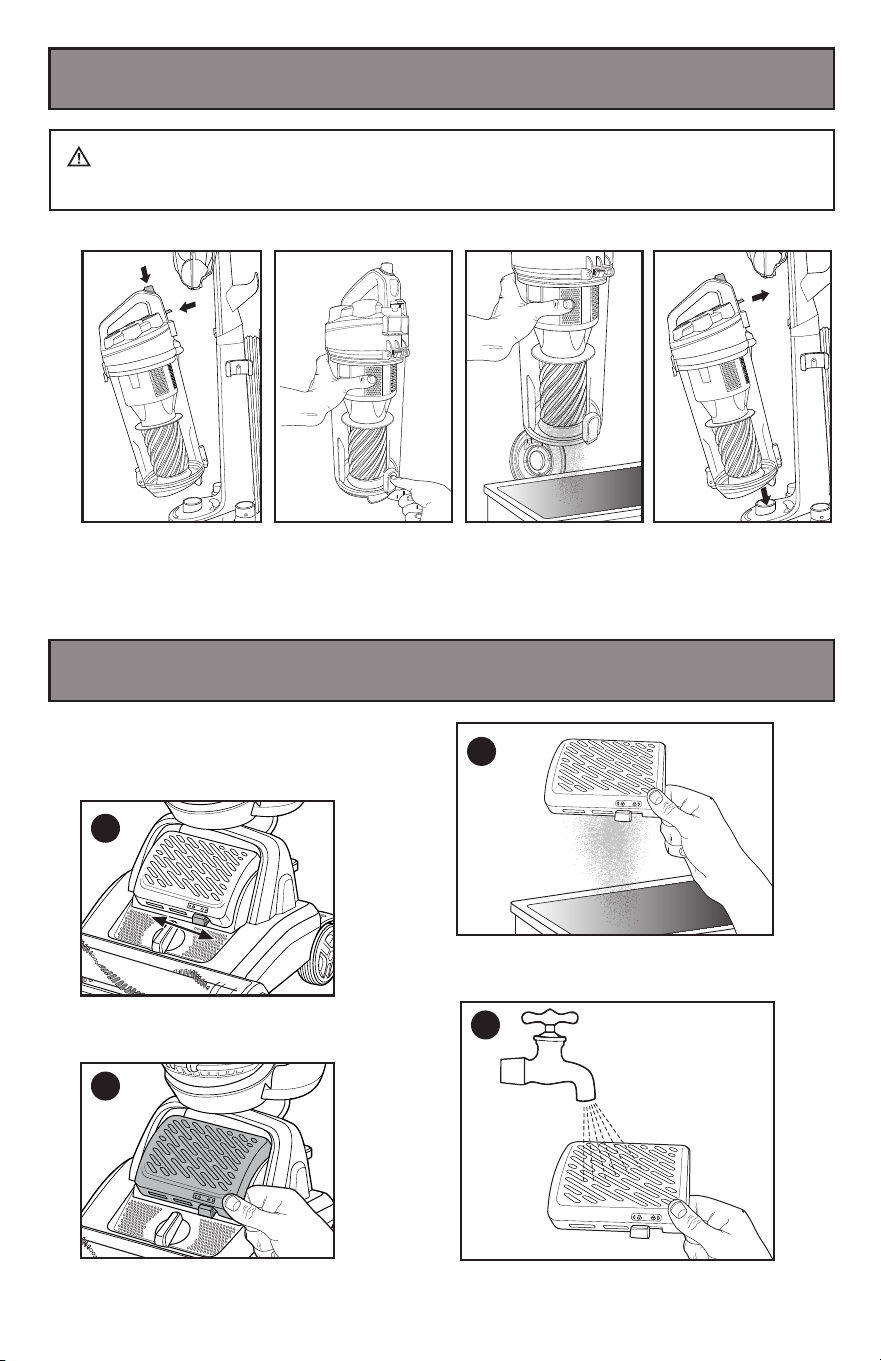
Maintenance And Care
-
Emptying
Maintenance And Care
-
Cleaning the Air Outlet HEPA
Press dust cup release
button to remove the
dust cup.
Close the base of the
dust cup, align the cup
base back onto the
machine and push until
it clicks back into place.
Hold dust cup over garbage bin and unclip
the lock on the bottom of the cup, allowing the
dust to empty.
Emptying and cleaning the dust cup
Warning: Ensure that the unit is in an
upright position and power line is off
when you remove the HEPA Filter.
Locate and unlock filter cover as shown.
Push left to un-lock, right to lock.
Open the HEPA cover upwards and
remove the HEPA filter.
1
2
3
4
Wash with water when needed.
Dry for at least 24 hours before re-using.
Gently tap the HEPA Filter over a garbage
bin, removing dirt and debris.
WARNING: Turn off and unplug vacuum cleaner before performing
maintenance to the vacuum cleaner.
11
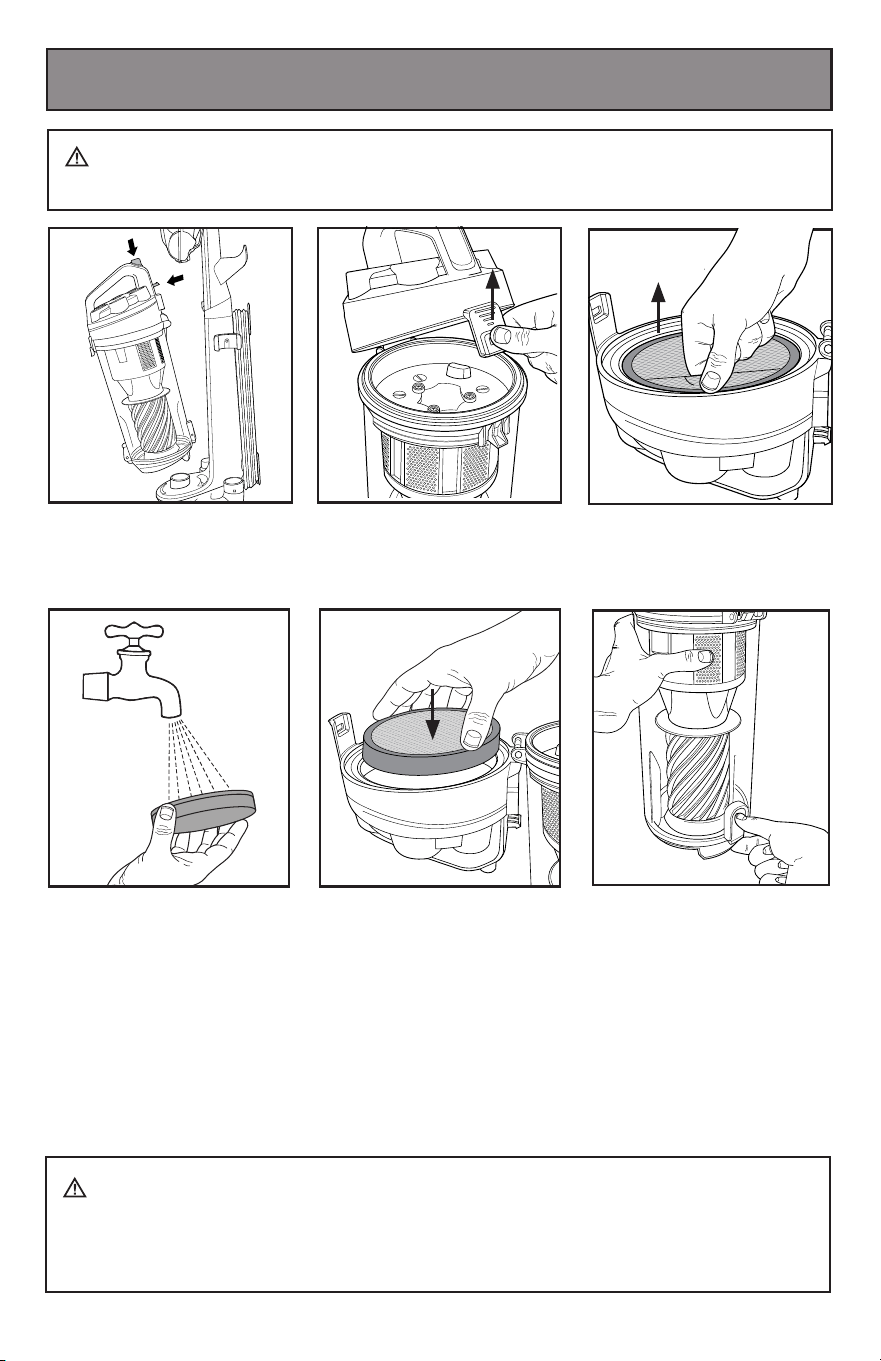
CAUTION: Do not turn appliance on when dust cup is removed.
• In order to keep the suction force optimized, the dust cup and filters must be
cleaned regularly.
• Reassemble after cleaning
Maintenance And Care
-
Cleaning Dust Cup Filter
1. Remove the dust cup.
3. Remove the dust
cup foam filter.
5. Allow filter to dry 24 hours
before putting back into
vacuum cleaner.
4. Hand wash the foam filter.
DO NOT operate without filter installed.
DO NOT wash dust cup in the dishwasher.
DO NOT install filter damp.
2. Open the dust cup
filter lid, located on the
top of the cup.
WARNING: Turn off and unplug vacuum cleaner before performing
maintenance to the vacuum cleaner.
6. Push the release button,
open the dust cup
and clean all parts of the
dust cup.
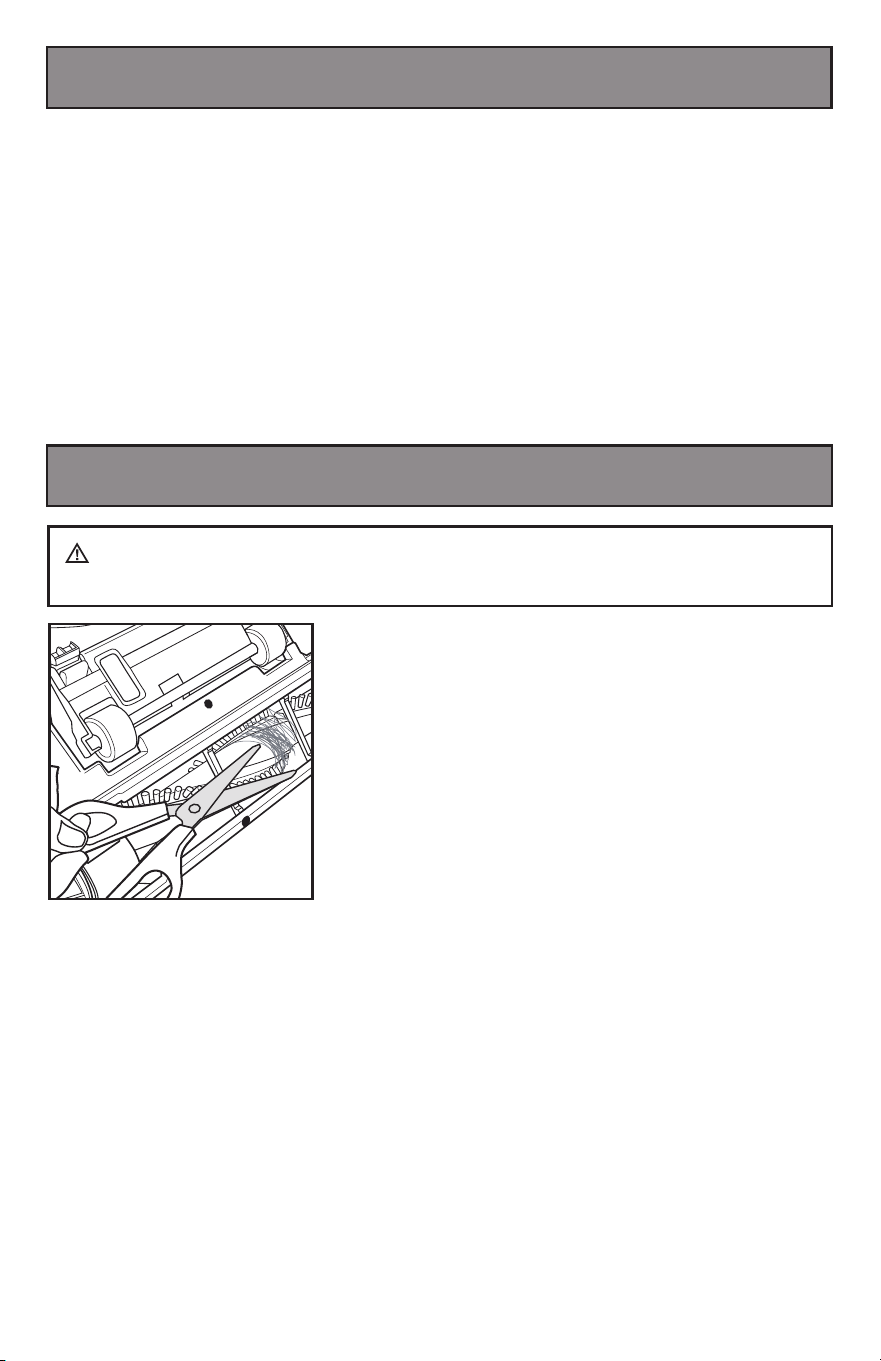
Maintenance And Care
-
Cleaning Vacuum And Tools
WARNING: Turn off and unplug vacuum cleaner before performing
maintenance to the vacuum cleaner.
1. To release the pet tool
plastic upper cap for internal
cleaning, rotate, unlock and
remove the plastic locking
ring as shown.
3. Remove plastic upper cap
and clean, removing pet hair
and debris.
2.
Pull up on the plastic
upper cap of the pet tool as
shown.
UNLOCK
LOCK
12
Maintenance And Care
-
Cleaning Dust Cyclone
WARNING: Turn off and unplug vacuum cleaner before performing
maintenance to the vacuum cleaner.
1. Remove the dust cyclone.
2. Wash with water when needed. Dry for at
least 24 hours before re-using.
13
Do not clean the vacuum cleaner, components or accessories using petrol
or any other flammable liquid or solvents, etc.
Clean only the outside of the vacuum cleaner.
Use only a moist cloth and mild detergent for cleaning the vacuum cleaner,
components and accessories.
After cleaning, wipe off the moisture on vacuum cleaner, components and
accessories with a dry cloth.
Do Not place accessories, tools or components in a dishwasher.
Maintenance And Care
-
Cleaning Vacuum And Tools
Maintenance And Care
-
Cleaning Brush Roll
Carefully remove any string, hair or debris
located on the brush roll.
You can use a tool such as a small knife
or scissors to remove and cut any hair or
string.
WARNING: Turn off and unplug vacuum cleaner before performing
maintenance to the vacuum cleaner.
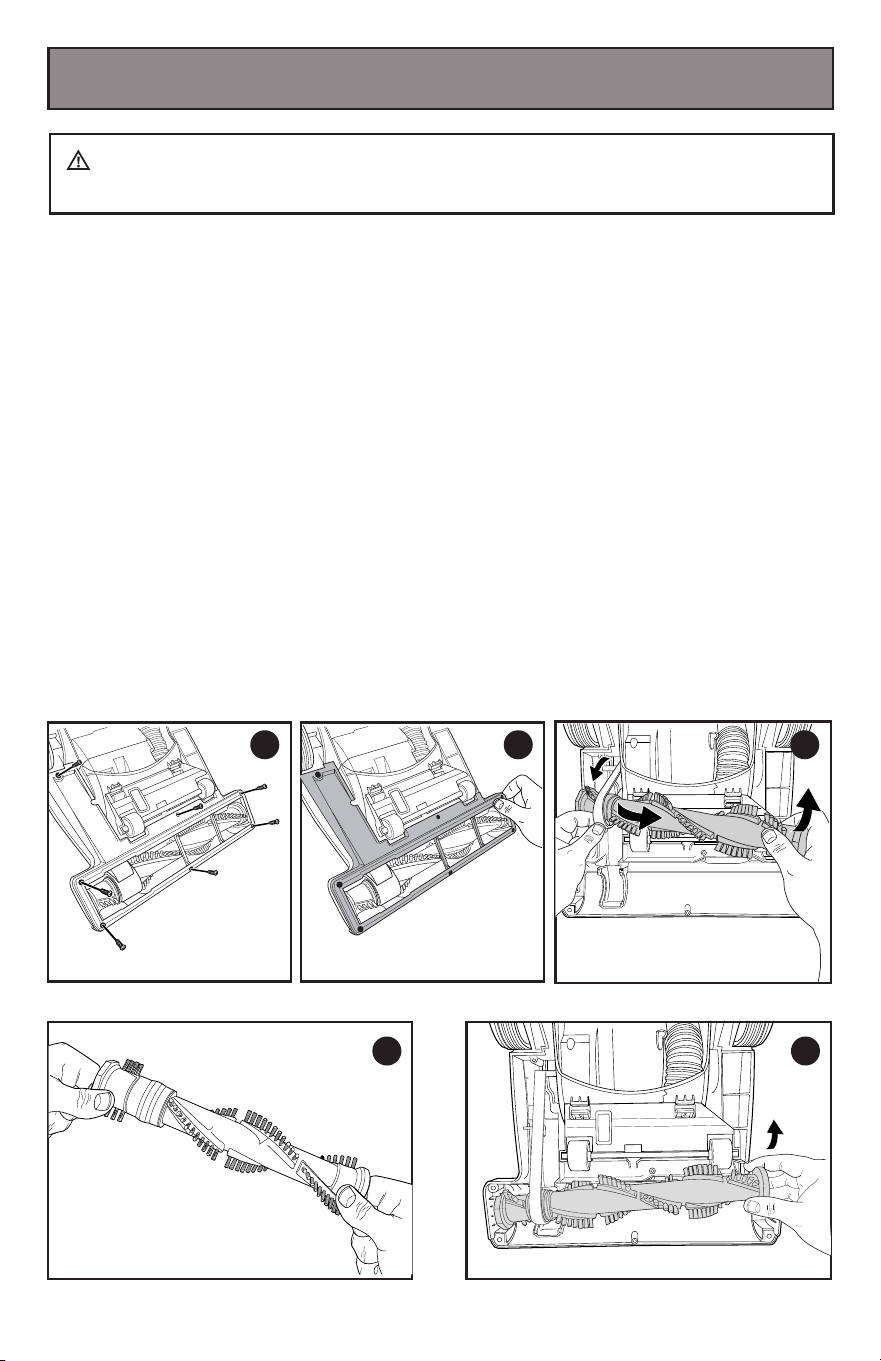
14
You should check your cleaner’s brush roll and drive belt regularly for wear or
damage. You should also clean the brush and brush ends by removing string, hair
and carpet fibers. These can wrap around the brush and hamper its ability to
effectively clean your carpet. Also remove any debris that has accumulated under
the brush cover.
1. Turn off vacuum and unplug from electrical outlet.
2. Place vacuum upside down with brush roll facing upwards.
3. Remove the seven screws as shown with a small Phillips screwdriver.
4. Lift off brush cover.
5. Grasp floor brush at both ends and remove by lifting out.
6. Clean string, hair and other debris from floor brush, motor pulley, and drive belt.
7. Check floor brush for worn areas and replace if needed.
8. Check air passageway for obstructions. Remove debris from this area.
9. When finished cleaning, reposition floor brush and drive belt.
Then replace the brush cover and re-install the seven screws.
10.Turn floor brush by hand several times in the direction of the motor pulley.
If properly installed, the drive belt will align itself on floor brush.
Maintenance And Care
-
Replace Brush Roll
WARNING: Turn off and unplug vacuum cleaner before performing
maintenance to the vacuum cleaner.
1 2
5
4
3
Remove
Seven Screws
Remove
Brush Cover
15
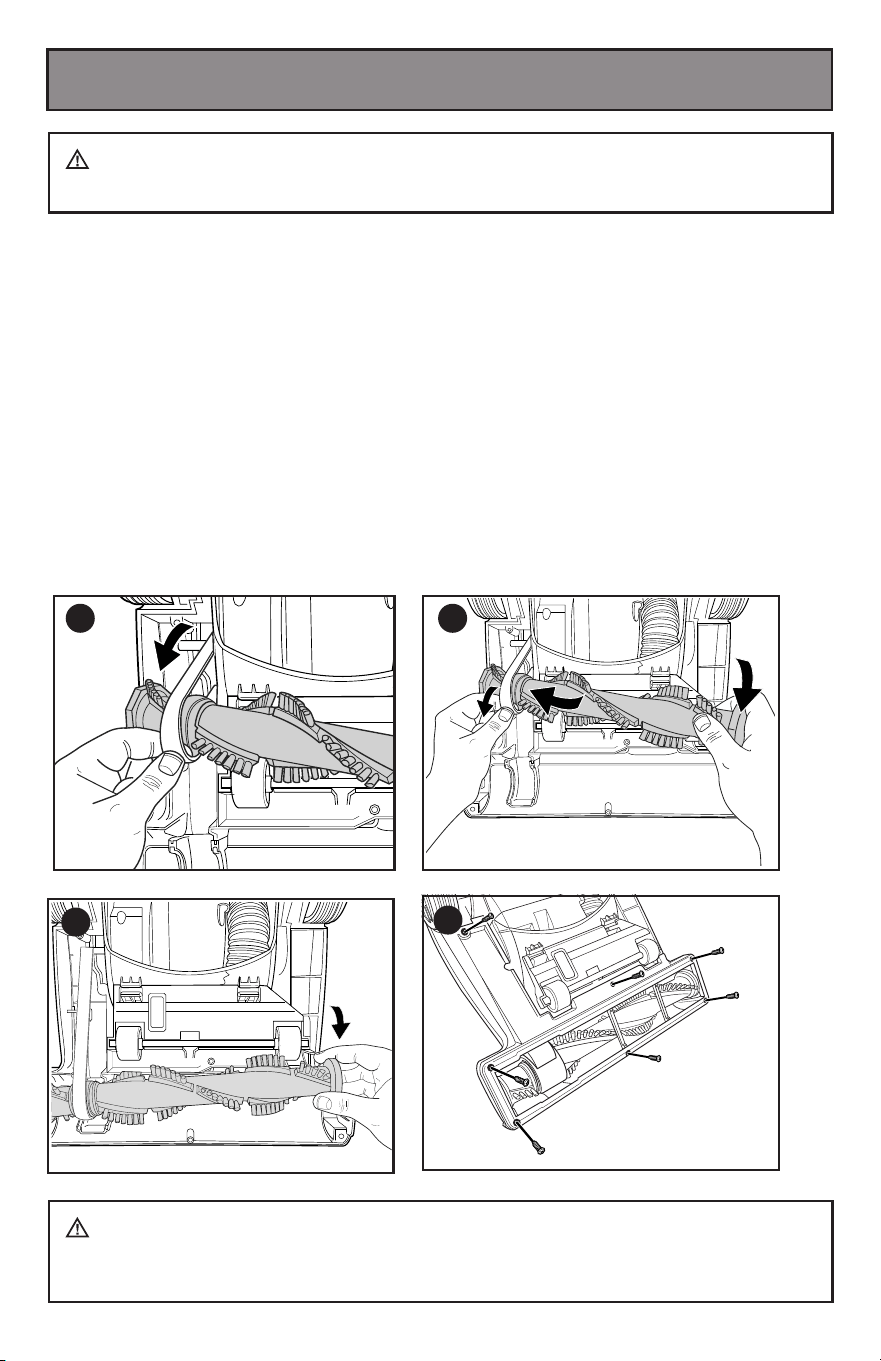
Check the drive belt carefully for wear, cuts and stressed areas. If the drive belt
appears worn, you will need to replace it.
To remove the drive belt, read the instructions and follow the drawings below:
1. Grasp the old drive belt and remove from motor shaft. Discard old drive belt.
2. Loop new drive belt over motor shaft and stretch other and over floor brush in the
space provided between the bristles.
3. Place ends of floor brush down into slots on sides as shown.
4. Turn floor brush by hand several times in the driection of the motor shaft. If
properly installed, drive belt will align itself on floor brush.
5. Replace brush cover and seven screws.
Maintenance And Care
-
Replace Drive Belt
WARNING: Turn off and unplug vacuum cleaner before performing
maintenance to the vacuum cleaner.
WARNING: The plug must be removed from the power socket before
any maintenance or replacement. If the power cord is damaged, replace them only
by the factory or maintenance center or similarly qualified persons.
1 2
4
3
Replace Brush
Cover and
Seven Screws
16
Vacuum cleaner won’t run: Possible causes Remedies
1. Vacuum cleaner is not plugged in 1. Check electrical plug
2. Blown fuse/tripped breaker 2. Check/replace fuse or reset breaker
Vacuum cleaner won’t pick up dirt:
Possible causes Remedies
1. Dirt cup is full 1. Empty dirt cup
2. Filter dirty 2. Check, remove debris or clean
3. Hose not secure 3. Check to be sure hose is snapped into place at
both ends
4. Dirt cup not in place 4. Make sure dirt cup is fully inserted and dirt cup
release handle is pushed in completely
5. Vacuum path clogged 5. Visually check air passageway, hose inlet, and
hose for anything that might be obstructing the
vacuum path. Carefully remove blockage
6. Rotating power brush drive belt broken 6. Replace drive belt
7. Drive belt stretched 7. Check drive belt area and remove obstructions
Replace drive belt if necessary
8. Floor brush bristles worn 8. Replace floor brush
9. Floor brush jammed 9. Remove floor brush and clean debris from
brush and ends Check drive belt for any damage
Troubleshooting
Replacement Parts
WARNING: To reduce the risk of electric shock, turn power OFF and
disconnect plug from electrical outlet before performing maintenance or
troubleshooting to the vacuum cleaner.
Other maintenance or service not included in the manual should be performed by an
authorized service representative. Thank you for selecting a BLACK&DECKER product.
Please do not return this product to the store
ta ecivreS remotsuC ruo tcatnoc esaelp ,snrecnoc ro snoitseuq yna roF
1-800-524-6716
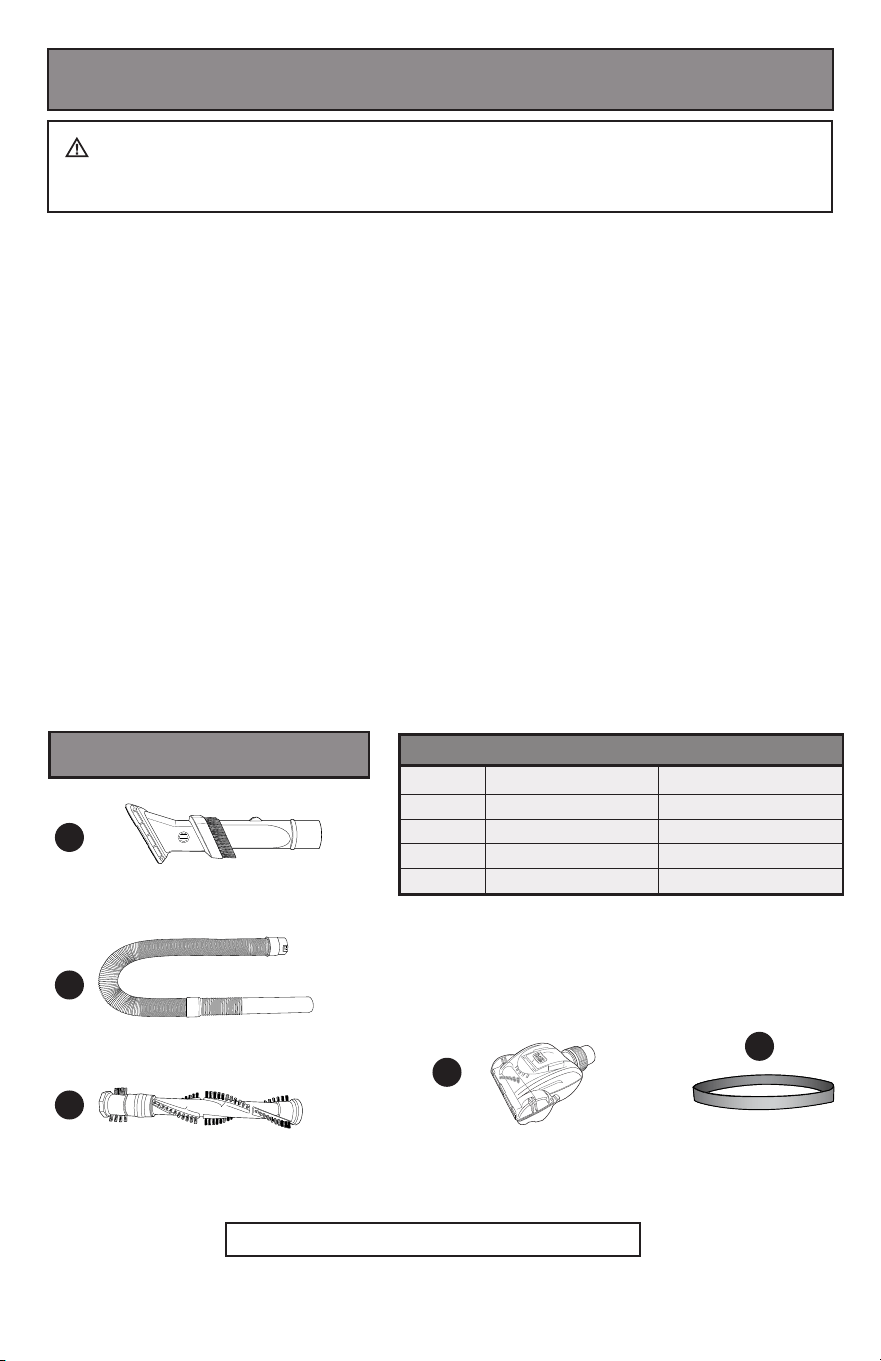
Item: Part No.: Part Name:
1 PC0101 3 in 1 crevice tool
2 PC0201 Handle Hose
3 PC0301 Brush Roll
4 PC0401 Pet Tool
5 PC0501 Drive Belt
1
2
5
3
4

17
Midea USA,Inc.
Imported by
5 Sylvan Way Parsippany,
NJ 07054,USA
1-800-524-6716
WARRANTY
ONE-YEAR LIMITED
WARRANTY
Black & Decker (U.S.) Inc. warranties
this product to be free from defects in
material or workmanship for a period of
one(1) year following the date of purchase,
provided that the product is used in a
home environment. This limited warranty
does not cover failures due to abuse,
accidental damage or when repairs have
been made or attempted by anyone other
than BLACK+DECKER authorized service
agent. A defective product meeting the
warranty conditions set forth herein will be
replaced or repaired at no charge in either
of two ways:
The first, which will result in exchanges
only, is to return the product to the retailer
from whom it was purchased (provided
that the store is a participating retailer).
Returns should be made within the time
period of the retailer’s policy for exchanges.
Proof of purchase may be required. Please
check with the retailer for its specific return
policy regarding time limits for returns or
exchanges.
The second option is to take or send the
product (prepaid) to a BLACK+DECKER
authorized service agent for repair or
replacement at BLACK+DECKER’s option.
Proof of purchase may be required.
This warranty does not apply to accessories.
This warranty gives you specific legal
rights and you may have other rights
which vary from state to state. Should you
have any questions, please call customer
service at 1-800-524-6716. This product
is not intended for commercial use, and
accordingly, such commercial use of this
product will void this warranty. All other
guarentees, express or implied, are hereby
disclaimed.
For assistance with your product, visit our
website www.blackanddecker.com or call
the
BLACK+DECKER
help line at
1-800-524-6716
BLACK & DECKER, BLACK+DECKER, the BLACK & DECKER and BLACK+DECKER
logos and product names are trademarks of The Black & Decker Corporation, used
under license. All rights reserved.