1 1
1:1
K
项目
库
文件名
A
1
2
4
6
3
5
1
2
4
6
3
5
B
C
D
E
F
G
H
A
B
C
D
E
F
G
H
技术要求(版本号:B,2020-01)
2.该说明书的幅面大小为: 145*210mm ,未注直线尺寸公差应符合GB/T1804-v;
4.说明书警语及认证标志应满足CE/UL标准,CE:警语部分大写字母高度不低于3mm,CE标志不低于5mm,WEEE标志不低于7mm;
UL:大写字母字高不小于1/12”(2.11mm),小写字母字高不小于1/16”(1.6mm),“IMPORTANT SAFEGUARDS”,“SAVE
THESE INSTRUCTIONS”等词,其字高不小于3/16”(4.8mm),IMPORTANT SAFEGUARDS 必须在最前面。
5.产品应符合QMG-J53.021《产品说明书技术条件》的有关要求。
6.有ROHS指令要求的物料应符合美的企业标准QML-J11.006《产品中限制使用有害物质的技术标准》。
1.文字图案印刷颜色为: 黑色 ,印刷字体需清晰可见,文字不能粘到一起;
16161000A22339
说明书 MIDEA-AMS150-PBW(AMS150-PBW)-0501
广东美的生活电器制造有限公司
会 签
材料:80克双胶纸
刘雪莲 李海棣
古广君
古广君
2023.2.10
制 图
设 计
校 对
审 核
标准化
审 定
日 期
标记
处数 更改文件号 签 字 日 期
无叶风扇
说明书
重点
校对项
1.物料编码
2.版面尺寸
3.材质标注
4.颜色标注
5.客户型号
6.产品名称
7.产品参数
8.电压功率
-----
-----
-----
9.单位符号
10.认证标志
11.回型标志
15.目录及
页码
12.ROHS标志
13.警语警语
及字高
14.控制面板
及功能
3.该说明书的装订方式为: 打钉 ;[70P以下为钉装,70P以上为胶装(特殊要求除外)]
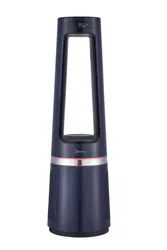
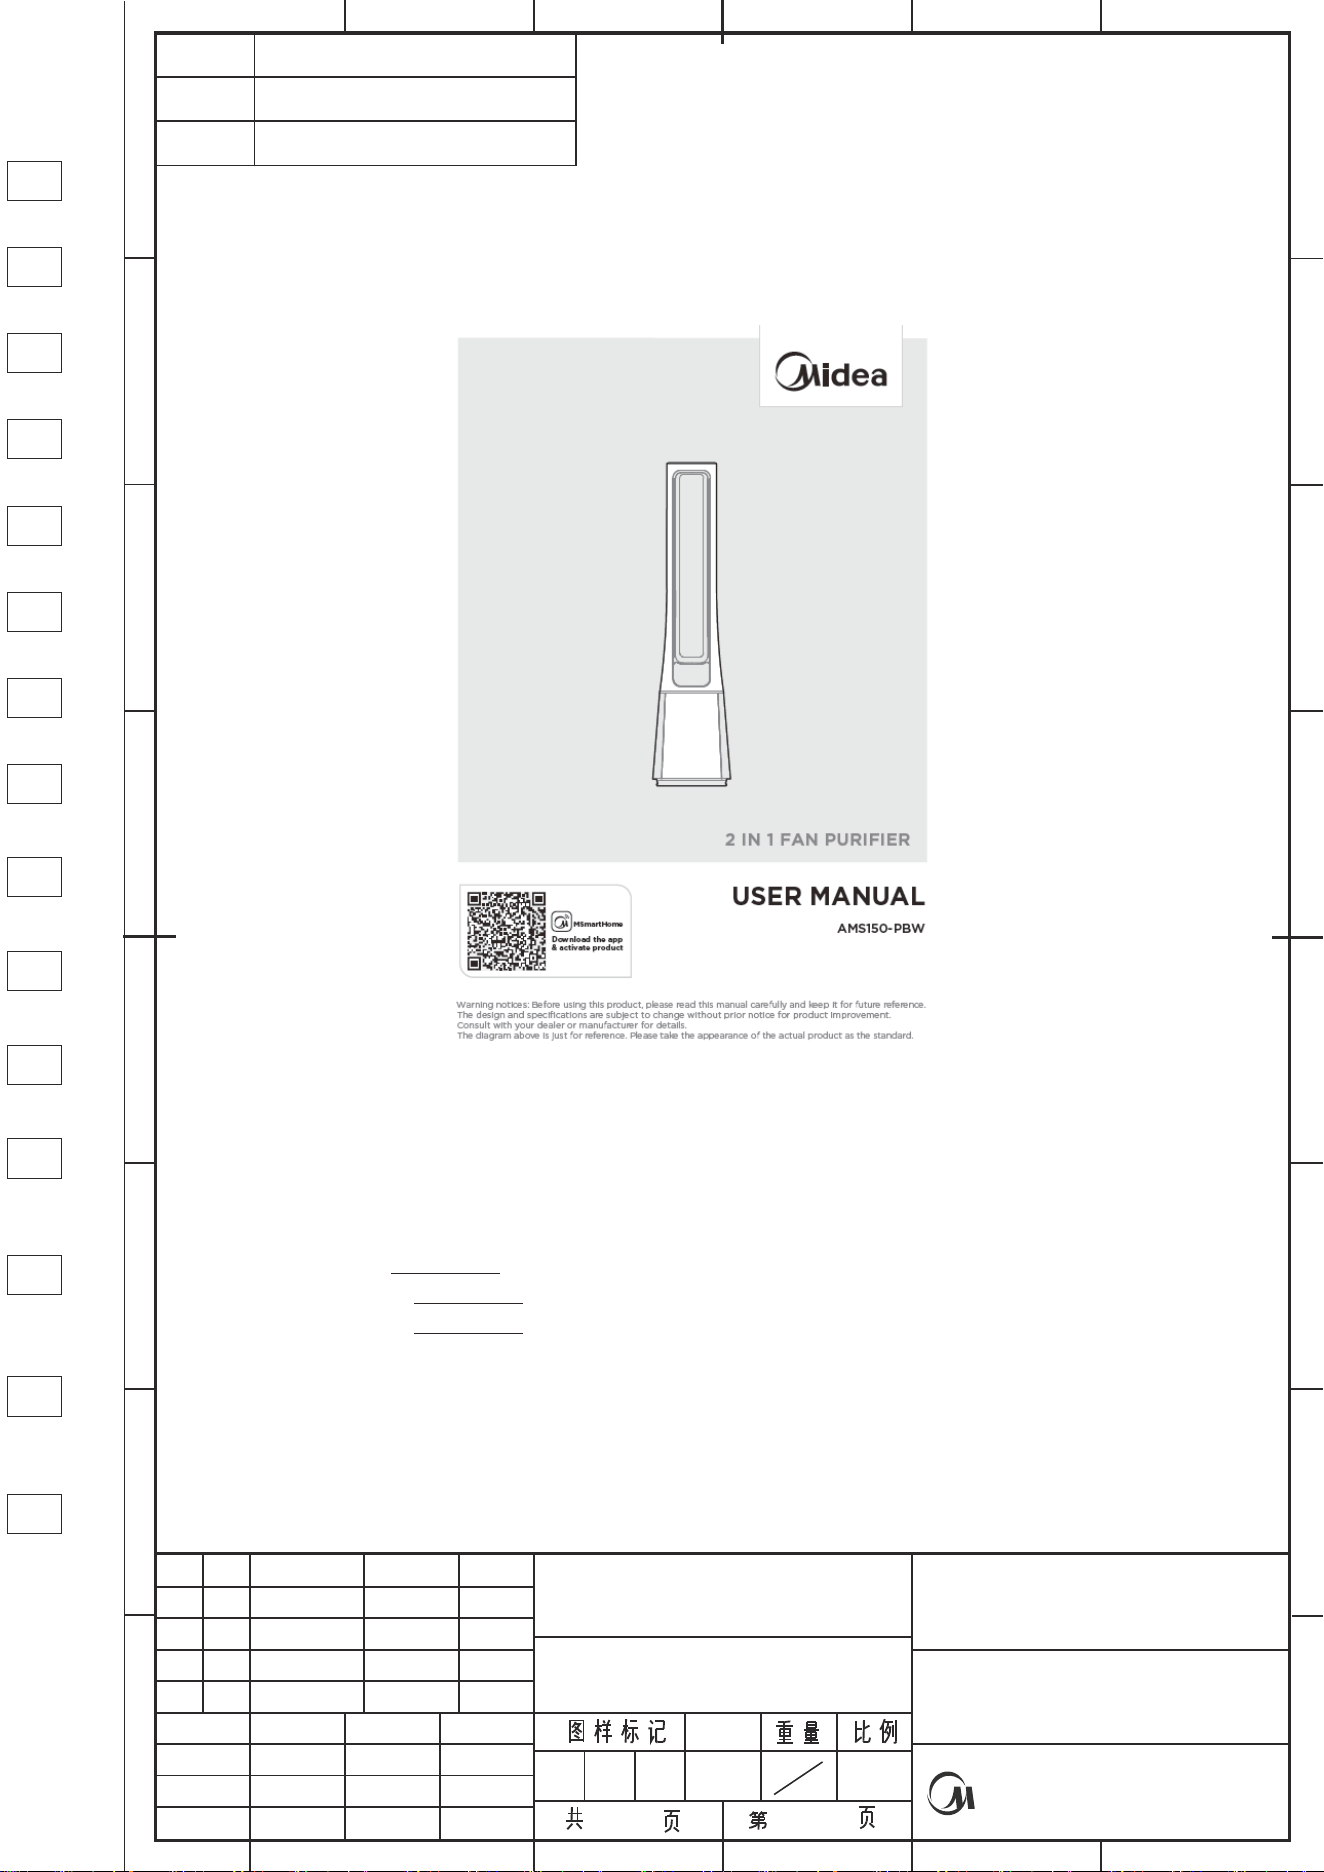
AMS150-PBW
2 IN 1 FAN PURIFIER
Warning notices: Before using this product, please read this manual carefully and keep it for future reference.
The design and specifications are subject to change without prior notice for product improvement.
Consult with your dealer or manufacturer for details.
The diagram above is just for reference. Please take the appearance of the actual product as the standard.
USER MANUAL
Download the app
& activate product
MSmartHome

CONTENTS
0 1
02
05
09
1
06
THANK YOU LETTER
SAFETY INSTRUCTIONS
SPECIFICATIONS
PRODUCT OVERVIEW
07
PRODUCT INSTALLATION
OPERATION INSTRUCTIONS
APP SETUP AND OPERATION
1
1
1
CLEANING AND MAINTENANCE
TROUBLESHOOTING
1
TRADEMARKS, COPYRIGHTS AND LEGAL STATEMENT
DISPOSAL AND RECYCLING INFO
THANK YOU LETTER
Thank you for choosing Midea! Before using your new Midea product, please read
this manual thoroughly to ensure that you know how to operate the features and
functions that your new appliance offers in a safe way.
01
7
1
3
5
6
DATA PROTECTION NOTICE
1 8
02
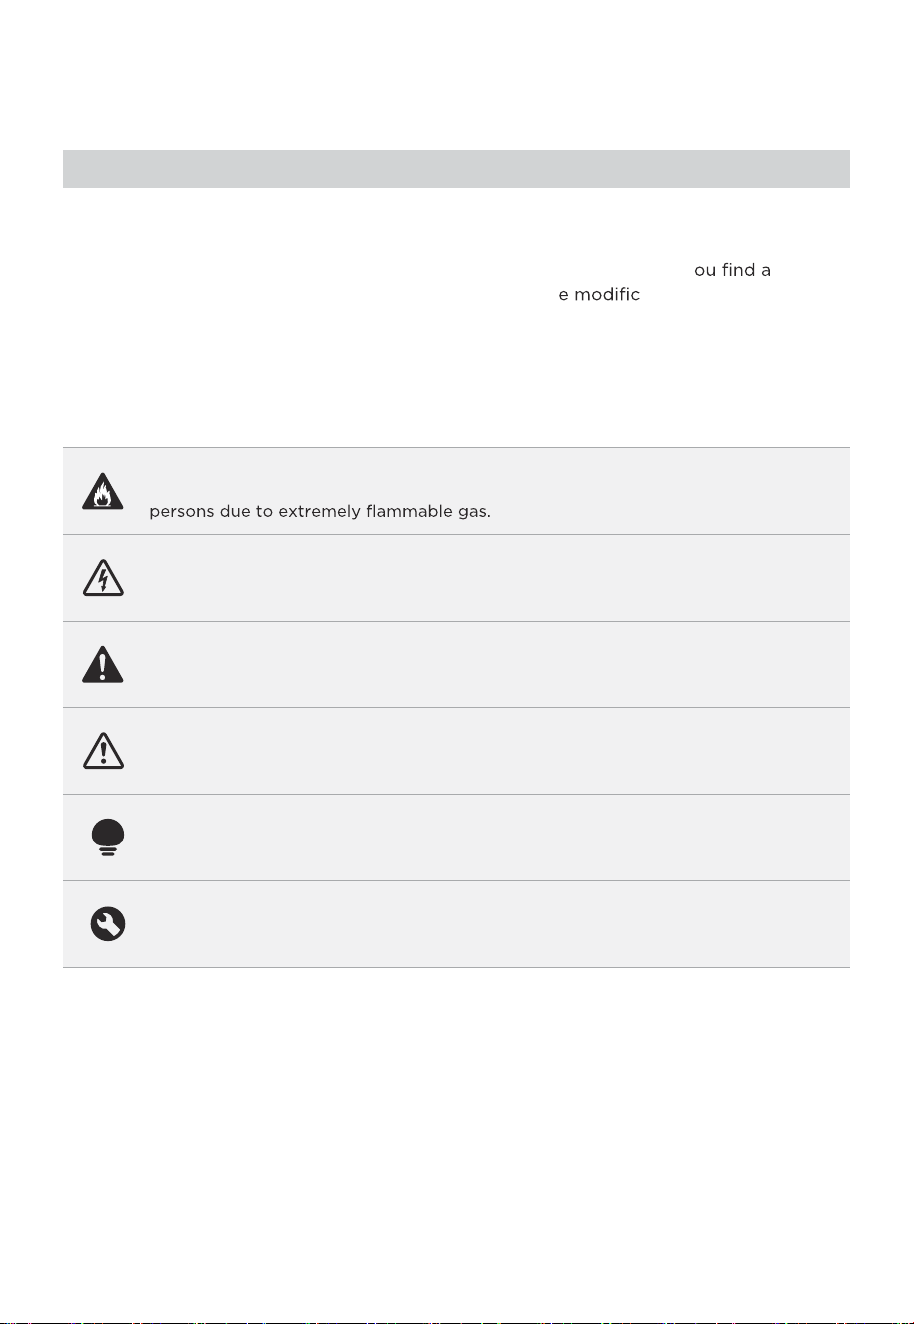
Danger
This symbol indicates that there are dangers to the life and health of
Warning of electrical voltage
This symbol indicates that there is a danger to life and health of
persons due to voltage.
Warning
The signal word indicates a hazard with a medium level of risk which, if
not avoided, may result in death or serious injury.
Caution
The signal word indicates a hazard with a low degree of risk which, if
not avoided, may result in minor or moderate injury.
Attention
The signal word indicates important information (e.g. damage to
property), but not danger.
Observe instructions
This symbol indicates that a service technician should only operate and
maintain this appliance in accordance with the operating instructions.
The following safety guidelines are intended to prevent unforeseen risks or damage from
unsafe or incorrect operation of the appliance. Please check the packaging and appliance
on arrival to make sure everything is intact to ensure safe operation. If y ny
damage, please contact the retailer or dealer. Please not ations or alterations to
the appliance are not allowed for your safety concern. Unintended use may cause
hazards and loss of warranty claims.
Read these operating instructions carefully and attentively before using/commissioning the
unit and keep them in the immediate vicinity of the installation site or unit for later use!
Intended Use
Explanation of Symbols
SAFETY INSTRUCTIONS
03
03
Caution
If the supply cord is damaged, it must be replaced by
manufacturer or its service agent or a similarly qualified
person in order to avoid a hazard.
To protect against the risk of electrical shock, do not
immerse the unit, cord or plug in water or other liquid.
When the appliance is not in use and before cleaning,
unplug the appliance from the outlet.
Ensure that the fan is switched off from the supply mains
before removing the guard.
The appliance is only to be used with the power supply
unit provided with the appliance.
●
●
●
●
●
Warning
●
●
●
●
●
●
●
Read rules for safe operation and instructions carefully.
This appliance can be used by children aged from 8 years
and above and persons with reduced physical, sensory or
mental capabilities or lack of experience and knowledge
if they have been given supervision or instruction concerning
use of the appliance in a safe way and understand the
hazards involved. Children shall not play with the appliance.
Cleaning and usermaintenance shall not be made by children
without supervision.
Never insert fingers, pencils, or any other object through
the grille when fan is running.
Disconnect fan when moving from one location to another.
Be sure fan is on a stable surface when operating to
avoid overturning.
Keep electrical appliances out of reach from children or
infirm persons. Do not let them use the appliances without
supervision.
Household use only.

04
• When the fan was assembled, the rotor blade guard shall
not be taken off anymore.
- Prior cleaning unplug the fan.
- The rotor guard shall not be dissembled/opened to clean
the rotor blades.
- Wipe the fan enclosure and rotor blade guard with a
slightly damp cloth.
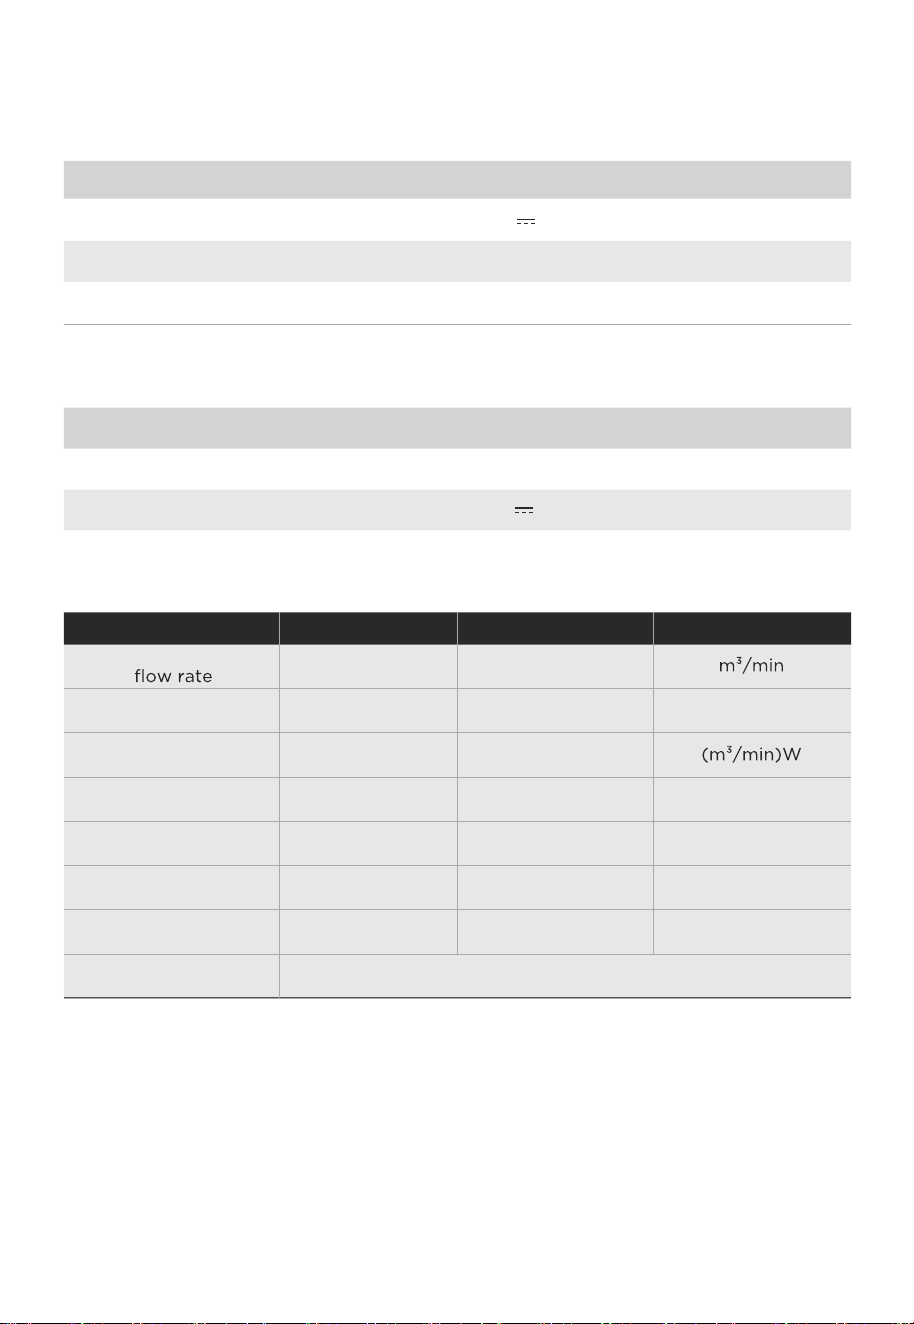
SPECIFICATIONS
05
AMS150-PBWProduct Model
Working Voltage
Rated Power
Noise
24V
33 W
Parts
Adapter
≤
Input
Output
24V 1.5A
100-240V~ 50/60Hz 1.5A
61dB
Service value
Standby power
consumption
Fan sound power
level
Maximum air
velocity
Seasonal electricity
consumption
Measurement standard
for service value
EN IEC 60879:2019
Item Symbol Value
Unit
Maximum fan
Fan power input
F
P
SV
PSB
LWA
C
Q
27,07
22,10
1,22
0,22
57,32
2,66
7,32
W
W
dB(A)
meters/sec
kWh/a
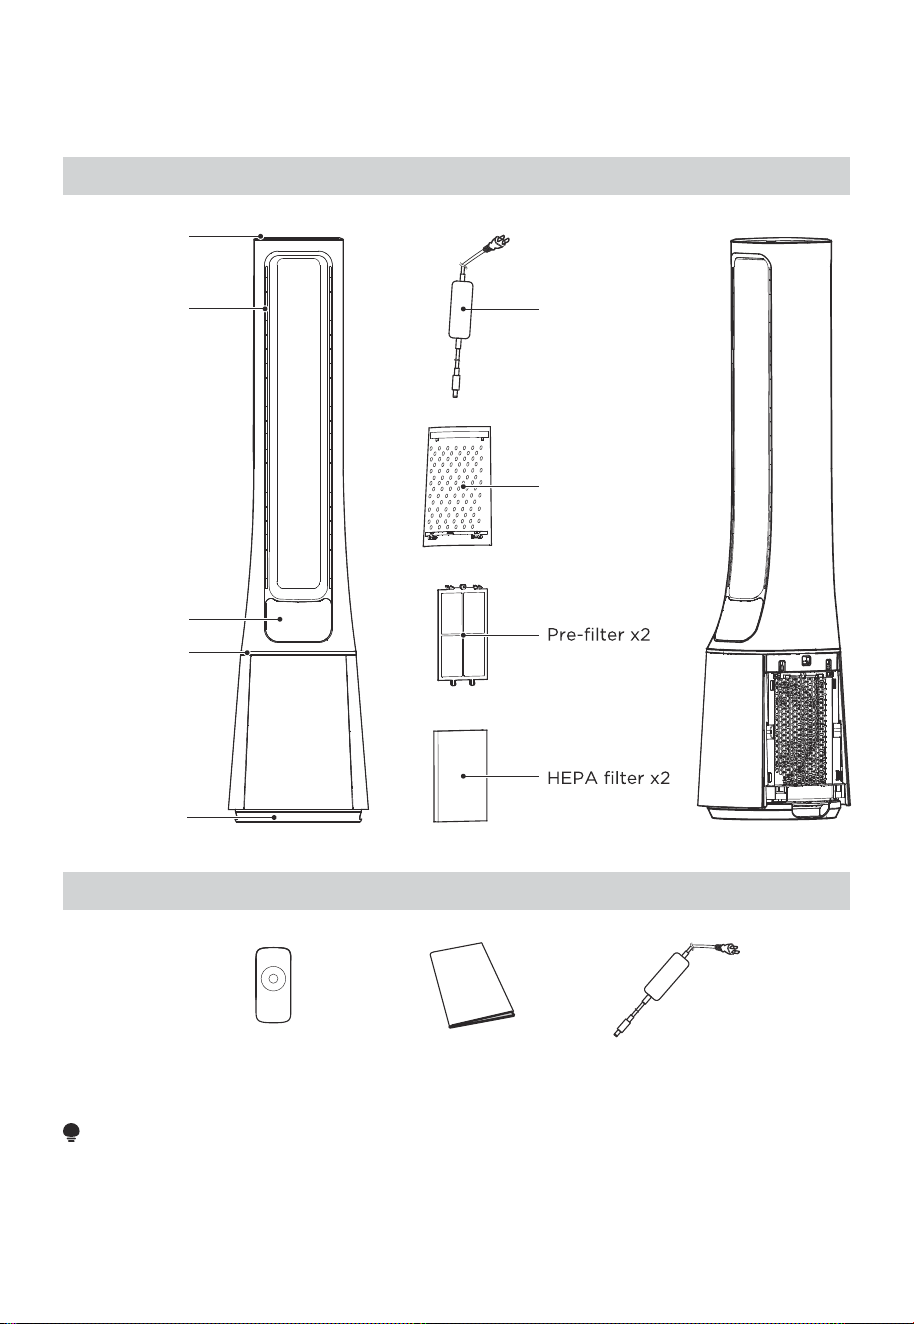
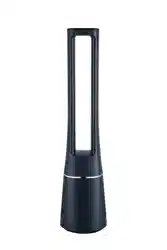
PRODUCT OVERVIEW
Manual x1 Remote control x1
Adapter x1
NOTE
All the pictures in this manual are for explanation purpose only. Any discrepancy
between the real object and the illustration in the drawing shall be subject to the real
subject.
06
Top cover
Air outlet
Display and
Control panel
Center piece
Base
Air inlet grille x2
Adapter
Component Name
Parts List
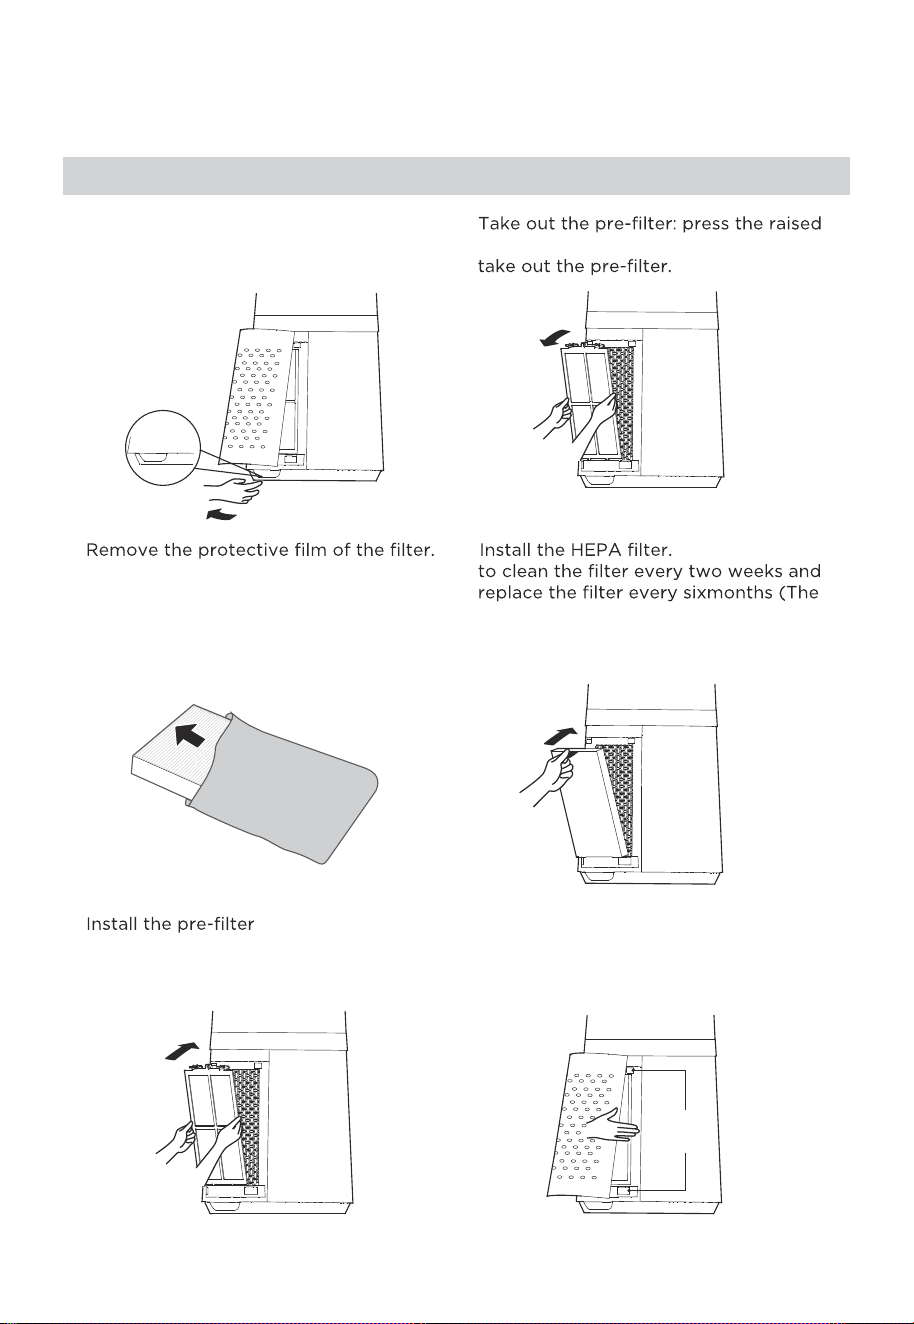
07
1 Remove the air inlet grille. 2
part on both sides to pull it outwards, and
3
Buckle
4 It is recommended
cleaning and replacement cycle can
beadjusted according to the use
environment).
5 : align the slot
position at the bottom, and buckle up
the upper U-shaped buckle.
6 Install the air inlet grille: align the upper
two buckles and press them tightly, then
press the two sides at lower part, slowly
and gently buckle the air inlet grille.
Buckling
position
Installation Procedures
PRODUCT INSTALLATION
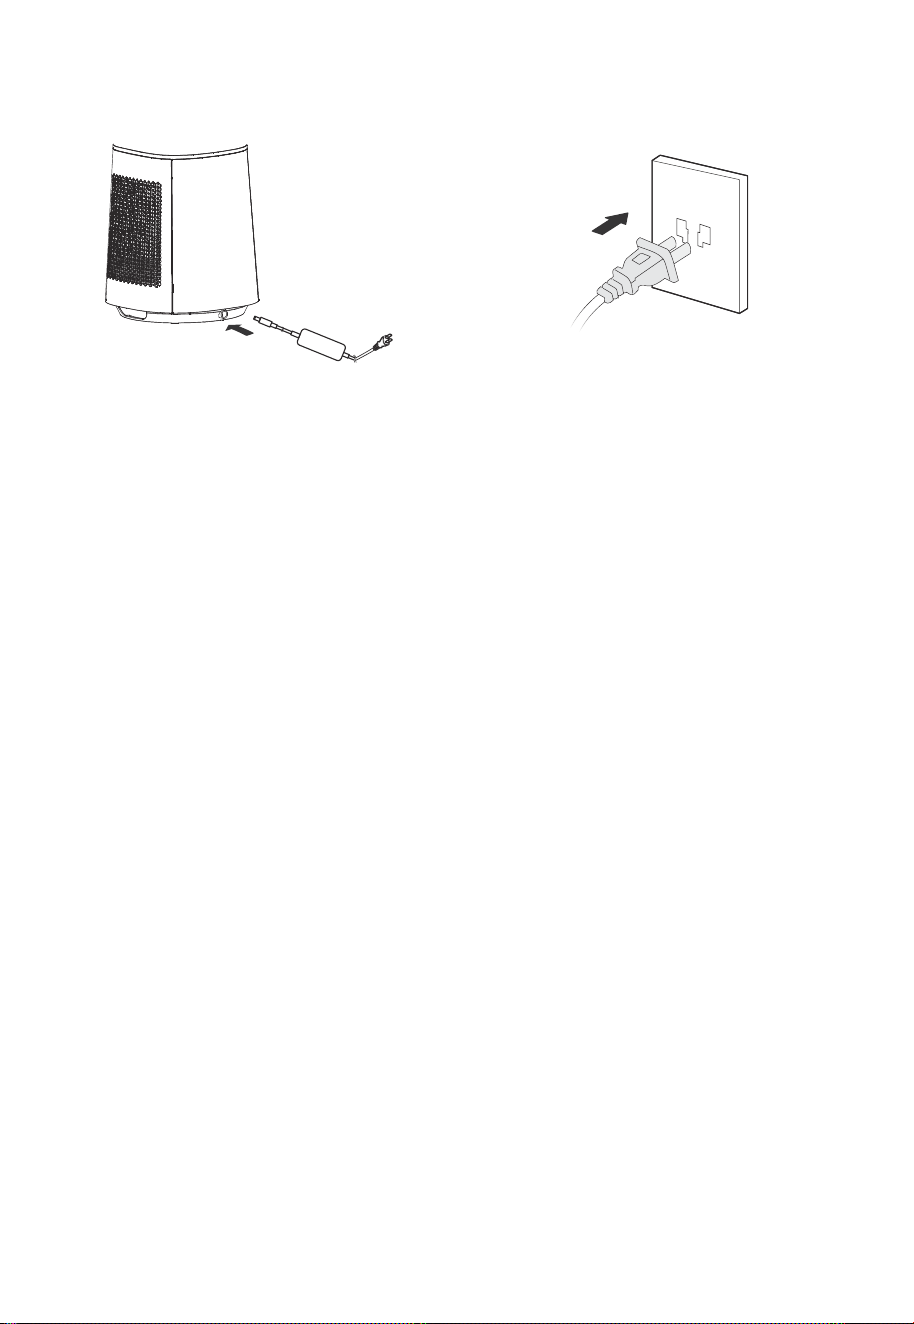
08
8 Plug power supply.
Install the adapter,Tighten the plug
with the socket position of the base.
7
09
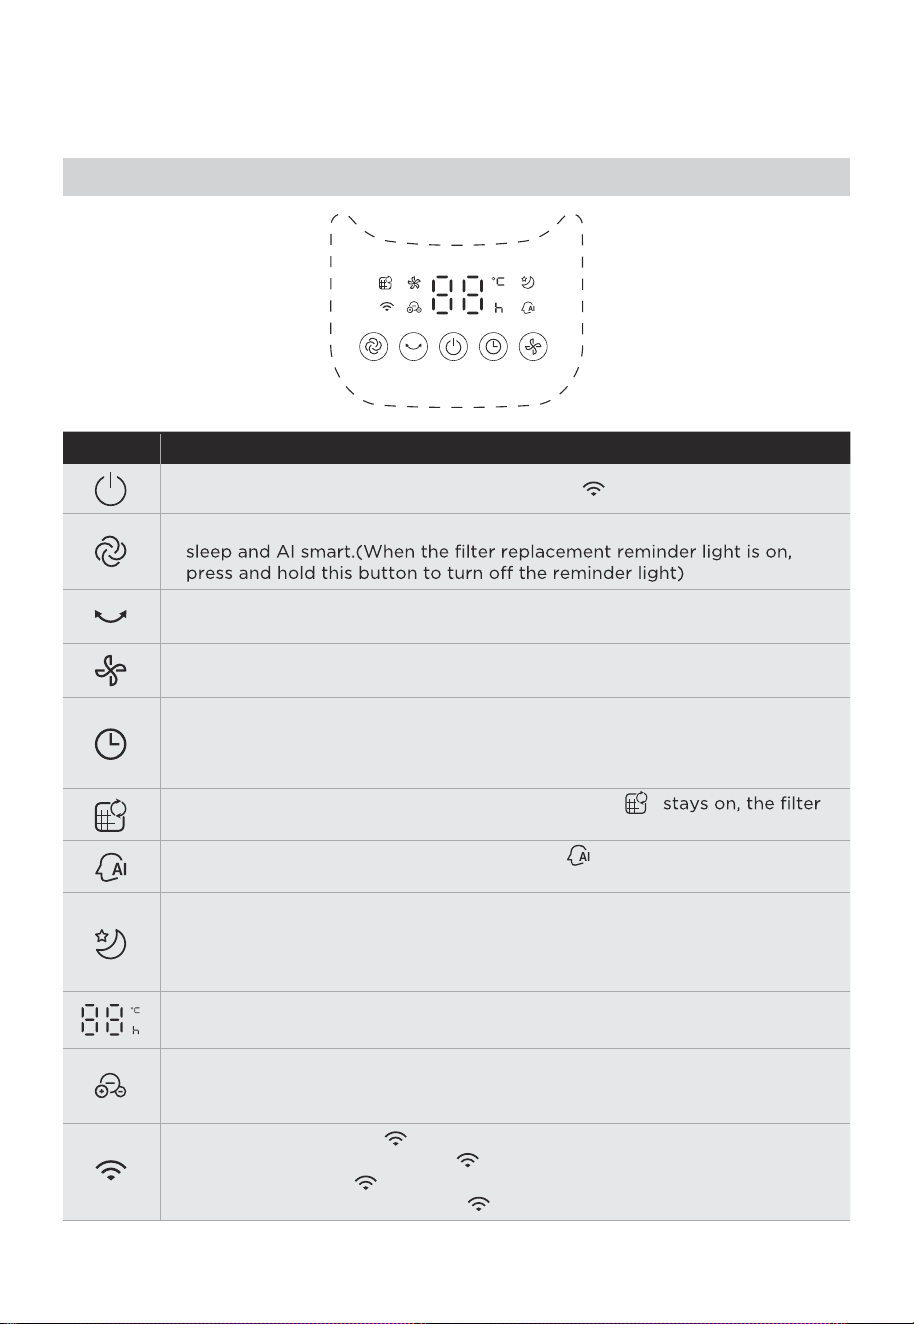
OPERATION INSTRUCTIONS
Function description
●
Startup/Standby, long press the on button, “ ” indicator lights up.
●
Touch this button to start/stop the swing.
●
Touch this button to switch the wind speed (cycles among level
1-2-3-•••-10-1-2).
●
●
Schedule to shut down in the power-on state, and schedule to start up in
the standby state.
Touch this button to set the timer (the display cycles among
0-1-2-•••-12-0h); 0h means that the timer is canceled.
●
Touch this button to switch the wind mode among normal, plasmacluster,
●
Filter replacement reminder icon; when the icon “ ”
needs to be replaced.
●
In AI smart wind mode, the indicator light “ ” is on, and the wind power
is automatically adjusted according to changes in ambient temperature.
●
This indicator light is on in sleep wind mode.Start the sleep wind function,
and the fan automatically adjusts the level according to the program; there
are three levels: 1, 2 and 3; you can adjust the level of the sleep wind by
pressing the wind speed button.
●
●
This indicator light is on in ion wind mode.
In this mode, plasmacluster is turned on, and level 1~10 wind has
plasmacluster.
●
●
●
This indicator light is “ ”.Long press the switch button for 3 seconds to
start matching or disconnect “ ”.
The lights are on, “ ” is connected.
The lights are blinking and the “ ” is disconnected or being connected.
●
Displays the wind speed level or set timer, and displays the temperature in
the wind mode.
Control Panel Operations
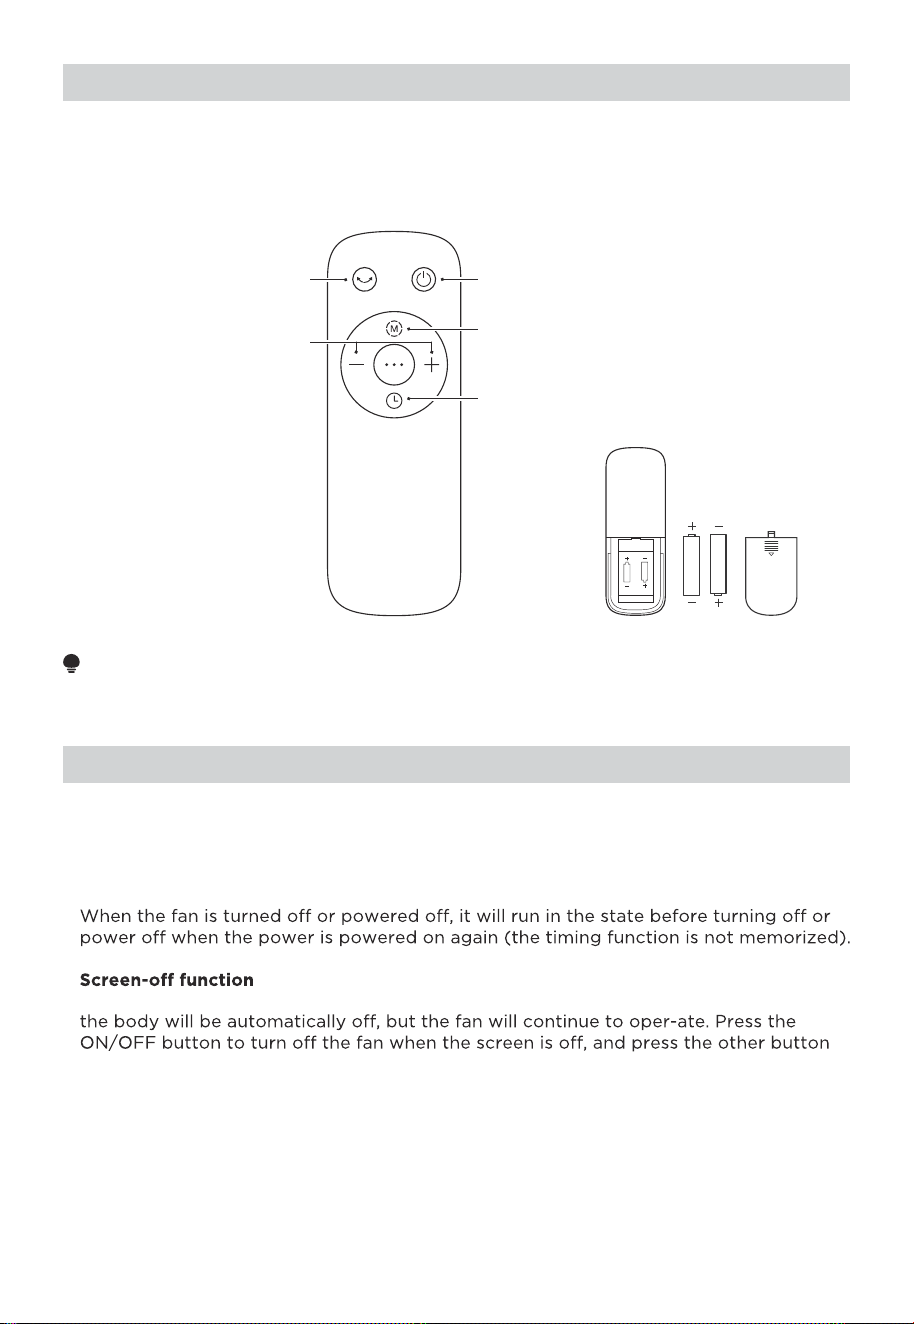
10
AAA Battery. 1.5V
Battery
Startup/Standby
Press “+, -” to set the
winds peed or timing time
Set the timed shutdown
/reserved startup
Start up or shut down
oscillating
Switch the wind type
Use manganese or alkaline batteries of type "AAA". DO NOT use rechargeable batteries.
NOTE
●
●
The remote control should be normally used within 5 meters of the front of the
product and 30 degrees of the deviation angle.
●
The battery contains many heavy metals, acids and bases, etc., which may threaten
human's health. Waste batteries should be recycled separately.
Forced shutdown
There is no operation during the running of the fan, after 15 hours of continuous
operation, the fan will be forced to shut down auto-matically.
Intelligent memory
●
●
●
In case of no operation for 30 seconds during normal operation, the indicator light on
to restore display.
Remote Control
Additional Functions
11
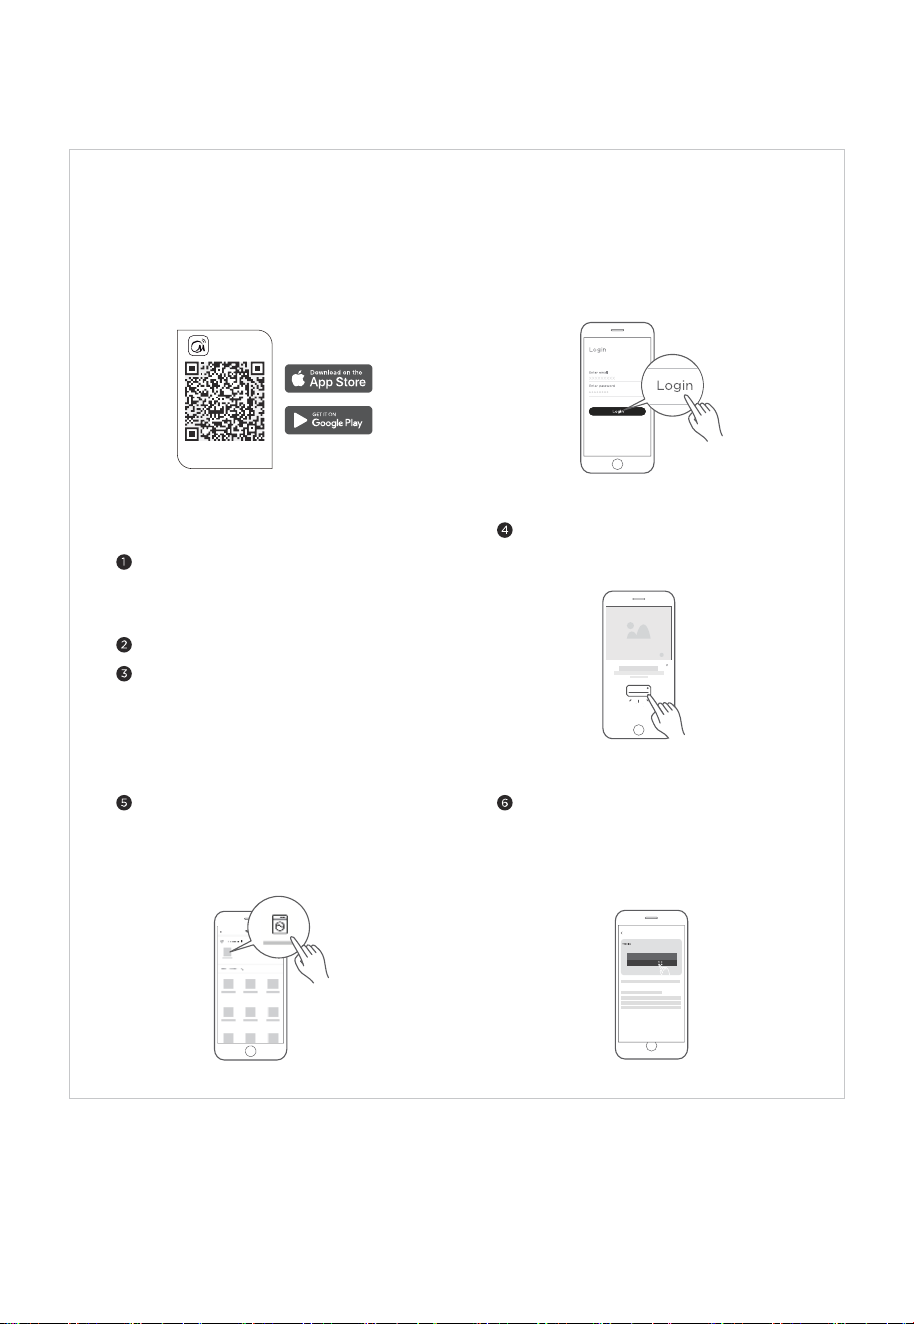
APP SETUP AND OPERATION
Connect your devices to MSmartHome
Add device
8:88
...
Download the app
& activate product
MSmartHome
Register and log inDownload the MSmartHome app
Connect your device to the wireless
network according to instructions on app.
If the connection fails, please follow the
instructions provided by the app to
continue with the operation.
On an app market (Google Play Store, Apple
App Store), search for "MSmartHome" and find
the MSmartHome app. Download and install it
on your phone. You can also download the app
by scanning the QR code below.
Open the MSmartHome app, and create a new
account to start (you can also register through
a third-party account). If you already have an
existing account, use the account to log in.
Please power on your devices.
Open MSmartHome app on your phone.
Please make sure your mobile phone is
connected to a wireless network. If it is
not, go to Settings and enable wireless
networks and Bluetooth.
If a message of "Smart devices discovered
nearby" appears, click to add.
If no message appears, select "+" on the
page and select your device in the list of
nearby devices available. If your device is
not listed, please add your device manually
by the device category and device model.

12
NOTE
• Make sure your devices are powered on.
• Keep your mobile phone close enough to your device when you are connecting your device to the network.
• Connect your mobile phone to the wireless network at home, and make sure you know the password of the
wireless network.
• Check if your wireless router supports 2.4 GHz band and turn it on. If you are not sure whether the router
supports 2.4 GHz band, please contact the router manufacturer.
• The device cannot connect to the wireless network that requires authentication, and it usually appears in public
areas such as hotels, restaurants, etc. Please connect to a wireless network that does not require authentication.
• Turn off the WLAN+ (Android) or WLAN Assistant (iOS) function of your mobile phone when connecting your
device to the network.
• In the case that your device connected to a wireless network before but it needs to reconnect, please click "+" on
the app Home page, and add your device again by the device category and model according to the instructions
on app.
Operation frequency band: 2.4GHz; RF outputpower:13-20dBm;
Hereby,GD Midea Environment Appliances MFG.Co.,Ltd declaresthat this electric fan is in compliance with the
essential requirements and other relevant provisionsof RE Directive 2014/53/EU.
13
CLEANING AND MAINTENANCE
The fan requires minimal maintenance. Do not try to fix it by yourself. Refer it to
qualified service personnel if service is needed.
Before cleaning and assembling, unplug the fan power.
To ensure adequate air circulation to the motor, keep vents at the rear of the motor free
of dust. Do not disassemble the fan to remove dust.
Please wipe the exterior parts with a soft cloth soaking a mild detergent.
Do not use any abrasive detergent or solvents to avoid scratching the surface.
Do not use any of the following as a cleaner: gasoline, thinner.
Do not allow water or any other liquid entering into the motor housing or interior parts.
Be sure to unplug from the electrical supply source before cleaning.
Plastic parts should be cleaned with a soft cloth moisten with mild soap Thoroughly
remove soapsuds with dry cloth.
1.
2.
3.
4.
5.
6.
7.
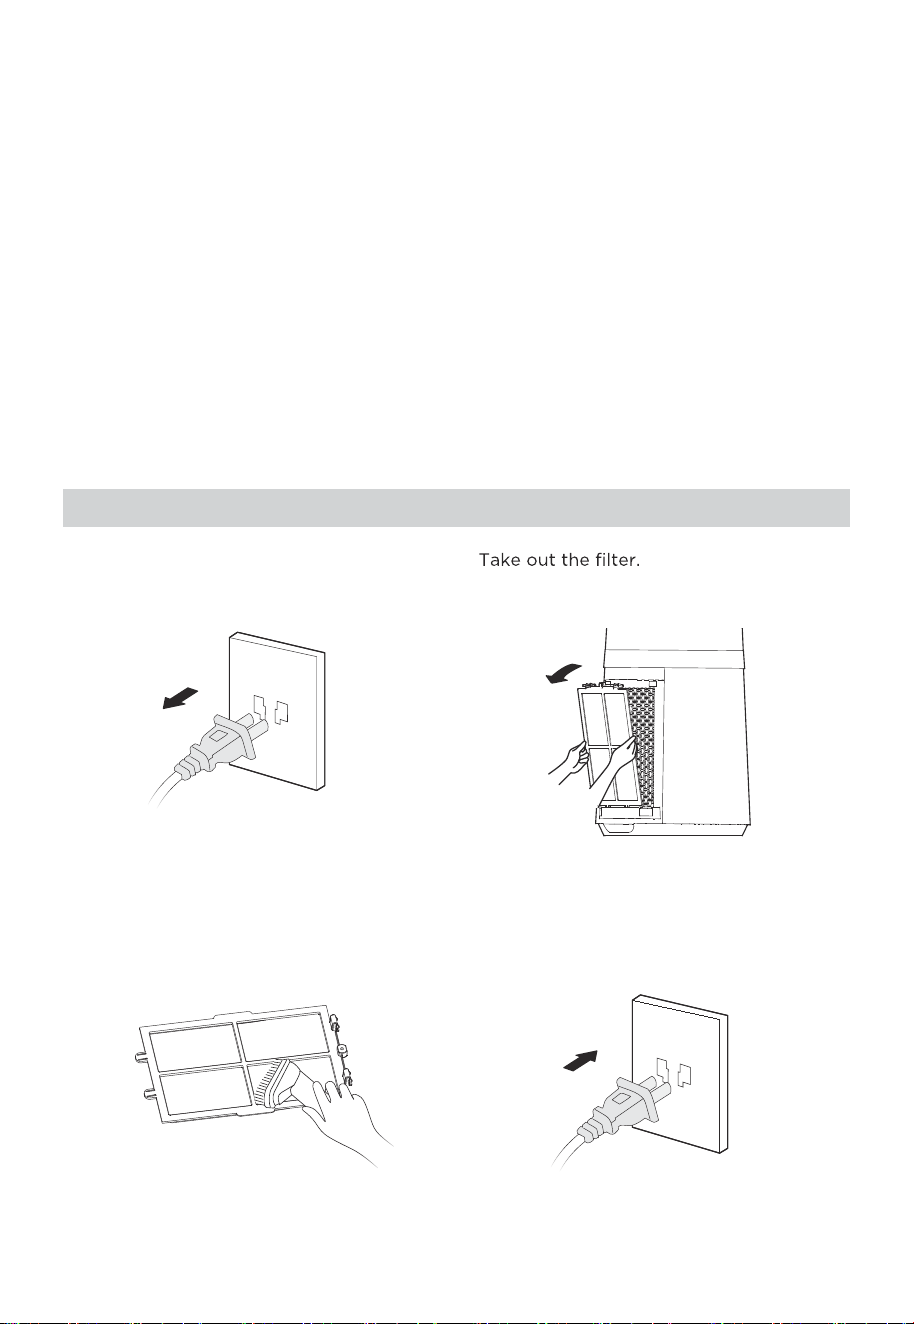
1 Unplug the power cord.
2
3 Remove the dust with vacuum cleaner. 4 Install the machine in reverse order and
plug power supply.
Pre-filter Cleaning
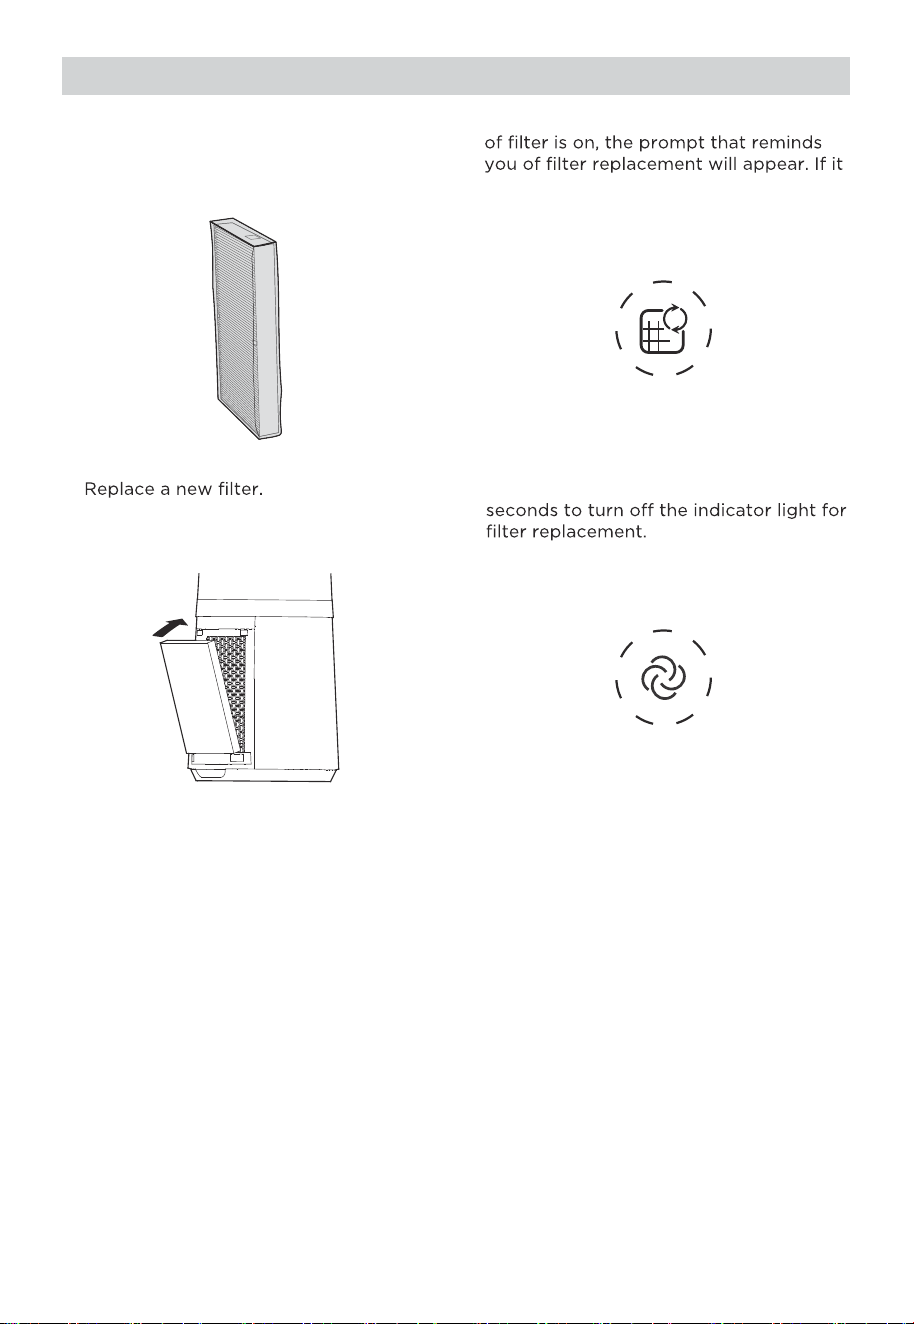
4 Long press the mode button for 3
2 When the indicator light for replacement
is not replaced in time, the prompt will
appear during each startup.
3
1 Filter model: FQ150CJ-2
(including 2 pieces).
Filter Replacement
14

15
Solution
TROUBLESHOOTING
Operation of your appliance can lead to errors and malfunctions. The following tables
contain possible causes and notes for resolving an error message or malfunction. It is
recommended to read the table below carefully in order to save your time and money
that may cost for calling to the service center.
Cause SolutionProblem
The power cable is not
plugged in or has poor contact.
Make sure the plug is properly
inserted into the socket.
The switch on the body is
not turned on.
Turn on the switch on the
body.
The battery needs replacing. Replace the battery.
The remote is being used more
than 5m away from the fan.
●
●
●
●
The machine does
not work properly
after installed
The remote does
not work
Use the remote closer to the
fan and make sure it is pointing
directly at the display panel.

16
logo, word marks, trade name, trade dress and all versions there of are
trademarks, copyrights and other intellectual property rights, and all goodwill derived
valuable assets of Midea Group and/or its affiliates (“Midea”), to which Midea owns
from using any part of an Midea trademark. Use of Midea trademark for commercial
purposes without the prior written consent of Midea may constitute trademark
infringement or unfair competition in violation of relevant laws.
This manual is created by Midea and Midea reserves all copyrights thereof. No entity or
individual may use, duplicate, modify, distribute in whole or in part this manual, or
bundle or sell with other products without the prior written consent of Midea.
All the described functions and instructions were up to date at the time of printing this
manual. However, the actual product may vary due to improved functions and designs.
TRADEMARKS, COPYRIGHTS
AND LEGAL STATEMENT
17
device must be returned to official collection point for
DISPOSAL AND RECYCLING
Important Instructions for Environment
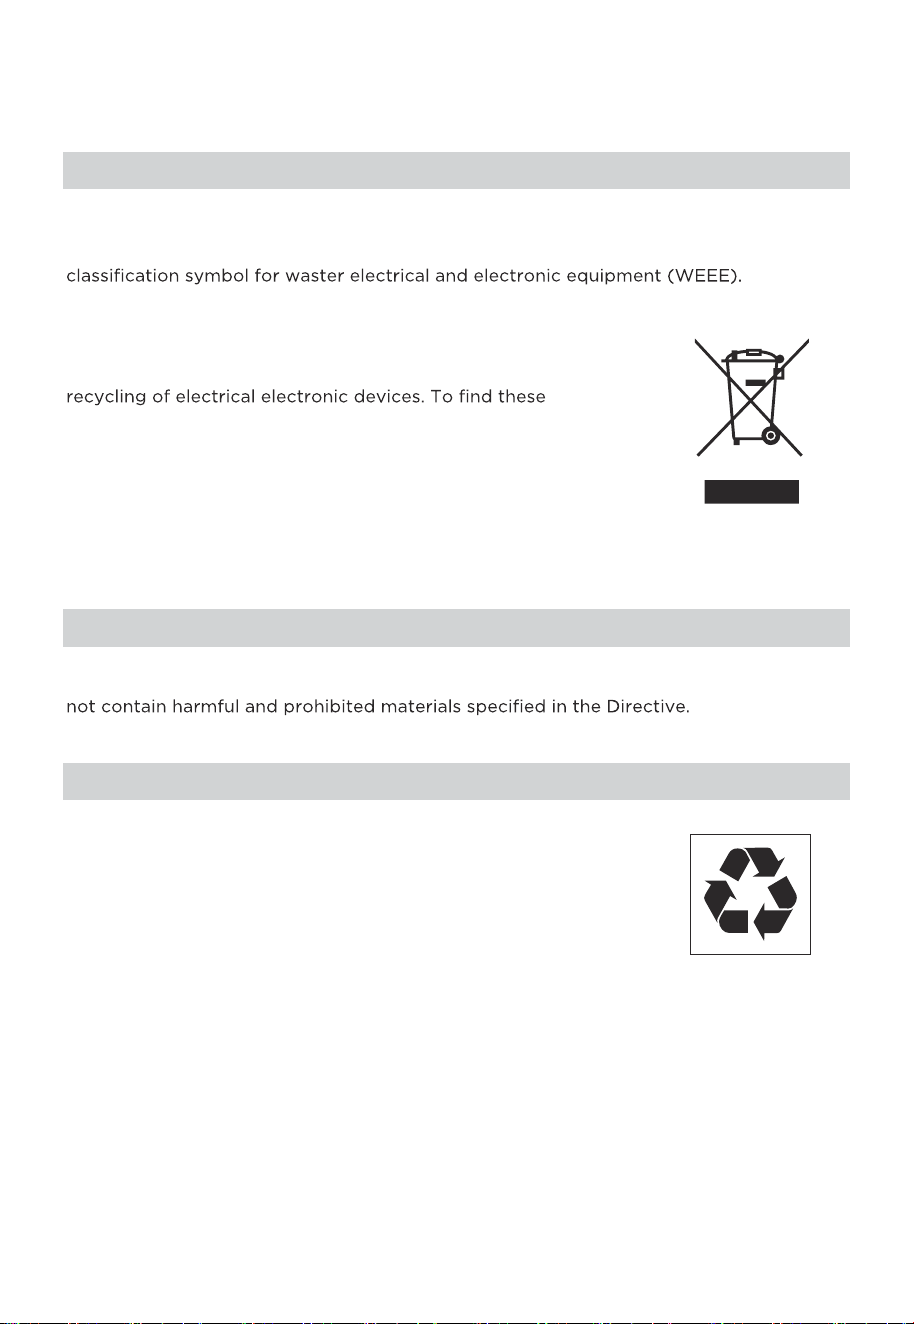
Compliance with the WEEE Directive and Disposing of the Waster Product:
This product complies with EU WEEE Directive (2012/19/EU). This product bears a
This symbol indicates that this product shall not be disposed
with other household wastes at the end of its service life. Used
collection systems please contact to your local authorities or
retailer where the product was purchased. Each household
performs important role in recovering and recycling of old
appliance. Appropriate disposal of used appliance helps
prevent potential negative consequences for the environment
and human health.
Compliance with RoHS Directive
The product you have purchased complies with EU RoHS Directive (2011/65/EU). It does
Package Information
Packaging materials of the product are manufactured from
recyclable materials in accordance with our National Environ-
ment Regulations. Do not dispose of the packaging materials
together with the domestic or other wastes. Take them to the
packaging material collection points designated by the local
authorities.

18
DATA PROTECTION NOTICE
For the provision of the services agreed with the customer,
we agree to comply without restriction with all stipulations of applicable data protection
law, in line with agreed countries within which services to the customer will be delivered,
as well as, where applicable, the EU General Data Protection Regulation (GDPR).
Generally, our data processing is to fulfil our obligation under contract with you and for
product safety reasons, to safeguard your rights in connection with warranty and
product registration questions. In some cases, but only if appropriate data protection is
ensured, personal data might be transferred to recipients located outside of the
European Economic Area.
Further information are provided on request. You can contact our Data Protection
Officer via [email protected]. To exercise your rights such as right to object your
personal date being processed for direct marketing purposes, please contact us via
[email protected]. To find further information, please follow the QR Code.