
OWNER’S MANUAL
®
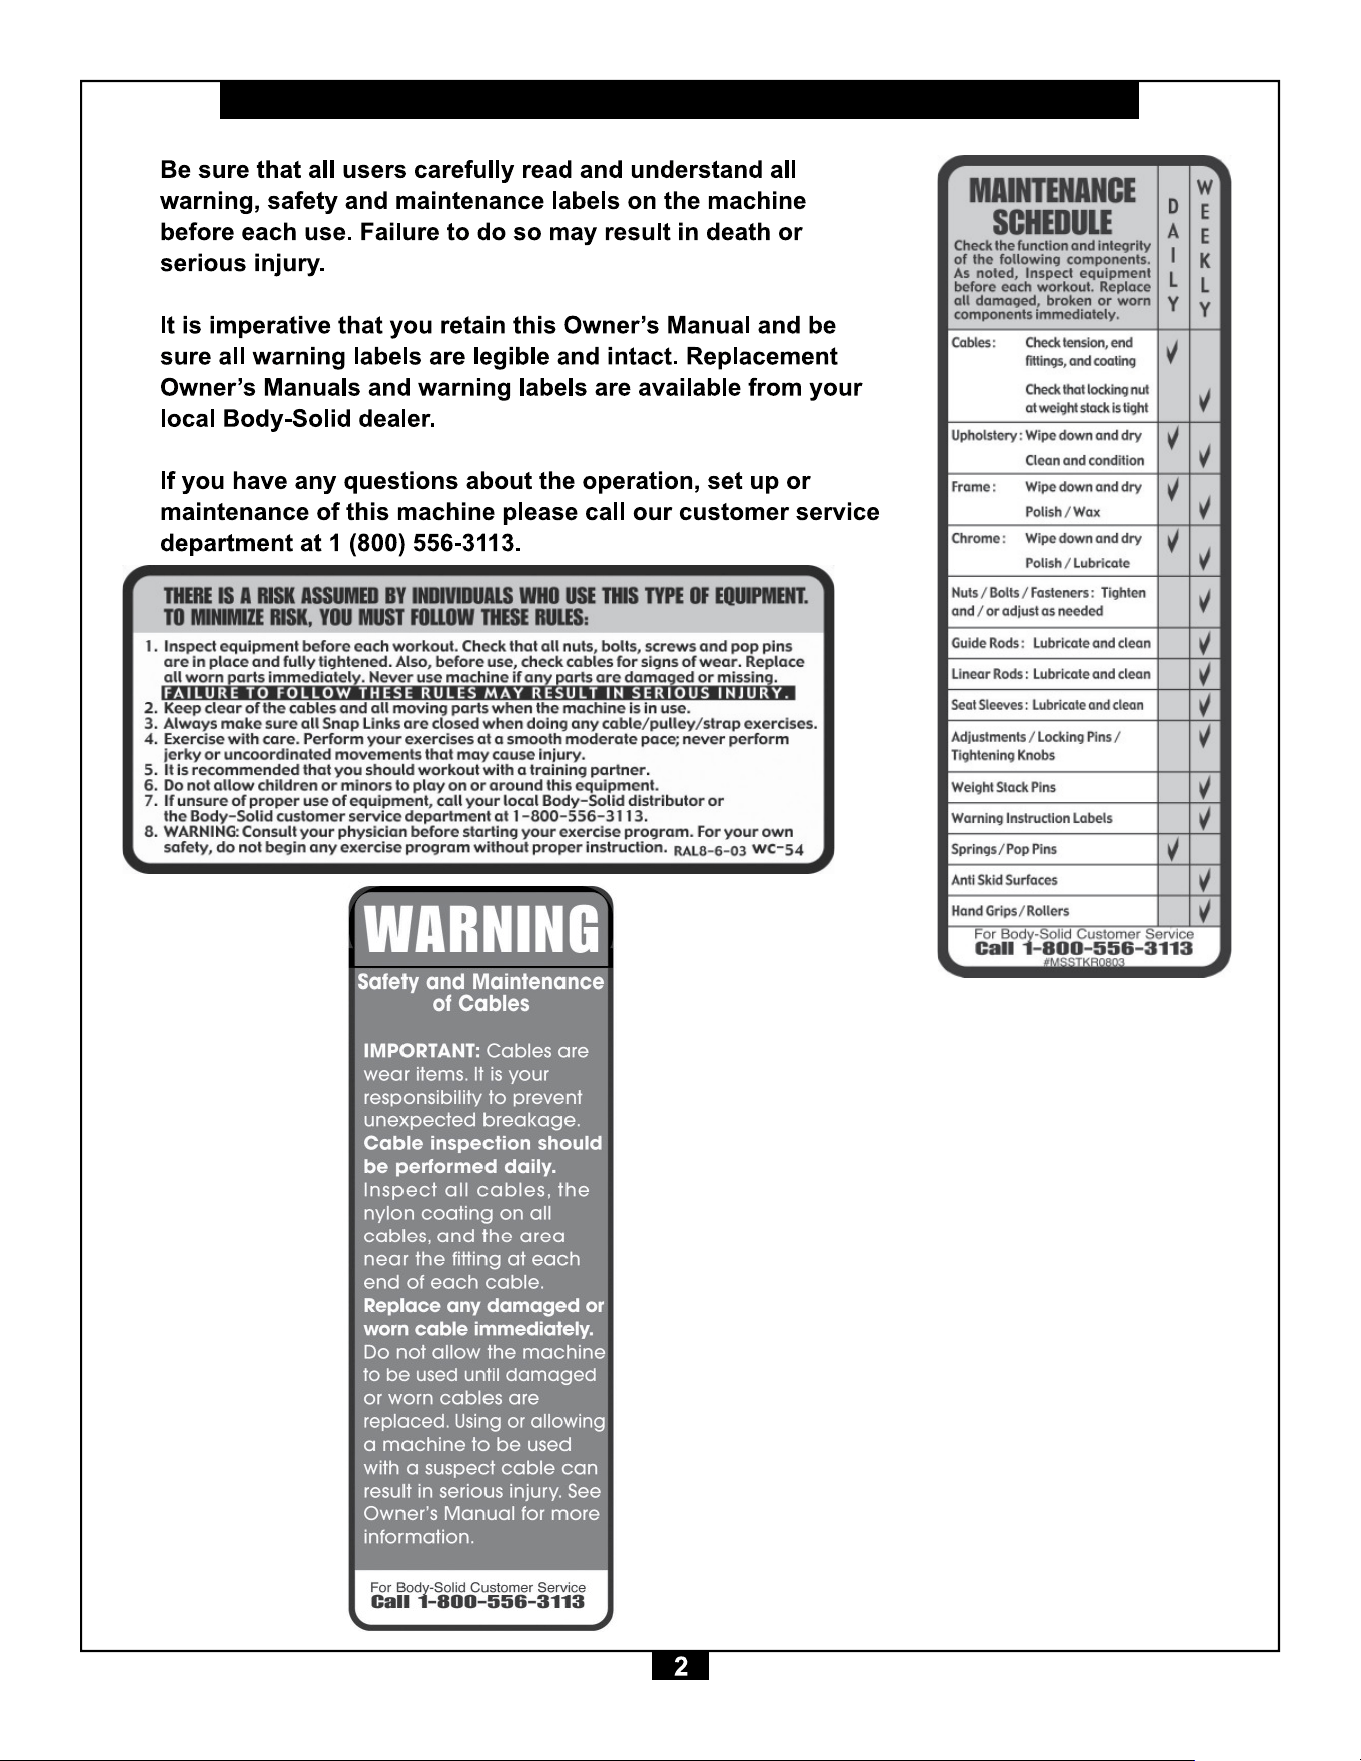
Warning, Safety & Maintenance
Table of Contents

Important Safety Instructions
When using exercise equipment, you
should always take basic precautions,
including the following:
m
m
m
m
m
m
m
m
m
m
m
m
m
Personal Safety During Assembly
m
m
m
Obtaining Service
Retain this Owner’s Manual for future
reference. If you need to order replacement
parts please be prepared to provide the
following information when contacting us so
that we can assist you better.
1. Model Number
2. Place of Purchase
3. Serial Number (S/N)
4. Part # and Description
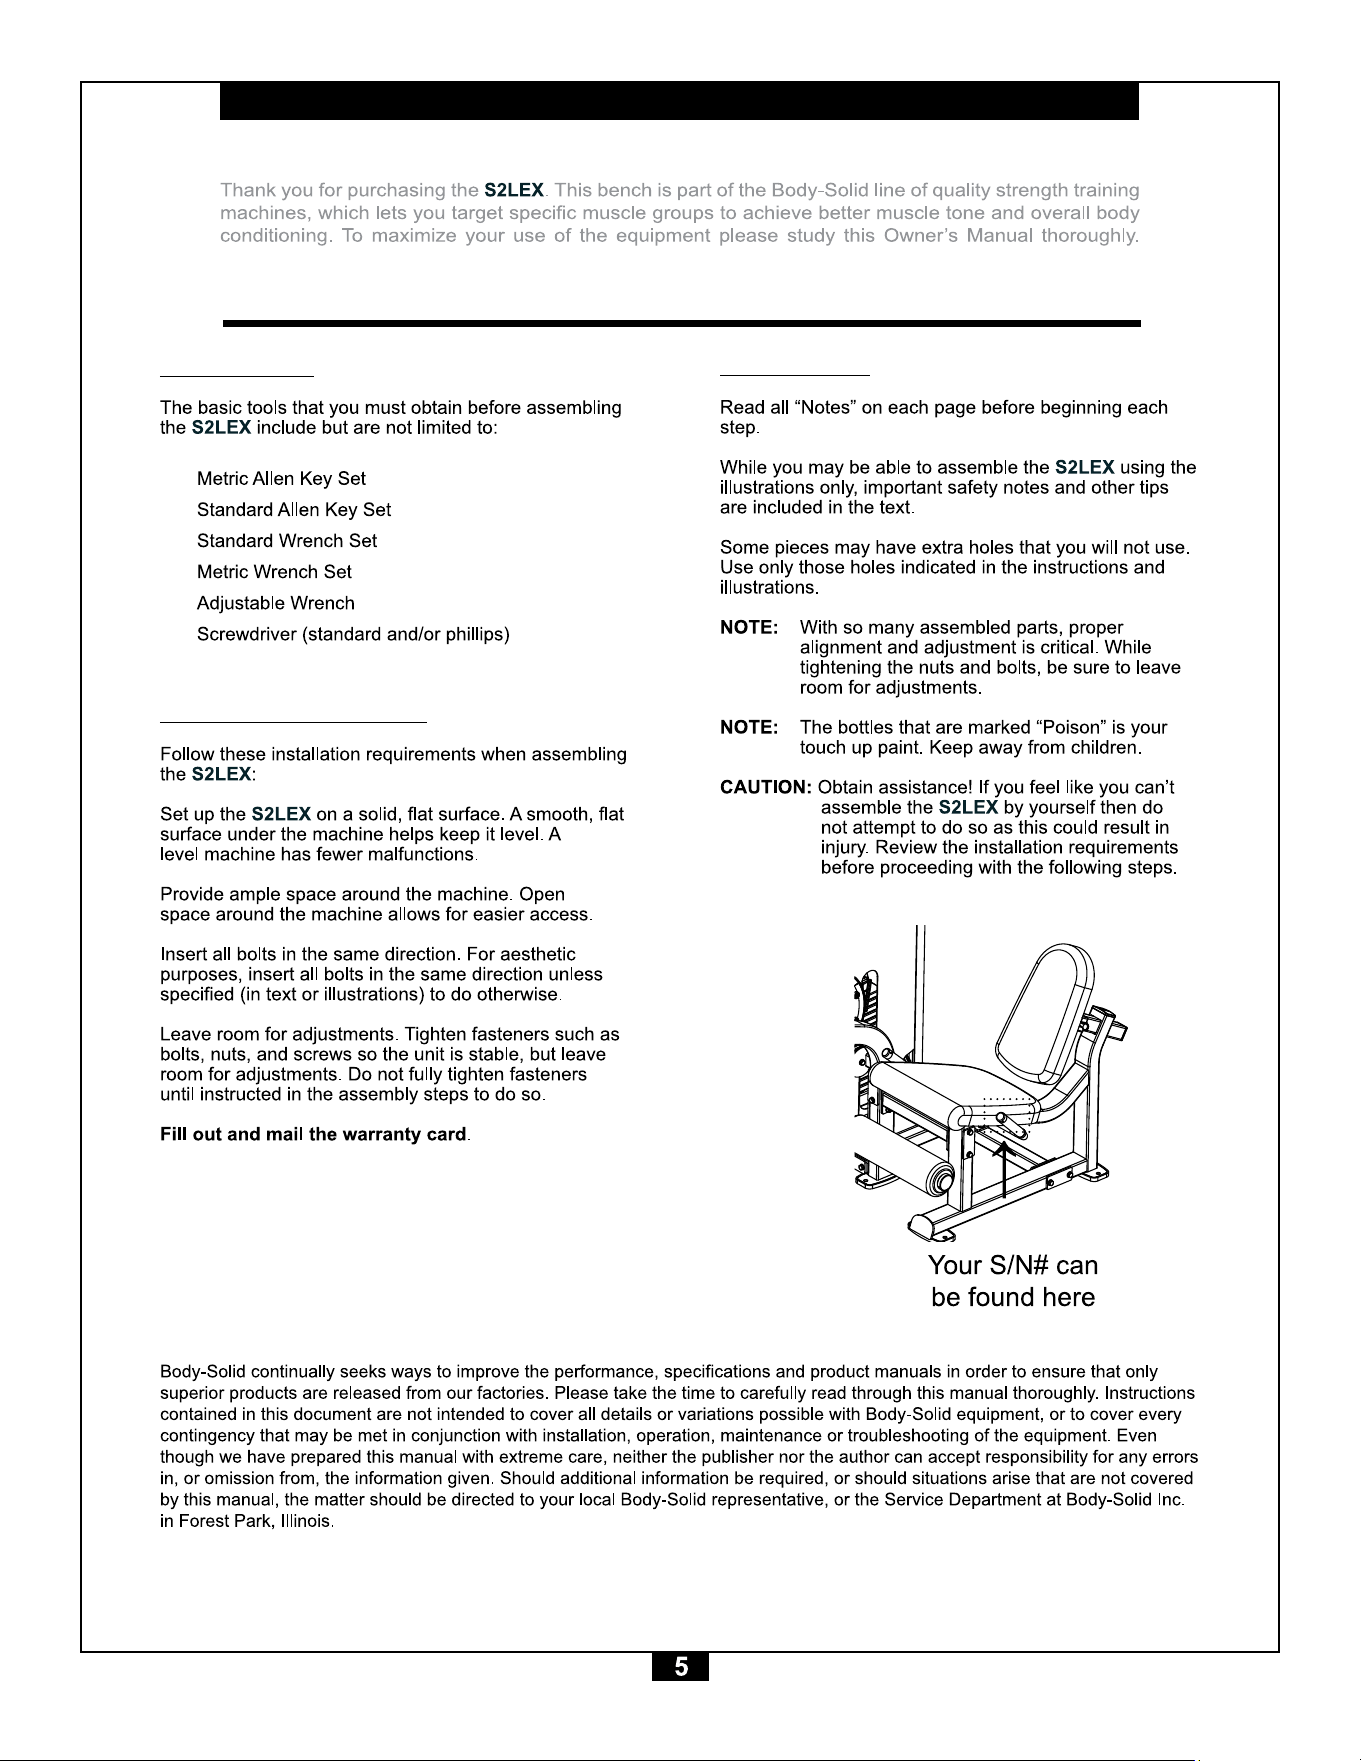
Preparation
Required Tools
m
m
m
m
m
m
Installation Requirements
Assembly Tips

Part# Size Description Quantity
S2LEX Hardware List
Part# Size Description Quantity
S2LEX Hardware List
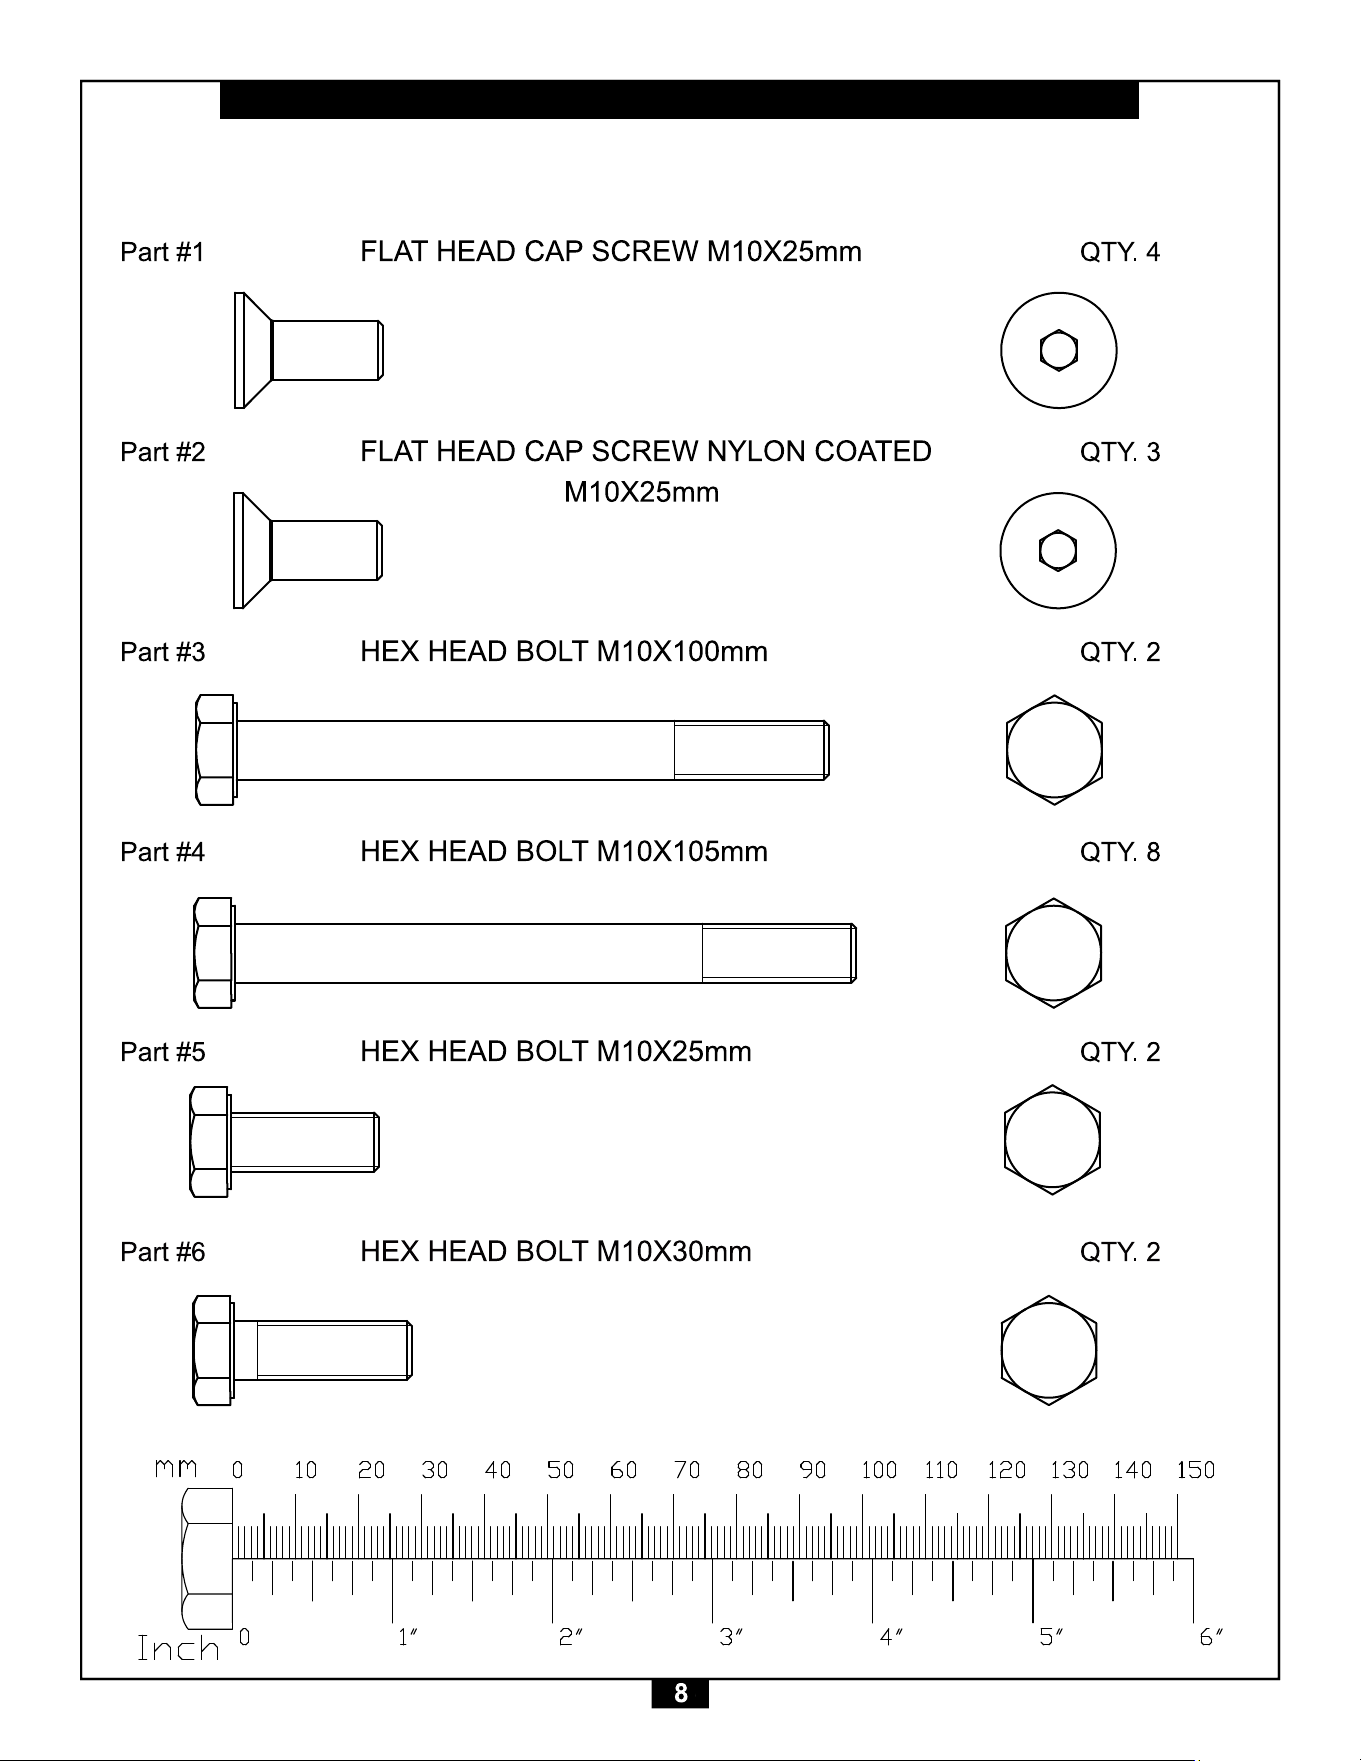
S2LEX Hardware Illustration
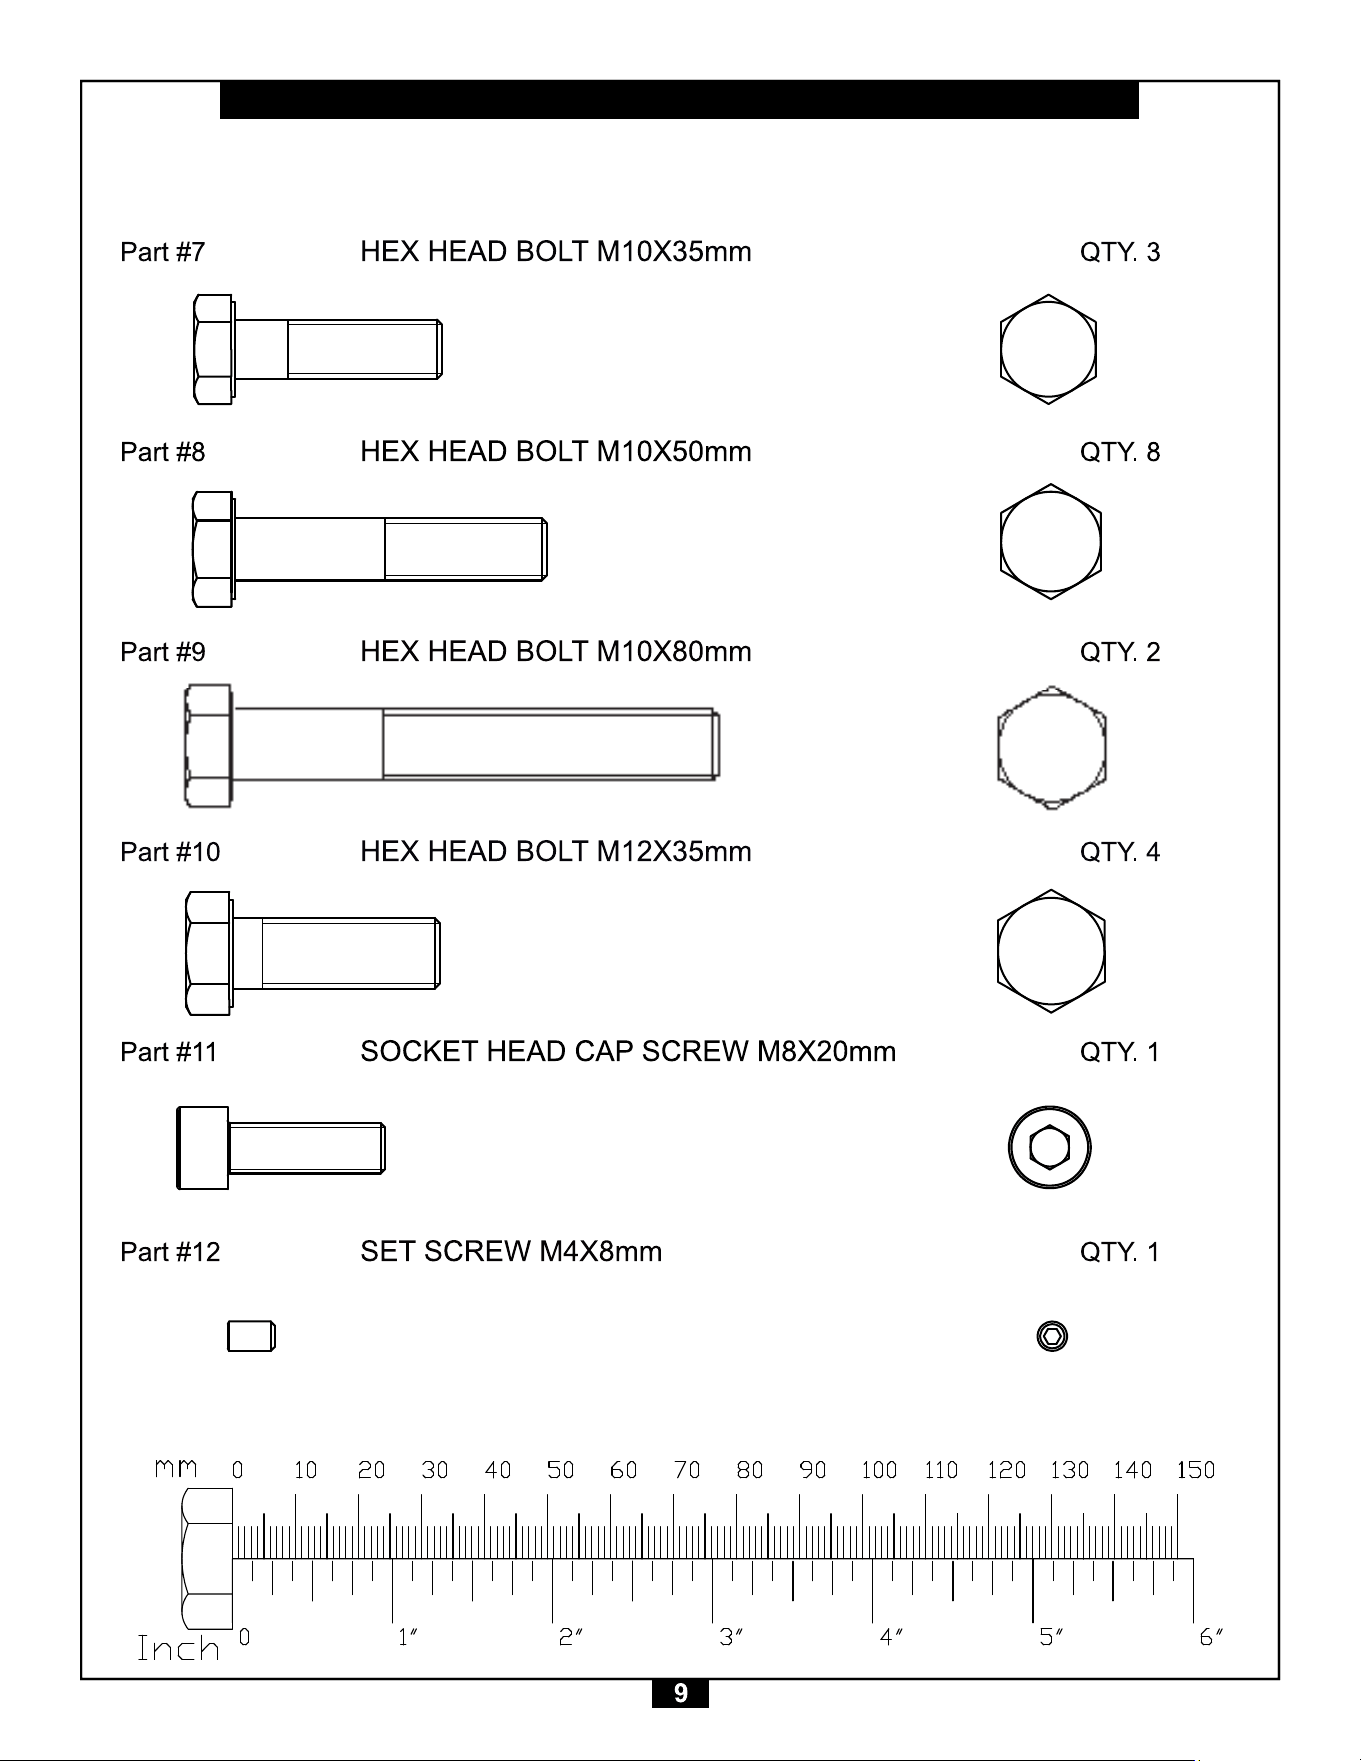
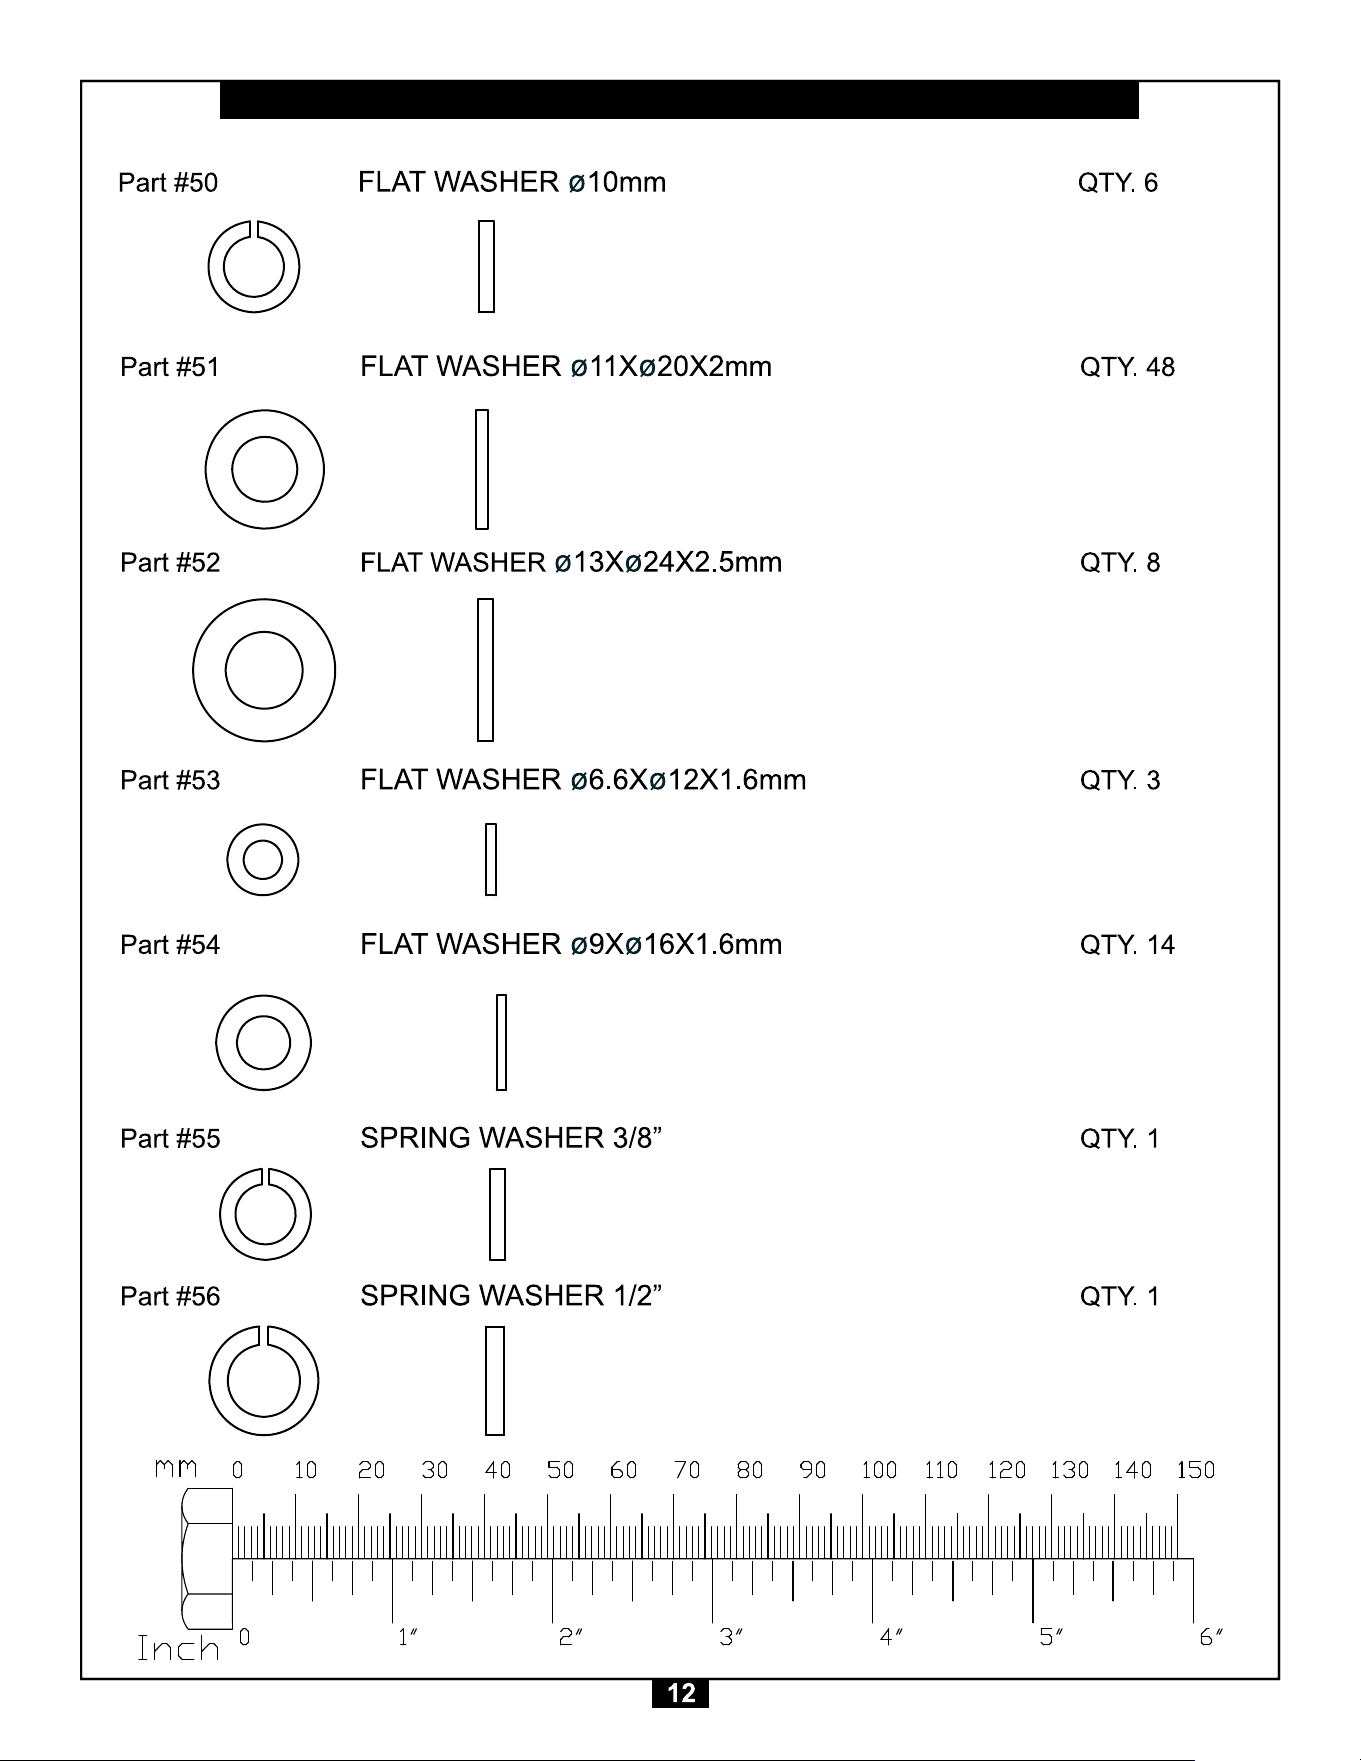
S2LEX Hardware Illustration
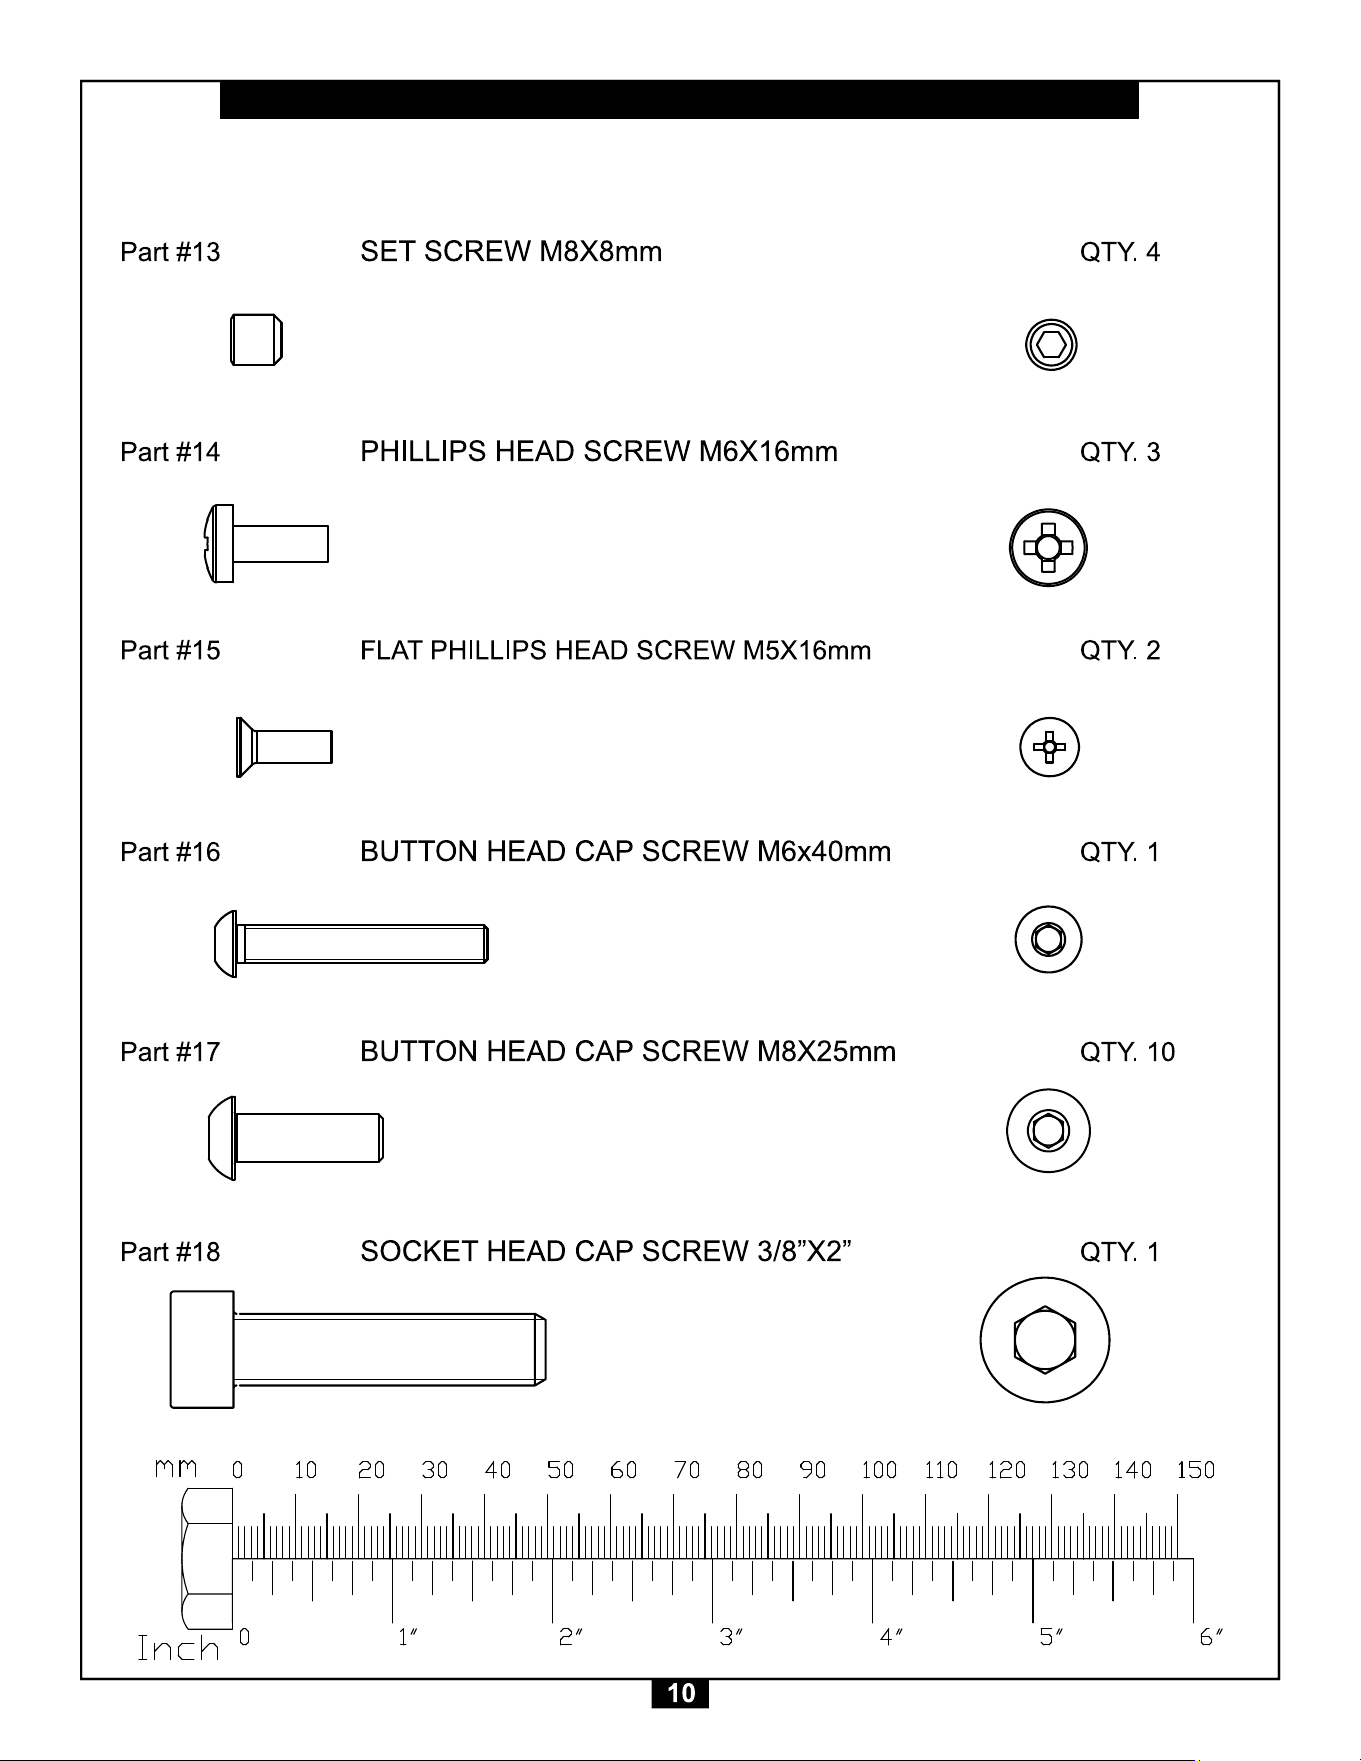
S2LEX Hardware Illustration
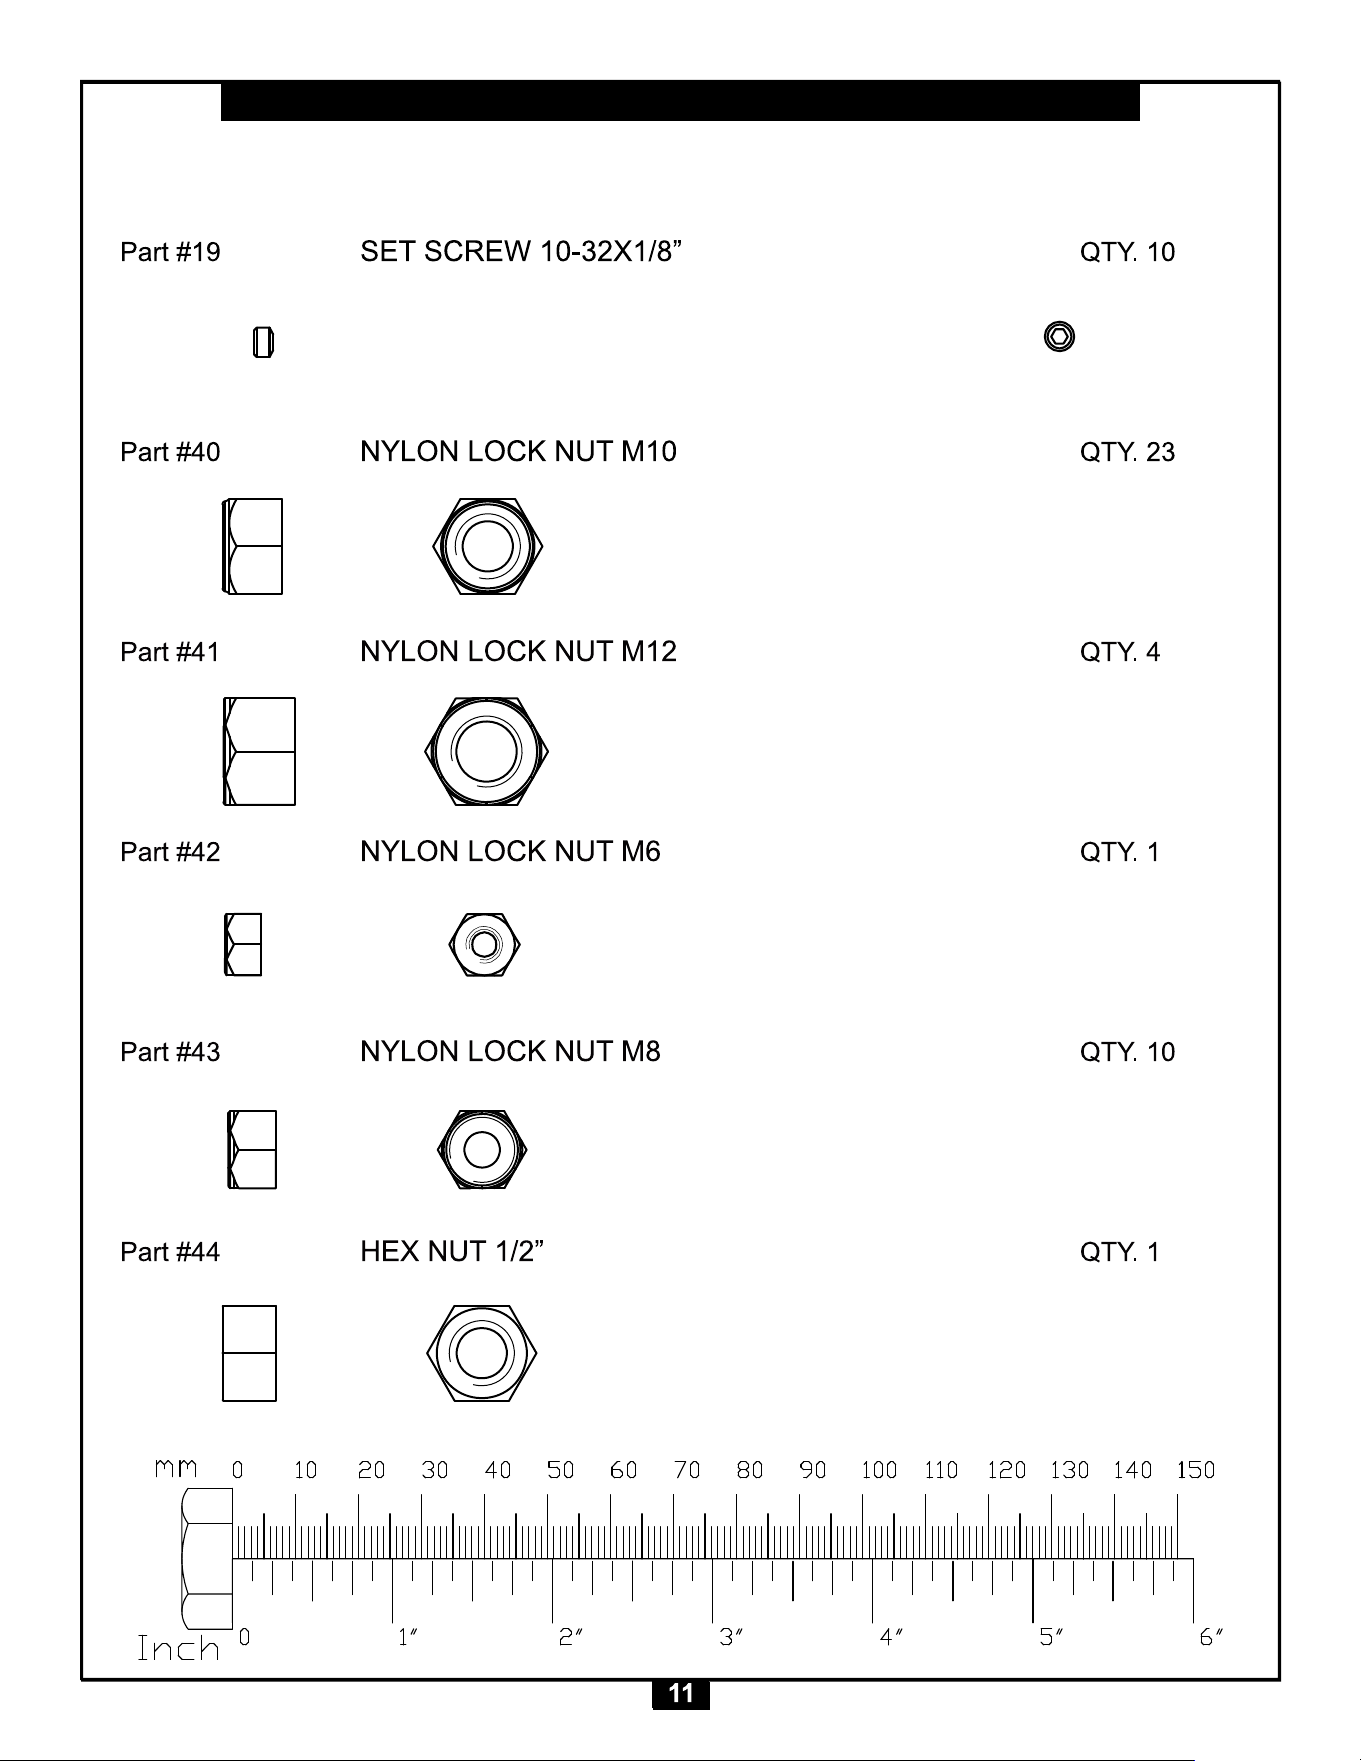
S2LEX Hardware Illustration
ijij
ijij
ijij
ijij
ij
ijij
ijij
ijij
ijij
ij
ijij
ijij
ijij
ijij
ij
ij
S2LEX Hardware Illustration
ijij
ijij
ijij
ijij
ij
ijij
ijij
ijij
ijij
ij
ijij
ijij
ijij
ijij
ij
ijij
ijij
ijij
ijij
ij
ijij
ijij
ijij
ijij
ij
ijij
ijij
ijij
ijij
ij
ijij
ijij
ijij
ijij
ij
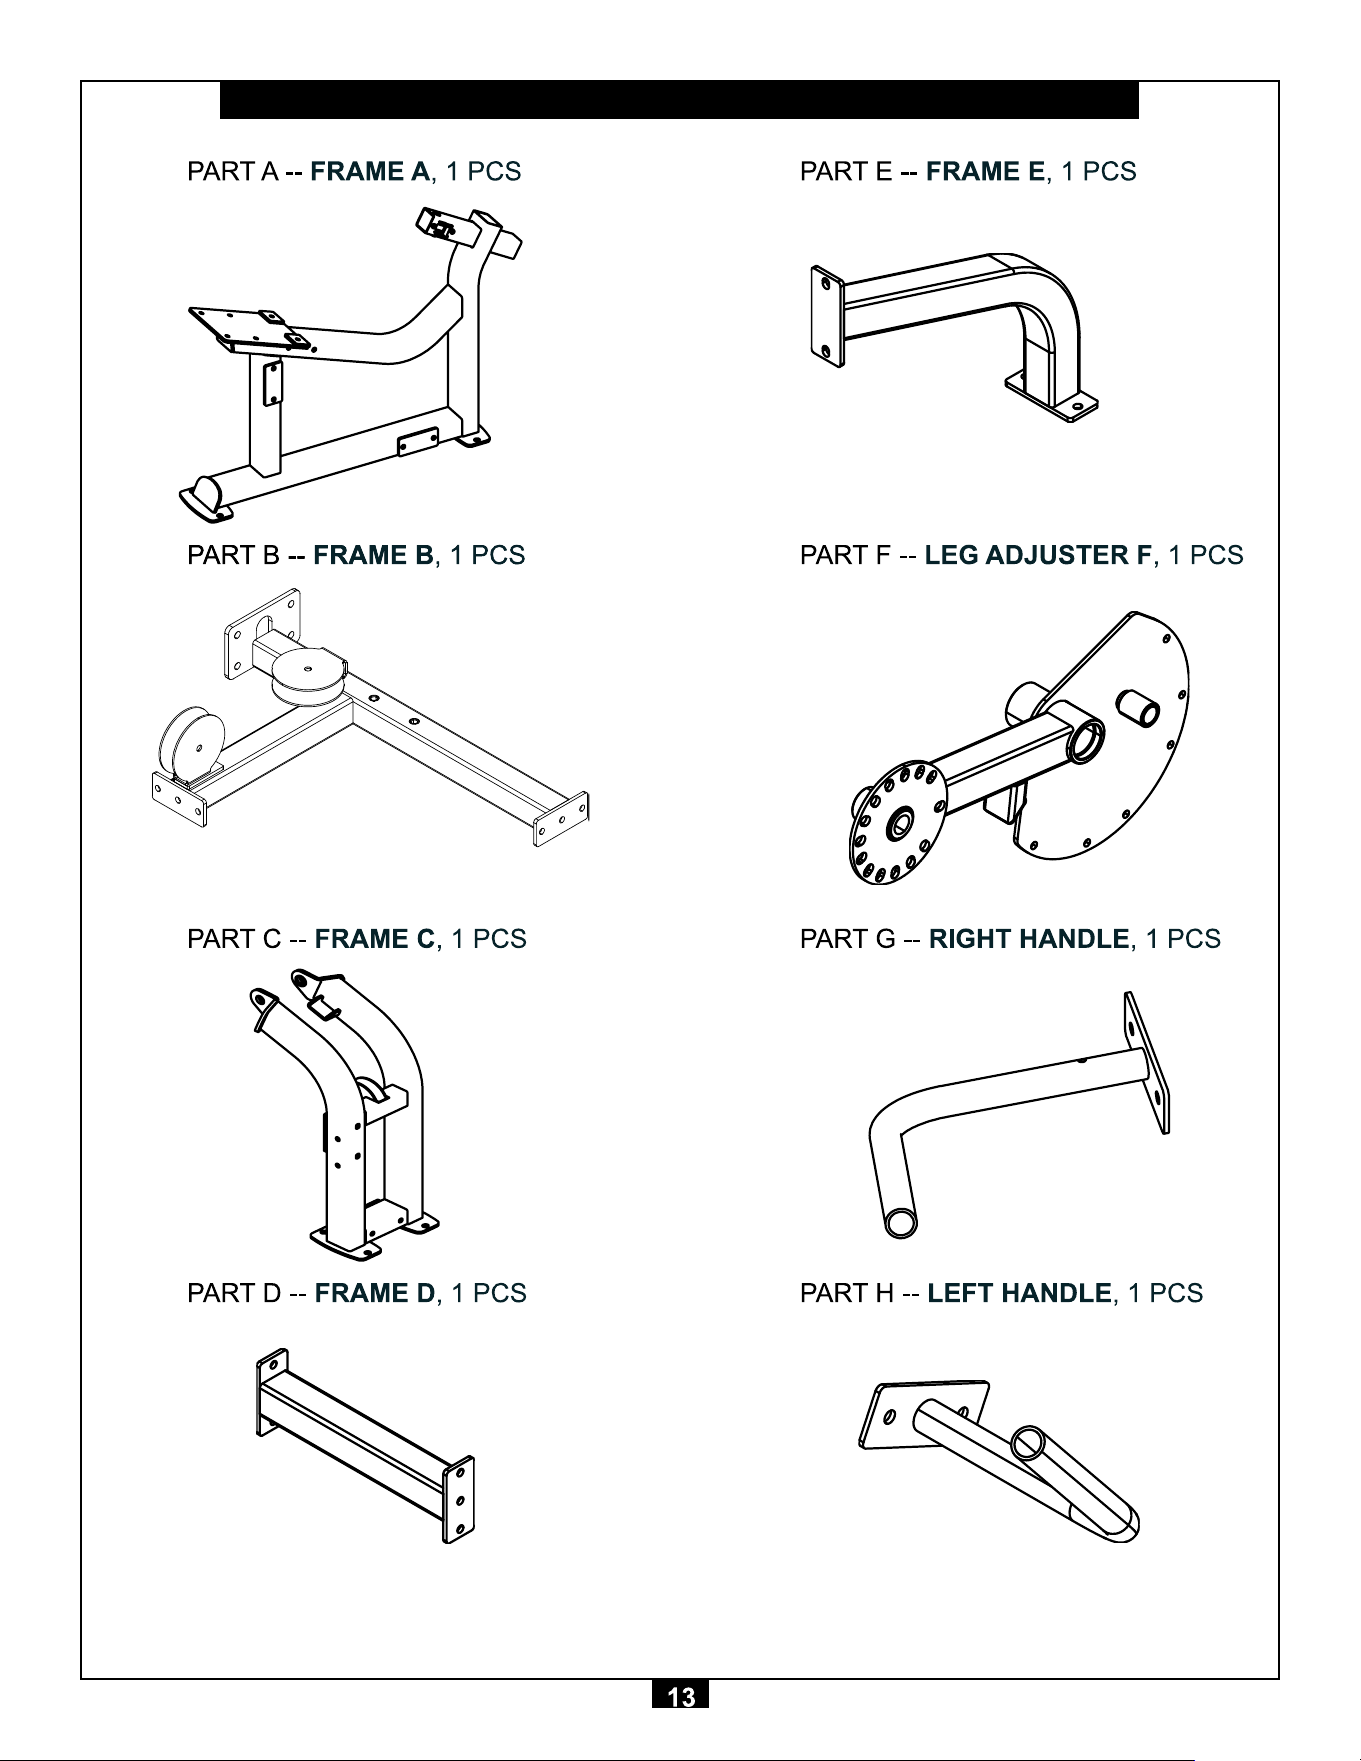
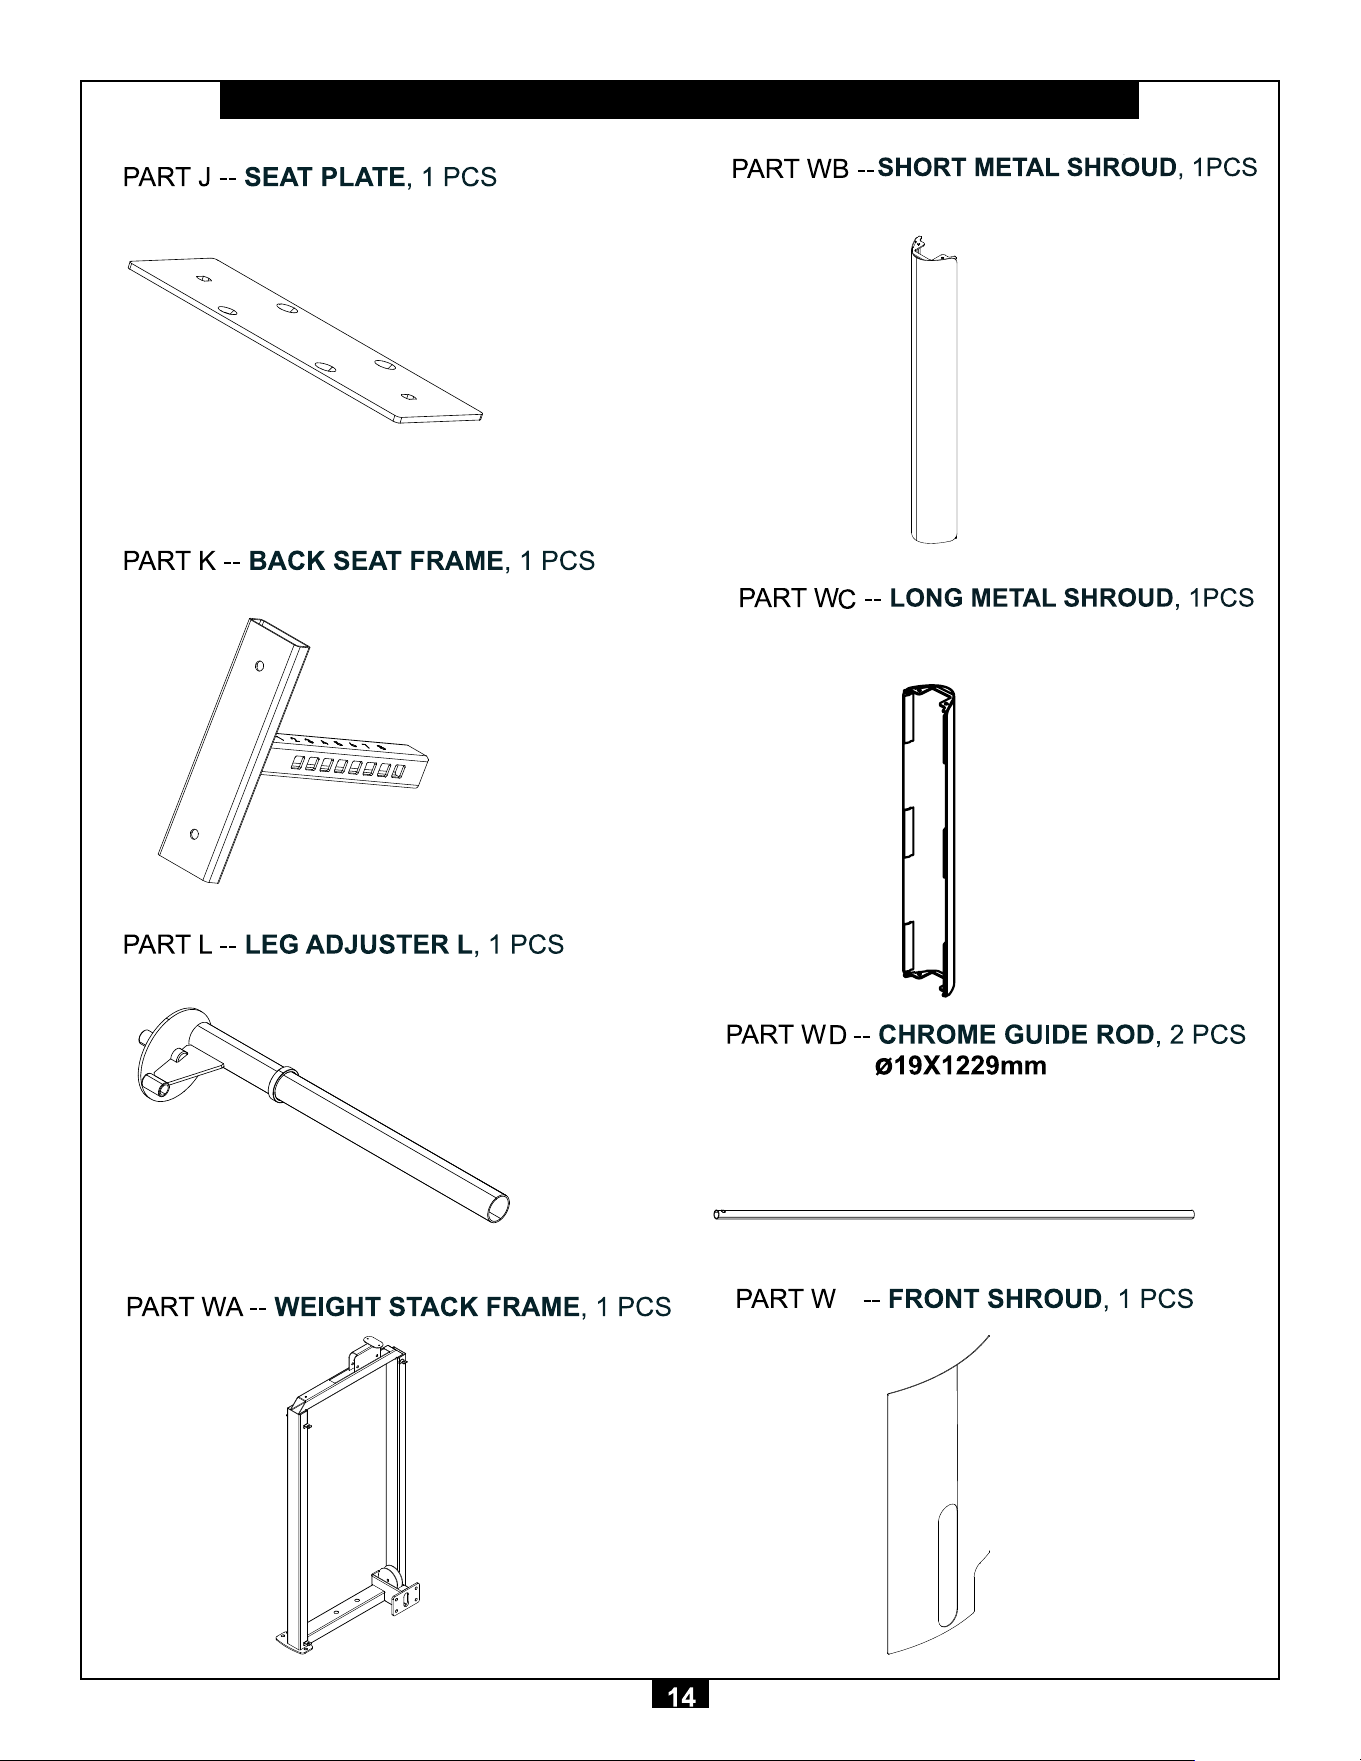
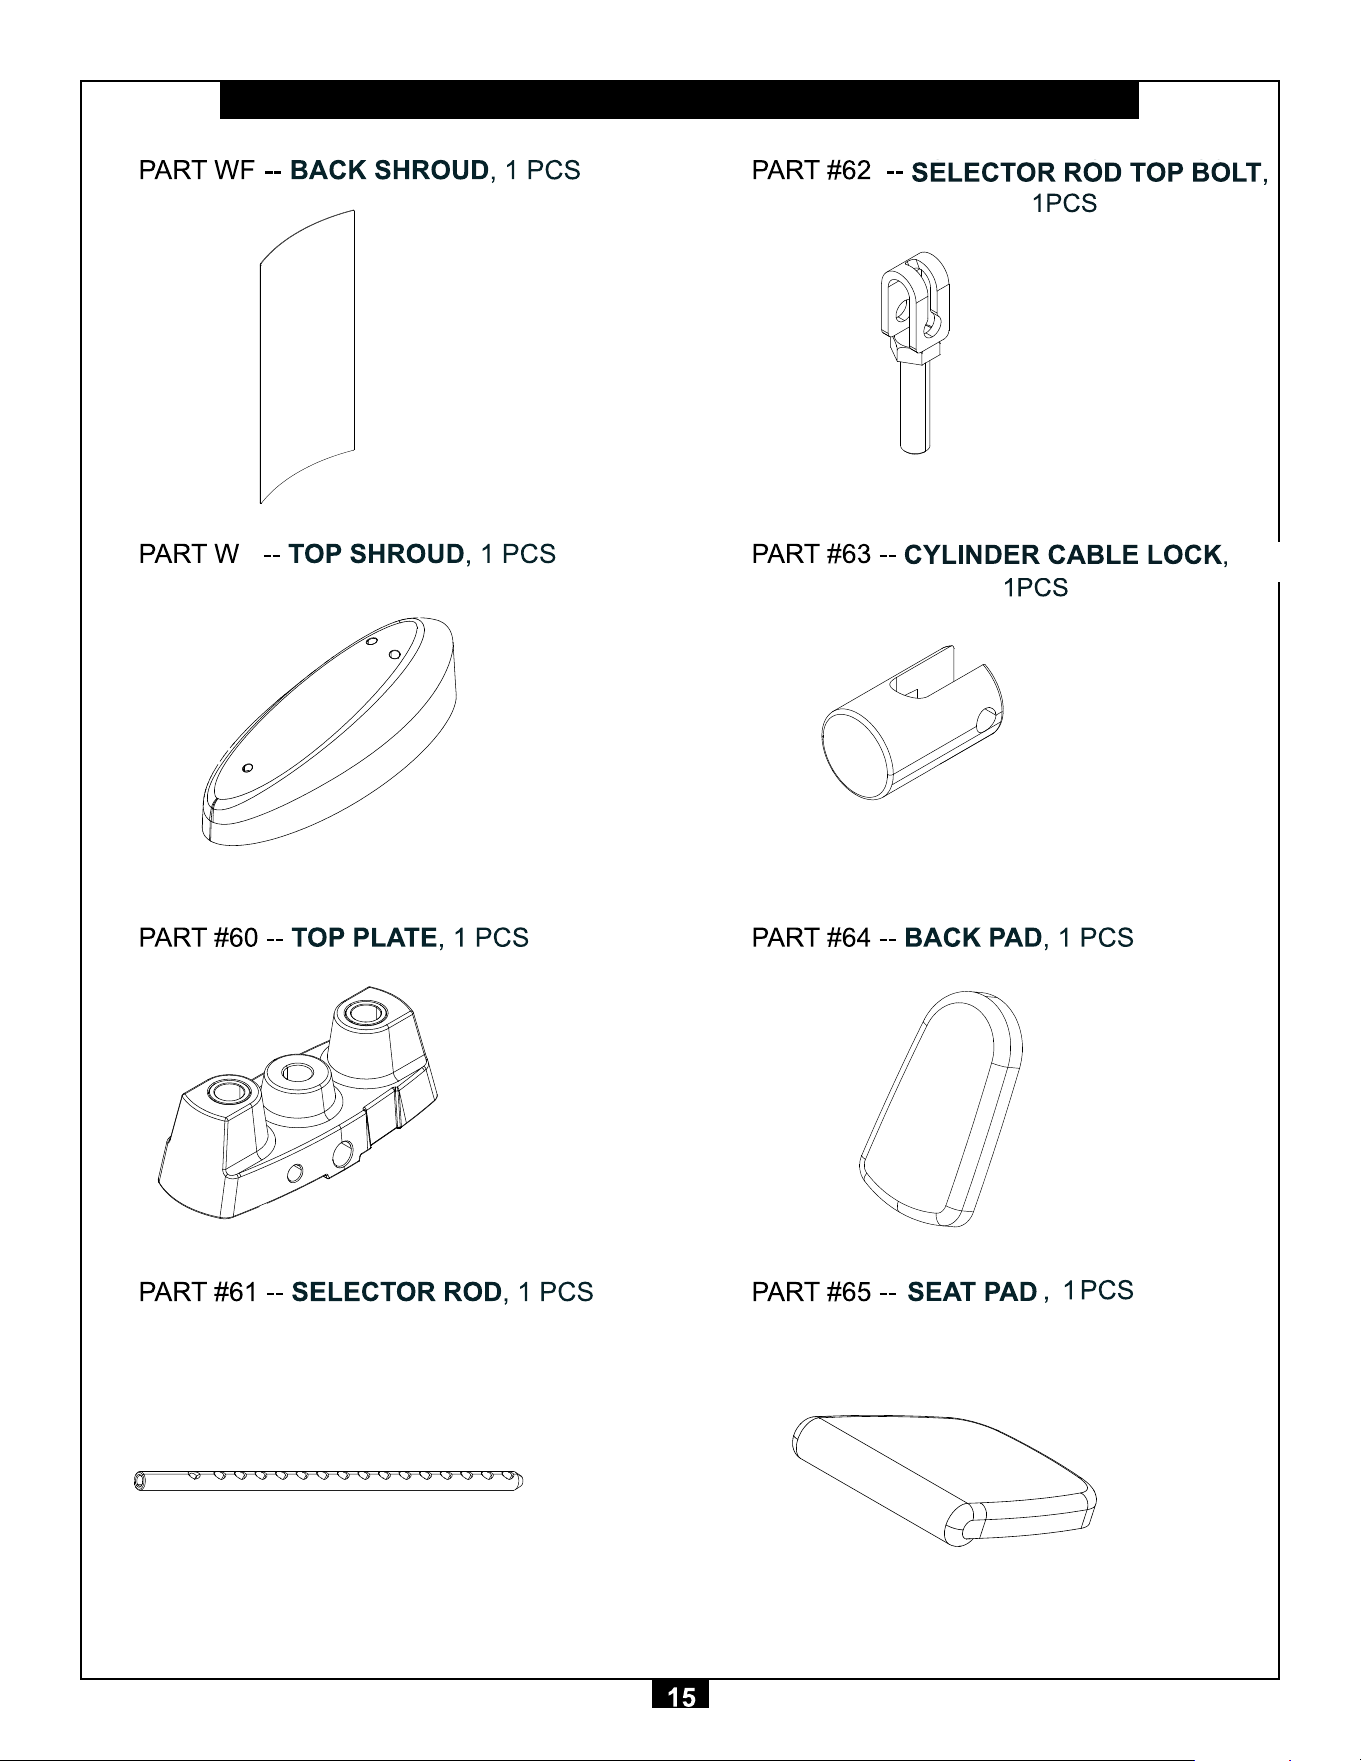
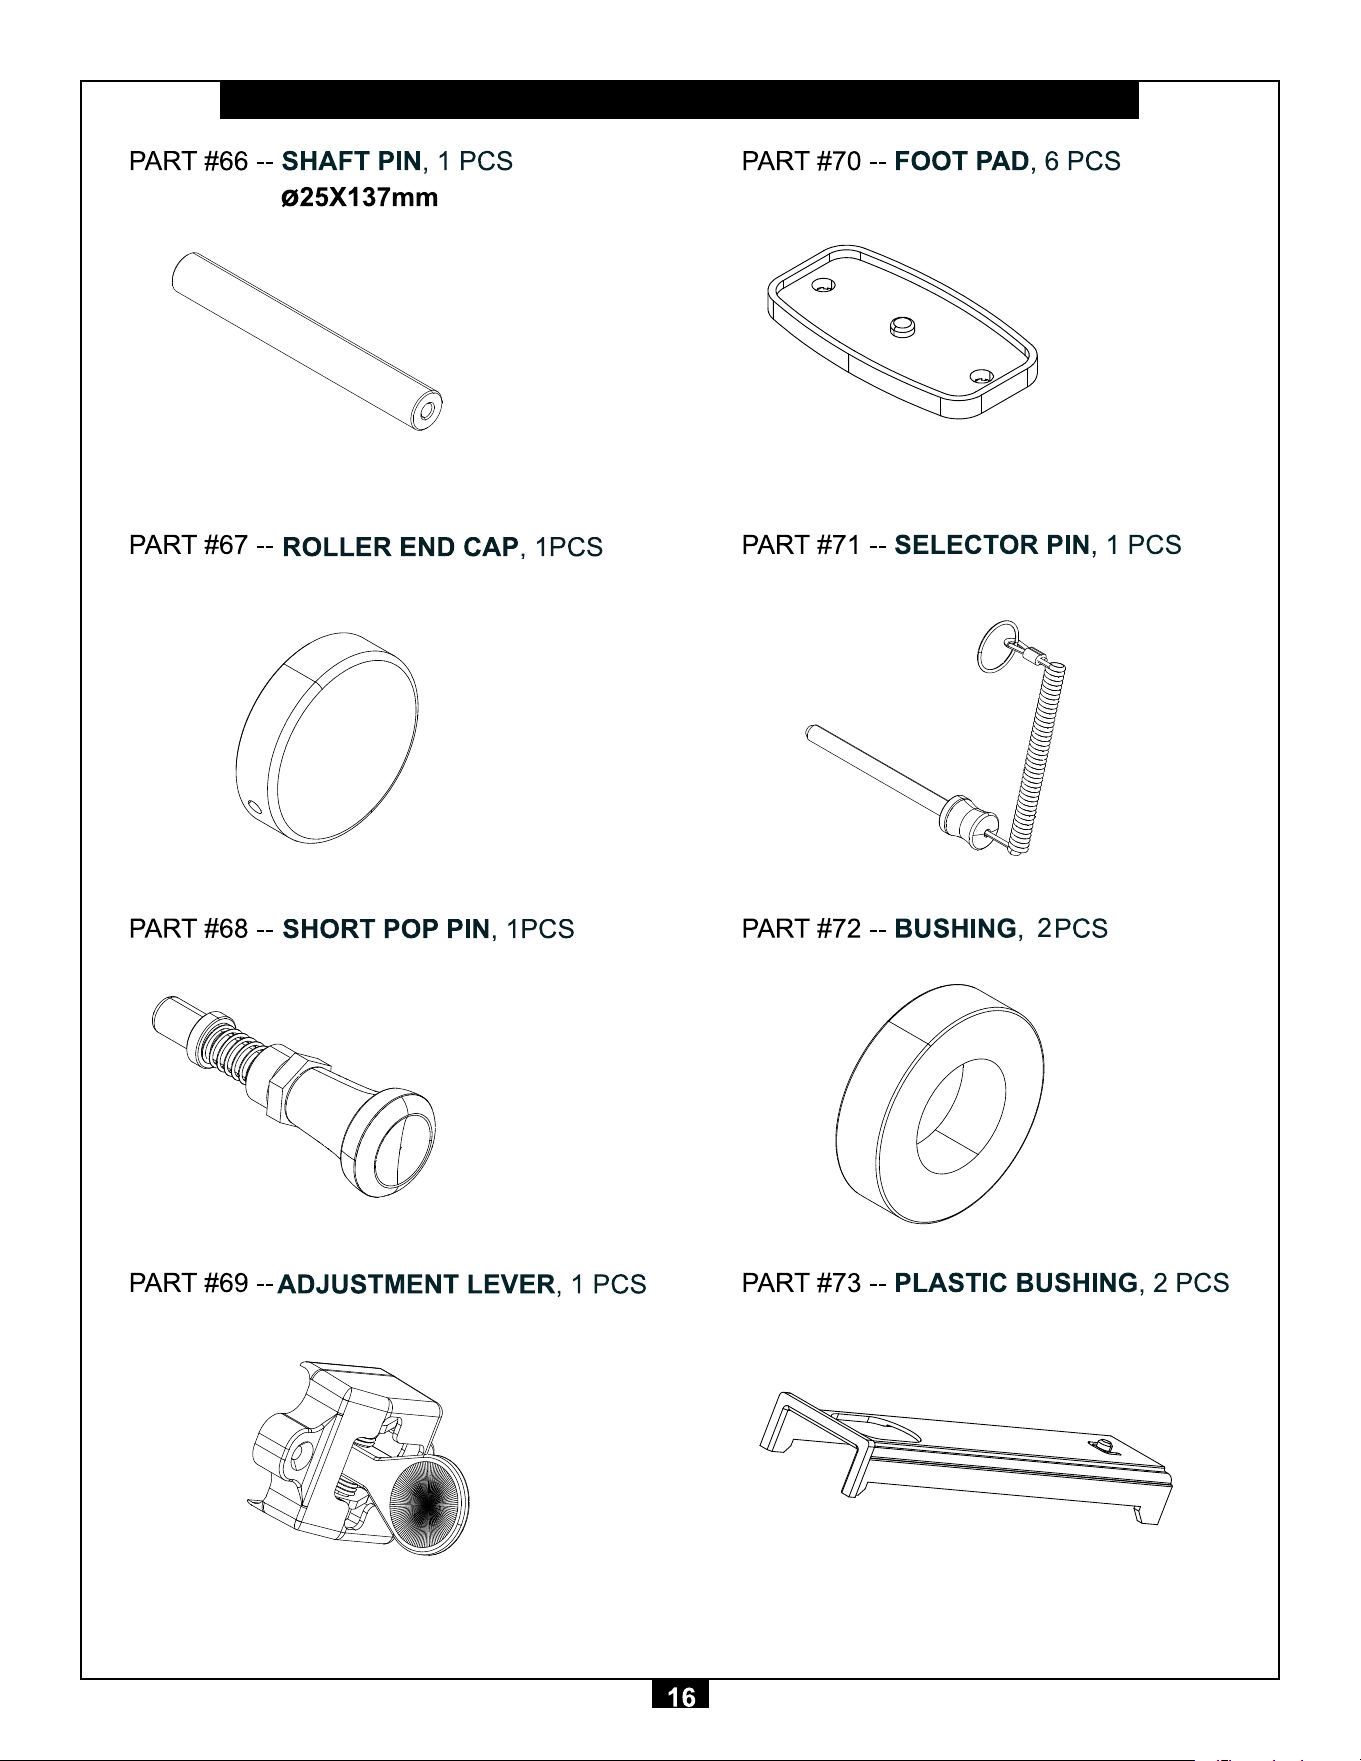
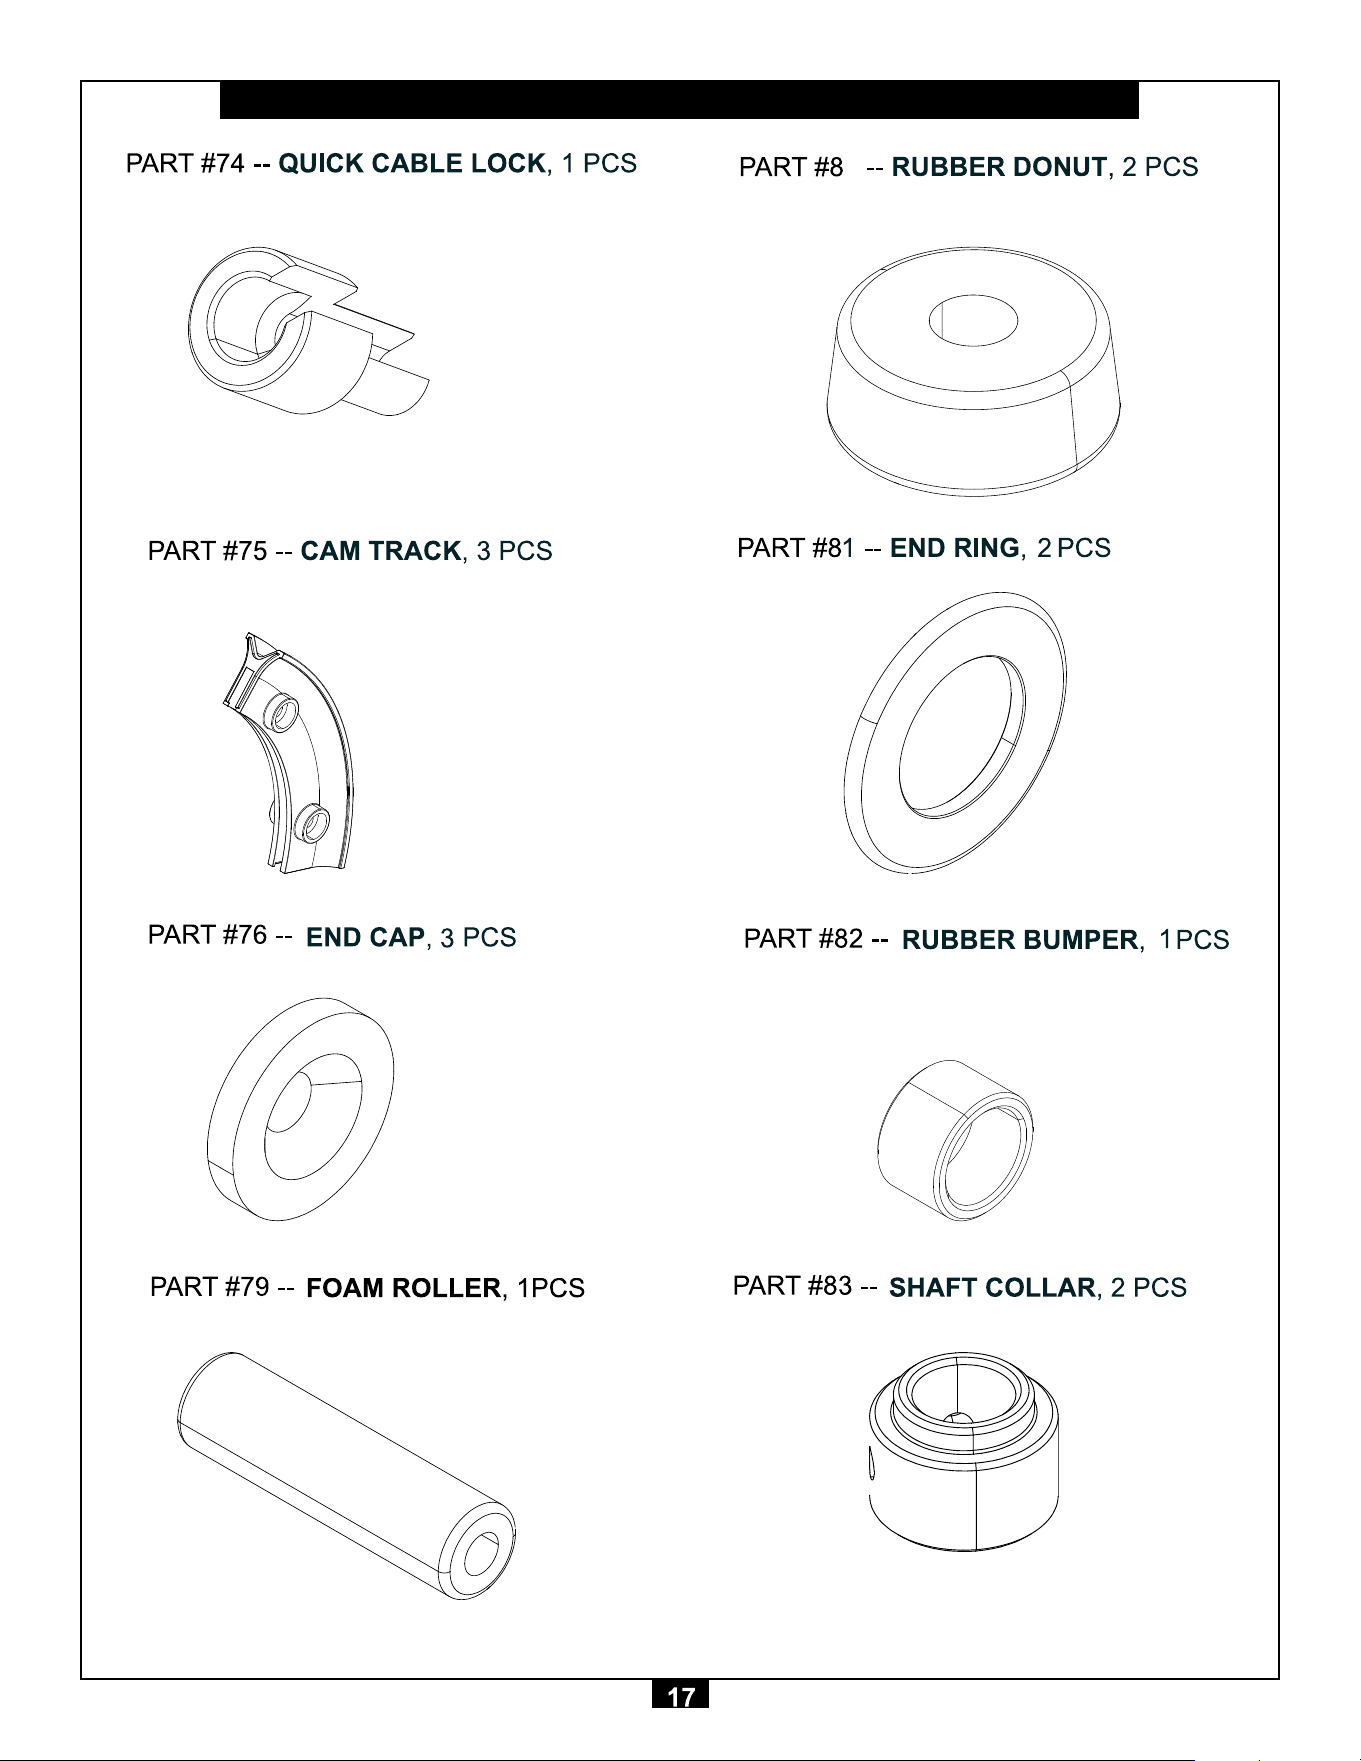
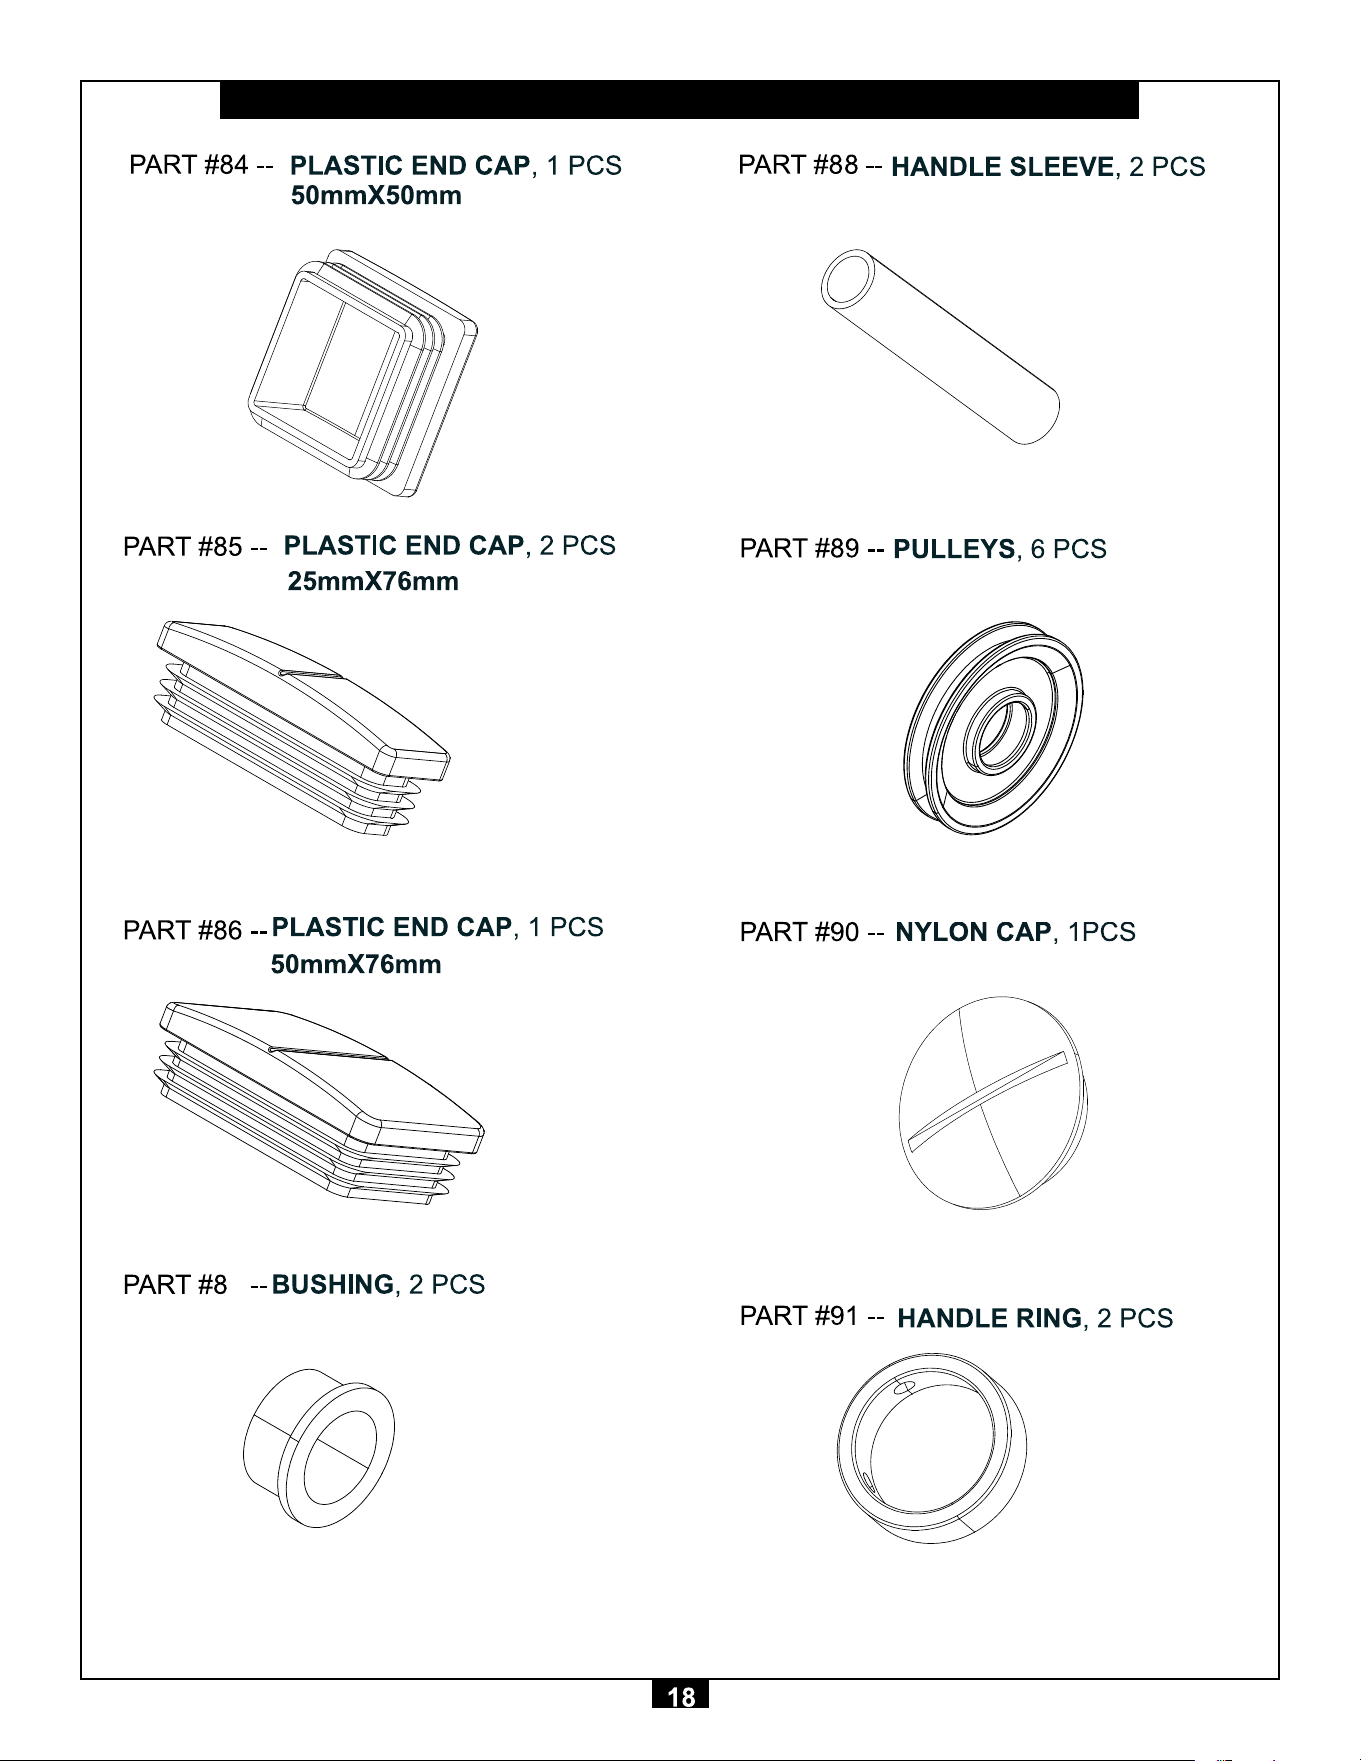
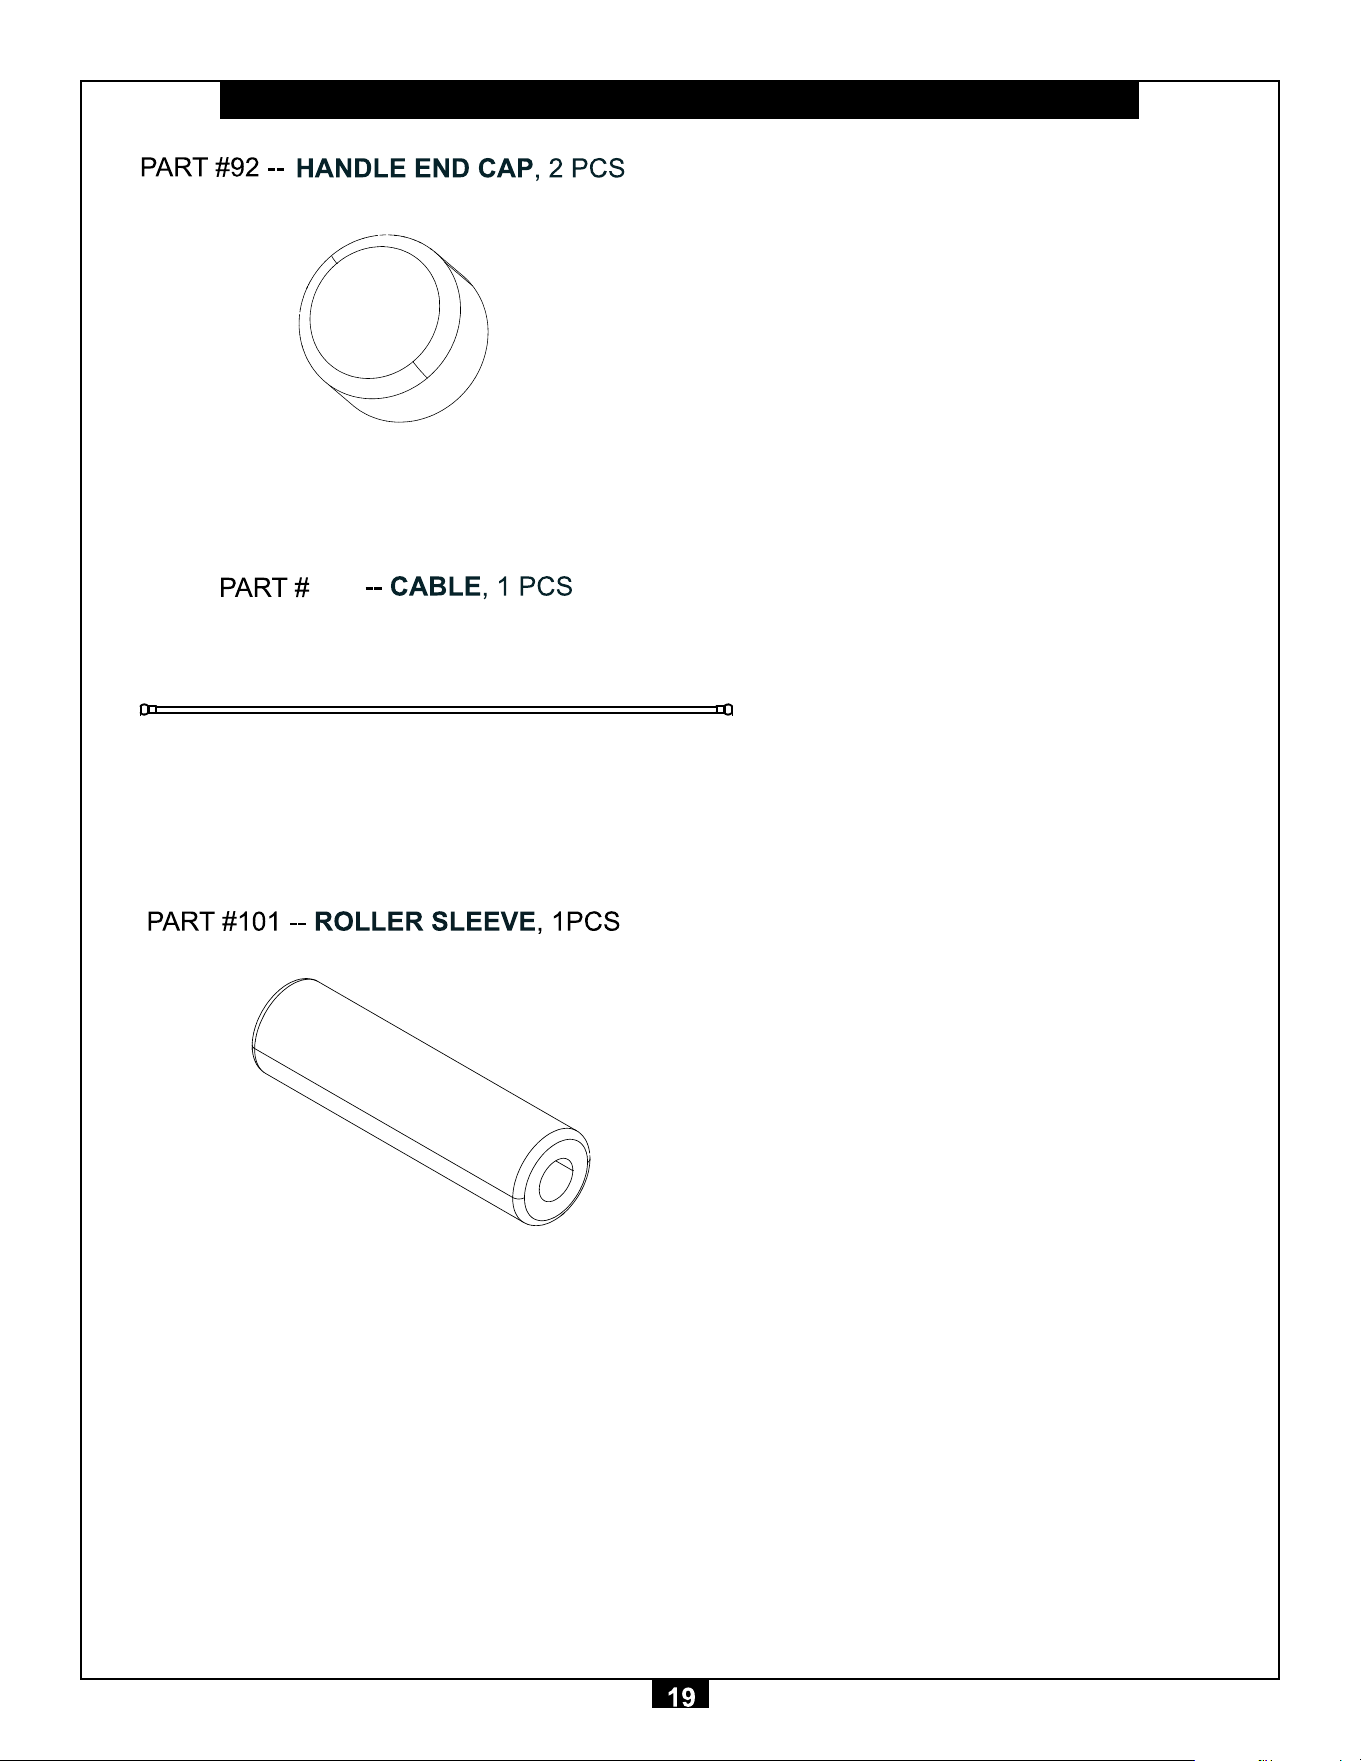
S2LEX Parts List/Illustration
S2LEX Parts List/Illustration
1
1
E
1162.7X286.6X2
1212.7X286.6X2
ij
S2LEX Parts List/Illustration
G
S2LEX Parts List/Illustration
ij;PP
S2LEX Parts List/Illustration
0
S2LEX Parts List/Illustration
7
Ƒ
Ƒ;
Ƒ;
S2LEX Parts List/Illustration
100
3590mm

STEP
1
Be careful to assemble all components
in the sequence they are presented.
NOTE:
Finger tighten all hardware in this step. DO NOT wrench tighten unless instructed.
Some components may be pre-assembled. Nylon lock nuts will not fully screw onto
bolts, they must be wrench tighten to fully go on.
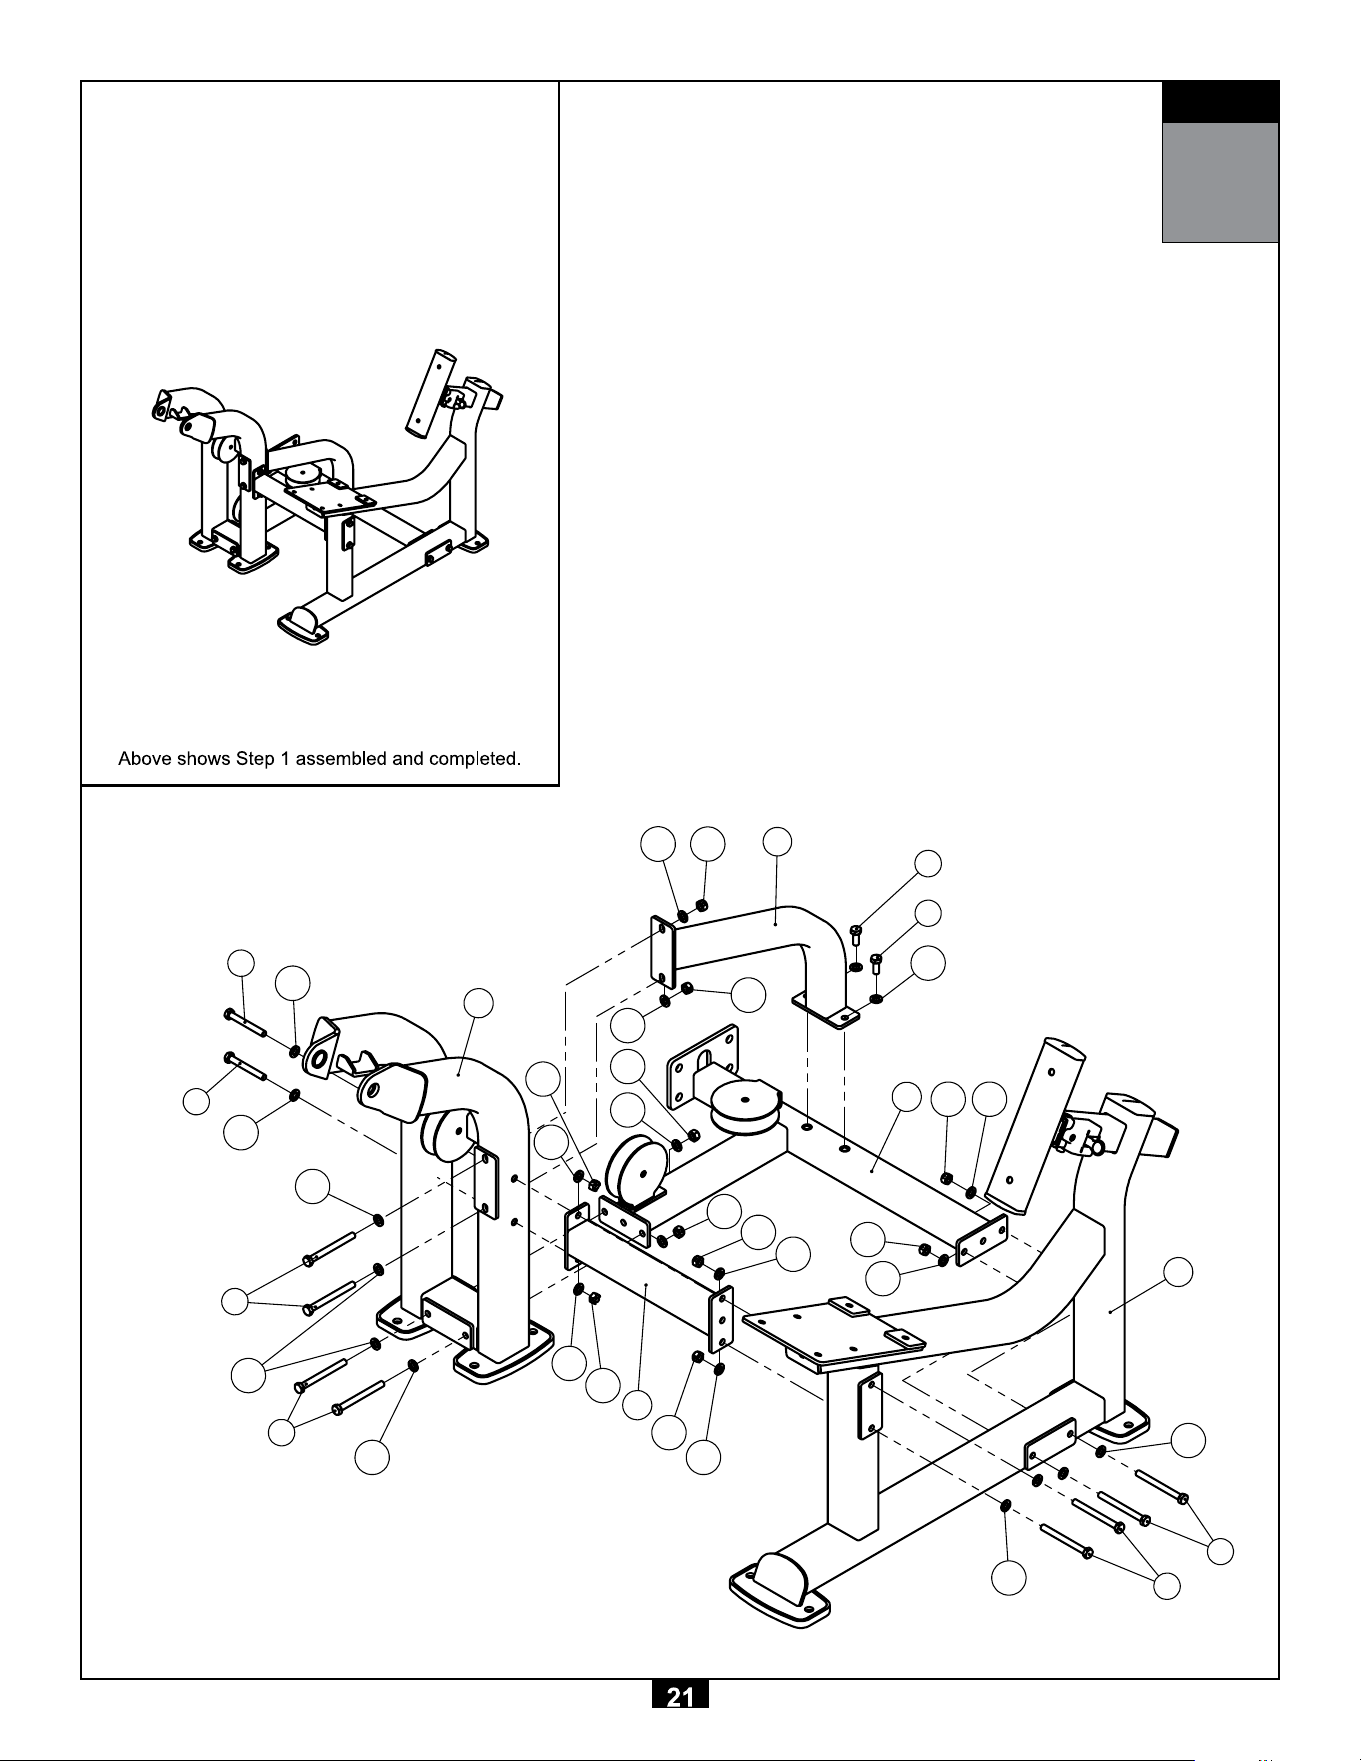
STEP
1
A
B
C
E
5
5
51
4051
40
51
40
51
51
40
51
40
51
40
40
51
D
40
40 51
40
51
4
51
51
9
51
9
51
4
4
51
51
51
4
STEP
2
Be careful to assemble all components
in the sequence they are presented.
NOTE:
Wrench tighten ALL hardware at the end of
STEP 2A. Some components may be pre-as-
sembled. Nylon lock nuts will not fully screw onto bolts, they must be wrench tighten to
fully go on.
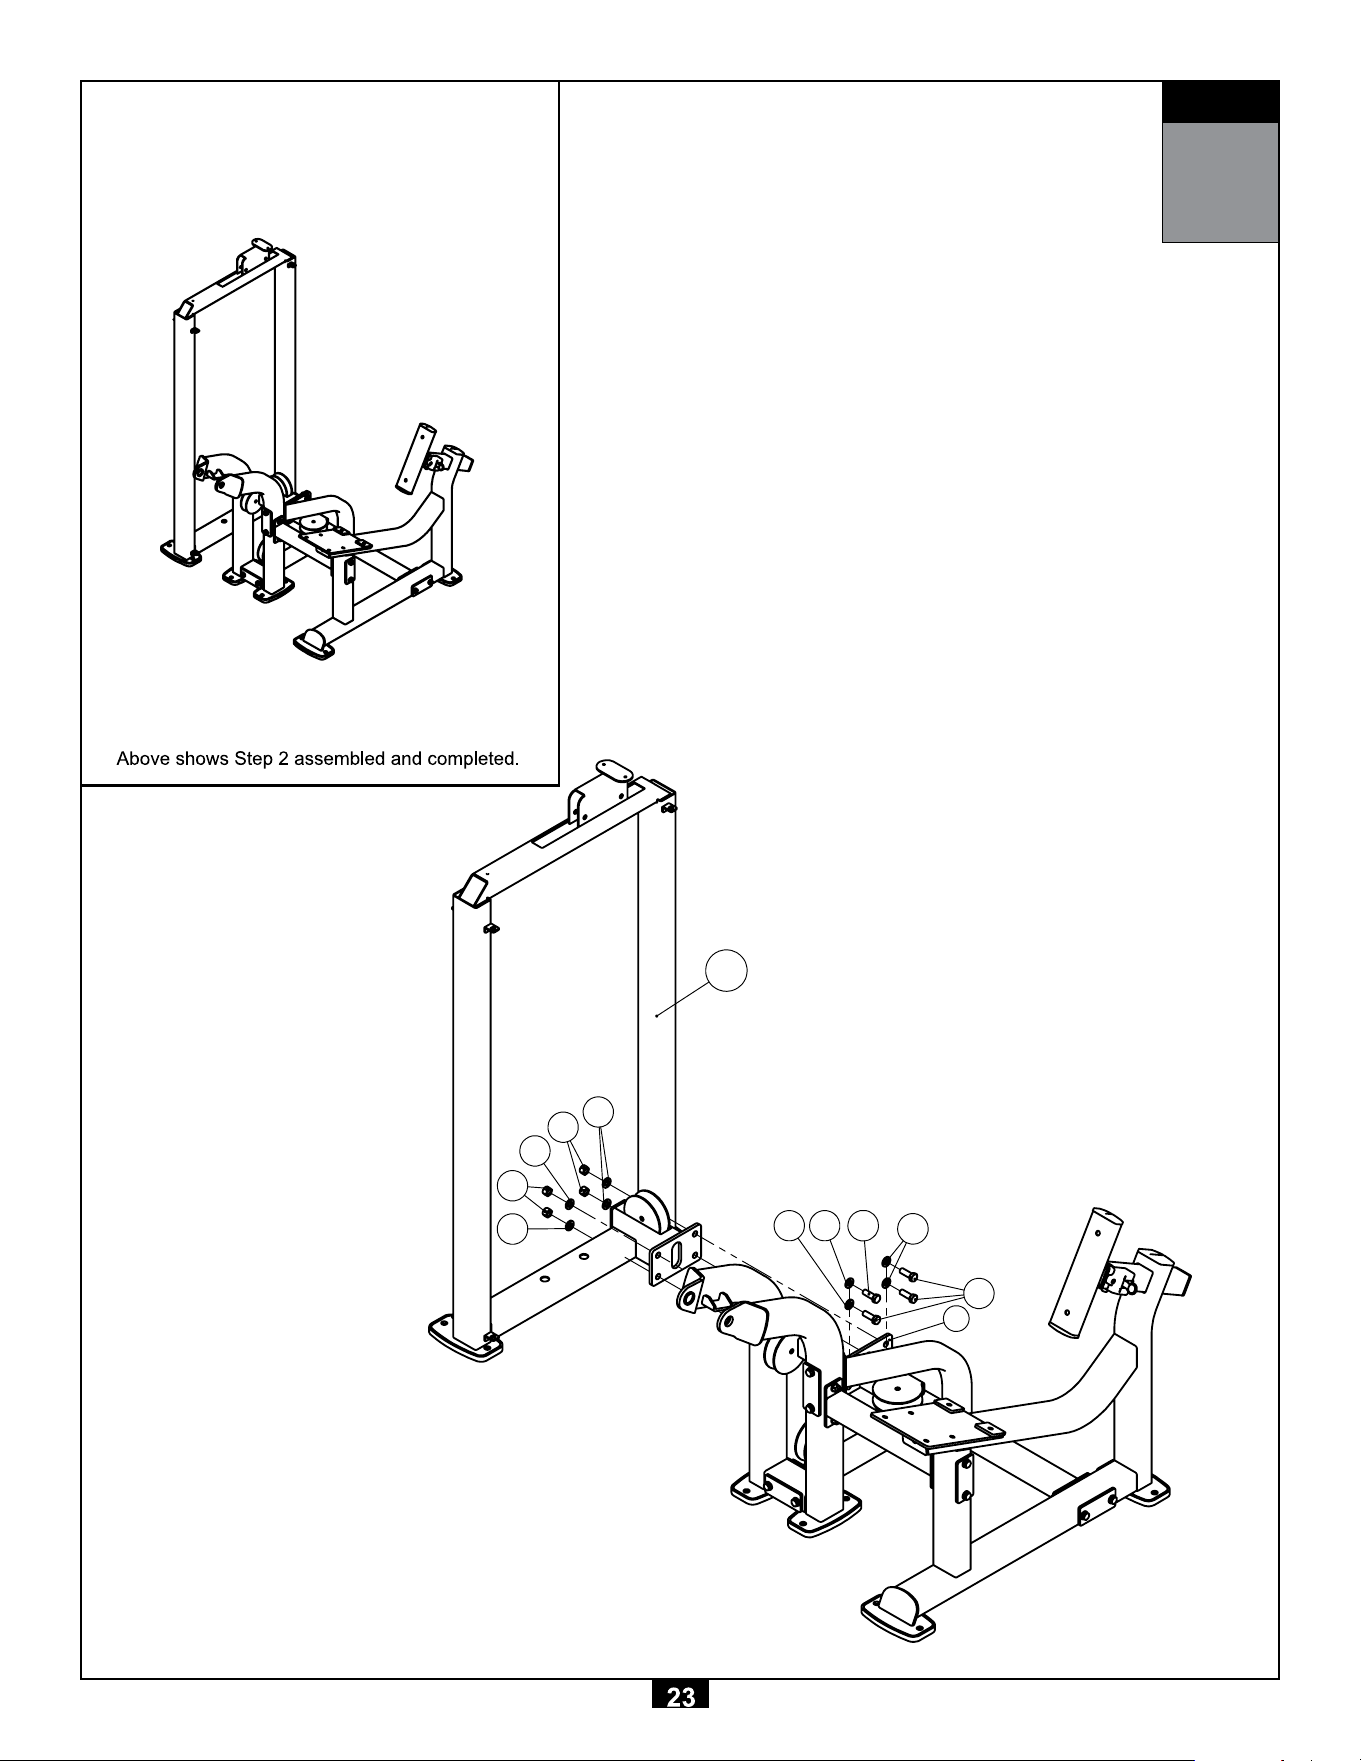
STEP
2
52
105252
10
41
52
41
52
52
WA
B
STEP
3
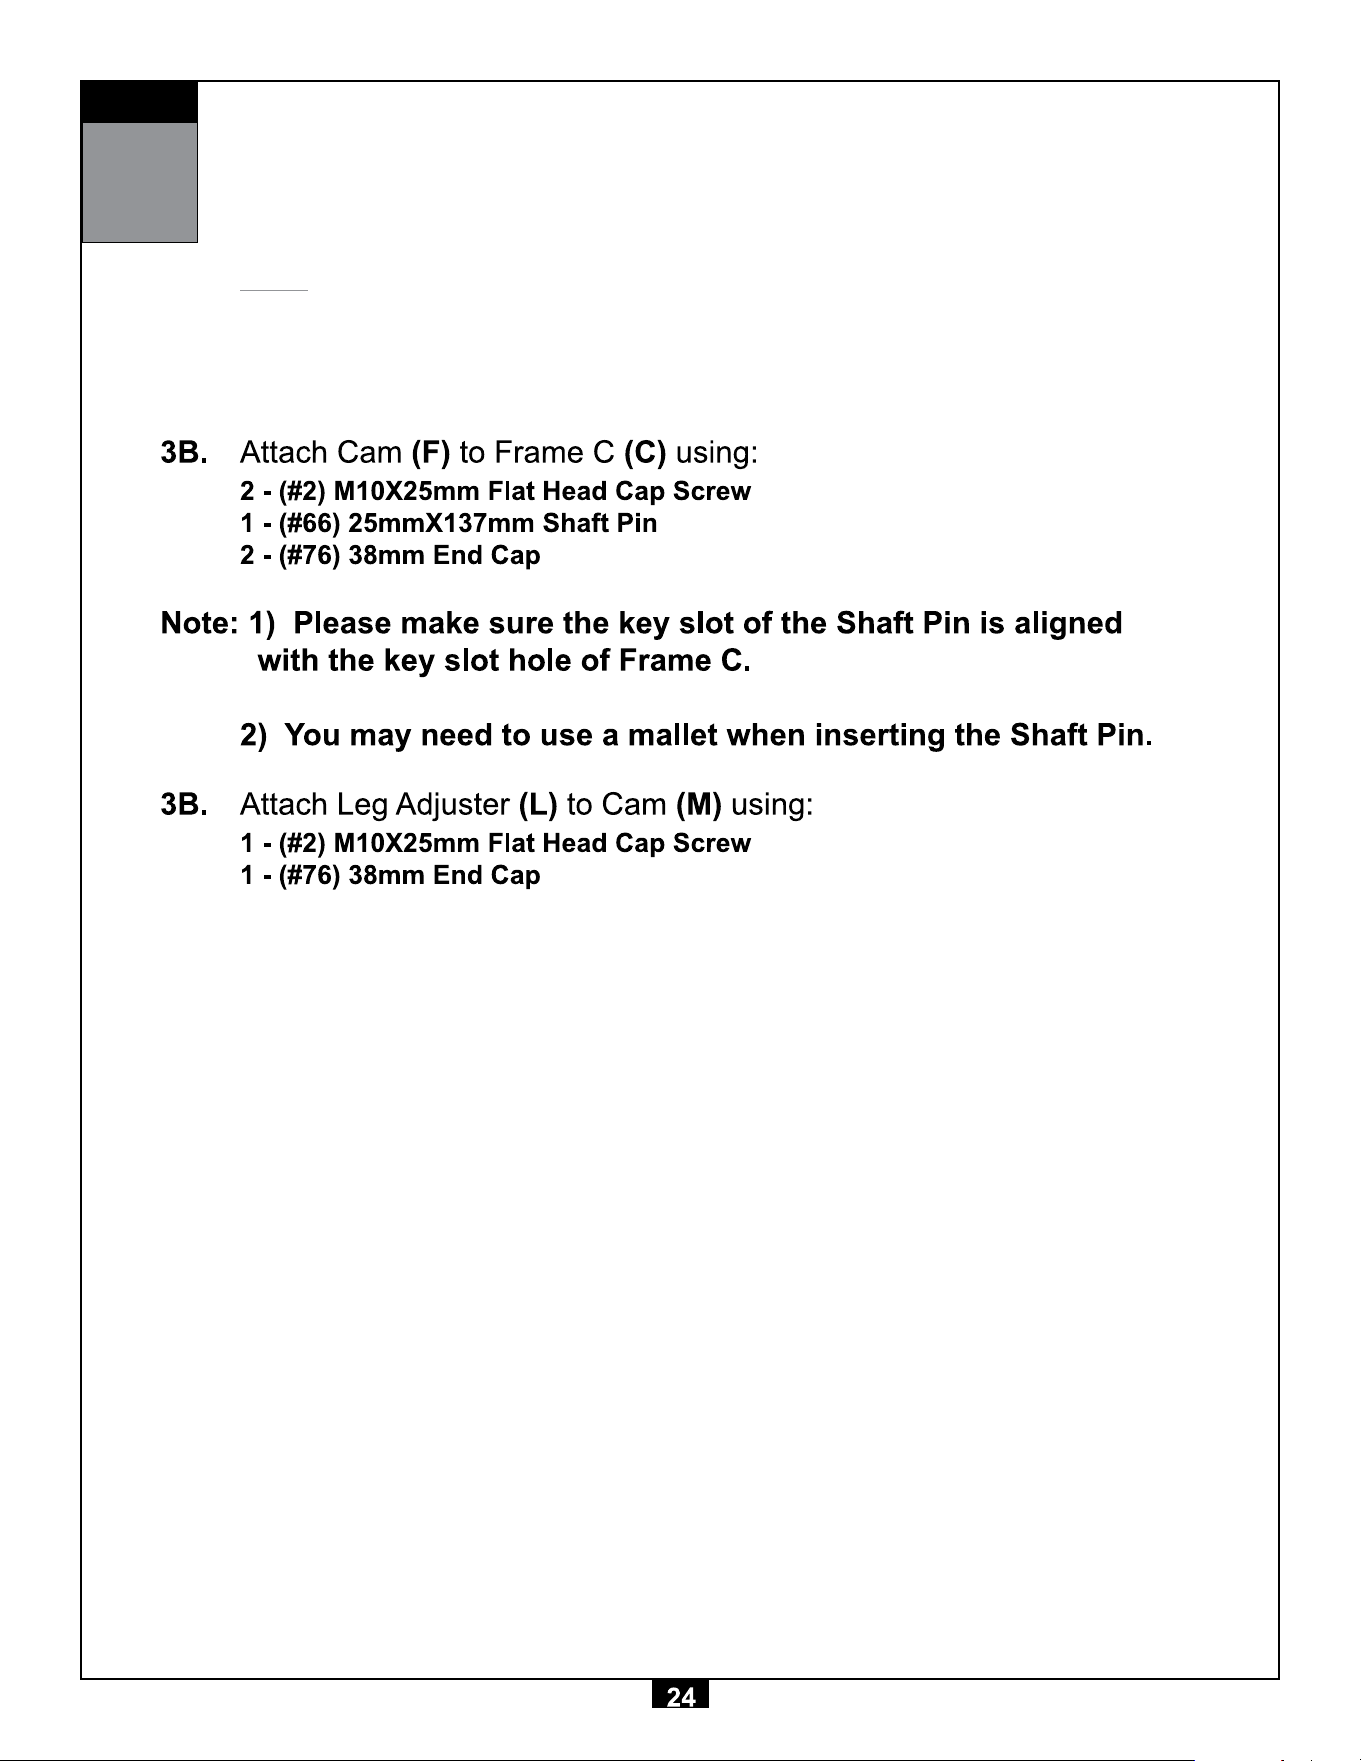
Be careful to assemble all components
in the sequence they are presented.
NOTE:
Finger tighten all hardware ! r st in this step. Wrench tighten ALL hardware at the end of
STEP 3C. Some components may be pre-assembled. Nylon lock nuts will not fully screw
onto bolts, they must be wrench tighten to fully go on.
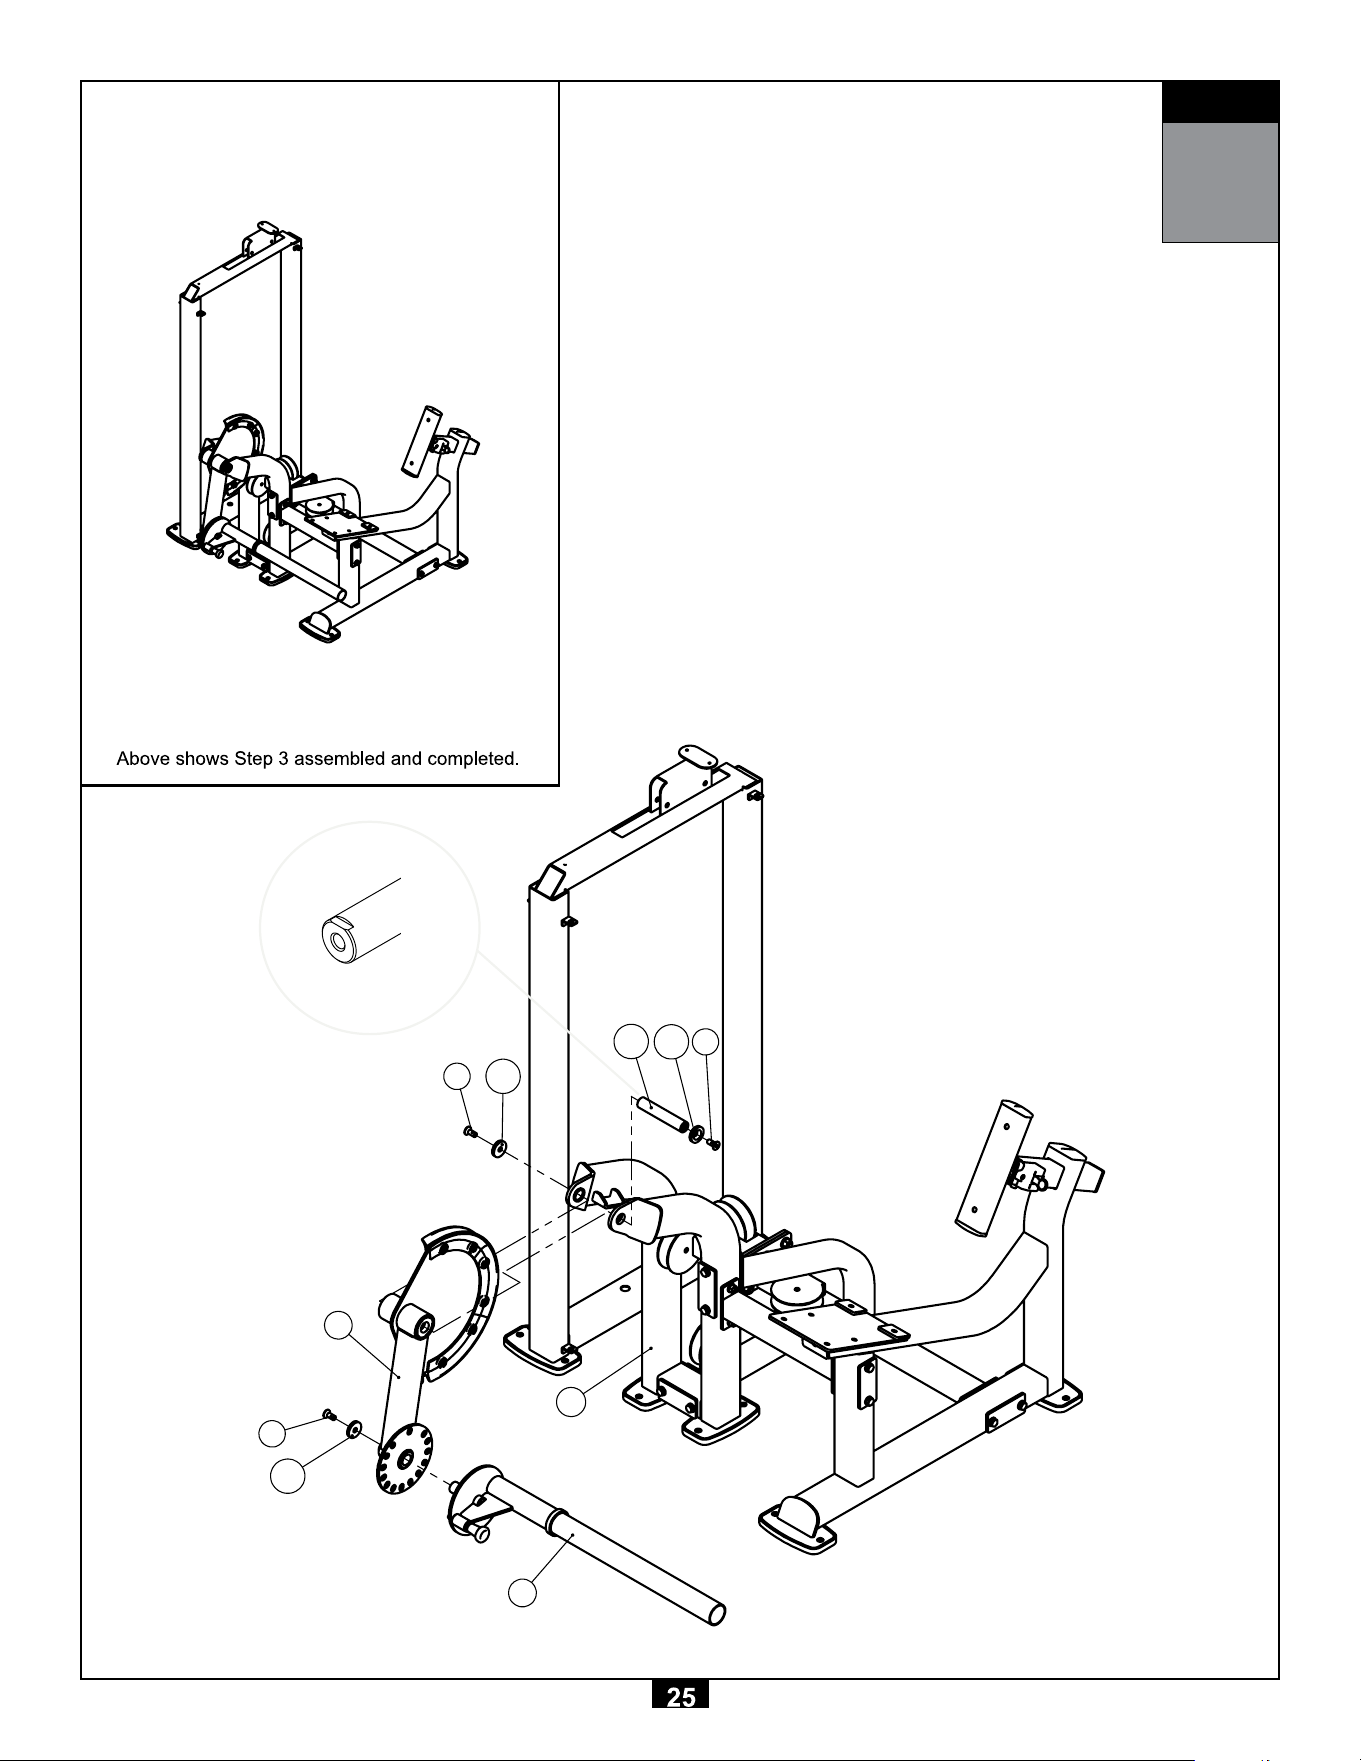
STEP
3
F
L
2
76
276
76 2
66
C

STEP
4
Be careful to assemble all components
in the sequence they are presented.
NOTE:
Finger tighten all hardware ! r st in this step. Wrench tighten ALL hardware at the end of
STEP 4H. Some components may be pre-assembled. Nylon lock nuts will not fully screw
onto bolts, they must be wrench tighten to fully go on.

STEP
4
13
8383 13
13
WD
WD
62
44
56
61 71
80
80
105
WA
55 6018
STEP
5
Be careful to assemble all components
in the sequence they are presented.
NOTE:
Finger tighten all hardware ! r st in this step. Wrench tighten ALL hardware at the end of
STEP 5D. Some components may be pre-assembled. Nylon lock nuts will not fully screw
onto bolts, they must be wrench tighten to fully go on.
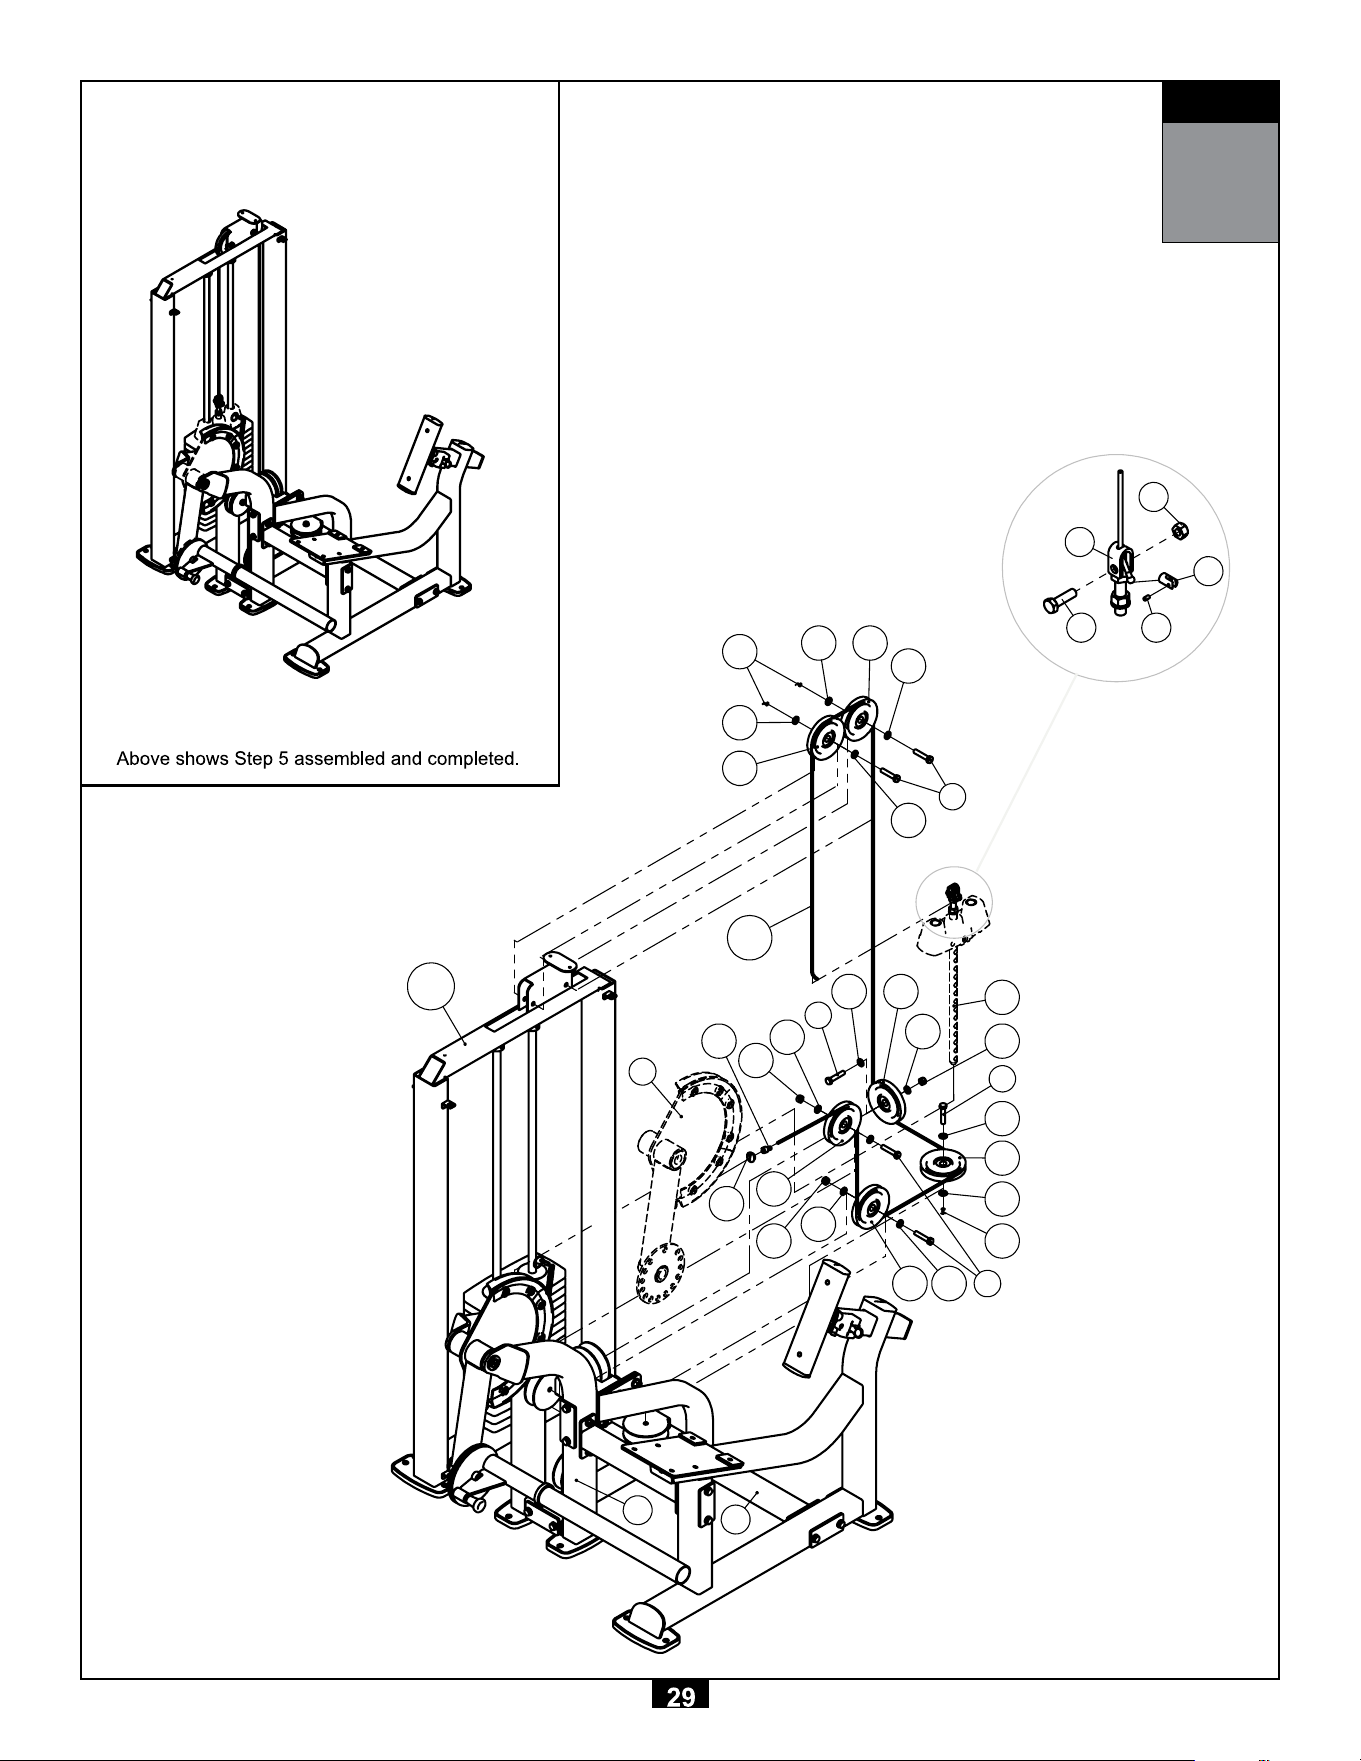
STEP
5
WA
90
74
40
51
8
51
40
51
889 51
40
51
89
51
8
61
40
51
51
89
89
8
51
51
100
B
C
89
89
51
40
F
62
63
40
712
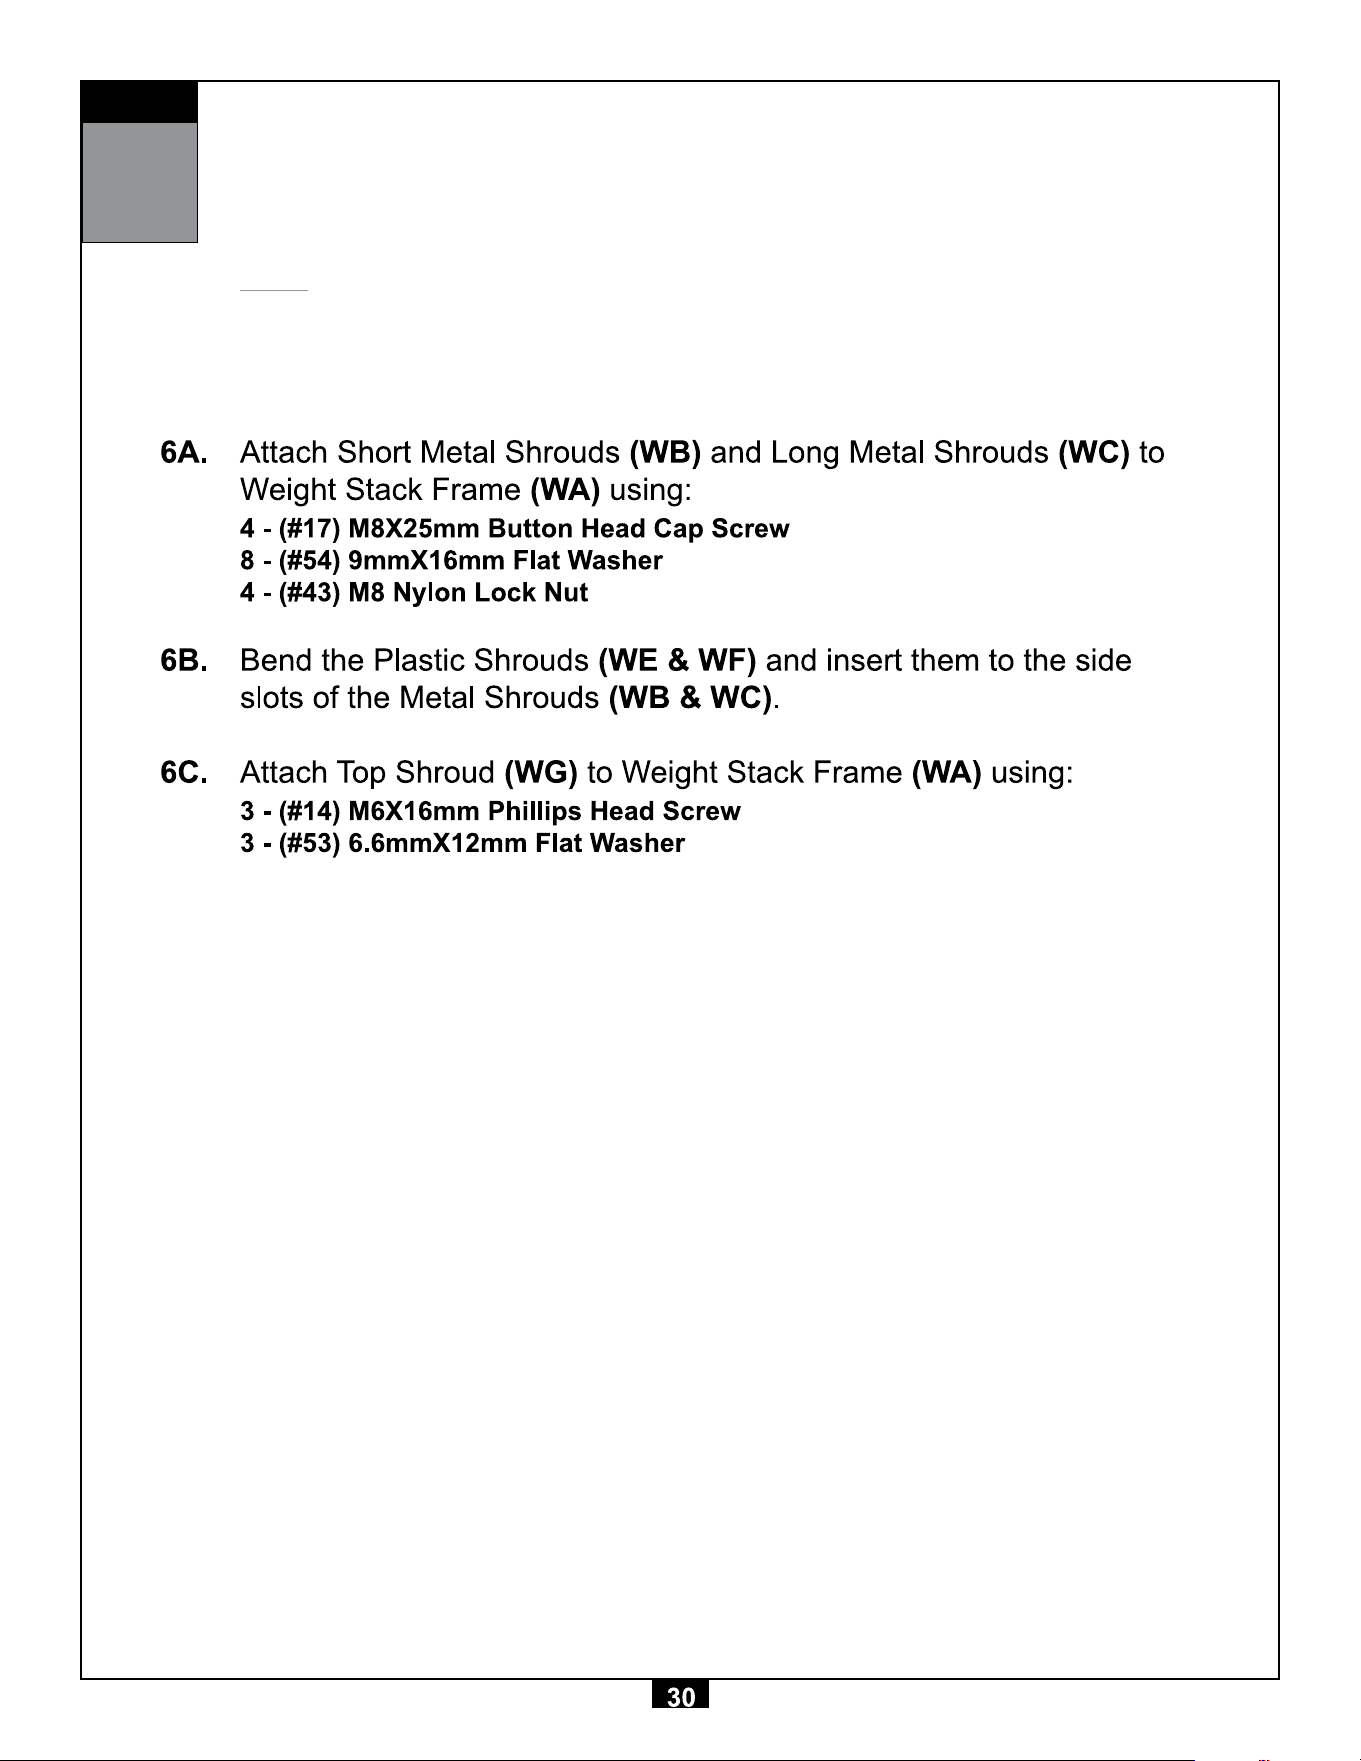
STEP
6
Be careful to assemble all components
in the sequence they are presented.
NOTE:
Wrench tighten ALL hardware at the end of
Each Step. Some components may be pre-as-
sembled. Nylon lock nuts will not fully screw onto bolts, they must be wrench tighten to
fully go on.
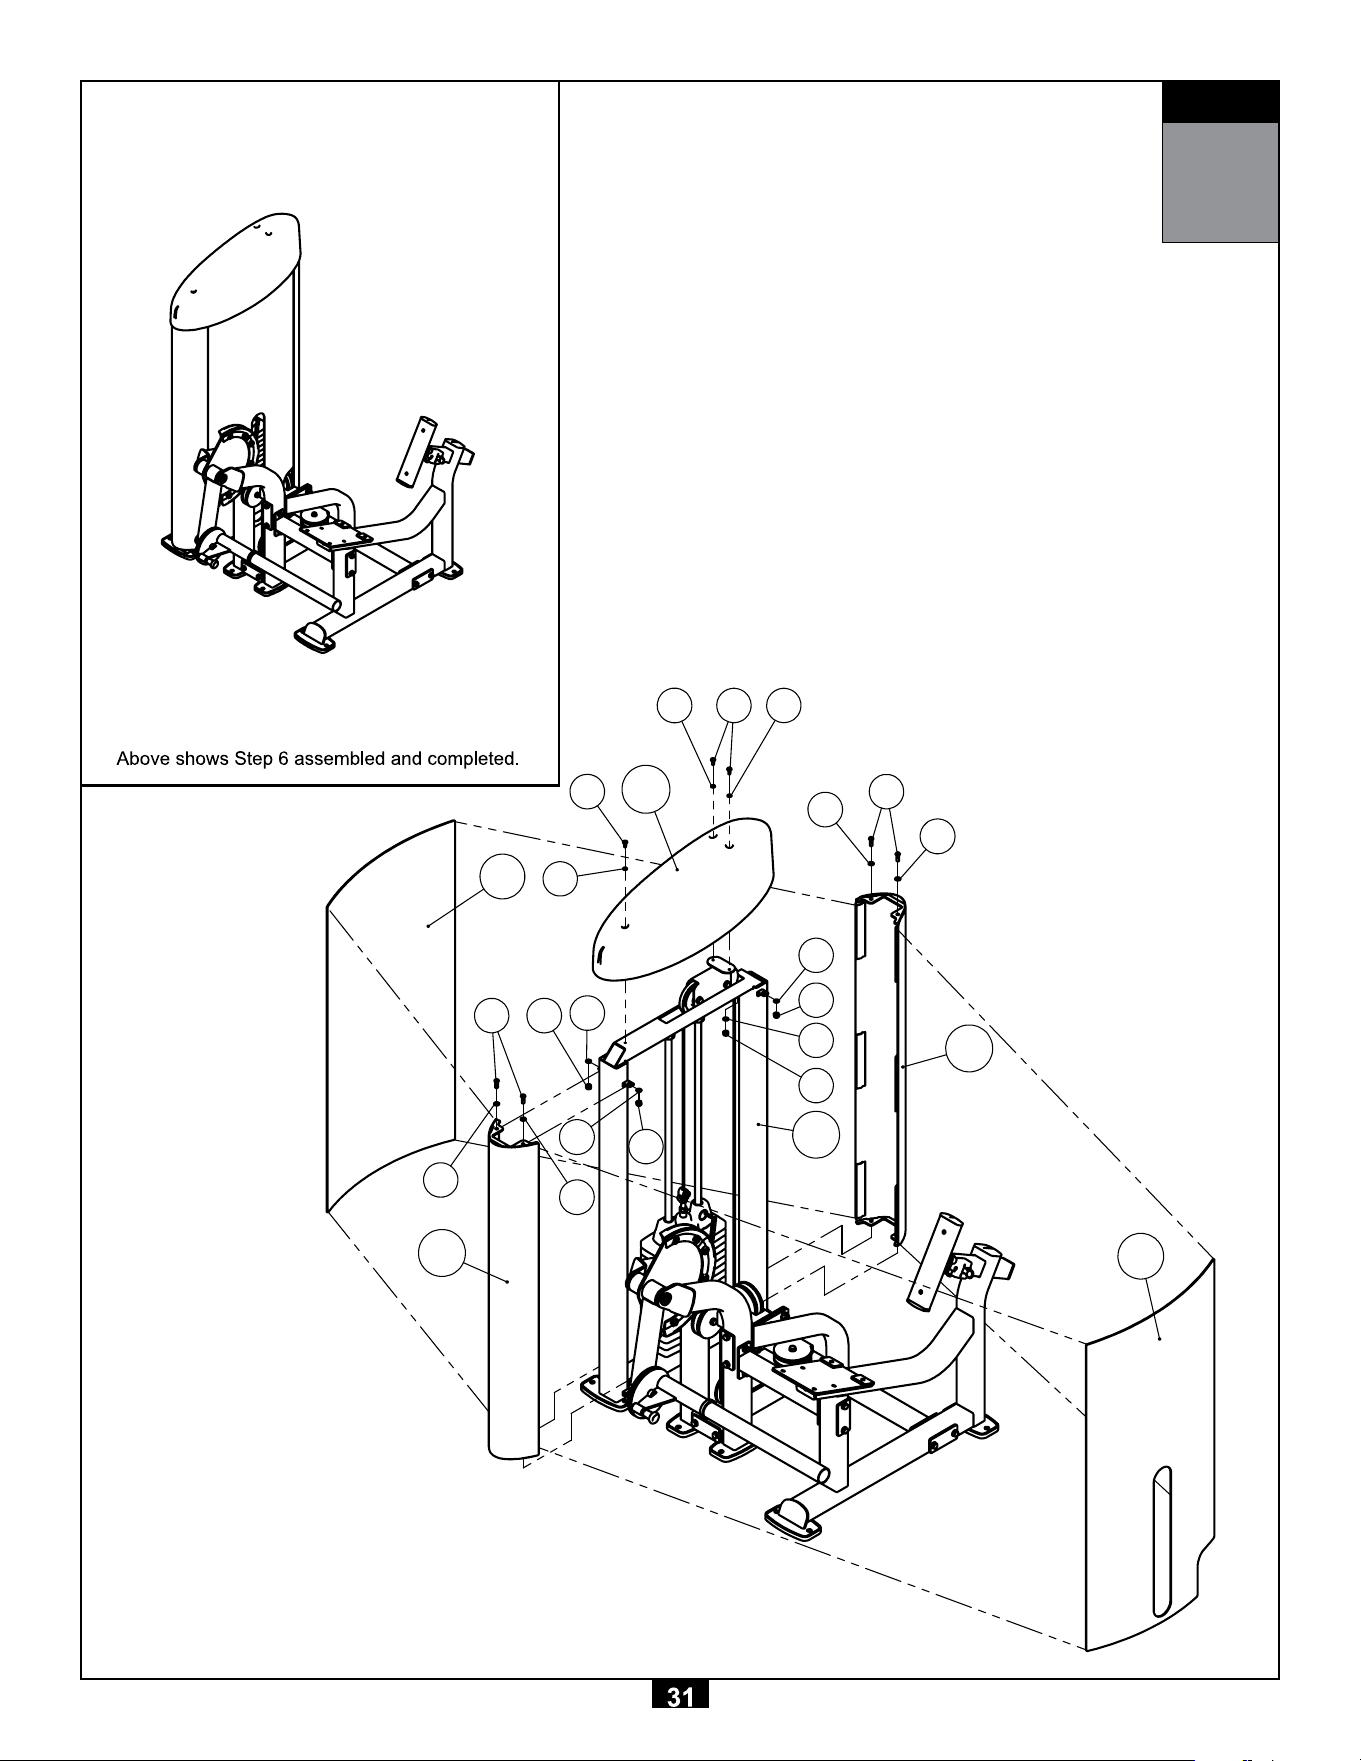
STEP
6
:)
:*
:&
:%
:(
:$
67(3
:)
:*
:&
:%
:(
:$
67(3
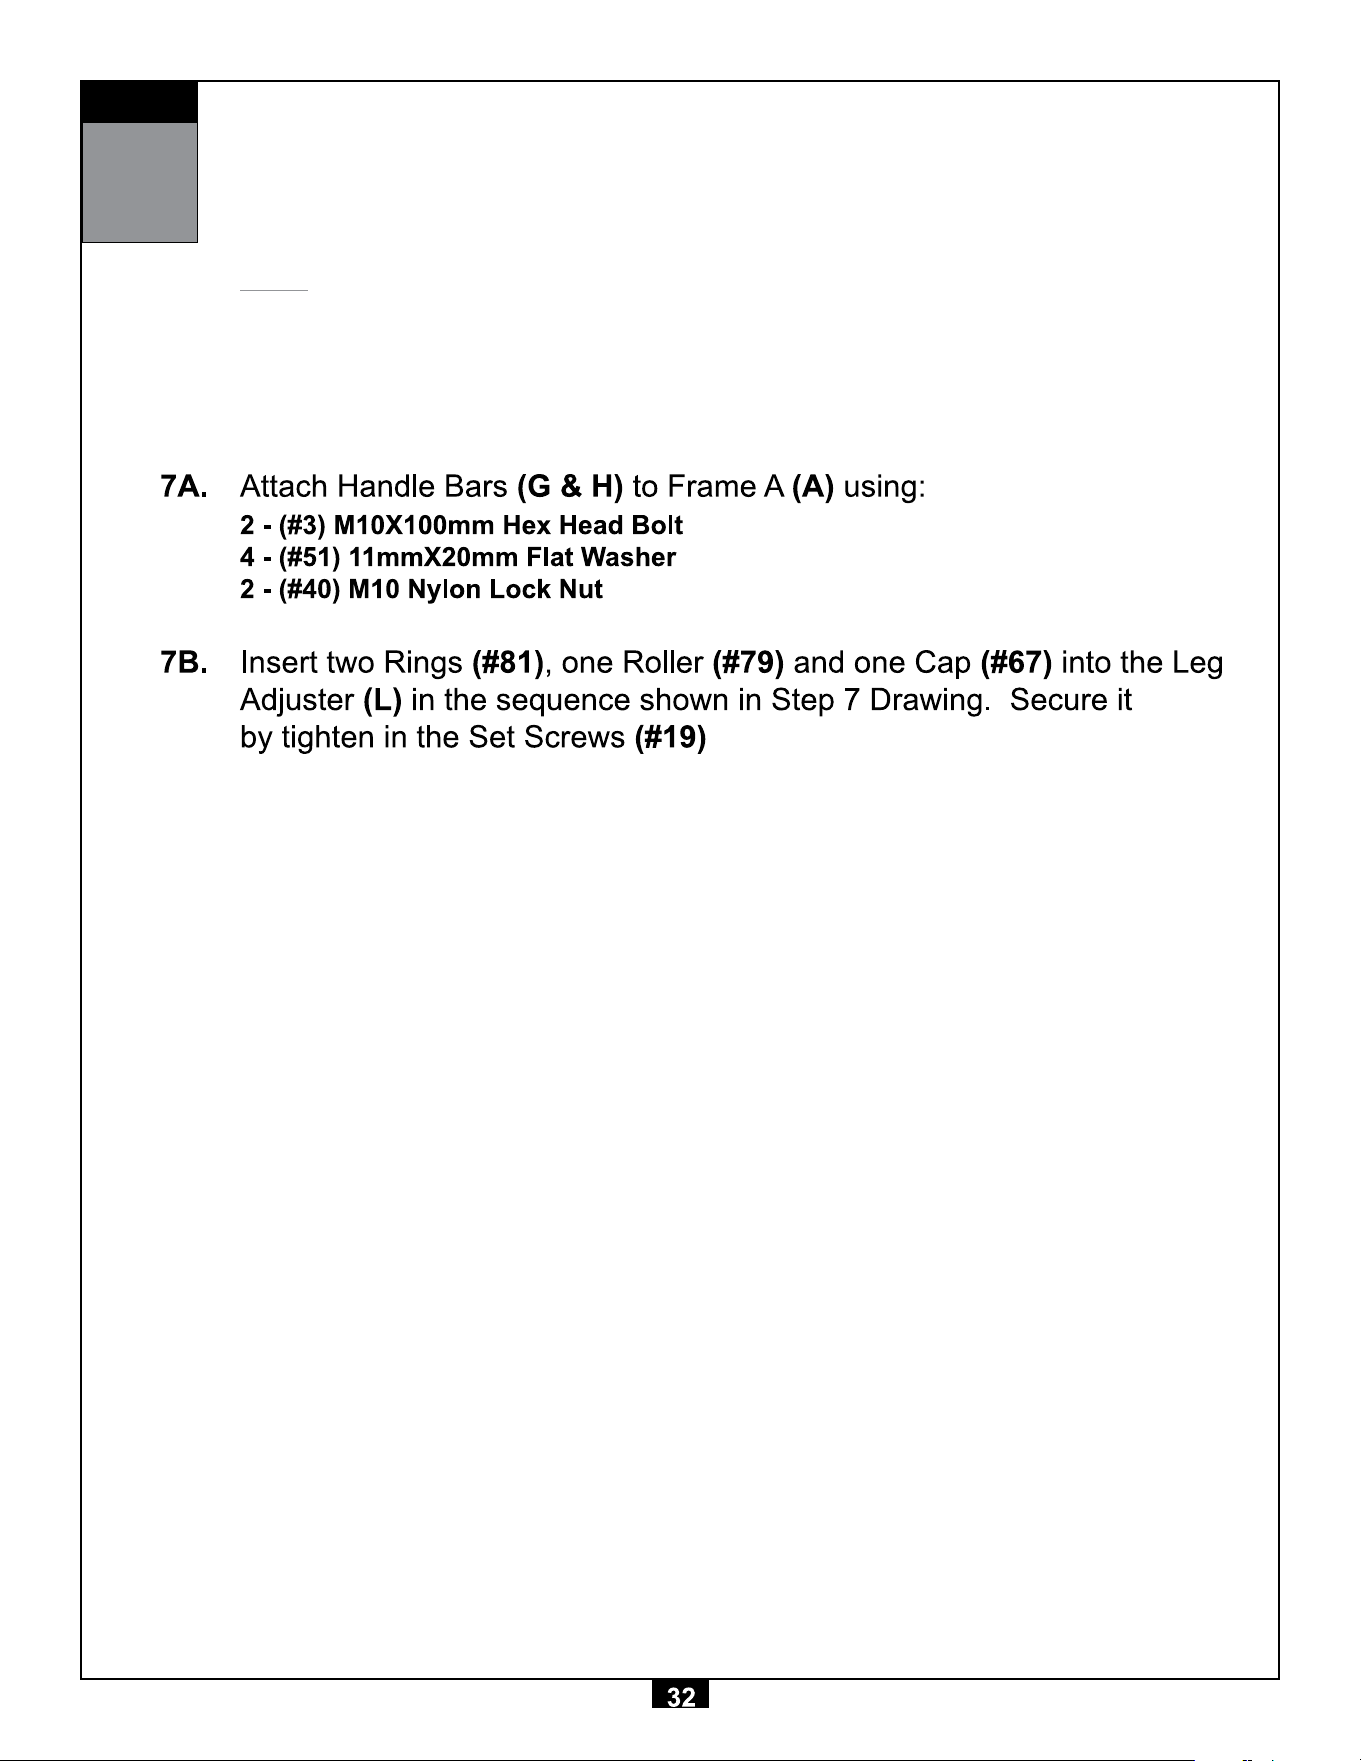
STEP
7
Be careful to assemble all components
in the sequence they are presented.
NOTE:
Finger tighten all hardware ! r st in this step. Wrench tighten ALL hardware at the end of
STEP 7B. Some components may be pre-assembled. Nylon lock nuts will not fully screw
onto bolts, they must be wrench tighten to fully go on.
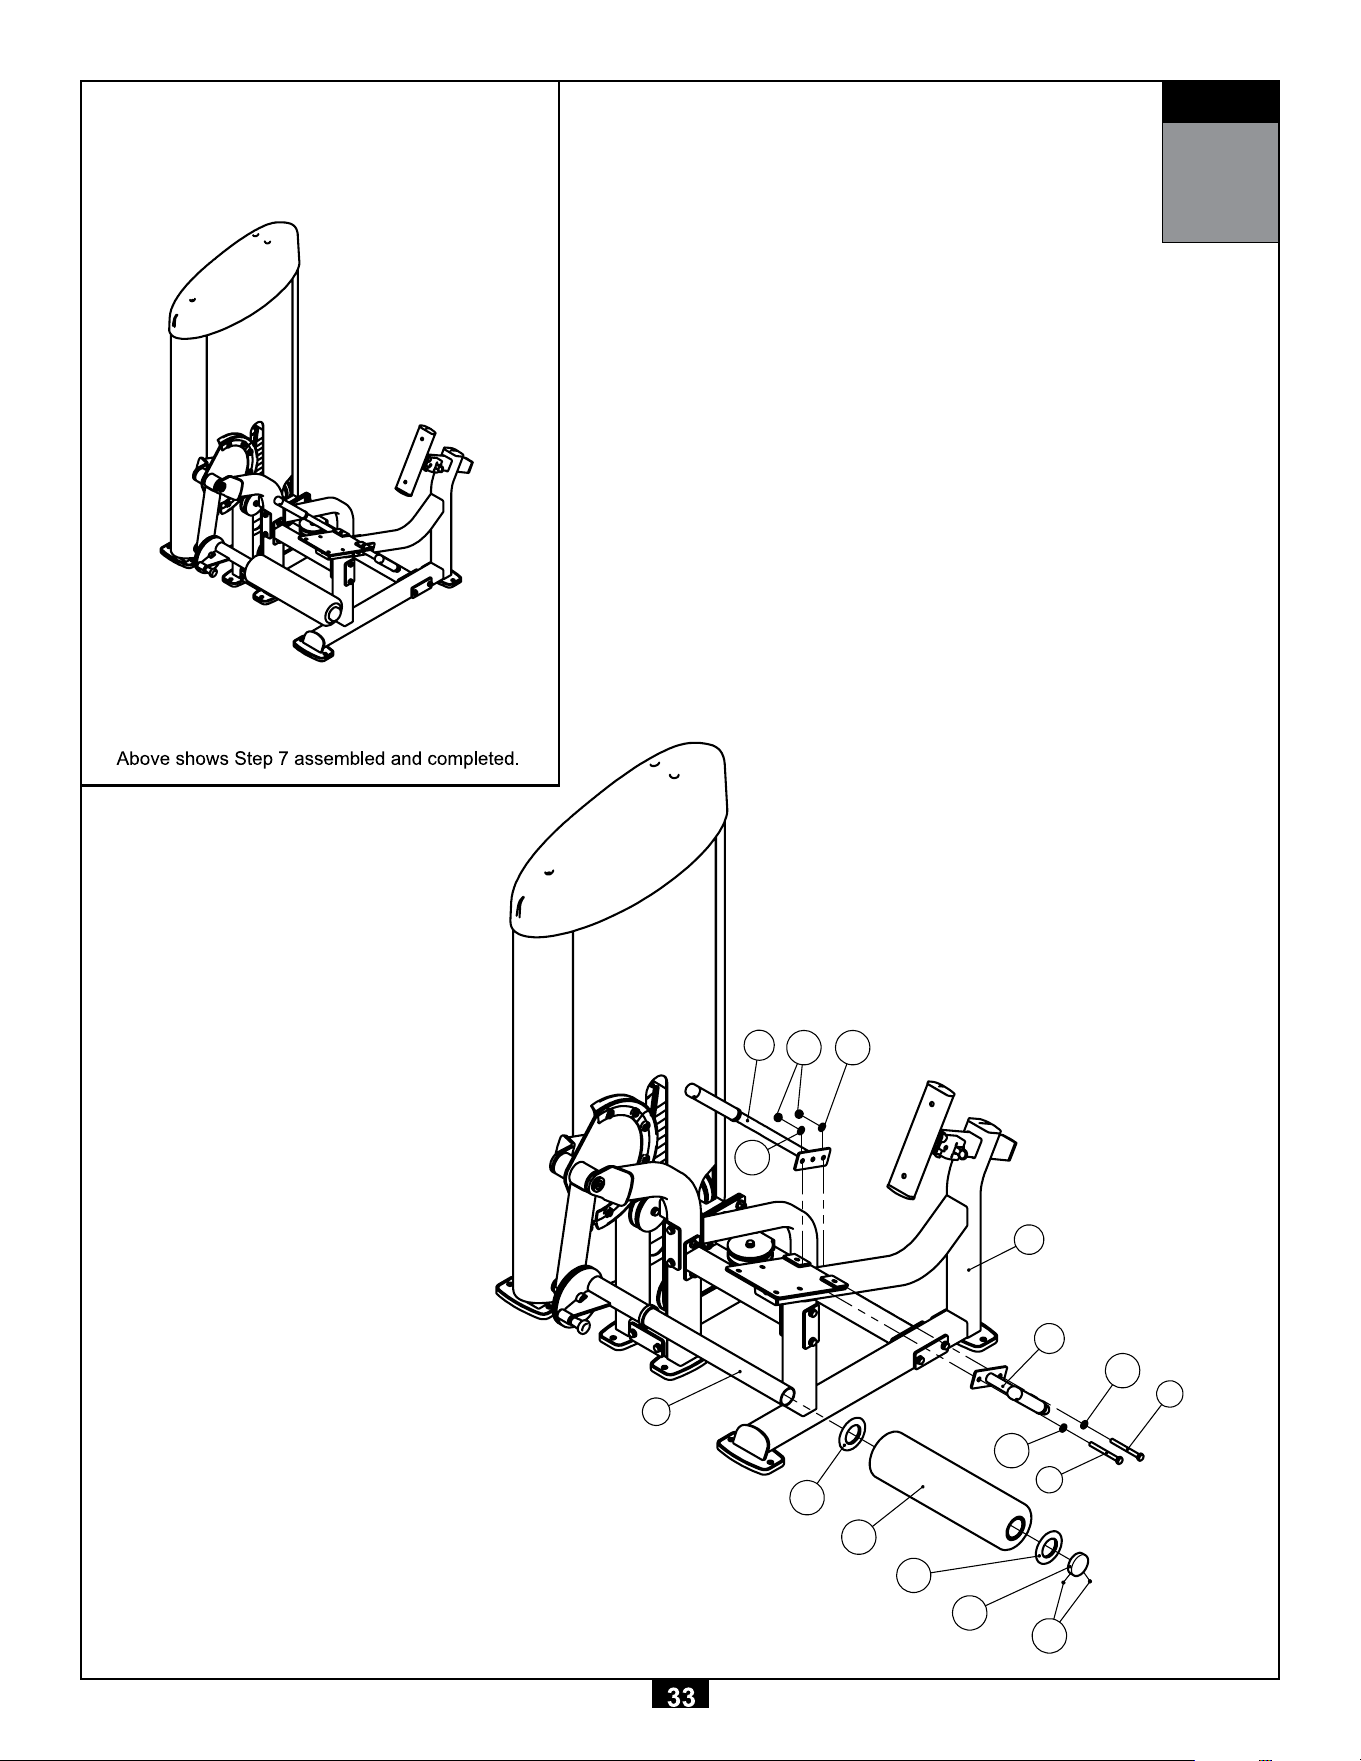
STEP
7
G
40 51
51
H
51
3
52
3
A
81
79
81
67
19
L

STEP
8
Be careful to assemble all components
in the sequence they are presented.
NOTE:
Some components may be pre-assembled. Nylon lock nuts will not fully screw onto bolts,
they must be wrench tighten to fully go on.

STEP
8
65
64
A
40
51
7
50
51
51
50
7
51 50 8
51 50 8
J
1
6
50
51
51
50
6
1
51
K

Notes
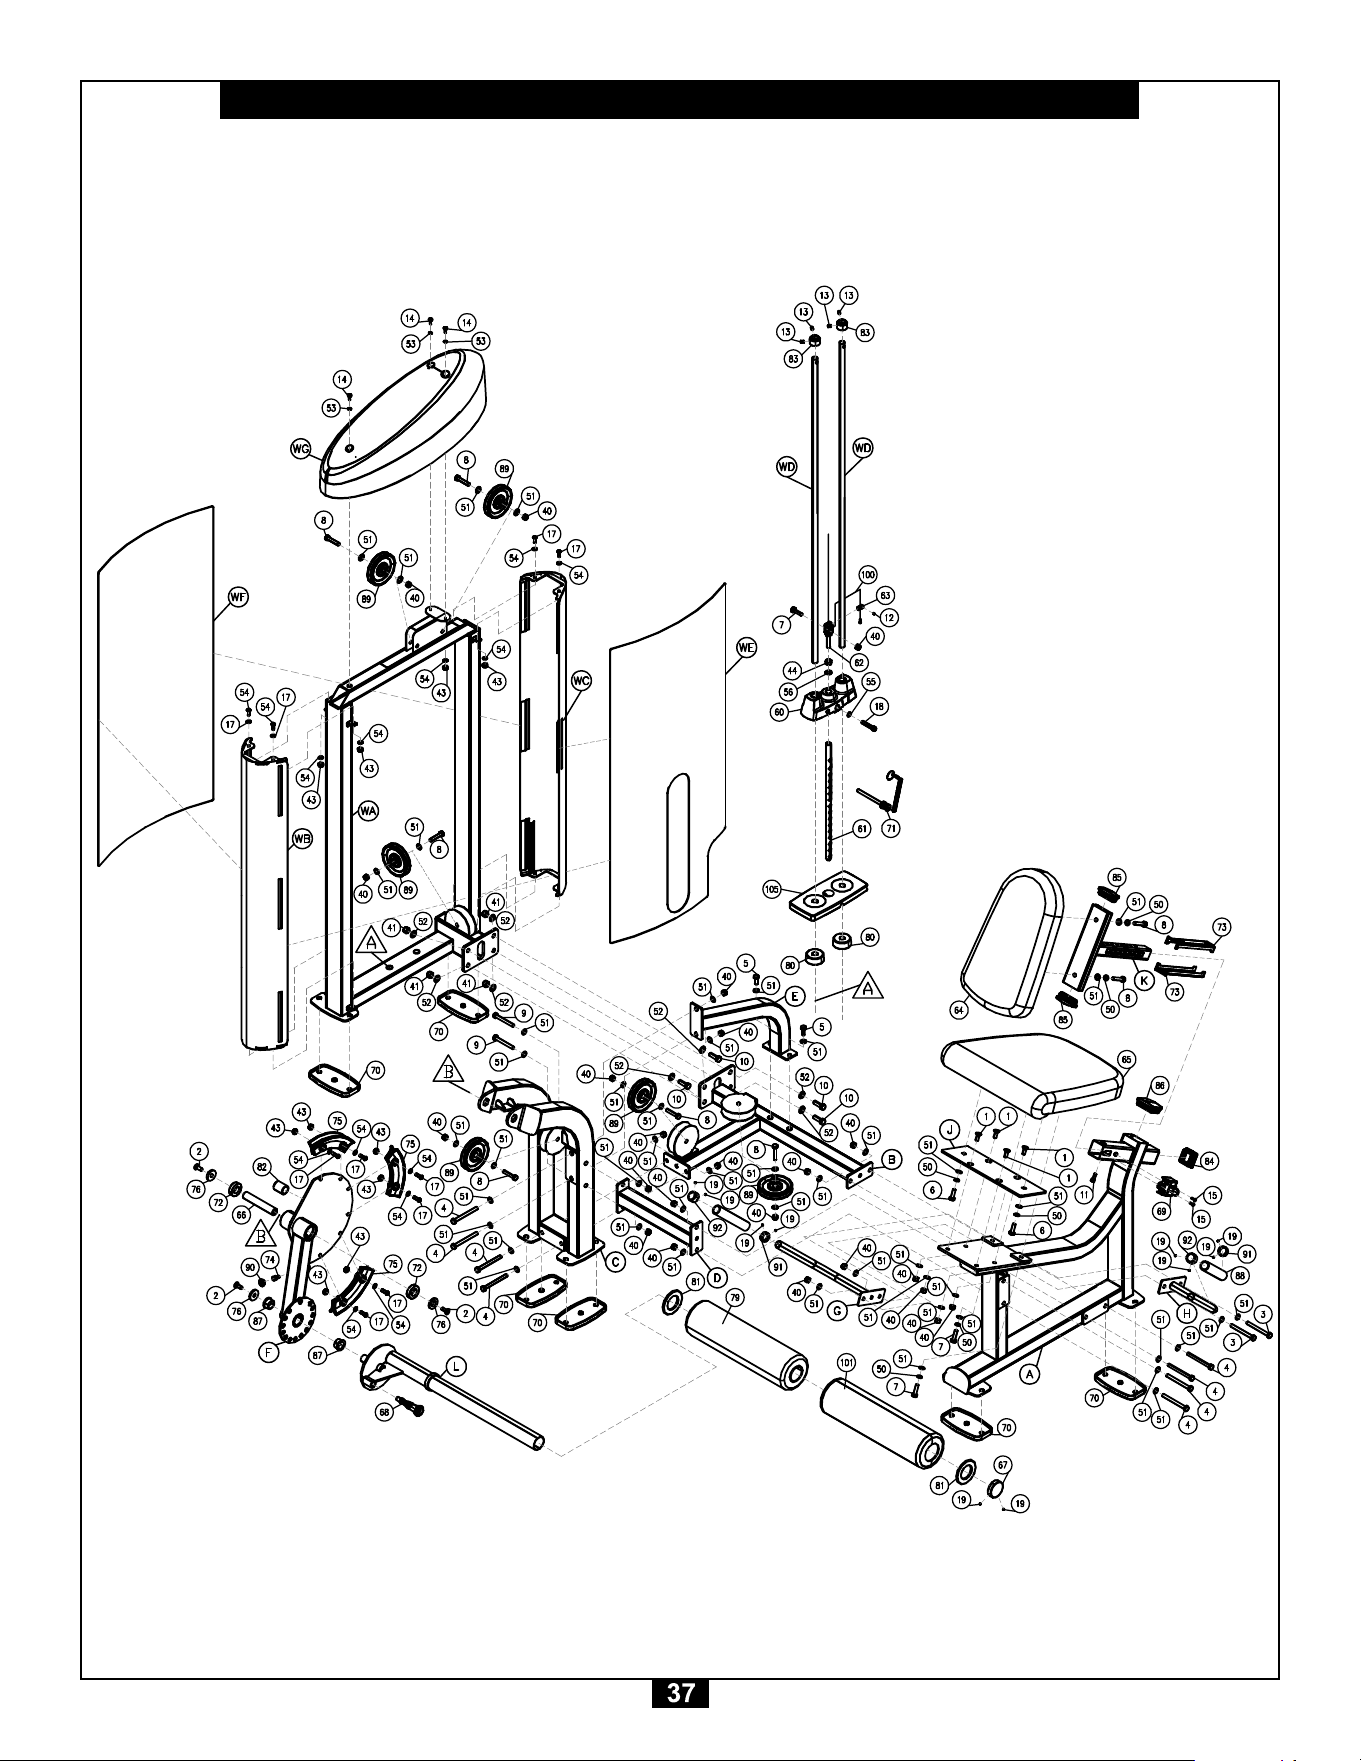
S2LEX Exploded View

www.bodysolid.com
Copyright 2009. Body-Solid. All rights reserved. Body-Solid reserves the right to change design and speci! cations when we feel it will improve the product.
Body-Solid machines maintain several patented and patent pending features and designs. All rights reserved on all design patents and utility patents.
®