PortableCapture Software
User Guide
For Ivation® Portable Digital HD LCD Microscope
IVAMS04HD
1
Install Software
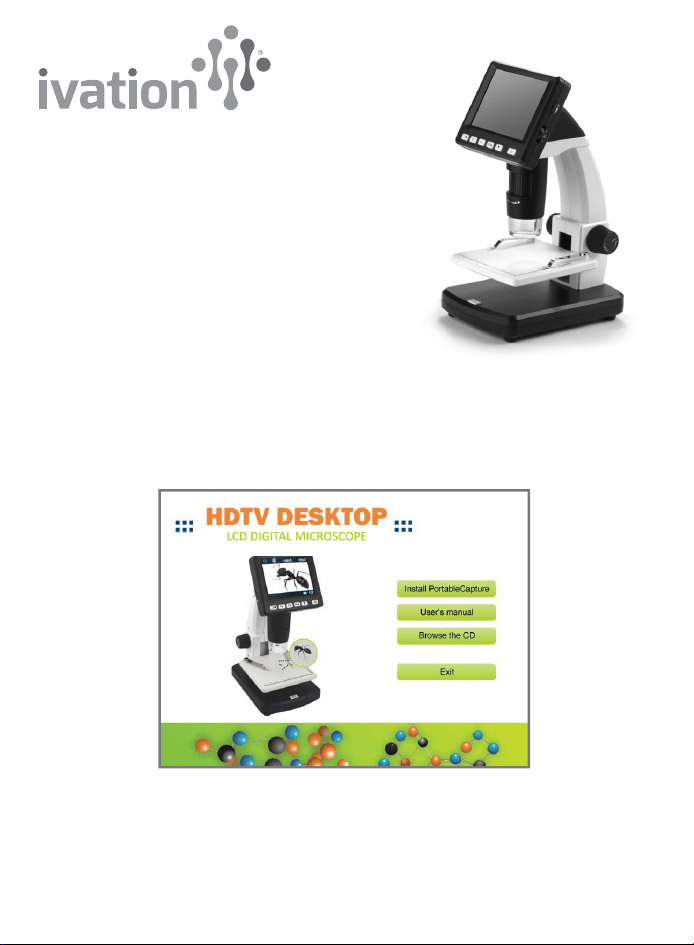
Insert the driver CD into your device's CD-ROM drive. The following interface
will display.
Click on Install PortableCapture. Reboot your computer if prompted.
You can also access the user guide and browse the CD contents by choosing the
corresponding menus.
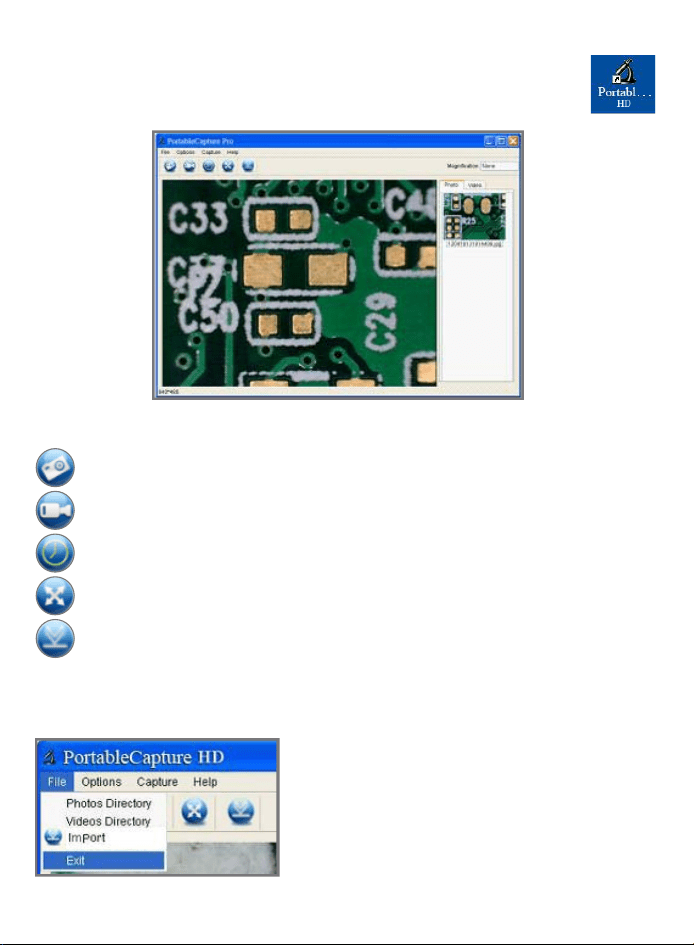
Connect Your Microscope
Connect your microscope to your PC using a USB cable. Start the software
by clicking on the icon (right) generated on the desktop after installation.
The following screen and main menu will appear:
Main Menu Functions
File
Main Menu Icons
2
Capture photos
Photos Directory: Set up a directory to
store photos.
Videos Directory: Set up a directory to
store videos.
Import: Import photos and video from
other sources.
Start/stop video recording
Time-lapse for photos/video
Full screen mode
Import images/video

Main Menu Icons
Options
3
Save as
Copy to clipboard
Undo
Next
Previous
Copy file
Redo
Draw
Download
Calibration
Measurement
Text note
Resolution: Change preview size.
Date/Time: Set to display system date/
time on the preview screen.
Language: Choose language option.
Crossing: Display the XY guide on
preview screen.
Fullscreen mode: Display full-screen
view. Click ESC or double-click to exit.
Capture
Photo: Take a photo.
Video: Record a video clip.

Software Functions
Capture Photos
1. Click the Photo shortcut icon on the
main menu bar.
2. Click Capture > Photo.
Capture Video
1. Click the Video shortcut icon on the
main menu bar.
2. Click Capture > Video.
Timer and Time-lapse
(Photos / Video)
Click Timer shortcut icon on the main menu bar.
4
Using the Timer > Photo function,
you can set the start time, interval
time and total number of pictures
to be taken.
Use the Timer > Video function to
set the start time, interval time and
total number of video clips you wish
to take.
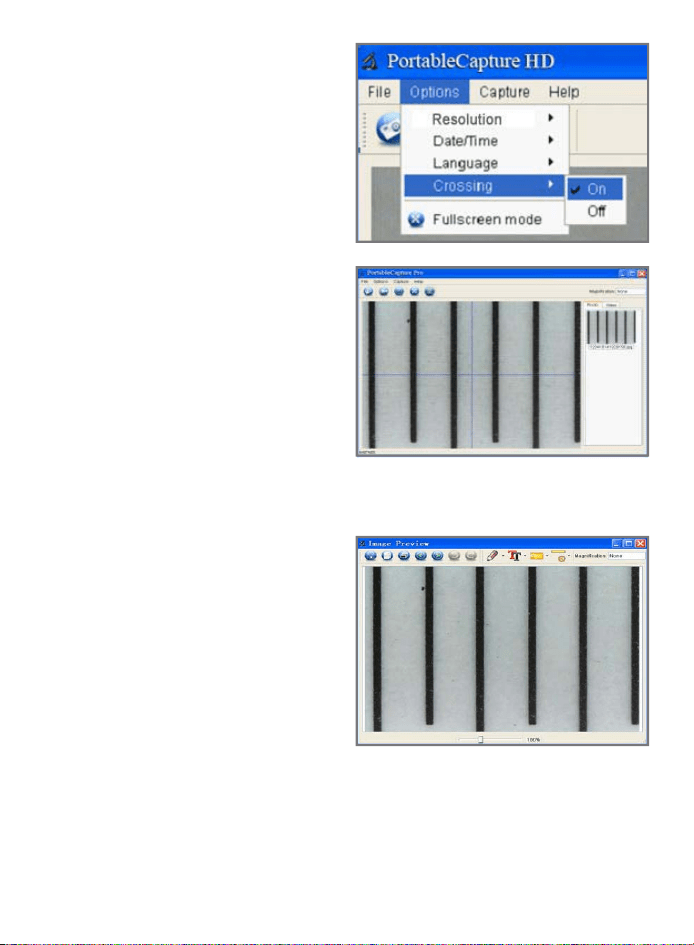
Calibration
1. From Options choose Crossing > On.
The crossed horizontal and vertical
(X and Y) guide lines will appear on
the screen.
2. Place the calibration chart on the
stage. Use the crossed lines to
adjust the chart so that the vertical
lines are parallel and straight.
3. Rotate the focus adjustment knob
on the microscope until you achieve
a clear focus.
Important: Note the degree of
magnification and make sure it is
the same for the object you will be
plotting or measuring. Level of
magnification should be kept low so that you can later adjust the size of your object.
4. Take a snapshot. (Click on the camera
icon or on Capture > Photo.)
The picture you have just taken will
appear in the bar on the right, Double-
click on the picture to bring up the
measurement menu at the top of
the screen.
5. Click on the calibration icon ,
and then move your mouse to the
picture. Click on the beginning and
ending points across a known value.
A dialog box will pop up.
6. Enter the exact value of the measurement sample into "Actual dimension."
The software will automatically calibrate the magnification level.
5
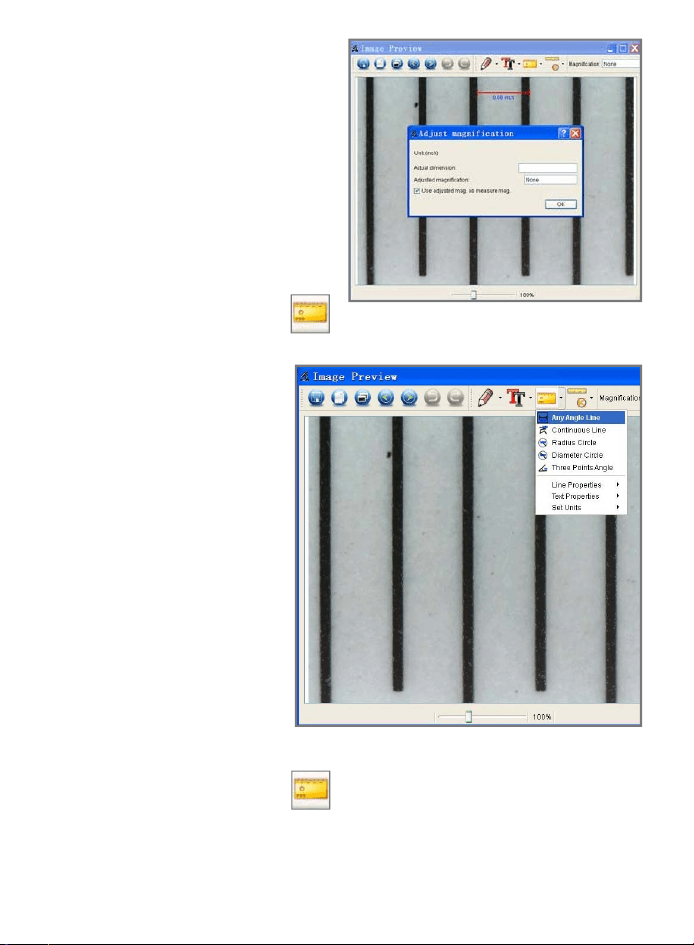
7. Click OK and the adjusted
magnification level will show
in the upper right corner.
8. Click on the measurement icon .
9. Choose "Any Angle Line’ from
the dropdown menu. Measure
the value again. If the value
calculated by the software is
nearly the same as the exact
value you entered into "Actual
dimension," the calibration has
been completed.
Measurement
1. Double-click on the picture to bring up the measurement menu at the top of
the screen.
2. Click on the measurement icon .
3. Choose from options in the dropdown menu.
• Any Angle Line Measurement
Click on a point on the image and drag to the next point. Then release the click.
6

• Continuous Line Measurement
Click and drag to form several lines. Lines will connect when you release.
• Radius Circle Measurement
Click on any area; hold down and extend out; release. The radius, circumference
and area of the circle will display.
• Diameter Circle Measurement
Click on any area; hold down and extend out; release. The radius, circumference
and area of the circle will display.
• Three Points Angle Measurement
Click on any 3 points. The angle degree will display.
Change Calibration
If you need to change the magnification rate and adjust the focus to capture an image,
please calibrate the magnification rate again.
1. Double-click on the picture.
2. Click on the calibration icon .
3. From the dropdown menu
choose Reset magnification >
Reset picture magnification.
Start the calibration process
again.
Change Magnification
1. Double-click on the picture.
2. Click on the calibration icon .
3. From the dropdown menu
choose Set magnification >
Set picture magnification.
4. A dialog box will pop up.
Enter the magnification rate
into the field and click OK.
7

Magnification for Capture
If you want to use the same magnification rate when capturing pictures, click on the
calibration icon .
Choose Set magnification >
Set capture magnification
from the dropdown menu.
All pictures will be set to the
same magnification level.
Draw and Text
You can add drawings or text to
your picture and save it for later
analysis.
Click on the drawing icon
and choose options from the
dropdown menu.
Click on the text icon and
choose fonts and colors from
the dropdown menu.
8