USER MANUAL
Before using, please read the operating instructions carefully to
ensure proper application and achieve satisfactory results.
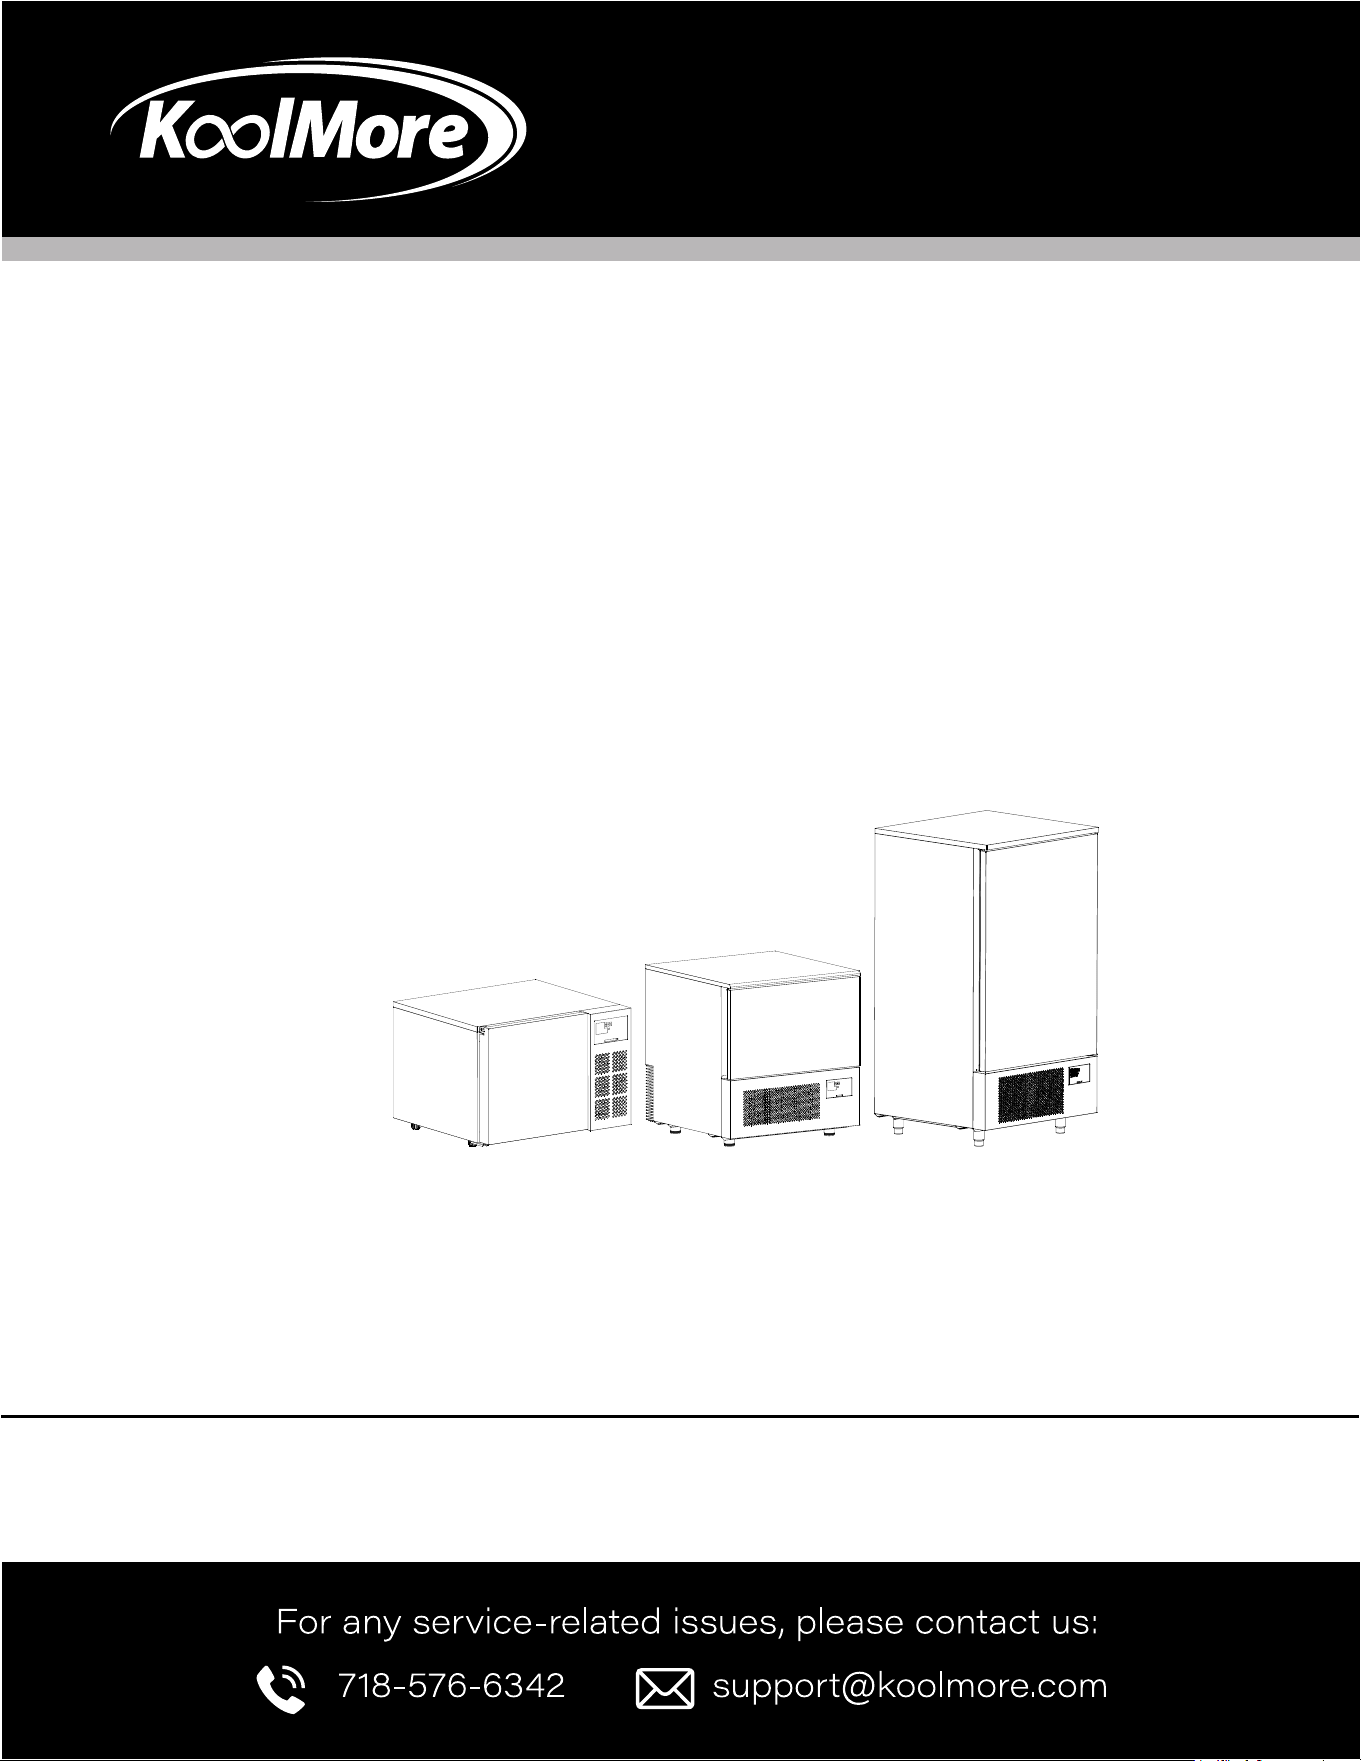
KoolMore Countertop Blast Chiller
Models: KM-CBLC-3 | KM-CBLC-5 | KM-CBLC-10
BLAST CHILLER

Stay informed with the latest information
for your KoolMore Appliance.
If you need any assistance or have questions, our customer
support team is here to help.

3
Contents
Safety .......................................................................... 4
Installation ................................................................... 6
Operation .................................................................... 7
Maintenance .............................................................. 11
Troubleshooting .......................................................... 13

4
Power Connection
• Ensure the machine’s voltage and frequency match the rating label before connecting to power.
• Use a high sensitivity leakage switch (30mA) to connect the machine.
• The socket must comply with national safety laws and regulations, requiring proper grounding.
Electrical Safety
• Disconnect power before any cleaning or maintenance.
• Wear gloves when maintaining the motor and refrigeration system.
• Do not insert tools into protective areas like heat exchange vents or evaporators.
• Avoid touching electrical parts with wet hands or bare feet.
• Ensure ventilation openings are not obstructed.
Authorized Personnel
• Only trained personnel should operate the machine.
• Installation, routine, and special maintenance must be done by authorized technicians with knowl-
edge of refrigeration and electrical systems.
• This device is not suitable for use by persons with physical, sensory, or intellectual impairments,
or by children.
Child Safety
• Supervise children to ensure they do not play near the machine.
Handling Failures and Maintenance
• If the power supply device fails, contact the manufacturer or authorized professionals for replace-
ment.
• Do not modify or remove safety devices such as protective grilles or hazard labels.
Fire Safety
• In case of re, do not use water. Use a carbon dioxide re extinguisher to cool the motor area.
Defrosting and Refrigerant
• Only use manufacturer-recommended methods for defrosting.
• Do not damage the refrigerant circuit.
• Electrical appliances should not be used inside the food storage compartments unless specied
by the manufacturer.
Environmental Safety
• Dispose of the appliance at authorized waste centers. The refrigerant and insulation gases are
ammable; do not expose to ame.
Cord and Appliance Safety
SAFETY

5
• If the supply cord is damaged, it must be replaced by qualied personnel.
• Do not store explosive substances, such as aerosol cans with ammable propellants, in the appli-
ance.
Ventilation and Sound
• Keep ventilation openings clear of obstructions.
• The appliance operates below a sound pressure level of 70 dB(A).
Climatic Class Information
The appliance’s climatic class is indicated by the alpha-numeric characters on the label:
32°C ± 2°C for classes 0, 1, 2, 3, 4, 6, or 8
43°C ± 2°C for classes 5 or 7
Fire Risk Warning: Risk of re/amable materials.
Load Limits
Do not exceed a load of 11 lbs (5 kg) per inner tray holder.

6
Installation
The packing and shipping
• Packed in wooden cases, the machine should be transported with appropriate equipment, do not
move manually.
• When using a lifting system, such as forklifts or pallets, pay special attention to balance and pre-
vent tipping.
• Normally, the machine should be xed on wooden pallets to ensure safety during transportation
and storage.
• A warning symbol shall be printed on the package to remind the instructions to be followed and
ensure that the machine will not be damaged during loading, unloading and transportation.
Stacking limit
• When storing or handling machines, the maximum stacking quantity shall be two machines, un-
less otherwise specied on the appropriate sticker.
• As the center of gravity of the machine is not consistent with the geometric center, take care not
to tilt during handling.
Unpacking
• Due to the packing in wooden cases, please use tools for operation during the unpacking. After
the unpacking, if any damage is found, please inform the carrier immediately.
Installation
• Do not push or pull the machine during handling to avoid capsizing or damage to parts.
• Do not lean the machine against the door.
• The machine should be placed in a well-ventilated place, and away from heat sources, away from
explosive objects.
• The installation plane shall be at.
• The minimum gap ≥3 in. must be observed to ensure good operating performance, ventilation and
maintainability, and the back of the machine must be placed against the wall for use.
• Before connecting the power to the machine, make sure the voltage and frequency are consistent
with those on the rating label. To allow normal voltage variations of +/-10%, the machine should
be connected to a valid ground connection.
Storage
• Turn off the power and unplug the machine.
• Empty the refrigerated bin and clean it carefully.
• Keep the door slightly open to ensure ventilation and avoid mildew or odors.

7
Operation
Rapid Cooling Process
This program can quickly reduce the temperature of cooked food from 194°F to 37°F in 90 min-
utes, avoiding the critical temperature range of 46°F to 154°F that can cause spoilage. Quick-cooled
cooked food can be stored in the refrigerator at 37°F for up to ve days.
Quick-Freeze Program
The quick-freeze program rapidly reduces the temperature of food from 194°F to 0°F in 240 minutes,
preventing the formation of ice crystals and thereby minimizing juice and vitamin loss. This procedure
is suitable for both cooked and raw foods. Frozen cooked and raw foods can be stored at 0°F for up
to 2 months and 12 months, respectively.
Save Program
Once the quick-cooling or quick-freezing process is complete, the machine automatically shifts into a
preservation mode to maintain the food’s core temperature. In this phase, the machine operates like a
standard refrigerator. However, it is not recommended for long-term storage.
Food Storage Guidelines
For optimal performance during the Save Program stage:
• Do not place hot food or uncovered liquids in the machine.
• Wrap or cover foods, especially those with strong aromas.
• Arrange food properly to ensure good air circulation. Avoid placing food on paper trays, cardboard,
or wooden boards, as these can block airow.
• Minimize the frequency and duration of door openings.
During the Quick-Cooling or Quick-Freezing Process stage:
• Do not open the door from the beginning to the end of the program.
• To achieve optimal quick-cooling and quick-freezing eciency, start the machine at the lowest
temperature and let it run for 20 minutes before placing food inside. This also enhances the ma-
chine’s low-temperature sterilization effect.
• Avoid covering food with lids or placing it in closed containers. Use plastic wrap or other methods
to prevent splashes when placing food into the machine.
• Do not use trays or containers deeper than 2.5 inches.
• Do not stack food; the thickness should be less than 1.6 inches.
• Use aluminum or stainless steel containers without lids.

8
CONTROL PANEL AND FUNCTIONS
Power Button
When the power is connected, the machine enters standby mode. In standby mode, press the
Power button to enter work preparation mode. The display will show the current temperature
inside the cabinet and the last set time value.
Pressing the Power button again while in work preparation mode or during operation will
return the machine to standby mode.
Set Button
In preparation mode, press the SET button to toggle between temperature and time (hours or
minutes) settings. Use the “+” and “-” buttons to adjust:
Temperature range: -22°F to +77°F (-30°C to +25°C)
Time range: 00:10 to 99:59 (hours)
Press the SET button again to save the settings. The display will revert to showing the room or
food sensor temperature if no further adjustments are made.
To switch the temperature unit between °C and °F, press and hold the SET button along with
the “-” button for three seconds while in work preparation mode.
While the machine is operating, press and hold the SET button to view the set temperature and
time.
Start/Stop Button
After setting the desired temperature and time, press the START/STOP button to begin
operation. The cooling indicator will light up, and the countdown timer will start.
Pressing the START/STOP button during operation will stop the machine and display the
current temperature inside the cabinet or the food probe temperature if the food probe button
is pressed.
Compressor Protection Features:
To protect the compressor’s lifespan, avoid frequent starts. The compressor will have
a delayed start of 2 minutes after the START/STOP button is pressed, followed by the
evaporator fan starting after another 2 minutes.
In soft quick-freeze mode, if the cabinet temperature is below the set point, the compressor
will not start until the temperature rises to the set level.
In hard quick-freeze mode, the compressor will not start if the food probe temperature is
below the set point. It will start only when the temperature reaches the set level.
Adjust Buttons (+ -)
Use the “+” and “-” buttons to adjust temperature and time settings after selecting the
9
appropriate parameter with the SET button.
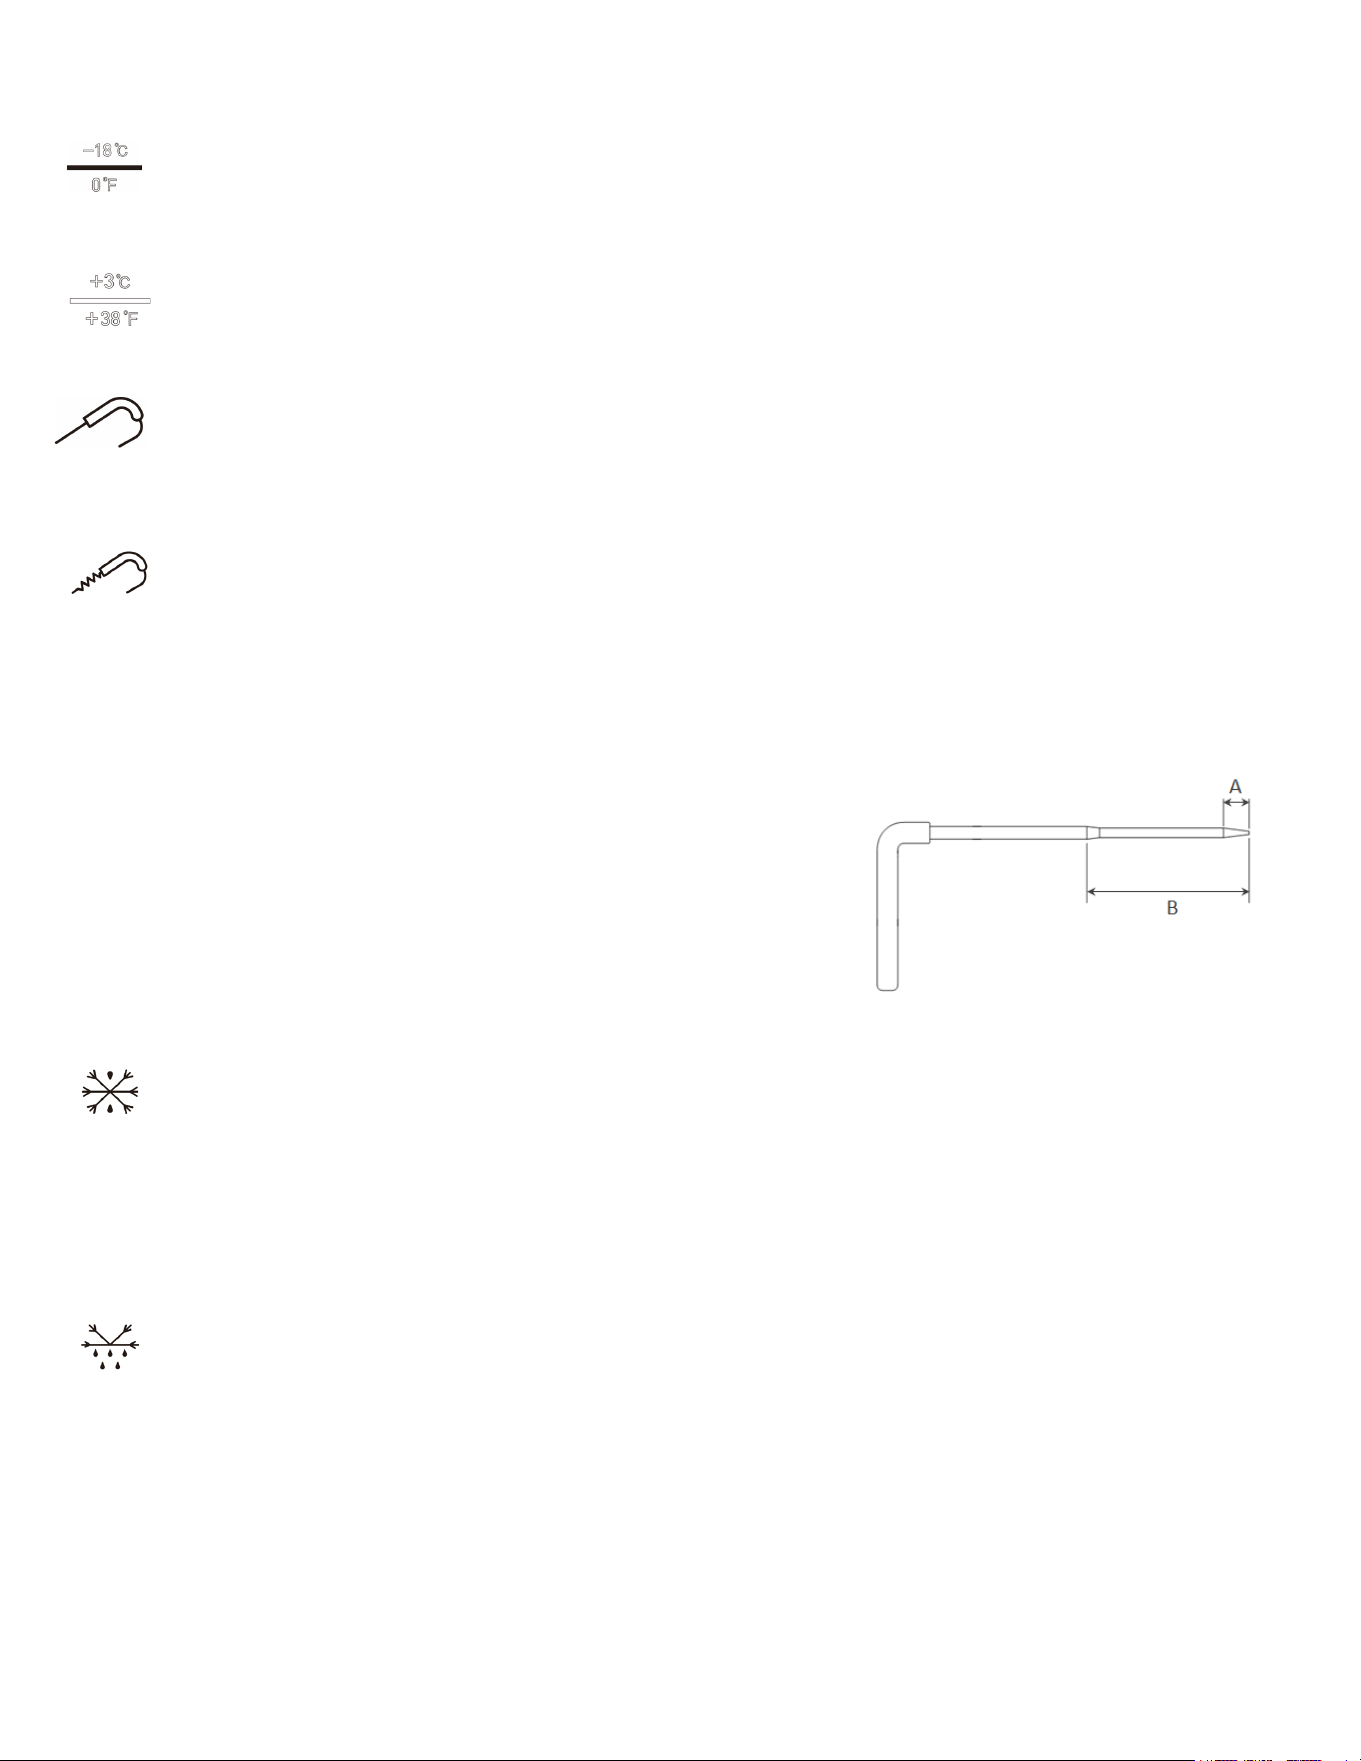
Quick Freeze Shortcut Key
Press this shortcut key to set the temperature to 0°F (-18°C) and the time to 04:00 hours. Then,
press the START/STOP button to start the machine.
Quick Cold Shortcut Key
Press this shortcut key to set the temperature to +38°F (+3°C) and the time to 01:30 hours.
Then, press the START/STOP button to start the machine.
Food Probe Key
Insert the food probe into the food and press the key. The probe icon will light up, and the
display will show the food’s temperature. Press the key again to switch back to displaying the
cabinet’s temperature.
Heat Probe for Food
To remove the food probe from frozen food, press this button to activate the probe heating
function, indicated by the heating icon. Once the icon turns off, the probe is heated, and it can
be safely removed.
Food Probe Use Precautions:
The probe’s tip (A) must be fully inserted into the food for
accurate temperature monitoring.
Use the heating function only when removing the probe,
preferably after the set program is completed. If needed
during operation, stop the machine rst.
Avoid touching the heating section (B) of the probe after
removal to prevent burns.
Never remove the food sensor in any situation.
Hard Freeze Button
Press this button to activate hard quick freeze mode, indicated by the hard freeze indicator
light. The machine will operate based on the food probe’s target temperature. If the button is
not pressed, the machine defaults to the cabinet’s target temperature (soft freeze).
Note: Ensure the food probe is inserted and the hard freeze button is pressed before starting
the machine. Otherwise, stop the machine, press the hard freeze button, and restart the
machine.
Defrost Button
Press this button to initiate the defrost function, indicated by the defrost indicator light. The
machine will automatically perform a defrost every 6 hours during operation.
Temperature Digital Display
Shows the current temperature inside the cabinet after power-on and during operation, displays
the actual temperature inside the cabinet or from the food probe.
Time Digital Display
Shows the last set time value after starting and the remaining time during operation.
10
Temperature Return Difference Function:
During cooling, when the temperature reaches the set value, the compressor stops. It will restart after
a 2-minute delay once the temperature exceeds the set point by 5°F (3°C).
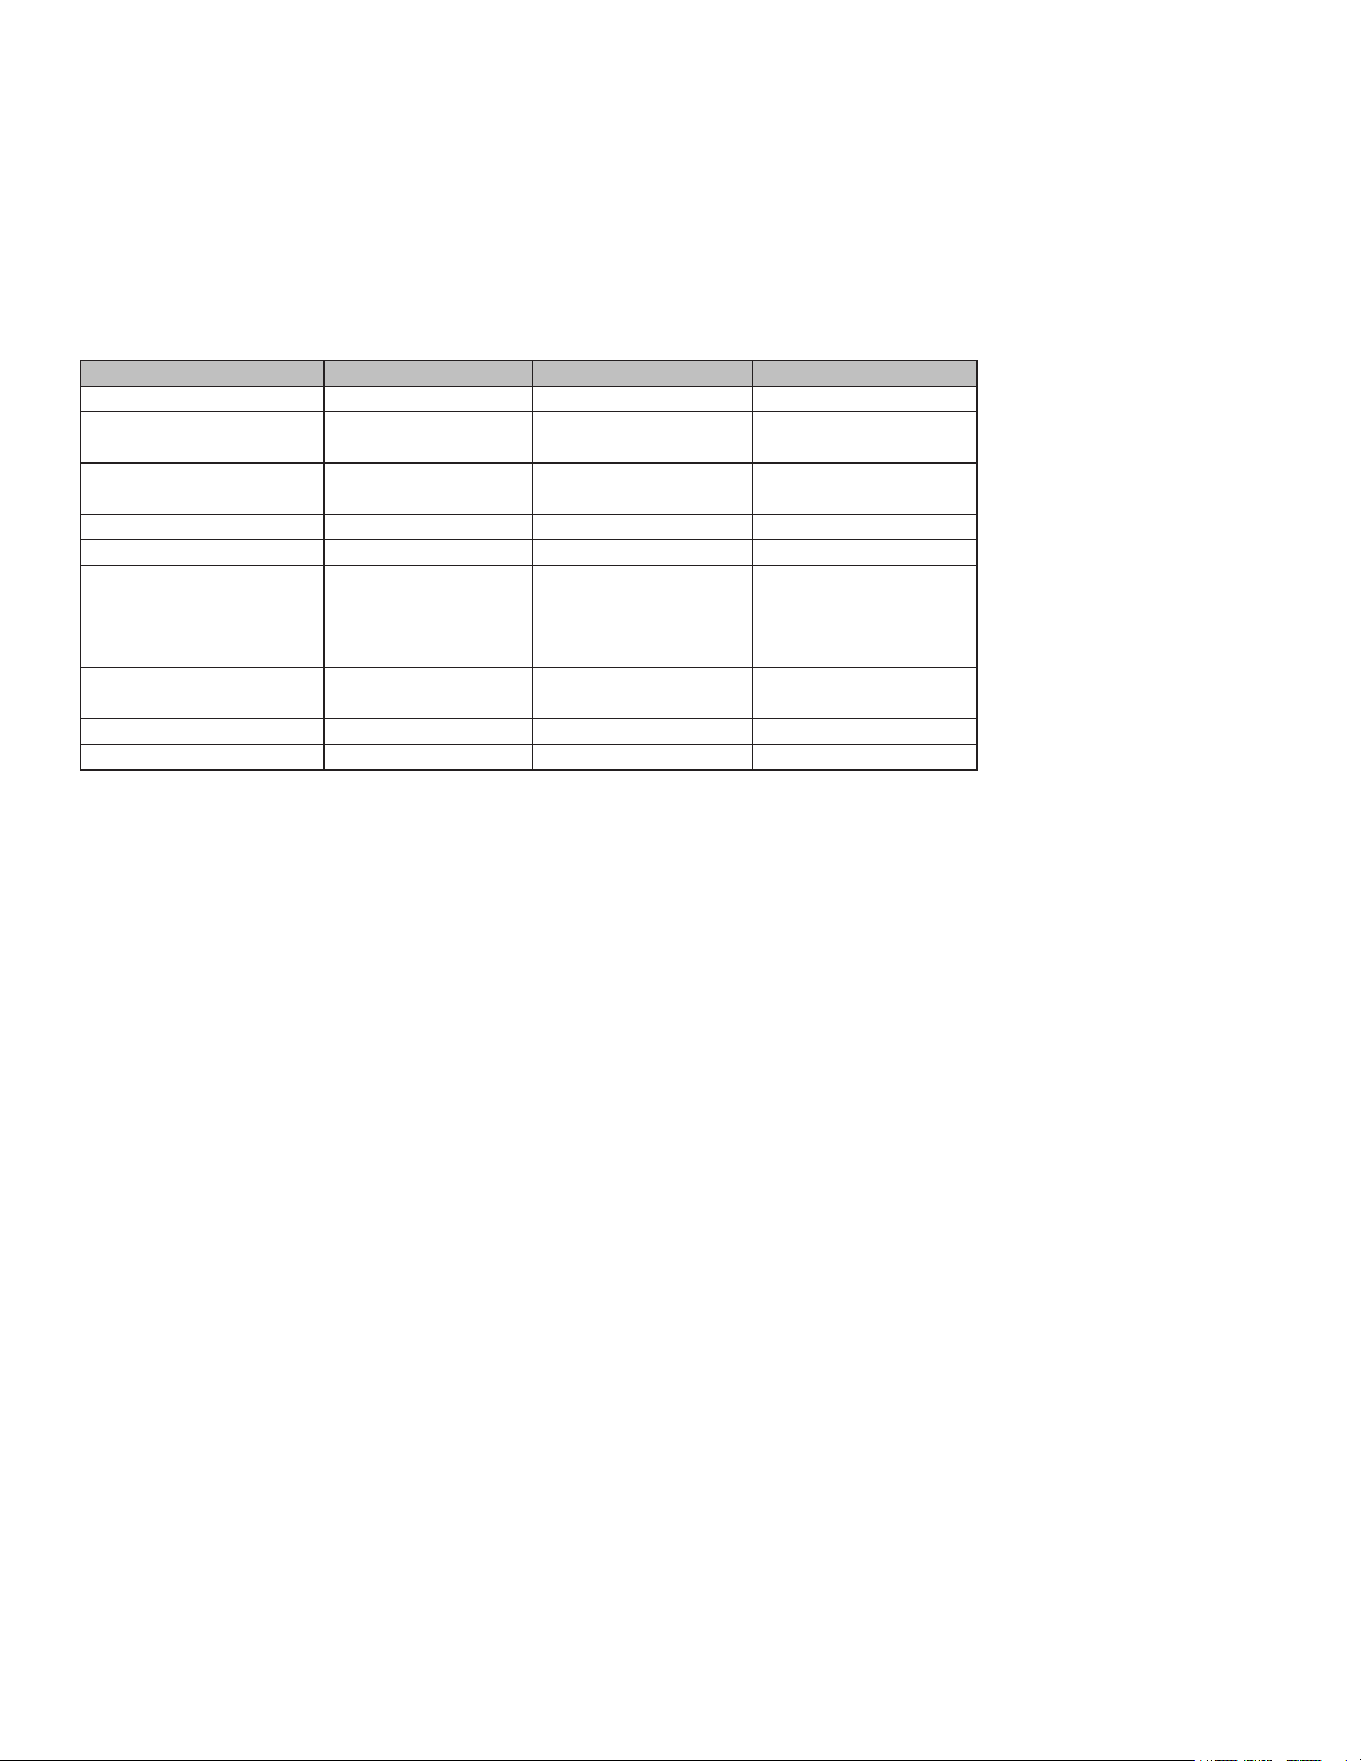
SPECS
Model KM-CBLC-3 KM-CBLC-5 KM-CBLC-10
Voltage, Power 110~120V, 60Hz, 300W 110~120V, 60Hz, 660W 110~120V, 60Hz, 1300W
Rapid Cooling Capacity (Food
Center Temperature)
+194°F to +37°F in 90
mins, 15 lbs
+194°F to +37°F in 90
mins, 31 lbs
+194°F to +37°F in 90
mins, 88 lbs
Quick-Freeze Capacity (Food
Center Temperature)
+194°F to 0°F in 240
mins, 8 lbs
+194°F to 0°F in 240 mins,
26 lbs
+194°F to 0°F in 240 mins,
77 lbs
Foaming Agent C5H10 C5H10 C5H10
Refrigerant R290 R290 R290
Storage Capacity 3×GN2/3 (14×12.8×1.6-
2.6 inches)
5×GN1/1 (20.9×12.8×1.6-
2.6 inches), 35 (23.6x15.7
inches Oven tray)
10×GN1/1 (20.9×12.8×1.6-
2.6 inches), 10 (23.6x15.7
inches Oven tray)
Overall Size (W×D×H inches) 24.8×24.2×18.7 29.6×29.4×33.1 30.9×30.5×61.6
Cavity Size (W×D×H inches) 13×15×9.3 24.6×16.1×14.8 25.4×16.1×41.1
Net Weight (lbs) 90 145 278

11
Maintenance
This section is intended for routine maintenance by properly trained personnel. Special maintenance
and program-related tasks should be performed by authorized professionals.
Cleaning and Maintenance: Regular cleaning and maintenance are essential to ensure the stability
and proper functioning of the machine.
Refrigeration System: The condenser must be cleaned by a professional.
Drain Hole: Clean the drain hole regularly to prevent blockages. Ensure the drain hole lid is securely
covered after cleaning, and keep the drain hole closed during normal use.
Safety
Power Off: Always turn off the machine's power before performing any cleaning or maintenance.
Protective Devices: Do not remove protective or safety devices (such as grids or stickers) during daily
maintenance.
Machine Cleaning
Before the initial cleaning, clean the interior and accessories with water and mild soap to remove any
odor. Properly arrange all accessories in the cabinet.
Outer Surface Cleaning: Use a damp cotton cloth to clean the machine's exterior.
Detergent Use: Only use neutral detergents; avoid chlorine or abrasive cleaners to prevent dirt residue.
Avoid Scratches: Do not use utensils that can cause scratches or rust. Rinse with water and dry thor-
oughly.
Hard Residue Removal: Use soap and water or a neutral detergent. A wooden or plastic scraper may
be used if necessary.
Water Usage: Do not sprinkle water directly onto the machine to prevent water from seeping into elec-
trical components.
Daily Cleaning: Clean the lower part of the machine and adjacent areas daily with soap, water, and
non-toxic, chlorine-free cleaners.
Food Probe Cleaning: If the food probe is blackened, it can be cleaned with cleaning solution.
Special Maintenance (Only by Professionals)
Condenser Cleaning: Regularly clean the condenser.
Door Seal: Check the door seal strip to ensure a proper seal.
Electrical System: Ensure the electrical system is functioning properly.
Heating Elements: Check the surrounding heating elements using an ammeter.
Parts Replacement: Provide the machine's serial number for repairs or parts replacement.
Regular Inspection
Power Connection: Ensure the plug is correctly connected to the power socket.
Heat Source: Check if the machine is affected by any heat source.
Machine Placement: Verify that the machine is placed on a level surface.
Door Seal: Ensure the door seal is intact.

12
Airow: Check if the heat exchange vent is blocked.
Air Filter: Inspect the condenser air lter for dust accumulation. Clean the air lter immediately if dust
is found.
Machine fault code: HI, LO, E01
HI: cabinet temperature probe high temperature alarm, cabinet temperature high temperature alarm
temperature set to 45°C/113°F.
Press the START/STOP button to start the cooling. After 2 hours, check the temperature inside the
cabinet. If the cabinet temperature is greater than or equal to the high temperature alarm temperature
of 45 °C / 113 °F, the temperature display column alternately displays the cabinet temperature and
HI until the temperature is lower than the alarm temperature. At this time, check whether the door of
the machine is closed, or stop the machine to check whether the temperature probe or compressor is
faulty.
LO: The cabinet temperature probe is low temperature alarm, and the cabinet temperature low tem-
perature alarm temperature is set to -45 °C / -49 °F.
Press START/STOP to START the refrigeration, and test the temperature inside the cabinet 2 hours
later. If the temperature of the cabinet is less than or equal to the low temperature alarm temperature
of -45°C/-49°F, the temperature display bar will alternately display the temperature of the cabinet and
LO until the temperature is higher than the alarm temperature. At this time to stop the cabinet tem-
perature probe and other devices to check whether there is a fault.
Communication failure code E01:
If the motherboard and panel cannot communicate normally, the panel displays E01. At this time to
power off and restart the machine or check the connection between the motherboard and the panel
cable is connected to the right.
Restore factory value parameters:
In the work preparation mode, press the “+” and “-” keys simultaneously for 3 seconds, the tempera-
ture bar will display “rS”, and then automatically shut down. Press the Power button to start the ma-
chine, and the machine parameters will be restored to factory Settings. The factory value parameter
is: temperature unit: ; Set the temperature value: -18°C; Setting time: 4:00.
If there is no mention of the fault, do not disassemble the machine at will. Please contact our autho-
rized professionals for related testing and maintenance to avoid safety failure.
13
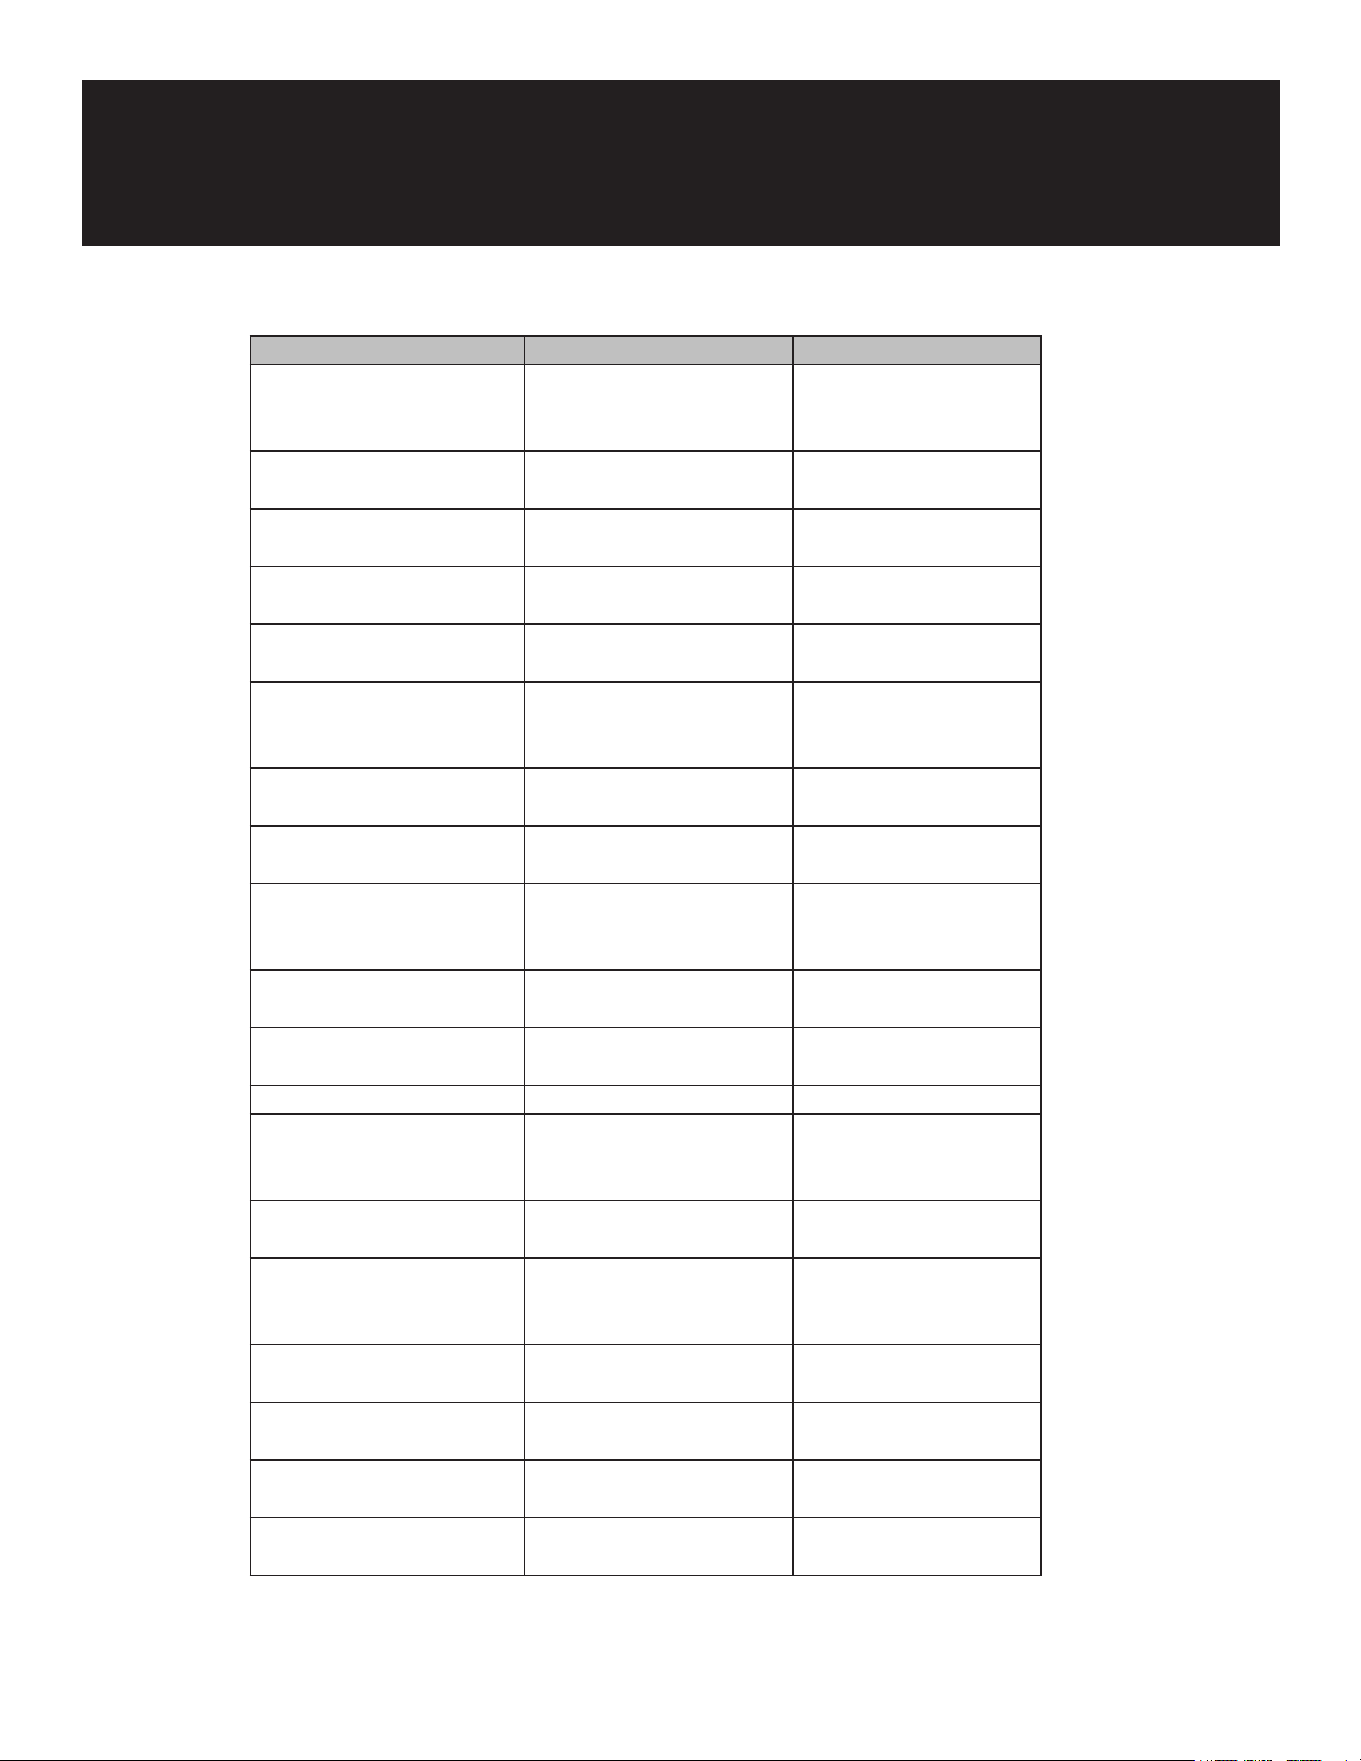
Troubleshooting
Issue Possible Causes Solutions
No power supply,
compressor does not work
Power supply issues Check and repair power
supply, cord, and wiring
terminals
Faulty power cord or wiring
terminals
Replace faulty
components
Evaporating fan not working Replace faulty
components
Circuit board not outputting Replace circuit board
Faulty thermal protector or
starter relay
Replace thermal protector
and relay
Compressor coil resistance
issues
Measure and address
compressor coil
resistance
No cooling, compressor
works
Continuous compressor
operation
Check and repair
refrigerant leaks
Frost on cabinet evaporator Remove obstructions
Partial frost due to blockage
or refrigerant leak
Re-vacuum and rell
refrigerant
Alternating frosting/
defrosting
Follow usage instructions
Excessive refrigerant or
compressor failure
Follow usage instructions
Excessive moisture Replace lter
Poor refrigeration effect Incorrect equipment
location (near heat source or
sunlight)
Relocate equipment to a
suitable place
Poor door seal condition Replace or repair door seal
Excessive food or frequent
door openings
Follow usage guidelines
to prevent overloading or
frequent door openings
Thermostat set too high Adjust thermostat settings
Incorrect thermostat probe
placement
Reinstall the thermostat
probe properly
Thermostat aging or
damage
Replace the thermostat
Low compressor eciency Consider replacing the
compressor

14
WARRANTY
LIMITED WARRANTY
Koolmore Supply, Inc. extends a limited warranty to the original purchaser, guaranteeing that this Koolmore
product is free from manufacturing defects in material or workmanship for one year from the date of
purchase.
Should you discover any such defect within the warranty period, Koolmore Supply, Inc., reserves the right to
repair or replace the product without charge, or to cover the cost of replacement parts and repair labor needed
to correct defects present at the time of purchase or resulting from regular usage, when the appliance has been
installed, operated, and maintained as per the instructions provided.
At its sole discretion, Koolmore Supply Inc. may decide to replace the product. In such an event, your replace-
ment appliance will carry the warranty for the remaining term of the original unit's warranty period.
This warranty is valid exclusively to the original purchaser of the product and only applicable within the United
States. The warranty commences from the date of original consumer purchase. Proof of the original purchase
date will be required to obtain service under this warranty.
Under this limited warranty, your sole and exclusive remedy will be product repair, as outlined above. All
services must be provided by a Koolmore-designated service company.
To claim warranty or request repair service:
Email support@koolmore.com. Please include your name, address, phone number, warranty repair request,
and a copy of your proof of purchase receipt. Alternatively, visit koolmore.com and use the contact us page. A
Koolmore customer service representative will promptly arrange service for your appliance.
We thank you for choosing Koolmore.
WARRANTY EXCLUSIONS
This limited warranty will not cover:
1. Failure of the product to perform during power failures or interruptions,
or due to inadequate electrical service.
2. Damage incurred during transportation or handling.
3. Damage caused by accidents, vermin, lightning, winds, re, oods, or acts of God.
4. Damage resulting from accidents, alterations, misuse, abuse, improper installation, repair, or maintenance.
This includes using any external device that alters or converts the voltage or frequency of
electricity.
5. Unauthorized product modications, repairs by unauthorized centers, or use of non-approved
replacement parts.
6. Abnormal cleaning and maintenance not aligned with the user's manual.
7. Use of incompatible accessories or components.
8. Any costs associated with repairs or replacements under these excluded circumstances shall be the
responsibility of the consumer.

15