8L DUAL ZONE AIR FRYER
User Manual
220-240V~ 50/60Hz 1700W
Model No: AFT08003

---------------------------------------------------------------------
Thank you for
your purchase
Thank you for
your purchase
COMPANY: OBERO INTERNATIONAL LIMITED
CONTACT: Mr. Tian.
EMAIL: [email protected].
ADDRESS: Unit 1, Kiwi Park Commerce Way, Trafford Park, Manchester, M17 1HW, United Kingdom
MANUFACTURER: SHENZHEN RBU TECHNOLOGY GROUP CO., LTD.
ADDRESS: No.2016 Xuegang Road, Gangtou Community, Bantian Street, Longgang District, Shenzhen, China
For more information please contact us at: [email protected]
( Importer )
Warning: Keep the appliance and its cord out of reach of children less than 8 years
DISTRIBUTOR: VIGOR RECREATION LIMITED.
ADDRESS : Office 614 58 Peregrine Road, Ilford , IG6 3SZ, United Kingdom
Disposal Notes
This appliance complies with the WEEE Directive 2012/19/EU on the disposal of electrical and
electronic equipment (WEEE). This appliance complies with the European directive for
electromagnetic compatibility (EMC) 2014/30/EU and its revisions, as well as Low Voltage
Directive (LVD) 2014/35/EU and its revisions.This symbol [the crossed-out wheeled bin/
PICTURE] indicates that this product should not be disposed of with other household waste
throughout the UK and EU. To prevent possible harm to the environment or human health from
uncontrolled waste disposal, recycle it responsibly to promote the sustainable re-use of material
sources. To return your used device, please use the return and collection systems or contact
Customer Care for further recycling and WEEE information.
We are redefining customer satisfaction, andresponding to your needs with
helpful solutions.your uten-chef are here for you, ready whenever,wherever.

DIRECTORY:
---------------------------------------------------------------------
PARTS DESCRIPTION
4
DIGITAL CONTROL PANEL
5
IMPORTANT SAFEGUARDS
6
KNOW YOUR SMART FRYER OVEN 11
BEFORE THE FIRST USE
12
PREPARATION TIPS
17
PRE-SET PROGRAMS
18
CLEANING AND MAINTENANCE
20
TROUBLESHOTING 21
OPREATING INSTRUCTIONS 13
13
13
14
15
· Before Cooking
· Single Cooking
· Dual Cooking
· After Cooking
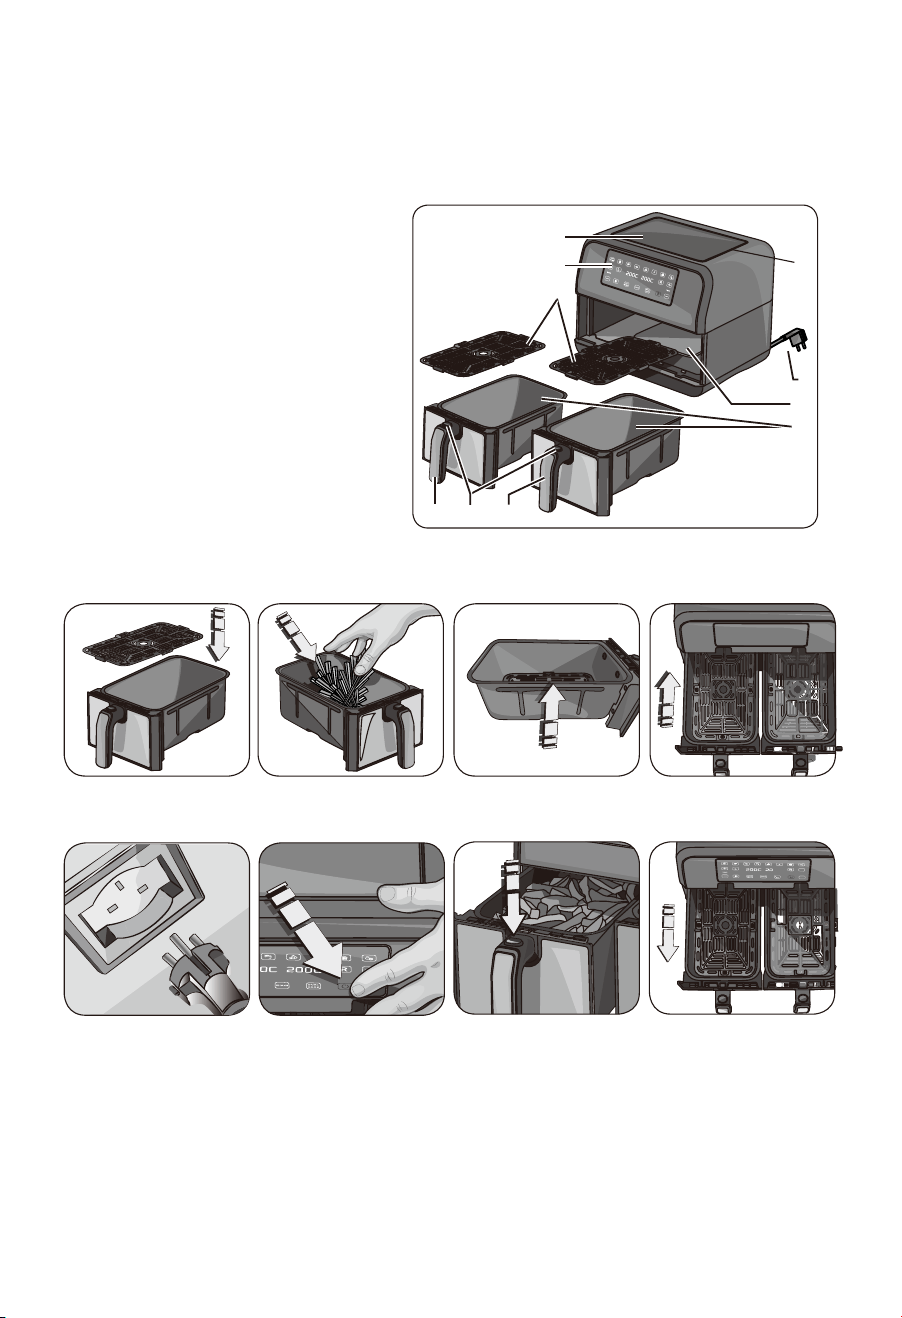
I
F
H
G
A. Body of the appliance
B. Touch screen display
C. Non-stick plates
D. Basket handles
E. Unlocking buttons of the baskets
F. Basket
G. Cooking compartment
H. Power cord
I. Air intake
PARTS DESCRIPTION
Elements
---------------------------------------------------------------------
4
B
A
C
ED D
Fig. 1 Fig. 2 Fig. 3
Fig. 4
Fig. 6
Fig. 7
Fig. 8
Fig. 5
---------------------------------------------------------------------
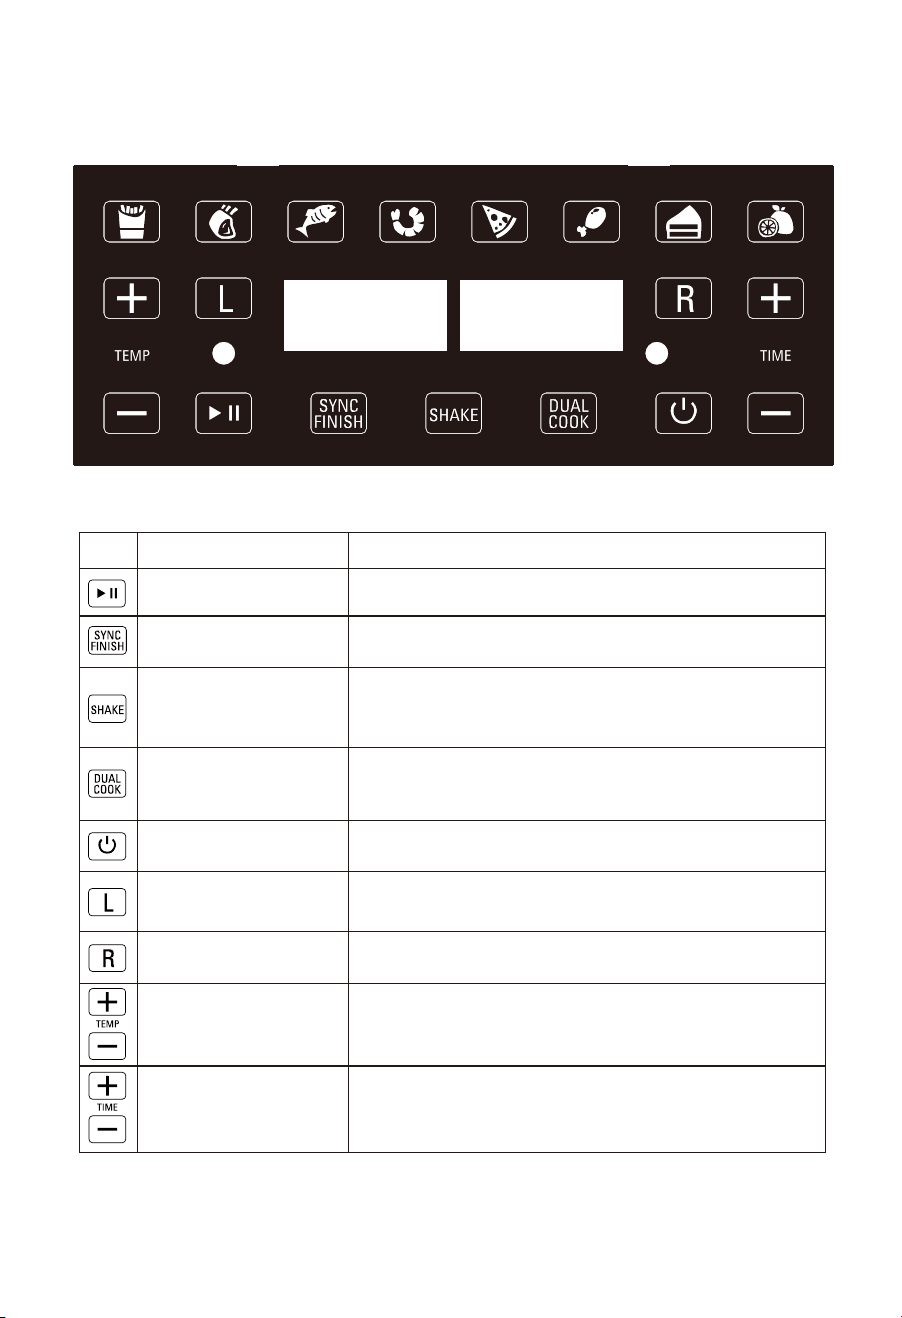
DIGITAL CONTROL PANEL:
5
Start/Pause button
SYNC FINISH button
SHAKE button
DUAL COOK button
On/off button
Left basket control button
Right basket control button
TEMP button
TIME button
Allows the user to start or pause the cooking.
Allows the user to synch different cooking times for the two
baskets, in order to finish cooking at the same time.
Allows the user to activate or to deactivate the sound signal
that indicates the need to shake or mix the food when the
appliance reaches 2/3 or 1/2 of the total cooking time
Allows the user to apply to the second basket the same settings
selected for the first basket. Two cooking zones become one,
ideal for large quantities of food.
Allows the user to turn on or off the appliance
Allows the user to select the desired cooking set-tings for the
left basket.
Allows the user to select the desired cooking set-tings for the
right basket.
Allows the user to manually adjust the cooking temperature.
Press the + or - buttons to raise or lower the cooking temperature.
Allows the user to manually adjust the cooking time.Press
the + or - buttons to increase or decrease the cooking time.
Button Description
Fries Steak
SYNC FINISH SHAKE DUAL
Prawn
Fish
Pizza Drumstick Cake Dehydration
IMPORTANT SAFEGUARDS
---------------------------------------------------------------------
When using electrical appliances, basic safety precautions
should always be followed, including the following:
1. READ ALL INSTRUCTIONS BEFORE USE!
2. Check that the voltage in your home corresponds to that stated on the appliance.
3. Make sure the appliance is plugged into a dedicated wall socket, always make sure
that the plug is inserted into the wall socket properly and without any other
appliances on the same outlet.
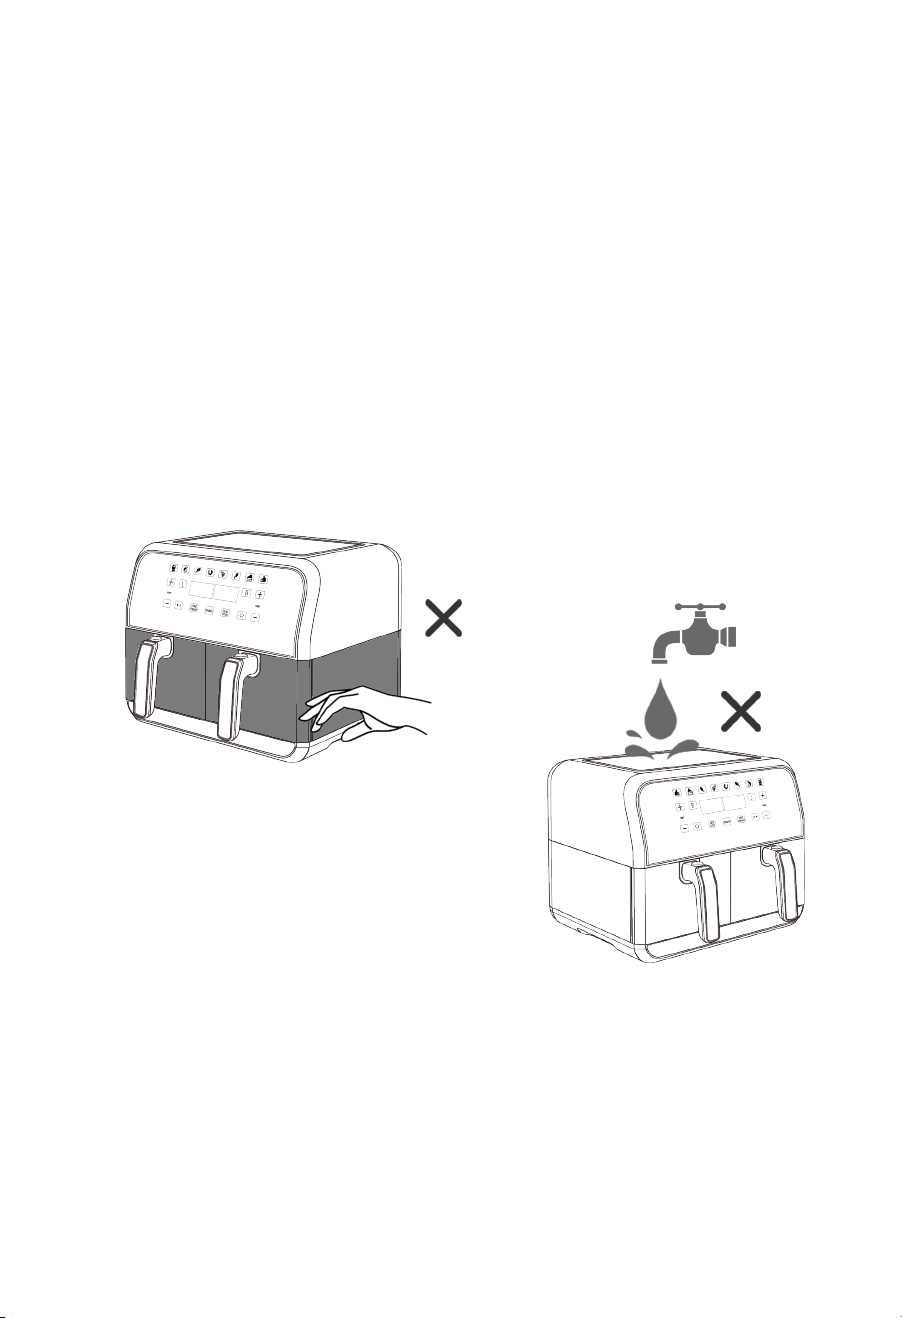
6. To protect against electrical shock, fire or personal injury, do not immerse cord,
plugs, or the appliance in water or other liquid. Do not plug in the power cord or
operate the unit controls with wet hands.
4. Do not touch hot surfaces, use handles or knobs.
5. Never immerse the unit's housing in
water or rinse it under the tap.
7. Never connect this appliance to an external timer switch or separate remote-control
system.
6
8. Unplug from outlet when not in use and before cleaning. Allow to cool before putting
on or taking off parts.
9. Do not operate any appliance with a damaged cord or plug or after the appliance
malfunctions or has been damaged in any manner. Return the appliance to the
nearest authorized service facility for examination, repair, or adjustment.
10. Keep the appliance and its power cord out of the reach of children when it is in
operation or in the cooling process.
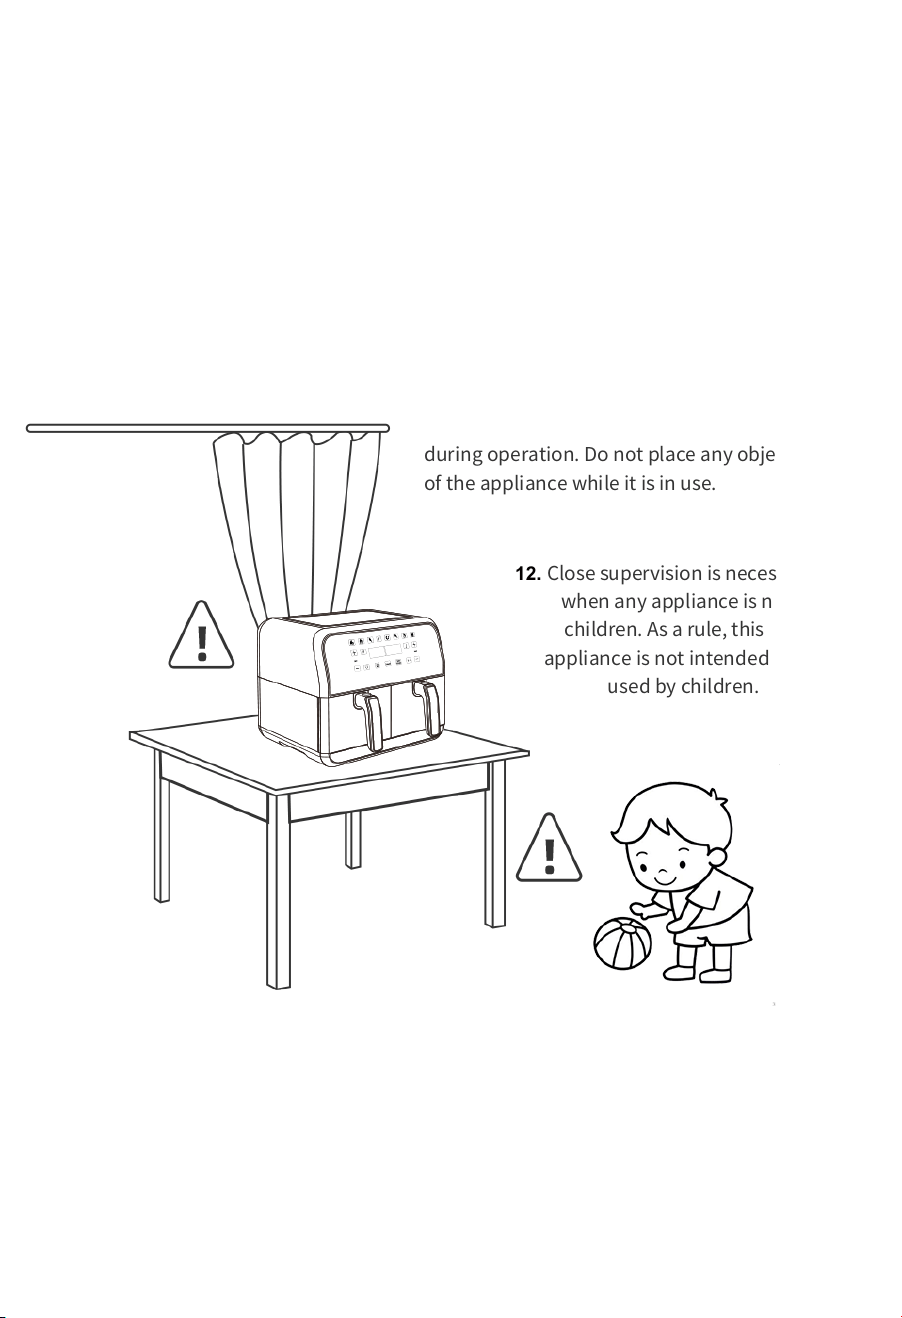
11.
A fire may occur if the appliance is covered or in
contact with flammable materials, such as
curtains, draperies, tablecloths, walls, and the like,
during operation. Do not place any objects on top
of the appliance while it is in use.
12. Close supervision is necessary
when any appliance is near
children. As a rule, this
appliance is not intended to be
used by children.
13. The use of accessory attachments not recommended by the appliance manufacturer
may cause injuries.
14. Do not use outdoors.
15. Do not let the cord hang over the edge of a table or counter, or touch hot surfaces.
7

16. Do not cover the air intake vent or air outlet vent while the Smart Fryer Oven is
operating. Doing so will prevent even cooking and may damage the unit or cause it
to overheat.
17. Extreme caution must be used when moving an appliance containing hot oil or
other hot liquids.
18. To disconnect tum any control to "off", then remove the plug from wall outlet.
19. Do not use the appliance for anything other than intended use.
20. Over size foods or metal utensils must not be inserted in the Smart Fryer Oven as
they may create a fire or risk of electric shock.
21. Do not dean with metal scouring pads, Pieces can break off the pad and touch
electrical parts involving a risk of electric shock.
22. Extreme caution should be exercised when using containers constructed of other
than metal or glass.
23. Do not store any materials, other than manufacturers recommended accessories,
in this appliance when not in use.
24. Do not place any of the following materials in the appliance: paper cardboard,
plastic, and the like.
25. Do not leave unit unattended when in use.
26. The Smart Fryer Oven can be turned off while using any of the functions by
pressing the on/off button for 3 seconds.
27. During hot air frying, hot steam is released
through the air outlet openings. Keep your
hands and face at a safe distance from the
steam and from the air outlet openings. Also
be careful of hot steam and air when you
remove the cooking accessories from the
appliance.
8
Beware of steam burns
9
29. The unit' s outer surfaces may become hot during use. The accessories will be hot,
Always wear oven mitts or use the fetch tool when handling hot components. Wear
oven mitts when handling hot surfaces.
30. Immediately switch off and unplug the appliance if you see dark smoke coining
out of the appliance. Wait for the smoke emission to stop before you remove the
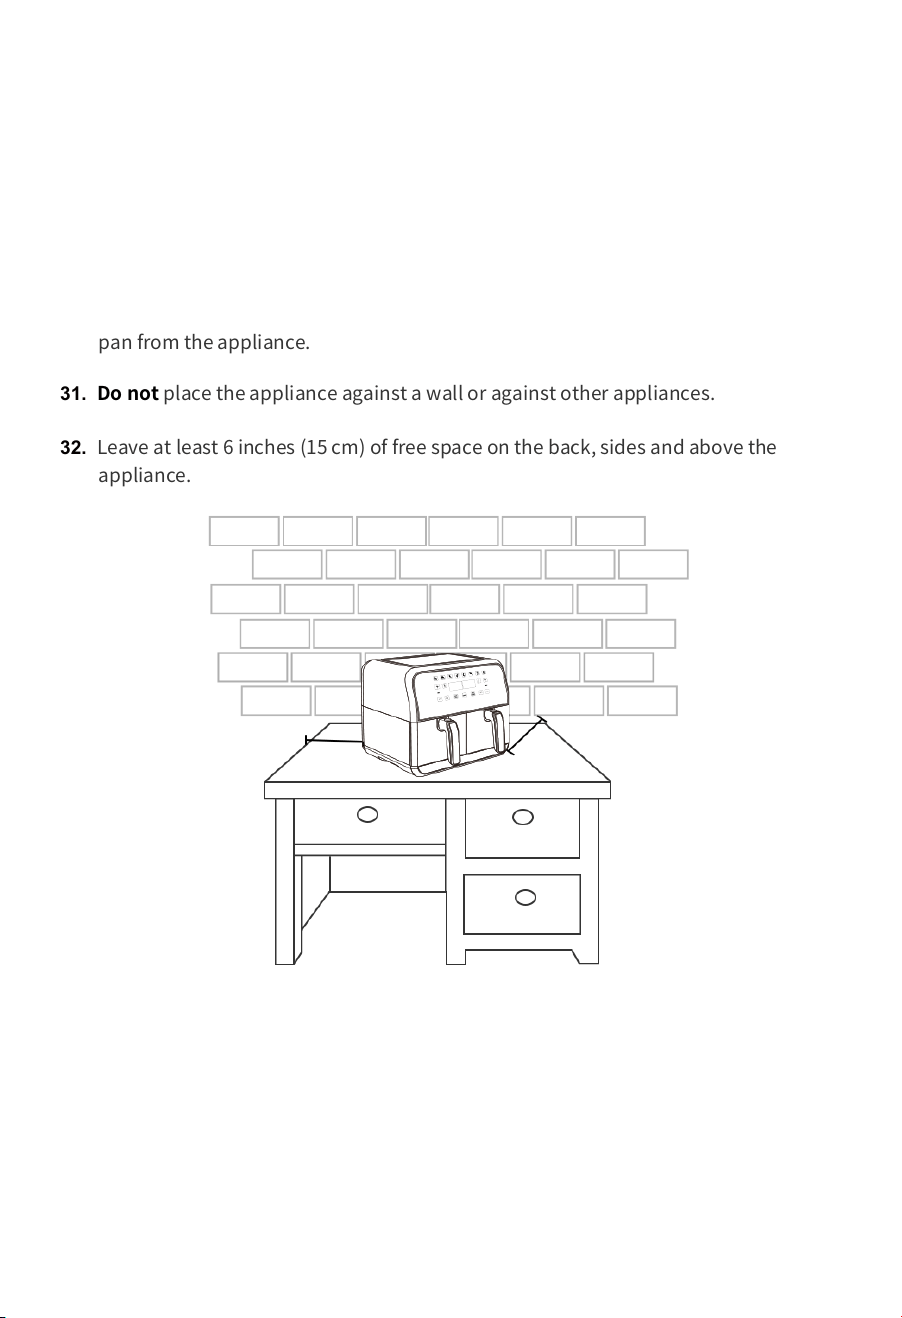
pan from the appliance.
31. Do not place the appliance against a wall or against other appliances.
32. Leave at least 6 inches (15 cm) of free space on the back, sides and above the
appliance.
28. Do not place on or near a hot gas or electric burner, or in a heated oven. Do not
place on stove top surfaces.
33. The appliance can be used to cook solid foods. Do not use the appliance to cook
liquid foods. If necessary for cooking, small quantities of liquid can be added,
verifying that the liquid is absorbed by the solid food before pouring more liquid.
If an excessive amount of liquid is added, it may leak out and damage the appliance.
≥15CM
≥15CM

10
CAUTION!!
· Always place the appliance on a horizontal level, heat resistant and stable surface.
· This appliance is intended for normal household use only.
· Always unplug the appliance after use.
· Let the appliance cool down for approximately 30 minutes before handling or cleaning it.
· The appliance is equipped with a safety micro switch inside that will pause the cooking process
automatically if the door is opened during cooking.
SAVE THESE INSTRUCTIONS HOUSEHOLD USE ONLY
34. The appliance complies with the Regulation (EC) No. 1935/2004 of 27/10/2004
concerning the materials intended to come into contact with food products.
35. Do not use the appliance if your hands are wet or if you are barefoot
36. Put the ingredients only in the basket to prevent the food from touching the
electric resistances.
37. Always ensure the baskets are properly inserted in the cooking compartment
before starting the appliance.
38. Never use the appliance without inserting the baskets in the cooking compartment.
39. After unplugging the appliance and when hot parts have cooled down, the
appliance shall only be cleaned using a non-abrasive cloth slightly damped with
water and a few drops of mild, non-aggressive detergent.
40. In order to lift the appliance, hold it by the body.
41. Do not move the appliance without removing the food from the baskets.
42. Place the appliance in an environment that is sufficiently lit, clean and where the
power outlet is easily accessible.
43. A short power supply cord is provided to reduce the hazards resulting from
becoming entangled in, or tripping over a longer cord.

11
This Smart Fryer Oven Feature:
------------------------------------------------------------------
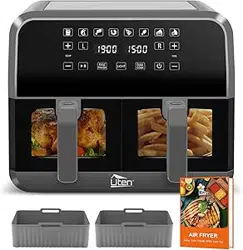
· Double fryers can cook simultaneously, each with a capacity of 4 liters, giving
you more possibilities.
· 8 preset programs
· 360°hot air circulation
· Inductive touch control, easy temperature control
·Washable parts for easy housekeeping
·0-60 minutes timer
·40-200°C temperature setting
Other great advantages provided by your Smart Fryer
Oven include:
•Quick and easy clean-up: Cooking accessories are dishwasher safe.
•Hassle-free frying—no splatters, no mess, and no oil smell!
•Versatility with its frying, baking, grilling and roasting capacities, this unit serves
as a great cooking tool for a busy kitchen.
KNOW YOUR SMART FRYER OVEN
Specifications:
POWER SUPPLY : AC220-240V~ 50/60Hz RATED POWER: 1700W
CAPACITY: 2x4.0Liter TEMPERATURE RANGE: 40~200°C
TIME RANGE: 1~60 min
N.W.: 8.5kg / 18.74 pounds G.W.: 9.5kg / 20.94 pounds
UNIT SIZE: 37.5 x 38 x 29 cm /14.76 x 14.96 x 11.42 inches
GIFTBOX SIZE: 43.7 x 44.7 x 37 cm / 17.2 x 17.6 x 14.6 inches
12
BEFORE THE FIRST USE
---------------------------------------------------------------------
• Unpack the appliance and its accessories. Wash the accessories in hot, soapy water
and then wipe them dry. Wipe the interior of the frying cavity with a damp cloth or
sponge, and then dry with a paper towel. Make sure the cavity is dry before operating
the unit.
• Remove the packing material and check that all components are present.
• Position the Smart Fryer Oven on a flat, level and heat-resistant surface. Make sure
that it is also positioned at least 6 inches (15 cm) away from any surrounding objects.
• The non-stick plates increase the crispiness of the food. The use of the non-stick
plates is optional.
• It is recommended to let the Smart Fryer Oven heat for about 20 minutes without any
food in it. This helps to eliminate grease that may have adhered during manufacturing,
and to eliminate the "new" appliance smell.
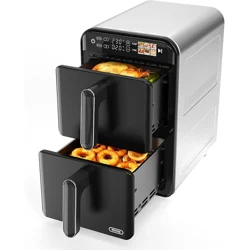
• The appliance is equipped with two cooking
baskets. It is possible to cook foods in both
baskets (read the “Dual cooking” paragraph) or to only use one
(read the “Single cooking”paragraph). The appliance operates only when both
baskets are properly inserted in the cooking compartment, even if one of
them is empty.
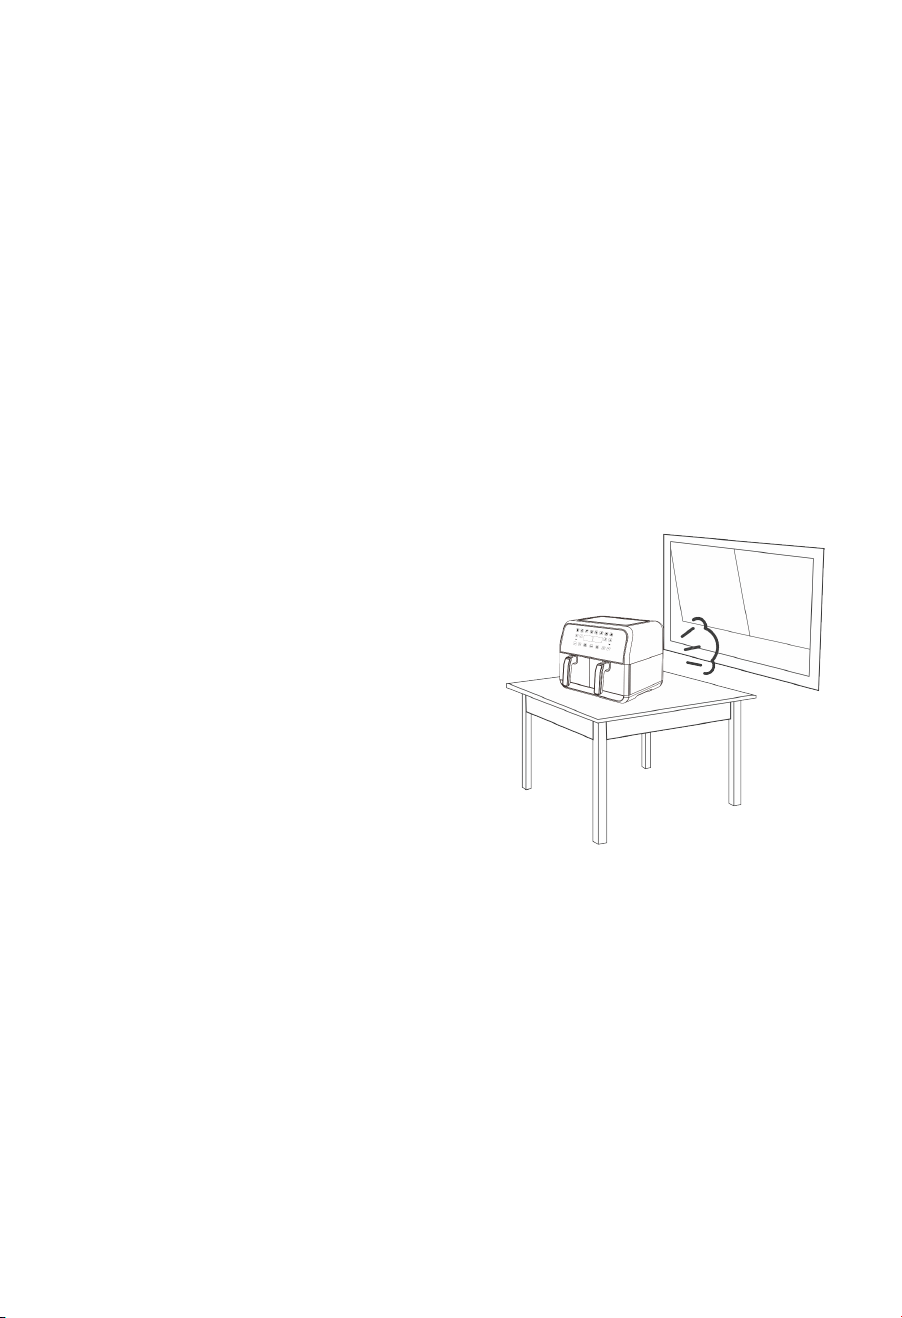
• During the initial use of your Smart Fryer
Oven, it may emit slight smoke or odor,
which is normal for many heating appliances.
To ensure proper ventilation, open a window
or use a fan during this period. Please note
that this does not affect the safety of your
appliance.

---------------------------------------------------------------------
13
lf you want to increase the crispiness of your foods, insert the non-stick plate (C) in the
basket(Fig. 1).
Make sure the baskets are properly inserted and locked before operating
the appliance.
The appliance is equipped with a system that prevents its operation if the baskets
are notproperly inserted in the cooking compartment. The display (B) shows
the word “Pot”.
Each pre-set program has a default cooking time, but it is possible to manually set the
cooking temperature and time:
- Press the TEMP buttons + or - to set the cooking temperature, in intervals of 5°C
- Press the TIME buttons + or - to set the cooking time, in intervals of 1 minute.
When using the appliance for the first time, you may notice the release of a slight
smelland a little smoke: this is to be considered perfectly normal because some parts
have been slightly lubricated, it will stop occurring after a short time. This will have no
effect on the operation of the appliance.
1. Press the right basket control button ( ) or the left one ( ) to enable cooking in
the desired basket.
2. Select the pre-set cooking program, depending on the type of food to cook
(read "Cooking Tips"for details on the programs).
1. Place the food in the basket (F) (Fig. 2). Do not exceed the maximum level. The
maximum levelis indicated by the raised line on the external surface of the
baskets (Fig. 3).
3. Plug the appliance into the power outlet (Fig. 5).
4. Press the ON/OFF button( ) (Fig. 6).
2. Insert the basket in the cooking compartment (G). The correct insertion is done
with a "click" (Fig.4).
Do not fill the basket with oil.
Before Cooking
Single cooking
Warning!
OPREATING INSTRUCTIONS

14
To increase the selection speed, press and hold down the cooking time and
temperature setting buttons.
The appliance can be paused during operation, e.g. to mix the ingredients during the
cooking process.
- Press the start/pause button ( ). The appliance stops the cooking process.
- Shake the basket to cook the ingredients evenly.
- The resume the appliance operation, insert the basket in the cooking compartment.
Press thestart/pause button ( ).
- Press the unlocking button (E) of the basket (F) (Fig. 7). Grab the handle (D) and remove
the basket in use from the cooking compartment (G) (Fig. 8).
Danger of burns. Do not touch the metal parts of the appliance.
When the basket is removed from the cooking compartment, air and hot steam also escape.
Keep your hands and face away from the cooking compartment.
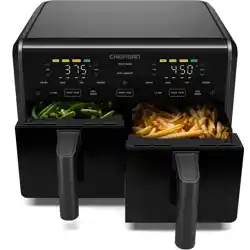
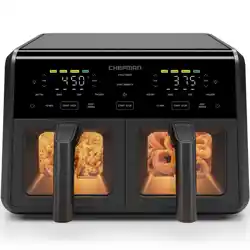
The dual cooking function can be used to cook the same food in both baskets, or to
cook different foods at the same time.
While cooking, the display (B) will alternately show the decreasing time and the set
temperature. To change the time and temperature during the cooking, press the right
basket control button ( ) orthe left one ( ), then press the setting buttons + or - to
select the cooking time or temperature. ltis not necessary to confirm the change, after
a few minutes the change will be effective.
lf you want to cook the same food in both baskets, it is possible to activate the DUAL
COOK function, which will turn the two cooking zones into one, ideal to cook large
quantities of food.
- Press the DUAL COOK button ( ). Select the desired cooking program The symbols of
the right basket control button ( ) and the left one ( ) flash. The settings will be applied
to both baskets.
- Press the start/pause button ( ).
3. Press the start/pause button ( ). The appliance starts to cook food.
- Press the SHAKE button ( ) to activate the sound signal that suggests shaking or
mixing the foods when the appliance reaches 2/3 or 1/2 of the total cooking time.
Dual cooking
Warning!

15
Alternatively, it is possible to cook different foods in the two baskets:
The appliance is equipped with the SYNC FINISH function, to synch the cooking time
when you want to cook different foods in the two baskets. The cooking of the foods will
therefore finish at the same time. To activate the SYNC FINISH function:
If the SYNC FINISH function has been activated and you want to mix the ingredients
while cooking press the start/pause button ( ) to stop both cooking processes.
- To manually stop the cooking process, press the on/off button( )
When cooking is complete, the appliance beeps a few times and the display shows
the word “End”. If the ingredients are not ready, put the basket back in the cooking
compartment and set the timer to a few more minutes.
Do not touch the baskets, the cooking compartment, the non-stick plates and the
internal metal parts of the appliance when the appliance is operational or in the
minutes following its shut-down. Wait for the cooling of hot parts.
1. Press the unlocking button (E) of the basket (F) (Fig. 7). Grab the handle (D) and
remove the basket in use from the cooking compartment (G) (Fig. 8 ).
2. Put the food on a plate. Serve out.
- Select the different cooking settings for the two baskets through the right ( ) and
left ( ) basket control buttons.
- Press the start/pause button ( )
- Press the SYNC FINISH button ( ). The appliance will regulate automatically the
start of the cooking process of the two baskets. The cooking of the foods will finish
at the same time.
Select the cooking settings according to the food placed in each basket.
The cooking settings selected can be different for the two basket.
- Select the cooking settings for the left basket and then for the right basket. Follow the
procedure described in the "Single cooking" paragraph.
After cooking
Warning!

16
This appliance has a timer. When the timer reaches "0" the appliance beeps and
switches off au-tomatically. To turn the appliance off manually, press the on/off
button ( ). The ventilation system stops a few moments later.
Auto-off function
Any oil residue will be collected at the bottom of the basket.
At the end of the cooking process, the appliance can be used immediately to
prepare other food.

---------------------------------------------------------------------
17
The smaller ingredients require a shorter cooking time compared to the bigger ingredients.
A larger amount of ingredients requires a slightly longer preparation time while a
smaller amountrequires a slightly shorter time.
Stirring the smaller ingredients while cooking optimizes the final result and helps to
cook the ingredients evenly.
For a crispier result, add a tablespoon of oil to fresh or frozen potatoes and use the
provided non-stick plates (C).
You can cook in the airy fryer also the snacks that normally you bake.The optimal
amount to make crispy fries is about 1.2-1.7 kg.
PREPARATION TIPS
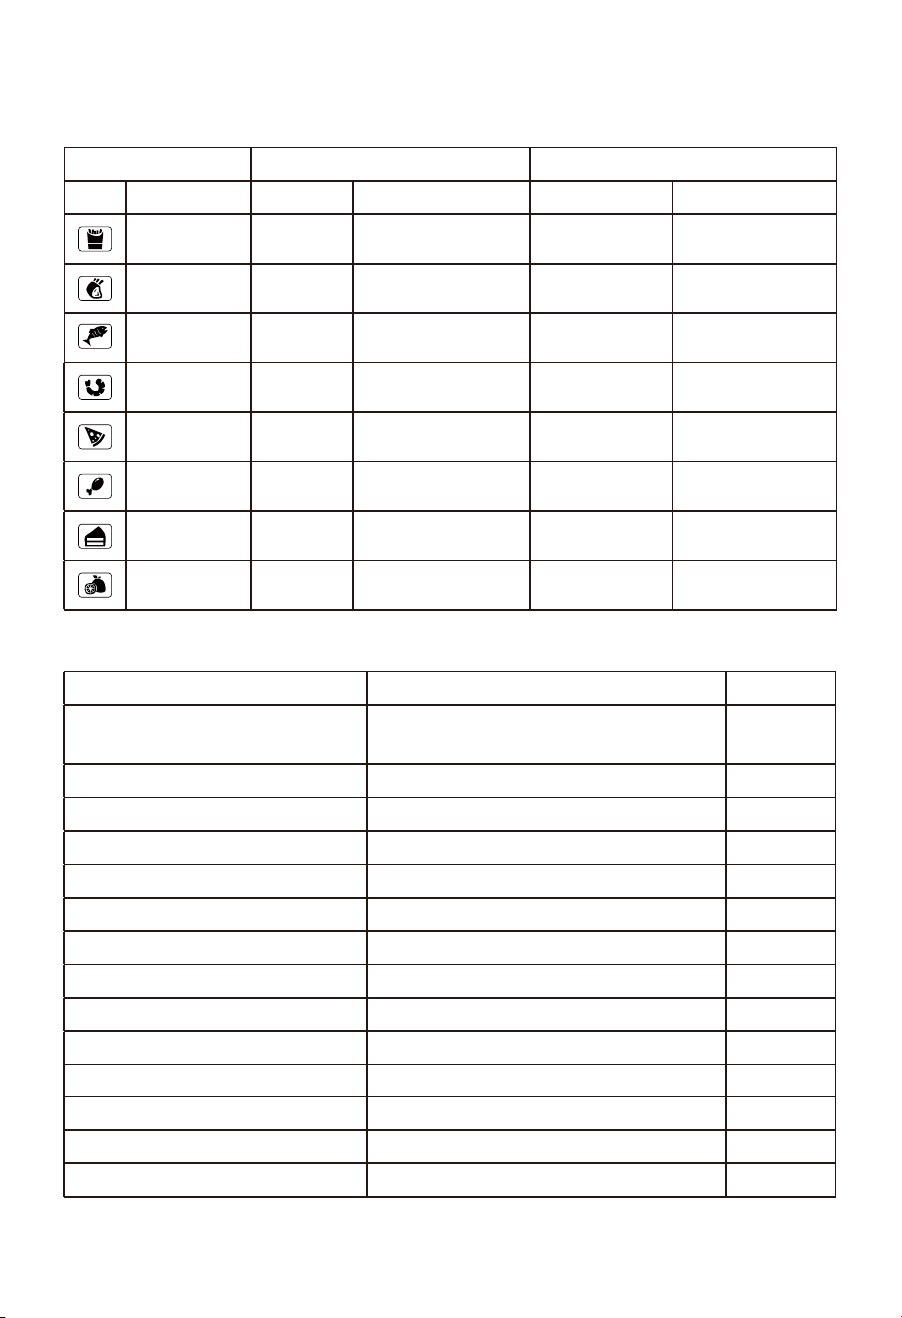
The following table shows the pre set programs available on the touch screen display.
18
The following table shows approximate times and temperatures for different types of food:
Program Temp.(°C)Time
IntervalDefault
Fries
Steak
20/25 min 1-60 min 200 80 - 200
80 - 200
80 - 200
80 - 200
80 - 200
80 - 200
80 - 200
15/20 min
15/20 min
10/10 min
12/12 min
1-60 min 180
Fish 1-60 min 180
Prawn 1-60 min 170
Pizza 1-60 min 150
Drumstick 25/30 min 1-60 min 200
Cake 12/12 min 1-60 min 150
Dehydration 8hrs 1 hr-24 hrs 70 40 - 80
IntervalDefault
Chips (frozen) 15 – 20 minutes 200°C
Fried vegetables 10 – 15 minutes 200°C
Croquettes 12 – 15 minutes 190°C
Chicken nuggets
Chicken legs
10minutes 200°C
20 – 25 minutes 190°C
Steak 10 – 15 minutes 190°C
Meatballs 8 minutes 180°C
Scampi 15 – 20 minutes 160°C
Cake 20 – 30 minutes 160°C
Quiche 25 – 30 minutes 180°C
Pork cutlet 10 – 15 minutes 200°C
Spring rolls 10 – 15 minutes 200°C
Vegetables 10 – 20 minutes 180°C
Fish 15 – 20 minutes
160°~180°C
Chips (fresh)
20 - 30 minutes depending on how the
potato is cut
180°C
200°C
PRE-SET PROGRAMS
---------------------------------------------------------------------
(Single barrel/double barrel) (Single barrel/double barrel)

Each symbol corresponds to a cooking program. The program is set with a
recommended cooking temperature and time based on the type of food. The cooking
time is approximate, it depends alsoon the thickness and the quantity of the
ingredients used. lt is possible to change the time and temperature of the pre-set
cooking programs.
19
To preheat the appliance without ingredients or to reheat foods, press the button for the
fiies ( ) which allows to select a cooking temperature between 60 and 200 °C and a
cooking time between 1 and 60 minutes.
Preheating function
Herbs 40 °C
Vegetables 50-55 °C
Fruit 55-60 °C
Fish/Meat 65-70 °C
From 5 to 15/20
hours
From 2 to 8
hours
The dehydration function ( ) allows to effectively dehydrate foods for optimal storage.
Warm aircirculates freely inside the appliance drying the foods evenly while minimising
the loss of healthy vitamins.
This function can be used to enjoy fruits, vegetables and mushrooms, or to dry flowers
and plants.Before dehydrating, insert the two non-stick plates provided in the baskets.
The following table shows approximate dehydrating times and te mperatures for
different types offood:
The timer can be set up to 24 hours. lf the dehydration requires more time, set the
appliance again at the end of the set time.
Dehydration function
Food
Temperature Time

20
---------------------------------------------------------------------
CLEANING AND MAINTENANCE
Decommissioning
Clean the fixed parts of the appliance using a non-abrasive damp cloth to prevent damaging
the coating. Dry using a dry cloth.
In the case of decommissioning of the appliance, it shall be electrically disconnected. Should
the appliance be disposed of, separate the various materials used in the construction of the
appliance and dispose of them according to their composition and the legal provisions in
force in the country of use.
Clean the cooking compartment with a non-abrasive cloth, soaked in warm water. Dry using
a dry cloth
Clean the resistances with a dry cloth to remove residual of food.
Cleaning the appliance
The non-stick plates and the baskets are made of non-stick material: any opacity
and mark which may appear after prolonged use is normal and does not affect
cooking and food taste.
The non-stick plates and the baskets are dishwasher safe. To extend the life of the non-stick
coating, it is recommended to handwash the non-stick plates (C) and the baskets (F).
Use a common dish detergent and a soft non-abrasive sponge.
To soften the residues of food in the basket, it is possible to fill it with hot water. Add a few
drops of detergent. Let effect for 10 minutes. Wash and dry.
Cleaning the components
Warning
Warning
Warning
Warning
Danger of electric shock. Do not immerse the appliance in water or other liquids.
Unplug the appliance and wait for the hot parts to cool down before carrying out
any cleaning and maintenance operations.
Do not use abrasive cleansers or metal tools to avoid scratching and damaging
the coating.
Never use solvents that damage plastic parts.
Always unplug the appliance before inserting or removing individual components.
Do not fill the baskets with water when they are installed in the cooking compartment.

21
---------------------------------------------------------------------
TROUBLESHOOTING
The appliance does
not work.
The ingredients are
not ready.
The ingredients are not
cooked evenly.
The fried snacks are
not crispy.
The basket cannot be
inserted completely in the
cooking compartment.
The power cord is not
plugged in.
Insert the plug into the power socket,
which must be earthed.
The timer has not been set.
The basket has not
been inserted correctly.
The quantity of ingredientsin
the basket is too big
The set temperature is to low.
The cooking time selectedis
too short.
Some ingredients required to
be stirred several times while
cooking.
You are using snacks that
have to be cooked in a
traditional way.
The quantity of ingredients in
the basket is too big.
The basket has not been
inserted correctly in the
cooking compartment.
Use snacks for the oven or brush the
snacks with oil before putting them in the
basket.
Insert the non-stick plate in the basket to
increase the food crispiness
Put less ingredients in the basket. Small
food quantities are easier to be cooked
evenly.
Properly insert the basket in the cooking
compartment. The correct insertion is
done with a "click" (Fig. 4).
The ingredients on top or that are covered
with other ingredients must be stirred
while cooking.
Press the TIME button and set a
longer cooking time. Refer to the
recipes book
Put less ingredients in the basket.Small
food quantities are easier to be cooked
evenly.
Press the TEMP button and set a higher
cooking temperature. Refer to the recipes
book
Properly insert the basket in the cooking
compartment. The correct insertionis
done with a "click" (Fig. 4).
Press the TIME button and set the
desired cooking time. Press the
startpause button ( ) to start cooking
Problems Possible causes Solutions

22
Problems Possible causes Solutions
White smoke comes out
of the appliance.
Fresh potatoes, cut in
sticks, are not fried
evenly.
The fresh potatoes, cut in
sticks are not crispy
when I take them out
of the fryer.
The ingredients you are
cooking are greasier.
In the basket there are some
residuals of grease left from
the previous cooking.
The type of potatoes used is
not suitable for frying.
Wash and dry the potatoes
before frying them.
The crispiness of the fried
potatoes depends on the
quantity of water contained
in the potatoes and from the
quantity of oil introduced in
the in the fryer.
Make sure to dry the water from the
external parts of the potatoes before you
add the oil.
Cut the potatoes in smaller sticks for more
crispiness
Add a bit more oil for more crispiness
Insert the non-stick plate in the basket to
increase the food crispiness.
Wash the potatoes and remove all the
starch that has deposited on the potatoes.
The white smoke is caused by the
warming of the grease or oil in the basket.
Clean the basket thoroughly after use.
Use fresh potatoes and make sure to mix
them while cooking.
When you fry greasier ingredients more
oil deposits in the container. The oil
produces more white smoke while
cooking. This has no effect on the
preparation of the ingredients or on the
appliance.