Owner’s Manual
Model: 20660-20665
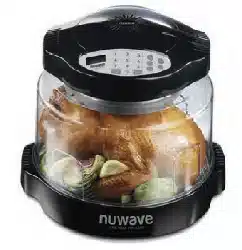
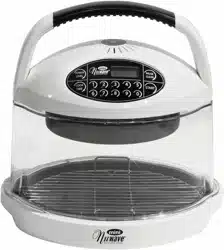
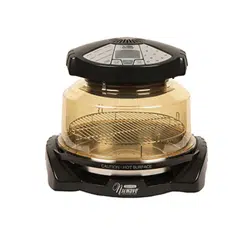
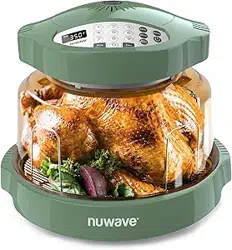
PRO PLUS 2
INFRARED OVEN
TM
Master Your Pro Plus 2
Scan the code to nd recipes,
how-to videos and more!
ALL
*
P
F
A
S
F
R
E
E
*Tested by independent 3rd party lab for 106 known PFAS elements and none were detected.
Customer Service: support@nuwavenow.com
Questions or Concerns?
1-888-502-7805
Mon-Fri 7:30am-4:30pm CST

2 | nuwavenow.com
Register Today!
Use your smartphone or device to scan the QR code located on the back
of your unit to register your product, or visit Nuwavenow.com/register.
Connect with Us!
#Nuwavenow
Visit Nuwavenow.com to see other great products and accessories.
THANK YOU!
Congratulations on your Nuwave® purchase. We know there are many options available
and sincerely appreciate the trust you have placed in us.
For the last 30 years, we have committed to introducing products that promote healthy
living at affordable prices. By combining the highest quality designs with cutting edge
technology, we have always strived to blend feature, function, and innovation into every
product we make. We hope you will agree.

nuwavenow.com | 3
CONTENTS
Meet your Nuwave® Pro Plus 2
TM
Infrared Oven and its unique combination
of conduction, convection and infrared heat that locks in avor, delivers
healthier, tastier results made faster and more efciently than traditional cooking
appliances!
Safeguards & Information ........................................................................... 4-5
Electrical Information ..................................................................................... 5
Parts & Accessories .................................................................................... 6
Ordering Parts ............................................................................................... 6
Assembly Guide .......................................................................................... 7-9
Before First Use............................................................................................. 7
Reversible Rack ............................................................................................ 8
Dome Holder ................................................................................................. 9
Genral Rules ................................................................................................ 10
Control Panel ................................................................................................. 11
Operating Buttons.......................................................................................... 10-12
Care & Maintenance .................................................................................... 13
Protective Grate Removal ............................................................................. 13
Troubleshooting Guide ............................................................................... 14
RoHS Compliant .......................................................................................... 15
Limited Warranty ......................................................................................... 16-18
Notes............................................................................................................. 19

4 | nuwavenow.com
HOUSEHOLD USE ONLY • READ ALL INSTRUCTIONS BEFORE USE
When using electrical products, especially when children are present, basic safety
precautions should always be followed, including the following:
IMPORTANT SAFEGUARDS
1. Read all instructions instructions, safeguards, and warnings before using the
appliance.
2. DO NOT touch hot surfaces. Use handles or knobs.
3. To protect against electrical shock do not immerse cord, plugs, or Power Head in
water or other liquid.
4. Close supervision is necessary when any appliance is used by or near children.
5. Unplug from outlet when not in use and before cleaning. Allow to cool before
putting on or taking off parts.
6. DO NOT operate any appliance with a damaged cord or plug or after the
appliance malfunctions or has been damaged in any manner. Any service MUST
be done by Nuwave LLC or authorized by the manufacturer for repairs.
7. The use of accessory attachments not recommended by the appliance
manufacturer may cause injuries.
8. DO NOT use outdoors.
9. DO NOT let cord hang over edge of table or counter, or touch hot surfaces.
10. DO NOT place on or near a hot gas or electric burner, or in a heated oven.
11. Extreme caution must be used when moving an appliance containing hot oil or
other hot liquids.
12. ALWAYS when disconnecting, turn any control to “off”. Then remove plug from
outlet.
13. DO NOT use appliance for other than intended use.
14. Save these instructions.
ADDITIONAL SAFEGUARDS
1. DO NOT use or operate where aerosol (spray) products are being used or
where oxygen is being admistered.
SAFEGUARDS & INFORMATION
ALWAYS KEEP THIS MANUAL HANDY FOR FUTURE REFERENCE.
When using electrical products, especially when children are present, basic safety
precautions should always be followed, including the following:
2. DO NOT line Pro Plus 2 accessories or base tray with foil or parchment
paper. This could cause the unit to overheat or catch fire.
3. To protect against electric shock, DO NOT immerse cord, plugs, or the
powerhead in water or other liquid.

nuwavenow.com | 5
Electrical Information:
The cord length of this appliance was selected to reduce Safety Hazards that may
occur with a long cord. Extension cords are available and may be used if care is
exercised in their use. If an extension cord is used: (1) the marked electrical rating
of the extension cord should be at least as great as the electrical rating of the
appliance, and (2) the longer cord should be arranged so that it does not drape over
the counter or table top where it could be accidentally pulled off the counter or table
or tripped over.
Certain models of the appliance may have a polarized plug (one blade is wider
than the other). This plug is intended to fit into a polarized outlet only one way.
if the plug does not fit fully into the outlet, reverse the plug. If it still does not fit
properly, contact a qualified electrician. DO NOT attempt to modify the plug in
any way.
• Always wear oven mitts or use pot holders.
• Allow Liner Pan and Cooking Rack to cool completely before cleaning.
HOUSEHOLD USE ONLY • READ ALL INSTRUCTIONS BEFORE USE
SAFEGUARDS & INFORMATION
ALWAYS KEEP THIS MANUAL HANDY FOR FUTURE REFERENCE.

6 | nuwavenow.com
Power Dome
Part #: 22069
Dome Holder
Part #: PMA7
1-inch and 3-inch
Reversible Rack
Part #: 22070
Liner Pan
Part #: 26010
PARTS & ACCESSORIES
ORDERING PARTS
Need a new part or accessory? We have you covered! Simply visit nuwavenow.com
or contact Customer Service to order the part you need.
Power Head
Black PA1 Cozy Blue PP4
Cool Gray PA2 Mint PA5
Deep Blue PA3 Army Green PA6
Base Tray
Black PP7 Cozy Blue PP10
Cool Gray PP8 Mint PP11
Deep Blue PP9 Army Green PP12

nuwavenow.com | 7
BEFORE FIRST USE:
• Remove all packaging
materials, including labels
and protective plastic from
the display panel and center
top of the power head.
• Wash the Power Dome,
Liner Pan, and Base Tray in
warm soapy water or in the
dishwasher. Dry thoroughly.
IMPORTANT - DO NOT wash
or immerse Power Head
in water or cycle through
dishwasher. The outer
surface may be cleaned by
wiping carefully with a damp
dishcloth or sponge.
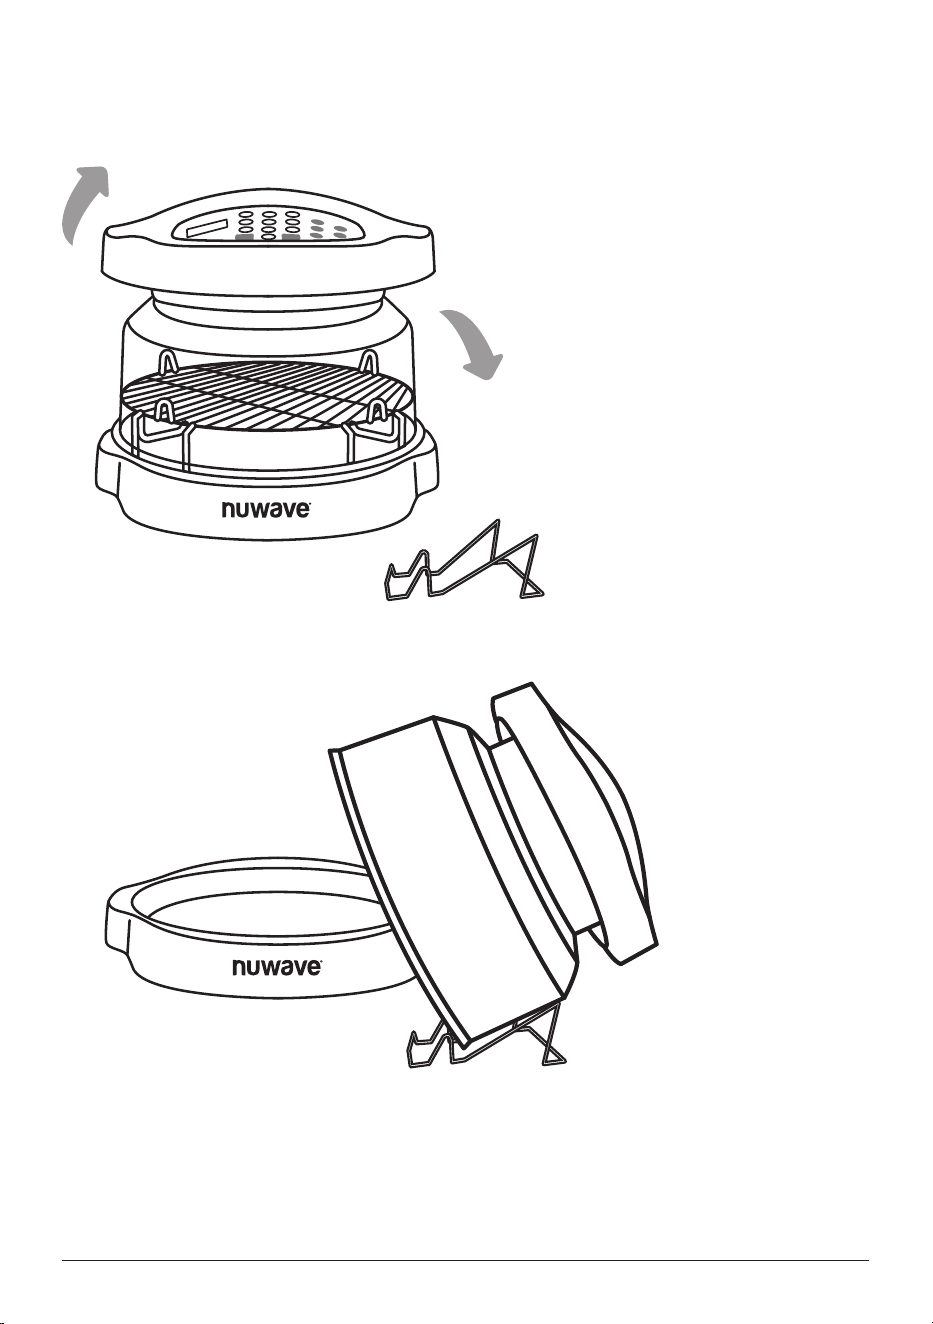
ASSEMBLY:
1. Place Base Tray on a firm,
stable surface, but never on a
stovetop.
2. Place Liner Pan inside Base
Tray. Be sure the handles are
in the dropped down position.
If not, the Power Dome may
not fit over the Base properly.
3. Place Reversible Cooking
Rack on the Liner Pan.
4. Place the Power Dome over
the Cooking Rack, Liner Pan
and Base Tray.
5. Place Power Head on rim of
the Dome.
6. Lock it into place by rotating
the Power Head clockwise
until the locking lugs are
engaged.
Power Head
Power Dome
Reversible Rack
Base Tray
Liner Pan
ASSEMBLY GUIDE
1
2
3
4
6
5
8 | nuwavenow.com
ASSEMBLY GUIDE
Base Tray
Liner Pan
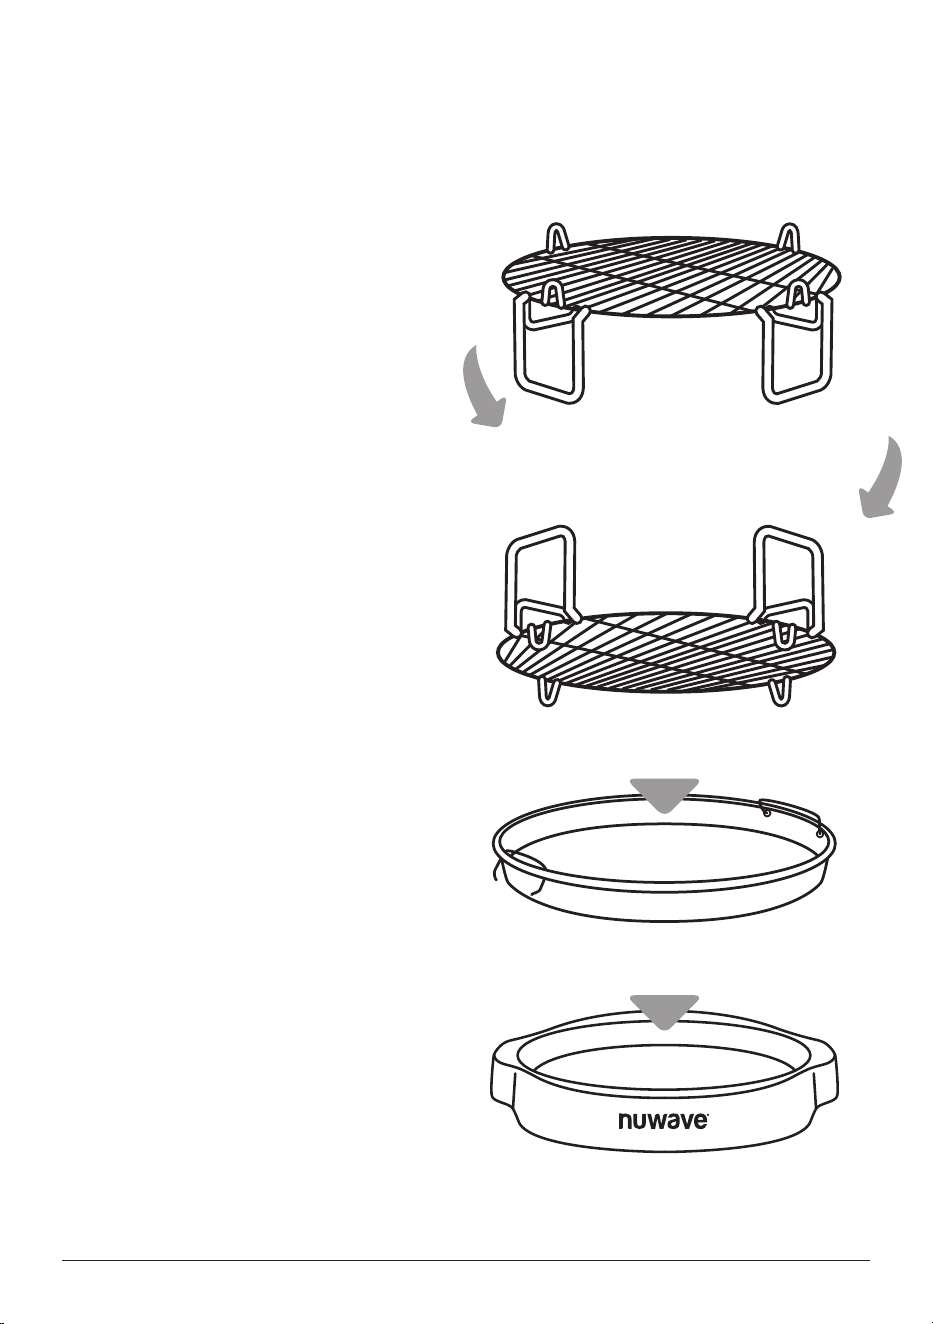
3-inch Rack Configuration
Turn the Reversible Rack over to
switch between 3-inch and 1-inch
heights.
1-inch Rack Configuration
To increase or decrease the height at which you are cooking your food, select
and ip the Reversible Rack to the corrseponding 3-inch or 1-inch side.
1. Place the Liner Pan inside the
Base Tray. Be sure the handles
are fully dropped.
2. Add the Reversible Rack to the
Liner Pan to the height needed for
your recipe.
REVERSIBLE RACK
Note:
• Exercise caution when handling the
Reversible Rack after cooking. Use
oven mitts or wait for the Cooking
Rack to cool before flipping.
• DO NOT USE the pro Plus without
the Liner Pan fully attached to the
Base Tray.
nuwavenow.com | 9
ASSEMBLY GUIDE
Note:
• DO NOT set the Dome Holder near the edge of the counter.
• DO NOT leave Dome in Dome Holder for an extended period of time.
1. Set the Dome Holder next to
the Pro Plus 2 unit.
2. Make sure the Power Head is
tightly locked onto the Dome.
3. Using the handles on the
power head, place the dome
into the groove to rest at a 45°
angle on the dome holder as
shown in the picture.
Place on a 45° angle
DOME HOLDER
Setup Instructions
10 | nuwavenow.com
GENERAL RULES
OPERATING 2-KEY BUTTONS
Mute: Turns off all beeping.
1. Press and hold DELAY + REHEAT
for 2 seconds.
2. You will hear 2 beeps.
3. Repeat to unmute.
Lock: Disables the control panel when
in use or not in use to prevent accidental
button selections.
1. Press and hold START/PAUSE and
DELAY for 2 seconds.
2. You will hear 2 beeps, and LOC will
display.
3. Repeat to unlock.
• Can use the to unlock and will
end the cooking cycle.
2-KEY BUTTONS
GENERAL RULES
• While cooking, the dome must be placed completely level to the Base Tray.
• DO NOT tilt the Dome or leave the dome open while in use.
• To avoid moisture/steam build up inside the oven, remove food when done.
• To keep cooked food warm set at a low temperature.
• Only lift Dome by the handles on the Power Head.
• When removing Liner Pan after cooking, be extremely careful and always use
oven mitts.
• Use only oven-safe dishes for cooking, same as in a conventional oven may be
used in the Nuwave® Pro Plus 2 Oven™.
• For even cooking, flip or turn food halfway through the cooking.
• Place foods that require the longest cooking time on the 3-inch reversible rack
side, closest to the heating element (ex. potatoes, carrots), and place soft
vegetables on the lower 1-inch side (ex. mushrooms, tomatoes).
• When choosing the multi-level cooking option, can choose food combinations
that take about or different times (the food that cooks the least amount of time,
put on the top rack).
• If top layer foods finish cooking first, remove them and continue cooking bottom
foods in liner pan until done.
• To warm bread, place it on the 1-inch side of the reversible rack or Liner Pan
and cover. To bake bread, place bread on the 3-inch reversible rack side.
For best results, follow the time, temperature, and Cooking Rack height in
the instructions provided in the cooking chart and recipe book.

nuwavenow.com | 11
50°F ~ 320°F 99:59 (99 hours and 59 minutes)
325°F ~ 350°F 2:00 (2 hours)
The maximum selectable cooking time differs depending on the selected
cooking temperature.
CAUTION
DO NOT open the Power Dome or remove the Power Head while the
Nuwave Oven is operating. Turn off the power before removal.
CONTROL PANEL
Temp: The default cooking temperature
is 350°F.
1. To change the temperature, press
TEMP and select any temperature
between 50°F and 350°F using the
keypad.
Start/Pause: Press START/PAUSE to
begin cooking. Press again to pause
cooking.
Note: While paused, the programmed
cooking settings will be saved until you
resume cooking. These can be cleared
by turning off the unit.
Press to turn the unit off and on. Turning the unit off will also cancel the
current cooking function.
OPERATING BUTTONS
• If using at the max temperature at the max time, allow 30 minutes for the
Power Head to cool down before using again.
• If the time entered is above the maximum time for the set temperature range,
the unit will display and operate at the maximum time allowed.
NuWave Pro Plus 2 Black Control Panel - Graphic
09-22-23-JD
Menu
12 | nuwavenow.com
Menu: There are 100 pre-programmed
Menu Presets and 50 User Presets.
Presets are listed in the Quick Start
Guide and Recipe Book.
1. Press MENU, then enter your preset
# using the keypad.
2. Press START/PAUSE to begin
cooking.
• Temperatures and time can be
adjusted before and during the
cooking process,. but will not
automatically be saved.
Saving User Presets #101-150:
Create your own recipe or adjust one of
the existing 100 Menu Presets.
1. Set your desired cooking
temperature and time.
2. Use the keypad to select the slot
number (#101-150) for your custom
recipe.
3. Press and hold MENU until “Save”
is shown on the display to save your
recipe.
• A recipe can be saved before,
during, or after the cooking cycle.
Time: The default cooking time is 15
minutes.
1. Press TIME, then enter the cooking
time in hours and minutes
2. Can adjust time before and during
the cooking. When done, will beep
3 times and “End” will be shown on
the display.
Minutes/Seconds Conversion:
1. Press and hold TIME for 4 seconds.
You will hear 2 beeps and 15:00sec
will be displayed.
2. Repeat to change back to hours and
minutes.
• Your selected time mode will remain
in place even if the unit is powered
off or unplugged
°F/°C Conversion:
1. Press and hold TEMP for 4 seconds
until 2 beeps are heard, and “177C”
is displayed.
2. Repeat to switch back to Fahrenheit.
Note:
• When switching temperature modes,
the Oven will always display the
default temperature of 350°F or
177°C.
• Your selected temperature mode will
remain in place even if the unit is
powered off or unplugged.
OPERATING BUTTONS
Reheat: The default temperature and
time are 350°F for 4 minutes.
Press Reheat, then press START/
PAUSE to begin cooking.
Delay: You can delay the start of your
programmed cooking function.
1. Set the cooking temperature and
time.
2. Press DELAY, DLY will be shown on
the display. Enter the time you want to
delay cooking in hours and minutes.
Hour: Min 1st Press 2nd Press 3rd Press
01:30 1 3 0
00:20 2 0 -
00:05
5 - -
Example:
nuwavenow.com | 13
Dishwasher-safe, top rack only parts are: the Power Dome, Reversible Rack,
Liner Pan, and Base Tray. They can also be cleaned with warm soapy water.
• Allow the oven to cool completely
• Always unplug the Oven from the electrical outlet before cleaning.
• NEVER clean the unit while it is plugged in.
• Allow the Oven to cool completely before cleaning.
• DO NOT use any abrasive, harsh brushes, or steel pads on any part of the
Pro Plus 2.
• DO NOT immerse the Power Head in water or wash in the dishwasher.
CARE & MAINTENANCE
Unscrew here
Protective Grate Removal
To clean the protective grate on the underside of the Power Head, unscrew the
single corner screw and carefully push in then lift the grate to remove. Clean the
grate with warm soapy water and dry completely before reinserting into the Power
Head. Be sure the corner screw is completely tightened.
Protective Grate
Underside of Power Head
DO NOT touch or clean the fans.
DO NOT remove the heaters.
NEVER clean the unit while it is plugged
in. Allow the oven to cool completely
before cleaning.
DO NOT wash the Power Head in the
dishwasher or immerse in water.
DO NOT use any abrasive, harsh
brushes, or stainless steel pads, to
clean any of the Pro Plus 2 parts.
3. Press START/PAUSE to begin the delayed cooking process.
• The delay time can be changed at any time.
• The temperature cannot be changed while the delay function is active.
14 | nuwavenow.com
Error Message: Solution(s):
Err1 The unit circuit is short. Contact Custome Service.
Err2 The unit circuit is open. Contact Customer Service.
Error Solution(s):
Unit does not turn on
1. Check the plug is properly inserted into the outlet.
2. Press the Power icon.
Food is not cooked
evenly
1. Check the food periodically during the cooking process.
2. Halfway through cooking turn or flip the food.
The unit is not heating
1. Check the unit is plugged into an outlet.
2. Take out the plug, and plug the unit back into the outlet.
3. Be sure the unit is turned on.
4. Press the Power icon.
5. Check the temperature setting. Be sure the temperature is
set for the recipe being used.
* If the unit continues not to heat contact Customer Service.
The unit has moisture
or steam
1. Check that the power dome is properly set onto the base
tray.
2. Cooking has completed and the food has not been removed.
TROUBLESHOOTING GUIDE
See table below for when any error messages are displayed.
Error Messages
WARNING
DO NOT place the unit on or near a hot
gas burner, electric burner, or in a heated
oven or on a stovetop.
NOTICE
It is perfectly normal for your new unit
to produce a heated plastic smell when
used for the rst time. This will go away
after the rst few uses.
For further assistance, please contact Nuwave’s Customer Service Department:
support@nuwavenow.com
nuwavenow.com | 15
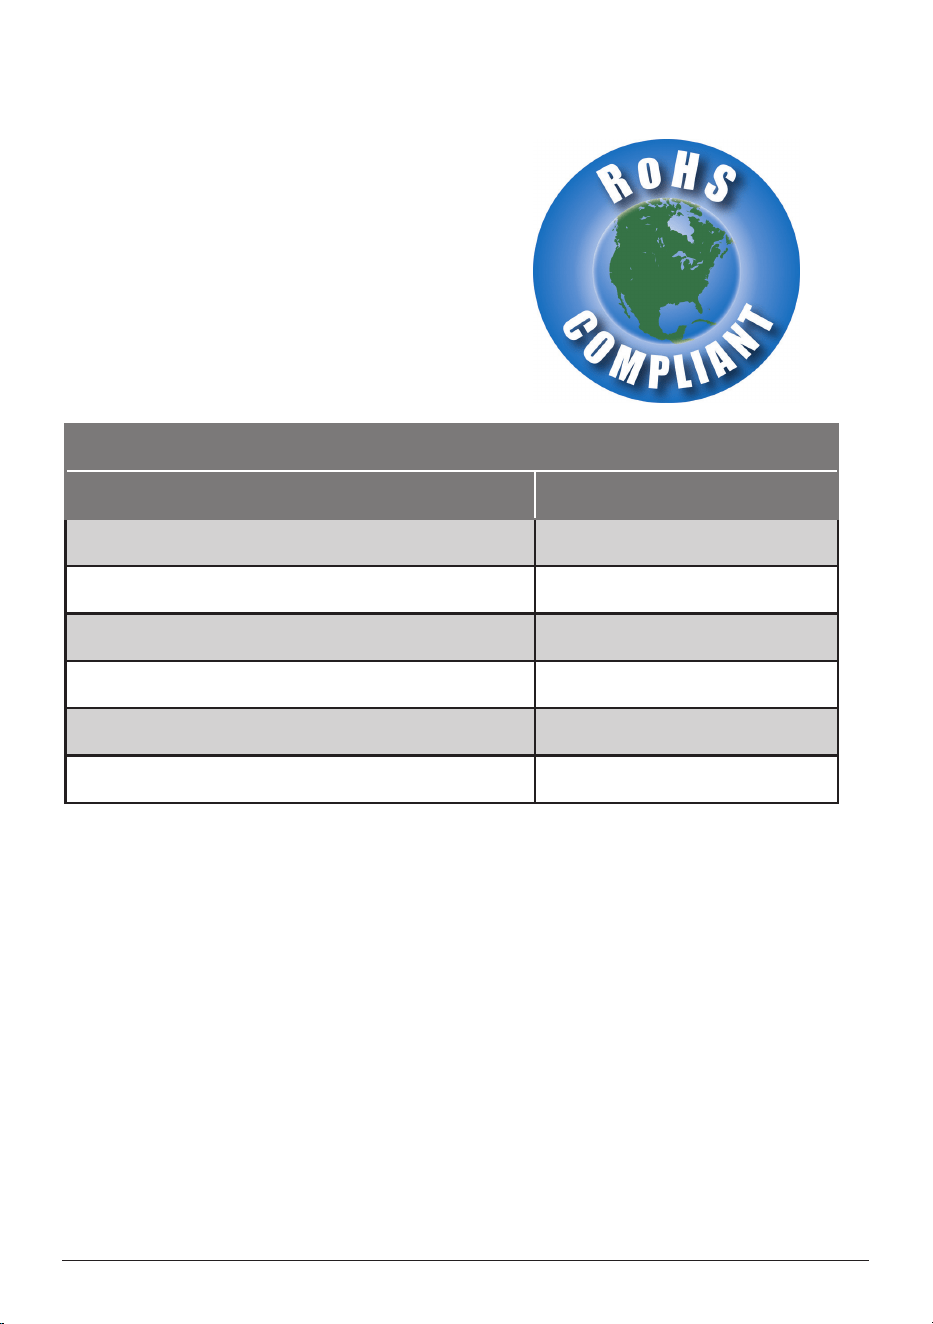
*RoHS stands for “The Restriction Of the use of certain Hazardous Substances in
electrical and electronic equipment”.
If you want to find out more about the RoHS Directive, please visit
www.rohsguide.com/rohs-faq.htm
At Nuwave LLC, we have taken a great
amount of care in ensuring that our products
are safe and secure for every household. All
Nuwave Ovens are built and manufactured
in strict compliance with RoHS* standards.
Although US manufacturers are not bound
by law to follow RoHS standards, Nuwave
LLC has made a conscious decision to
voluntarily follow this directive to preserve
the safety of its consumers and the quality
of our environment.
RoHS Restricted Materials
Material & Toxicological Prole Maximum Concentration
Lead (Pb) 0.1% by weight
Mercury (Hg) 0.1% by weight
Cadmium (Cd) 0.01% by weight
Hexavalent Chromium (Cr-VI) 0.1% by weight
Polybrominated Biphenyls (PPB) 0.1% by weight
Polybrominated Diphenyl Ethers (PBDE) 0.1% by weight
LIMITED WARRANTY

16 | nuwavenow.com
THE MANUFACTURER WARRANTS
Nuwave, LLC warrants that the Nuwave® Pro Plus 2
TM
Infrared Oven will be free from
manufacturer defects for 1 year from the date of purchase, under normal household
use, and when operated in accordance with the Manufacturer’s written instructions This
Limited Warranty covers for the Original Purchaser only. The Manufacturer will provide the
necessary parts and labor to repair the product at the Nuwave LLC Service Department.
After the expiration of the warranty, the cost of the parts and labor will be the responsibility
of the owner.
THE WARRANTY DOES NOT COVER
The Limited Warranty is voided if repairs are made by an unauthorized dealer, or the
serial number data plate is removed or defaced. Normal deterioration of nish due to use
or exposure is not covered by this Warranty. This Limited Warranty does not cover failure,
damages or inadequate performance due to accident, acts of God (such as lightning),
uctuations in electric power, alterations, abuse, misuse, misapplications, corrosive-
type atmospheres, improper installation, failure to operate in accordance with the
Manufacturer’s written instructions, abnormal use, commercial or rental uses, or resold
units. Nuwave LLC reserves the right to void the Limited Warranty, where allowable by
law, for products purchased from an unauthorized dealer.
TO OBTAIN SERVICE
The owner shall have the obligation and responsibility to pay for all services and parts not
covered by the warranty; prepay the freight to and from Service Department for any part
or system returned under this warranty; and carefully package the product using adequate
padding material to prevent damage in transit. The original container is ideal for this
purpose. Include in the package the owner’s name, address, daytime telephone number,
a detailed description of the problem, and RGA (Return Goods authorization number). To
obtain the RGA number, email us at: support@nuwavenow.com
Provide the product model & serial number and proof of date of purchase (a copy of the
receipt) when making claims under this warranty.
MANUFACTURER’S OBLIGATION
The Manufacturer’s obligation under this Limited Warranty is limited, to the extent
allowable by law, to repairing or replacing any part covered by this Limited Warranty
which upon examination is found to be defective under normal use. The Limited
Warranty is applicable only within the continental United States and only to the original
purchaser of the manufacturer’s authorized channels of distribution.THE LIMITED
WARRANTY MAY NOT BE ALTERED, VARIED OR EXTENDED EXCEPT BY A
WRITTEN INSTRUMENT EXECUTED BY THE MANUFACTURER. THE REMEDY OF
REPAIR OR REPLACEMENT AS PROVIDED UNDER THIS LIMITED WARRANTY IS
EXCLUSIVE. IN NO EVENT SHALL THE MANUFACTURER BE LIABLE FOR ANY
CONSEQUENTIAL OR INCIDENTAL DAMAGES TO ANY PERSON, WHETHER OR
NOT OCCASIONED BY NEGLIGENCE OF THE MANUFACTURER, INCLUDING
WITHOUT LIMITATION, DAMAGES FOR LOSS OF USE, COSTS OF SUBSTITUTION,
PROPERTY DAMAGE, OR OTHER MONEY LOSS.
Some states do not allow the exclusion or limitation of incidental or consequential
LIMITED WARRANTY

nuwavenow.com | 17
damages, so the above limitation exclusions may not apply. This Limited Warranty gives
specic legal rights, and there may also be other rights which vary from state to state.
EXCEPT AS OTHERWISE EXPRESSLY PROVIDED ABOVE, THE MANUFACTURER
MAKES NO WARRANTIES EXPRESSED OR IMPLIED ARISING BY LAW OR
OTHERWISE, INCLUDING WITHOUT LIMITATION, THE IMPLIED WARRANTIES OF
MERCHANTABILITY AND FITNESS FOR A PARTICULAR PURPOSE TO ANY OTHER
PERSON. READ YOUR OWNER’S MANUAL. IF YOU STILL HAVE ANY QUESTIONS
ABOUT OPERATION OR WARRANTY OF THE PRODUCT, PLEASE CONTACT Nuwave
LLC.
DISPUTE RESOLUTION PROCEDURE
For disputes relating to use of the website or use or purchase of a Nuwave product
or service (collectively “Disputes”), you agree to rst contact Nuwave LLC at legal@
nuwavenow.com. If we cannot resolve your dispute informally, any and all disputes shall
be submitted to nal and binding arbitration. You may start the arbitration process by
submitting in writing a demand to the American Arbitration Association (“AAA”) and sending
a copy to Nuwave. Nuwave will pay all ling costs. A single arbitrator of the AAA will
conduct the arbitration in a location convenient to you or by phone. The arbitrator’s award
will be binding and may be entered as a judgment in a court of competent jurisdiction.
The arbitration will be conducted in accordance with the provisions of AAA’s Commercial
Arbitration Rules and Mediation Procedures in effect at the time of submission of your
demand for arbitration. See https://www.adr.org/sites/default/les/CommercialRules_Web.
pdf. Except as may be required by law as determined by an arbitrator, no party or arbitrator
may disclose the existence, content, or results of any arbitration hereunder without prior
written consent of both parties.
A. WAIVER OF RIGHT TO SUE. By agreeing to arbitration, you understand that, to the
maximum extent permitted by law, you are agreeing to waive your right to le suit in any
court, to a court hearing, a judge trial, or a jury trial.
B. CLASS ACTION WAIVER. To the maximum extent permitted by law, you expressly
agree to refrain from bringing or joining any claims in any representative or class-wide
capacity, including but not limited to, bringing or joining any claims in any class action or
class-wide arbitration.
C. OPT OUT PROCEDURE. To request to opt out of arbitration you must contact
Nuwave LLC at legal@nuwavenow.com, Nuwave LLC, 560 Bunker Ct., Vernon Hills, IL
60061, U.S.A. You will have thirty (30) days from the date of product delivery to opt out
of arbitration with respect to any dispute arising out of or relating to use or purchase of
any Nuwave product. If more than 30 days have passed, you are not eligible to opt out
of arbitration and will have waived your right to sue or participate in a class action with
respect to the dispute arising out of your purchase or use of a Nuwave product. For any
dispute arising out of your use of Nuwave’s website, you have thirty (30) days from the
date you provided information to the website to opt out of arbitration. If more than 30 days
have passed, you are not eligible to opt out of arbitration and you will have waived your
right to sue and participate in a class action with respect to the dispute arising out of your
use of Nuwave’s website.
D. SOME MATTERS ARE NOT SUBJECT TO ARBITRATION. Not withstanding the
LIMITED WARRANTY

18 | nuwavenow.com
LIMITED WARRANTY
foregoing, the following shall not be subject to arbitration and may be adjudicated only in
the state and federal courts of Illinois: (i) any dispute, controversy, or claim relating to or
contesting the validity of our intellectual property rights and proprietary rights, including
without limitation, patents, trademarks, service marks, copyrights, or trade secrets; (ii)
an action by a party for temporary, preliminary, or permanent injunctive relief, whether
prohibitive or mandatory, or other provisional relief; or (iii) interactions with governmental
and regulatory authorities. You expressly agree to refrain from bringing or joining any
claims in any representative or class-wide capacity, including but not limited to, bringing or
joining any claims in any class action or any class-wide arbitration.
Para la versión en español de este manual,
visita www.nuwavenow.com.

nuwavenow.com | 19
NOTES
NOTES
Item No: BM20660
V1-YK
06-20-24
FOR HOUSEHOLD USE ONLY
120V, 60Hz, 1500 Watts
For patent information please go to:
www.nuwavenow.com/legal/patent
Designed & Developed in USA
Nuwave LLC
560 Bunker Ct.
Vernon Hills, IL 60061, U.S.A.
Made in China
©2024 Nuwave LLC • All Rights Reserved.
Model:
20660-20665
PRO PLUS 2
INFRARED OVEN
TM
Master Your Pro Plus 2
Scan the code to nd recipes,
how-to videos and more!
www.nuwavenow.com
Customer Service: support@nuwavenow.com
Questions or Concerns?
1-888-502-7805
Mon-Fri 7:30am-4:30pm CST