1
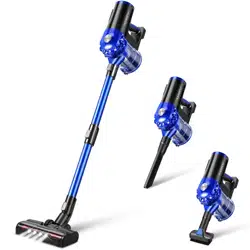
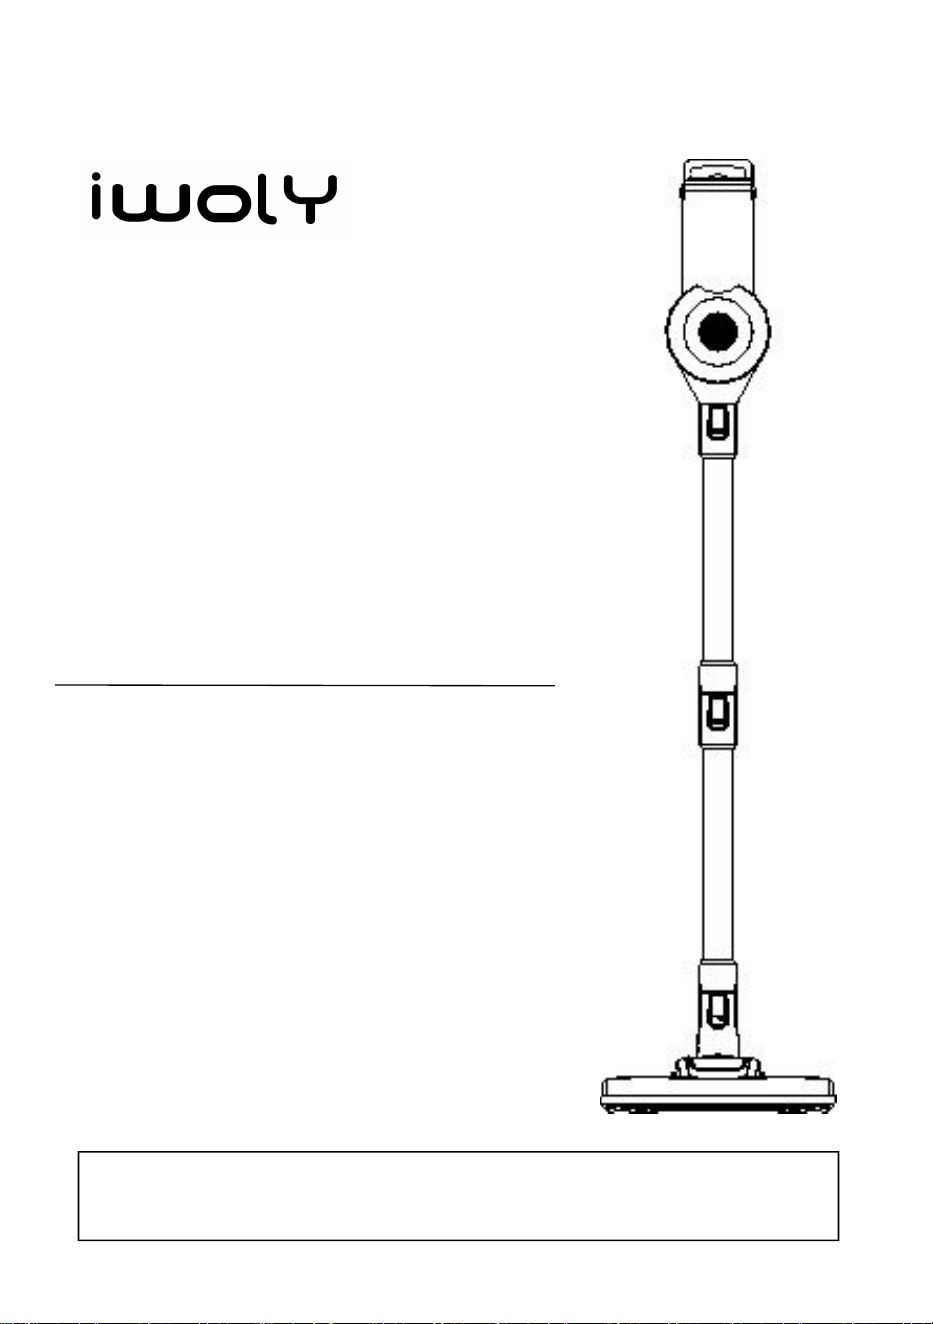
Cordless Vacuum Cleaner
C150
OWNER’S GUIDE
Email:support@iwolyhome.com
Website: www.iwolyhome.com


1
CONTENTS
1. IMPORTANT SAFETY INSTRUCTIONS
.........................................................
About Vacuum Cleaner
...........................................................................................
About Battery
............................................................................................................
About Charger
..........................................................................................................
2. ILLUSTRATION (PART NAME)
.........................................................................
3. TECHNICAL PARAMETERS
.............................................................................
Cleaner Parameter
...................................................................................................
Charger Parameter
..................................................................................................
Battery Parameter
....................................................................................................
4. ATTACHED ACCESSORIES
.............................................................................
5. ASSEMBLY INSTRUCTION
..............................................................................
6. CLEANING AND MAINTENANCE
....................................................................
7. REPLACE THE BATTERY PACK
.....................................................................
8. PROBLEM-SOLVING
.........................................................................................
9. ONE-YEAR LIMITED WARRANTY
..................................................................
What is covered in my warranty?
..........................................................................
What is not covered in my warranty?
...................................................................
How to get service?
............................................................................................. 2
0

2
1. IMPORTANT SAFETY INSTRUCTIONS
When using an electrical appliance,
basic precautions should always be followed, including the followin
g:
READ ALL INSTRUCTIONS
BEFORE USING (THIS APPLIANCE)
WARNING- To reduce the risk of fire, electric shock, or injury:
About Vacuum Cleaner
1. This product is for home use only; it’s not for any professional or
commercial use!
2. Any damage/consequence caused by improper use or use without
following this instruction is not covered by warranty.
3. This product cannot be used by persons (including children) with
reduced physical, sensory or mental capabilities or lack of experience
and knowledge unless they have been given supervision or instruction
concerning the use of the appliance in a safe way and understand the
hazards involved.
4. Please keep the instruction manual, warranty card, invoice, package,
and so on for future use or storage, or repair.
5. Please check carefully whether every part is in good condition upon
opening the box, please do not use the product and contact the dealer
or service immediately if anything is found missing or broken.
6. Please make sure all parts are assembled correctly. Do not use this
product without filtration.
7. Do not handle the appliance with wet hands.
8. This product is not a toy, please store this product far away from the
reach of children. Special attention shall be made when children are
playing around.
9. Please never use this product to vacuum any liquid, heat temperature
substance, very fine substance (E.g. sawdust, plaster powder, cement,
ash, carbon powder), sharp substance (E.g. glass, staple), and

3
hazardous substance (E.g. detergent, solvent), chemical substance
(E.g. Acid), flammable substance (petrol, alcohol), Etc.
10. Do not use to pick up flammable or combustible liquids, such as
gasoline, or use in areas where they may be present.
11. Do not have the product immersed in the water, do not leave or use the
product outside of the house!
12. Do not try disassembling or repairing this product/charger yourself,
please call professionals for any repair or replacement with the original
parts/unit.
13. Do not put any objects into openings. Do not use any opening blocked;
keep free of dust, lint, hair, and anything that may reduce airflow.
14. Keep hair, loose clothing, fingers, and all parts of the body away from
openings and moving parts.
15. Use extra care when cleaning on stairs.
16. Please cut off the power before you clean the product, please always
use a dry or slightly wet soft cloth, and do not use alcohol, benzene,
Etc.
17. The appliance employs an automatic thermal limiter which will cut off
the power automatically when the appliance overheats. When the
thermal limiter shuts off the appliance automatically, do not switch on
the appliance after the appliance cools naturally for at least 45
minutes.
18. This product can’t stand itself, please apply the product body onto the
holder.
19. Store the appliance in a cool place when not in use.
20. For repairs or accessories. Contact customer service for help.
About Battery
21. Do not try disassembling the battery.
22. Do not place the battery on a metal surface or near heat sources. Do
not put the battery on fire.
23. Do not charge the battery outdoors.
24. Do not place the battery in a high place to charge to avoid falling and

4
hurting.
25. Please charge the battery far away from the reach of children. Special
attention shall be made when children are playing around.
26. Do not turn on the product and do not try removing the battery during
its charging!
27. Only within 0
0
C--45
0
C can charge be allowed, overheating or over cold
could prolong the charging time or even damage the battery.
28. Normal charging takes 4-5 hours, please charge fully and use the
product until the battery is fully discharged 1-3 times when you initiate
using it so that the battery can be fully activated.
29. If this product will not be used for a long time, please charge and
discharge the battery once every 3 months.
30. Please make sure that products can no longer be used before you
discard them, the battery pack must be removed from the product for
further safe recycle disposal.
About Charger
31. Please make sure the local power (V) falls within the power range
indicated on the charger.
32. The charger should be connected to a correctly-earthed power socket.
33. Charger shall be placed on a dry surface, do not leave it unattended
during charging.
34. Please hold the plug instead of the cord to pull the charger out from the
socket, the cord shall stay away from heat sources. Do not touch the
charger with a wet hand.
35. Do not leave the appliance when plugged in. Unplug from the outlet
when not in use and before servicing.
36. Do not use it outdoors or on wet surfaces.
37. Do not handle the plug with wet hands.
38. Do not allow it to be used as a toy. Close attention is necessary when
used by or near children.
39. Use only as described in this manual. Use only the manufacturer's
recommended attachments.

5
40. Do not use with damaged cord or plug. If the appliance is not working
as it should, has been dropped, damaged, left outdoors, or dropped
into water, return it to a service center.
41. Do not pull or carry by cord, use the cord as a handle, close a door on
the cord, or pull the cord around sharp edges or corners. Do not run
the appliance over the cord. Keep the cord away from heated surfaces.
42. Do not unplug by pulling on the cord. To unplug, grasp the plug, not the
cord.
43. Turn off all controls before unplugging.
SAVE THESE INSTRUCTIONS
6
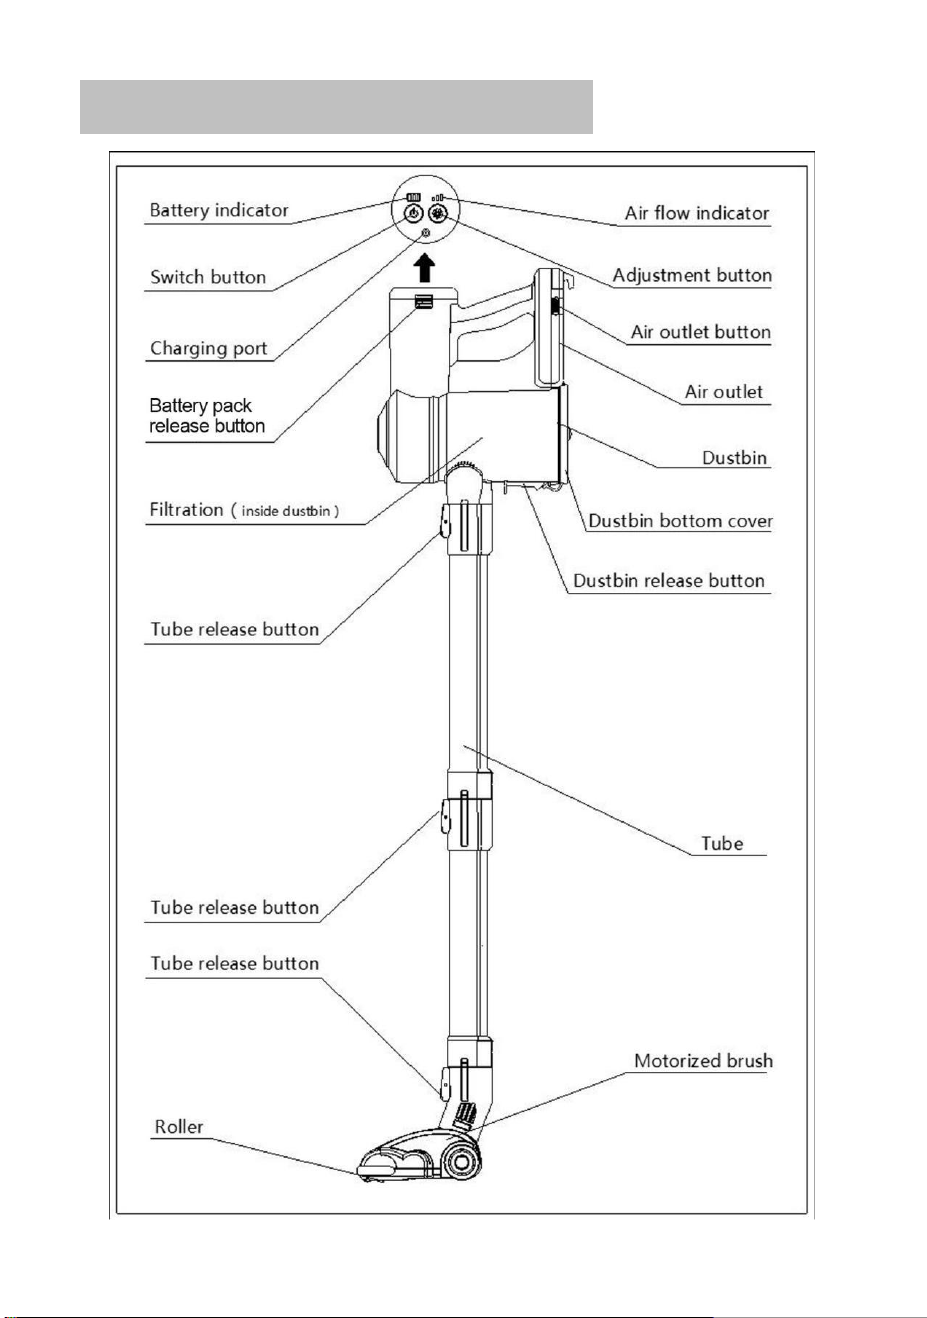
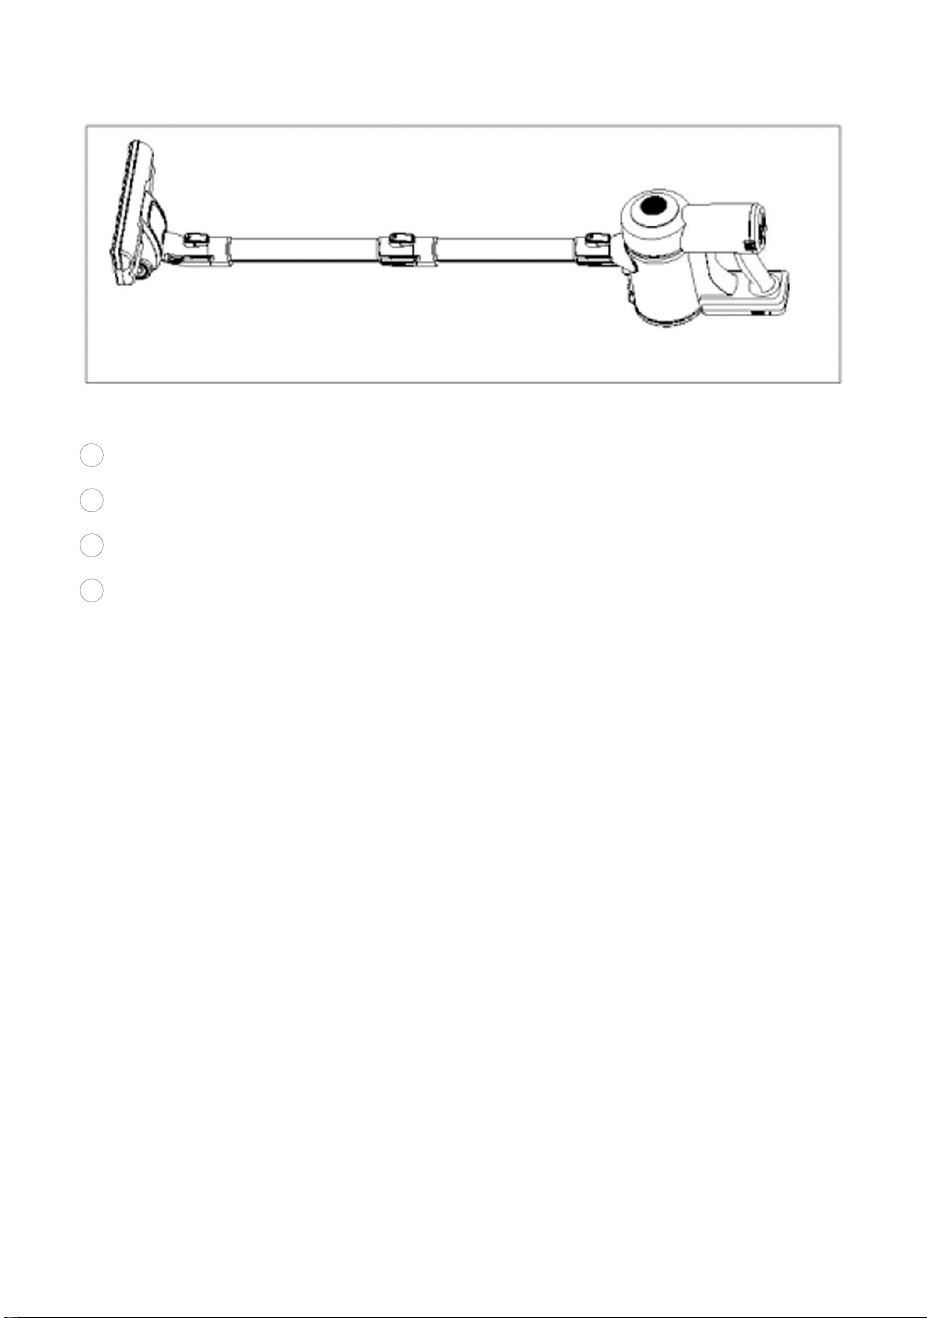
2. ILLUSTRATION (PART NAME)
7
3. TECHNICAL PARAMETERS
Cleaner parameter
Model name:Cordless Vacuum Cleaner
Model no:C150
Rated voltage:22.2V
_ _ _
Rated power:150W
N.W.: 1.3 KG
Charger parameter
Model no:RSS1002-130260-W2
Charger input:100-240V~ 50/60Hz 0.6A
Charger output:26V
_ _ _
0.5A
Battery Parameter
Model no:DH598C
Battery:Li-ion 2200mAh, 48.8Wh
High-speed working time:18-20 minutes
Middle-speed working time:25-26 minutes
Low speed working time:34-35 minutes
Charging time:4-5H
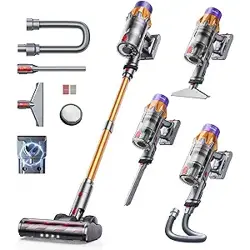
4. ATTACHED ACCESSORIES
PICTURE
DESCRIPTION
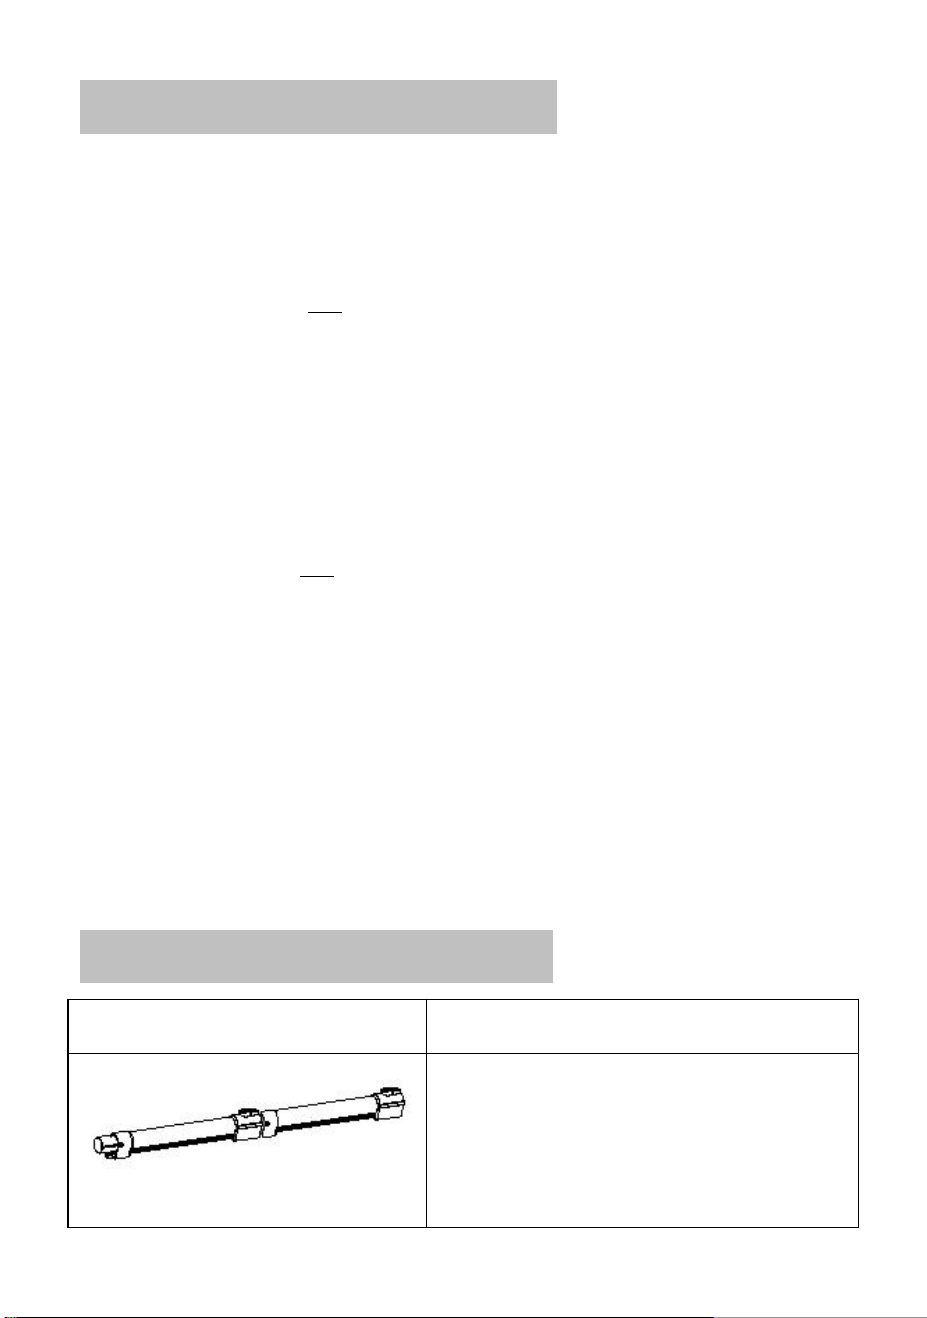
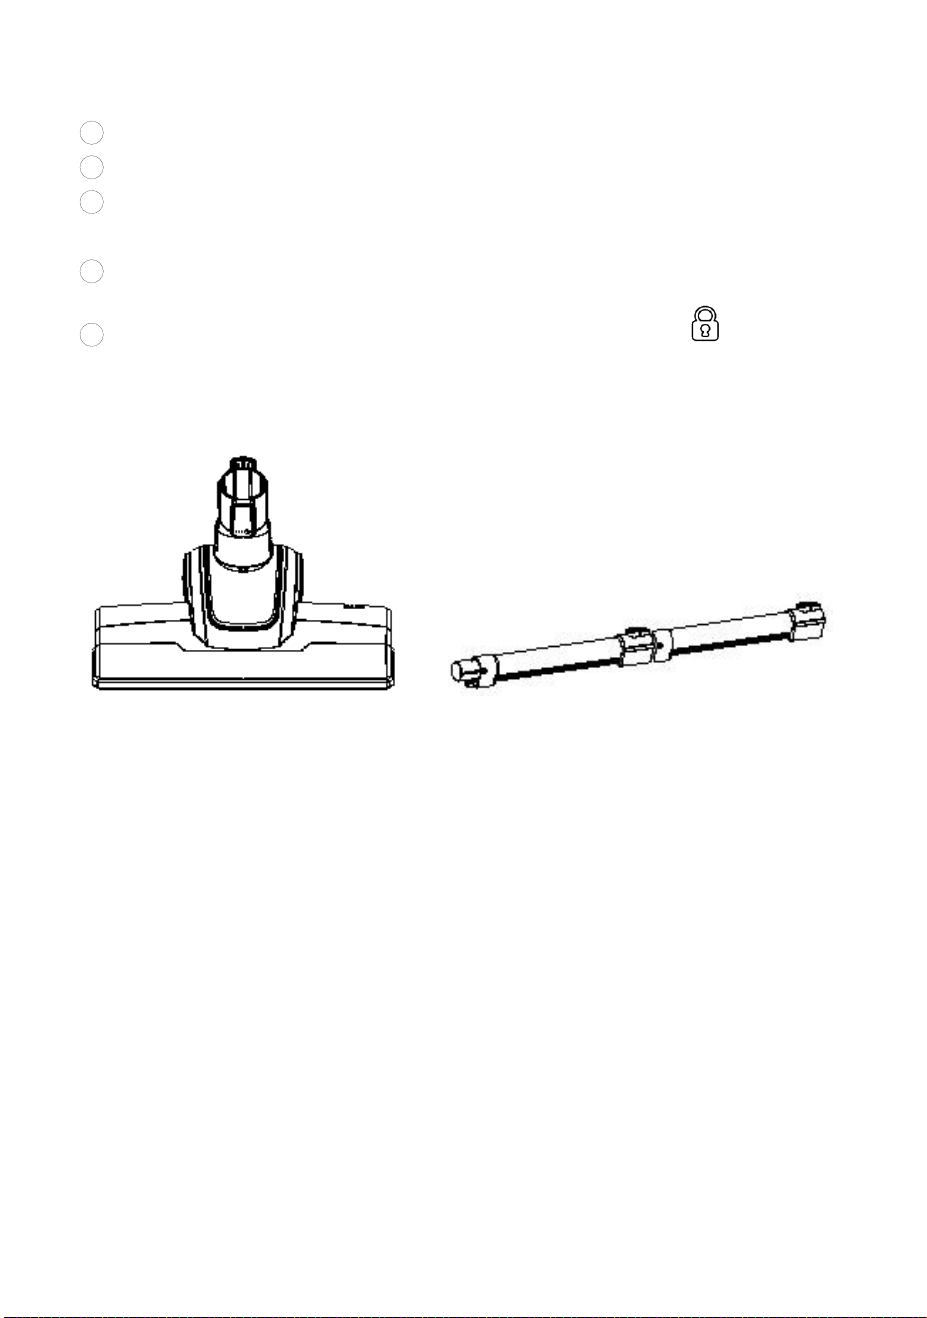
Connection tube
You can use 1 or 2 extension tubes to
adjust the length of the vacuum
cleaner.
8
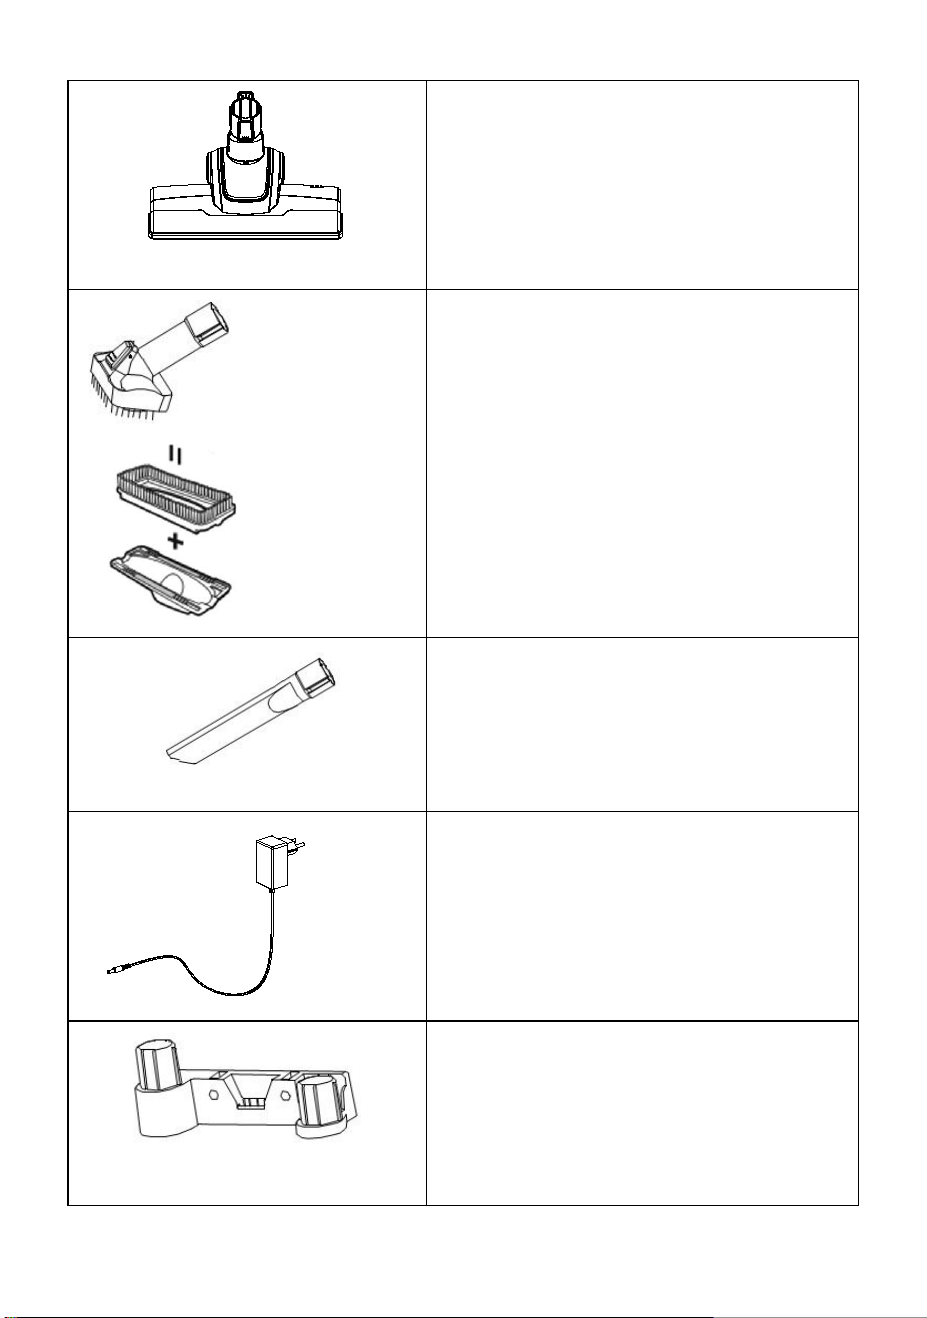
Motorized nozzle
Equipped with LED lights and roller
brush, perfect for removing fine/dry
dust/particles on hard floors.
2 in 1 nozzle
The brush can be removed when
pushing the button.
With a brush: For cleaning and dusting
tables and countertops.
Without brush: Upholstery Cleaning
Tool. Great for home upholstery
cleanings like sofas, mattresses,
sheets, and curtains.
Crevice Tool
Great for cleaning tight spaces.
Charger
Only can be used with an iwoly C150
vacuum cleaner.
Holder
The wall-mounted holder can be
securely mounted on the wall with
screws, which helps to store the
vacuum cleaner and attachments.
9
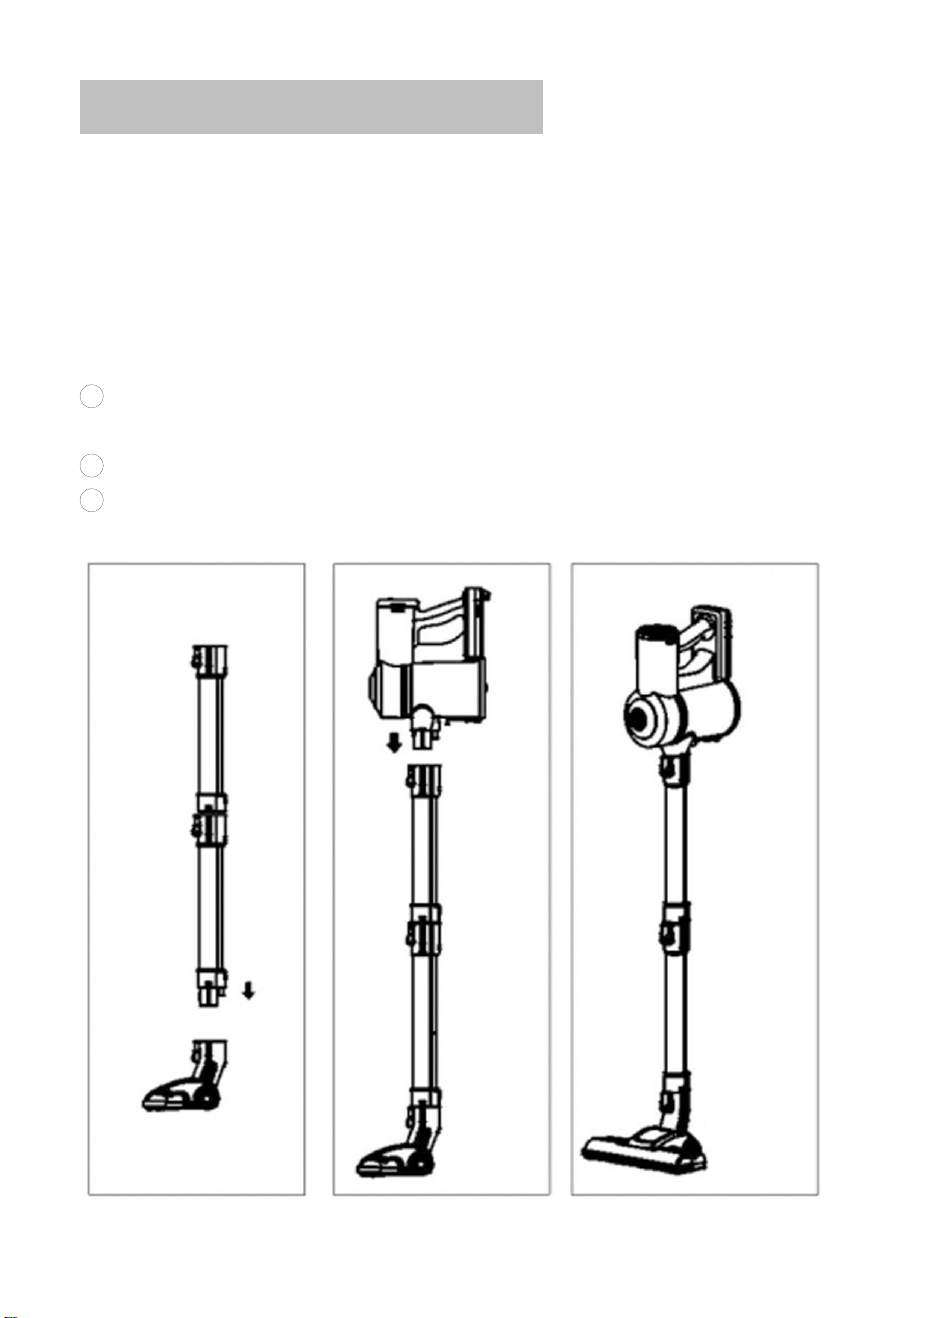
5. ASSEMBLY INSTRUCTION
Please carefully read “ATTENTION” before assembly:
This product can’t stand itself, please apply the body part onto the holder
which is on the connection tube.
5.1 PRODUCT ASSEMBLY
1 Connect the motorized brush and the connection tube until the button
is locked;
2 Insert the body into the connection tube until the button is locked;
3 Hang the assembled vacuum cleaner and nozzles on the holder.
10
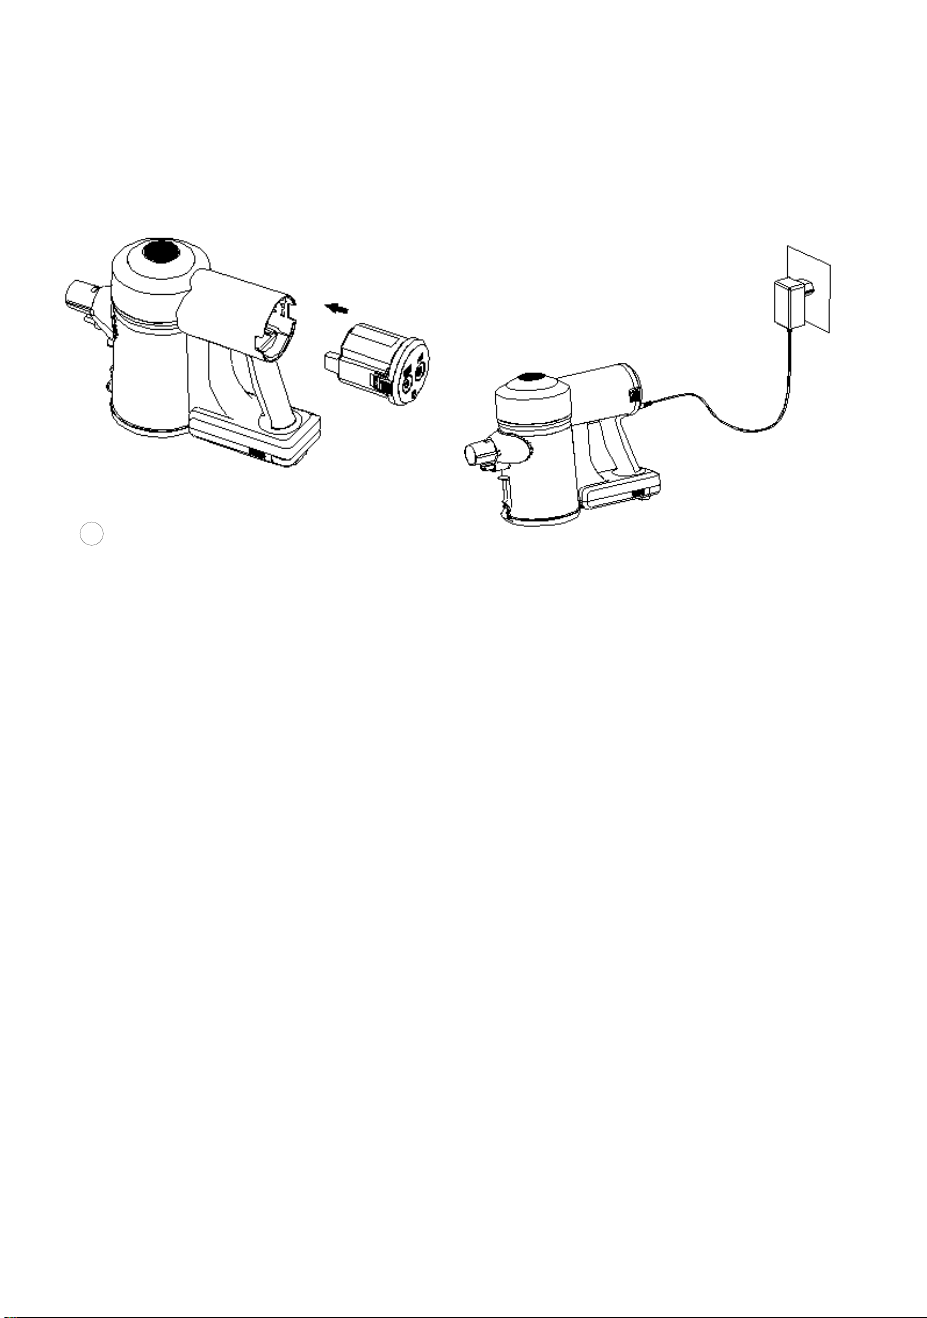
5.2 VACUUM CLEANER CHARGING
BATTERY ASSEMBLY:
Same as an illustration: have a battery pack locked into the cleaner body.
BATTERY CHARGING:
1 Make sure that the product is
powered off, plug the adapter charging head into the charging port
behind the console (The battery pack can be charged separately), and
plug the adapter into a 100-240Vac to 50/60Hz power outlet.
② When charging the battery, the 3 charging indicators will light in turn,
and the indicator lights up to show the current charge. When the charge is
complete, all 3 lights are on for 3 minutes and then turned off.
WARNING: Do not turn on the product and do not try removing the
battery during its charging!
Attention:
Only within 0
0
C--45
0
C can charge be allowed, overheating or
over-cold could prolong the charging time or even damage the battery.
Normal charging takes 4-5 hours, please charge fully and use the
product until the battery is fully discharged 1-3 times when you initiate
using it so that the battery can be fully activated.
If this product will not be used for a long time, please charge and
discharge this product once every 3 months.
11
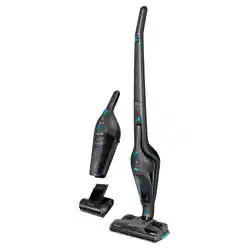
5.3 USED AS STICK VACUUM CLEANER
(You may use 1pc of tube only or 2pcs tubes connected)
1 Step on the motorized brush and tilt the appliance backward;
2 Press the power button to turn on the power supply;
3 Press the adjustment button to adjust the flow;
4 Move back and forth and start cleaning.
Attention:
By default, the vacuum cleaner is in normal mode when turned on.
Switch to the high-performance mode by pressing the adjustment
button one time. Switch to the economic mode by pressing the
adjustment button two times.
Press the adjustment button again to switch back to normal mode.
Turn off the product by pressing the power button again.
When the battery is empty, the vacuum cleaner turns off and the three
power indicators on the battery pack flash at the same time. Please
charge it in time.
The motorized roller rolls at a very high speed, to avoid damage to the
cleaning surface, do not stay cleaning in the same spot too long. The
motorized nozzle has overheating protection function which can cut
off the power to the nozzle when a blockage or hair twirling occurs.
Please turn off the product, unblock and clean the nozzle. Do not use
the product until it cools down.
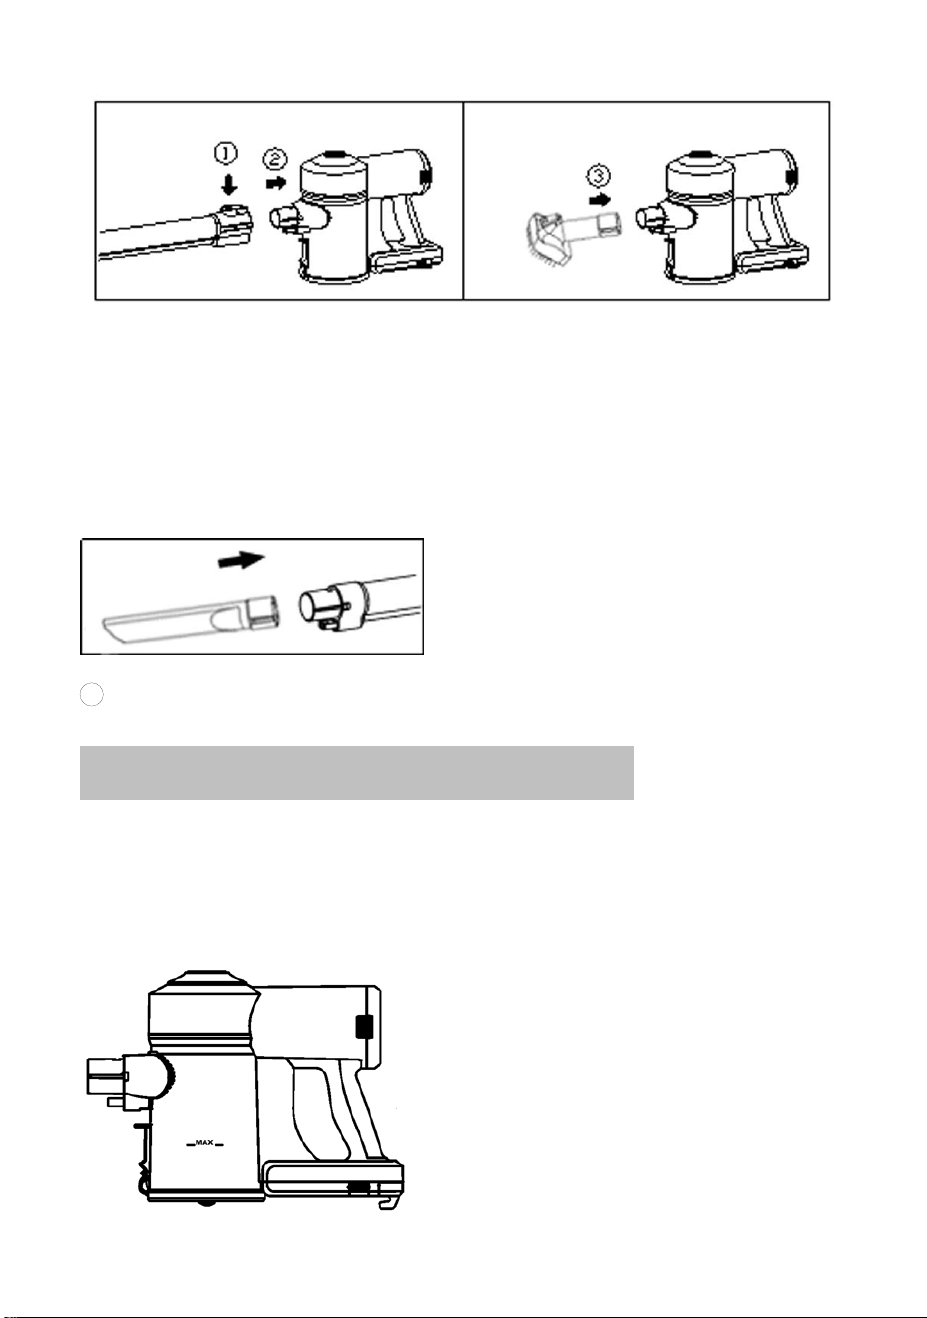
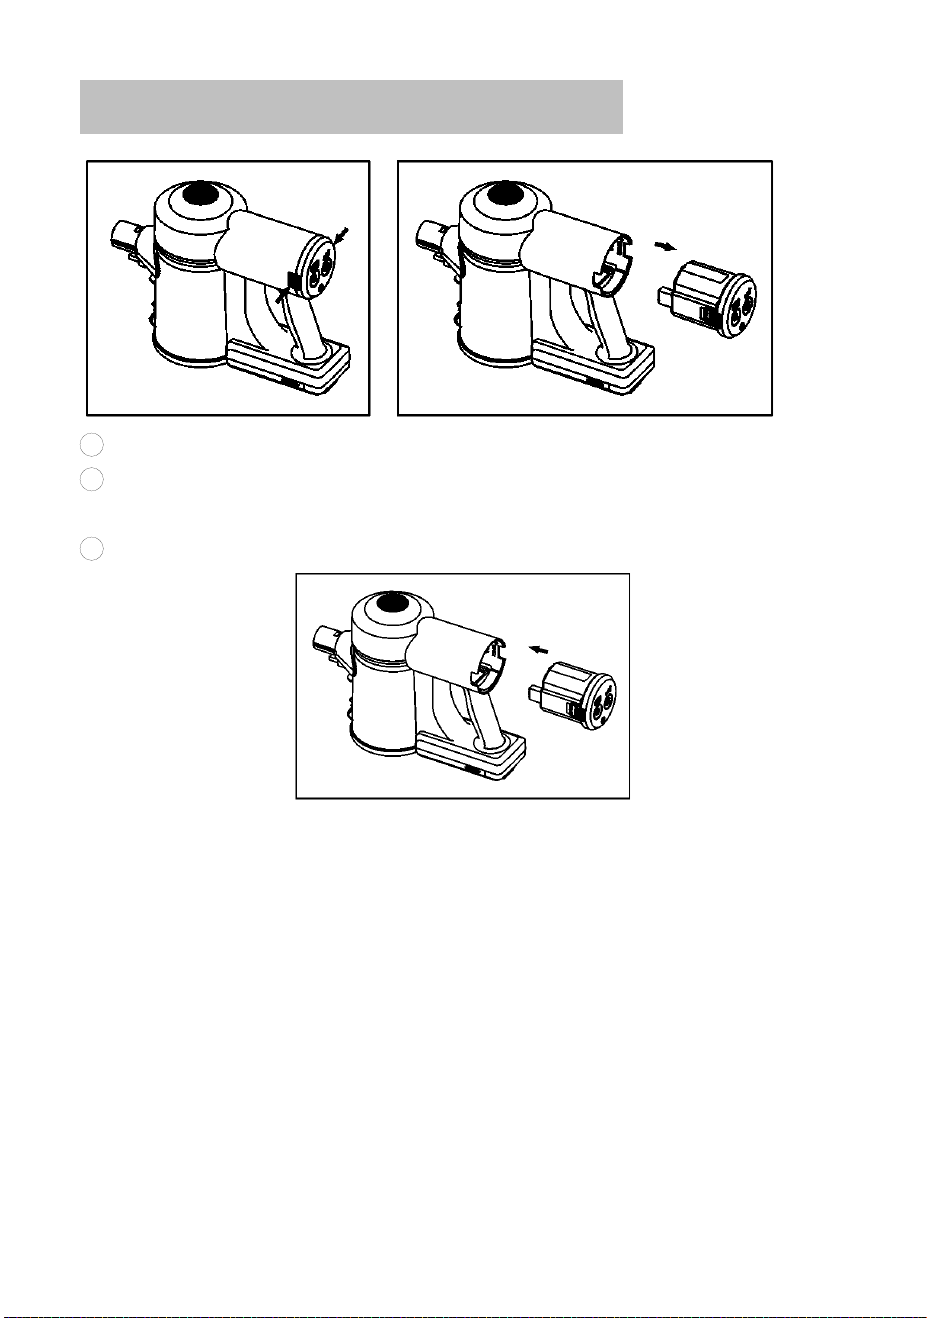
5.4 USED AS A HANDHELD VACUUM CLEANER
12
① Press the button on the connection tube;
② Separate the body and connection tubes (place the ground brush and
connection tube properly);
③ Using a nozzle: Insert the hand-held vacuum cleaner snort as shown.
Or use the connection tube as shown before connecting the nozzle.
5 Press the power switch to start the machine.
6. CLEANING AND MAINTENANCE
6.1 EMPTY THE DUST
Attention:
Please empty the dust when it reaches the “MAX” level on the dustbin.
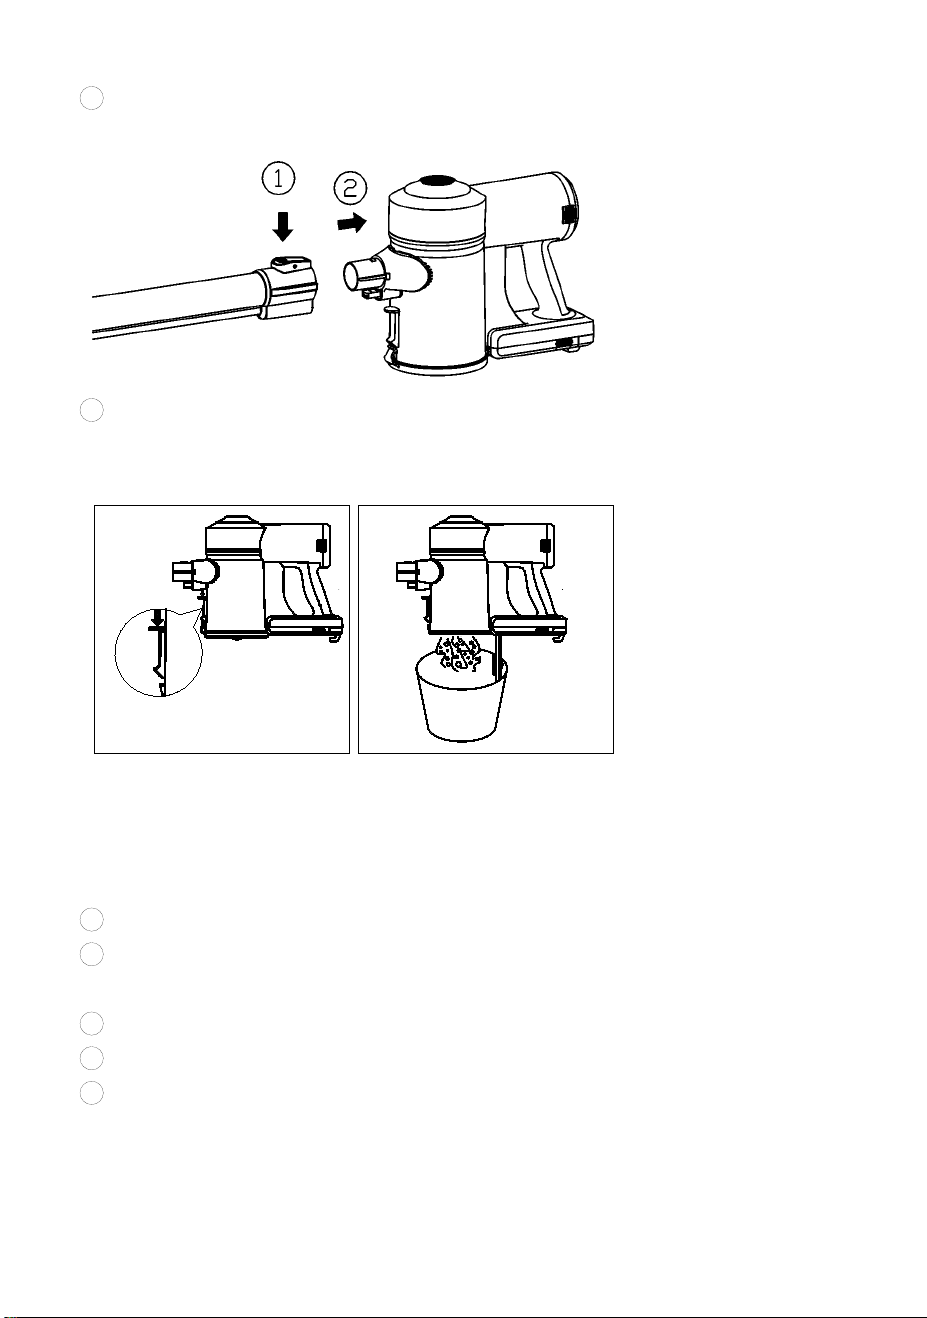
13
1 Turn off the power and press the connection tube button to separate
the vacuum cleaner as shown.
2 Aim the bottom of the dustbin at the garbage can and push the bottom
switch of the dust collection cup. Gently shake to empty the dust in the
dustbin, close the bottom cover, and lock.
6.2 CLEAN THE DUSTBIN SYSTEM
To maximize the cleaning performance, it’s suggested to clean the filtration
system after every 4-6 times of using.
1 Turn off the power, press the bottom switch, and empty the dust;
2 Hold the bottom of the filter assembly, rotate and remove the filter
assembly in the direction shown;
3 Remove the HEPA filter from the upper part of the filter assembly;
4 Clean the HEPA filter, metal filter, and dustbin and dry;
5 Reassemble all parts correctly in reverse order.
*The wrong assembly will reduce suction and even damage the
motor!*

14
Attention:
Before assembly back, make sure that all parts after cleaning are
completely dry, otherwise do not use them.
The dustbin is not available for water flushing to prevent liquid from
entering the interior of the host and can be wiped with a slightly damp
soft cloth. Do not use it until it gets completely dry.
WARNING: DO NOT USE THE PRODUCT WITHOUT FILTRATION.
6.3 CLEAN UP THE MOTORIZED BRUSH
1 2 3 4
1
T
urn off the power and release the motorized brush.
2 Turn the button on the bottom of the nozzle by coin to the “ ”
15
position.
3 Open the roller fixing cover.
4 Lift one side of the roller and take it out.
5 Along the groove on the roller, cut off twirled hair or blockage with
scissors or a knife.
6 Place back the cleaned roller.
7 Cover the fixing cover and turn the button back to the “ ” position.
6.4 UNBLOCK
① This product has a protection function. When the roller brush is stuck by
the winding and will automatically cut off the power to the motorized brush.
Please turn off the product and unblock the roller immediately. (Please
refer to 6.3)
② When the machine duct is blocked, the protection device will cut off all
power, check and clean the motorized brush, connection tube, or host air
duct, remove the blockage, and cool down for some time can be used
again.
16
7. REPLACE THE BATTERY PACK
1 Turn off the power.
2 Press the release button left and right of the battery pack, and remove
the battery pack.
3 Insert the new battery pack into the body until the button is locked.
Attention:
Must use the original battery pack and charger.
Do not use the battery pack for another purpose.

17
8. PROBLEM-SOLVING
There are some simple problems in the process of use that can be
resolved by reference to the following methods.
Problem
Possible causes
Solving
The product cannot
start
●Running out of power
●Referring to the “battery
charging” instruction, charge the
battery
No suction or weak
suction
●Dustbin is full of dust
●Filtering is not correctly
assembled or dust blocked the
HEPA
●Nozzle and/or tubes blocked
●Empty the dust
●Assembly the filtering again or
clean/replace the filtering
●Referring to “unblock”
instruction, unblock the nozzle
and/or tube
The nozzle roller
does not rotate
●Roller blocked, protection
function works
●Referring to the “unblock”
instruction, unblock the nozzle
Using time shorter
●Battery not fully charged
●Battery aging
●Referring to the “Battery
charging” instruction, charge the
battery
●Purchase the original battery
Pack from the manufacturer
The motor makes a
strange noise.
● When the filter is not
properly attached to the main
body, the dust has entered the
motor.
● Contact the seller and replace
the main body of the vacuum
cleaner.
Smell bad
● A non-dry HEPA filter was
used.
● Dust entered the motor.
● Replace the HEPA filter.
● Contact the seller and replace
the main body of the vacuum
cleaner.
Body and handle
warm-up
It will become warm due to the heat generated by the motor, but this
is not abnormal.
The tube
Please contact the seller or the after-sales service to get a

18
WARNING:
FOR SOLVING OTHER PROBLEMS OR REPLACEMENT, PLEASE
ALWAYS RESORT TO THE PROFESSIONALS SPECIFIED, ANY
UNAUTHORISED REPAIRING ARE NOT COVERED BY WARRANTY.
detachable part is
damaged.
replacement part.
The dust cup lid is
damaged.
Please contact the seller or the after-sales service to get a
replacement part.
The charger is lost
Please contact the seller or the after-sales service to get a
replacement part.
19
9. ONE-YEAR LIMITED WARRANTY
The 1-Year Limited Warranty applies to purchases made from authorized
retailers of Shenzhen Mingke Lixin Technology Co., Ltd. Warranty
coverage applies to the original owner and the original product only and is
not transferable.
warrants that the unit shall be free from defects in material and
workmanship for a period of 1 year from the date of purchase when it is
used under normal household conditions and maintained according to the
requirements outlined in this instruction manual, subject to the following
conditions and exclusions.
What is covered in my warranty?
1. The original unit and/or non-wearable components deemed defective,
in ’s sole discretion, will be repaired or replaced for up to 1
year from the original purchase date.
2. If the unit is replaced, reserves the right to replace the unit
with one of equal or greater value.
What is not covered in my warranty?
Our Customer Service/Product Specialists are available to provide all the
warranty service options available to you.
1. Normal wear and tear of wearable parts such as foam filters, HEPA
filters, pads, etc., which require regular maintenance and/or replacement
to ensure the proper functioning of your unit are not covered by this
warranty.

20
2. Any unit that has been tampered with or used for commercial purposes.
3. Damage caused by misuse, abuse, negligent handling, or damage
due to mishandling in transit.
4. Consequential and incidental damages.
5. Defects caused by or resulting from damages from shipping or from
repairs, service, or alteration to the product or any of its parts which have
been performed by a repair person not authorized by .
How to get service?
If your appliance fails to operate properly while in use under normal
household conditions within the warranty period, send an e-mail to
options.