Recipe
guide.
Recipes, tips
& more!

BLENDING WITH
THE BATCHBOWL:
HOT LIQUIDS CAN ONLY
BE USED IN THE VENTED
BATCHBOWL.
Use caution when blending
hot liquids in the pitcher.
Never turn the power on while
using the pitcher without the
vented lid cap inserted and
locked into the pitcher lid, as
ingredients can splash, and if
hot or warm, could potentially
cause thermal injury and/or
property damage.
Never blend carbonated
liquids or eervescing
ingredients (e.g., baking
soda, baking powder, yeast,
cake batter, etc.). Built-up
pressure from released gases can
cause the cup to burst, resulting
in possible personal injury or
property damage.
Never leave the NutriBullet
Baby
®
unattended while it is
in use. Close supervision is
necessary when any appliance
is used by or near children.
Important safeguards
&
cautionary information.
Warning! To avoid the risk of serious injury, carefully read all
instructions before operating your NutriBullet Baby
®
. When
using any electrical appliance, basic safety precautions should
always be observed, including the following critical information.
PERSONAL SAFETY
BLENDING WITH THE
SHORT CUP:
NEVER PUT HOT LIQUIDS
IN THE SEALED BLENDING
CUP BEFORE BLENDING.
Start with cold or room
temperature ingredients.
Heated ingredients can
create internal pressure in a
sealed blending cup, which
may erupt on opening and
cause thermal injury.
Friction from the rotating
blade will cause ingredients
to heat and generate internal
pressure in the sealed vessel.
Do not continuously operate
for more than one minute. If
the vessel is warm to touch,
allow to cool before carefully
opening pointed away from
your body.
If storing blended ingredients,
remove the blade from the cup
and replace with the flip top lid.
Never store the extractor blade
on the power base without a
cup or vessel attached. Failure
to do so may result in personal
injury if the unit is accidently
turned on.
short cup
3-piece batchbowl
WARNING!
WARNING!WARNING!
2

NEVER leave spoons or other
foreign objects in the cup
or pitcher before blending.
Failure to do so will result in
damage to the cup and/or
possible personal injury.
VERY IMPORTANT: If there
is a liquid spill, immediately
disconnect the unit from the
power source. If the spill is
external only, clean with a
warm soapy cloth and allow
unit to dry completely before
operating.
If the spill has leaked in to
the internal components
of the power base, cease
use immediately. Unit must
be checked by a Qualified
Electrician and certified as
electrically safe before using
again. Failure to do so will
result in a possible electric
shock and/or personal injury.
To avoid risk of electric shock,
never immerse the cord, plug,
or power base of blender in
water or other liquids.
Switch o the appliance and
disconnect from power supply
before changing accessories
or handling moving parts. At all
times, avoid contact with moving
parts. Keep hands and utensils
away from the extractor blade.
WARNING!
TO REDUCE THE RISK OF
PERSONAL INJURY OR LEAKAGE,
make
sure the extractor blade
is securely twisted (hand-
tightened) onto the NutriBullet
®
blending cup before placing it
on the motor base.
Check to make sure the easy-
twist extractor blade is aligned
properly before placing it on the
motor base and operating your
NutriBullet Baby
®.
This appliance is not intended
for use by persons (including
children) with reduced physical,
sensory or mental capabilities,
or lack of experience and
knowledge, unless they have
been given supervision or
instruction concerning use
of the appliance by a person
responsible for their safety.
WARNING!
If you are taking any medica-
tion, especially cholesterol-
lowering medication, blood
thinners, blood pressure drugs,
tranquilizers, or antidepres-
sants, please check with your
physician before consuming
any NutriBullet
®
recipes.
The following list of seeds and
pips contain chemicals that
release cyanide into the body
when ingested. Do not use:
apple seeds, apricot seeds,
cherry pips, plum pips, and
peach pips in your NutriBullet
Baby
®
.
WARNING!
3

Always inspect your blades
before each use.
Always operate the Batchbowl
with the Lid firmly in place.
Never insert food into the
Batchbowl by hand while the
NutriBullet
Baby
®
is running.
Remove the Batchbowl from the
Motor Base to add ingredients.
Do not attempt to override the
interlock mechanism.
Do not use the Date-Dial
Storage Cups to freeze foods.
Use a freezer-safe container to
freeze foods.
Do not fill the Date-Dial Storage
Cups more than 2/3 full.
Do not microwave any of the
NutriBullet
Baby
®
components
(cups, lids, blades, motor base)
and never microwave a sealed cup.
Do not use your NutriBullet
Baby
®
for anything other than
its intended use.
Do not use outdoors.
Always use your NutriBullet
Baby
®
on a clean, flat, hard, dry
surface.
Do not use attachments other
than those provided for your
NutriBullet
Baby
®
, including
canning jars, as they may cause
fire, electric shock, personal
injury, or product damage and
will void the product's warranty.
Use of adapters and converters
is considered an unauthorized
modification of the product and
as such will void the warranty.
PRODUCT SAFETY
To prevent the overheating of
the ingredients being blended,
never allow the unit to run
continuously for more than
1 minute.
If the motor stops for any reason,
unplug the power base and let it
cool for at least 15 minutes.
If the NutriBullet
®
malfunctions
or is dropped, or damaged in
any manner, discontinue use
and contact Customer Service
for further assistance.
Extractor blades are
sharp!
Handle carefully.
Do not remove the seal from
your blade attachment. The
seal is not designed to be
removed. If seal is removed,
cease use immediately and
purchase a replacement.
Consumable Parts: The
cup, pitcher and blades are
consumable components. We
recommend replacing your
extractor blade every 6 months
for optimal performance. If,
over time, the extractor blade
becomes loose, damaged,
or needs replacing, you may
order a new extractor blade
at: bulletbrands.com.au/
bulletbrands.co.nz or contact
customer service.
Blade attachments should not
be placed in the dishwasher for
cleaning. Exposure to hot water
can cause damage to the seal in
the outer rim of the attachment.
WARNING!
extractor
blade
4

Use of this product in locations
with dierent electrical
specifications may result in
damage to the product.
To avoid risk of electrical shock,
never immerse the cord, plug
or Motor Base in water or other
liquids.
Always UNPLUG the NutriBullet
Baby
®
when it is not in use or
BEFORE assembling, disassembling,
changing accessories, or cleaning.
Do not attempt to handle the
NutriBullet
Baby
®
until all parts
have stopped moving.
Do not allow the cord to hang
over the edge of any table or
counter. Do not pull, twist, or
damage the power cord. Do
not allow the cord to touch hot
surfaces, including the stove.
Sterilising Nutribullet Baby
®
accessories with hot water or
steam is NOT recommended,
as this can damage or warp
the plastic components making
them unfit for use. Only cold
water sterilisation options
may be used, such as anti-
bacterial dissolvable tablets.
These steriliser tablets can be
purchase at most supermarkets
or chemists.
Do not expose Extractor
Blade and other plastic
parts to extreme, rapid
temperature changes, like
sterilizing in boiling water or
steaming, as this may warp
or damage the plastic.
CLEANING THE NUTRIBULLET
BABY
®
MOTOR BASE
The Motor Base doesn't
generally require much
cleaning, but liquids can leak
into the base and activator
buttons if cups and blades
are not tightly sealed during
blending.
How to clean the Motor Base:
STEP 1:
UNPLUG the Motor Base.
STEP 2:
Use a damp rag to wipe
down the inside and outside of
the Motor Base.
STUBBORN CLEANUP
To loosen dry and stuck-on
ingredients from the NutriBullet
Baby
®
cups, fill cup halfway with
soapy water, twist on the blade,
and blend on the Motor Base
for 10-20 seconds. Untwist the
blade, pour out the water, then
lightly scrub and rinse to remove
any remaining debris.
Cleaning the NutriBullet
Baby
®
is easy. Simply place
the cups / batchbowl on the
TOP RACK of the dishwasher
or hand wash with warm,
soapy water and rinse. Blades
are NOT dishwasher safe!
Save these
instructions
WARNING!
WARNING!
!
5

6

09 The NutriBullet
Baby
®
system
10 Benefits
13 What you get
14 Using the NutriBullet
Baby
®
17 Batch preparation
18 3 stages of baby food
20 What do I need?
22 Allergy alert
27 Stage 1
32 Feeding baby
34 1 ingredient purée recipes
40 Combo purée recipes
47 Stage 2
50 Tasty texture recipes
57 Stage 3
60 Recipes for 1+ years
69 Recipes for mama
76 NutriBullet
Baby
®
1-year limited warranty
78 References
Contents.
7

8

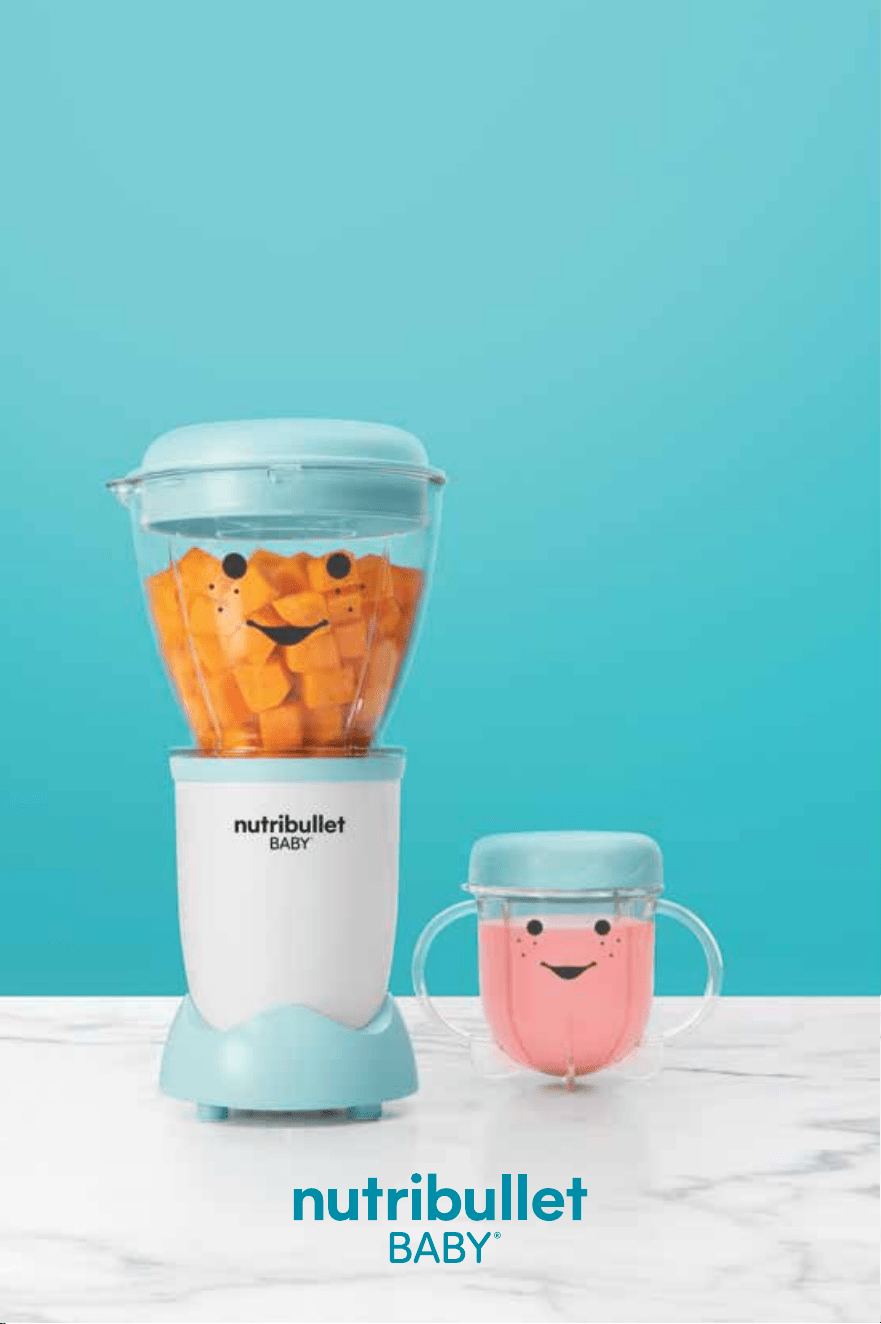
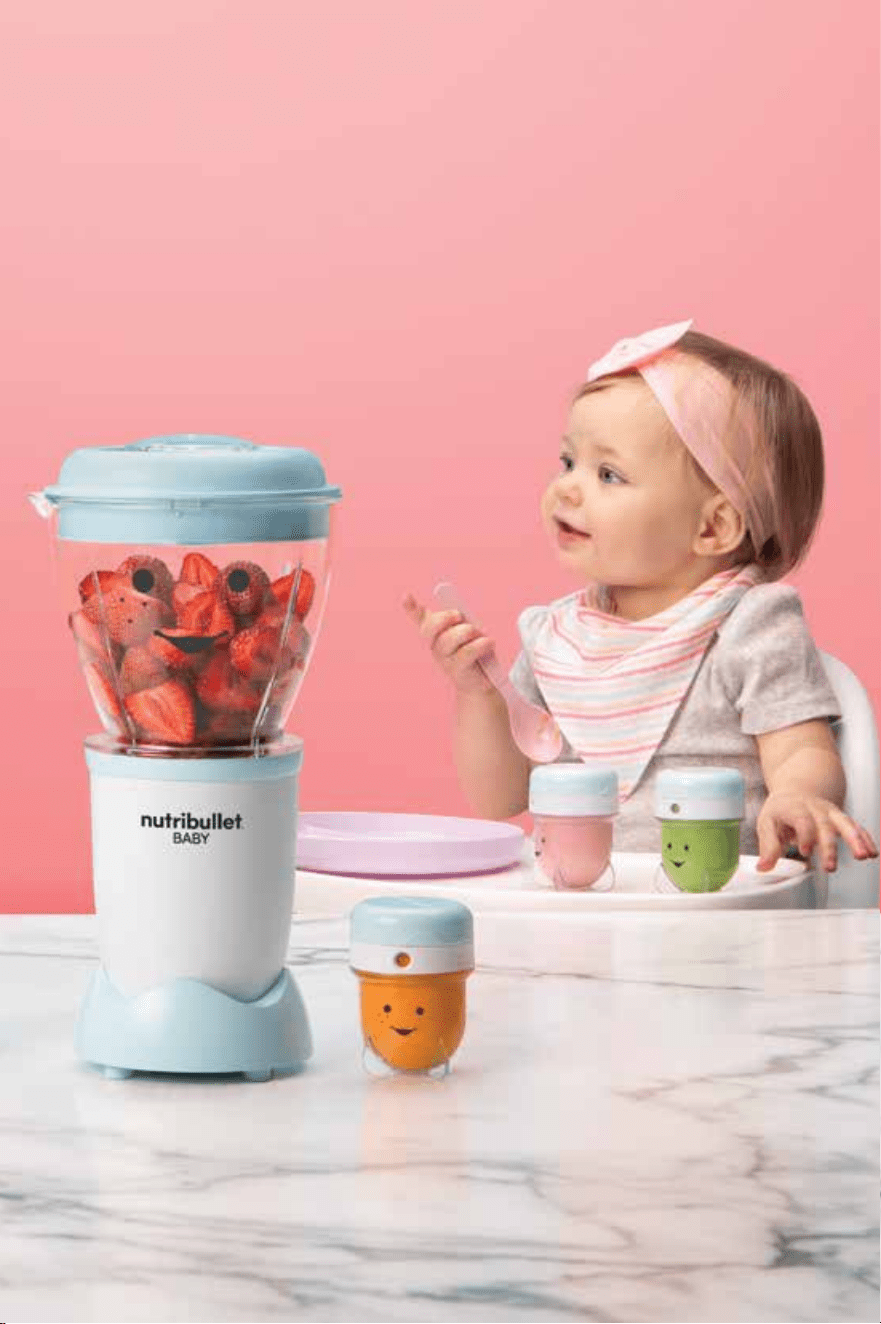
The
NutriBullet
Baby
®
system.
Caring for infants can be challenging. The NutriBullet
Baby
®
is designed
to make it easier. With specific components for blending, storing,
and serving, this ecient machine quickly and easily creates fresh,
aordable homemade food for your baby from wholesome ingredients.
Baby food, made with love
®
.
When making your baby's food from scratch with NutriBullet
Baby
®
,
you get full control over what goes into each meal, providing your child
with better nutrition at a fraction of the cost of prepackaged purées.
NutriBullet
Baby
®
allows you to make several flavors of delicious,
preservative-free baby food in less time than it takes to go to the store
to buy one jar. To sum it up, this system saves you time and money
while maximizing the quality of your baby’s food. What’s not to love?
9

Benefits.
Simple. Wholesome. Nutritious.
The ingredients in homemade baby food are ones you are familiar
with — foods with names you can pronounce that are free from
preservatives, stabilizers, and dyes. Because NutriBullet
Baby
®
purées
are made without additives, they should be consumed fresh within
2 days, or frozen and consumed within 3 months.
Fresh baby food.
Make fresh, delicious food with
wholesome ingredients. You
control exactly what goes in — no
hidden stabilizers, preservatives,
or flavor enhancers necessary.
Cleans like a dream.
Less mess, less stress. The cups
and batchbowl are dishwasher-
safe for a quick and easy
cleanup.
Quick & easy.
As a parent, you don't have
a minute to spare; that's why
NutriBullet
Baby
®
only takes
seconds. Just add ingredients,
blend, and serve. It's really
that simple.
Saves money.
Make fresher food at a
fraction of the cost! When
you buy prepackaged baby
food, you’re not only paying
for the ingredients contained
within, you’re also paying for
the materials, resources and
employees required to produce,
store, distribute, market and
sell the food. When you make
your own food, all you need
to purchase is the ingredients.
The cost is significantly lower
and the quality much better.
It’s a win-win.
10
Getting started.
The NutriBullet
Baby
®
system
is more than just a baby food
maker. This Recipe Guide
compiles the information
new parents and caretakers
need and want most into one
convenient guide. Features
include a food allergy list, a
summary of when and how
to introduce solid foods, and
multiple age-appropriate
recipes to guide you through
the first two years of your
baby's development.
Looking for even more? Browse
our collection of NutriBullet
Baby
®
recipes, articles, Q&A, tips and
tricks on bulletbrands.com.au /
bulletbrands.co.nz
We are here for you
and are invested in
helping you raise a
healthy eater!
11

12

What you get.
3-piece batchbowl
stay-fresh
resealable lid
6 date-dial
storage cups
tip-proof tray
motor base extractor blade
easy-pop freezer
tray with lid
short cup
13

Remove the batchbowl lid, and
add liquid of choice and food,
making sure any skins, cores, pits,
or stems have been removed.
Do not exceed the MAX line.
Place the lid back on the
batchbowl and place the
batchbowl assembly onto the
motor base. Push down and
twist clockwise to engage the
motor. Blend until food reaches
the desired consistency.
2
Using the NutriBullet Baby
®
.
Using the batchbowl.
Twist the extractor blade
onto the batchbowl ensuring
it is sealed.
Twist the batchbowl assembly
counterclockwise to disengage
the motor and lift o the motor
base. Spoon the purée into a
bowl and enjoy immediately
or store for later.
3 4
1
ALWAYS use caution when blending hot or warm ingredients in the batchbowl.
Never blend hot or warm ingredients in the batchbowl without the batchbowl lid
and cap attached.
NOTE: The batchbowl MAX line is marked at a volume of 475mL. This is the MAX volume
for blending using this vessel. The maximum capacity of the batchbowl is 945mL.
The batchbowl should not be used for storage.
14

NEVER blend hot, carbonated, or eervescing ingredients or liquids in a sealed
short cup, as it can pressurize and lead to personal injury.
Using the short cup.
Add liquid of choice and
completely cooled food to the
short cup, making sure any skins,
cores, pits, or stems have been
removed. Do not exceed the
MAX line.
1
4
2
3
Twist the extractor blade
onto the short cup ensuring
it is sealed.
Place the short cup assembly
onto the motor base. Push down
and twist clockwise to engage
the motor. Blend until food
reaches the desired consistency.
Twist the batchbowl assembly
counterclockwise to disengage
the motor and lift o the motor
base. Spoon the purée into a
bowl and enjoy immediately
or store for later.
NOTE: The short cup MAX line is marked at a volume of 180mL. This is the MAX volume
for blending using this vessel. If used for storage or feeding, the cup can be filled
beyond this line, the MAX line is an indication for blending only. The maximum capacity
of the short cup is 295mL.
15

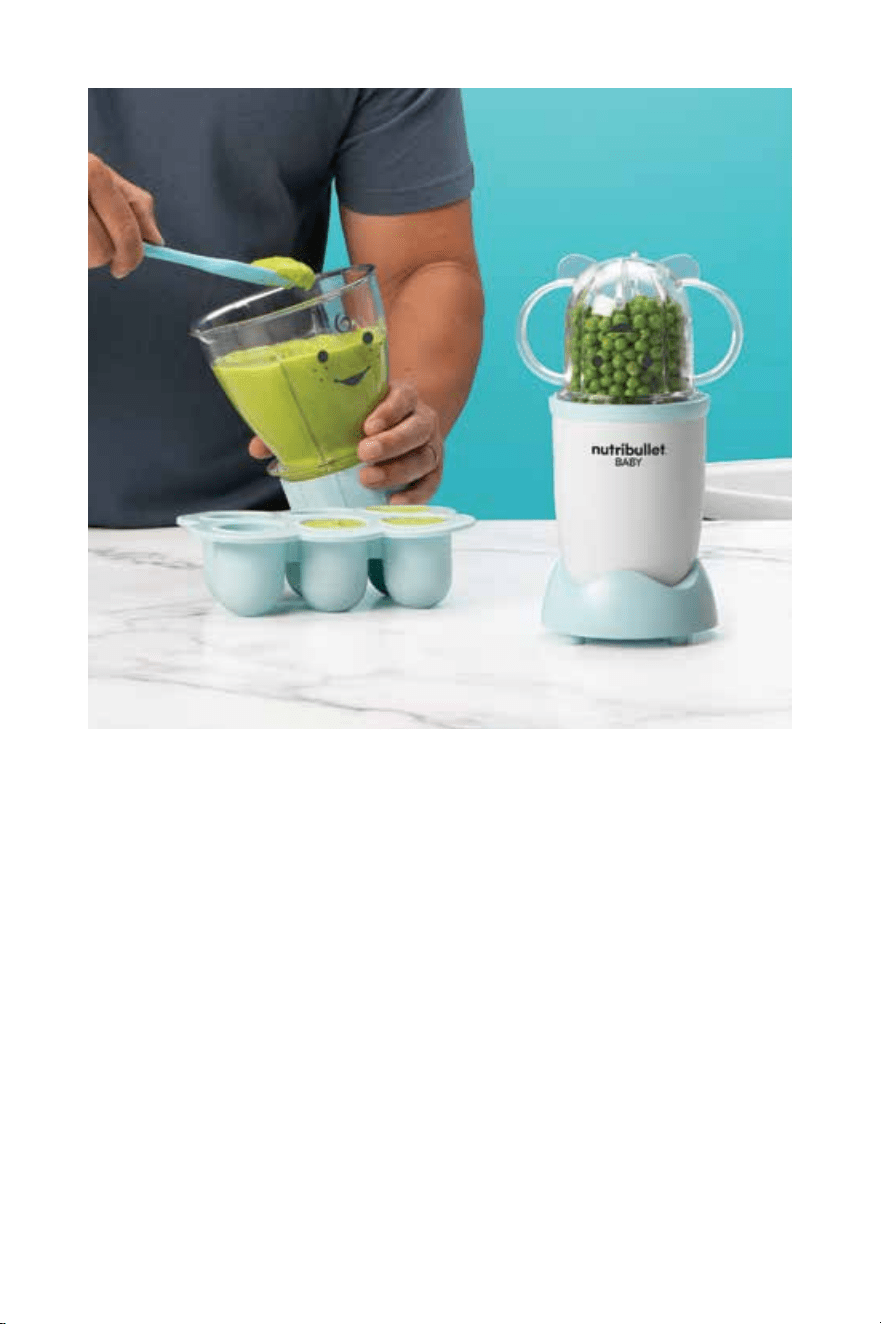
Storage.
Short-term storage
Spoon the purée into the date-
dial storage cups for short-term
storage in the refrigerator.
Long-term storage
Spoon the purée into the easy
pop freezer tray, snap on the
lid and store in the freezer.
NOTE: Refrigerated foods must be consumed within 2 days.
Frozen foods are good for up to 3 months.
16

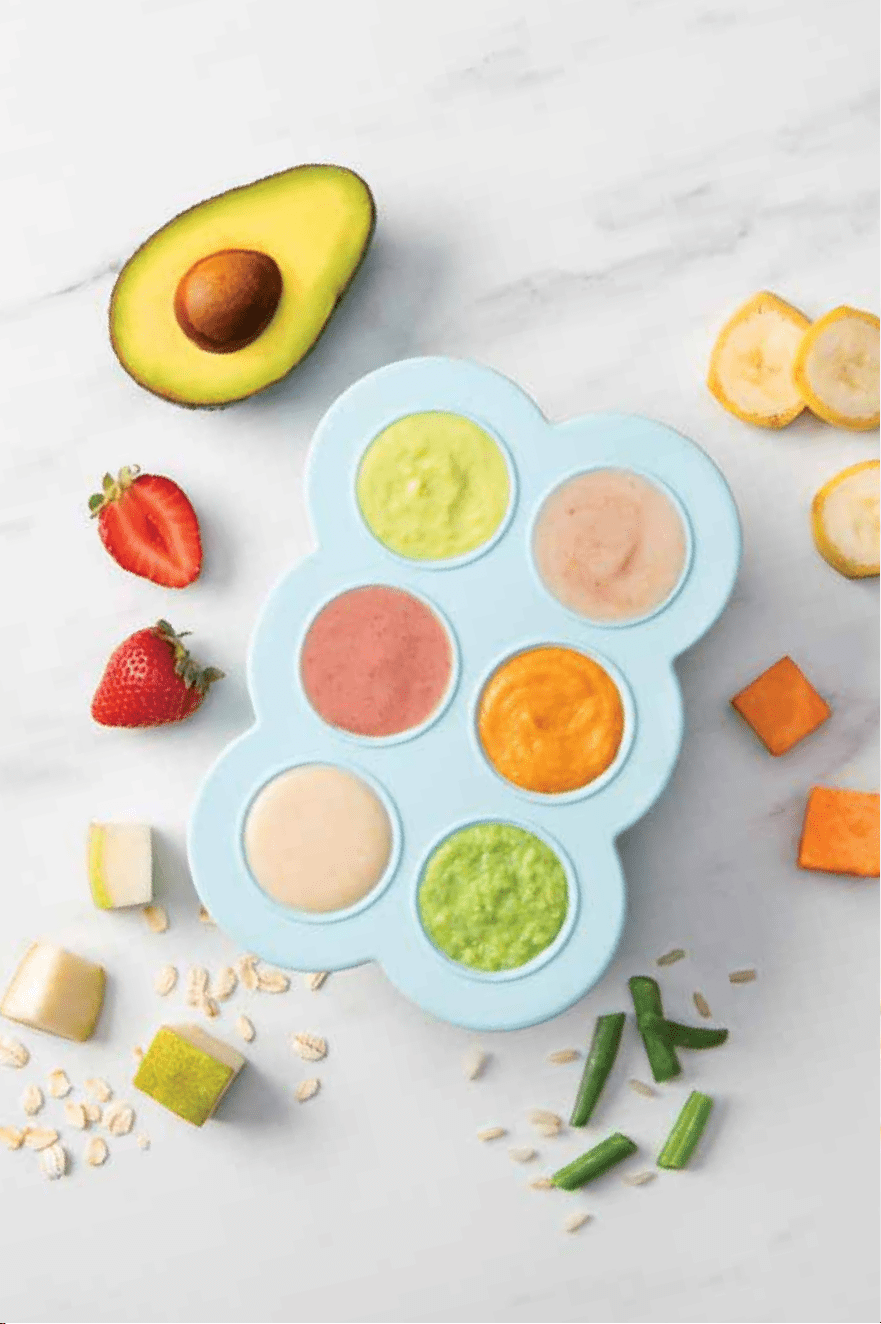
Batch preparation.
Now is when you really get to take advantage of all that the
NutriBullet
Baby
®
has to oer and make multiple flavors of
fresh baby food in minutes! Here’s how you do it:
1 Choose your weekly menu
based on foods your baby
already tolerates and new
foods you'll be introducing.
Boil and steam all of the
tolerated foods together so
they cook at the same time.
New foods must be prepared
separately to avoid cross-
contamination in case of an
allergic reaction.
2 While the tougher ingredients
cook, purée ingredients
that do not require cooking
like banana, avocado,
watermelon. Be sure to wash,
skin/peel, de-seed/core
your fruits and vegetables
accordingly and wash your
Batchbowl between blends.
Allow cooked ingredients
to cool completely, then
blend with liquid (breast
milk, formula, or water)
to the desired texture and
consistency.
3 Refrigerate foods you plan
to serve within the next two
days in either the Short Cup
or in the Storage Cups. Use
the Date-Dial to keep track of
the preparation date. Use the
Easy-Pop Freezer Tray to freeze
purées for up to 3 months.
Check gasket before each use to make
sure it is completely seated in the
extractor blade. Attempted removal of
the gasket may permanently damage
the blade configuration and cause
leakage. If in time a gasket becomes
loose or damaged, please contact
customer service for a replacement
www.bulletbrands.com.au /
www.bulletbrands.co.nz.
Do not run motor for more than one
minute at a time, as it can (i) cause
permanent damage to the motor and
(ii) heat and pressurize the ingredients
through friction from the rotating
blades, resulting in possible personal
injury or property damage. If the
motor stops working, unplug the motor
base and let it cool for a few hours
before attempting to use it again.
Your NutriBullet
Baby
®
has an internal
thermal breaker that shuts o the motor
if it overheats. The motor base will reset
when the thermal breaker cools down.
17

3 stages of baby food.
Stage 1
Perfect purées: 6-8 months
Stage 1 introduces your baby to
a series of smooth, thin purées
to get developing systems used
to solid food. Most babies begin
this stage between 6 and 8
months of age, but they can be
ready as early as 4 months or
as late as 10 months.
If you choose to introduce solids
prior to 6 months of age, we
suggest that you consult with
your pediatrician and ensure
your baby shows the signs
detailed below.
Signs your baby may be
ready for Stage 1 include:
• Baby weighs at least 6kg
and/or has doubled his or
her birth weight.
• Baby can sit upright with
support and has the ability
to “lean in” for more food.
• Baby has good head control.
• Baby can turn away to
signify mealtime is over.
• Baby does not push food
out with his or her tongue
(extrusion reflex), and baby
can move food to the back
of the mouth and swallow.
[1, 2, 3, 4]
18

As your baby grows and
develops stronger swallowing
skills, he or she will become
hungrier and more interested
in food. At this stage, your baby
may be willing to try just about
anything, so get creative!
Remember to always follow your
baby’s lead when introducing new
foods. Be gentle and do not force
your child to eat anything he or
she doesn’t want. If it doesn’t go
well, simply take a break and try
again in a week. Self-feeding is
a big part of Stage 2, so this is
where you can begin to oer age-
appropriate finger foods, let your
baby hold the spoon, and serve
thicker foods in a bowl.
Stage 3
Mini-meals: 12+ months
Stage 2
Tasty textures: 9-12 months
Stage 3 expands your baby’s list
of developmentally appropriate
foods. To avoid picky eating
habits, keep oering a wide
variety of textures and flavors.
If a certain food is rejected or
ignored, do not stop serving
it to your child. Consistently
including a new type of food
on your child’s plate will make
it more familiar and reduce the
anxiety surrounding feeding
time. It takes an average of
5-10 repeated servings for most
infants to start liking a new food,
so with repetition and patience,
your child is likely to expand his
or her palate.
Because every baby develops dierently, it is important to talk to your pediatrician
first, so you can make informed decisions about what foods are appropriate for
your baby at their stage of development. If at any point you become concerned with
your baby’s eating habits, contact your pediatrician for advice.
19

Food steamer or
stainless-steel pots
with steam basket.
With the exception of naturally
soft foods like bananas and
avocados, most foods need to
be steamed before they are
puréed. Get a steam basket for
your kitchen if you do not already
own one.
Slightly reclining infant
seat or high chair.
Every family has unique needs,
so it is important to find a high
chair that suits yours, whether it’s
a strap-on chair that attaches to
any dining chair or a higher, eye-
level highchair. Whatever you
choose, safety and security are
always your top priorities when
feeding your baby.
Floor mat or splat mat.
When it comes to feeding your
baby, expect the unexpected
and be prepared. Flying purée is
common when your baby starts
on solid food.
To minimize the
mess, line your floor with a floor
mat or a splat mat. It’s a much
easier clean-up than hosing
down the kitchen!
What do I need?
Plastic bibs with big pockets
to catch foods & drips.
Wet ingredients often seep right
through cloth bibs and into your
baby’s clothes. For advanced
spill protection, try water-
resistant plastic or silicone bibs
that catch rogue splashes and
bits without absorbing them.
Baby-friendly utensils.
To feed your baby safely, it’s
important to have the right tools.
Make sure all utensils, plates,
and bowls are BPA-free and
phthalate-free. Baby spoons
and forks should be made out of
silicone, bamboo, natural wood
or stainless steel, and should
be equipped with a soft-grip
handle. If you are serving warm
foods be sure to test the food to
ensure its not too warm for your
baby and avoid burning your
baby's mouth. Make sure bowls
and plates are equipped with a
suction bottom to avoid flying
purées!
20
21

Infants and children commonly experience allergies. A food allergy
occurs when the body’s immune system reacts to a certain food as if it
is dangerous or harmful, triggering symptoms that range from mild to
severe (see Signs of an allergic reaction on page 23). While children
often outgrow allergies to milk, eggs, soy and wheat, allergies to
peanuts, tree nuts, fish and shellfish are more likely to be permanent [5].
Certain foods may cause an allergic reaction in babies,
so we
recommend staying vigilant for at least the first year of feeding. Current
guidelines recommend introducing allergenic foods when your baby
starts consuming puréed foods (~6 months). Evidence has shown that
delaying the introduction of such foods may actually increase a child’s
risk of developing a food allergy. Keep in mind that a child can develop
an allergic response at any time, even after initial exposure. Babies
require constant monitoring as they’re exposed to new foods during
these early stages.
It is also important to remember that every baby is dierent. Consider
your family’s history of allergic reactions to food, as this may play a
factor.
It is vital to consult with your pediatrician before introducing any
foods, especially those that are known to provoke allergic reactions.
We recommend introducing new foods one at a time and earlier in
the day
, so you are able to contact your pediatrician during normal
business hours in the event of an allergic reaction.
Allergy alert.
Introducing highly
allergenic foods.
Please note that the decision
to introduce highly allergenic
foods is a personal one to
make in consultation with your
pediatrician. If your infant already
shows signs of a food allergy, or
if a sibling has a peanut allergy
[6], your pediatrician may refer
you to an allergist for testing and
personalized guidance.
Top food allergens:
• cow’s milk
• egg
• soy
• wheat
• peanuts
• tree nuts
• fish
• shellfish
22

NOTE: Be sure to confirm a food allergy diagnosis with your pediatrician to avoid
unnecessary dietary restrictions for you and your baby.
Signs of an allergic reaction.
Mild to moderate
reactions
Easier to identify in children
and adults who can verbalize
something is wrong.
More
dicult to identify in infants.
LOOK OUT FOR:
• hives or welts
• swelling of lips, face,
or eyes
• tingling of the mouth
• abdominal pain
or vomiting
Severe
reactions
Can be deadly and require
immediate medical attention.
SEEK MEDICAL ATTENTION
IMMEDIATELY - DO NOT DELAY.
Remember these symptoms are
dicult to identify in anyone,
especially infants and children, so
be on the alert when introducing
new foods to your child
[7, 8, 9]
.
LOOK OUT FOR:
• dicult/noisy breathing
• swelling of the tongue
• swelling or tightness
in the throat
• diculty talking and/or
hoarse voice
• wheezing or
persistent cough
• persistent dizziness
or collapse
• pale skin, floppy movements
NOTE: Even a small allergic
reaction can be the first sign of a
severe reaction. Please call your
pediatrician at any sign of an
allergic reaction!
23

NOTE: The information contained in our guide is not a substitute to regular baby
care. Always consult your pediatrician regarding food safety, nutrition and the
feeding of your child.
Food intolerance.
Food intolerance is sometimes confused for a food allergy because it
can manifest similar symptoms, such as vomiting, abdominal pain, and
diarrhea. Whereas food allergies are immune reactions to the proteins
found in foods like milk, nuts and fish, food intolerances are a reaction
to the body’s inability to digest a certain kind of food.
While food intolerance and its related symptoms are not as
dangerous as food allergies, it is important to review any symptoms
with your pediatrician and provide your child with the medical
attention he or she needs.
• Infants are at a higher risk
for food-borne illnesses than
older children and healthy
adults. It is critical to adhere
to food safety practices.
• Cleanliness is extremely
important when making
homemade baby food.
Always use clean hands,
clean cooking utensils, clean
preparation surface(s) and
clean pots/pans, etc. when
making and preparing
homemade baby food.
• Be sure steamed or heated
foods are completely cooled
and skins, cores, pits or stems
are removed before adding
to the Short Cup.
24

What to avoid.
Choking
hazards
• raw, hard
vegetables
• large pieces
of fruit
• sticky or hard
foods (popcorn,
marshmallows,
hard candy, etc.)
• whole nuts,
both small and
large
Harmful
bacteria &
spores
• Unpasteurized
dairy products
are not treated
to kill harmful
bacteria and are
therefore unsafe
for immature
immune systems.
• Honey contains
spores that
may cause
botulism, a rare
and extremely
serious illness,
in an immature
digestive system.
Canned foods
that are...
• outdated
• without a label
• dented, rusted,
bulging, or
leaking
Added
ingredients
• salt or sugar
25
26

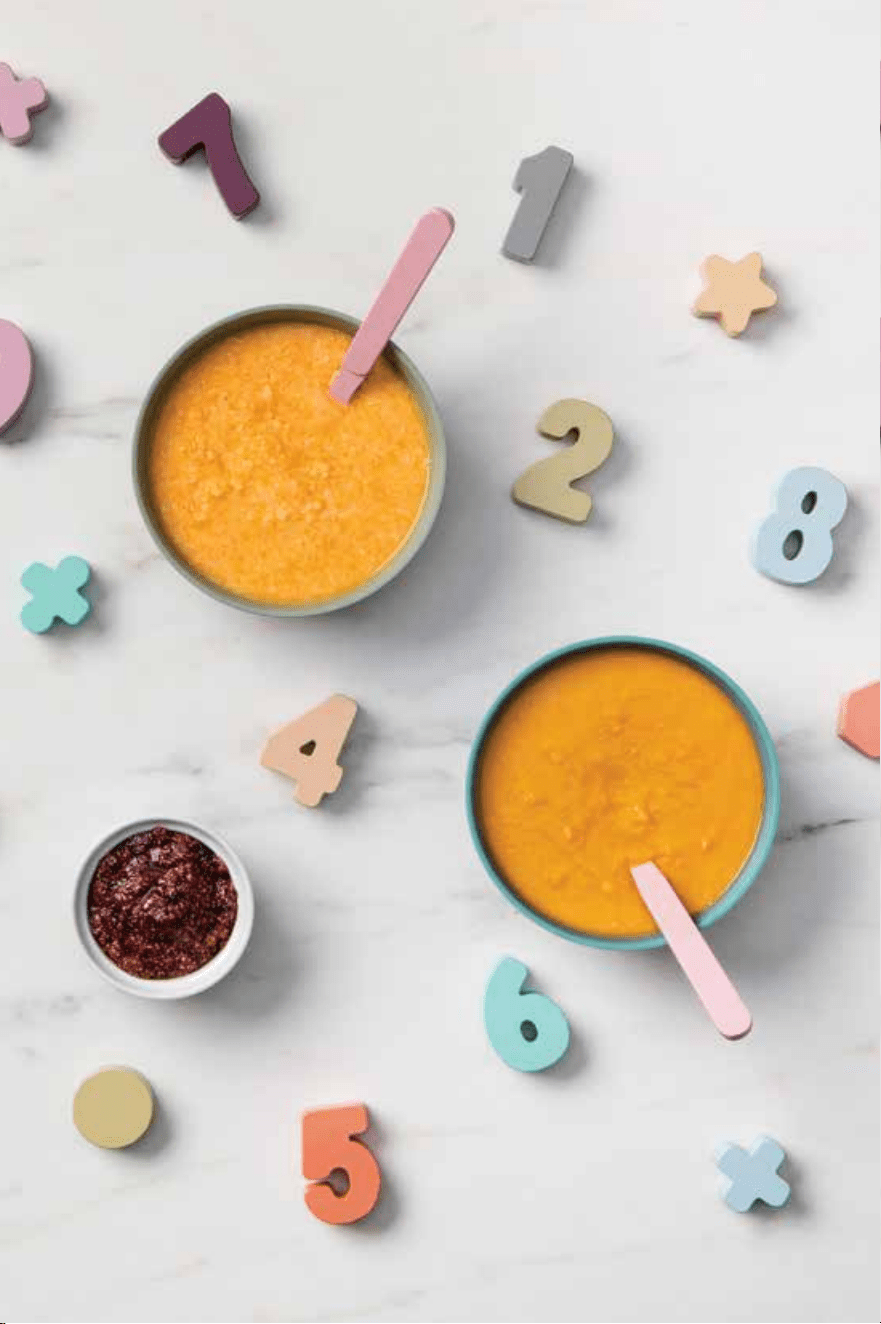
Stage 1.
Perfect purées
6-8 months
Finely blend veggies and fruits
for nutritious, wholesome purées
— your baby's first introduction
to solid food.
NOTE: to make a thicker purée, reduce liquid to 1 tbsp; for a
thinner purée, add 1 tbsp of liquid at a time until you reach
desired consistency.
27

Stage 1 will last
6-8 weeks.
Stage 1 introduces very simple, thin purées with no
more than two ingredients. New foods should be
introduced on a 4-day schedule, meaning you’ll
introduce one new food at a time, every four days.
This is critical for tracking any allergic reactions to
a particular food.
Introducing flavors
Baby’s first “solid” meal will actually be a thin,
single ingredient purée. To create a purée that
is the appropriate consistency, purée foods with
breast milk, prepared formula or water.
“4-Day wait” rule
When introducing new foods, it’s very important to
follow the “4-Day Wait” rule: introduce new foods
one at a time, for four-days straight. For example,
if your baby tried avocados on Monday, wait until
28

Friday to introduce sweet potatoes. That way, you
can trace any strange reactions, rashes or poops
that appear right back to the oending food.
Only introduce new foods in the morning or early
afternoon in the event you need to reach your
pediatrician. It is fine to combine a new food with
any food you know your baby already tolerates.
Thicken the consistency over the course of Stage 1
As your baby becomes more familiar with eating,
gradually thicken the consistency of their food by
blending with less liquid (breast milk, prepared
formula or water). Let your baby lead the way.
Every child develops differently, so it’s important to talk to your
pediatrician to make informed decisions about what foods
are appropriate, specifically for your baby. If at any point you
become concerned with your baby’s eating habits, contact your
pediatrician for advice.
29

Baby’s First Purée!
Purée consistency: thin & smooth enough to run o a spoon
The day has arrived, but how do you choose what will be the very first
solid food your baby eats? Don’t fret! If you have to, close your eyes
and point at this page to choose the first food. The very first “meal”
likely won’t be more than a spoonful.
Some food ideas for your
baby’s first meal:
• apple
• avocado
• banana
• brown rice cereal
• butternut squash
• pear
• carrots
• peas
• sweet potato
• white rice cereal
• yam
30

IMPORTANT! Do not save leftovers that have come in contact with a
used spoon or utensil. Germs from the spoon can easily contaminate the
remaining food. If you don’t think your baby will consume the full contents
of a storage cup, simply take what you need out of the cup with a clean
utensil, reseal the lid, and save the rest for later.
WARNING: Do not fill Freezer Tray more than 2/3 full to prevent freezer burn
and leakage. Make sure all sides of the Freezer Tray Lid are snapped on and
sealed to avoid freezer burn.
Flavor #2:
freezer
Week 1.
For week one, you will continue
to feed your baby one food a
day in conjunction with breast
milk or formula. After 2 days,
make sure you take the servings
for day 3 and 4 out of the
freezer and place them in the
refrigerator to thaw. On day 4,
take the servings for day 5 and
6 out of the freezer and place in
the refrigerator to thaw.
Making the right amount
of food for week 1.
To avoid wasting food, fill 3-4
Date-Dial Storage Cups halfway
with the first food and fill the Easy
Pop Freezer Tray with the second
food. Refrigerate the storage
cups and freeze the Freezer Tray,
so you’ll be ready to go all week!
Storage reminder:
Fresh food
keeps in the refrigerator for
2-3 days per USDA food safety
guidelines [12]. Frozen food
keeps for about 3 months.
Even if the food has changed
color or browned, it is still safe
to eat if consumed within the
recommended timeframe.
Immediately freezing purées
after preparing helps to
reduce browning.
Week 2.
For Week 2, you can oer
a third flavor, but stay on the
“4-Day Wait” Rule schedule.
Start oering a bit more food
than in Week 1; we recommend
half a NutriBullet
Baby
®
serving
once a day. Always watch for
signs from your baby that let
you know mealtime is over.
Moving forward.
Depending on your baby’s age at
the time of the first meal, you may
be looking at 2 servings a day
pretty quickly. Follow their lead.
Flavor #1:
refrigerator
31

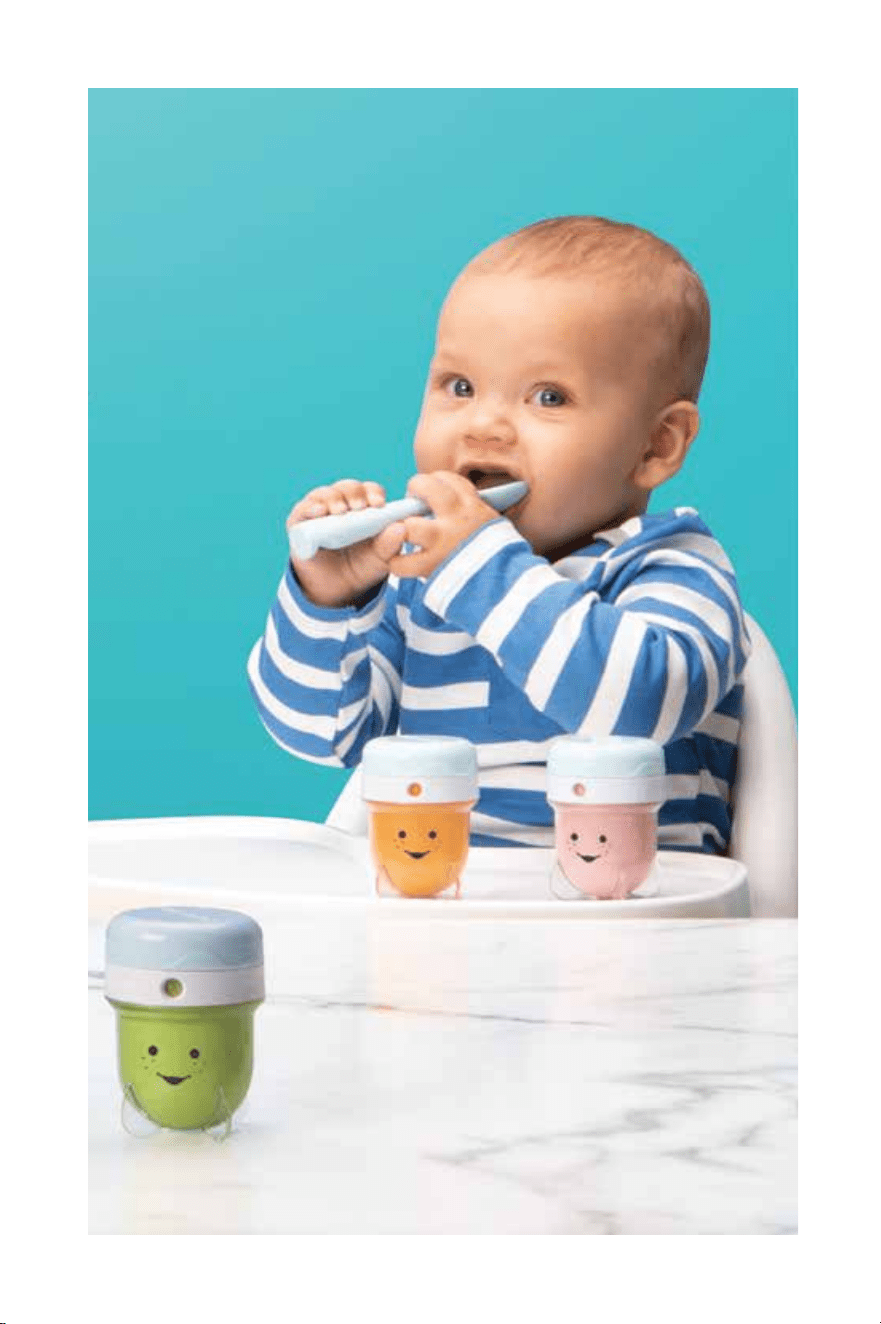
Feeding baby.
1 Oer the first meal at a time
when your baby isn’t too
hungry. First feed your baby
with breast milk or formula,
but stop short before they are
full. Then introduce the purée
immediately afterwards or
wait up to 2 hours.
2 Oer the first meal early in the
day (morning or afternoon) in
case your baby has a reaction
such as gas or colic.
3 Oer food at room
temperature or slightly
warmed (about 98.7°F)
Do not heat foods in the
microwave, because it
creates heat pockets.
4 Place a tiny bit of food onto
the spoon and put some on
your baby’s lips. Then place
the spoon on the bottom lip
and slip the spoon gently into
your baby’s mouth. This may
cause your baby’s tongue to
push the food back out. If so,
use the spoon to scrape the
food o the chin area and
try putting it in your baby’s
mouth again. If the tongue
keeps pushing the food back
out, don’t worry.
You are ocially ready to start introducing purées. Here are a few tips
for smooth sailing:
Never push your baby to eat.
If the first meal doesn’t go well,
try again in a few days.
Ending mealtime
Your baby will show signs that
mealtime is over by leaning back
in the chair, turning away from
food, playing with the spoon, or
refusing to open up for the next
bite. If there is food left, throw
it out. Don’t force your baby to
continue eating when full. Throw
out any leftovers that have come
into contact with your baby’s
mouth or the spoon.
You did it!
Congratulations!
32

33

1 ingredient
purées.
S
T
A
G
E
1
.
S
H
O
R
T
C
U
P
.
34

1 ingredient
purées.
Banana purée.
MAKES ABOUT 88ML
Often considered the best solid food to introduce to babies, banana
is a tasty, low allergy-risk food.
10 seconds
1
2 TBSP
BANANA, MEDIUM,
CHOPPED
BREAST MILK,
FORMULA,
OR WATER
1 Add ingredients to
the short cup. Do not
exceed the MAX line.
2 Blend to desired consistency.
NUTRITIONIST TIP
Although you may have heard that
it’s best to introduce your little one
to veggies prior to fruits, babies are
hardwired to prefer sweet foods
and the order of introducing foods
is not likely to change this.
35

Avocado purée.
MAKES ABOUT 130ML
Rich in vitamins, minerals, and healthy monounsaturated fats,
creamy avocados are one of nature’s great achievements.
15 seconds
1
1/4 TSP
3 TBSP
AVOCADO, SMALL
LEMON JUICE
(OPTIONAL, TO
HELP PREVENT
BROWNING)
BREAST MILK,
FORMULA, OR
WATER
1 Add ingredients to
the Short Cup. Do not
exceed the MAX line.
2 Blend to desired consistency.
PRO TIP
Avocado not quite ripe? To speed
up the ripening process, place
the fruit in a brown paper bag
alongside a banana.
S
T
A
G
E
1
.
S
H
O
R
T
C
U
P
.
36

Sweet potato purée.
MAKES ABOUT 260ML
One of these sweet spuds goes a long way, making several
servings of baby food at once, which saves you precious time.
15 seconds
1
3 TBSP
SWEET POTATO,
MEDIUM, PEELED
(STEAMED OR
BOILED)
BREAST MILK,
FORMULA,
OR WATER
1 Add steamed and thoroughly
cooled sweet potato and
liquid to the Batchbowl. Do
not exceed the MAX line.
2 Blend to desired consistency.
PRO TIP
Avoid storing uncooked sweet
potatoes in the refrigerator.
Instead, store them in a cool,
dry, well-ventilated container.
S
T
A
G
E
1
.
B
A
T
C
H
B
O
W
L
.
37

Pear purée.
MAKES ABOUT 88ML
Introduce your little foodie to pears! From Anjou to Bartlett to Bosc
varieties, pears are an excellent source of vitamin C and fiber.
Their sweet taste also makes them a likely hit with tiny taste buds.
12 minutes
1
2 TBSP
PEAR, MEDIUM,
CHOPPED
(STEAMED)
BREAST MILK,
FORMULA,
OR WATER
1 Add steamed and thoroughly
cooled pear and liquid
to the Short Cup. Do not
exceed the MAX line.
2 Blend to desired consistency.
NUTRITIONIST TIP
If you’re tight on time (or energy!),
drained canned pears are a nice
alternative to steamed and cooled
fresh ones. Just make sure to
choose an unsweetened,
additive-free variety.
S
T
A
G
E
1
.
S
H
O
R
T
C
U
P
.
Always assure that any cooked
or steamed ingredient has
thoroughly cooled before
blending in the sealed small cup
and Extractor Blade!
38

Brown rice cereal.
MAKES ABOUT 375ML
Cereal is a classic introductory food for babies. We like using
brown rice since it’s a whole grain and a natural source of fiber.
20 minutes
1/2 CUP
11/2 CUPS
BROWN RICE,
UNCOOKED
BREAST MILK,
FORMULA,
OR WATER
1 Add 1/2 cup of uncooked
brown rice to the Batchbowl
and blend for 45 seconds
to a fine powder.
2 Add the milled brown
rice and 1 ½ cups of
breast milk, formula, or
water to a pot and stir.
3 Bring pot to a boil and
reduce to a simmer (low
heat) for 15 minutes.
4 Test the consistency of the
brown rice cereal. To make
thinner, add more liquid.
S
T
A
G
E
1
.
B
A
T
C
H
B
O
W
L
.
NUTRITIONIST TIP
Milled brown rice cereal is a great first
food. It also combines well with other
fruit and veggie purées (refer to page
42 for Green Bean & Rice Purée).
Always allow food to cool before
feeding baby.
39

Combo
purées.
To add more nutrition (and
sophistication) to your baby’s meal, mix
a second ingredient into your baby's
fruit or veggie purées. Feel free to
combine any foods you know your baby
tolerates. Always use the “4-Day Wait”
rule when introducing new foods.
S
T
A
G
E
1
.
B
A
T
C
H
B
O
W
L
.
40

Pear & oatmeal purée.
MAKES ABOUT 250ML
Mild and comforting oatmeal combines well with a variety of fruit
and vegetable purées.
60 seconds
1 CUP
1/2 CUP
2 TBSP
PEAR, STEAMED,
PEELED AND
DESTEMMED,
COOLED
OATMEAL, COOKED
AND COOLED
BREAST MILK,
FORMULA,
OR WATER
1 Add steamed and thoroughly
cooled pear, ¼ cup oats,
and 2 Tbsp breast milk,
prepared formula, or
water to Batchbowl. Do
not exceed the MAX line.
2 Blend for 30 seconds
until combined then add
remaining ¼ cup oats.
3 Blend for another 30 seconds
until consistency is even.
NUTRITIONIST TIP
Pediatricians may recommend
adding small amounts of tofu,
plain yogurt, and cottage cheese
into your baby’s diet around the
7-month or 8-month mark. Check
with your pediatrician to decide
whether or not these foods will work
for your little one. As with all new
foods, follow the “4-Day Wait” rule.
41

Green bean & rice purée.
MAKES ABOUT 192ML
Combine green beans and brown rice for a classic dish babies love.
60 seconds
1/2 CUP
1 CUP
1/4 CUP
GREEN BEANS
(STEAMED/BOILED,
COOLED)
BROWN RICE,
COOKED
BREAST MILK,
FORMULA, OR
WATER
1 Add thoroughly cooled
ingredients to the Batchbowl.
Do not exceed the MAX line.
2 Blend for 30 seconds until
combined, then stir.
3 Blend for another 30 seconds
to desired consistency.
NUTRITIONIST TIP
As your baby develops, you can start
creating purees with a bit more texture.
To get the right consistency, simply add
a bit less liquid and "pulse" a few times
by pushing straight down on the cup and
releasing immediately. If the new texture
is not appreciated, just blend with more
liquid to make it thinner and smoother.
S
T
A
G
E
1
.
B
A
T
C
H
B
O
W
L
.
Always allow food to cool
before feeding baby.
42

Strawberry &
banana purée.
MAKES ABOUT 125ML
Strawberry and banana are as iconic a duo as peas and carrots.
20 seconds
1
2
BANANA, MEDIUM,
CHOPPED
STRAWBERRIES,
HALVED
1 Add ingredients to the
Batchbowl. Do not
exceed the MAX line.
2 Blend to desired consistency.
NUTRITIONIST TIP
Peel and chop your overripe bananas
and store them in a reusable freezer
bag. They make a great addition to
adult smoothies and can be defrosted
for later use in baby food.
S
T
A
G
E
1
.
B
A
T
C
H
B
O
W
L
.
43

Avocado & pea purée.
MAKES ABOUT 142ML
Your baby will soon say “please” to avocado & peas. Surprisingly,
1/2 cup of cooked peas contains 4 grams of plant protein!
20 seconds
1/4
1/2 CUP
1/2 CUP
AVOCADO, PEELED
AND PITTED
GREEN PEAS,
STEAMED AND
COOLED
BREAST MILK,
FORMULA,
OR WATER
1 Add thoroughly cooled
ingredients to the Short Cup.
Do not exceed the MAX line.
2 Blend to desired consistency.
PRO TIP
Thoroughly wash fresh fruits and
vegetables (including those with
peels!) under clean, running water.
Always wash and dry avocados
before slicing.
S
T
A
G
E
1
.
S
H
O
R
T
C
U
P
.
Always assure that any cooked
or steamed ingredient has
thoroughly cooled before
blending in the sealed small cup
and Extractor Blade!
Always allow food to cool
before feeding baby.
44

Sweet potato
& carrot purée.
MAKES ABOUT 241ML
A top contender for one of the most popular veggie purees among
babies, both carrots and sweet potatoes provide the vitamin A
needed for healthy skin, healthy tissues, and good vision.
60 seconds
1/2 CUP
1/2 CUP
1/2 CUP
SWEET POTATO,
MEDIUM, PEELED
(STEAMED/BOILED
AND COOLED)
CARROT, PEELED
(STEAMED/ BOILED
AND COOLED)
BREAST MILK,
FORMULA,
OR WATER
1 Add thoroughly cooled
ingredients to the Batchbowl.
Do not exceed the MAX line.
2 Blend for 30 seconds until
combined, then stir.
3 Blend for another 30
seconds to reach a
smooth consistency.
NUTRITIONIST TIP
It’s important for babies to benefit
from a rainbow of foods on their
plates. For example, orange, green,
and red foods all oer unique
healthy compounds that are good
for growing minds and bodies.
S
T
A
G
E
1
.
B
A
T
C
H
B
O
W
L
.
45
46

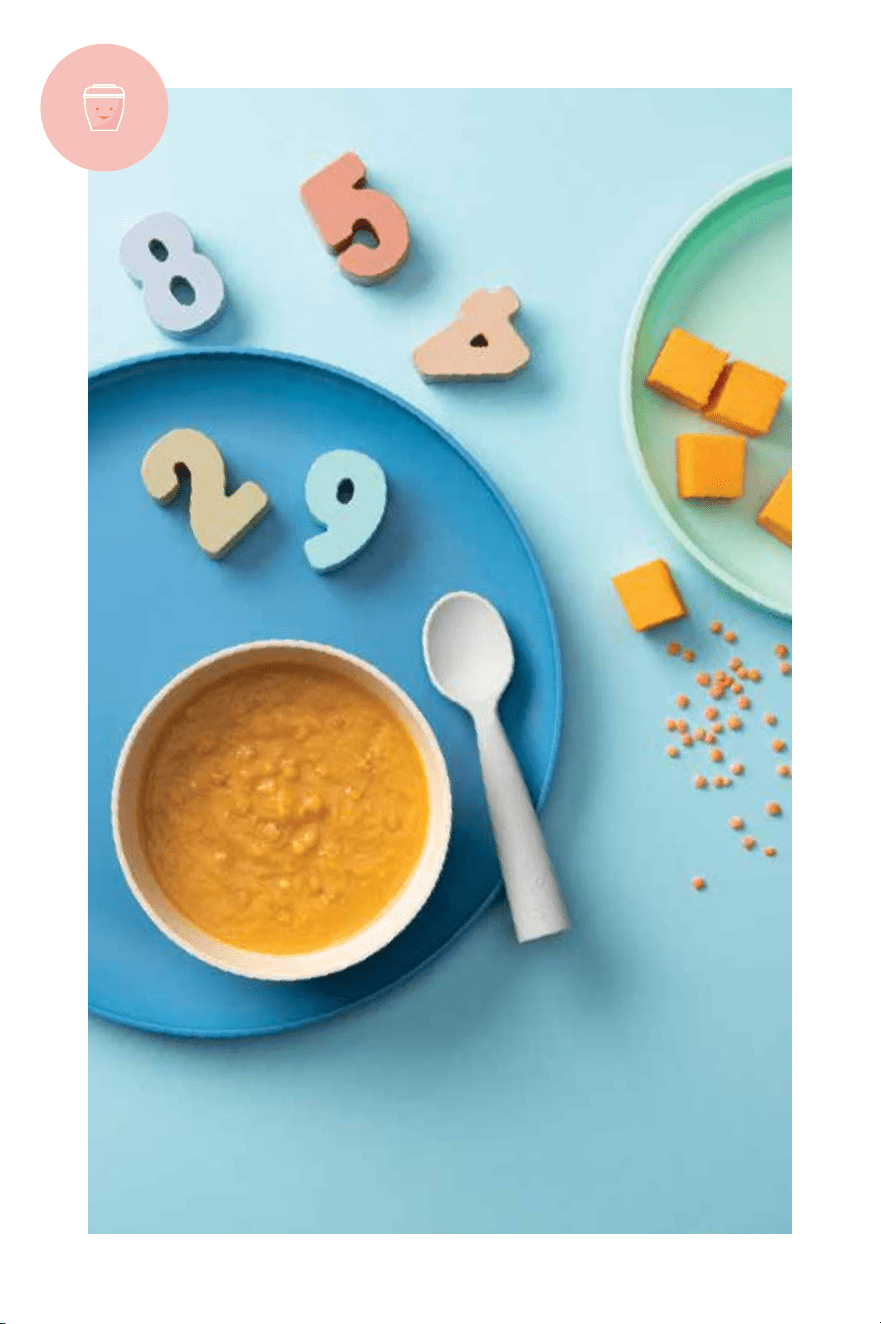
Stage 2.
Tasty textures
9-12 months
Easily adjusts to make thicker
blends for your baby's next stage
of feeding.
NOTE: to make a thicker purée, reduce liquid to 1 tbsp; for a
thinner purée, add 1 tbsp of liquid at a time until you reach
desired consistency.
47

Stage 2 means it’s time to
thicken things up a bit.
Start slow by adding well-cooked rice, oatmeal,
or tiny pasta bits into purées for an added bit of
texture. Once your baby gets used to these thicker
foods, you can get creative with your flavor
combinations to help develop a mature palate.
This stage also calls for the introduction of
heartier foods like chicken, red meat, and
shredded cheese. Now that your baby has a
much longer list of flavors to choose from, it’s
a great idea to make large batches of single-
ingredient purées in advance (see batch
preparation on page 17). That way, when a
recipe calls for something like chicken, you can
just toss in a thawed serving — no extra cooking
required. It will save you an incredible amount of
preparation time which allows you to be creative
without spending too much time in the kitchen.
Finally, stage 2 is a wonderful and fun time to
start introducing finger foods such as cereal,
tiny bits of fruit, and minced cooked vegetables.
Every child develops dierently, so it’s important to talk to your
pediatrician to make informed decisions about what foods
are appropriate for your baby, specifically. If at any point you
become concerned with your baby’s eating habits, contact your
pediatrician for advice.
48
49

30 seconds
Berry chia spread.
with optional toast or mixed with yogurt for a parfait
MAKES ABOUT 85ML
Chia jam is delicious way to give your little one the goodness of
berries and omega-3 fatty acids without any added sugar.
1/4 CUP
2
1 TBSP
BLUEBERRIES
STRAWBERRIES,
SMALL, HALVED
CHIA SEEDS
1 Add berries, strawberries,
then chia seeds to
the Short Cup. Do not
exceed the MAX line.
2 Blend for 30 seconds
until combined.
NUTRITIONIST TIP
This is a good time to encourage self-
feeding for your baby. When to do so will
vary for each little one, but the general
recommendation is to introduce this
practice once your baby can sit upright
and bring hands and other objects to
the mouth. Provide your baby with a
spoon at mealtime or prepare bits of
easily 'pinch-able' foods to facilitate
self-feeding.
S
T
A
G
E
2
.
S
H
O
R
T
C
U
P
.
50

60 seconds
Chicken, brown rice,
& carrot soup.
MAKES ABOUT 227ML
Purée a small portion of this well-rounded meal for your baby and
serve the solid mixture to the rest of the family!
1/4 CUP
1/4 CUP
1/4 CUP
1/2 CUP
CARROT (STEAMED
OR BOILED)
* use extra sweet potato
& carrot puree if you
have it
CHICKEN, COOKED
AND SHREDDED
BROWN RICE,
COOKED
VEGETABLE BROTH,
UNSALTED
1 Add liquid first then add
completely cooled down
carrot, chicken and rice
to the Batchbowl. Do not
exceed the MAX line.
2 Blend for 30 seconds until
combined, then stir.
3 Blend for another 30 seconds
to desired consistency.
PRO TIP
Use a meat thermometer to cook all
poultry to an internal temperature of
at least 165°F to kill any bacteria that
S
T
A
G
E
2
.
B
A
T
C
H
B
O
W
L
.
51
S
T
A
G
E
2
.
B
A
T
C
H
B
O
W
L
.
52

60 seconds
Butternut squash
& lentil soup.
MAKES ABOUT 255ML
Legumes, like lentils, are packed with beneficial nutrients like plant-
based protein, fiber, vitamins, minerals, and phytochemicals. Paired with
nutrient-rich butternut squash, this meal is a nutritional powerhouse.
1/2 CUP
1/2 CUP
1/2 CUP
BUTTERNUT
SQUASH, CUBED
(STEAMED OR
BOILED)
LENTILS, COOKED,
COOLED
VEGETABLE BROTH,
UNSALTED
1 Add liquid first, then add
thoroughly cooled squash
and lentils to the Batchbowl.
Do not exceed the MAX line.
2 Blend for 30 seconds until
combined, then stir.
3 Blend for another 30 seconds
to desired consistency.
NUTRITIONIST TIP
At this stage, thicker purees are
better for your baby. But if he or she
is having a hard time swallowing the
thicker food—or keeps pushing the
food out—stick with a thinner puree
and try again the following week.
53

60 seconds
Spinach & potato soup.
MAKES ABOUT 420ML
Spinach, a well-known superfood, is paired with the humble potato in
this nourishing dish.
1/2 CUP
1 CUP
11/2 CUP
SPINACH, COOKED
POTATO (STEAMED
OR BOILED),
PEELED
VEGETABLE BROTH,
UNSALTED
1 Add liquid first then
add thoroughly cooled
potato and spinach to
the Batchbowl. Do not
exceed the MAX line.
2 Blend for 30 seconds until
combined, then stir.
3 Blend for another 30 seconds
to desired consistency.
NUTRITIONIST TIP
All fresh foods should be cooked
with no added salt or seasoning
during these early stages. Since
processed foods tend to be
higher in salt and contain other
preservatives, homemade meals
are recommended.
S
T
A
G
E
2
.
B
A
T
C
H
B
O
W
L
.
54

60 seconds
Kid-friendly
bean spread.
with optional toast
MAKES ABOUT 227ML
Hummus is a go-to snack for grown-ups, so why not give a simple
variation to your baby? Made with fiber-filled beans and healthy
fats, there’s a lot to love about this spin on black bean hummus.
1
2 TBSP
1 TBSP
CAN OF BLACK
BEANS, NO SALT
ADDED, RINSED &
DRAINED
OLIVE OIL
LEMON JUICE
1 Add beans, olive oil and
lemon juice to the Batchbowl.
Do not exceed the MAX line.
2 Blend for 30 seconds until
combined, then stir.
3 Blend for another 30 seconds
to desired consistency.
NUTRITIONIST TIP
Baby-led weaning is an alternative
to spoon-feeding. When babies
feed themselves, it is thought to
bolster confidence and discourage
picky eating habits. Just be patient
if most of the food doesn’t make its
way into your baby’s mouth. Rome
wasn’t built in a day.
S
T
A
G
E
2
.
B
A
T
C
H
B
O
W
L
.
55
56

Stage 3.
Mini-meals | 1 year +
This stage incorporates small bits
of fruit and veggies into the mix,
helping your baby transition to
chewing whole foods.
57

What a dierence a year makes!
At this point of development, your baby’s eating
habits are becoming more like an adult’s. Your baby
will likely be self-feeding with fingers and utensils
and growing more vocal about likes and dislikes.
At this stage, it’s as important as ever to serve your
baby a variety of flavors and textures; what you
introduce now will set the foundation for future
eating habits. Encourage experimentation by
consistently serving a wide variety of options from
each food group. Even if servings go untouched, your
baby will grow familiar with the food you prepare
and more likely to actually eat it in the future.
Every child develops dierently, so it’s important to talk to your
pediatrician to make informed decisions about what foods are
appropriate, specifically, for your baby. If at any point you become
concerned with your baby’s eating habits, contact your pediatrician
for advice.
58

59
S
T
A
G
E
3
.
B
A
T
C
H
B
O
W
L
.
60

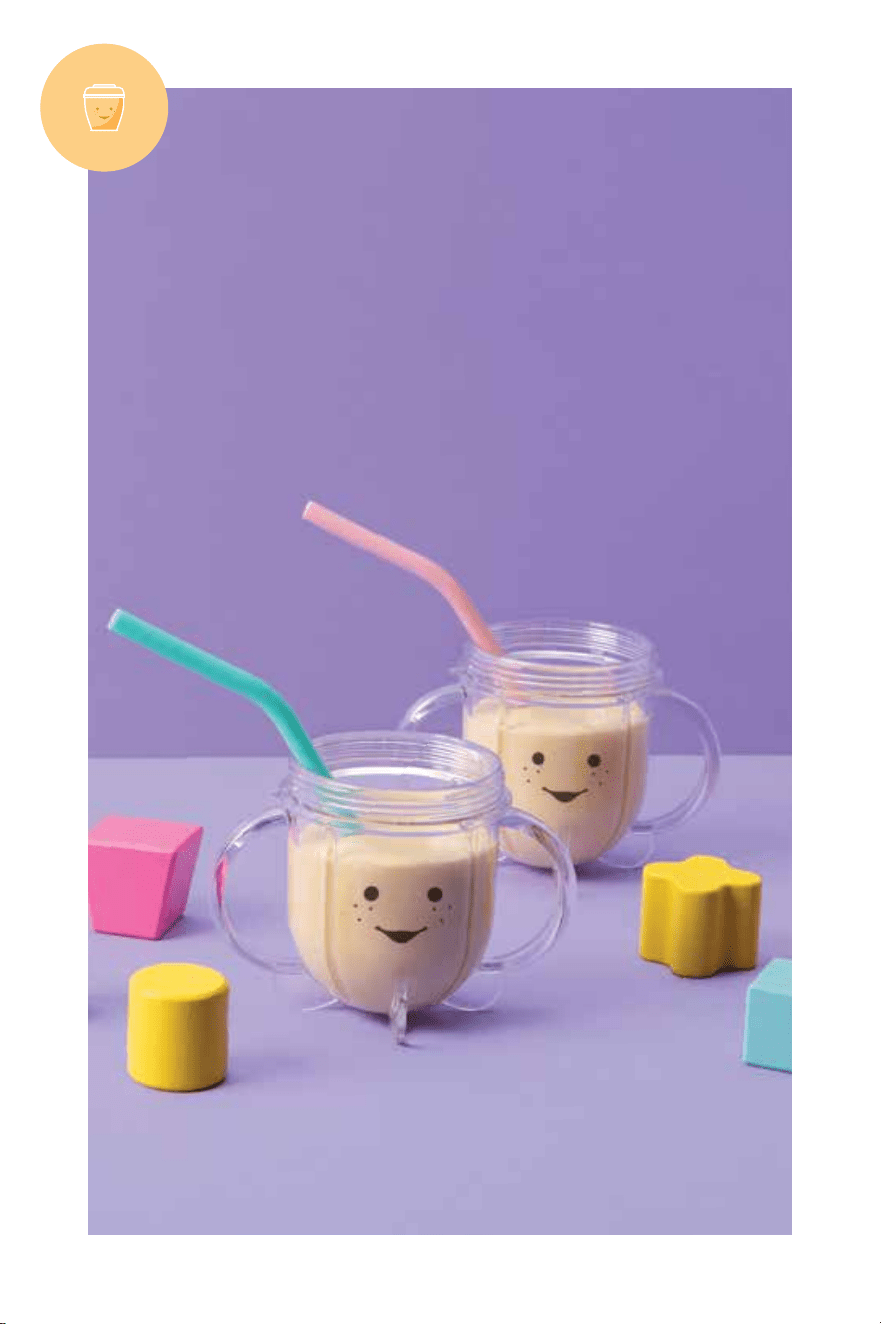
60 seconds
Peachy keen
yogurt smoothie.
MAKES ABOUT 285ML
Smoothies—like this classic one—are a wonderful
vehicle for nutrient-rich fruits and veggies.
1/2 CUP
1/2 CUP
1/2
2 TBSP
YOGURT, PLAIN
PEACH, PEELED,
PITTED, CHOPPED
BANANA, CHOPPED
BREAST MILK,
PREPARED
FORMULA,
OR WATER
1 Add yogurt, peach, banana
and liquid to the Batchbowl.
Do not exceed the MAX line.
2 Blend for 30 seconds until
combined, then stir.
3 Blend for another 30 seconds
to desired consistency.
NOTE: for thinner puree add 1 tbsp
of liquid at a time until you reach
desired consistency.
NUTRITIONIST TIP
You can use any fruit combination
you like in a NutriBullet
Baby
®
smoothie, so add a serving of any
fruit you have stashed in the freezer.
PRO TIP
If your baby doesn’t seem to
tolerate dairy, swap out plain
yogurt for a dairy-free alternative.
61

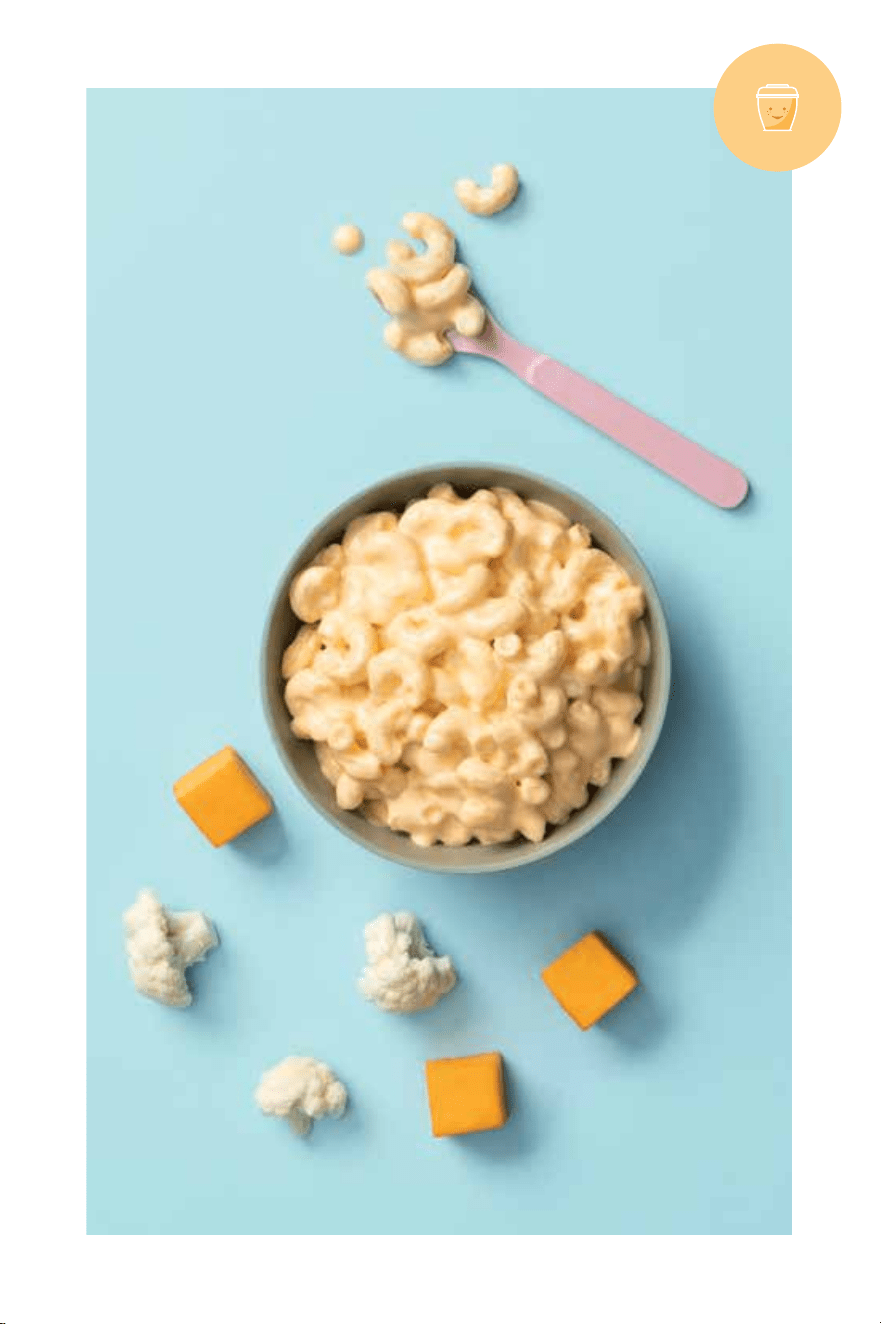
20 minutes
Cauliflower
mac & cheese.
MAKES ABOUT 430ML
Macaroni and cheese will inevitably become one of your child’s favorite
foods, so why not embrace it? Infuse your mac and cheese with some
puréed cauliflower to give it a nutritional boost.
1/4
2 TBSP
1 CUP
1/4 CUP
2 TBSP
3 TBSP
1 1/2 CUP
1/4 CUP
CAULIFLOWER
FLORETS, BOILED/
STEAMED & COOLED
MILK
CHEDDAR CHEESE
RICOTTA CHEESE
BUTTER, SOFTENED
MILK
MACARONI
NOODLES, WHOLE
GRAIN, COOKED
AND COOLED
Use star-shaped noodles
for additional fun!
SPINACH,
FINELY CHOPPED
(OPTIONAL)
1 Add thoroughly cooled
cauliflower purée
ingredients to the batchbowl.
Puree until smooth.
2 Add additional ingredients
to the batchbowl
(except the noodles) and
blend until smooth.
3 Pour the cheese mixture into
a saucepan over medium
heat, stirring gently until
melted and warm throughout.
4 Toss in cooked macaroni
noodles and stir until sauce
is evenly distributed. Fold
in spinach if desired.
NUTRITIONIST TIP
Cruciferous veggies like cauliflower
pack a serious inflammation-
fighting punch. Include others, such
as broccoli, Brussels sprouts, and
kale in your baby’s diet, too.
CAULIFLOWER PURÉE:
ADDITIONAL INGREDIENTS:
PRO TIP
Make extra cauliflower puree for
a delicious alternative to mashed
potatoes your whole family will love.
Always allow food to cool
before feeding baby.
62
S
T
A
G
E
3
.
B
A
T
C
H
B
O
W
L
.
63
S
T
A
G
E
3
.
B
A
T
C
H
B
O
W
L
.
64

10 minutes
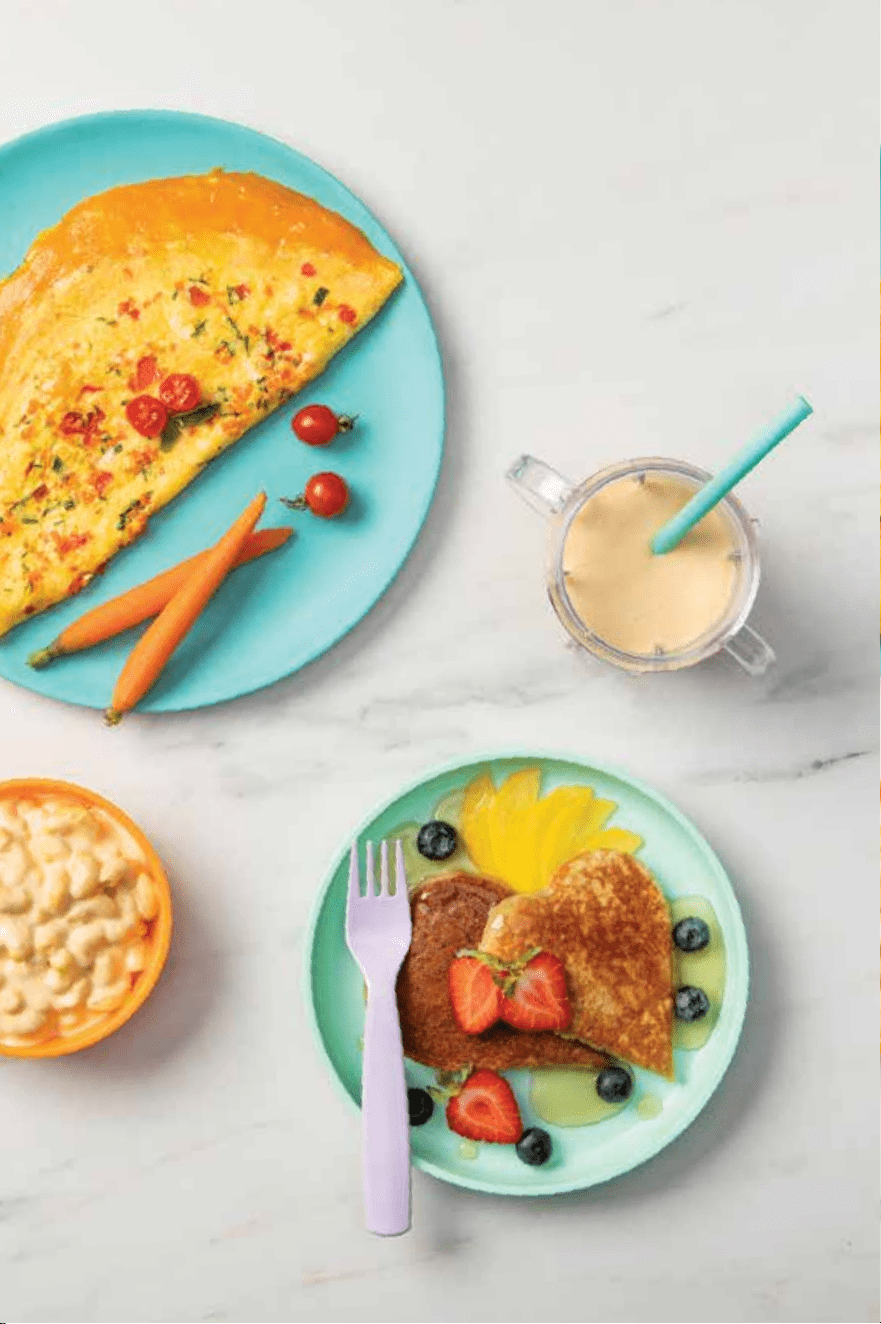
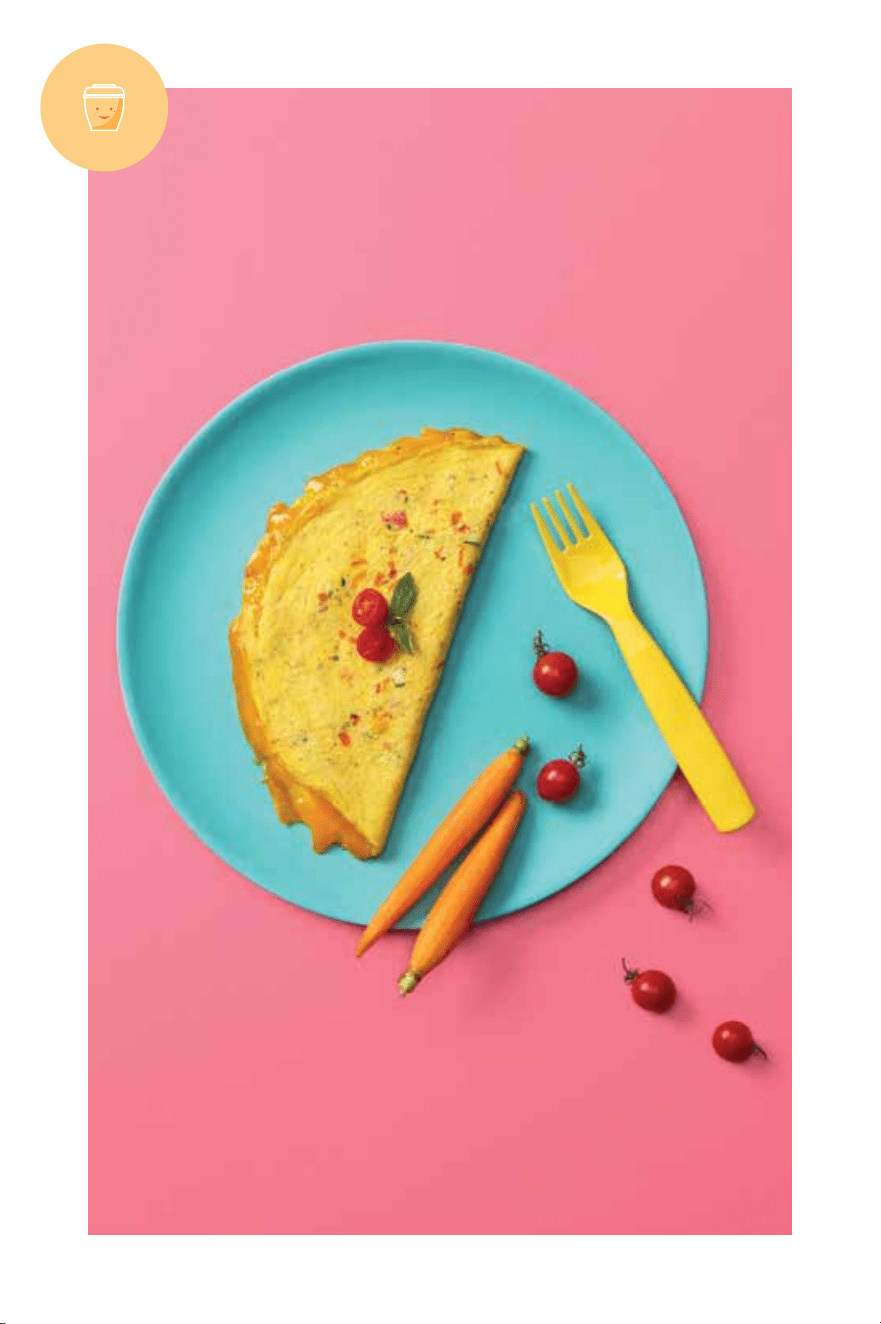
Veggie omelette.
MAKES 3 SERVINGS
Classic scrambled eggs just got a little more nutritious thanks to the
addition of a bunch of yummy veggies. Egg dishes like this one make a
tasty meal for breakfast, lunch, or dinner that the whole family will love.
1/4
1/4
4
3
1/4 CUP
2 TSP
CARROT, MEDIUM,
BOILED/STEAMED
ZUCCHINI,
MEDIUM, BOILED/
STEAMED
CHERRY TOMATOES
EGGS, LARGE
CHEDDAR CHEESE,
SHREDDED
EXTRA VIRGIN
OLIVE OIL
1 Add vegetables and eggs
to the Batchbowl and
blend until smooth.
2 Warm olive oil in a
medium-sized skillet
over medium heat.
3 Pour the egg mixture into
the skillet and top with
shredded cheese. Allow the
egg mixture to cook, tilting
pan and gently moving
cooked portions as needed.
4 When top surface of eggs
is thickened and no visible
liquid egg remains, fold the
omelette in half with spatula.
5 Ensure it is cool to the touch
and then serve. Store any
leftovers in the fridge for
an easy meal tomorrow.
NUTRITIONIST TIP
In the world of nutrition, eggs are
considered a perfect protein as they
contain all the non-essential and
essential amino acids your body needs.
PRO TIP
Feel free to use whatever veggies you
have on hand. Swap out zucchini for
broccoli, for example.
65

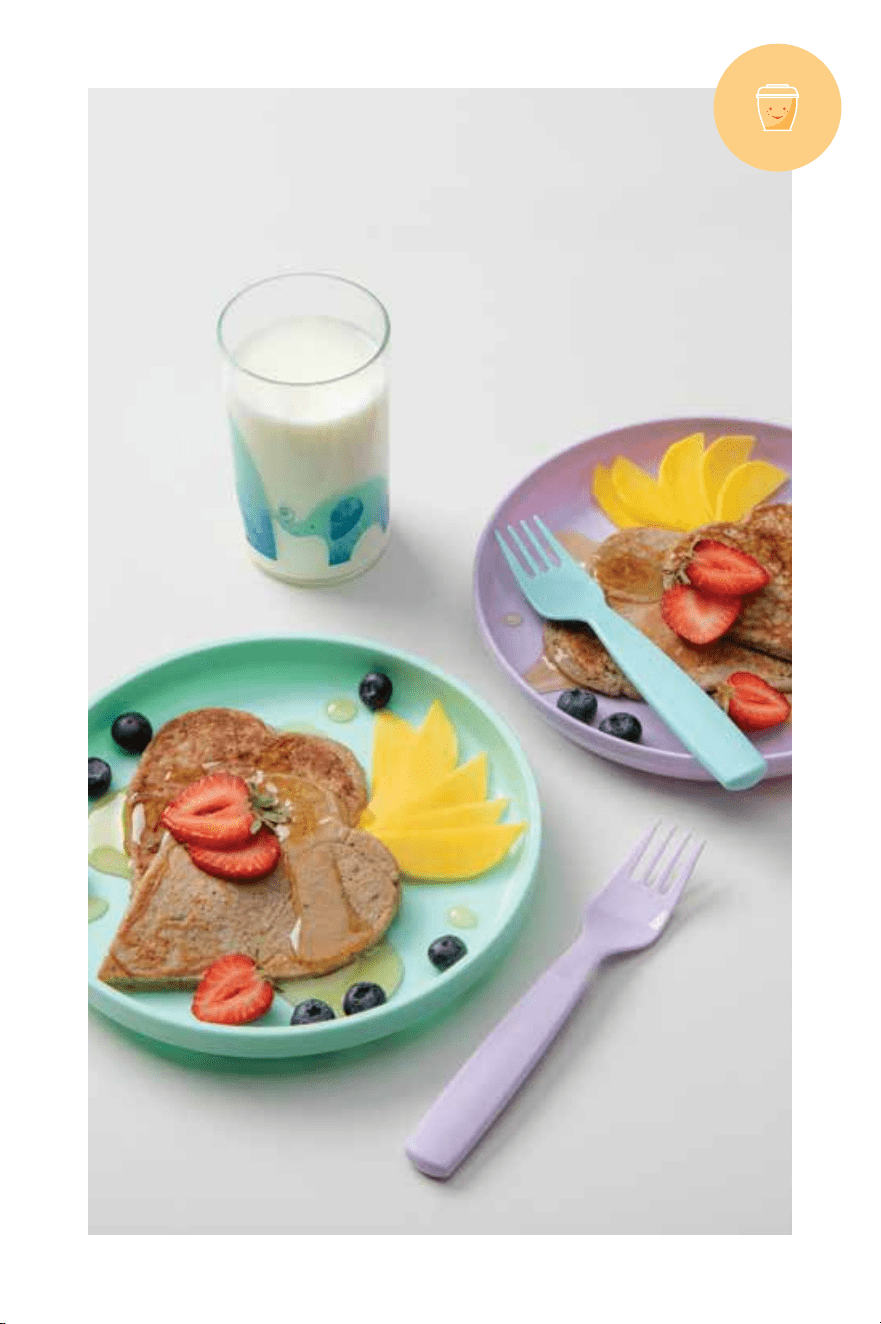
13 minutes
4-ingredient
banana pancakes.
MAKES 2 MEDIUM PANCAKES OR 3 MINI PANCAKES
Stack the breakfast table with a batch of these easy-peasy
4-ingredient flapjacks. This is a great recipe to double or triple
and make in the Batchbowl if you’re feeding the whole family.
1
1
1/4 CUP
1/8 TSP
1 TBSP
BANANA, SMALL,
CHOPPED
EGG, LARGE
WHOLE ROLLED
OATS
CINNAMON
BUTTER
1 Put all of the ingredients
into the Small Cup
(except the butter) and
blend until smooth.
2 Warm the butter in a skillet
or griddle on medium heat.
3 Pour the pancake batter into
the skillet, and flip pancakes
after bubbles rise to surface
and bottoms brown.
4 Continue to cook until the
second side is golden brown.
5 Ensure that the pancake is
cool to touch and then serve.
NUTRITIONIST TIP
One of the best ways you can foster
a healthy eater is to be a healthy
role model. Prioritize family meals by
turning o the TV and smart phones
and showing your little ones how
much you enjoy eating healthy foods.
PRO TIP
Put any leftover pancakes in an
airtight, reusable bag and store in the
freezer. Simply toss frozen pancakes in
the toaster to thaw and reheat when
you’re in a pinch for an easy breakfast.
66
S
T
A
G
E
3
.
B
A
T
C
H
B
O
W
L
.
67
68

Recipes
for mama.
After 40 weeks of carrying around
such precious cargo, your work is only
beginning! These next few recipes are
made with mamas in mind, containing
nutritious, delicious foods that will
keep you nourished and energized
while caring for your new addition.
69

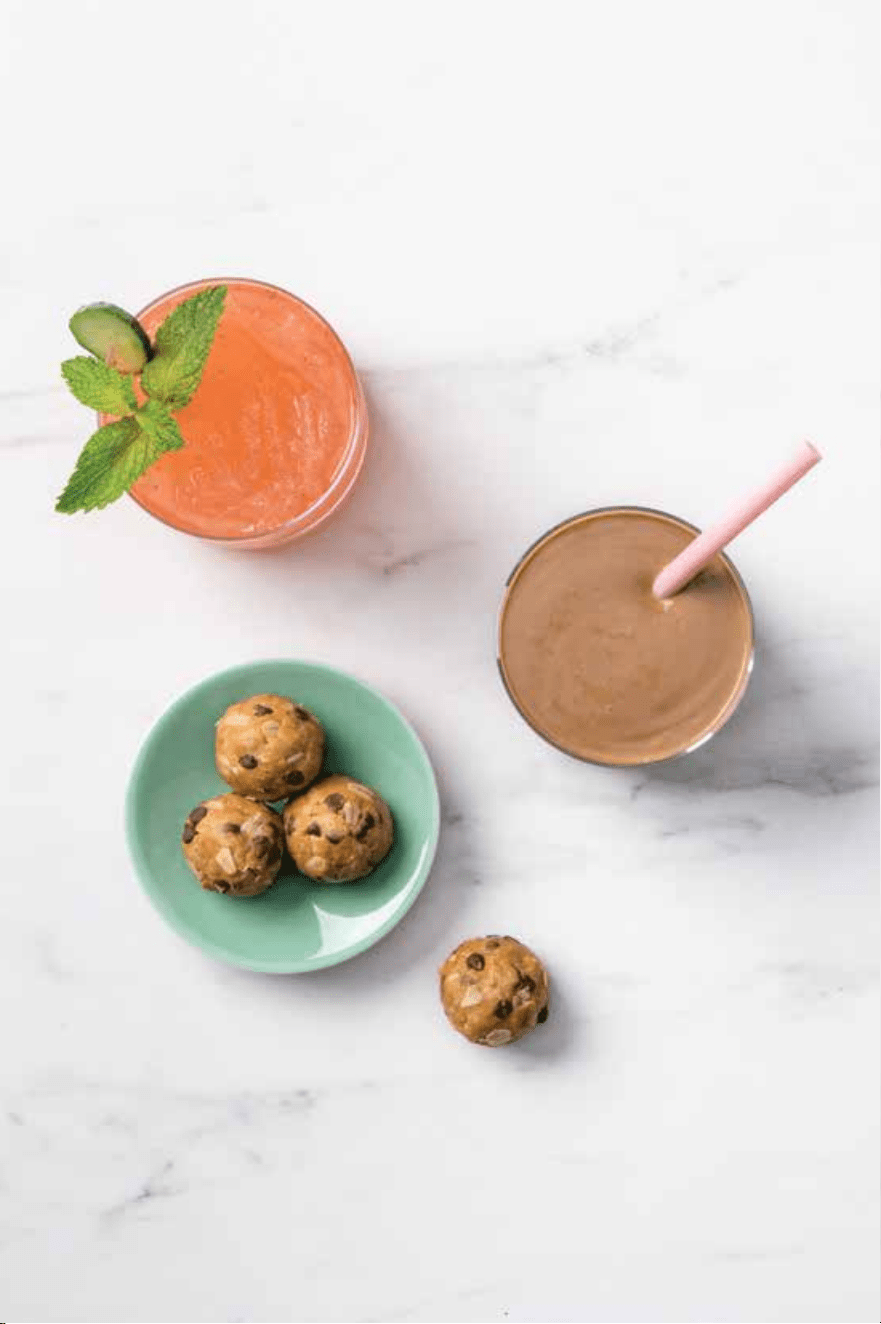
Nutrition-rich smoothie.
MAKES 3 CUPS
Chocolate and peanut butter. Nutritious and delicious.
This one’s for you, mama.
1/2
1
1 CUP
2 TBSP
2 TBSP
1 TSP
1/2 CUP
AVOCADO, MEDIUM
BANANA, CHOPPED
ALMOND MILK
UNSWEETENED
CACAO POWDER
PEANUT BUTTER
MAPLE OR AGAVE
(OPTIONAL)
ICE
1 Add all ingredients (except
ice) to the Batchbowl.
2 Blend for 45 seconds.
3 Add ice, then blend for
another 15 seconds until you
reach desired consistency.
NOTE: for a thinner smoothie, add
more liquid or ice. Do not exceed the
MAX line.
NUTRITIONIST TIP
When nursing, your body's working
overtime, needing about 500 extra
calories per day to provide important
nourishment for your growing baby.
60 seconds
70

F
O
R
M
O
M
S
.
B
A
T
C
H
B
O
W
L
.
71
F
O
R
M
O
M
S
.
B
A
T
C
H
B
O
W
L
.
72

Prep 5 mins, chill 1 hour
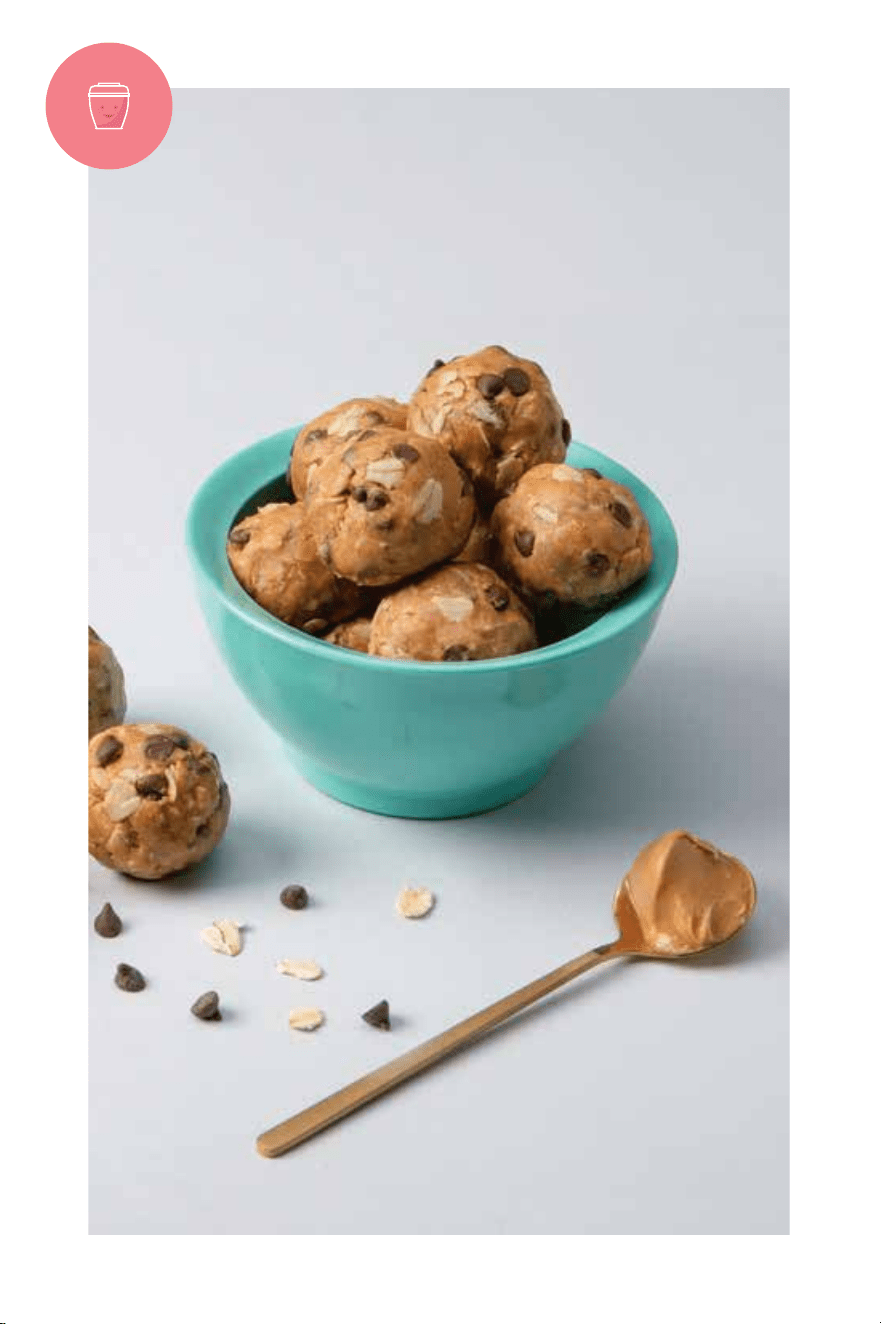
Lactation energy bites.
MAKES ABOUT 16 BITES
Made with galactogogues—foods said to increase milk supply
such as oats, nuts and seeds—these energy bites are good for
multitasking moms.
1 CUP
1/2 CUP
1 CUP
1/4 CUP
1 TSP
1/2 CUP
ROLLED OATS
FLAX SEEDS,
GROUND
PEANUT BUTTER
(OPTION TO USE
ANY NUT BUTTER)
MAPLE SYRUP
OR AGAVE
VANILLA EXTRACT
DARK CHOCOLATE
CHIPS
1 Pulse oats and seeds for
30 seconds in the Batchbowl
resulting in a coarse
and fine consistency.
2 In a medium bowl, add
all ingredients except
chocolate chips.
3 Mix and combine
ingredients together.
4 Once combined,
add chocolate chips
and mix again.
5 Roll into bite-sized balls,
roughly 2.5cm in diameter.
6 Place bites on a baking
tray or pan and chill in
the fridge for 1 hour.
7 Transfer to an airtight
container once hardened.
NUTRITIONIST TIP
Snacks with both protein and fiber can
help stabilize blood sugar (even when
everything else may feel a bit out of
control).
73

Hydrating strawberry
cucumber cooler.
MAKES ABOUT 1 CUP
Staying hydrated is necessary for everyone, but it’s especially
important for nursing moms. Sip on this refreshing beverage as a
break from plain H
2
0.
3
1/2 CUP
4
1/2 CUP
1/2 CUP
STRAWBERRIES
CUCUMBER,
CHOPPED
MINT LEAVES
COCONUT WATER
ICE
1 Add all ingredients (except
ice) to the Batchbowl. Do
not exceed the MAX line.
2 Blend for 30 seconds.
3 Add ice, then blend for
another 15 seconds.
NUTRITIONIST TIP
While plain water certainly does the
trick in keeping you hydrated, it can
be a little, well, plain. Smoothies,
fruit and herb-infused water, and
seltzer splashed with 100% fruit juice
are all fun options that help to beat
beverage boredom.
45 seconds
74

F
O
R
M
O
M
S
.
B
A
T
C
H
B
O
W
L
.
75

If your product becomes
defective due to faulty
material or workmanship
within a period of 1
year from the date of
purchase, we warrant to
do the following:
• For New Zealand Consumers:
We will replace the product
with a new product, free of
charge, or repair the product
at our cost, at our discretion.
• For Australian Consumers:
Our goods come with
guarantees that cannot
be excluded under the
Australian Consumer
Law. You are entitled to
a replacement or refund
for a major failure and for
compensation for any other
reasonably foreseeable
loss or damage. You are
also entitled to have the
goods repaired or replaced
if the goods fail to be of
acceptable quality and the
failure does not amount to a
major failure.
one (1) year limited
replacement warranty
statement.
YOUR WARRANTY
IS SUBJECT TO THE
FOLLOWING CONDITIONS:
• DO NOT operate the
appliance with a damaged
plug or cord, or if the unit has
been dropped, damaged or
dropped in water. To avoid
the risk of electric shock, do
not disassemble or attempt
to repair the appliance
on your own. If the supply
cord is damaged, it must
be replaced by a qualified
electrician in order to avoid
a hazard. Incorrect re-
assembly or repair can cause
a risk of electric shock or
injury to persons when the
appliance is used.
• The item has not been
misused, abused, neglected,
altered, modified or repaired
by anyone.
• The item has been subjected
to fair wear and tear.
• The item has not been used
for trade, professional or
hire purposes.
76

• The item has not sustained
damage through foreign
objects, substances or accident.
YOUR WARRANTY
DOES NOT COVER:
• Components that are
subject to natural wear and
tear caused by normal use
in accordance with
operating instructions.
• Unauthorised/improper
maintenance/handling or
overload is excluded from
this warranty.
• For guarantee claims, you
will need to submit a proof
of purchase in the form of
a valid receipt that displays
date and place of purchase.
This warranty does not replace
but is in addition to your
statutory rights.
This warranty does not apply
to accessories supplied with
the item.
This warranty applies only to
the original purchaser and may
not be transferred.
Replacement items will
be covered by the limited
warranty for the balance of the
warranty period from the date
of the original purchase.
PLEASE NOTE:
Only the defective product
or parts returned to place of
purchase will be replaced under
this warranty.
NEW ZEALAND
PO Box 100-707
NSMC
Auckland 0745
0800 285538
www.bulletbrands.co.nz
AUSTRALIA
PO Box 574
South Morang
Victoria 3752
1300 285538
www.bulletbrands.com.au
NutriBullet is a registered trademark of CapBran Holdings, LLC.
Copyright © 2019 CapBran Holdings, LLC. All rights reserved.
Los Angeles, CA 90025, USA. Made in China.
77

References.
[1] https://hgic.clemson.edu/factsheet/introducing-solid-foods-to-
infants/
[2] https://www.healthychildren.org/English/ages-stages/baby/
breastfeeding/Pages/Working-Together-Breastfeeding-and-
Solid-Foods.aspx
[3] https://ohioline.osu.edu/factsheet/MOB-4
[4] https://www.foodsafety.gov/people-at-risk/children-under-five
[5] https://www.foodallergy.org/about-fare/blog/who-is-likely-to-
outgrow-a-food-allergy
[6] www.llli.org/faq/firstfoods.html
[7] www.webmd.com/parenting/baby/introducing-new-foods#2-4
[8] www.schn.health.nsw.gov.au/parents-and-carers/fact-sheets/
allergy-fruit-and-vegetable-allergy
[9] www.kidswithfoodallergies.org/page/whats-the-big-deal-about-
food-allergies.aspx
[10] https://ghr.nlm.nih.gov/condition/lactose-intolerance#statistics
[11] https://www.fda.gov/food/people-risk-foodborne-illness/once-
baby-arrives-food-safety-moms-be
[12] https://www.aap.org/en-us/advocacy-and-policy/aap-health-
initiatives/HALF-Implementation-Guide/Age-Specific-Content/
Pages/Infant-Food-and-Feeding.aspx
78

79
220-240VAC 50-60Hz 200W
Capital Brands Distribution, LLC, Los Angeles, CA 90025
bulletbrands.co.au/bulletbrands.co.nz | All rights reserved | Printed in China
NutriBullet
®
and the NutriBullet
®
logo are trademarks of CapBran Holdings,
LLC registered in the U.S.A. and worldwide. Copyright 2021
210603_NBY-1807 (BB-101B)
®