
Elite 30 V2
Portable Power Station
User Manual V3.0
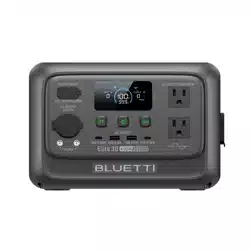
Important Instructions
For optimal performance, update your unit to the latest
firmware before first use.
See the appendix "Update Firmware via BLUETTI App"
for guidance.
Read and understand this manual before use and keep
it handy for future reference.
Warning
1. Fully charge the unit before first use.
2. Do not use solar panels with open circuit voltage higher than 28V. Solar input
voltage range for the unit is 12V-28V.
3. If the unit's SoC falls below 5%, please recharge the unit in time. If the SoC drops to 0,
power off the unit and charge it for at least 30 minutes before restarting.
4. Do not connect the unit's AC output to the grid.
5. If not used for more than 3 months, charge the unit to 40%-60% SoC and store it
with the power off.
6. For optimum battery life, discharge and charge the unit every 3 months.

Legal Information
Copyright © 2025 ShenzhenPowerOakNewenerCo., Ltd. All rights reserved.
No part of this document may be reproduced or transmitted in any form or by any
means without the prior written consent of ShenzhenPowerOakNewenerCo., Ltd.
Shenzhen PowerOak Newener Co., Ltd.
19F, Block A, Kaidaer Bldg., No.168 Tongsha Rd, Shenzhen, China
Website: https://www.bluettipower.com/
Notice
BLUETTI's products and services are subject to the terms and conditions agreed upon
during purchase. Some aspects described in this manual may not be available under
your purchase contract. Unless otherwise specified in the contract, BLUETTI makes no
express or implied representations or warranties regarding the contents of this manual.
The contents of this manual are subject to change without notice. Please obtain the
latest version from BLUETTI official website.
If you have any questions or concerns about this manual, please contact BLUETTI
support for further assistance.

Safety Instructions
Packing List
Get to Know Your Elite 30 V2
Overview
LCD Display
Use Your Elite 30 V2
On/Off
Charging Options
Power Your Devices
Configure Your Elite 30 V2
Settings Mode
AC Charging Mode
Power Lifting Mode
ECO Mode
Viewing Device Information
UPS Feature
Grid Self-Adaption Mode
Specifications
Troubleshooting & FAQs
Contents
1
2
3
3.1
3.2
4
4.1
4.2
4.3
5
5.1
5.2
5.3
5.4
6
7
8
9
10
Appendix
Compliance
05
08
09
09
10
11
11
12
14
15
15
16
16
16
17
17
19
20
21
22
25

1. Safety Instructions
WARNING - When using the product, basic precautions should always be followed,
including the following:
• Read all the instructions before using the product.
• Handle the product with care, avoiding drops, violent impacts, or tilting.
• To reduce the risk of injury, close supervision is necessary when the product is used near
children.
• Do not put fingers or foreign objects into the product's ports.
• Use of an attachment not recommended or sold by the manufacturer may result in a
risk of fire, electric shock, or injury to persons.
• Do not move the product during operation to avoid poor connections.
• Do not expose the battery to high temperatures, as this may cause an explosion or
leakage of flammable liquids or gases.
• Do not use the product in the rain or high humidity environments.
• Do not use a battery pack or appliance that is damaged or modified. Damaged or modified
batteries may exhibit unpredictable behavior resulting in fire, explosion, or risk of injury.
• Handle the product with caution in low air pressure environments to prevent explosions
or leaks.
• Charge the product in a well-ventilated area.
• Under abusive conditions, liquid may be ejected from the product's battery; avoid
contact. If contact accidentally occurs, flush with water. If liquid contacts eyes, additionally
seek medical help. Battery liquid may cause irritation or burns.
• In case of fire, use a dry powder fire extinguisher appropriate for the product.
• Never dispose of the product's battery in fire, hot ovens, or by cutting it.
• Do not operate the product with a damaged cord, plug, or output cable.
• To reduce the risk of damage to the electric plug and cord, pull the plug rather than the
cord when disconnecting the product.
• Do not disassemble the product; take it to a qualified service person if service or repair is
required. Incorrect reassembly may result in a risk of fire or electric shock.
• Unplug the product before any servicing to reduce the risk of electric shock.
• WARNING - RISK OF EXPLOSIVE GASES. Follow these instructions and those published
by manufacturer of any equipment you intend to use in vicinity of the product to
reduce risk of battery explosion.
INSTRUCTIONS PERTAINING TO RISK OF FIRE, ELECTRIC SHOCK, OR INJURY TO PERSONS
IMPORTANT SAFETY INSTRUCTIONS
JUST POWER ON 05
EN

• WARNING - RISK OF ELECTRIC SHOCK. Never use power pack to supply power tools to
cut or access to live parts or live wirings,or materials that maycontain live parts or live
wirings inside, such as building walls, etc.
• Have servicing performed by a qualified repair person using only identical replacement
parts. This will ensure that the safety of the product is maintained.
• The symbols on the unit and its accessories are intended to remind you to read
the instructions in the literature accompanying the product before operation and
maintenance.
• The socket-outlet should be installed near the product and easily accessible for safety
purposes.
• Caution: The output of USB-C, DC5521, and cigarette lighter ports are classified as PS3
according to standard IEC 62368-1. Consider implementing safeguards against fire, such
as a fire enclosure, for connected equipment or accessories.
• Do not expose a power pack to fire or excessive temperature. Exposure to fire or
temperature above 130℃(265℉) may cause explosion.
• It is strictly forbidden to connect an external power source to the DC output port. Doing
so may damage the device and, in severe cases, cause danger.
When charging with lead-acid batteries or using the product to charge them,
followthese safety precautions:
a. Wear complete eye and clothing protection; do not touch eyes when working near a
battery.
b. No smoking, sparks, or flames near the battery or engine.
c. Avoid dropping metal tools onto the battery to prevent sparks or short circuits.
Disposal and Recycling
1. Attention should be drawn to environmental aspects of battery disposal.Take old
electronic components and batteries to designated recycling centers. This prevents
improper disposal and supports material recovery.
2. If possible, fully discharge the batteries and then place them in designated battery
recycling boxes. The batteries in this product contain hazardous chemicals. Do not
dispose of them with regular household waste. Please follow local laws and regulations
for proper battery disposal.
3. If a battery cannot fully discharge due to product malfunction, do not place it in the
battery recycling box. Instead, contact a professional battery recycling organization for
safe handling.
4. RFID is for internal manufacturer upgrades only.
Not permitted on aircraft.
EN
JUST POWER ON
06

• When the SoC drops to 5%, charge the unit in time.
• Before storing, charge to 40%-60% SoC, then power off and disconnect all cables.
• Store it in a cool, dry place, away from flammable materials.
• Fully cycle every 3 months to maintain battery health.
• Avoid extended storage; it may impact performance and lifespan.
• The product can be safely stored within a temperature range of -20°C to 40°C ( -4°F
to104°F). However, if the storage duration exceeds one month, it's recommended to
maintain an ideal storage temperature of around 30°C (86°F).
If SoC drops to 0 during storage or startup, shut down immediately.
• Charge within 48 hours.
• Keep it at 5°C to 35°C (41°F to 95°F) for 6 hours before charging.
• Recommended to charge via an AC source; if using solar energy, ensure an input of
over 60W.
Grounding Instructions (For AC charging only)
• This product must be grounded when connected to the grid. If this product should
malfunction, grounding provides a path of least resistance for electric current to reduce
the risk of electric shock.
• The product is equipped with an AC charging cable having an equipment grounding
conductor and a grounding plug. The plug must be plugged into an appropriate outlet
that is properly installed and grounded in accordance with all local codes and ordinances.
• WARNING - Improper connection of the grounding conductor can result in a risk of
electric shock. Check with a qualified electrician if you're in doubt as to whether the
product is properly grounded. Don't modify the plug provided with the product - if it'll
not fit the outlet, have a proper outlet installed by a qualified electrician.
SAVE THESE INSTRUCTIONS
Storage Instructions
JUST POWER ON 07
EN
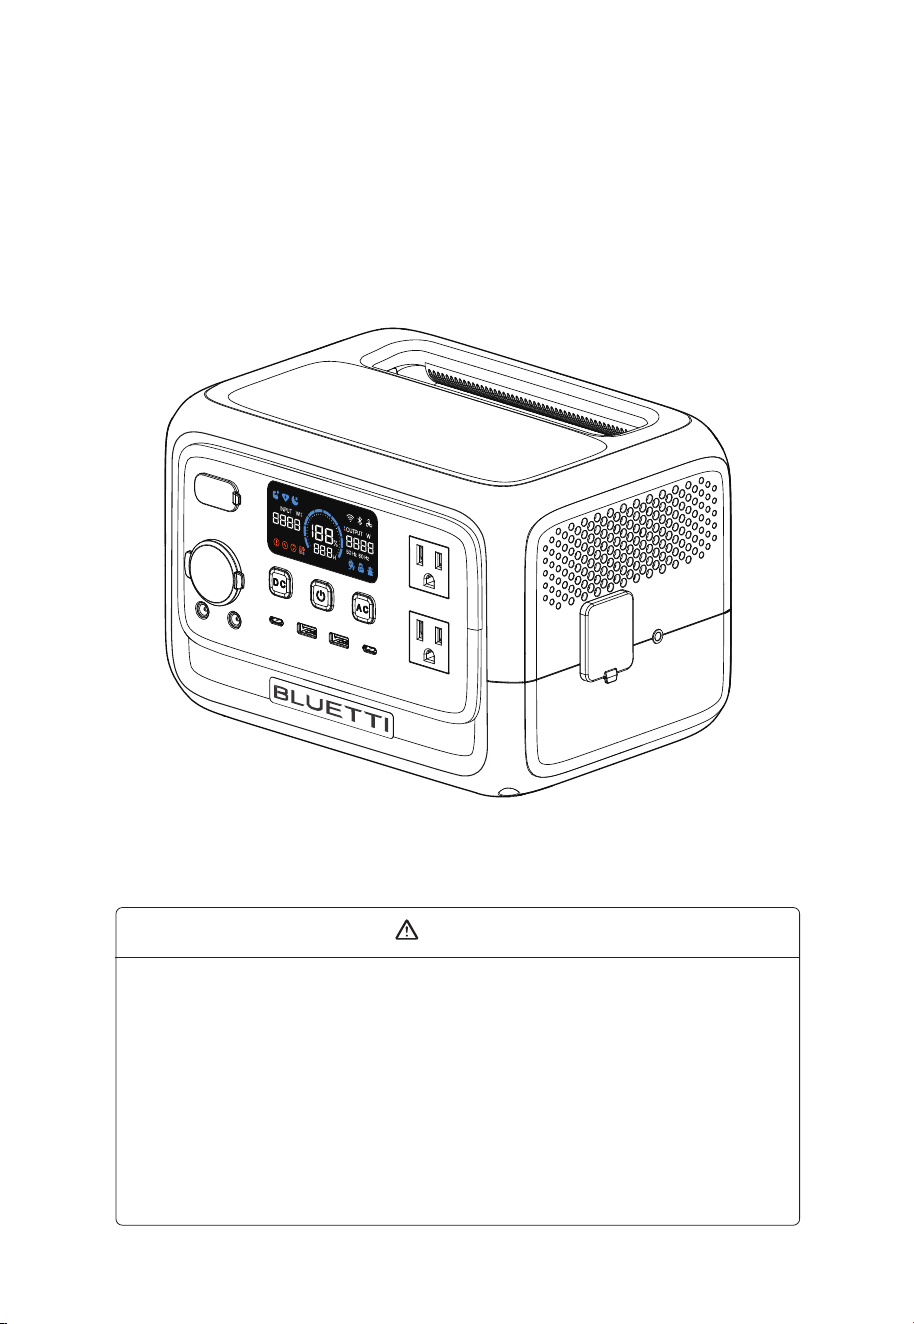
2. Packing List
Elite 30 V2
Portable Power Station
AC Charging Cable
(70.87in / 1.8m)
Grounding Screw
(M5*8, ×1)
Documentation
Car Charging Cable
(28.35in / 0.72m)
Elite 30 V2
Portable Power Station
User Manual
V3.0
Important Instructions
For optimal performance, update your unit to the latest
firmware before first use.
See the appendix "Update Firmware via BLUETTI App"
for guidance.
Read and understand this manual before use and keep
it handy for future reference.
Solar Charging Cable
(59.06in / 1.5m)
Lead-acid Battery Charging Cable
(19.69in / 0.5m)
The following accessories are not included.
Please purchase optional accessories at https://www.bluettipower.com
Note: All images are for reference only.
EN
JUST POWER ON
08
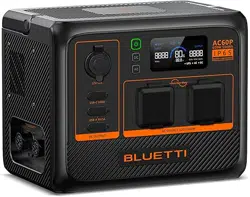
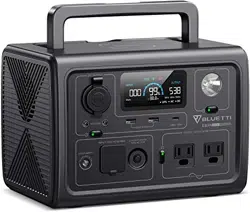
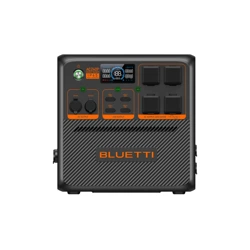
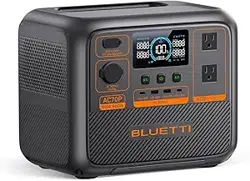
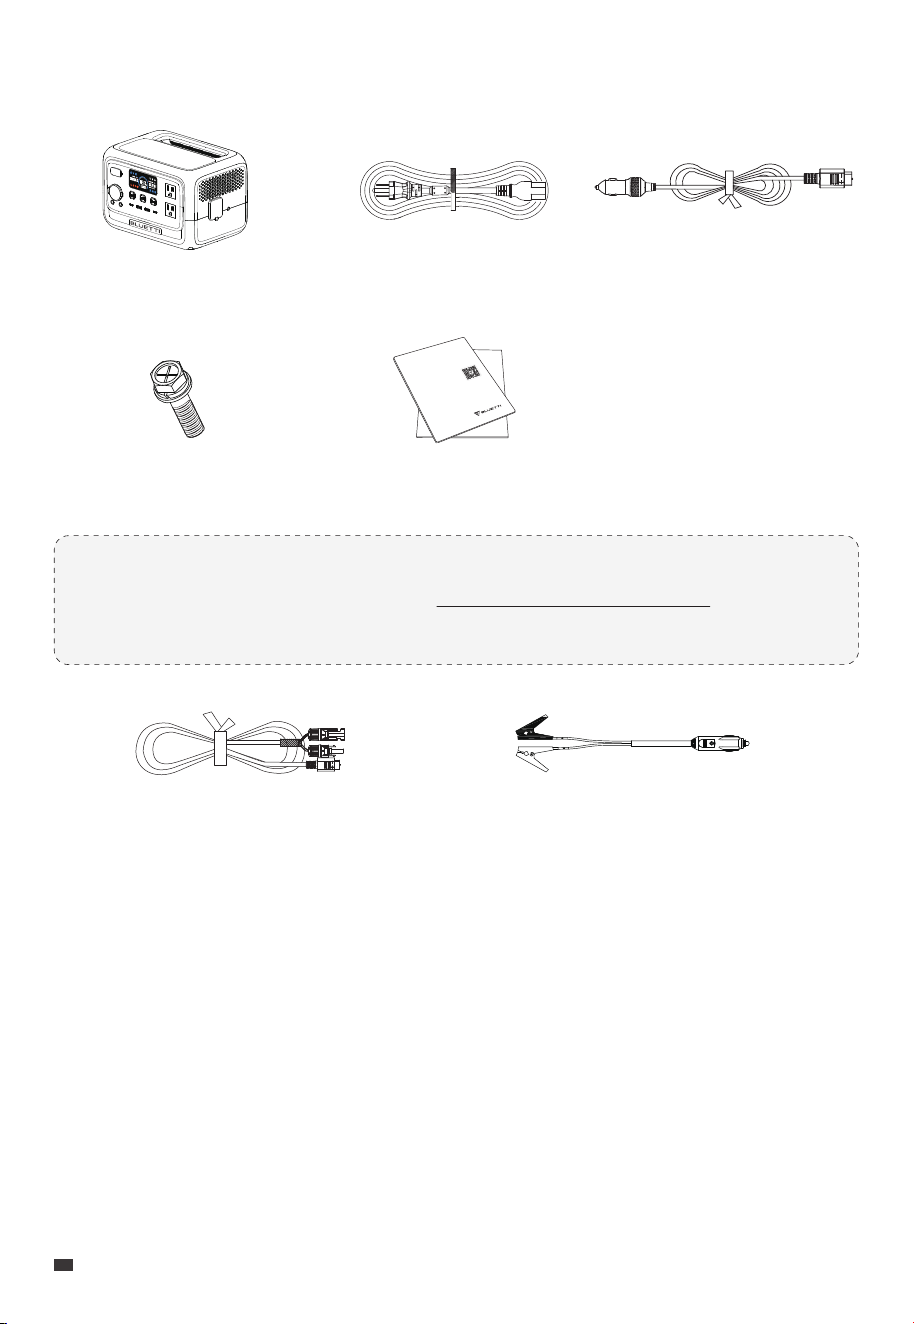
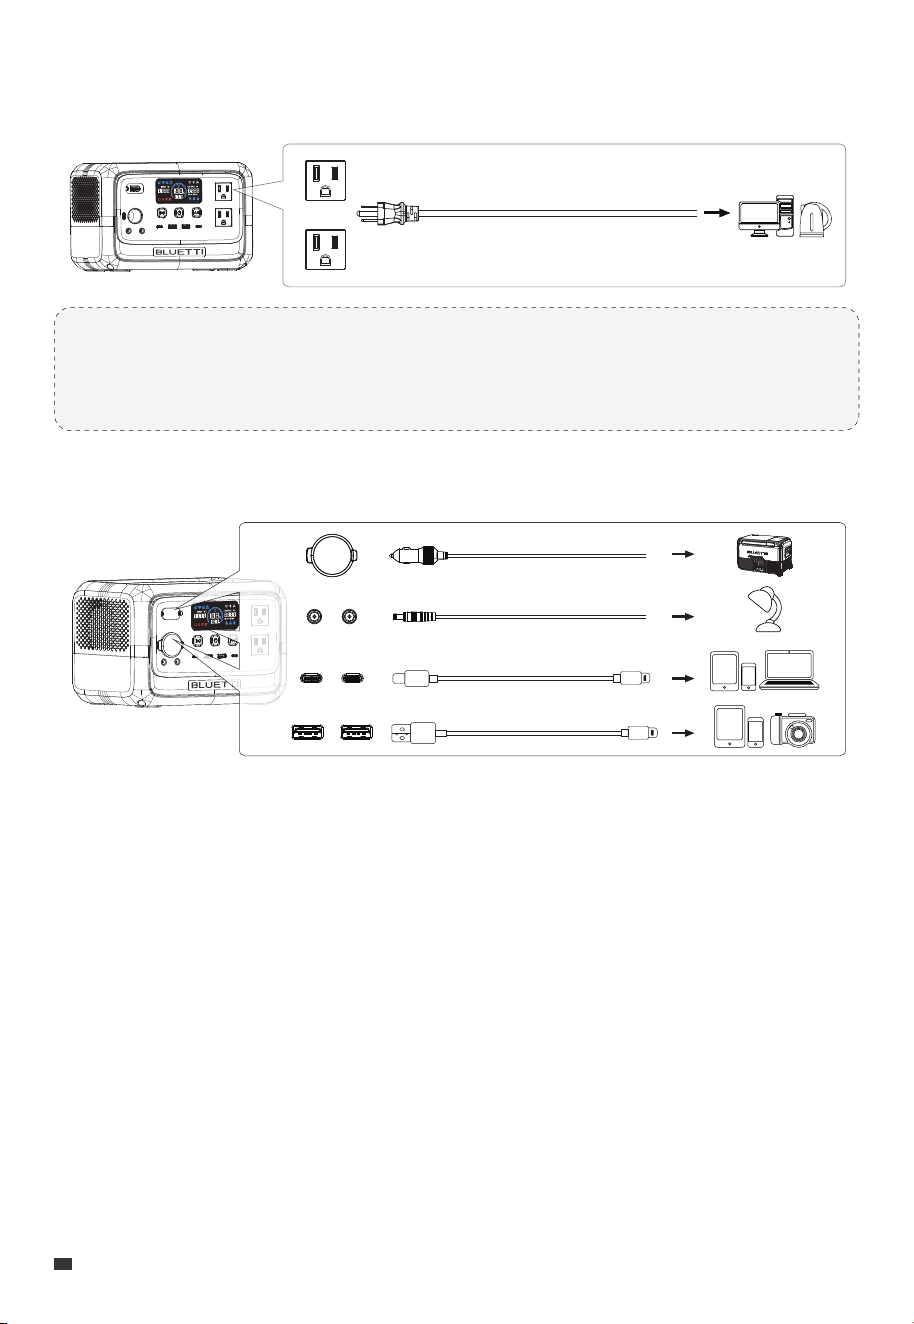
3. Get to Know Your Elite 30 V2
DC Power Button
LCD Display
Power Button
AC Power Button
AC Outlet
Grounding Terminal*
AC Input
100W USB-C Port
USB-A Ports
DC5521 Ports
140W USB-C Port
Cigarette Lighter Port
DC Input
①
②
③
④
⑤
⑥
⑦
⑧
⑨
⑩
⑪
⑫
⑬
* Used for grounding when powering certain equipment. For assistance, contact
us or seek guidance from the appendix "Grounding Guidelines".
3.1 Overview
JUST POWER ON 09
EN
6
7
8
1 4
2 3 5
9
10
11
12
13
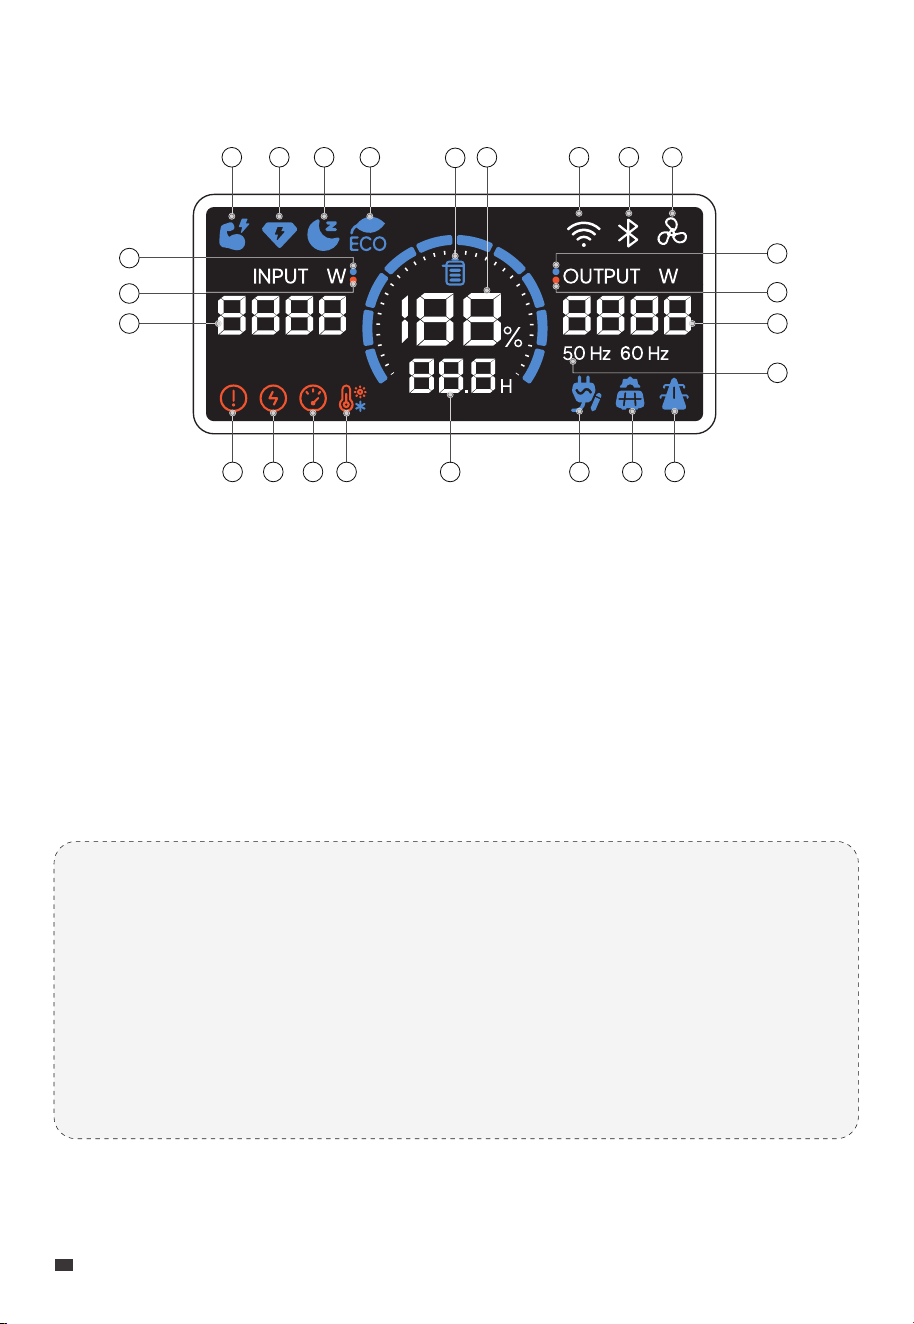
Charge Limit: Set through the app's working mode.
Fan: Flashing for abnormal fan operation.
AC Input: Charges from a wall outlet or generator.
DC Input: Charges from solar panel(s) or a car.
AC Output Restore: When the battery is depleted or reaches the SoC low value
which causes the unit to shut down, the AC output status will be saved and
automatically restored once connected to grid power.
Remaining Time: Remaining discharging time.
3.2 LCD Display
①
②
③
④
⑤
⑥
⑦
⑧
Power Lifting Mode
Turbo Charging
Silent Charging
ECO Mode
Charge Limit *
State of Charge (SoC)
WiFi Connection
Bluetooth Connection
Fan*
Output Active
Output Alarm
Output Power
AC Output Frequency
AC Input*
DC Input*
AC Output Restore*
⑨
⑩
⑪
⑫
⑬
⑭
⑮
⑯
Remaining Time*
High/Low Temp
Overload
Short Circuit
System Fault
Input Power
Input Alarm
Input Active
⑰
⑱
⑲
⑳
㉑
㉒
㉓
㉔
EN
JUST POWER ON
10
1 2 3 4 6 7 8 9
5
12
13
10
11
1415161718192021
22
24
23
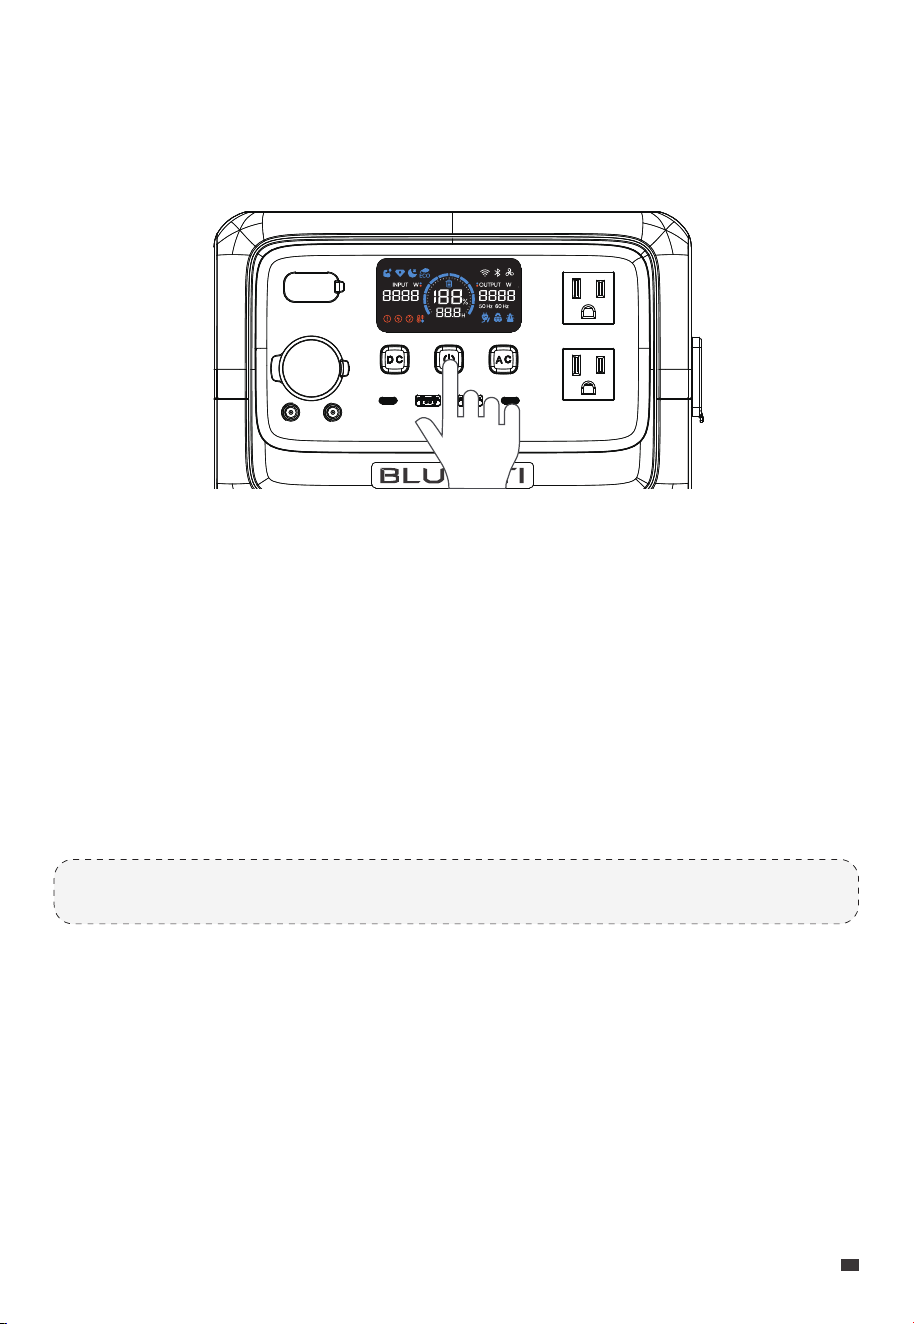
Power On
Press the power button; the lit button indicates that the Elite 30 V2 is on standby.
Power Off
Long press the power button for about 2 seconds to turn off the unit.
AC On/Off
Press AC power button when Elite 30 V2 is on.
DC On/Off
Press DC power button when Elite 30 V2 is on.
Note: When Elite 30 V2 is on, press any button to activate the display.
4. Use Your Elite 30 V2
4.1 On/Off
JUST POWER ON 11
EN
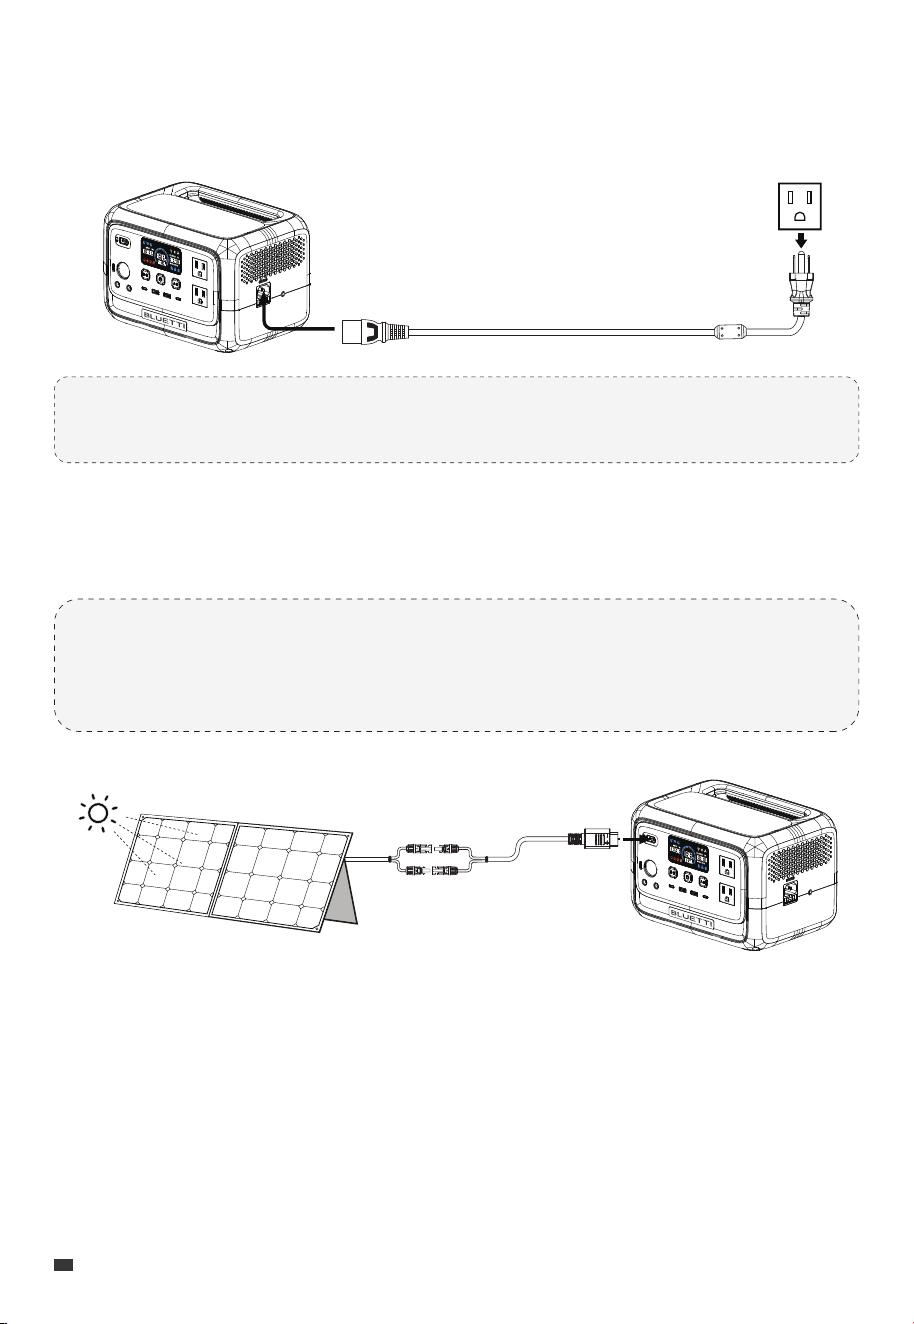
Note: Do not plug the unit's AC charging cable into its own AC outlets. Doing so could
damage the connected device.
Notes:
• Make sure the solar panel(s) meet the following requirements:
Voc: 12V-28V Current: 10A Max. Power: 200W Max.
4.2 Charging Options
4.2.1 Wall Outlet
Plug the Elite 30 V2 into a standard wall outlet. It stops charging when fully charged.
4.2.2 Solar Panel
Connect the solar panel(s) either in series or parallel, and use the solar charging cable to
link them to Elite 30 V2.
EN
JUST POWER ON
12
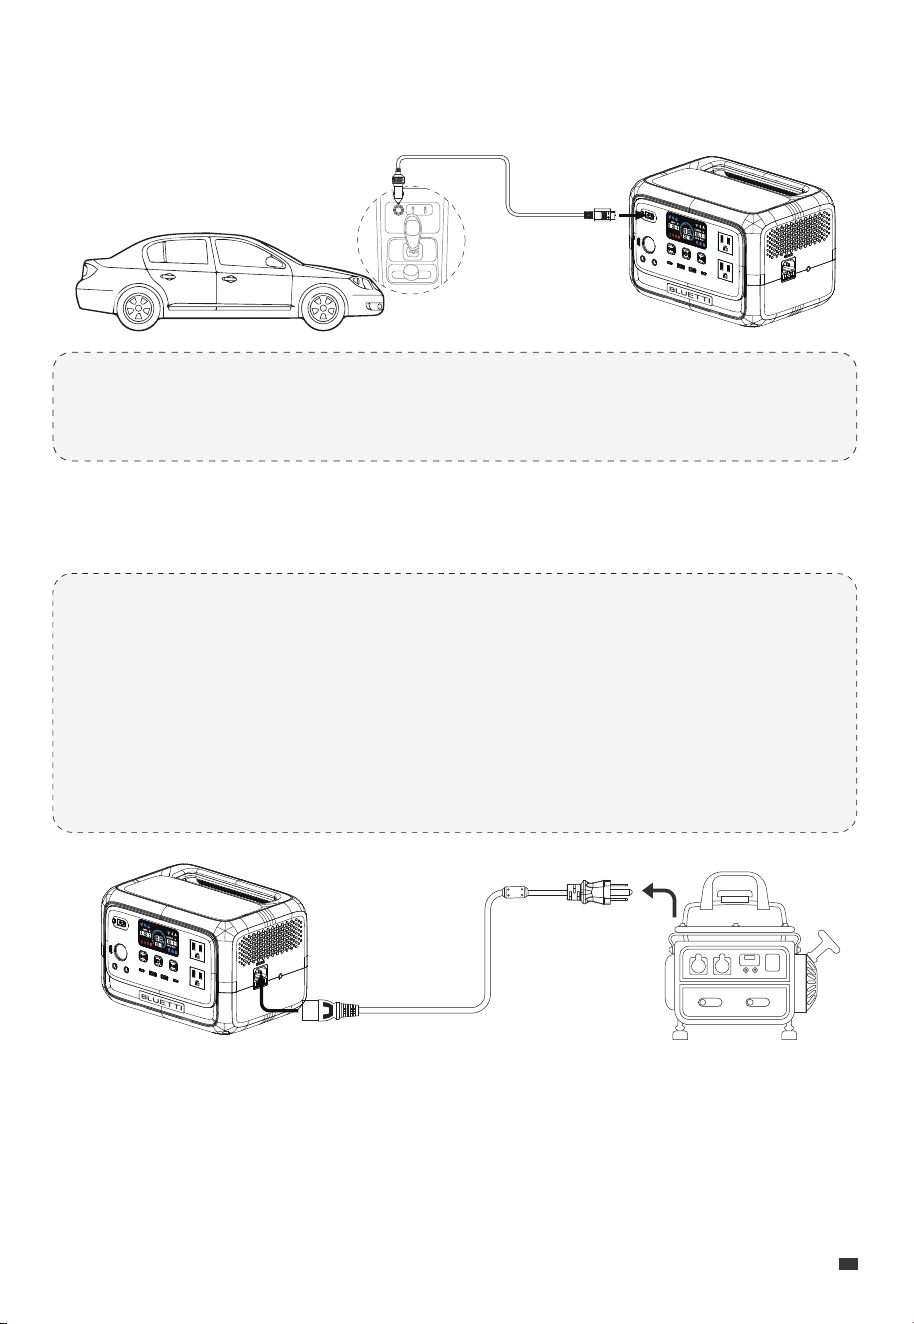
Notes:
• Use a generator with a pure sine wave output that matches the required voltage
and frequency and meets or exceeds the Elite 30 V2's input needs.
• It's recommended to enable Grid Self-Adaption mode when charging the Elite 30
V2 with a generator.
• If the generator's output is too low, adjust the Max. Grid Charging Current in the
app to match.
Notes:
• Make sure your car has power and the engine is running while charging.
• Avoid over-discharging the car's battery.
4.2.4 Generator
Connect the Elite 30 V2 to a generator using the AC charging cable. The charging stops
automatically when fully charged.
4.2.3 Car (12V/24V)
Connect the Elite 30 V2 to your car's 12V or 24V cigarette lighter port or socket using
the car charging cable.
JUST POWER ON 13
EN
Note: When servicing the devices connected to the unit, remember to unplug
them from the outlets. Even if the AC output is turned off, physically unplugging
the devices is necessary for complete disconnection.
4.3 Power Your Devices
AC Outlets
DC Outlets
120V/600W Max.
12V/5A per port
12V/10A
100W/140W Max.
5V/3A per port
EN
JUST POWER ON
14

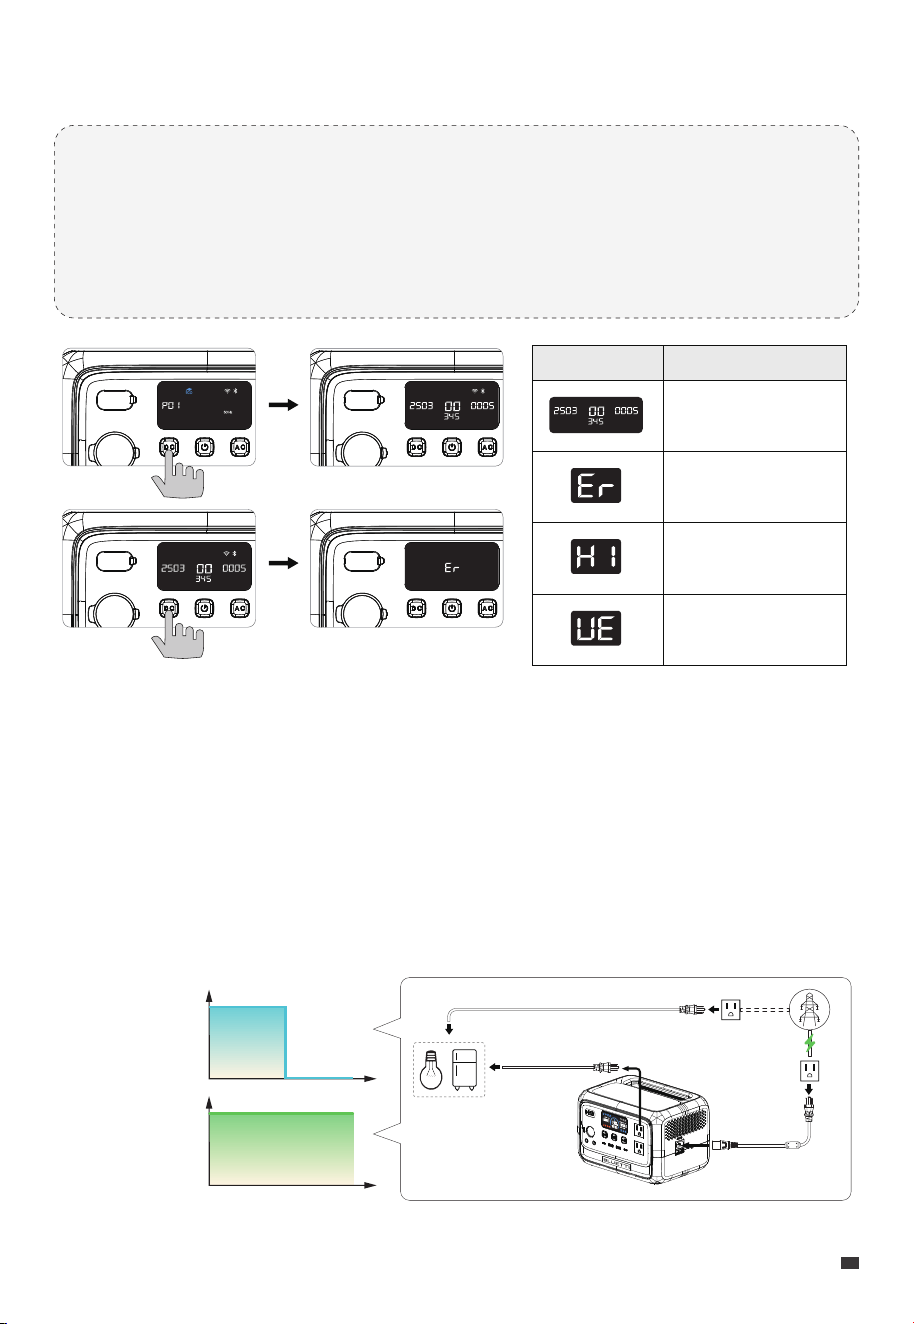
5.1 Settings Mode
Enter the Mode: Press and hold the AC and DC power buttons simultaneously for about
2 seconds. The frequency icon flashes.
Exit the Mode: Press and hold both the AC and DC power buttons again.
If left idle for 1 minute, the Elite 30 V2 automatically exits without saving any changes.
5. Configure Your Elite 30 V2
Adjust settings in Settings Mode.
• Turn off the AC power before setting the frequency.
• Press the DC power button to navigate through the items, and use the AC power
button to adjust.
The Elite 30 V2 can be configured using either the device's buttons or the BLUETTI
app. For advanced settings, such as adjusting the Max. Grid Input Current or
configuring ECO mode, use the BLUETTI app. Refer to the app manual for more
details.
P01
P03
P04
P05
P06
P07
Frequency
AC Charging Mode
Power Lifting Mode
ECO Mode
Bluetooth
WiFi
Page Code Setting
JUST POWER ON 15
EN

5.2 AC Charging Mode
The Elite 30 V2 offers three charging modes: Standard, Turbo, and Silent. By default, the
unit charges in Standard mode.
5.3 Power Lifting Mode
Power Lifting mode is disabled by default. It allows Elite 30 V2 to power up to 1500W pure
resistive loads like electric kettles, blankets, hairdryers, and similar heating devices.
Notes:
• Charging time may vary depending on the ambient temperature.
• The above data is for reference only.
Notes:
• AC-ECO mode is not available when charging with AC power.
• Press the AC power button to turn on/off AC-ECO and DC-ECO Modes together,
and use the BLUETTI app to control them separately.
• Disable the ECO mode when connecting small devices under 10W or critical
appliances such as lights .
Note: This mode is only for pure resistive loads rated 600W-1500W. While the Elite
30 V2 can handle such loads, its actual output power is still 600W.
5.4 ECO Mode
AC-ECO and DC-ECO modes are enabled by default. The Elite 30 V2 shuts off the AC or
DC output after a period of low or no load.
Mode AC Input Solar Input
AC + Solar
Input
AC Charging Time
(Estimated)
2 hrs
3 hrs
80% in 45 mins
200W Max.
380W Max.
200W Max. 200W Max.
200W Max.
200W Max.
200W Max.
200W Max.
380W Max.
Standard
Turbo
Silent
EN
JUST POWER ON
16
• Standard
The Elite 30 V2 charge fully using a combination of solar and grid power, prioritizing
solar when available. When the grid is active, it directly powers your devices. If the grid
goes out, the Elite 30 V2 seamlessly takes over.
Connect Elite 30 V2 to the wall, and it directly draws power from the outlet to operate
connected devices. It swiftly switches to battery power within 10ms during an outage.
Set UPS modes in the app.
6. View Device Information
7. UPS Feature
View device information in Settings Mode, too.
• Go to the P01 frequency page and long press the DC power button to view the
unit's SN. Press the DC power button again to navigate through other information.
• When on Fault History page, long press the AC power button for about 2 seconds,
then release to clear the history.
Serial Number (SN)
Error Code
Fault History
Version
Page Code Information
Input power
from grid
Time
Time
Backup
output power
(W)
(W)
0%
100%
0%
100%
AC Loads
JUST POWER ON 17
EN
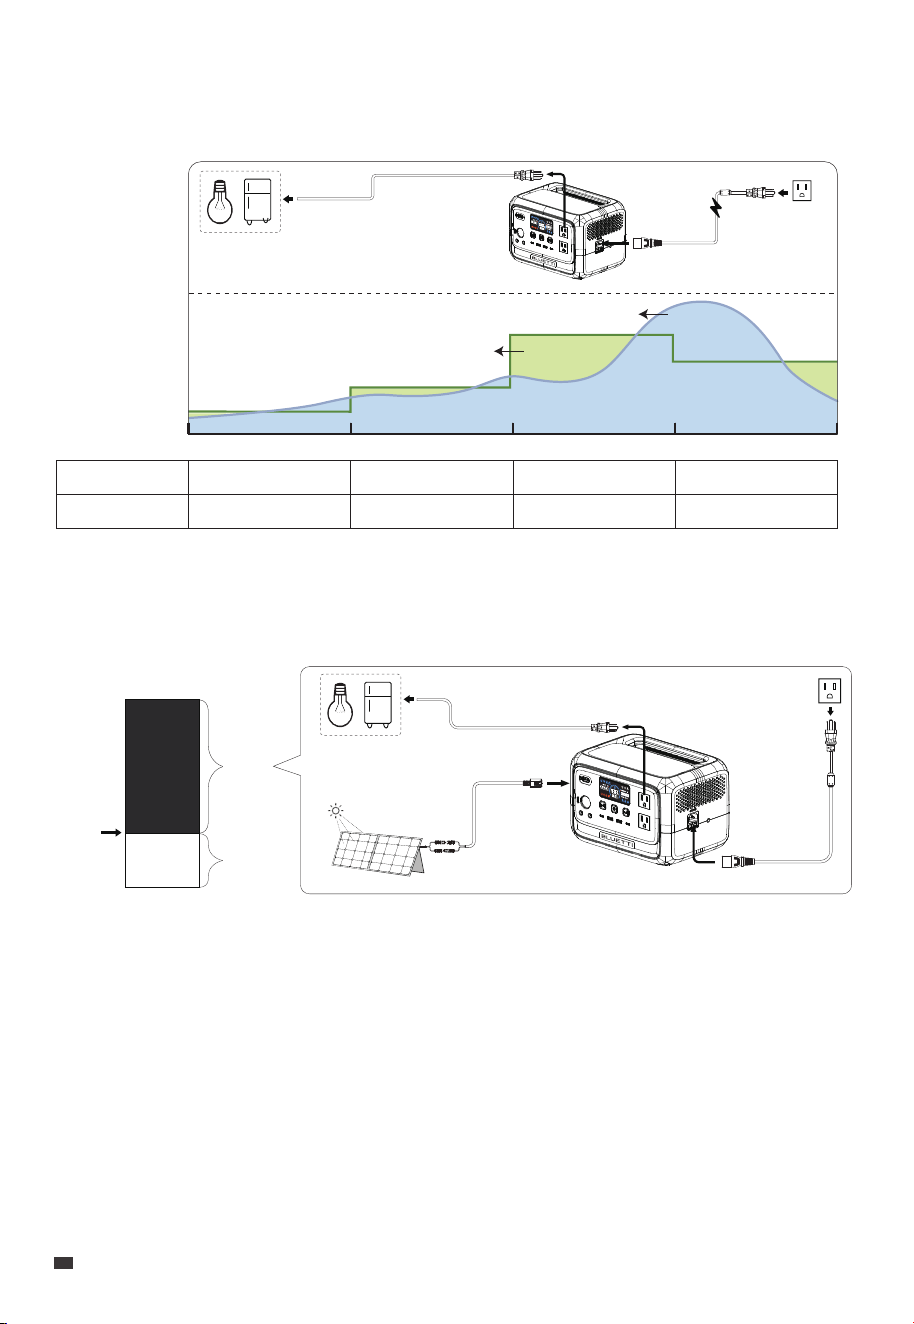
• Time Control
Save costs by scheduling Elite 30 V2 to charge during off-peak hours and power devices
during peak hours.
• PV Priority
Efficiently uses solar energy. Elite 30 V2 initially charges from the grid to a set SoC and
seamlessly switches to solar replenishment.
Period
Load Power
Charge
Grid
Discharge Discharge Discharge
Elite 30 V2 + PVElite 30 V2 + PV Elite 30 V2
0:00 6:00 12:00 18:00 24:00
AC Loads
Electricity Price
Household Consumption
AC Loads
SoC
100%
Solar
Grid
Battery capacity
0%
EN
JUST POWER ON
18
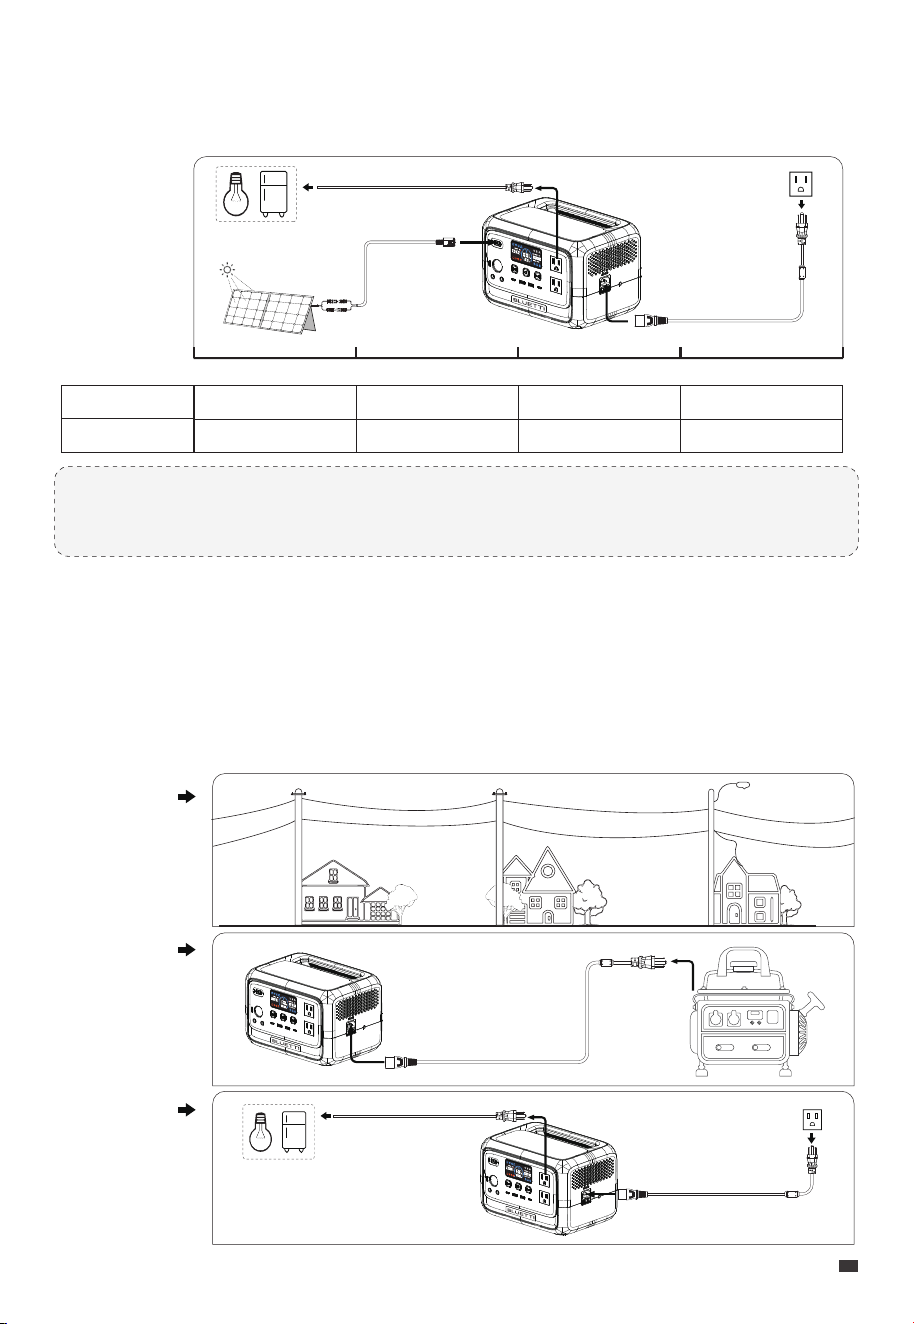
• Customized
Personalize charging/discharging schedule, set battery SoC limits, and control the
schedule and grid input switches.
When charging with an unstable generator or grid power, or if consumption power
exceeds charging power, enable this mode in the app. The Elite 30 V2 automatically
adjusts to handle power fluctuations, protecting the unit and connected devices from
potential issues due to variations in power quality.
8. Grid Self-Adaption Mode
Note: Not for devices like data servers or workstations that require high-performance UPS.
BLUETTI assumes no liability for issues arising from violating this restriction.
Unstable
grid
Unstable
generator
Charging and
discharging
AC Loads
Period
Load Power
Charge
Grid
Discharge Discharge Discharge
Elite 30 V2Elite 30 V2 Elite 30 V2
0:00 6:00 12:00 18:00 24:00
AC Loads
JUST POWER ON 19
EN

9. Specifications
Battery Capacity
Battery Type
Weight
Dimensions (L × W × H)
Charging Temperature
Discharging Temperature
Storage Temperature
Operating Humidity
AC Charging
AC Input (with Bypass)
DC Input
AC + DC Input
AC Output
Uninterruptible Power Supply (UPS)
Switchover Time
DC Output
1 × Cigarette Lighter Port
2 × DC5521
2 × USB-A
1 × 100W USB-C
1 × 140W USB-C
AC + DC Output
IP Rating
288Wh (18Ah)
LiFePO
4
About 4.3kg/ 9.48lbs
250 × 178 × 167.5mm (9.8 × 7 × 6.6in)
0°C to 40°C (32°F to 104°F)
-20°C to 40°C (-4°F to 104°F)
-20°C to 40°C (-4°F to 104°F)
10% to 90%
380W Max., 80% in 45 mins, @ 25°C / 77°F
980W Max.
200W Max., 12V-28V, 10A Max.
380W Max.
600W in Total, 120V, 5A, 50Hz/60Hz
Model Elite 30 V2
Note: The cigarette lighter port and DC5521 ports are wired in parallel with a total
maximum output of 10A.
≤10ms
12V/10A
12V/5A (per Port), 8A in Total
5V/3A (per Port), 15W Max.
100W Max., 5V/3A, 9V/3A, 12V/3A, 15V/3A, 20V/5A
140W Max., 5V/3A, 9V/3A, 12V/3A,15V/3A, 20V/5A, 28V/5A
600W Max.
IP20
EN
JUST POWER ON
20

Error Code Description
E001
E002
E003
E033
E039
E065
E067
E068
E085
E086
E087
E088
E115
E116
Others
Solutions
On the Error Code page, the and error code appears simultaneously on the screen.
See the table below for guidance.
10. Troubleshooting & FAQs
• Check device power usage.
• Reduce load if too high.
• Check device power usage.
• Reduce load if too high.
• Wait 10 mins for the unit to cool down.
• Turn on the AC output again.
• Check device power usage.
• Check devices for short circuits.
• Ensure the PV input voltage is within 12V-28V.
• Wait 10 mins for the unit to cool down.
• Re-enable the PV input.
• Check device power usage.
• Check devices for short circuits.
• Wait 10 mins for the unit to cool down.
• Restart your devices.
• Wait for the unit to cool down before charging
it again.
• Place the unit in an ambient temperature
range of 0°C to 40°C (32°F to 104°F).
• Wait for the unit to cool down before using it
again.
• Place the unit in an ambient temperature
range of -20°C to 40°C (-4°F to 104°F).
• Verify home grid frequency.
• Contact utility company if necessary.
• Verify home grid frequency.
• Contact utility company if necessary.
• Contact BLUETTI support for help.
Inverter overload
Inverter overtemperature
protection, AC output off
Inverter short circuit
PV overvoltage
PV overtemperature
DC output short circuit
DC output overcurrent
DC output overtemperature
Charging temperature too high
Charging temperature too low
Discharging temperature too high
Discharging temperature too low
Grid overfrequency
Grid underfrequency
/
JUST POWER ON 21
EN

FAQs (Frequently Asked Questions)
Q1:
A:
Q2:
A:
Q3:
A:
Q4:
A:
Q5:
A:
Q6:
A:
How do I know whether my devices will work with this product?
Keep the total power below 600W. Some devices with motors or compressors may
start at 2-4 times their rated power, which could easily overload the Elite 30 V2.
Can I use third-party solar panels to charge this product?
Yes, you can use third-party solar panels with open circuit voltage of 12V-28V and MC4
connectors. Avoid mixing different types of solar panels.
Can it charge and discharge at the same time?
Yes, the Elite 30 V2 supports pass-through charging.
Why is the charging power often too low?
The built-in BMS adjusts the charging power based on battery temperature and SoC to
protect the battery and extend its life.
How to calculate the operation time?
Operation time = Battery Capacity x DoD x η ÷ (Load + Elite 30 V2 Self-consumption)
Note: DoD (Depth of Discharge) is 95%. η (inverter efficiency) is over 90%. Elite 30 V2
self-consumption is about 9W .
Why does a warning come up when using a diesel heating pump with the cigarette
lighter port?
The pump may require more initial power to start. Use a compatible adapter to start
and run the pump with our AC outlets.
Appendix
Update Firmware via BLUETTI App
Keeping firmware updated is IMPORTANT for optimal performance. For detailed instructions,
refer to the app user manual in the app. Using the Elite 200 V2 upgrade as an example.
1. Download the BLUETTI app
Scan the QR code or search for “BLUETTI” in the App
Store or Google Play to download the app.
EN
JUST POWER ON
22
2. Log in or sign up
Log in with a BLUETTI account. If there is no
account, create one by following the on-screen
instructions.
3. Bind the unit
• Tap Add Device directly or
access My Devices > Add
Device to start the process.
• Select the unit from the
available device list, or choose
Add Manually and enter the
unit's serial number (SN).
• Alternatively, tap Scan on the
Home page or in Add Device
page to bind via QR code.
4. Connect via Bluetooth
On the My Devices page, tap the unit and
select Bluetooth as the connection method.
JUST POWER ON 23
EN
Use a cable with OT terminals for grounding. Connect one end to the grounding terminal
with a grounding screw and the other end to the wall outlet or home distribution box ground.
Grounding Guidelines
Only use the grounding terminal when the product is connected to the home grid using
a 2-pin cable, or if the wall outlet's grounding is ineffective, and the connected device
features a metal case.
Notes:
• Ensure the unit remains powered on and connected during the update.
• Keep your phone and the unit close together (recommended range: 16.4ft / 5m).
• Do not exit app until done.
5. Check for Firmware Updates
Tap Upgrade to access the Upgrade page.
The app will check for the latest firmware version
available for the unit.
6. Download and Install the Update
If a new firmware update is available, tap
Upgrade and follow the on-screen instructions.
EN
JUST POWER ON
24

• FCC Statement
This device complies with part 15 of the FCC Rules. Operation is subject to the following
two conditions:
(1) This device may not cause harmful interference.
(2) This device must accept any interference received, including interference that may
cause undesired operation.
This equipment has been tested and found to comply with the limits for a Class B digital
device, pursuant to part 15 of the FCC Rules. These limits are designed to provide
reasonable protection against harmful interference in a residential installation. This
equipment generates, uses and can radiate radio frequency energy and, if not installed
and used in accordance with the instructions, may cause harmful interference to radio
communications. However, there is no guarantee that interference will not occur in a
particular installation. If this equipment does cause harmful interference to radio or television
reception, which can be determined by turning the equipment off and on, the user is
encouraged to try to correct the interference by one or more of the following measures:
- Reorient or relocate the receiving antenna.
- Increase the separation between the equipment and receiver.
- Connect the equipment into an outlet on a circuit different from that to which the
receiver is connected.
- Consult the dealer or an experienced radio / TV technician for help.
FCC Caution: Any changes or modifications not expressly approved by the party
responsible for compliance could void the user's authority to operate this equipment.
IMPORTANT NOTE: FCC Radiation Exposure Statement
This equipment complies with FCC radiation exposure limits set forth for an uncontrolled
environment. This equipment should be installed and operated with a minimum
distance of 20cm between the radiator and your body.
Compliance
• IC Caution
This device contains licence-exempt transmitter(s) / receiver(s) that comply with
Innovation, Science and Economic Development Canada’s licence-exempt RSS(s).
Operation is subject to the following two conditions:
(1) This device may not cause interference.
(2) This device must accept any interference, including interference that may cause
undesired operation of the device.
JUST POWER ON 25
EN

RF exposure statement: The equipment complies with ISED Radiation exposure limits
set forth for uncontrolled environments. This equipment should be installed and
operated with a minimum distance of 20cm between the radiator and your body.
L’émetteur/récepteur exempt de licence contenu dans le présent appareil est conforme
aux CNR d’Innovation, Sciences et Développement économique Canada applicables
aux appareils radio exempts de licence. L’exploitation est autorisée aux deux conditions
suivantes:
(1) L' appareil ne doit pas produire de brouillage;
(2) L' appareil doit accepter tout brouillage radioélectrique subi, même si le brouillage
est susceptible d' en compromettre le fonctionnement.
Déclaration d'exposition aux RF : L'équipement est conforme aux limites d'exposition
aux rayonnements ISDE définies pour les environnements non contrôlés. Cet équipe-
ment doit être installé et utilisé avec une distance minimale de 20 cm entre le radiateur
et votre corps.
CAN ICES (B) / NMB (B)
EN
JUST POWER ON
26

@ BLUETTI Official
@bluetti.inc @bluetti.inc
Need Help? We're here for you!
Visit Us
SHENZHEN POWEROAK NEWENER CO., LTD.
19F, Block A, Kaidaer Bldg., No. 168 Tong Sha Rd, Shenzhen, China
BLUETTI Power Inc.
6185 S Valley View Blvd, Ste D, Las Vegas, NV 89118, US
+1 800-200-2980 (Mon-Sun 9:00-17:00)
service@bluettipower.com
@ bluetti_inc