
Technical Support and E-Warranty Certificate
www.vevor.com/support
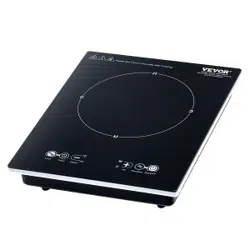
INDUCTION COOKTOP
Model:LI2H-98
We continue to be committed to provide you tools with competitive price.
"Save Half", "Half Price" or any other similar expressions used by us only
represents an estimate of savings you might benefit from buying certain tools
with us compared to the major top brands and does not necessarily mean to cover
all categories of tools offered by us. You are kindly reminded to verify carefully
when you are placing an order with us if you are actually Saving
Half in comparison with the top major brands.
1
NEED HELP? CONTACT US!
Have product questions? Need technical support? Please feel free to
contact us:
Technical Support and E-Warranty Certificate
www.vevor.com/support
This is the original instruction, please read all manual instructions
carefully before operating. VEVOR reserves a clear interpretation of our
user manual. The appearance of the product shall be subject to the
product you received. Please forgive us that we won't inform you again if
there are any technology or software updates on our product.
INDUCTION COOKTOP
HOB USER MANUAL
2
Warning: To reduce the risk of injury, the user must read the
instructions manual carefully.
MODEL AND PARAMETERS
Notice: the ceramic plate is hot after cooking, please do not touch!
WARNING
• Repair of any faults in your cooktop must be carried out only by an
Authorized Repair Service technician, otherwise the guarantee is not valid.
• The technical details and identification of the appliance are shown on the
specification plate. Consult this plate before proceeding with electrical
connection.
• Electrical connection must be carried out by a certified specialist familiar with
official regulations.
• In case of any damage, switch off the appliance and disconnect it from the
power supply.If the supply cord is damaged,it must be replaced by the
manufacturer,itsserviceagentorsimilarlyqualifiedpersonsinordertoavoida
hazard.
IMPORTANT SAFETY INFORMATION
General Information
• This appliance is designed for domestic household use and designed be built
into a standard kitchen cabinet or housing unit.
• IMPORTANT: Your product warranty will be void if the installation is not in
accordance with the instructions. The installation must be carried out by a
Model
LI2H-98
Voltage/Frequency
120V / 60Hz
Power (total)
1800W
Control mode
Touch
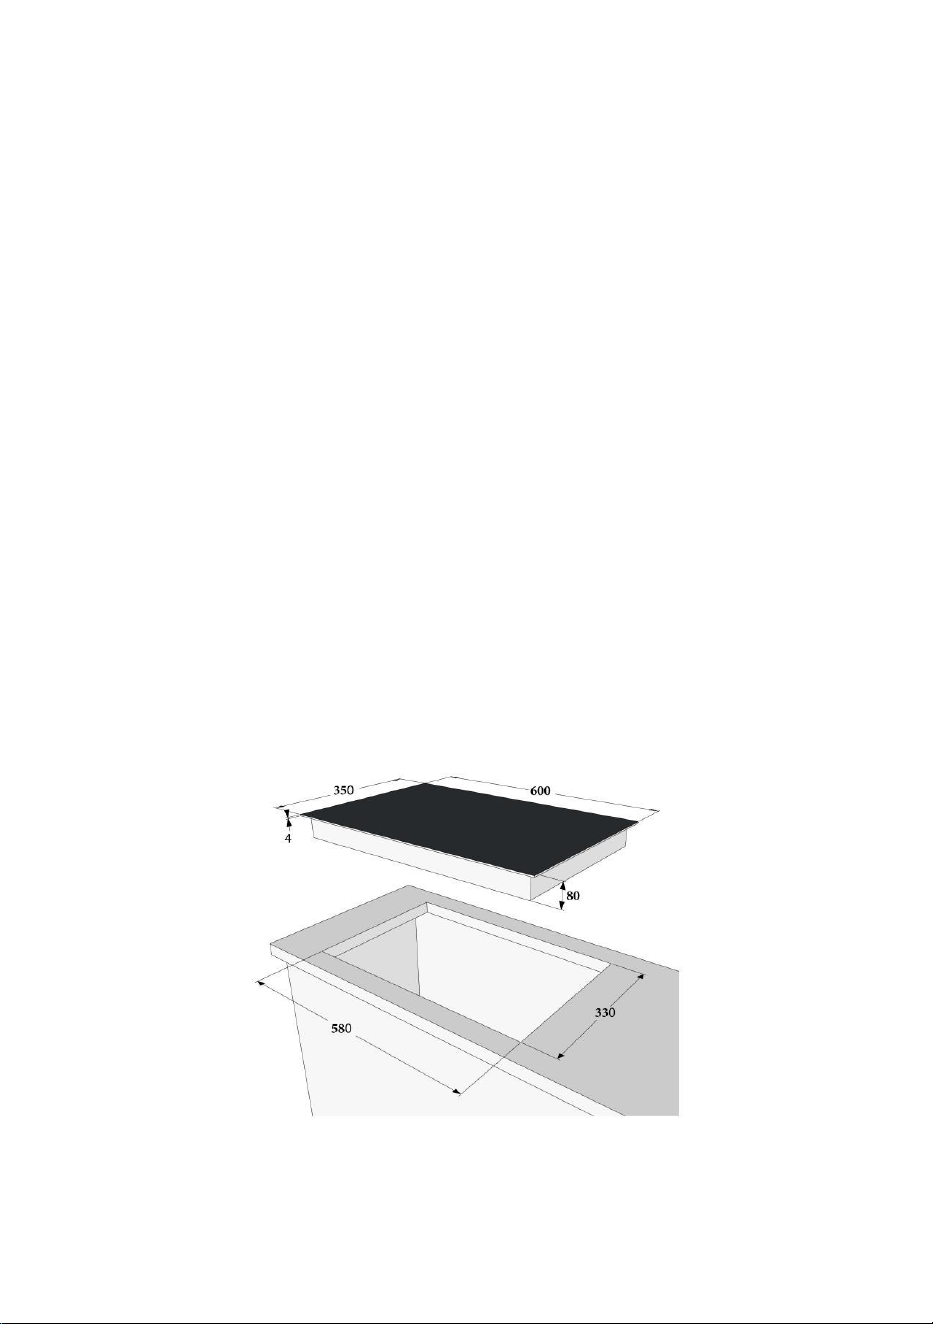
Built in size
580x330 mm
Product size
600x350 mm

3
suitably qualified person, in accordance with the manufacturer’s instructions,
and must be connected in accordance with all local electrical rules
specification.
• The use of this appliance for any other purpose or in any other environment
will void warranty.
• Your new appliance is guaranteed against electrical or mechanical defects,
subject to certain exclusions, the foregoing does not affect your statutory
rights.
• Repairs may only be carried out by Service Engineers or an authorised
service agent.
• Check the appliance for damage after unpacking it. Do not connect or install
the appliance if it has been damaged in transport as this will void the warranty.
Warning and safety instructions
CAUTION: The appliance and its accessible parts become hot during use.
Care should be taken to avoid touching heating elements. While in operation,
direct contact with the hob may cause burns.
• This appliance complies with all current North America safety legislation, and
designed to operate safely in normal use, however the appliance surfaces will
become hot during use and retain heat after operation.
• This appliance is not intended for use by persons (including children) with
reduced physical, sensory or mental capabilities, or lack of experience and
knowledge, unless they have been given supervision or instruction concerning
use of the appliance by a person responsible for their safety.
• People with a heart pace maker should consult with their doctor before using
this unit.
• During use the appliance becomes hot. Care should be taken to avoid
touching the induction hobs.
• The first few times the hob top is used, it may give off an acrid, burning smell.
This smell will disappear completely with repeated use.
• NOTICE: Do not switch on the hob until a proper pan has been placed on
it.(See the “BEFORE USE” section to choose the proper pan.)
• The positions where the heat will radiate from are clearly marked on the hob

4
top. The saucepans must be positioned exactly on these zones for efficient
heating to occur. Pans should have the same diameter as the cooking zone
that they are being used on.
• You should not use saucepans with rough bottoms, as this can scratch the
ceramic surface.
• Before use, make sure that the bottoms of the saucepans are clean and dry.
• Do not put pans weighing over 20kg on the hob.
• The best thickness for the bottom of the pans is 2 – 3 mm of enamelled steel
and 4 – 6 mm for stainless steel with sandwich type bottoms.
• If these rules are not followed, then there will be a great loss of heat and
energy. Heat not absorbed by the saucepan, will spread to the hob, frame and
surrounding cabinets.
• Food or liquid that has high sugar content may damage the hob top if it
comes into contact with the induction hob surface. Any spillages should be
wiped up immediately, however this may not prevent the hob surface from
becoming damaged.
• Do not leave induction hob unattended when frying. Oils and fats may catch
fire due to overheating or boiling over.
• Do not use the hob if the surface becomes broken or cracked. You should
switch off the appliance to avoid the possibility of electric shock; contact the
dealer customer care department immediately.
• Do not use the induction hob in the event of a technical fault. Any faults must
be fixed by an appropriately qualified and authorized person.
• In the event of any incident caused by a technical fault, disconnect the power
and report the fault to the service centre to be repaired.
• Ensure that small items of household equipment, including connection leads,
do not touch the hob as the insulation material of this equipment is usually not
resistant to high temperatures.
• Never try to extinguish a fire with water, but switch off the appliance and then
cover flame e.g. with a lid or a fire blanket.
• The appliance is not intended to be operated by means of an external timer
or separate remote-control system.
• Cleaning should be carried out in accordance with the “Cleaning and

5
Maintenance” section to avoid possible hazards.
• Use only hob guards designed by the manufacturer of the cooking appliance
or indicated by the manufacturer of the appliance in the instructions for use as
suitable or hob guards incorporated in the appliance. The use of inappropriate
guards can cause accidents.
• IMPORTANT: The ceramic hob surface is designed to be tough; however can
be damaged.
Especially if pointed or hard objects are allowed to fall on it with some force.
• CAUTION: Do not use the hob if the surface becomes broken or
cracked. You should switch off the appliance to avoid the possibility of
electric shock; contact the dealer customer care department
immediately.
Child Safety
• WARNING: Accessible parts may become hot during use.
• We strongly recommend that babies and young children are prevented from
being near to the appliance and not allowed to touch the appliance at any time.
• If it is necessary for younger family members to be in the kitchen, please
ensure that they are kept under close supervision at all times.
• Cleaning and user maintenance shall not be carried out by children without
supervision.
• The packaging materials will be dangerous for children. Keep the packaging
materials away from children. Please dispose of all parts of the packaging
according to environmental obligation.
WARNING: Do not use or attempt to install this appliance until you
have read this instruction manual. This appliance is intended for household
use only. SAVE THESE INSTRUCTIONS!
INSTALLATION
The installation must be carried out by a suitably qualified person, in
compliance with local electrical and building rules and specifications,
6
and the instructions outlined in this manual.
IMPORTANT:
• Ensure that the appliance is installed in a suitable position, in consideration
to adjacent walls, cupboards and protection for combustible materials in
accordance with local rules.
• The kitchen units that are in direct contact with the appliance must be heat
proof (min. 80°C).
• The appliance can be installed on a work surface with a thickness of between
30mm and 40mm, as well as near to walls which are higher than the work
surface, maintaining a minimum distance of 100mm.
• Carry out all cutting of the unit and work surface then carefully remove
shavings or sawdust before inserting the appliances.
• To ensure a correct ventilation of the hob, please comply with the dimensions
shown.
• The electric hob must be installed into the cabinet before use and testing.
• Make sure the surface is level and square and that no part interferes with the
space required for installation.
• Prepare the cut-out as indicated (see installation dimensions).
7
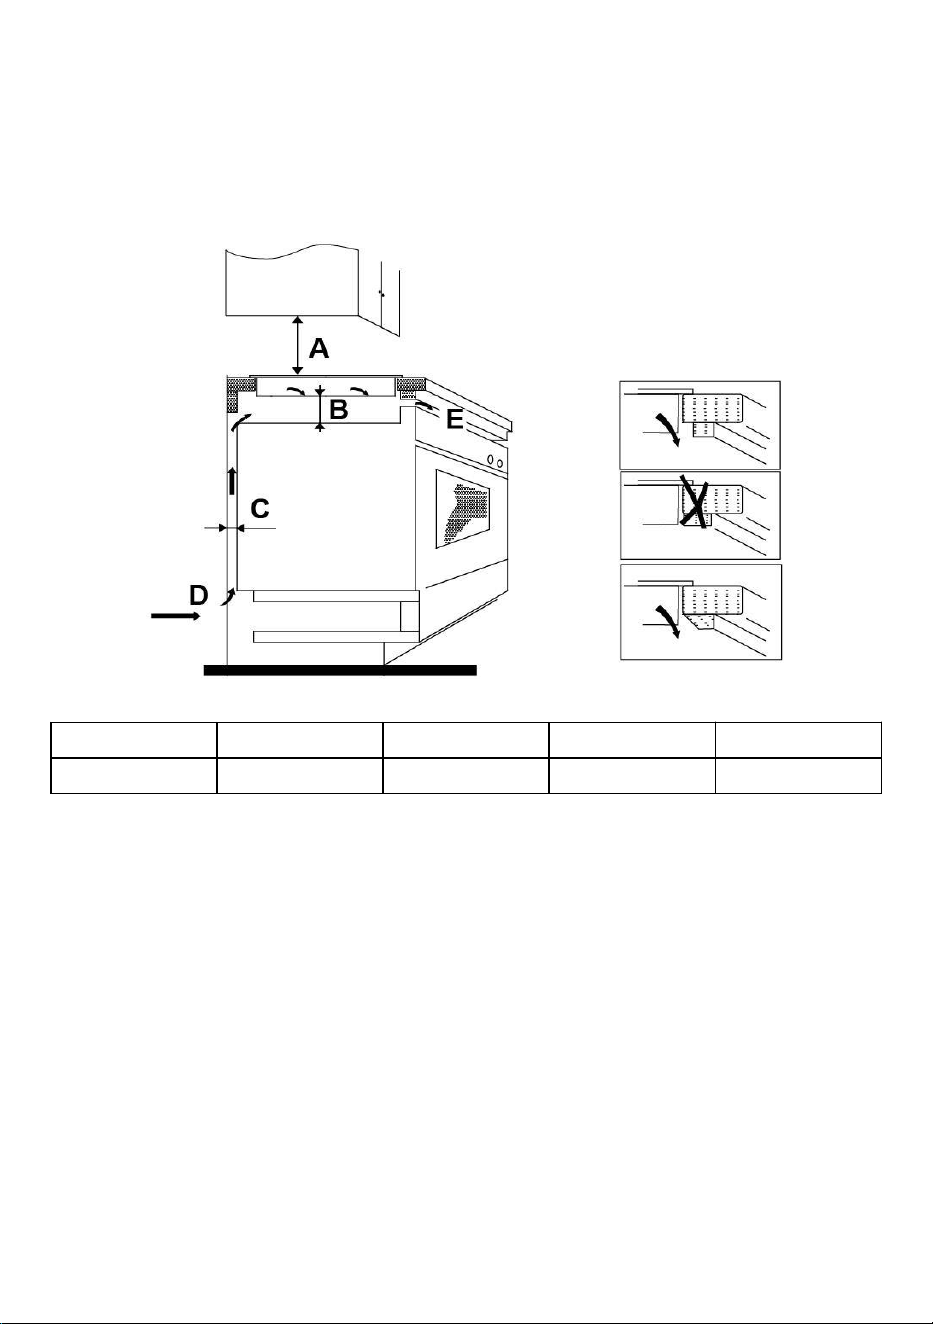
• Under any circumstances, make sure the hob is well ventilated and the air
inlet and outlet are not blocked. Ensure the hob is in good work state. As
shown below.
Note: The safety distance between the hotplate and the cupboard above the
hotplate should be at least 760mm.
A(mm)
B(mm)
C(mm)
D
E
760
50min
20min
Air intake
Air exit 5mm
Cautions
• The induction hotplate must be installed by qualified personnel or technicians.
Please never conduct the operation by yourself.
• The hob will not be installed directly above a dishwasher, fridge, freezer,
washing machine or clothes dryer,as the humidity may damage the hob
electronics.
• There is adequate flow of fresh air from outside the cabinetry to the base of
the hob.
• To avoid any damage, the sandwich layer and adhesive must be resistant to
heat.

8
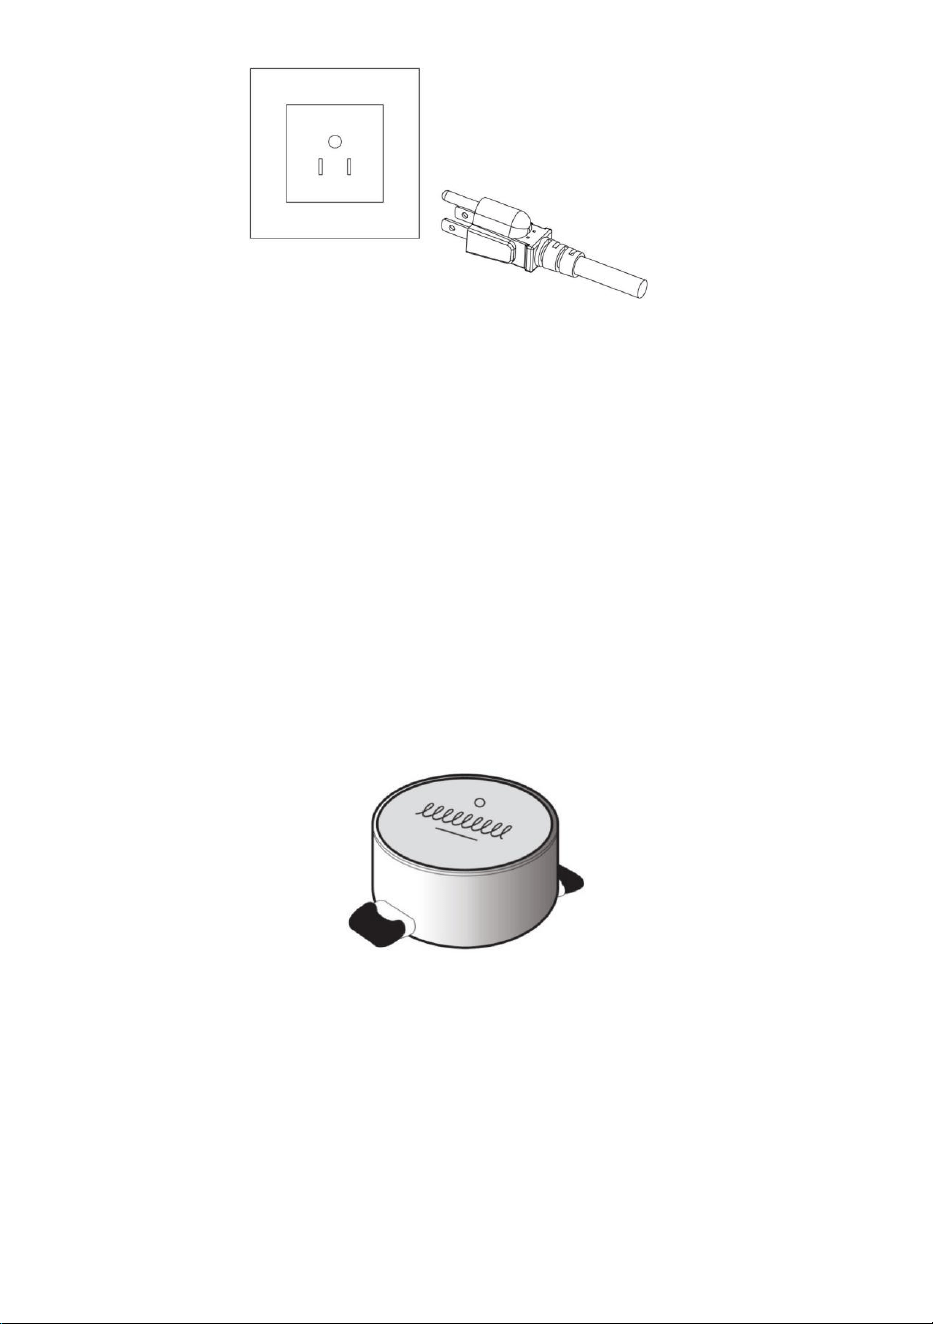
CONNECTION TO POWER SUPPLY
• Ensure that the voltage and frequency data on the induction cooktop
rating plate (at the bottom of the appliance) matches that of the wall outlet.
If in doubt, consult a qualified electrician.
• To reduce the risk of fire, the use of a multi-plug outlet adapter is not
recommended.
• Inspect the power cord for damage and ensure it doesn’t run under the
appliance or over hot or sharp surfaces.
• The electrical safety of the appliance is only guaranteed if it is connected
to a properly installed fused system. The use of the appliance without a
fuse is prohibited. If in doubt, consult a qualified electrician. Manufacturer
cannot be made responsible for damages due to a missing or damaged
protective conductor.
• Ensure to always use a grounded wall socket to connect the appliance.
• If an extension cord is used, its electrical rating must be at least as great
as the electrical rating of the appliance.
The extension cord should be arranged so that it does not drape over a
countertop or tabletop where it can be pulled on by children or tripped over.
When using an extension cord, always ensure that the entire cable is
unwound from the reel.
• Do not alter the plug in any way.
• The manufacturer declines all liability for injury to persons or animals and
for damage to property resulting from failure to observe the regulations
provided in this chapter.
Voltage : AC 120V Frequency: 60Hz
9
Electric induction stove failure, please contact us:
Customer Service Email: CustomerService@vevor.com
(Please send relevant videos and pictures to our email address, and attach
your Amazon order number. After confirming the problem, we will definitely
give you a satisfactory solution.)
BEFORE USE
IMPORTANT: The cooking zones will not switch on if pots are not the right size.
The bottom diameter of pots or pans should be at least 10cm.
Only use pots bearing the symbol “INDUCTION SYSTEM” (Figure below).
Place the pot on the required cooking zone before switching the hob on.
Existing pots and pans
Use a magnet to check if the pot is suitable for the induction hob: pots and
pans are unsuitable if not magnetically detectable.
• Make sure pots have a smooth bottom, otherwise they could scratch the hob.
Check dishes.
• Never place hot pots or pans on the surface of the hob’s control panel. This
could result in damage.

10
Notice: Cookware made from the following materials is not suitable: pure
stainless steel, aluminum or copper without a magnetic base, glass, wood,
porcelain, ceramic, and earthenware.
Do not use cookware with jagged edges or a curved base.
• Make sure that the base of your pan is smooth,sits flat against the glass,and
is the same size as the cooking zone. Use pans whose diameter is as large as
the graphic of the zone selected.Using a pot a slightly wider energy will be
used at its maximum efficiency. If you use smaller pot efficiency could be less
than expected. Pot less than 100 mm could be undetected by the hob. Always
centre your pan on the cooking zone.
• Always lift pans off the ceramic hob – do not slide, or they may scratch the
glass.
11
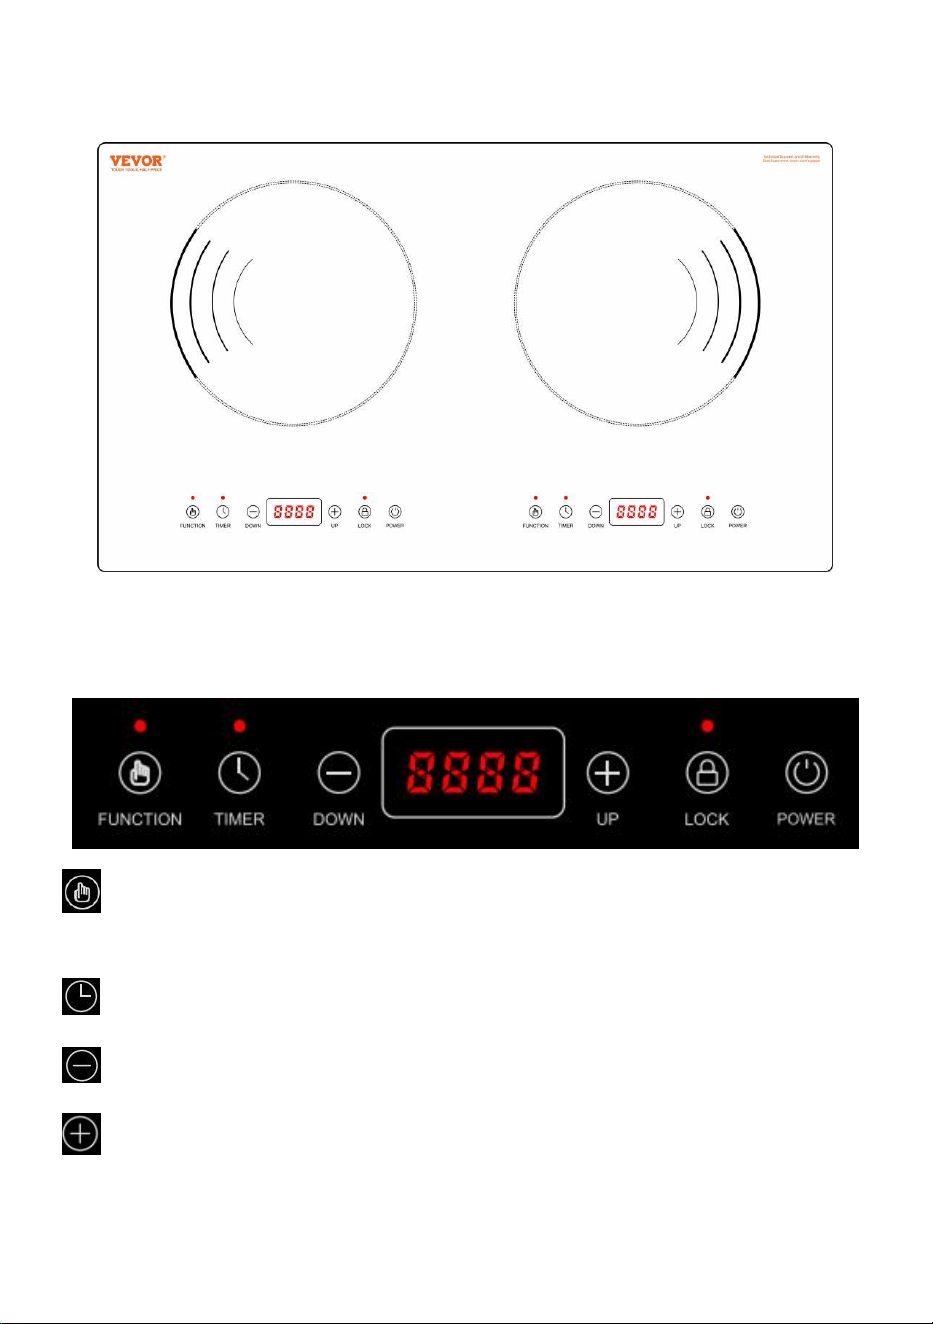
DIAGRAM OF THE RADIANT HOB
INDUCTION HOB CONTROL PANEL
FUNCTION: Touch to set the LED display power value or tempurature
value
TIMER: Set the time as required
DOWN: Reduce the power level or reduce the time
UP: Increase the power level or add the time
12
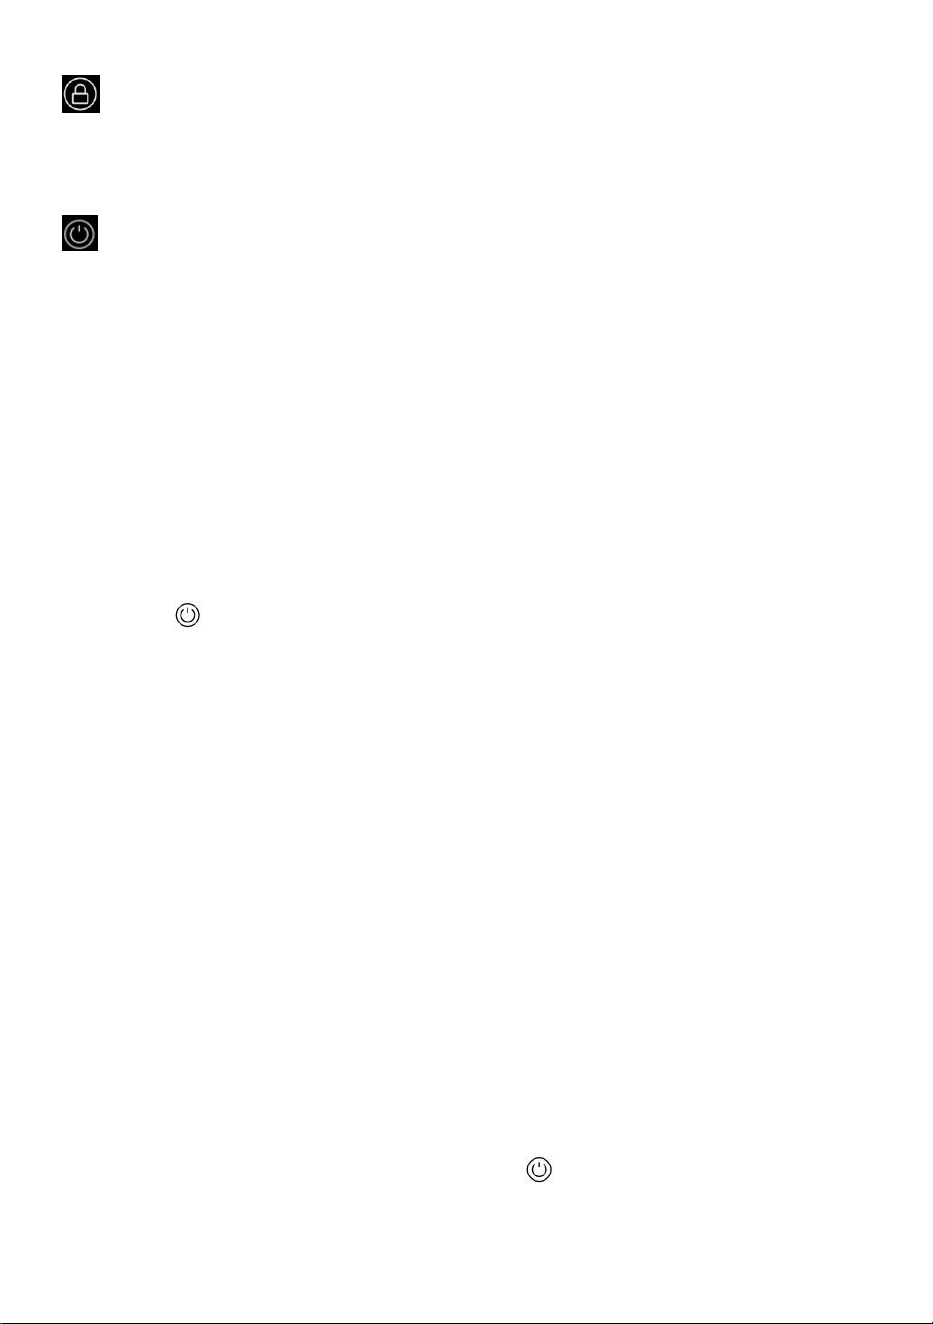
CHILD LOCK: Press 2 or 3 seconds once to lock the appliance. Other
buttons will not operate while appliance is locked. Hold 2 or 3 seconds the
button down to unlock.
POWER: Turn on or off the hob
INSTRUCTIONS FOR USE
Place on the proper cookware
Place a proper cookware onto the cooker plate,The operation of all zones is
the same. (See the “BEFORE USE” section to choose the proper cookware.)
Caution! Make no hot pots or pans on the keypad!
Power
Press the button for 2 or 3 seconds.
You will hear a beep and see flashing lines -- on the display next to every
cooking zone.
If you have not selected a program within about 30 seconds, the unit will return
to standby mode.
Power of each burner
Left zone up to max.1000W.
Right zone up to max.1000W.
Power Sharing
When both burners are on, both of their power together would be power
sharing Max 1800W.
Setting the heating zone power level
After turn on the heating burner by touching , the indicator next to the zone

13
will flash “----” by touching the plus button to increase the power, touching
the minus button to decrease the power .
*If you don’t choose a heat setting within a few seconds, the induction hob will
automatically return to the previous state.
Turn off the Cooking Zone
If you want to turn off any one burner, please touch the on / off button 2 or 3
seconds directly.
Residual heat indicator
When the cooktop has been operating for some time, there will be some
residual heat.
The residual heat indicator warns for each cooking zone separately with "H"
symbol.
Setting the timer
Touch the heating zone selection control that you want to set the timer for.
1. Touch the timer button , the LED above the timer button will start flashing
and the middle LED display will show the time “00”.
2. Touch the plus button to increase the time, touch the minus button
to decrease time. (Time setting max. 99 min.).
3. When the time is set, after 2 or 3 seconds no any operating, the time will
start timing and the display will indicate the countdown time until to “00”.
4. Timer cancellation: Touch the timer button for 2 or 3 seconds then the timer
function will be canceled.
Key lock (Child lock)
To ensure the safety of children, the induction cooktop is fitted with an interlock
cooktop.
To lock: hold the lock button for 2 or 3 seconds; the timer shows “L0” and
the rest of the keys are disabled except the on/off button. To unlock hold down
14
the lock key for 2 or 3 seconds and the cooktop will return to normal working.
SAFETY
Safety systems
• In order to protect the electronics from overheating if the control unit detects
excessive heat it will switch off the cooktop closest to the sensors and the
letter H will appear on the display. This cooktop can be activated when the
temperature of the electronic unit returns to normal.
• Each cooktop is equipped with an interior temperature limiter that switches
off the cooktop if the glass surface is heated excessively.
• If any cracks appear in the glass surface, immediately disconnect it from the
power. Do not use any part of the cooktop until a new glass surface has been
fitted.
Auto switch off
The hob will automatically switch off when you did not set cooking time, forgot
to switch off the hob, and did not operate the hob at all. The relationship
between the power level and default switch off time is shown in below figure.
TROUBLESHOOTING GUIDE
• Read and follow the instructions given in the section “Instructions for
use”.
• Check that the electricity supply has not been shut off.
• Dry the hob thoroughly after cleaning it.
• If, when the hob is switched on, alphanumeric codes appear on the
display, consult the following table for instructions.
• If the hob cannot be switched off after using it, disconnect it from the
power supply.
Power level
The hob automatically switch off after
0-9
2 hours
15
Noted:
* Please do not disassemble the unit by yourself to avoid any dangers and
damages to the induction hob.
* If, when the hob is switched on but cannot heat, please contact the seller and
provide the error code, the video clearly of the problem and the nameplate
picture on the bottom.
Error
code
Possible Cause
Remedy
E0
No proper cookware
Place on the proper pan.
E2
NTC short or open
Contact the Customer
Service please.
E3
High voltage
Contact the Customer
Service please.
E4
Low voltage
Contact the Customer
Service please.
• CC/CCC automatic safety shut-off for liquid overflow.
This means that the touch panel was watered with liquid. Please clean
the control panel.
NOISES MADE BY THE INDUCTION HOB
• Induction hobs can make whistling or crackling sounds during normal
operation, these actually come from the pots and pans as a result of the
characteristics of the bottoms (for example, bottoms made of several layers of
material, or uneven bottoms).
• These noises vary depending on the pots and pans used and the amount of
food they contain, and are not indicative of a defect of any kind.
• In addition, the induction hob is equipped with an internal cooling system to
control the temperature of electronic parts; as a result, during operation and for
several minutes after the hob has been switched off, the noise of the cooling
fan will be audible.

16
• This is perfectly normal and indeed essential for proper functioning of the
appliance.
CLEANING AND MAINTENANCE
CAUTION!
•
Cleaning operations must only be carried out when the hob is cool. The
appliance should be disconnected from the power supply before commencing
any cleaning process.
•
Before cleaning, make sure the cooking zones are switched off and that the
residual heat indicator (“H”) is not displayed.
IMPORTANT: Do not use abrasive sponges or scouring pads. Their use could
eventually ruin the glass.
Cleaning the induction hob top
• If the pots/pans are used without being cleaned, discoloration or cooked on
stains may occur.
• Do not use benzene, thinner, scrubbing brush or polishing powder to clean
the cooker.
• Do not use any flammable, acid alkaline materials or substances near the
cooktop, as this may reduce the service life of the cooktop and lead to
deflagration when the cooktop is turned on.
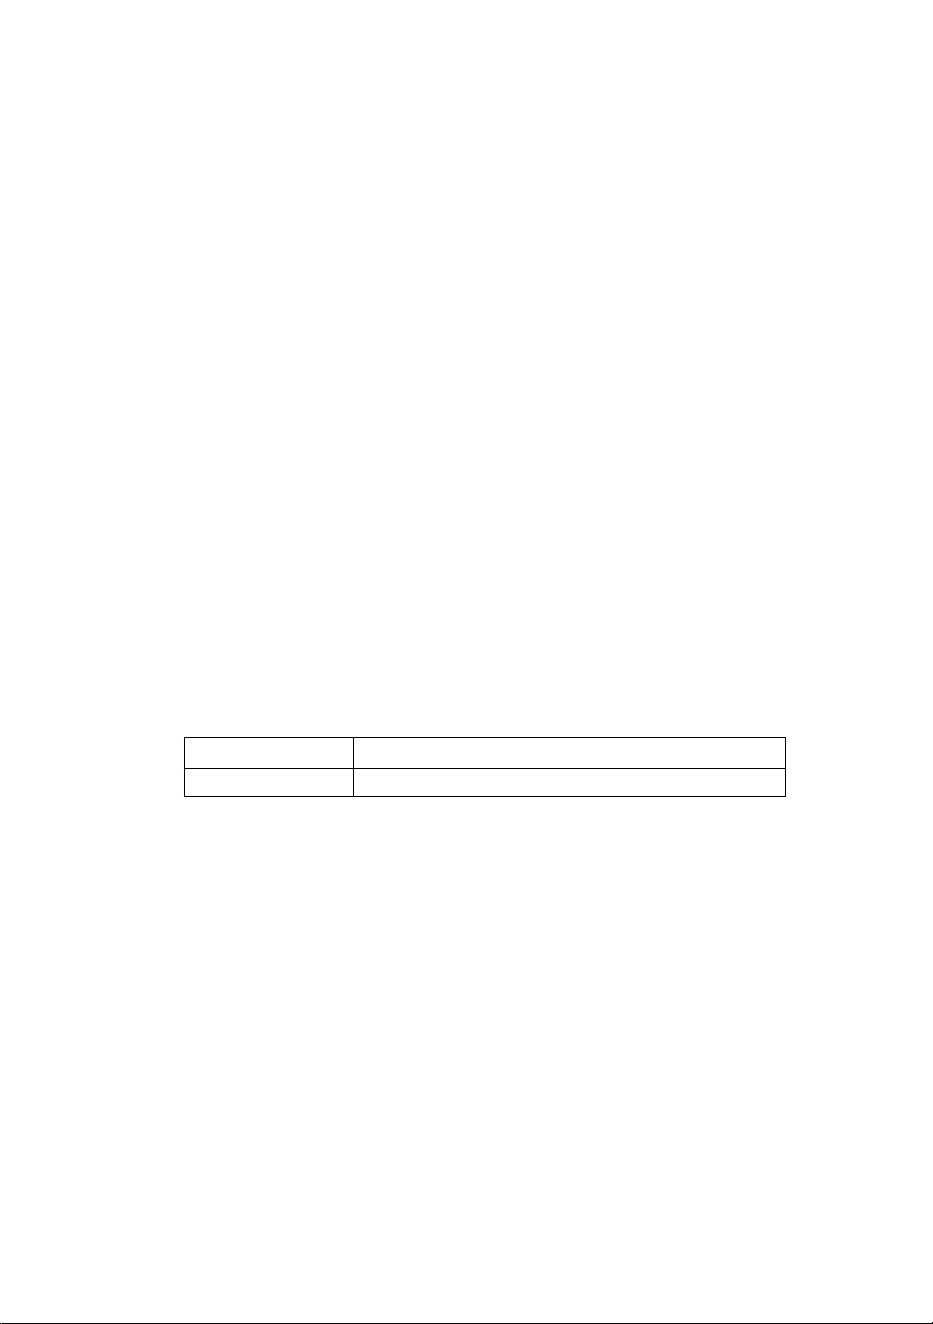
• Clean the radiant glass surface frequently, when it is cool. Please use dish
washing soapy water and wet cloth to wipe the surface of cooktop.
• Please Use vacuum cleaner to suck up dust from intake and exhaust vent.
• Never run water over the unit because it may cause a malfunction.
17
Clean the radiant glass surface frequently
when it is cool.
Never use abrasive products or pads,
Clean with a wet cloth.
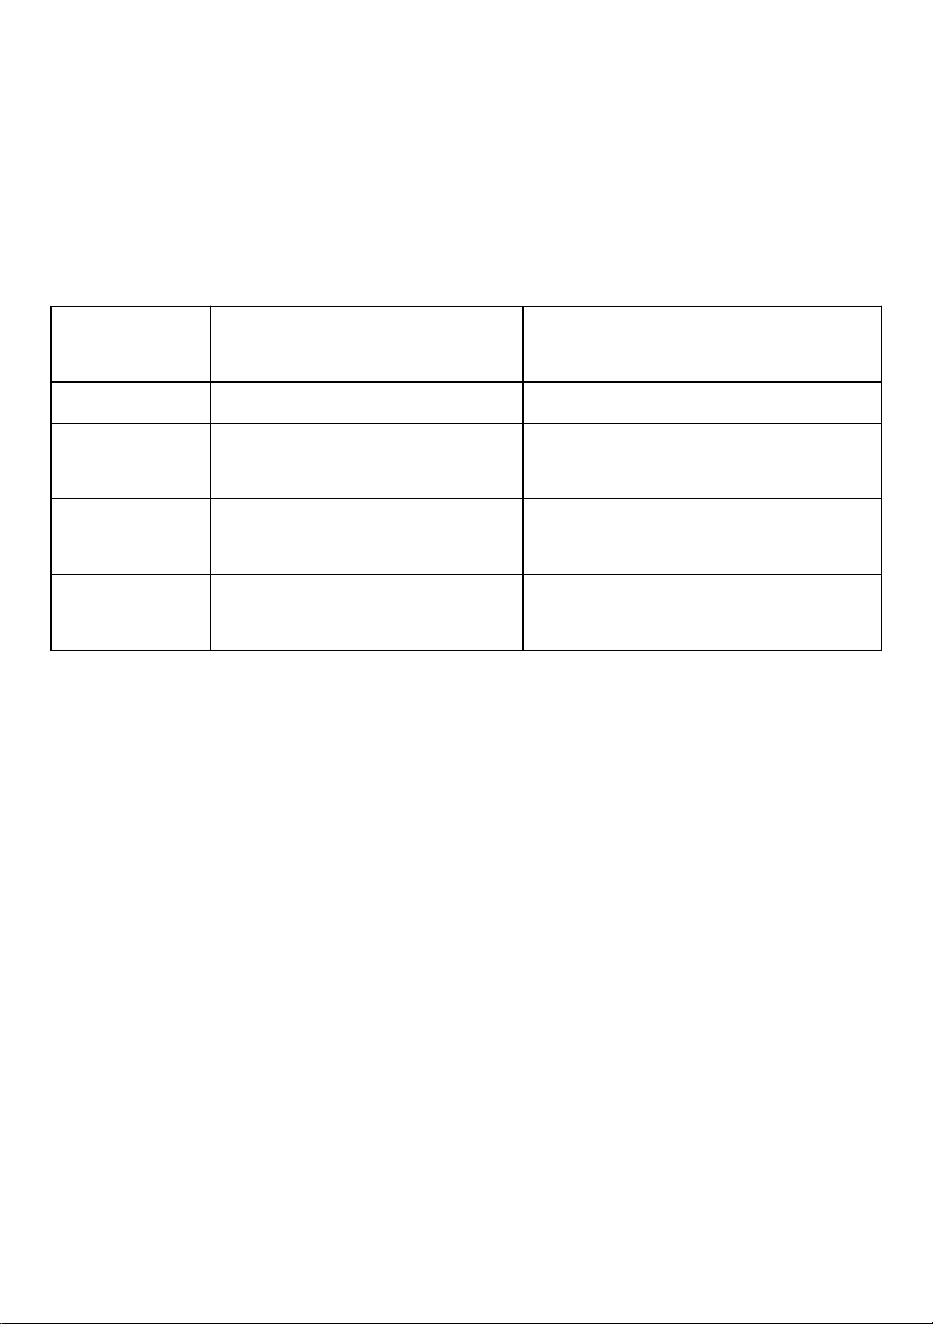
Once a week, clean thoroughly with specific
products that preserve and protect the cooktops.
Scrape off stuck on stuck dirt with a scraper.
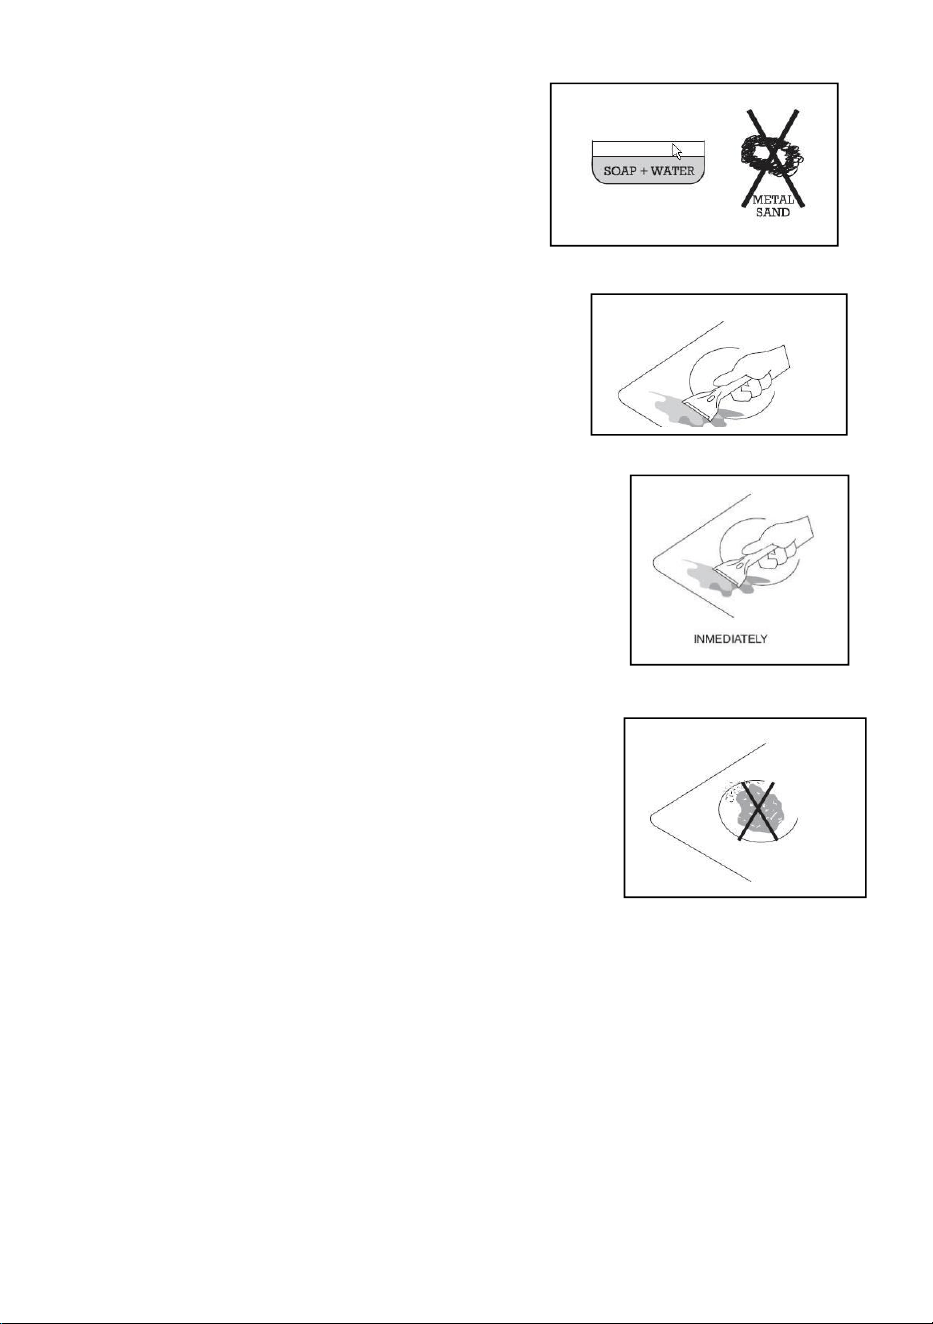
If sugar (or sugary matter) or plastic is accidentally
burnt on the cooktop, remove at once with the scraper
while still hot.
Otherwise it may leave a permanent mark.
Do not use the cooktop as a work surface.
Be particularly careful with dirt or dust from
vegetables, cleaning powders, etc.
which may scratch the surface when pans
are slid over it.

18
FCC Information:
CAUTION: Changes or modifications not expressly approved by the party
responsible for compliance could void the user's authority to operate the
equipment!
This device complies with Part 15 of the FCC Rules. Operation is subject to
the following two conditions:
1) This product may cause harmful interference.
2) This product must accept any interference received, including interference
that may cause undesired operation.
WARNING: Changes or modifications to this product not expressly approved
by the party.responsible for compliance could void the user's authority to
operate the product.
Note: This product has been tested and found to comply with the limits for a
Class B digital device pursuant to Part 15 of the FCC Rules, These limits are
designed to provide reasonable protection against harmful interference in a
residential installation.
This product generates, uses and can radiate radio frequency energy, and if
not installed and used in accordance with the instructions, may cause harmful
interference to radio communications. However, there is no guarantee that
interference will not occur in a particular installation. If this product does cause
harmful interference to radio or television reception,which can be determined
by turning the product off and on, the user is encouraged to try to correct the
interference by one or more of the following measures.
· Reorient or relocate the receiving antenna.
· Increase the distance between the product and receiver.
· Connect the product to an outlet on a circuit different from that to which the
receiver is connected.
· Consult the dealer or an experienced radio/TV technician for assistance.