- 02 -
Chapter 2 POWER SOURCES
Chapter 3 TIME SETTING
Version 1.2
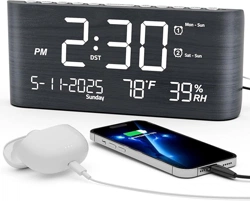
Stylish Calendar Clock with Thermometer
THE BEST CHOICE FOR YOUR HOME
Mad e in China
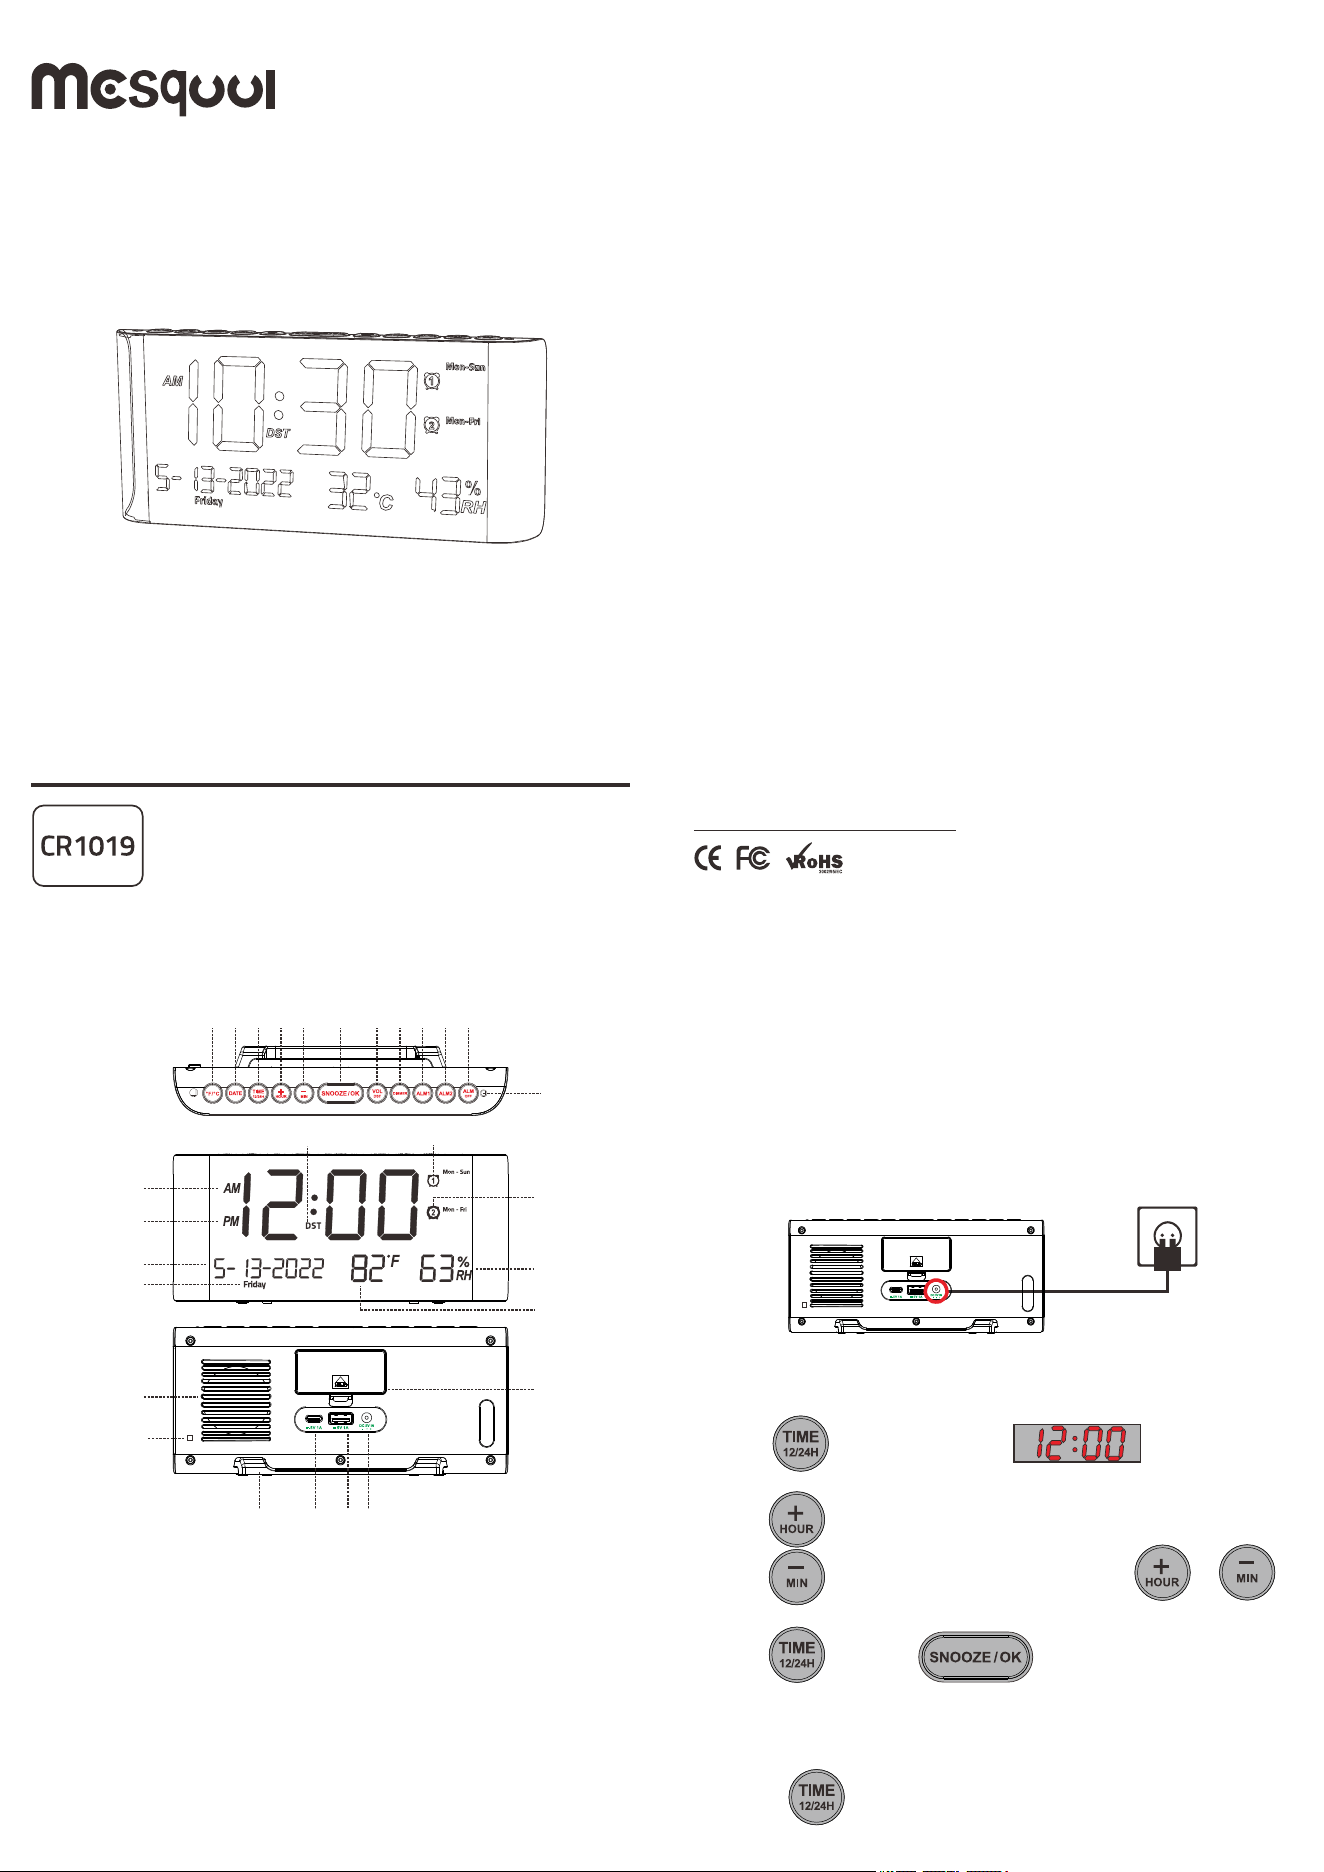
1. Install 2pcs 1.5V “AAA” size batteries to the proper terminals in the
battery compartment to memorize the time setting and the alarm will
ring in case of power outage.
NOTE: Batteries are not included and don’t support time display or any
other functions
2. Connect the adapter line to DC jack , then plug into a 100~240V AC wall
power outlet.
1. Press button once, display starts
flashing.
2. Press button to set the hour.
press button to set the minute. Hold press or to
quickly set the hour or minute.
3. Press button or button to save time or
wait for another 10 seconds to confirm automatically.
To change 12H/24H time format
Hold press button to change 12H/24H time format.
C h a p t e r4 A L A R MS E T T I N G
Contact our experts
https://www.mesqool.com
- 01 -
Chapter 1 LOCATION OF CONTROLS
1
2
3
4
5
6
7
8
9
10 11
13
14
15
16
17
18 2019
23
22
21
24
25 26
27
28
30
29
12
1. ℉/℃ 2. DATE 3. TIME & 12/24H
4. HOUR & Up 5. MINUTE & Down 6. SNOOZE & OK
7. VOL & DST 8. DIMMER 9. ALARM 1
10. ALARM 2 11. ALARM OFF 12. ALARM INDICATOR LIGHT
13. AM INDICATOR 14. PM INDICATOR 15. ALARM 1 INDICATOR
16. ALARM 2 INDICATOR 17. DST 18. MONTH DISPLAY
19. DATE DISPLAY 20. YEAR DISPLAY 21. WEEK DISPLAY
22. TEMPERATURE DISPLAY 23. HUMIDITY DISPLAY
24. BACKUP BATTERY COMPARTMENT 25. Type-C CHARGING PORT
26. USB CHARGING PORT 27. TEMPERATURE/HUMIDITY INDUCTOR
28. DC IN Jack 29. BRACKET 30.SPEAKER
- 05 -
- 04 -- 03 -
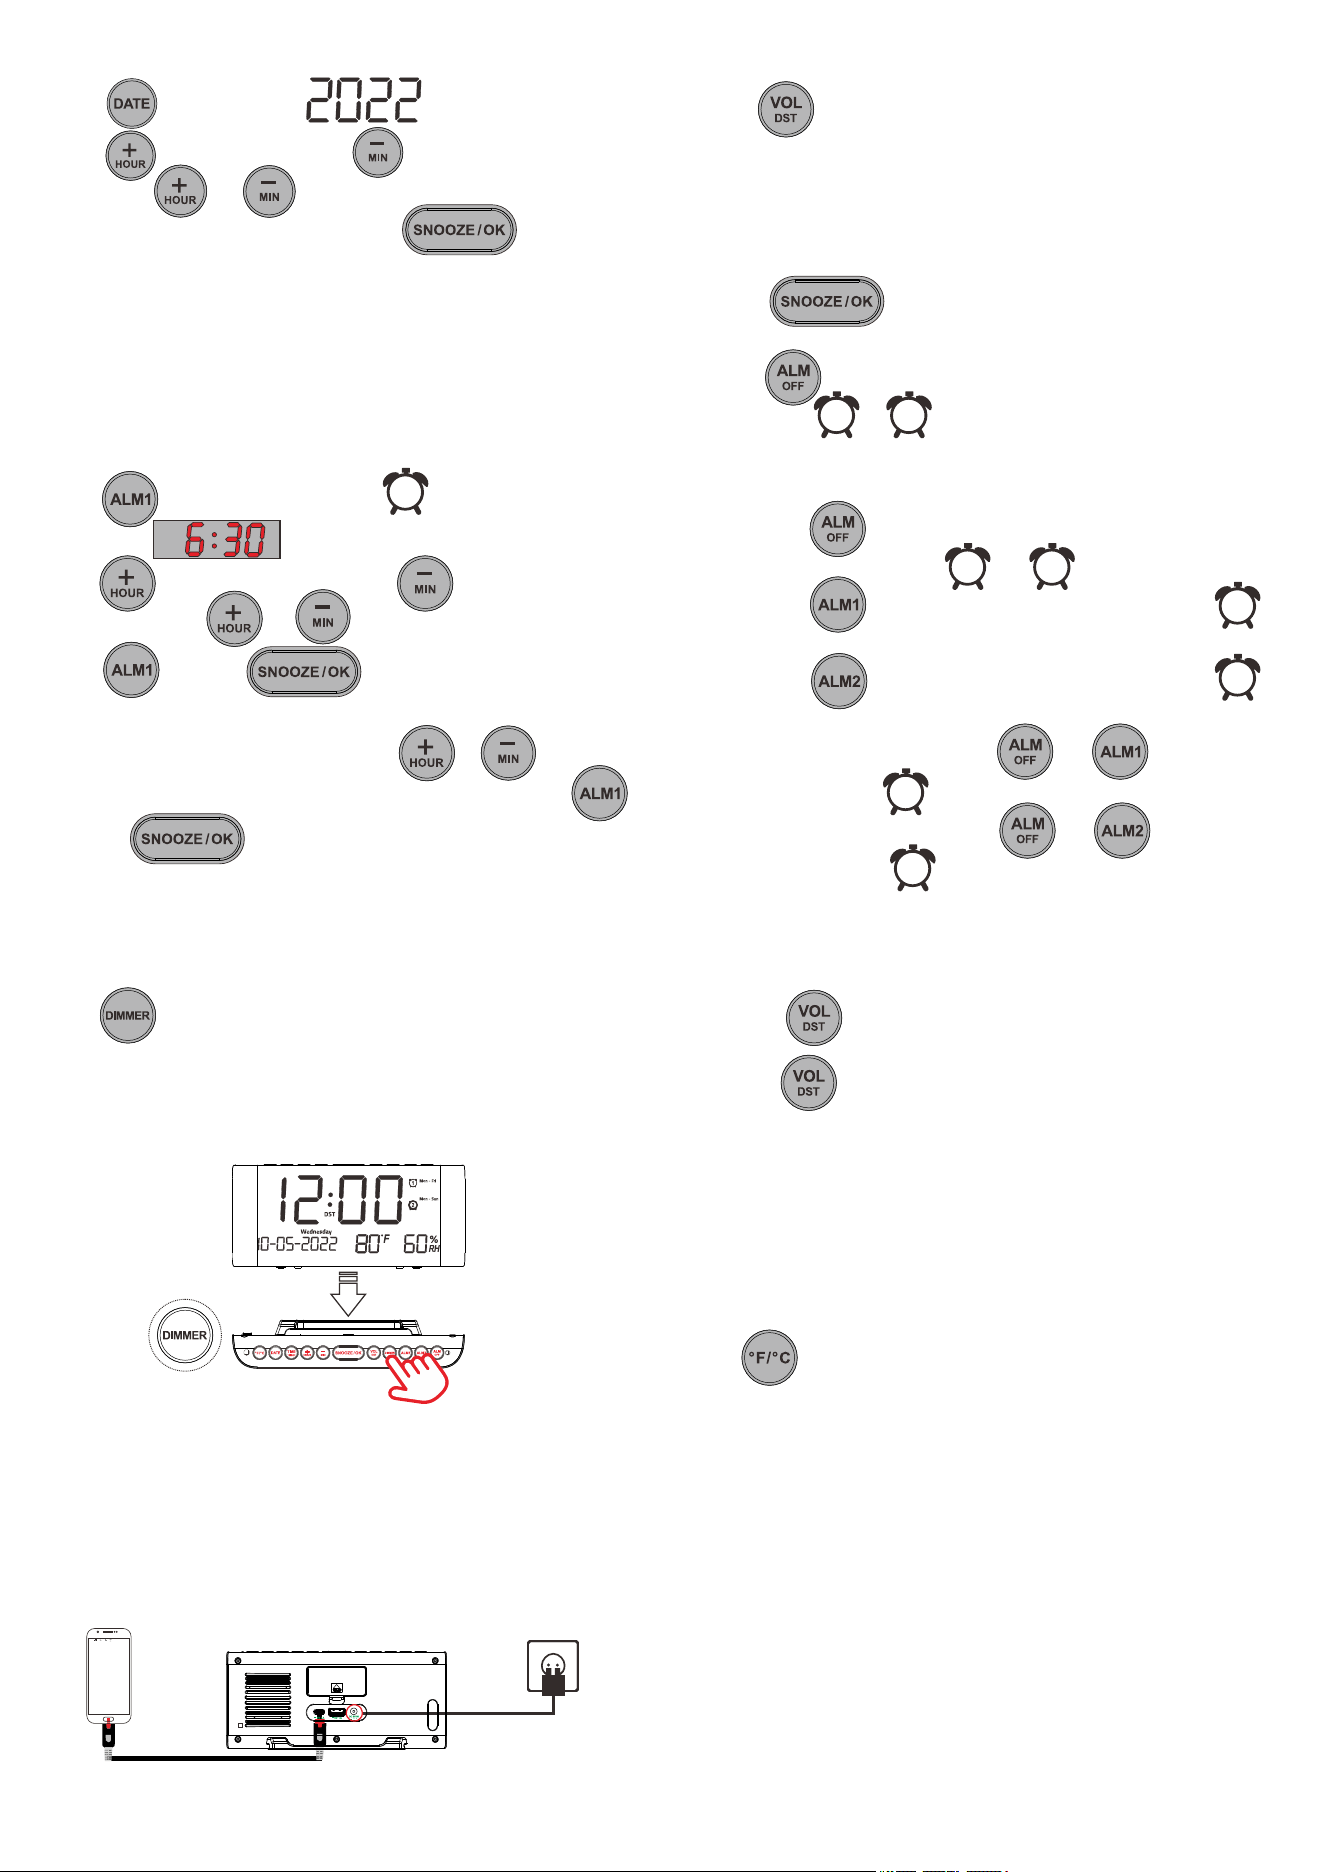
Chapter 6 USB & TYPE-C CHARGING
Plug charging cable into device such as phone or tablet.
Device can charge both your phone or tablet at the same time.
The maximum charge current is 1 Ampere.
Chapter 5 DIMMER
Repeat button to adjust the brightness of display for your
preference.
There is 5 levels, The sequence is as follows:
05(default)-04-03-02-01-02........
22:23
2
89%
E
E
1
Press repeatedly
1
1
Turn off Alarm
When alarm goes off:
1. Press button to temporarily turn off alarm for 9
minutes. Alarm will ring every next 9 minutes.
2. Press button to turn off alarm for 24 hours. The alarm
indicator or is still on, which means alarm is still
activated and will ring after 24 hours.
Cancel Alarm
1. Hold press button to turn off alarm1 and alarm 2 permanently.
And corresponding indicator and will turn off.
2. Hold press button, just turn off alarm 1 permanently.
indicator will turn off.
3. Hold press button, just turn off alarm 2 permanently.
indicator will turn off.
4. If alarm 1 goes off, then hold press or , just turn off
alarm1 permanently. indicator will turn off .
5. If alarm 2 goes off, then hold press or , just turn off
alarm 2 permanently. indicator will turn off.
2
2
1 2
1
2
YEAR/MONTH/DAY SETTING
1. Press once to maintain year flashing.
2. Press to increase year. Press to reduce year.
Hold press or to quickly increase or reduce.
3. When you finish the year adjustment. Press to
save the setting.
4. When month flashing, repeat Step-2 and Step-3 to set and
save the month.
5. When day flashing, repeat Step-2 and Step-3 to set and save the
day.
1. Press button, the alarm indicator will light up,
the display starts flickering.
2. Press button to set the hour, press button to set the
minute. Hold press or to quickly set the hour or minute.
3. Press button or button to save alarm
time or just wait for another 10 seconds to confirm automatically.
4. When the display "Mon-Sun" flashes.Press or to adjust
alarm period range. Mon-Sun / Mon-Fri / Sat-Sun/OneTime. Press
button or button again to save setting.
Setting ALARM 2 is the same as ALARM 1.
Chapter 4 ALARM SETTING
1
Set Alarm Ring Volume
Repeat button to adjust the alarm ring volume for your preference.
There is 5 levels, The sequence is as follows:
03(default)-04-05-04-03-02-01-02........
- 06 -
Hold press button to switch DST function. DST indicator will turn
on.
Hold press button again to turn off DST function. DST indicator will
turn off.
Chapter 7 DST
Chapter8REDINDICATORLIGHT
Whenthealarmgoesoff,theRed Indicator Lightwillflash.
Chapter 9 TEMPERATURE
TEMPERATURE FORMAT SWITCH
Displays in Fahrenheit by default. If you want to switch Fahrenheit / Celsius. Just
press button.
IMPORTANT REMINDER
1. It may take 1 minute for the temperature sensor to complete the
initialization.
2. Accuracy of thermometer is 1 degree Celsius.
3. There might be 1-3 degrees Celsius deviation within normal limits
due to unstable air flow and room heating.
Chapter 10 HUMIDITY
The measurement range of humidity is 0-99%RH, and accuracy deviation
of humidity is 2%RH.
Chapter 11 ATTENTION
Please note that the surface texture of each machine will be slightly
different due to the use of natural wood grain materials.