1 / 8
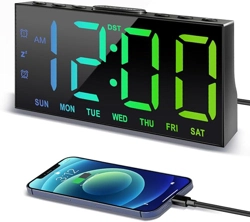
RGB Night Light Alarm Clock Instructions
We value every customer and commit to providing a lifetime warranty service
to each and every one of them. To activate lifetime warranty, please visit:
www.jall-us.com
Any questions about the alarm clock, please feel free to contact us:
ThreeDucksDirect@outlook.com
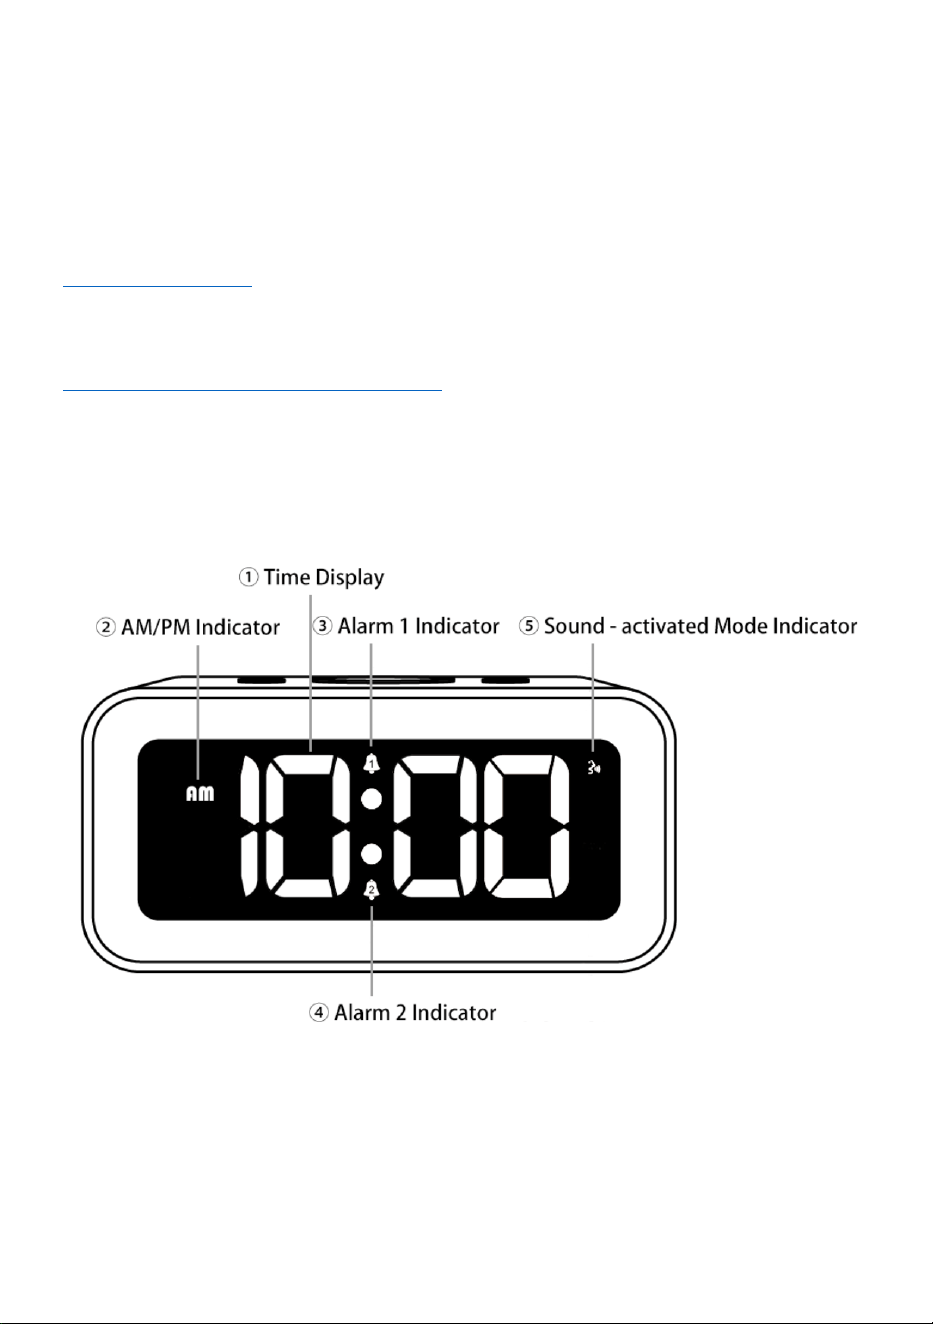
Front
① Time Display – Show current time.
② AM/PM Indicator – AM/PM Indicator is for 12-hour system only.
③ & ④ Alarm 1 / 2 Indicator – If you switch on alarm 1 / 2, it will be displayed.
⑤ Sound - activated Mode Indicator – If you switch on sound – activated mode, it will be
displayed.
2 / 8
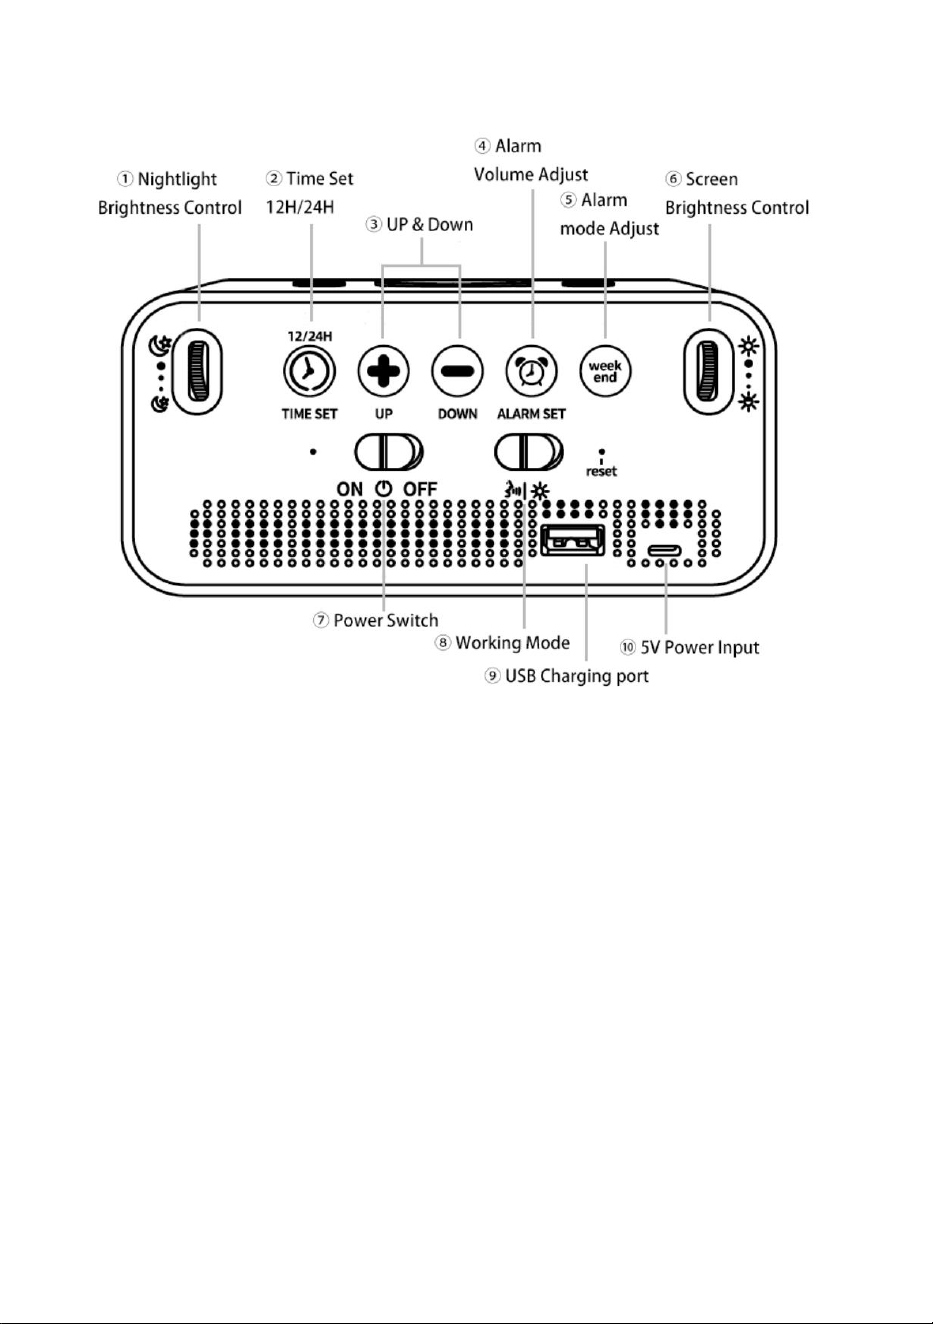
Back
① Nightlight Brightness Control – Use the scroll wheel to adjust brightness of night light.
② Time Set and 12H/24H – Hold “Time Set ” button for about 4s to set current time. Press
"Time Set" button to switch between 12-hour and 24-hour display modes.
③ Up & Down – Use these two buttons to adjust the value increase or decrease in various
settings.
④ Alarm Volume Adjust – Press "Alarm Set" button to select the appropriate alarm volume.
There are 3 levels of alarm volume to choose from.
⑤ Alarm Mode Adjust – Hold “Weekend” button for about 4s to set the working mode of
alarm 1 and alarm 2.
Note:
1 – 7: Monday – Sunday (7 – day mode). 1 – 5: Monday – Friday (Weekday mode). 6 – 7:
Saturday – Sunday (Weekend mode).
⑥ Screen Brightness Control – Use the scroll wheel to adjust brightness of screen.
⑦ Power Switch – Use the switch to turn alarm clock on or off.
⑧ Working Mode – Use "Working Mode" switch to select whether the alarm clock works in
constant mode or Sound - activated mode.
3 / 8
Note: When Sound - activated mode is turned on, the alarm clock will automatically go out
within 3 to 4 seconds. And it will be awakened by the sound of 60 decibels or a light tap.
⑨ USB Charging Port – Connecting a smartphone through USB charging port can charge the
smartphone.
⑩ 5V Power Input – Please use the original power cord and adapter to power the alarm
clock.
Note: Using a non-original power cord and adapter may cause malfunction of the alarm clock.
An excessive current may damage the circuit board (If your adapter is 5V 1A or 5V 2A, it can be
used as a replacement).
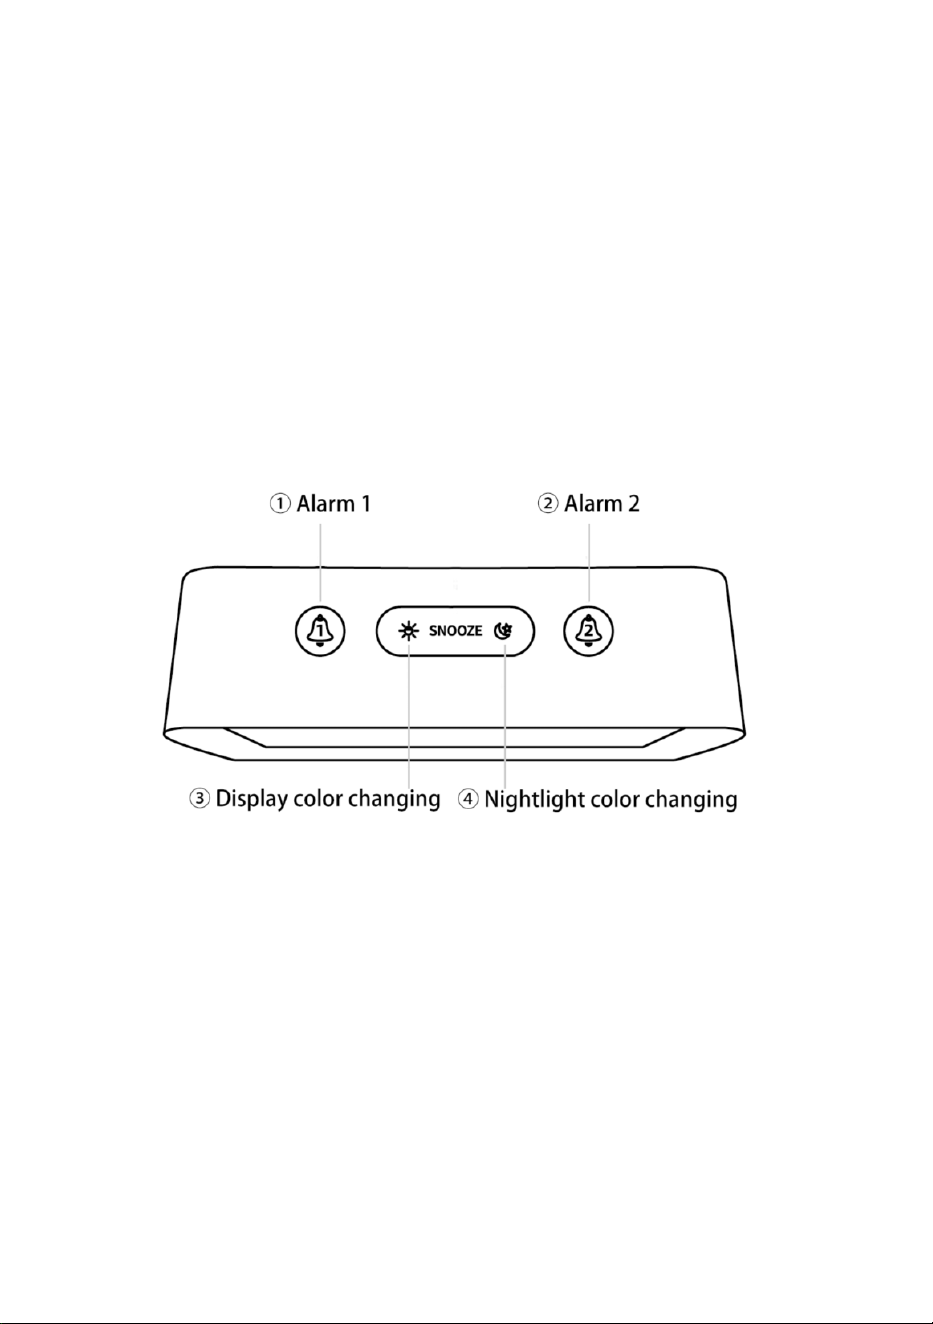
Top
① Alarm 1 – Hold “Alarm 1” button for about 4s to set alarm 1. Press "Alarm 1" button to
switch alarm 1 on/ off.
② Alarm 2 – Hold “Alarm 2” button for about 4s to set alarm 2. Press "Alarm 2" button to
switch alarm 2 on/ off.
③ Display color changing – Use “display color changing” button to select color of display.
There are a total of 8 display colors.
④ Nightlight color changing – Use “nightlight color changing” button to select color of
nightlight. There are a total of 7 nightlight colors.
Note: Both the “③display color changing” and “④nightlight color changing” buttons can be
used as “snooze” button.

4 / 8
1. Package Includes:
1 x Digital Alarm Clock
1 x User Manual
1 x USB Cable
1 x 5V 1A Power Adapter
2. Setting:
2.1 Time Setting:
2.2 12 / 24 H Switch:
5 / 8
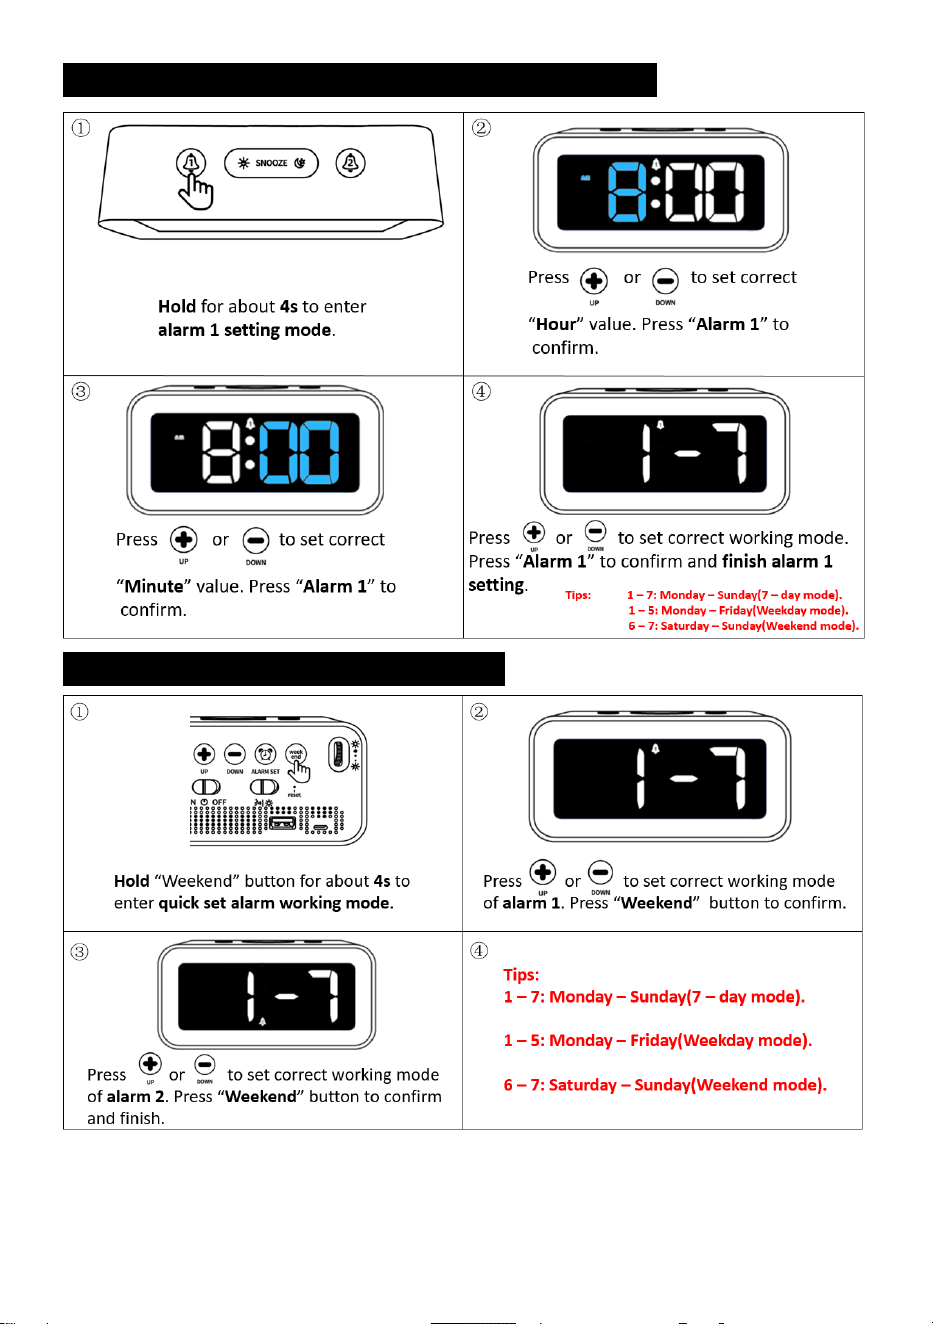
2.3 Alarm 1 Setting (Alarm 2 is the same as Alarm 1):
2.3-1 Quick Set Alarm Working mode:
6 / 8
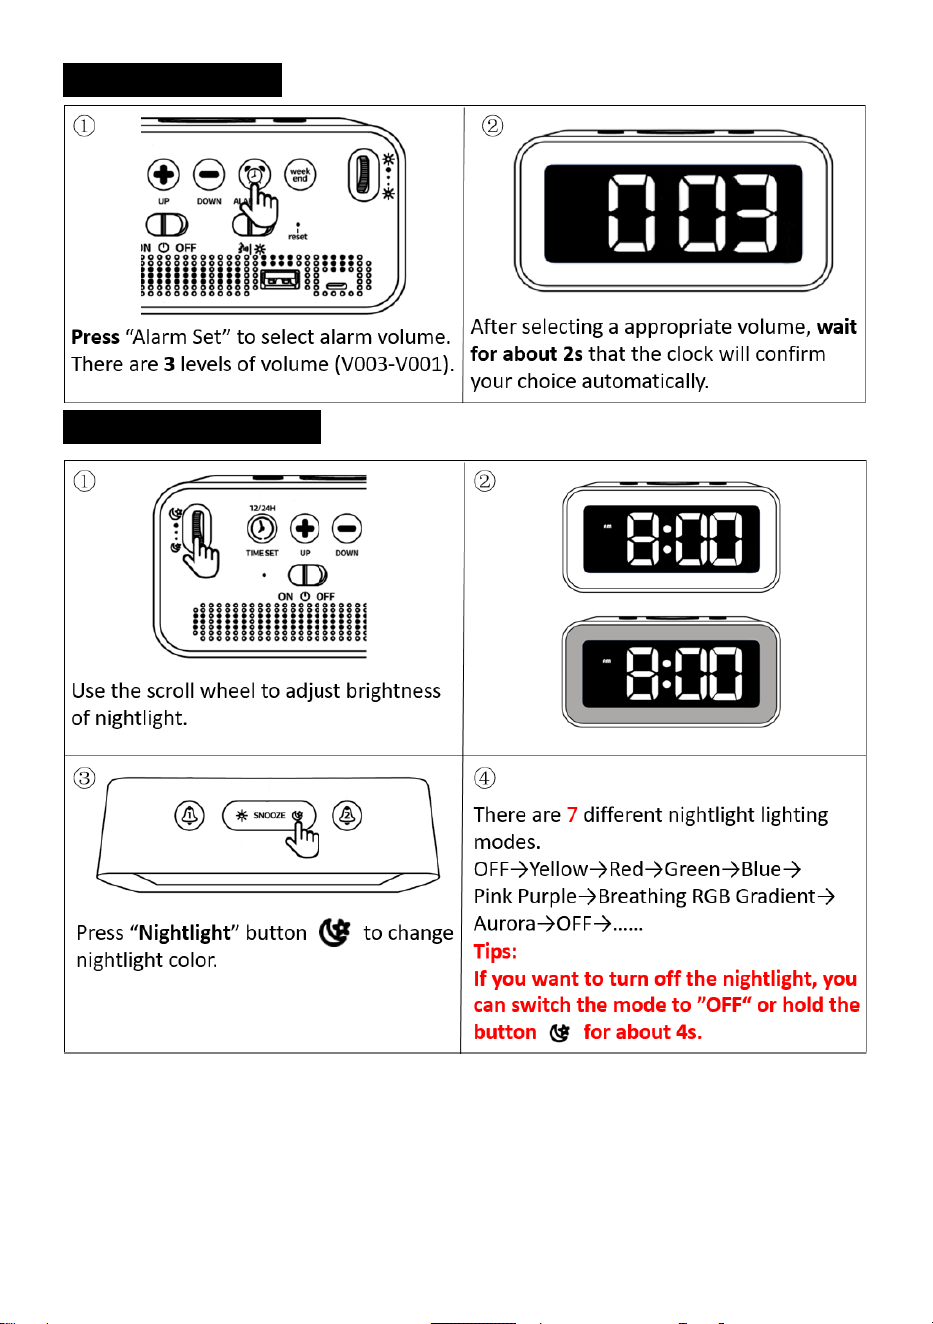
2.4 Alarm Volume:
2.5 Nightlight Setting:

7 / 8
2.6 Display Setting:
2.7 Snooze:
①When the alarm goes off, press “Snooze” button ( or ) once. The
corresponding alarm indicator light will flash, giving you an extra 5 minutes of snooze time.
②To turn off the snooze feature, simply press any button. This will stop the flashing of the
alarm indicator light. Alarm will go off on the next day.
2.8 Reset:

8 / 8
3. Product Features:
Input Voltage: AC110v-240V, 50/60HZ.
Output Voltage: DC5V / 500MA-2100MA.
4. Trouble Shooting:
1) Any questions about the clock, please contact us on Amazon or by email.
2) If the alarm clock cannot be turned on after connecting to the power supply,
please check the Power Switch at the back to make sure it is in the "ON"
position.
3) If the alarm clock always turns off automatically, please check the
"Working Mode" switch at the back. Make sure the switch is in the
"Constant Mode" position.
4) Please use the original power cord and adapter to work. If it’s broken,
please use a 5V 1A or 5V 2A power adapter as an alternative.
5) If you find that the alarm clock is malfunctioning, please try unplugging
and reconnecting power cord. Then press the "RESET" button at the back
of the alarm clock. If the issue persists, please contact us for a warranty.
To activate lifetime warranty, please visit: www.jall-us.com
Any questions about the alarm clock, please feel free to contact us:
ThreeDucksDirect@outlook.com