Assembly Instruction
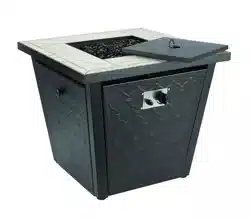
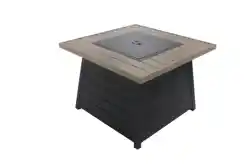
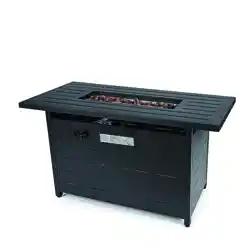
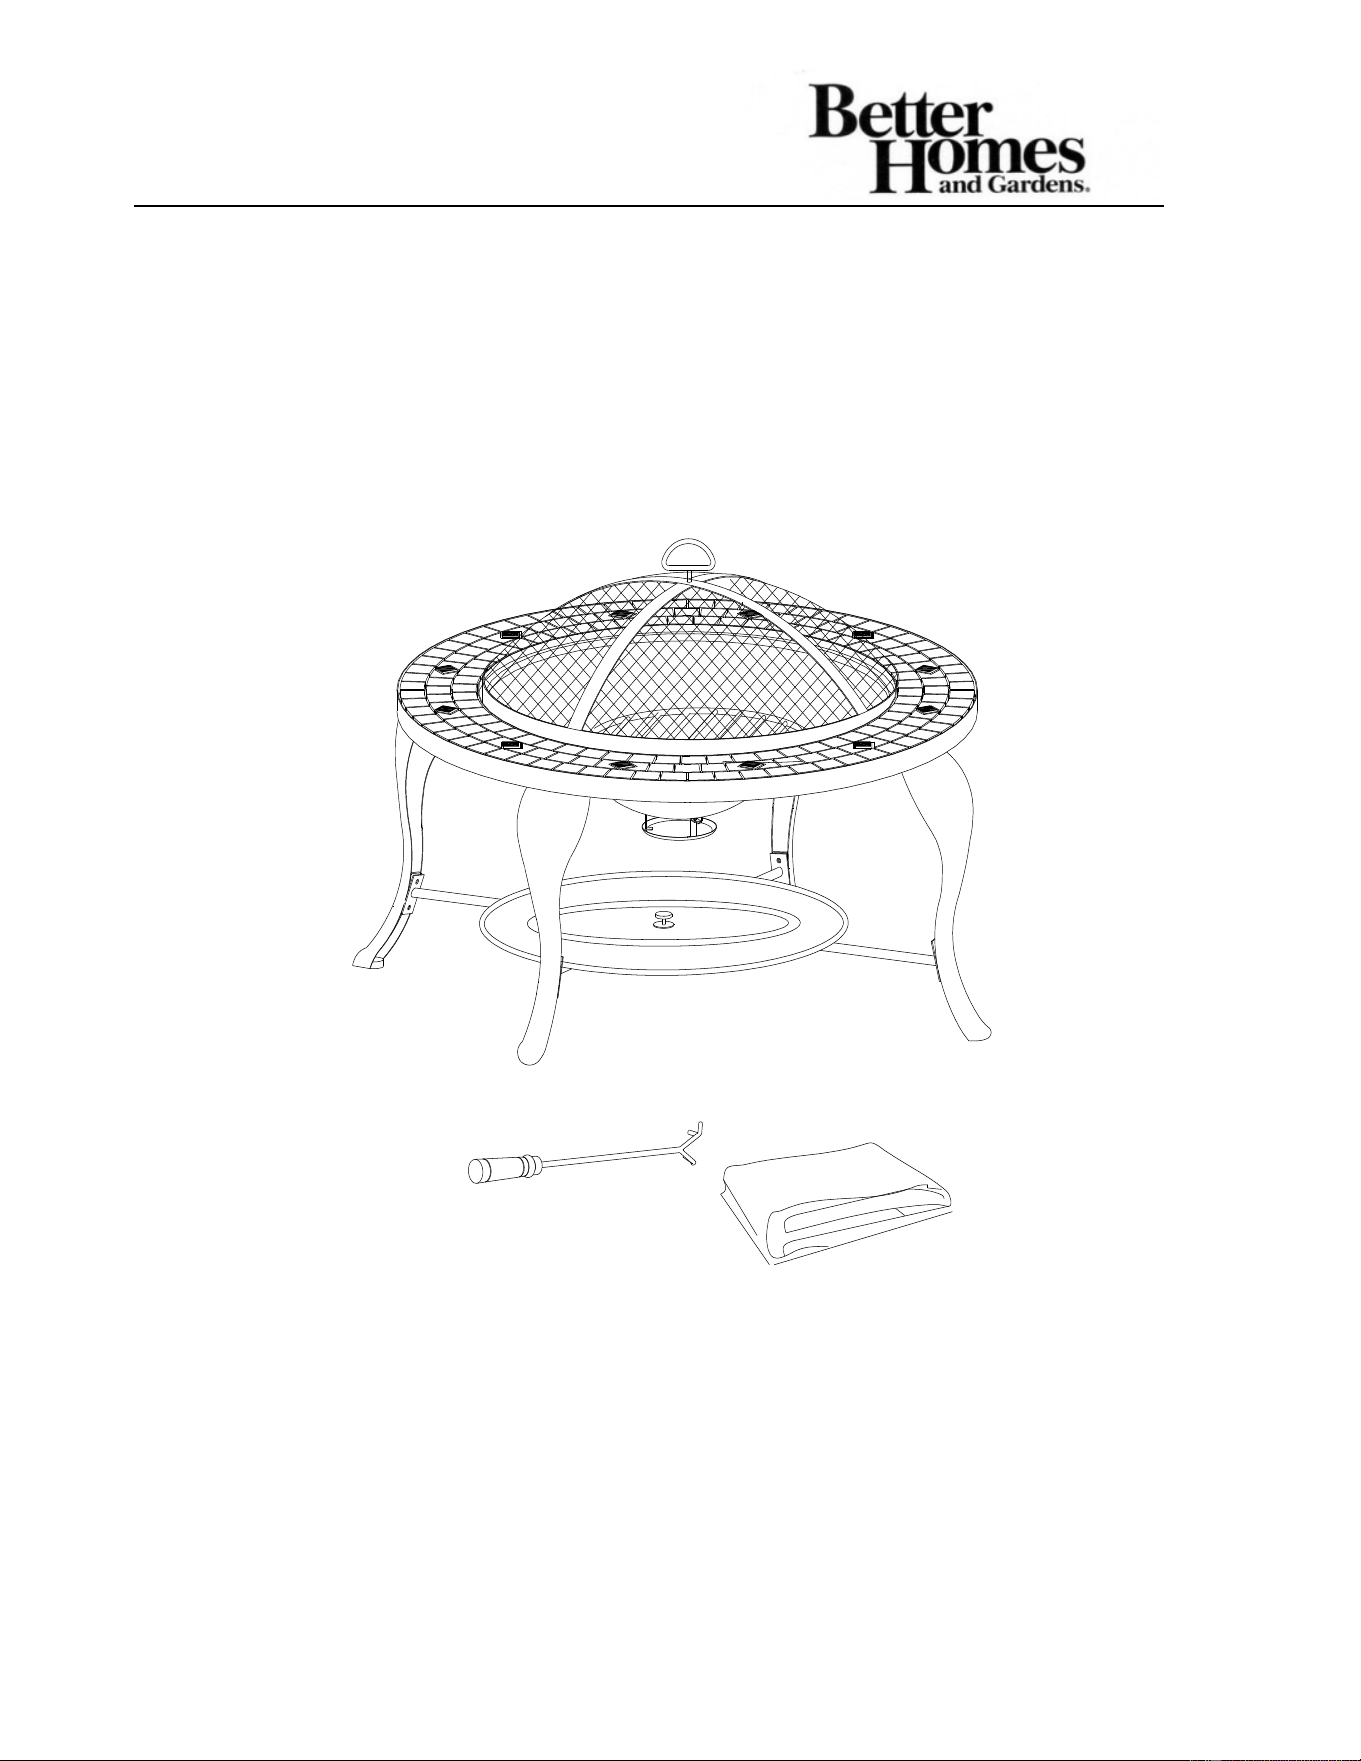
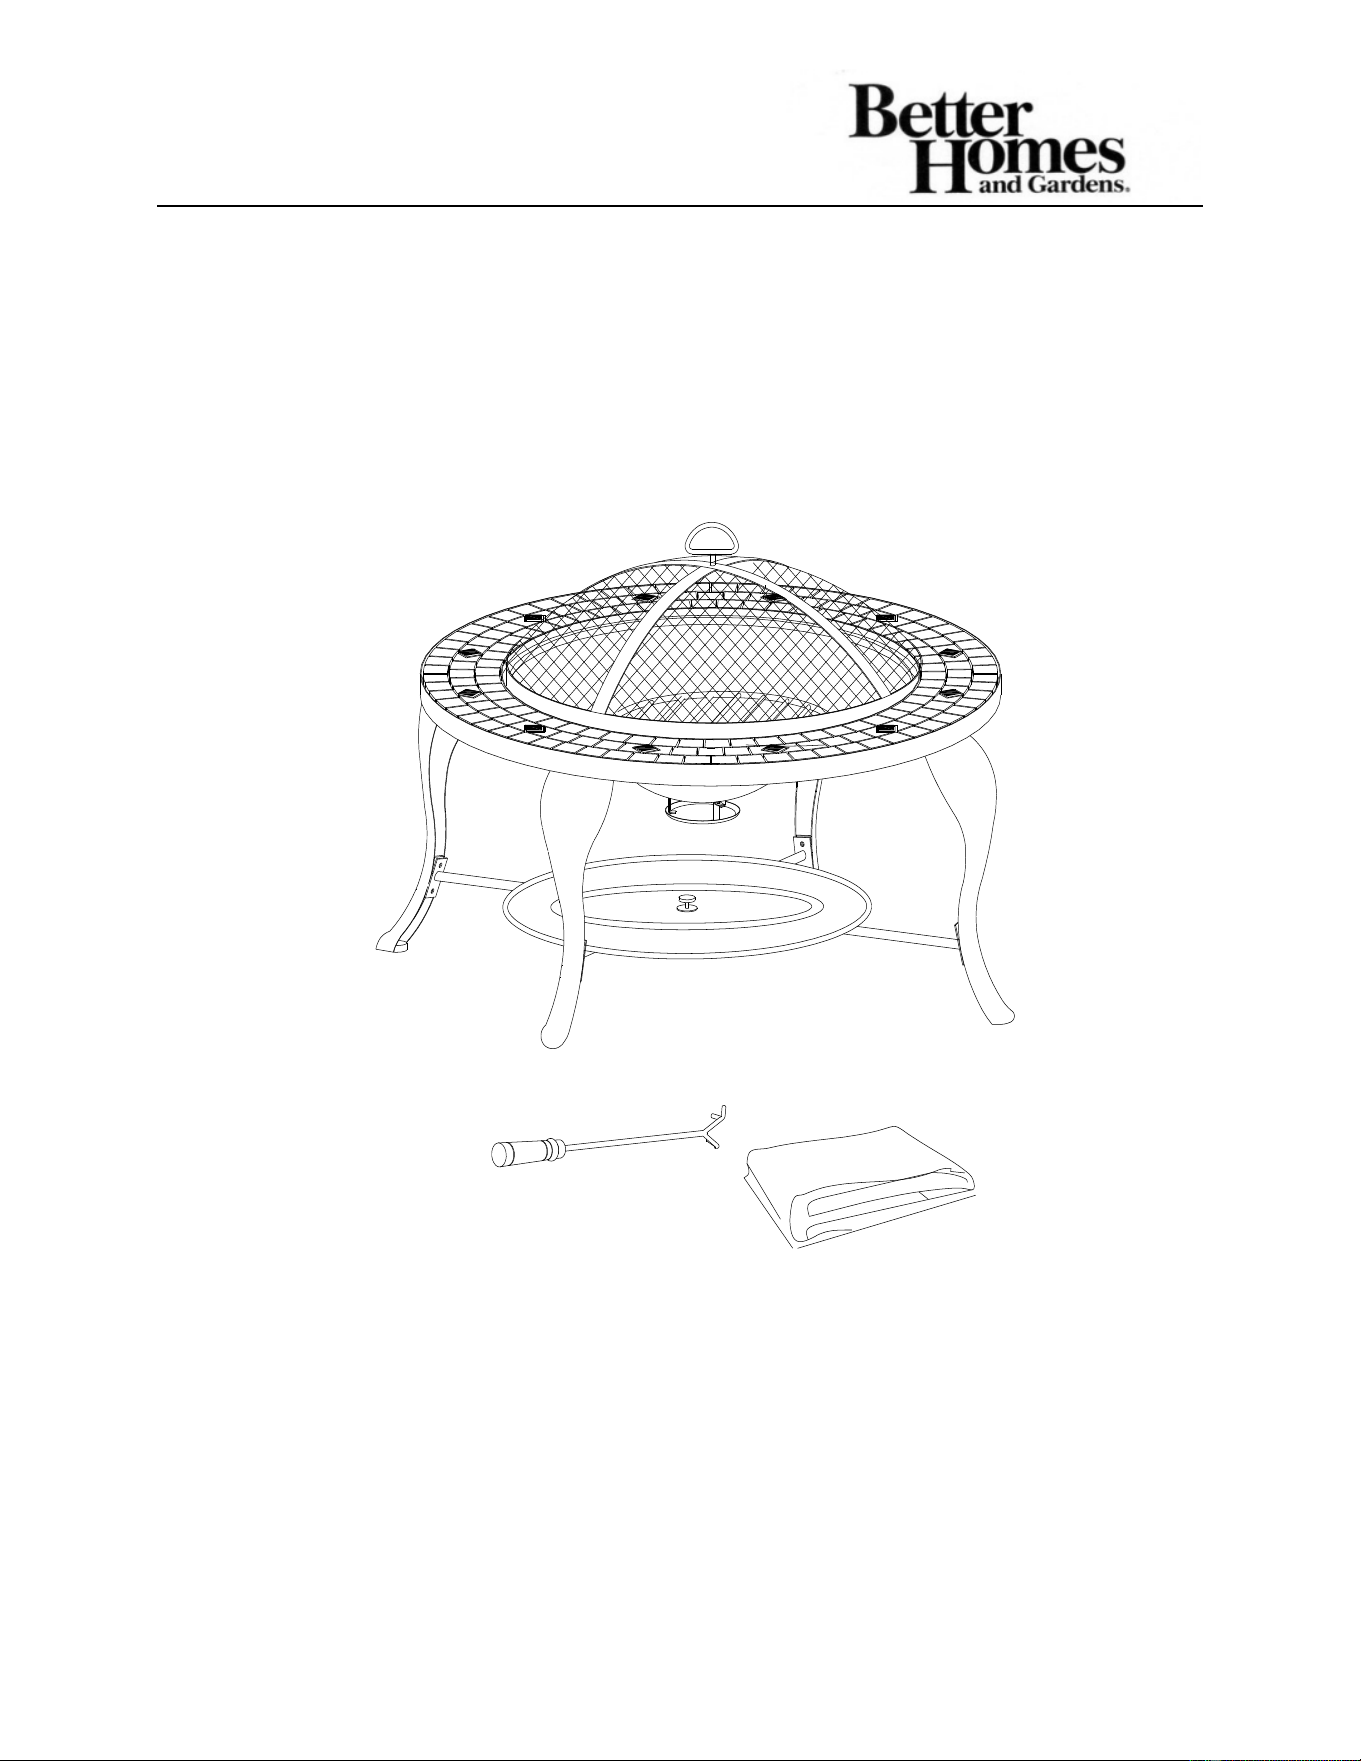
35”Slate Fire Pit
Model No.: BH16-093-999-04
We appreciate the trust and confidence you have placed in Better Homes and
Gardens through the purchase of this fire pit.
We strive to continually create quality product designed to enhance your
home. Thank you for choosing Better Homes and Gardens.
Table of Contents
Table of Contents----------------------2 Hardware included----------------------3
Safety Information---------------------2 Part Contents-----------------------------4
Pre-Assembly------------------------3-4 Assembly------------------------------5-6
Planning Assembly-------------------3 Operation Instruction-----------------------7
Tools required-------------------------3
Safety Information
DANGER
Failure to follow the danger, warning and operation instructions in this manual
may result in serious bodily injury or death, or in a fire or an exlosion causing
damage to property.
WARNING
This fire bowl is intended for outdoor use only. Do not use on wooden decks.
This fire bowl is intended to burn wood logs only. Do not burn leaves, or other
combustible materials in the fire bowl.
Not for use by children. Keep children and pets away from the fire bowl.
Free from combustible materials.
The fire bowl is hot. Use with caution. Do not touch the hot fire bowl with bare
hands.
Never leave the burning fire bowl unattended, and always extinguish the fire
completely before leaving the fire bowl.
Do not use near flammable or combustible objects or materials.
When the fire bowl is in use, the handle on the mesh screen can reach extreme
temperatures that can cause serious injury to an unprotected hand. Use a poker
or an appropriate heat resistant glove or pad when handling.
Check local fire regulations and municipal by-laws for safe use.

Pre-Assembly
Planning Assembly
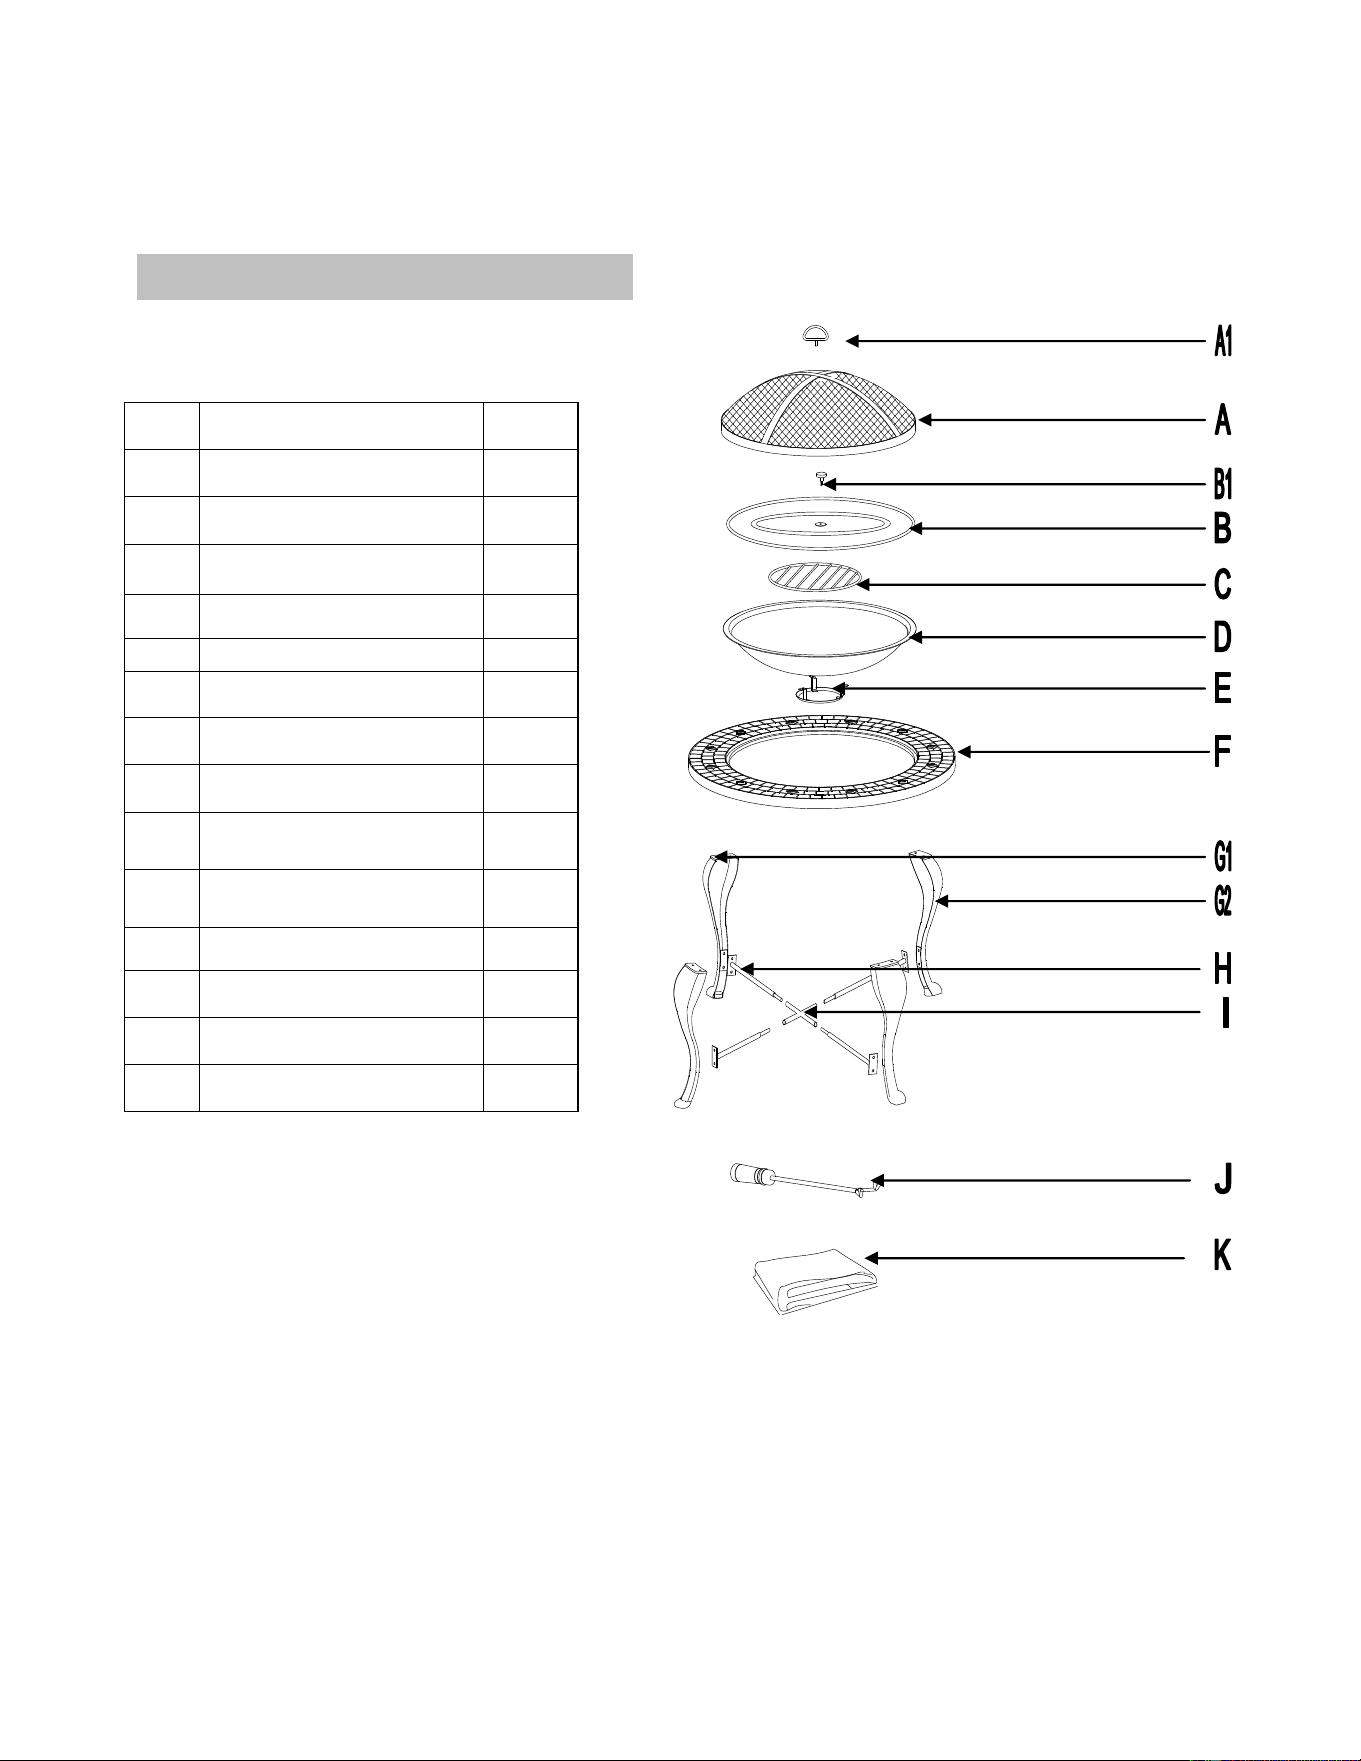
Before beginning assembly of product, make sure all parts are present.
Compare parts with package contents list and diagram above. If any part is
missing or damaged, do not attempt to assemble the product.
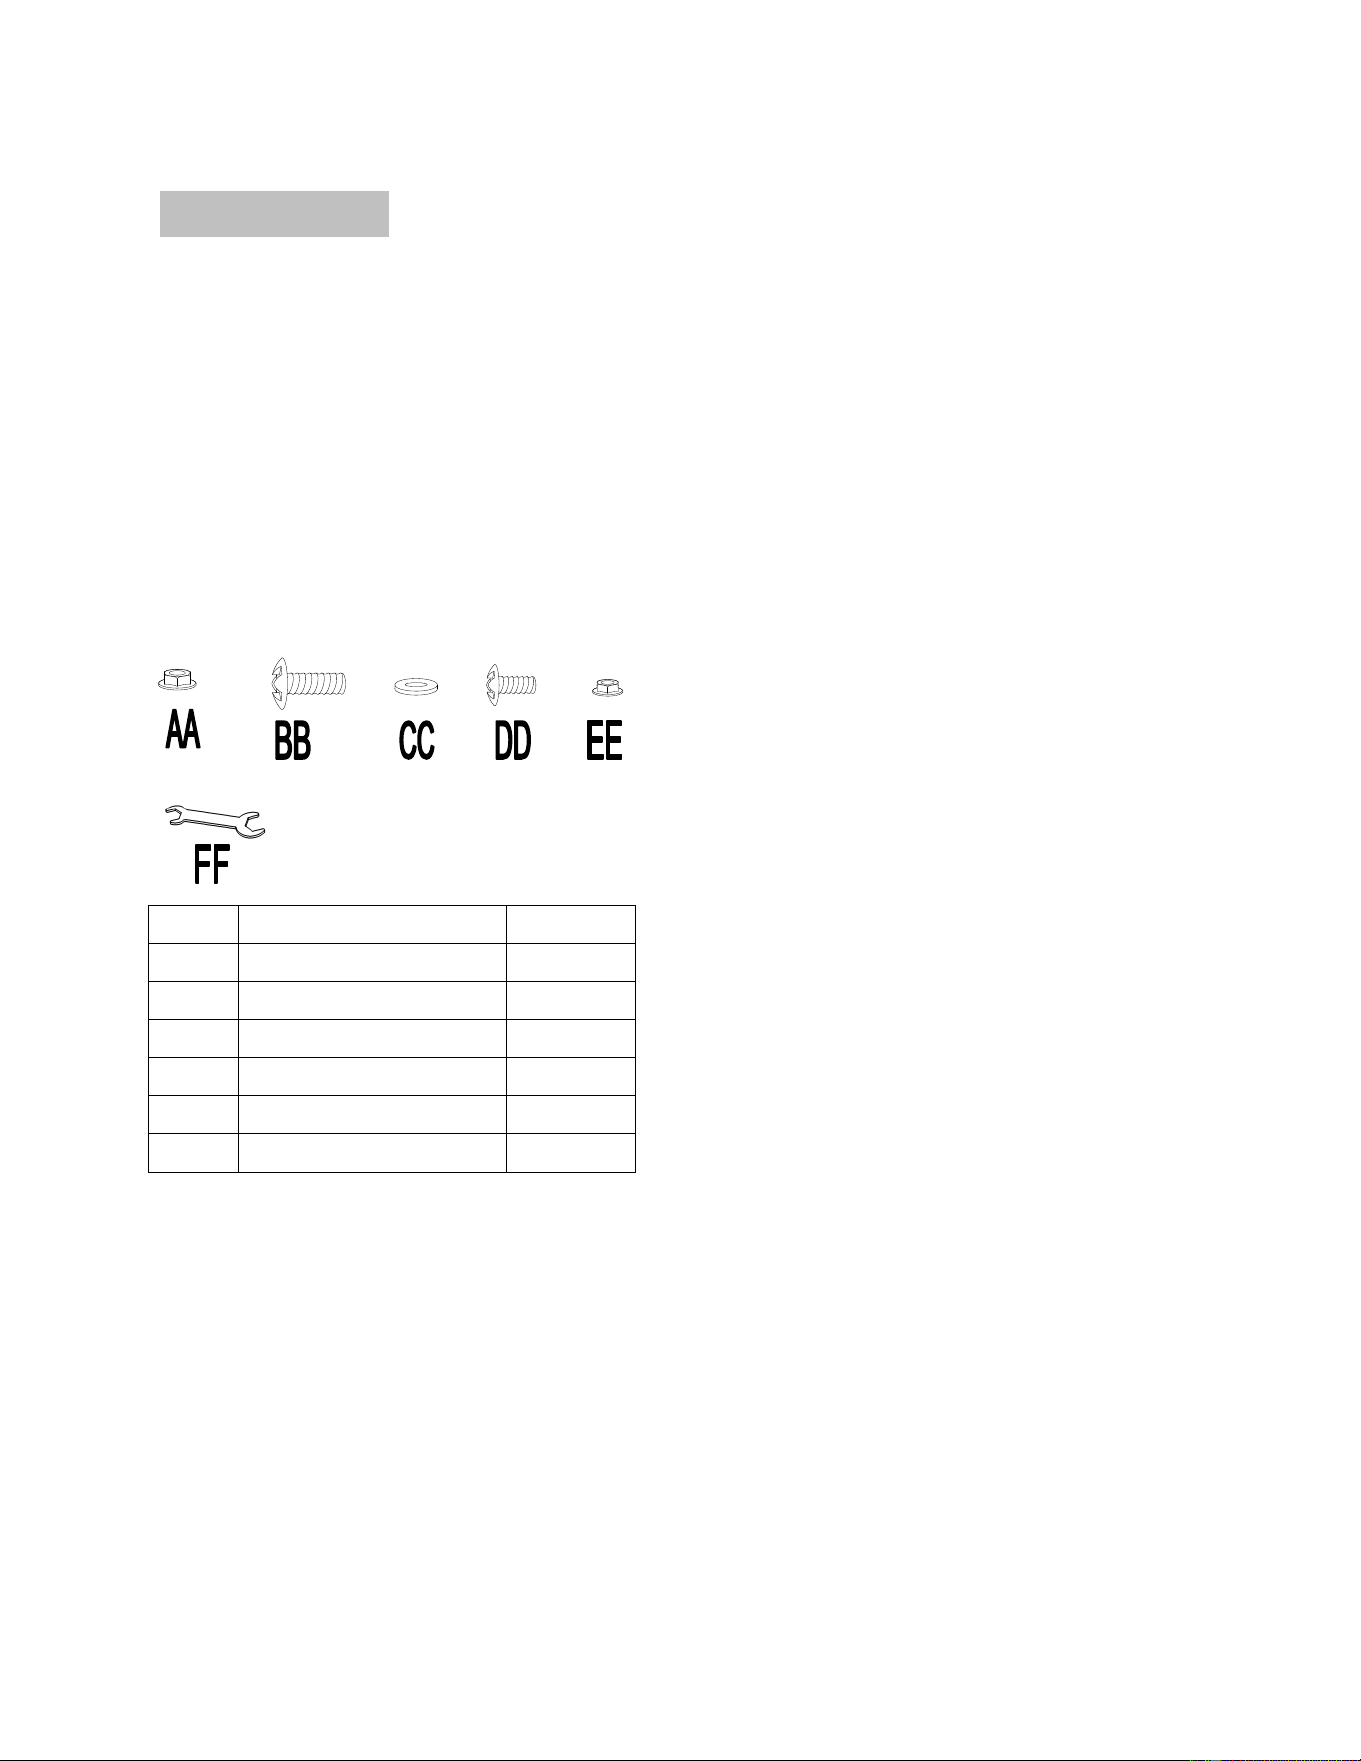
Hardware included
Part
Description
Qty
AA
M6 Nut
8
BB
M6*15 Bolt
16
CC
M6 Washer
16
DD
M5*10 Bolt
3
EE
M5 Nut
3
FF
M5/M6 Wrench
1
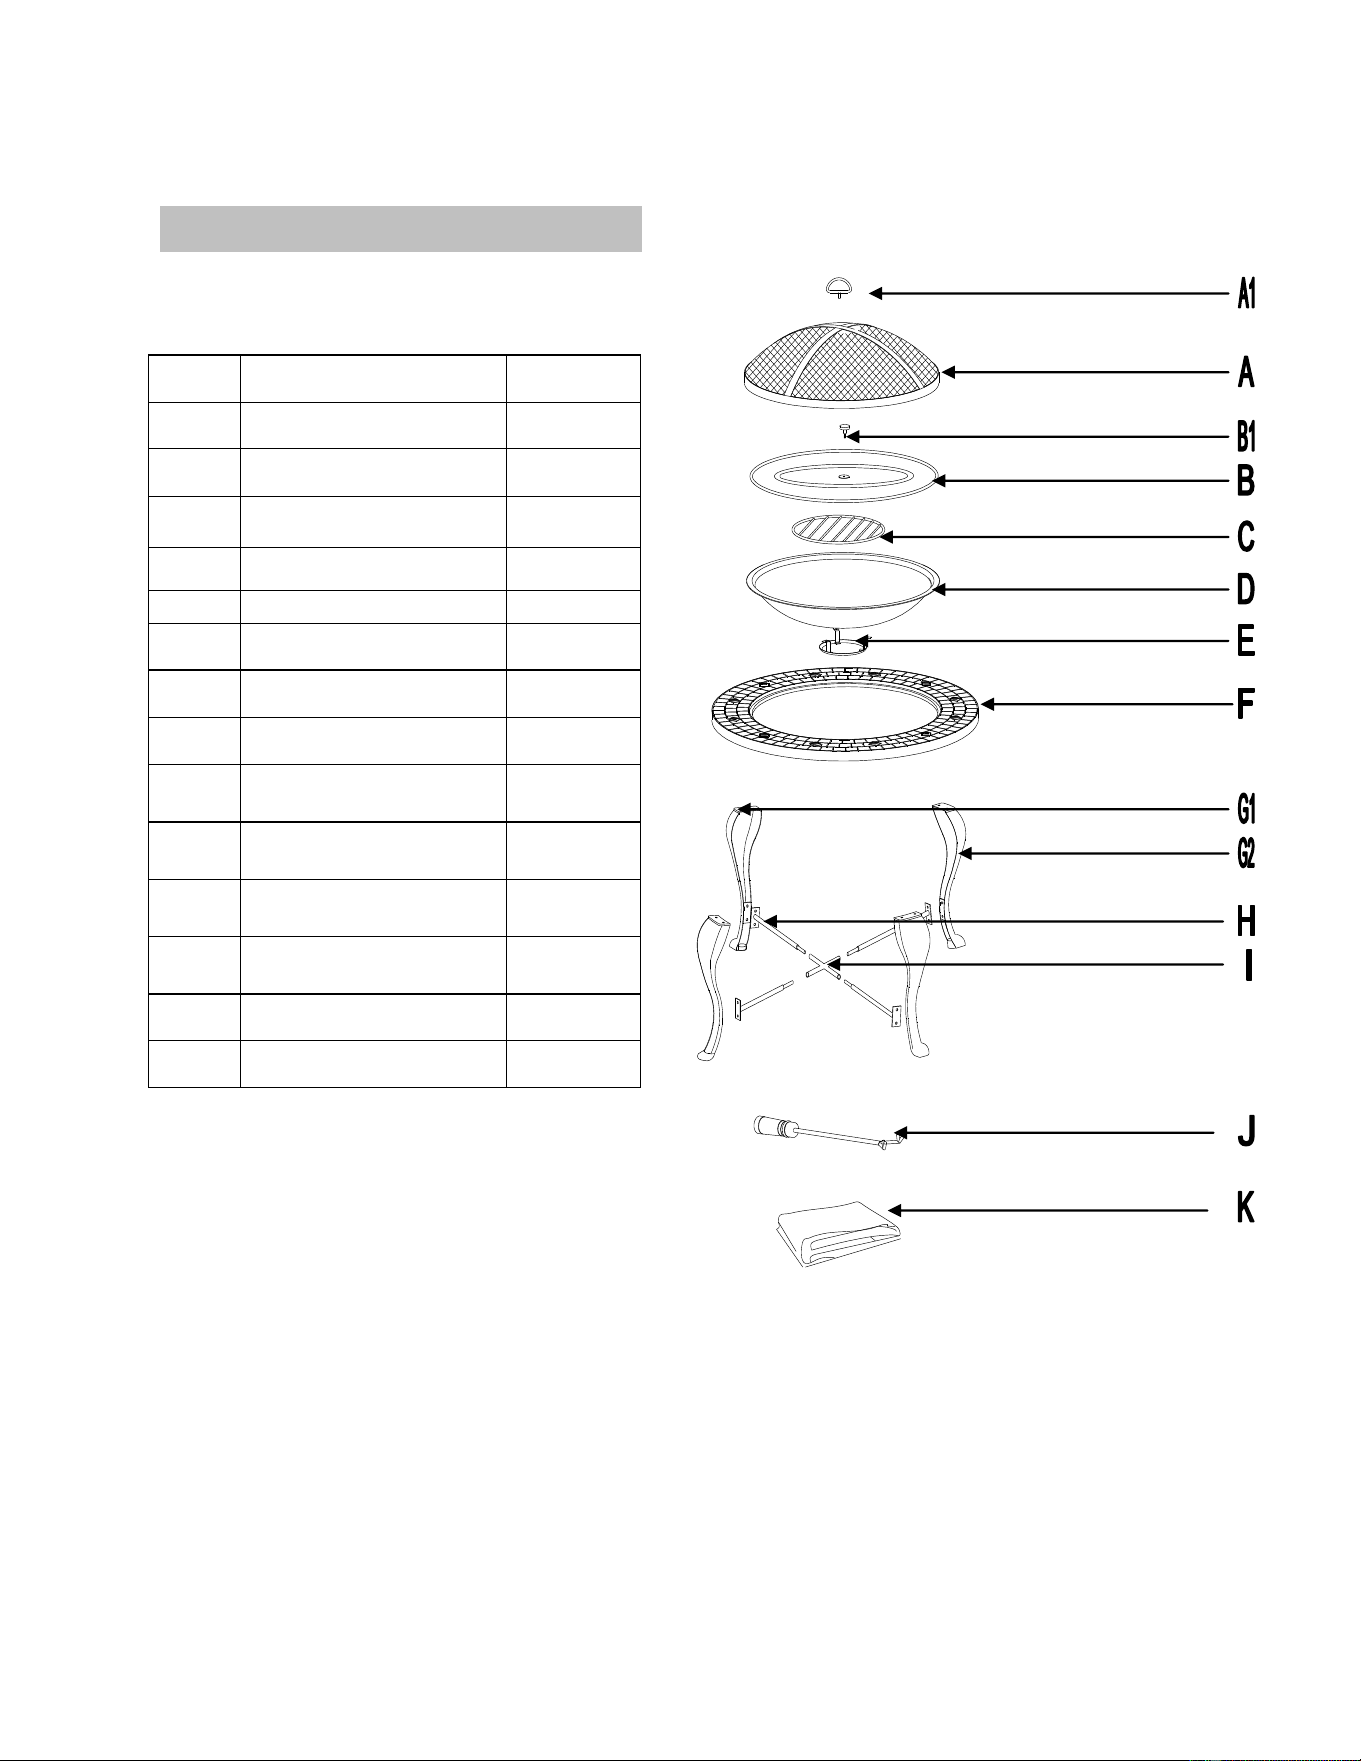
Pre-Assembly (continued)
Part Content
Part
Description
Qty
A1
Handle
1
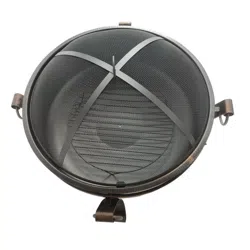
A
Mesh screen
1
B1
Lid Knob
1
B
Lid
1
C
Grate
1
D
Fire bowl
1
E
Ash tray
1
F
Table top
1
G1
Leg with pad
pre-assembled
3
G2
Leg with level pad
pre-assembled
1
H
Leg connecting tube
4
I
Cross connecting bar
1
J
Poker
1
K
Nylon cover
1
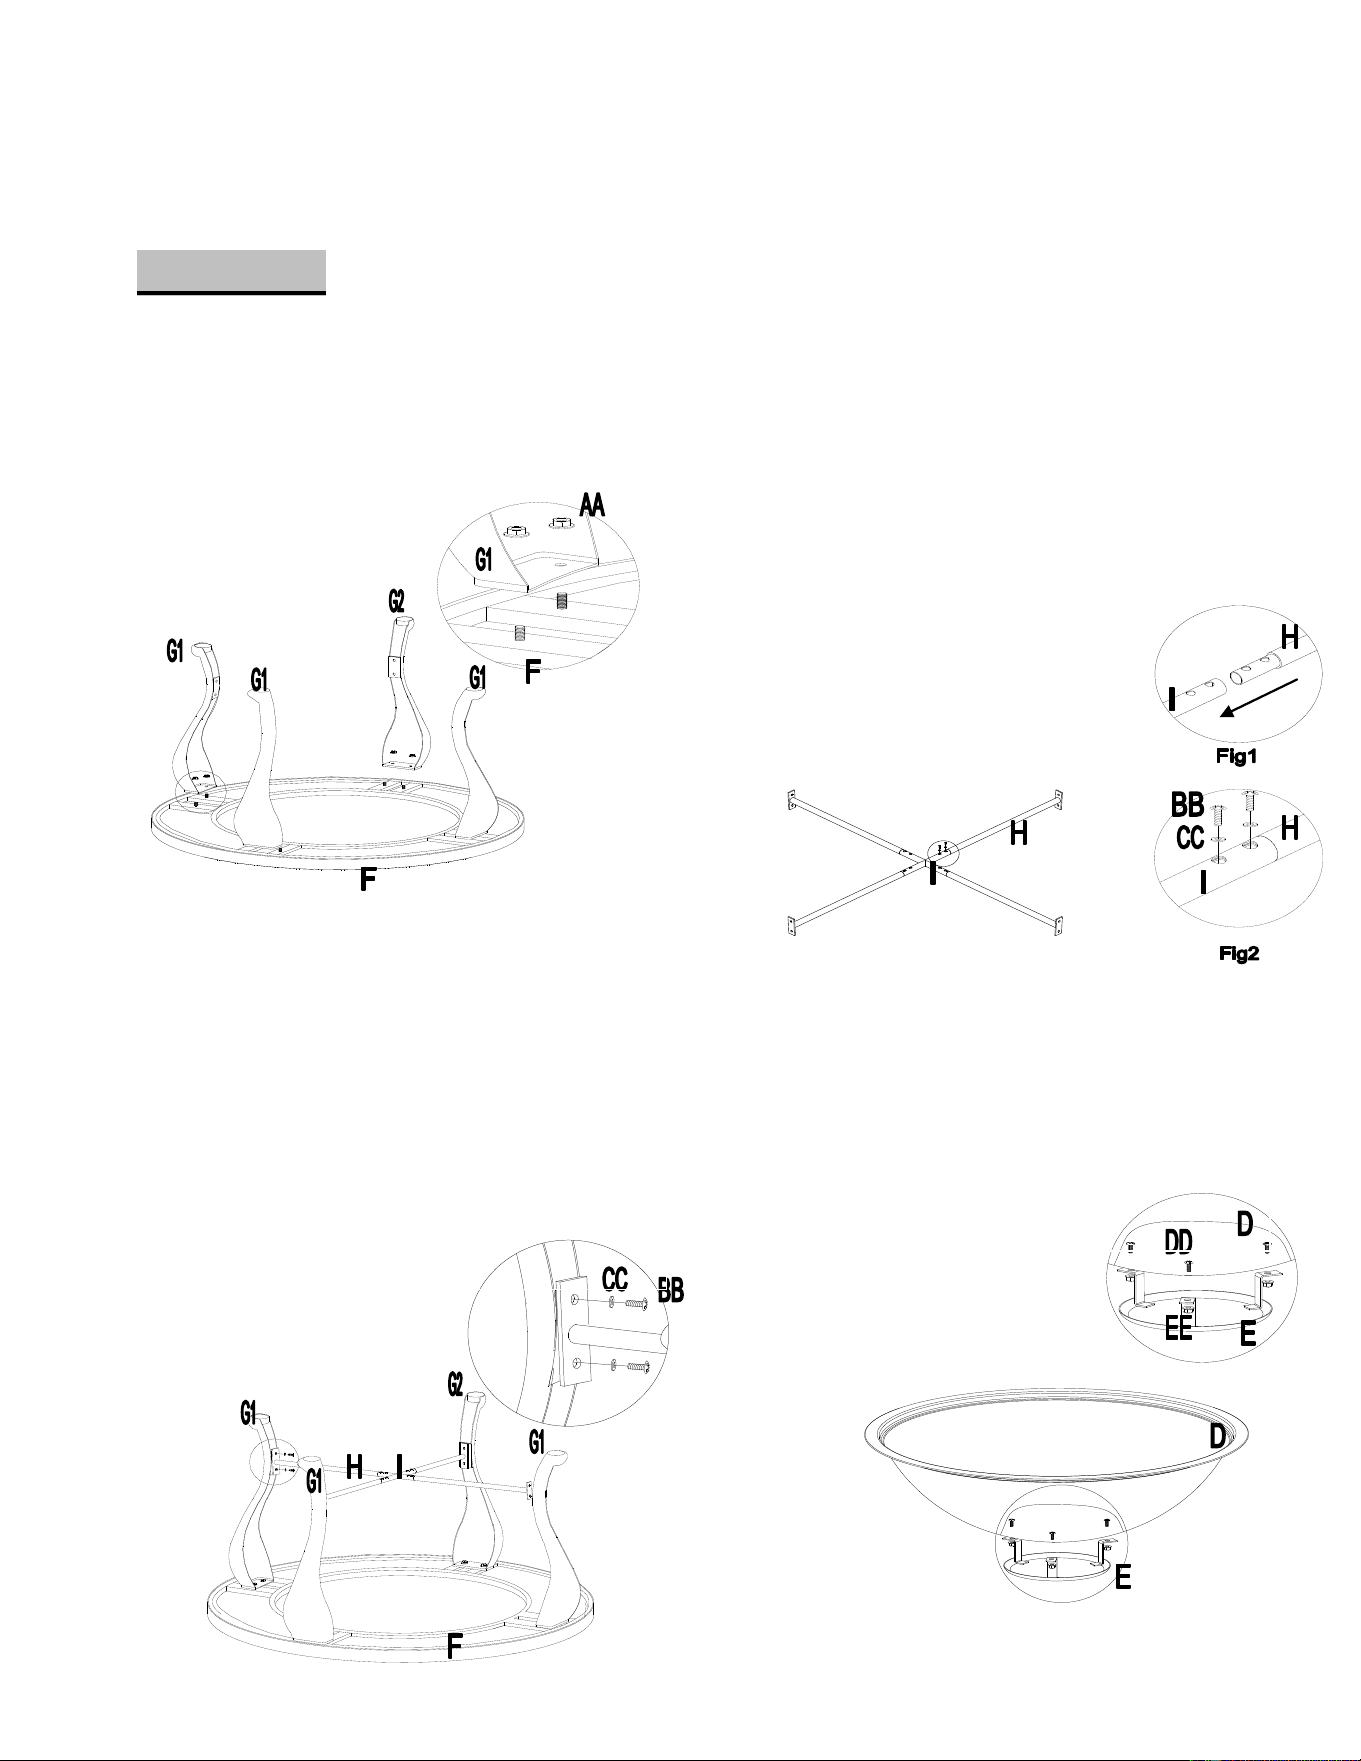
Assembly
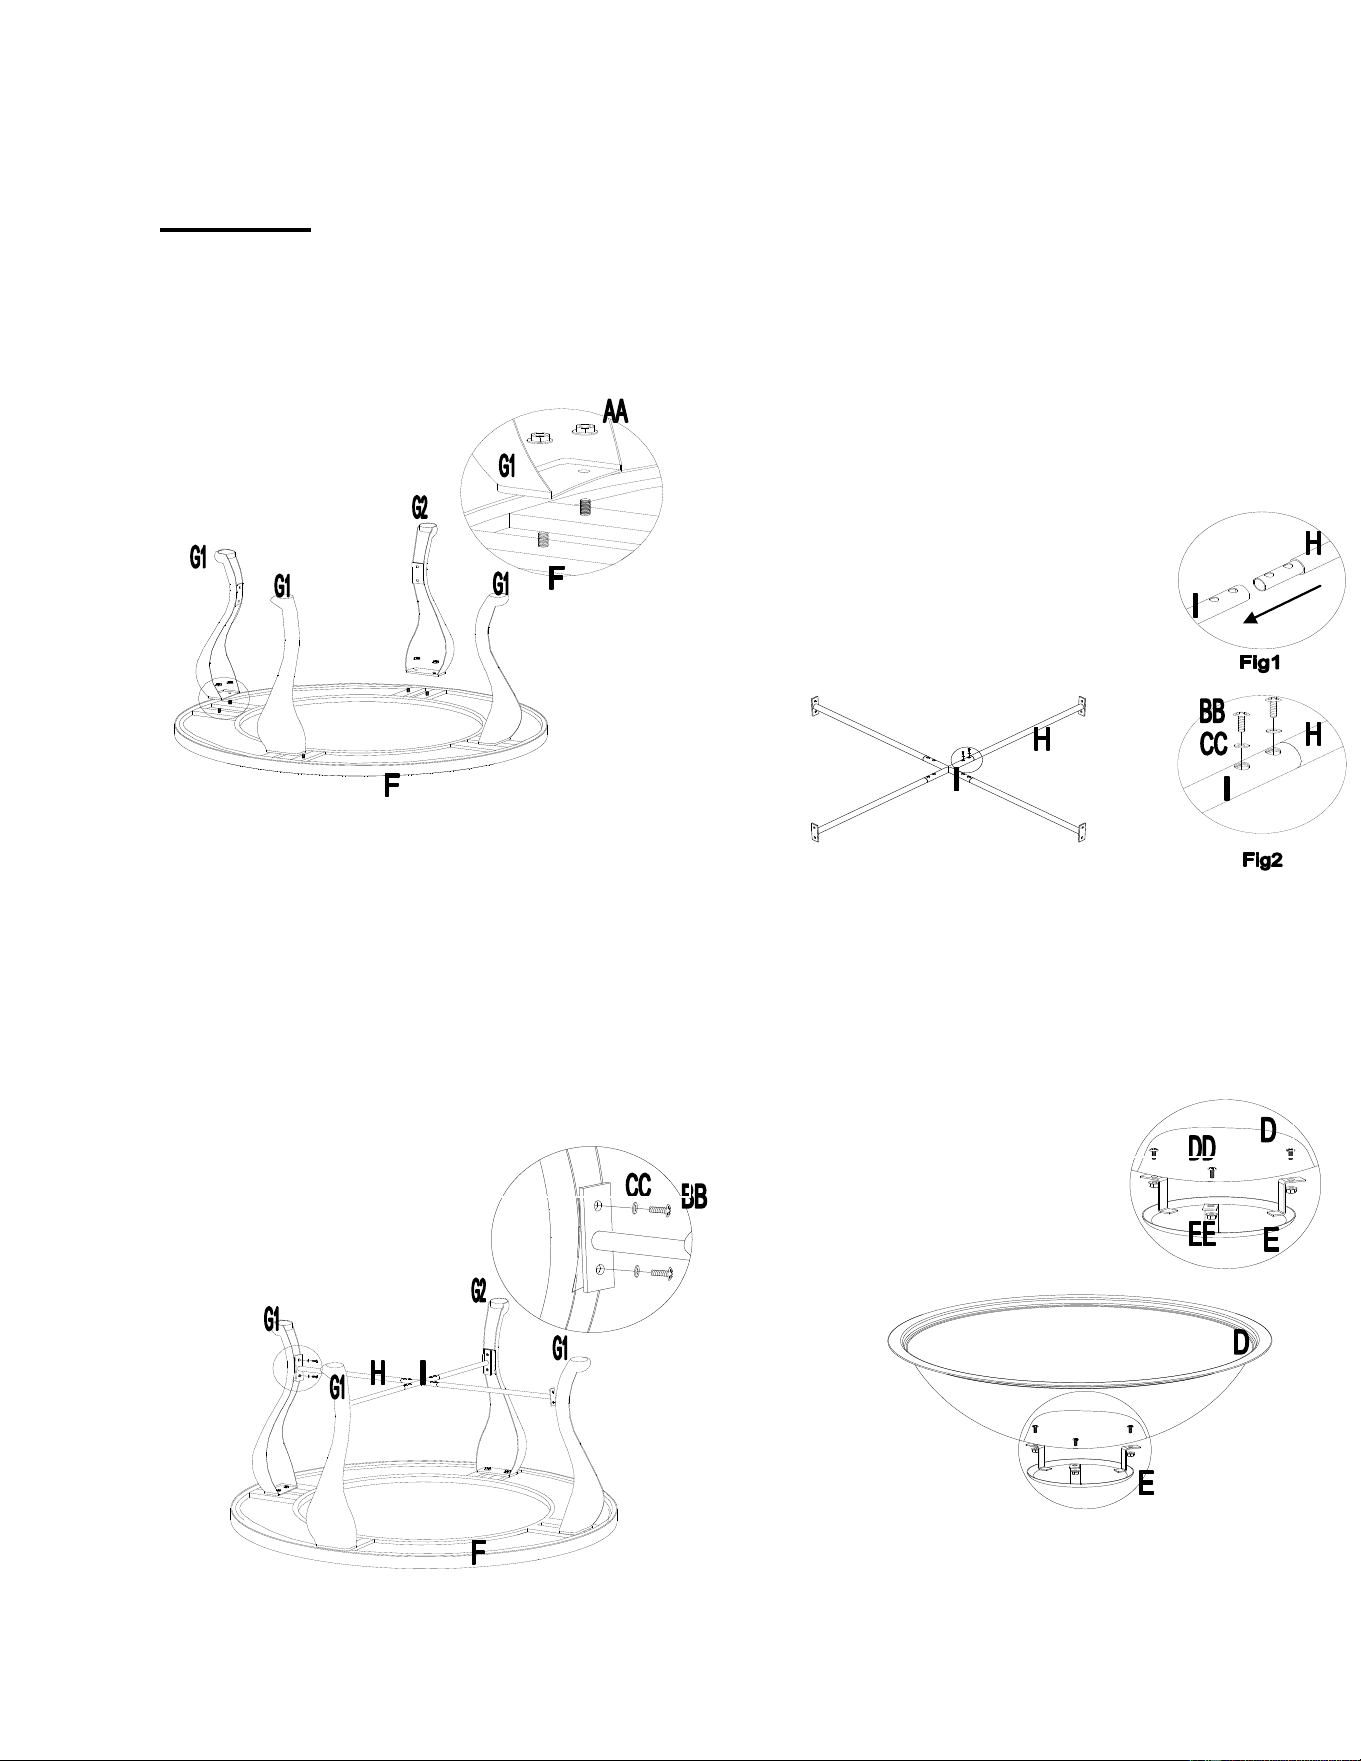
1: Connecting the leg to the table top 2: Connecting the leg connecting
tube to the cross connecting
bar
3: Attaching connecting tube to the leg 4: Attaching the ash tray to the
bowl
Fig1: Put leg connecting tube (H) to the cross
connecting bar (I), repeat this step for each
bar.
Fig2:Attach the leg connecting tube(H) to the
cross connecting bar(I) using 8 bolts(BB) and 8
washers(CC).Do not completely tighten the
bolts(BB).
Put the table top (F) as shown. Connect the leg
(G1, G2) to the table top (F) with eight nuts (AA)
Do not over tighten.
Place the table top (F), cross connecting bar as
shown. Attach connector (H/I) to the
assembled leg (G1, G2) using eight bolts (BB)
and eight washers (CC) .Fully tighten all the
previously assembled bolts.
Attach the ash tray (E) to the bowl (D) using
three bolts (DD) and three nuts (EE), as
shown.
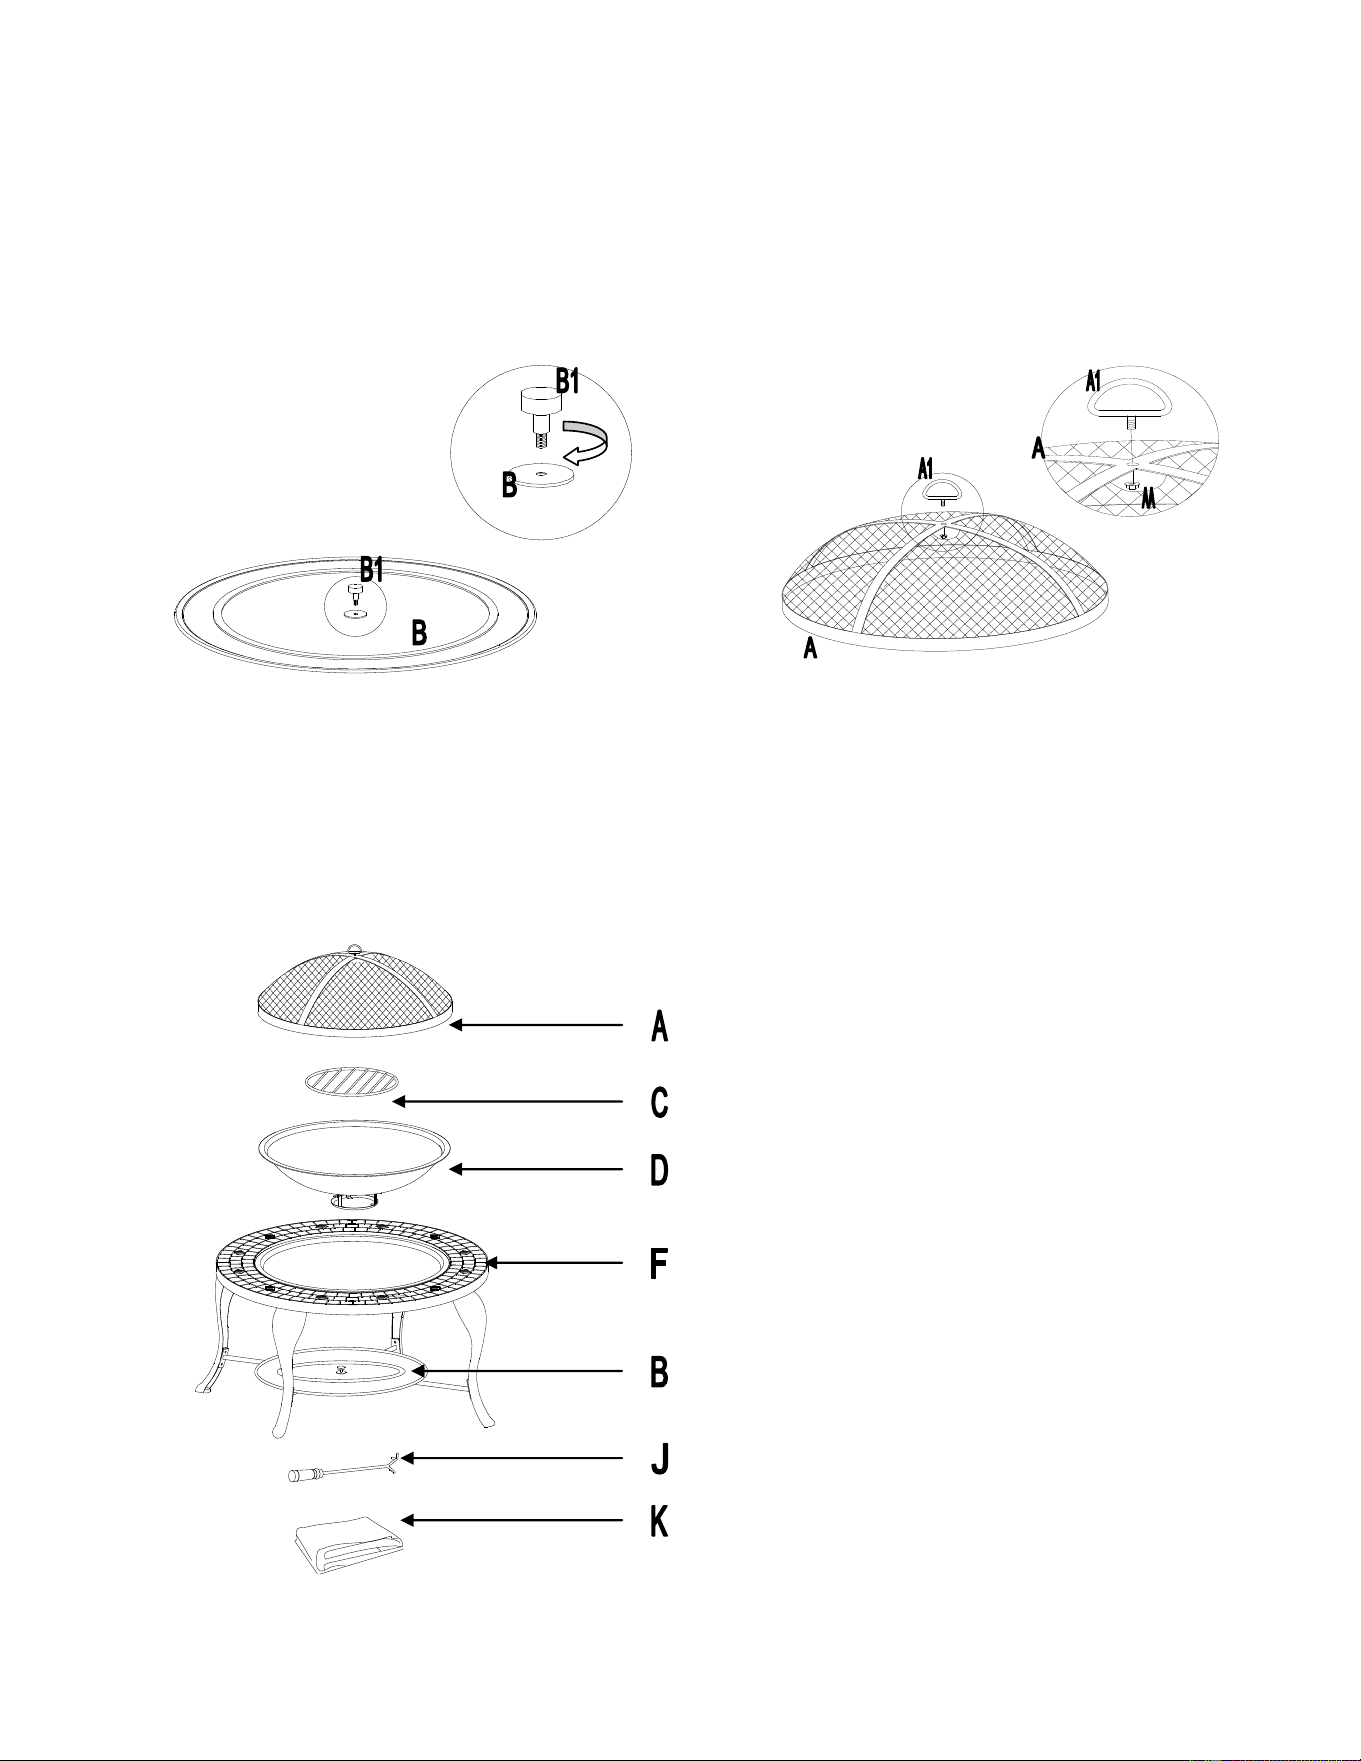
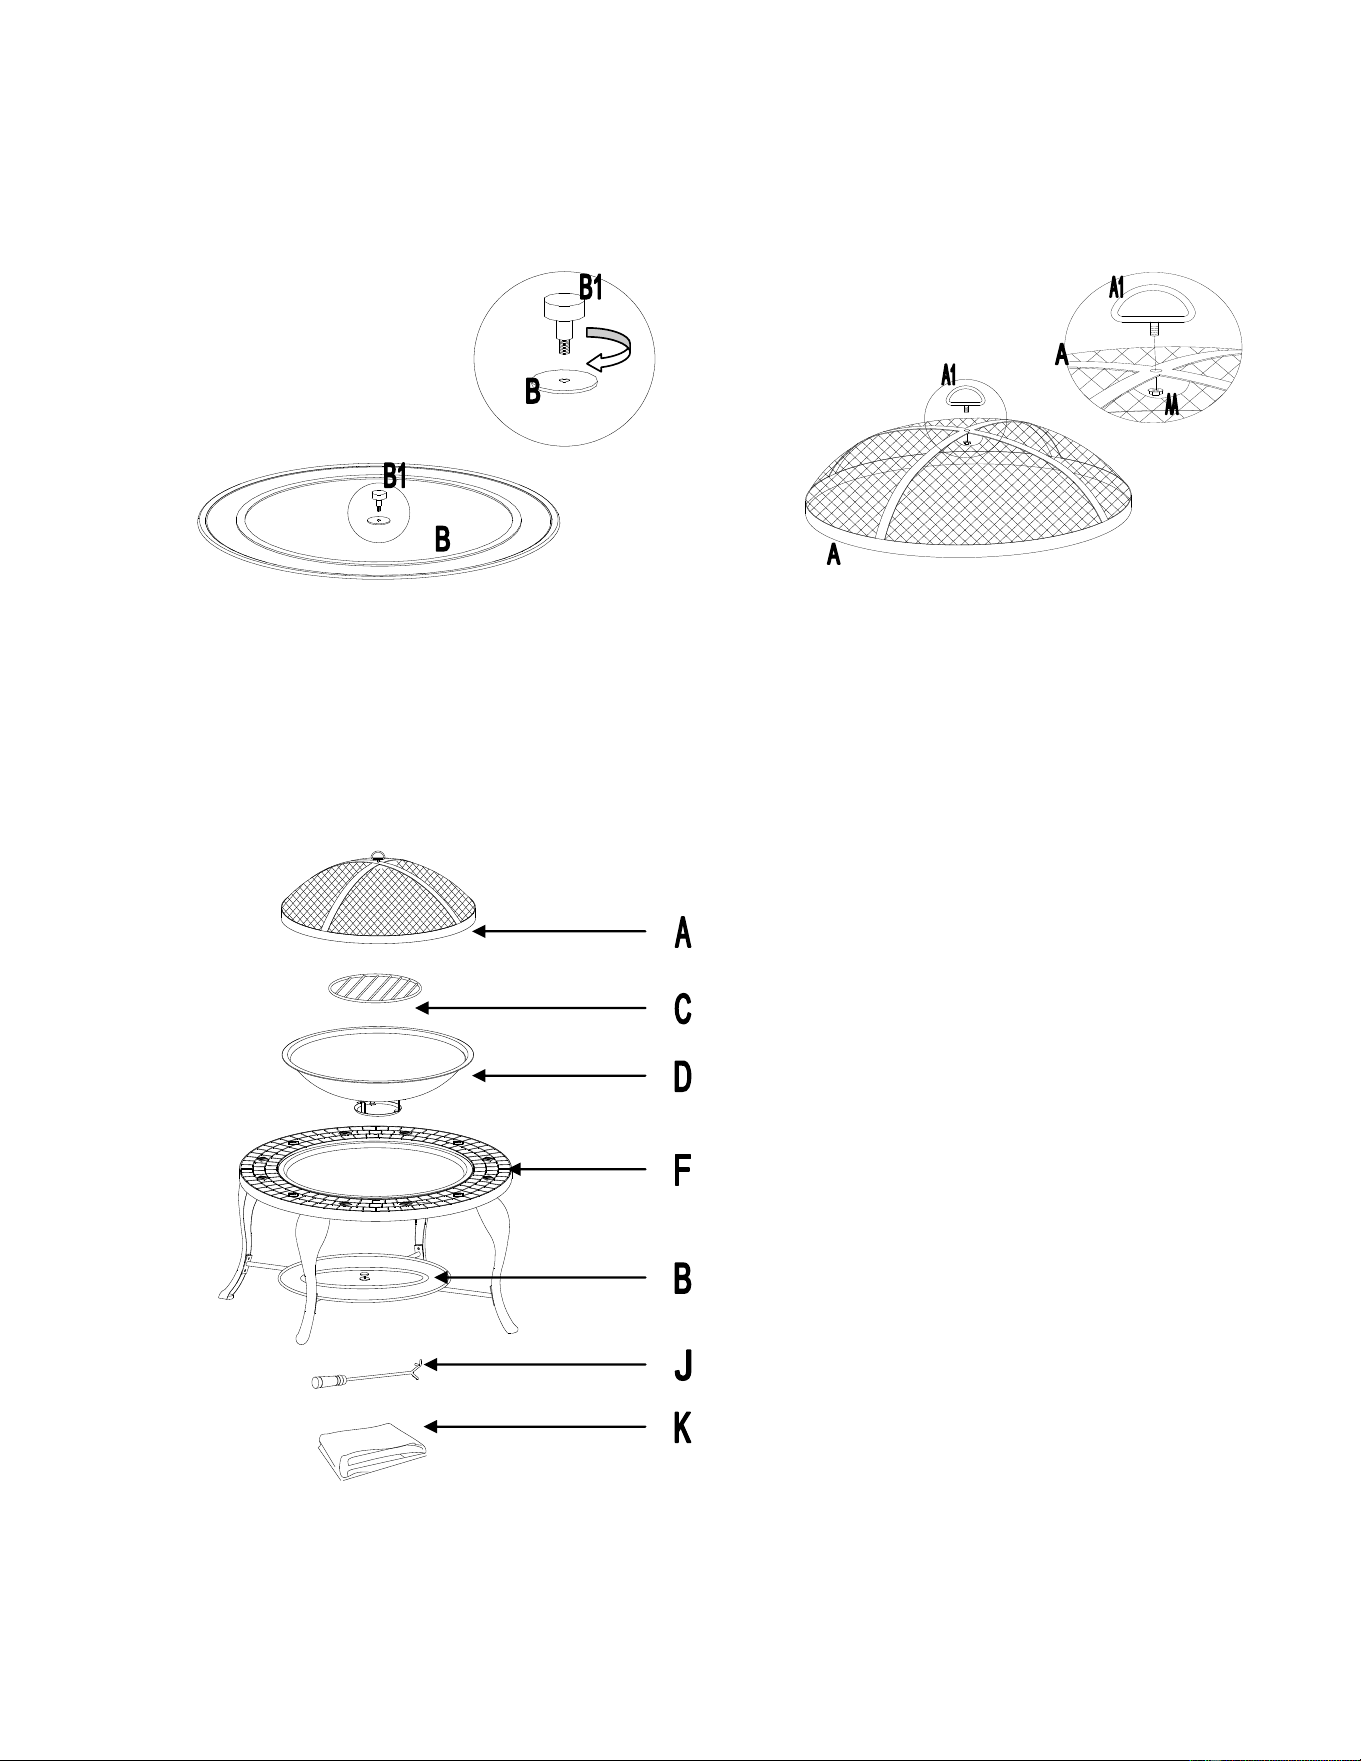
Screw the lid knob (B1) to the lid (B) in
the direction of arrow, until fully
tightened
Place the bowl (D), grate (C) and mesh screen (A)
on the table top (F), (put the lid (B) on the
cross).Place the poker (J) and the cover(K) near
the fire pit for further use.
Attach the handle (A1) to the mesh
screen (A) by one nut (AA)
5: Assembling lid knob to the lid 6: Assembling handle to mesh
screen
7: Completing the assembly
Operation Instruction
Lighting Instructions
1, Make sure there is no ash in the bottom of the bowl.
2, Place a layer of dry kindling or a natural firestarter such as Fatwood™ onto the center of the
grate.
3, Place above that a layer of dry seasoned hardwood that is cut to lengths no more than 3/4
the diameter of the bowel.
CAUTION:Do NOT add gasoline, kerosene, diesel fuel, lighter fulid or alcohol to
relight or enhance an existing fire.
4,Use a long match to light kinding or firestarter.
5,Once the kindling or fire starter is lit, using heat resistant gloves and long handled fire pit tool
carefully replace the spark guard.
Tending the fire
You may need to shift and or add longs for an ideal experience.
CAUTION:Do NOT place hot fire pit tools onto combustible surfaces such as
grass, wooden deck or furniture.
1,Using heat resistant gloves and long handled fire pit tool carefully remove the spark guard.
2, While using a long handled fire pit tool, shift coals and logos to allow additional airflow.
CAUTION:Do NOT add gasoline, kerosene, diesel fuel, lighter fulid or alcohol to
relight or enhance an existing fire.
3,Wait until glowing coals have developed before adding any additonal wood. If additional
wooed is required,place wood on top of coals. Be careful not to shift ashes.
4,Using heat resistant gloves and long handled fire pit tool, carefully replace the spark guard.
Extinguishing
1,Allow fire to burn itself out.
2,Do NOT use water to extinguish as this is dangerous and can cause damage to the outdoor
fire pit.
Cleaning and Care
1,Before using, cleaning the fire pit completely with a soft dry towel.
2, When not in use, unfold the nylon cover to cover the whole fire pit then store in a cool, dry
area.
Instrucciones de Montaje
Brasero de Pizarra de 35Pulg.
Modelo No.: BH16-093-999-04
Le agradecemos la fe y confianza que ha otorgado a Better Homes and
Gardens comprando este brasero.
Nos esforzamos constantemente para crear productos de calidad concebidos
para perfeccionar su hogar. Gracias por su elección de Better Homes and
Gardens.
Índice
Índice---------------------------------------2 Ferretería incluida------------------------3
Información de Seguridad-----------2 Piezas incluidas--------------------------4
Pre-Montaje--------------------------3-4 Montaje--------------------------------5-6
Plan de montaje----------------------3 Instrucciones de operación-----------------7
Herramienta necesaria---------------3
Información de Seguridad
PELIGRO
Preste atencion a las instrucciones de peligro, avisos y operacion en este manual,
de lo contrario, podria provocar heridas graves o la muerte, asi como un incendio
o explosion ocasionando daños a la propiedad.
AVISO
Este brasero es para empleo exterior únicamente. No utilice sobre suelos de
madera.
Este brasero es solamente para quemar leña. No queme hojas, u otros
materiales combustibles en el brasero.
No lo deben utilizar los niños. Mantenga a niños y animales fuera del alcance
del brasero.
Carece de materiales combustibles.
El brasero está caliente. Empléelo con cuidado. No toque el brasero con las
manos descubiertas.
No deje nunca descuidado el brasero encendido, y apague siempre el fuego
antes de abandonar el brasero.
No utilice cerca de llamas u objetos o materiales combustibles.
Mientras estén empleando el brasero, el mango de la rejilla puede alcanzar
temperaturas extremas que pueden provocar heridas graves en una mano
desprotegida. Utilice el atizador o un guante o almohadilla apropiados,
resistente al calor cuando lo manipule.
Verifique las regulaciones y leyes municipales para un empleo seguro.
Pre-Montaje
Plan de Montaje
Antes de empezar a montar el producto, asegúrese que todas las piezas estén
incluidas. Compare las piezas con la lista del contenido de embalaje y con el
diagrama inferior. Si falta alguna pieza o alguna está dañada, no trate de
montar el producto.
Ferretería Incluida
Pieza
Descripción
Cantidad
AA
Tuerca M6
8
BB
Tornillo M6*15
16
CC
Arandela M6
16
DD
Tornillo M5*10
3
EE
Tuerca M5
3
FF
Llave M5/M6
1
Pre-Montaje (continuado)
Piezas Incluidas
Pieza
Descripción
Cantidad
A1
Mango
1
A
Rejilla
1
B1
Botón de la tapadera
1
B
Tapadera
1
C
Parrilla
1
D
Recipiente
1
E
Cenicero
1
F
Mesa
1
G1
Pata con cojinete ya
montado
3
G2
Pata con cojinete de
nivelación ya montado
1
H
Tubo de conexión de
las patas
4
I
Barra Cruzada de
conexión
1
J
Atizador
1
K
Forro de Nylon
1
Montaje
1: Conexión de la pata a la mesa 2: Conexión del tubo de conexión a
la barra cruzada de conexión
3: Acoplamiento del tubo de conexión a la pata 4: Acoplamiento del cenicero
al brasero
Fig1: Introduzca el tubo de conexión (H) en la
barra cruzada de conexión (I), repita esta
etapa para cada tubo.
Fig2: Fije el tubo de conexión (H) en la barra
cruzada de conexión (I) con 8 tornillos (BB) y 8
arandelas (CC). No apriete los tornillos (BB)
del todo.
Coloque la mesa (F) como en el diagrama.
Conecte la pata (G1, G2) a la mesa (F) con 8
tuercas (AA) No las apriete del todo.
Coloque la mesa (F), y las barras y tubos de
conexión como en el diagrama. Fije los tubos
de conexión como en el diagrama. Fije la
conexión (H/I) a la pata montada (G1, G2) con
9 tornillos (BB) y 8 arandelas (CC) .Apriete
ahora todo lo montado anteriormente.
Fije el cenicero (E) al recipiente (D) con 3
tornillos (DD) y 3 tuercas (EE), como en el
diagrama.
Atornille el botón (B1) a la tapadera (B)
en el sentido de la flecha hasta que
esté fuertemente fijado.
Coloque el recipiente (D), la parrilla (C) y la rejilla
(A) sobre la mesa (F), (coloque la tapadera (B)
sobre la cruz). Coloque el atizador (J) y el forro
(K) cerca del brasero para cuando lo necesite.
Conecte el mango (A1) a la rejilla (A)
con una tuerca (AA)
5: Atornillar el botón de la tapadera 6: Conexión del mango a la rejilla
7: Terminación de montaje
Instrucciones de Operación
Instrucciones para encender
1. Asegúrese que no hay cenizas en el recipiente.
2. Coloque una capa de astillas o un encendedor de fuego natural como Fatwood™ en el centro
de la parrilla.
3. Coloque encima de esa capa, leña seca estacionada, cortada a una largura adecuada de no
más de tres cuartos (3/4) del diámetro del recipiente.
PELIGRO: NO ECHE gasolina, kerosina, diesel, ni fluidos para encender ni alcohol
para volver a encender o para amplificar un fuego existente.
4.Utilice una cerilla o fósforo largo para encender las astillas o el encendedor.
5. Una vez que estén encendidas las astillas o el encendedor, utilice guantes resistentes al calor
y herramientas de manipulación de brasero de mango largo. Coloque con cuidado la rejilla anti
estillas.
Cuidado del fuego
Quizás tenga usted que mover o añadir leña para una satisfacción ideal.
AVISO:NO PONGA las herramientas calientes sobre superficies combustibles
como cesped, suelos de madera o muebles.
1.Utilice gurantes resistentes al calor y herramientas de manipulacion de brasero con mango
largo. Quite la rejilla anti estillas con cuidado.
2. Con una herramienta de brasero de mango largo, mueva el carbón y la leña para más
circulación de aire.
PELIGRO: NO ECHE gasolina, kerosina, diesel, ni fluidos para encender ni alcohol
para volver a encender o para amplificar un fuego existente.
3.Espere que se encienda el carbon antes de añadir mas leña. Si necesita mas leña, coloquela
sobre el carbon. Cuidado de no remover las cenizas.
4.Con un guante resistente al calor y una herramienta de brasero con mango largo, vuelva a
colocar la rejilla anti-estillas.
PARA APAGAR
1.Deje que el fuego acabe de quemarse.
2.No utilice agua para apaguar porque puede ser peligroso y provocar daños al brasero exterior.
Limpieza y Cuidado
1.Antes de emplear, limpie el brasero completamente con una toalla seca y suave.
2. Cuando no esten empleando el brasero, deslie el forro de nylon para cubrir el brasero y
guadelo en un lugar fresco y seco.