2460-20
M12™ ROTARY TOOL
Feb. 2014
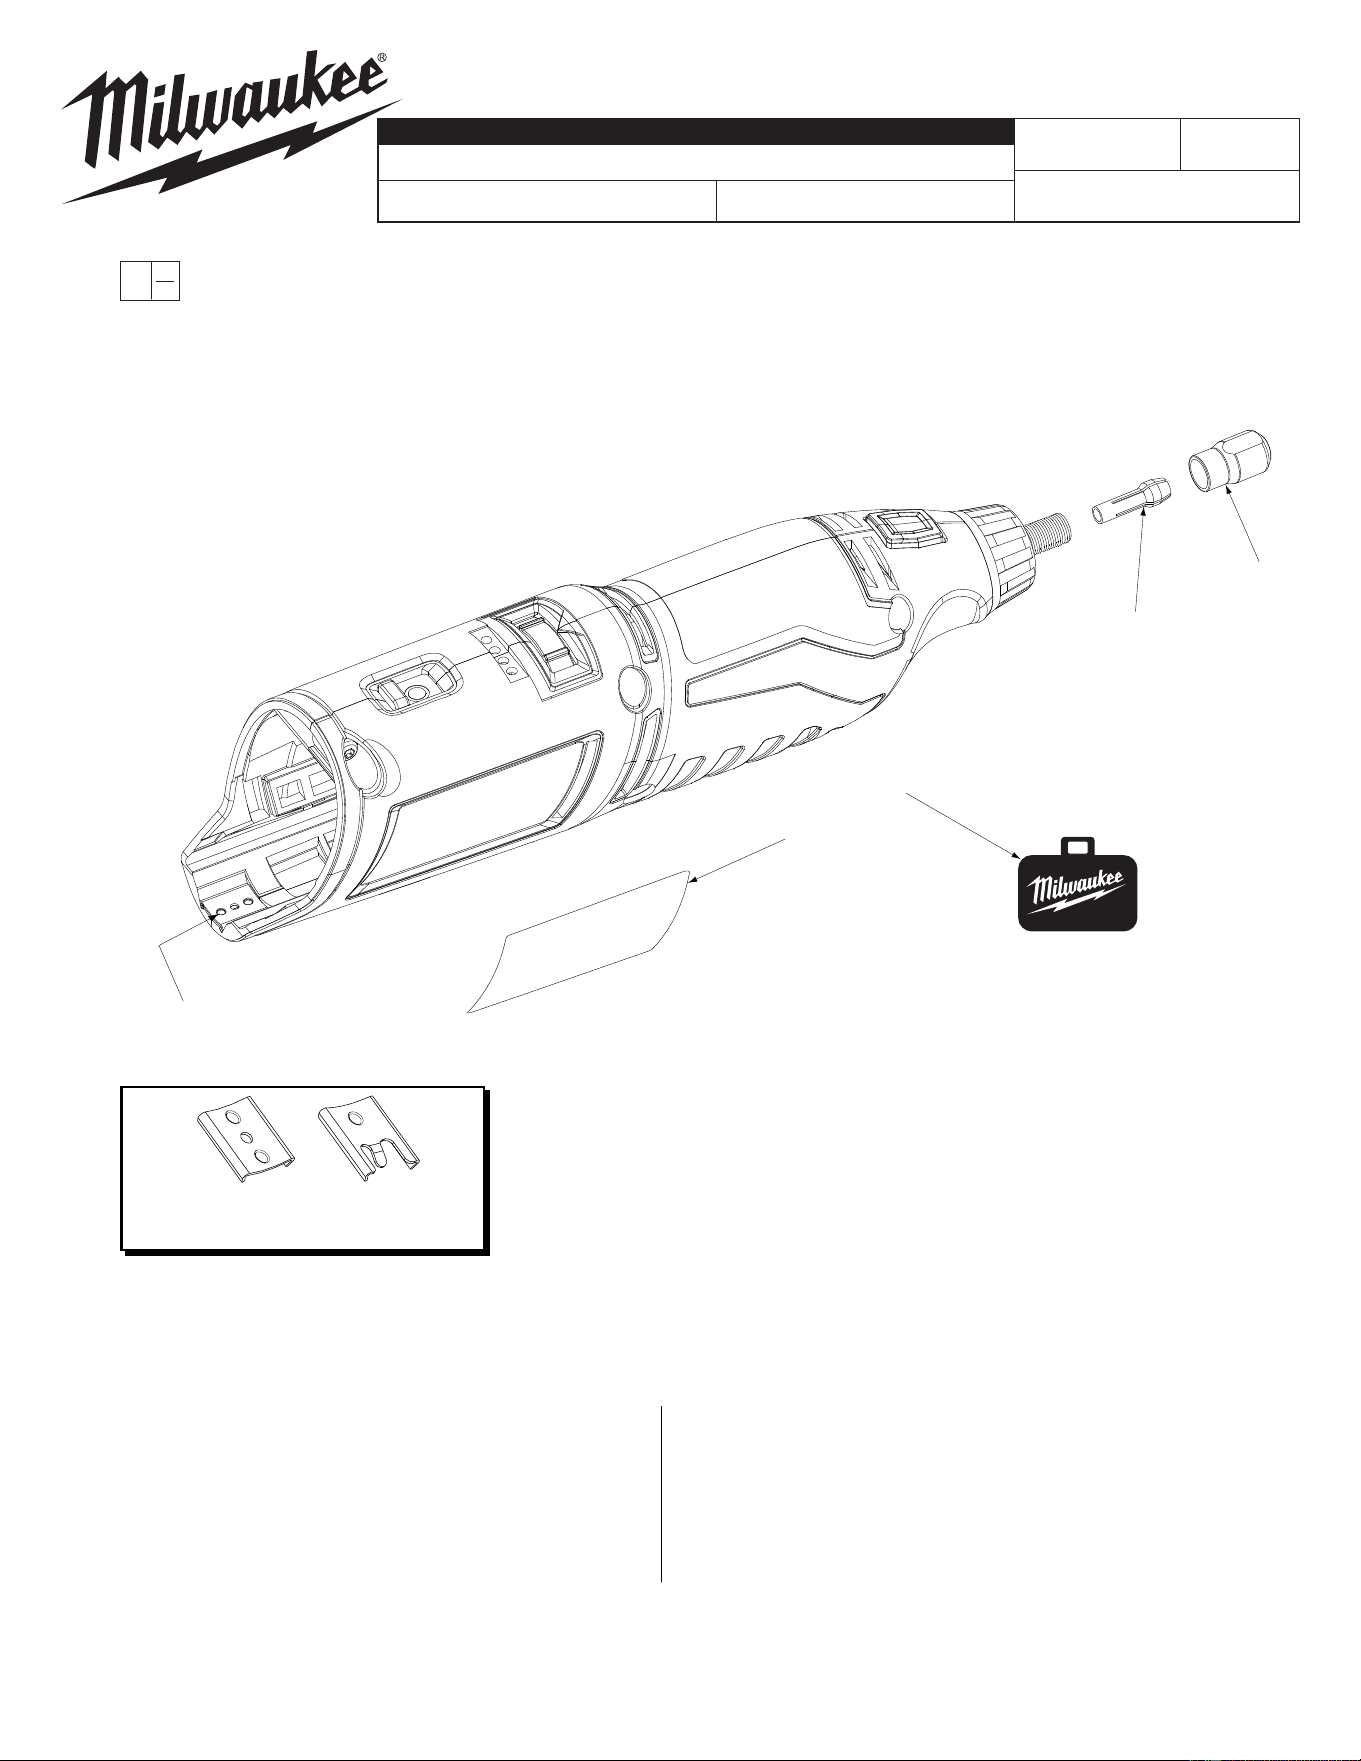
FIG. PART NO. DESCRIPTION OF PART NO. REQ.
1 44-40-0770 Collet Nut (1)
2 42-77-0400 1/8" Collet (1)
3 --------------- Service Nameplate (1)
4 42-55-2460 Storage Bag (1)
5 10-20-3675 Warning Label (Not Shown) (1)
6 45-96-0400 Collet Nut Wrench (Not Shown) (1)
FIG. NOTES
3,5 A clean, dry surface is essential for proper performance for any
adhesive system. The area intended for application of any adhesive
label or nameplate must be prepared by cleaning with isopropyl
alcohol. The solvent is to be applied with a clean, lint free applicator
and the surface allowed to dry before applying the label or name
plate.
54-22-2460
REVISED BULLETIN
SERVICE PARTS LIST
BULLETIN NO.
WIRING INSTRUCTION
DATE
CATALOG NO.
SPECIFY CATALOG NO. AND SERIAL NO. WHEN ORDERING PARTS
SERIAL
NUMBER
MILWAUKEE ELECTRIC TOOL CORPORATION
13135 W. LISBON RD., BROOKFIELD, WI 53005
Drwg. 2
EXAMPLE:
Component Parts (Small #)
Are Included When Ordering
The Assembly (Large #).
0
00
C81A
2
1
3
4
*
42-70-0058
Improved
Design
Original
Design
42-70-0055
*
M12™ tools utilize two different Housing
Connection Clip designs depending on the
Handle Set . See page two for details.

42-70-0055
42-70-0058
42-70-0058
Recess in early handle
sets may only have the
slots to accommodate a
housing clip. Use 42-70-0055
only in this situation.
Slots
Recess in newer handle
sets have two slots, a
dimple and a tab cavity to
accommodate the newer
housing clip design.
Slots
Dimple
Tab Cavity
Updated M12™ Handle Sets utilize Housing
Connection Clips No. 42-70-0055 and 42-70-
0058. (The 42-70-0058 is a preferred upgrade).
Install this clip design by aligning the side rails
of the clip with the two slots in the handle set.
Gently push into place with the aid of a small
flat blade screwdriver or a similar instrument.
Be sure that the clip is properly seated in both
slots and that the tab of the clip snaps down in
the round dimpled cavity of the handle set. Be
sure that the clip is flush to sub-flush to the end
of the handle set. To remove the clip, use the
same small flat blade screwdriver or a similar
instrument and lift up on the clip tab while
pushing the clip out of the handle set. Use a
needle nose pliers to gently rebend the clip tab
if necessary. If the tab on the clip is damaged
during this process and is loose or will not stay
in place, replace with a new 42-70-0058 clip.
Early M12™ Handle Sets utilize Housing
Connection Clip No. 42-70-0055. Install this
clip design by aligning the side rails of the clip
with the two slots in the handle set. Gently
push into place with the aid of a small flat
blade screwdriver or a similar instrument. Be
sure that the clip is properly seated in both
slots and that the clip is flush to sub-flush to
the end of the handle set. To remove the clip,
use the same small flat blade screwdriver or a
similar instrument and push the clip out of the
handle set. If the clip is loose or will not stay in
place, a needle nose pliers can be used to
gently bend/pinch the side rails of the clip. If
the clip is damaged do not use, replace with a
new 42-70-0055 housing clip.
Slots
Dimples
Recess in this
handle set design
has slots and dimples
to secure a housing clip.
The 42-70-0055 can be
used but the 42-70-0058 is
preferred in this situation.
Newer M12™ Handle Sets utilize Housing
Connection Clip No. 42-70-0058. Install this
clip design by aligning the side rails of the clip
with the two slots in the handle set. Gently
push into place with the aid of a small flat blade
screwdriver or a similar instrument. Be sure
that the clip is properly seated in both slots and
that the tab of the clip snaps down in the
rectangular cavity of the handle set. Be sure
that the clip is flush to sub-flush to the end of
the handle set. To remove the clip, use the
same small flat blade screwdriver or a similar
instrument and lift the clip tab out of the cavity
while pushing the clip out of the handle set.
Use a needle nose pliers to gently rebend the
clip tab if necessary. If the tab on the clip is
damaged during this process and is loose or
will not stay in place, replace with a new
42-70-0058 clip.