1
/
6
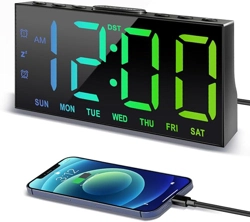
V18038 Alarm Clock Instructions
We value every customer and commit to providing a lifetime warranty service to each and
every one of them. Missing power cord, user manual, incorrect color or any other problems,
please contact us:
ThreeDucksDirect@outlook.com
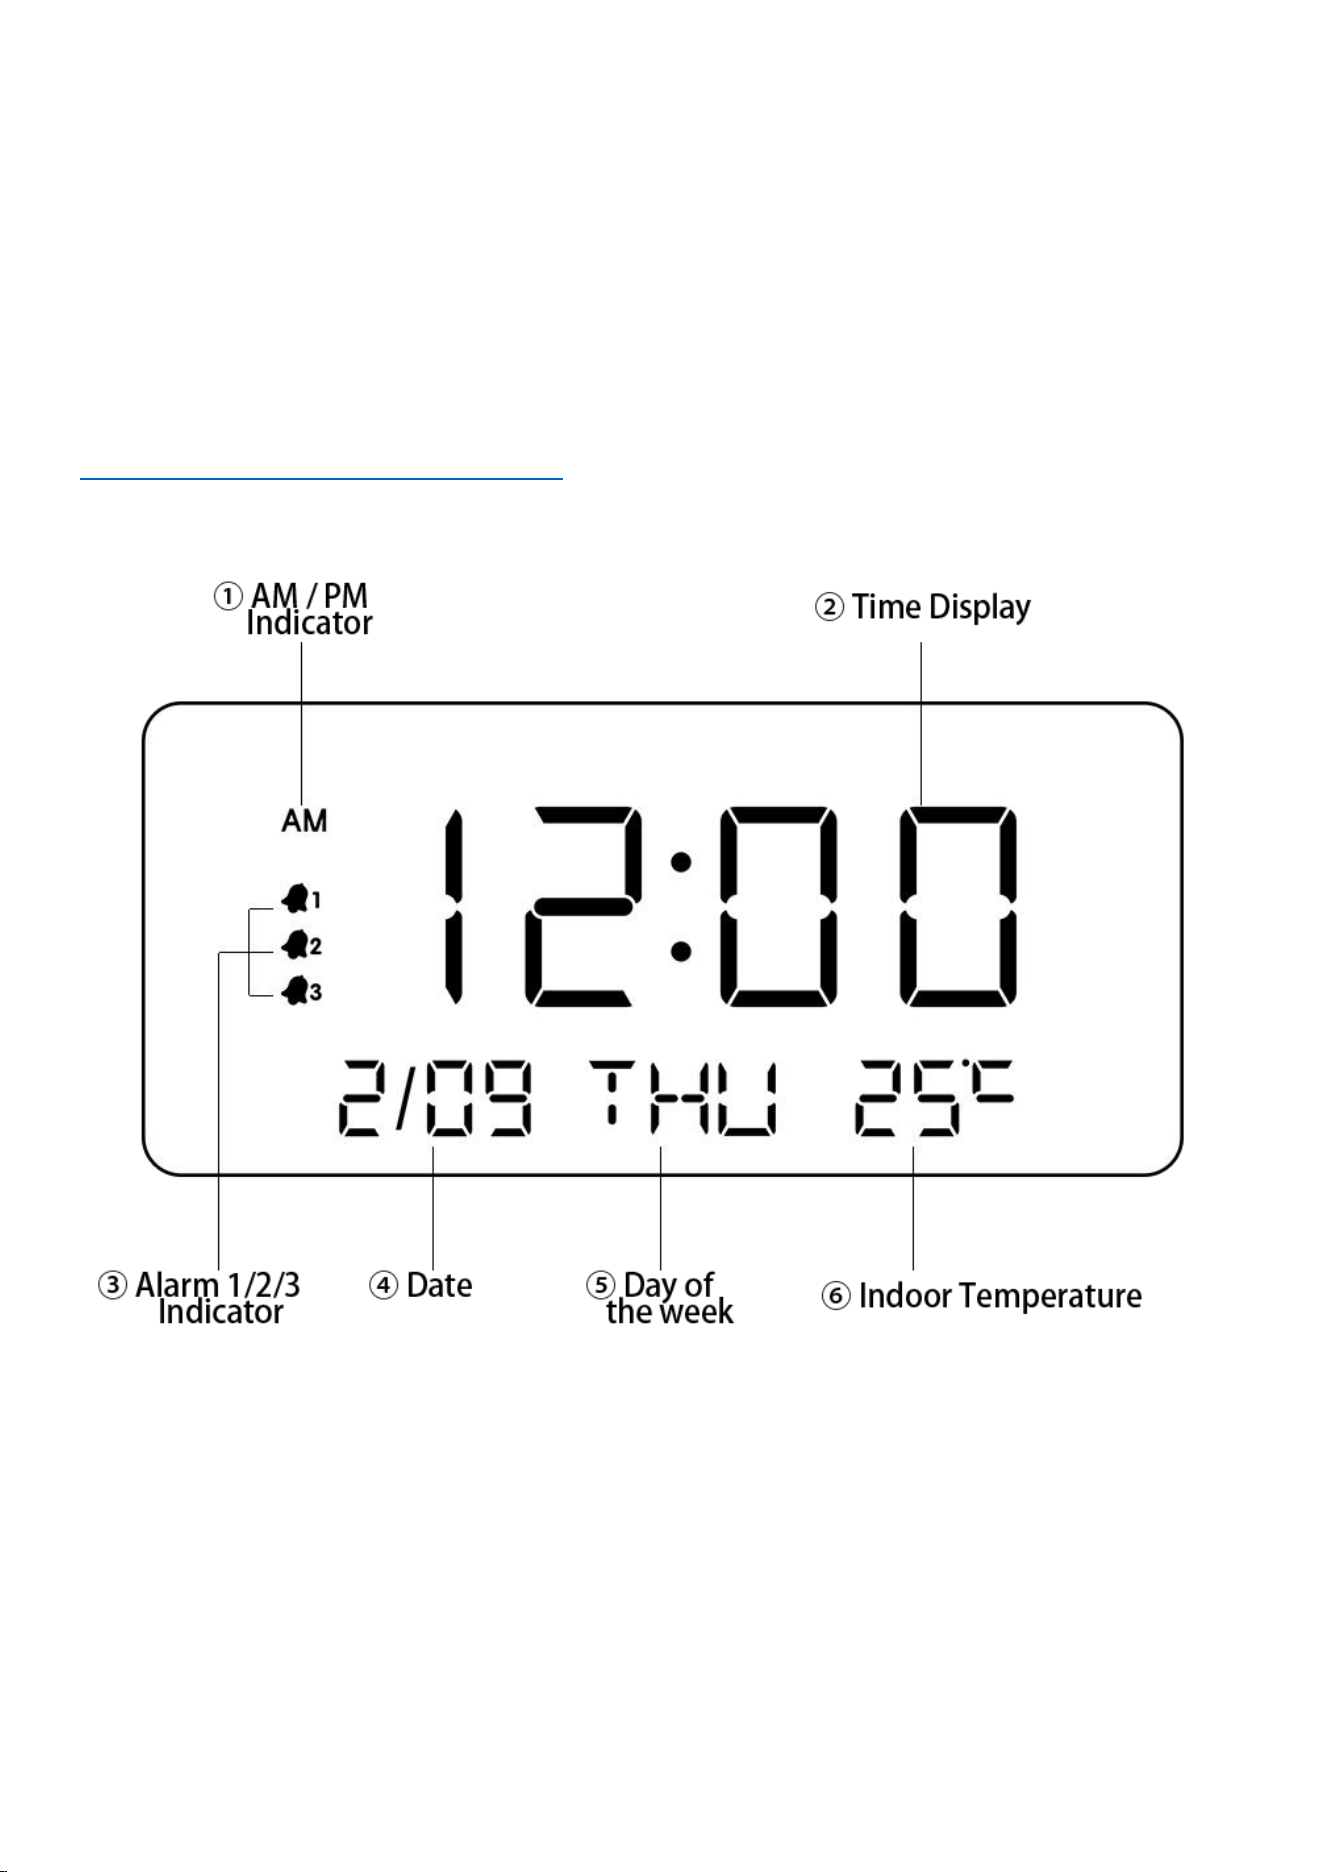
Front
①
AM/PM Indicator
– AM/PM Indicator is for 12-hour system only.
②
Time Display
– Show current time.
③
Alarm 1/2/3 Indicator
– If you switch on 1 of the alarms, it will be on.
④
Date
– Show current date.
⑤
Day of the week
⑥
Temperature
– This shows the current indoor temperature in Celsius or Fahrenheit, which is detected by a sensor and
cannot be manually changed.
2
/
6
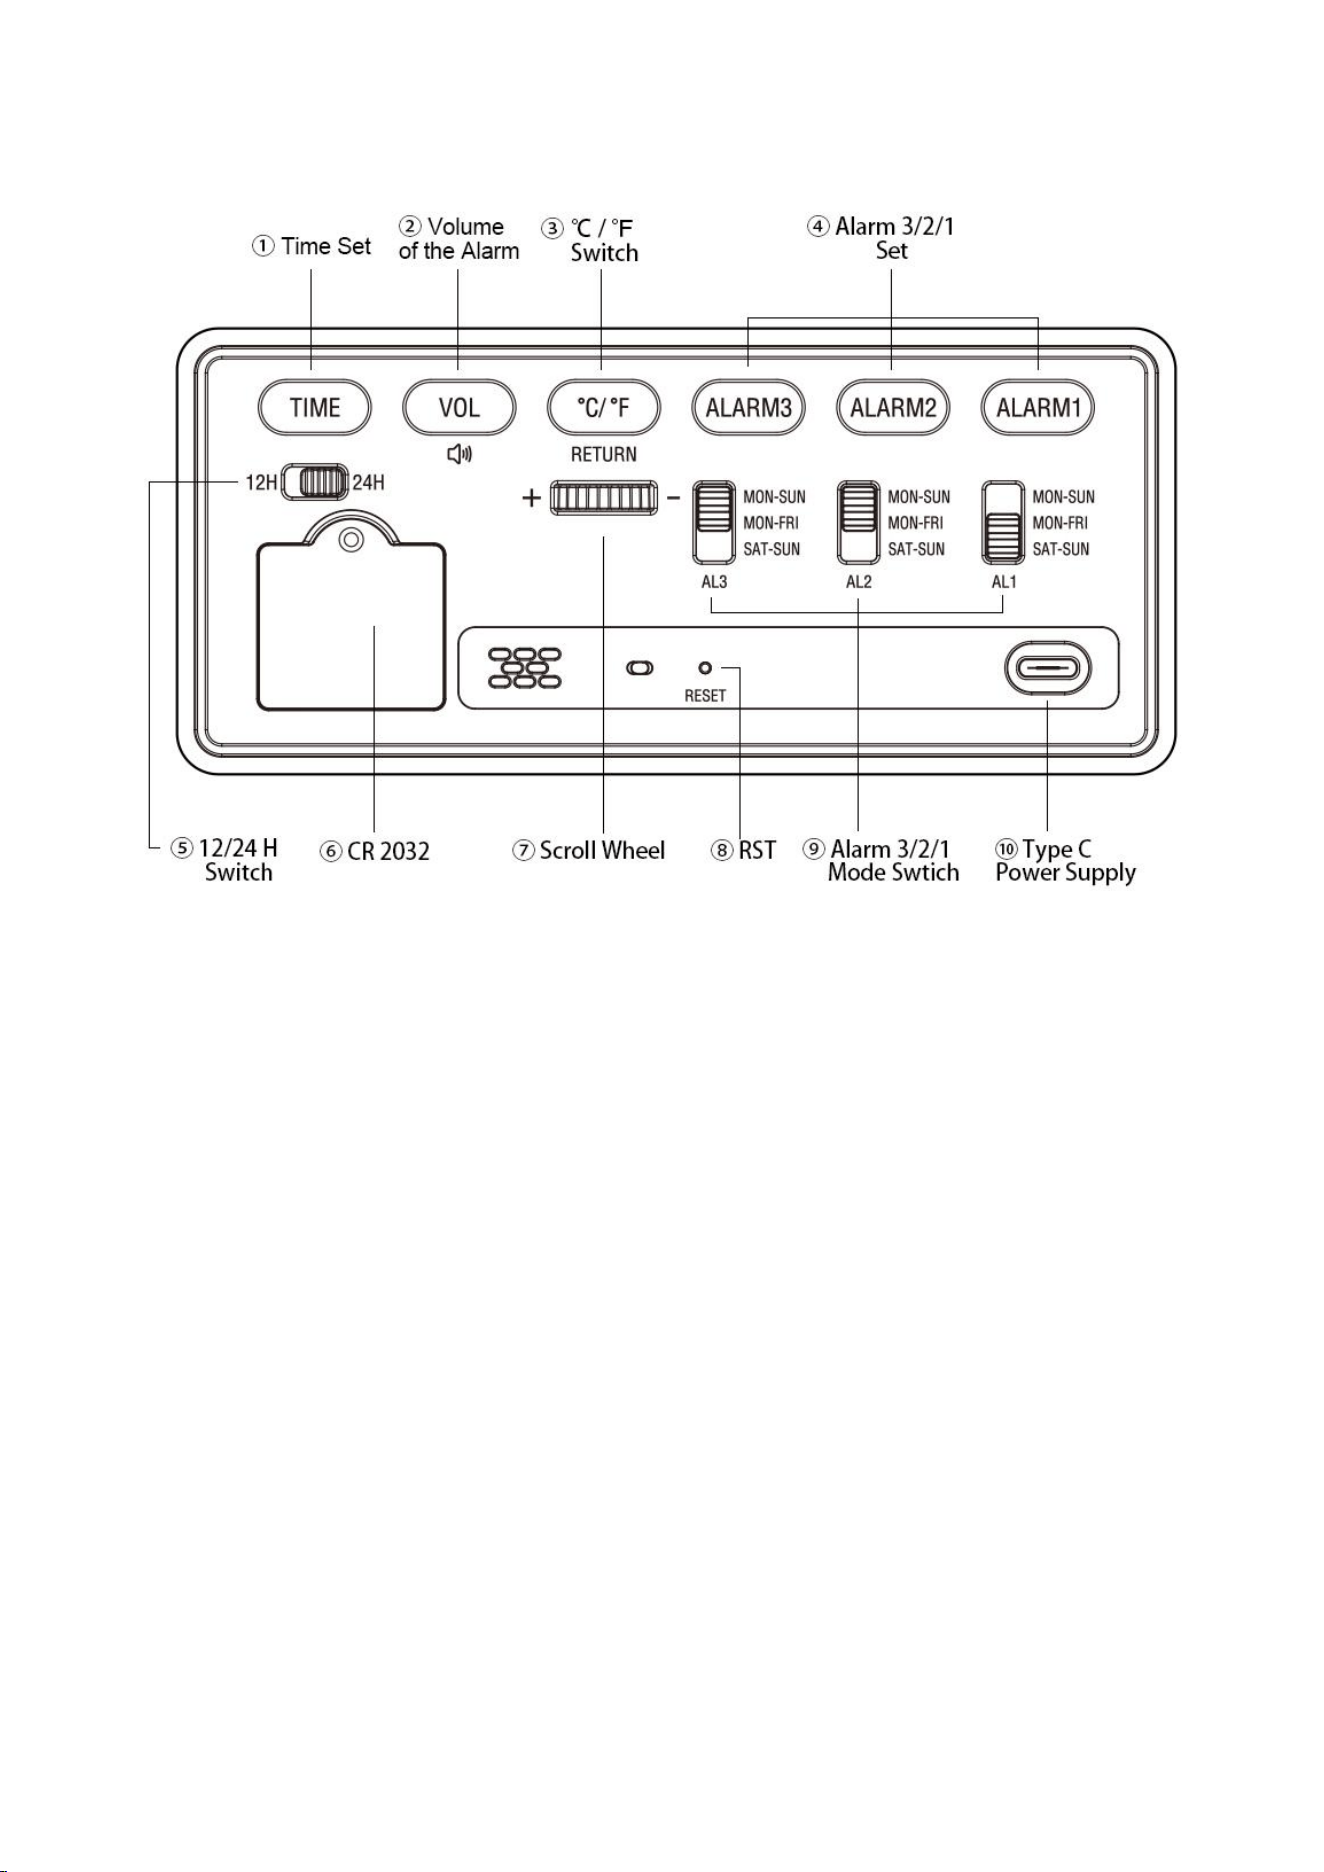
Back
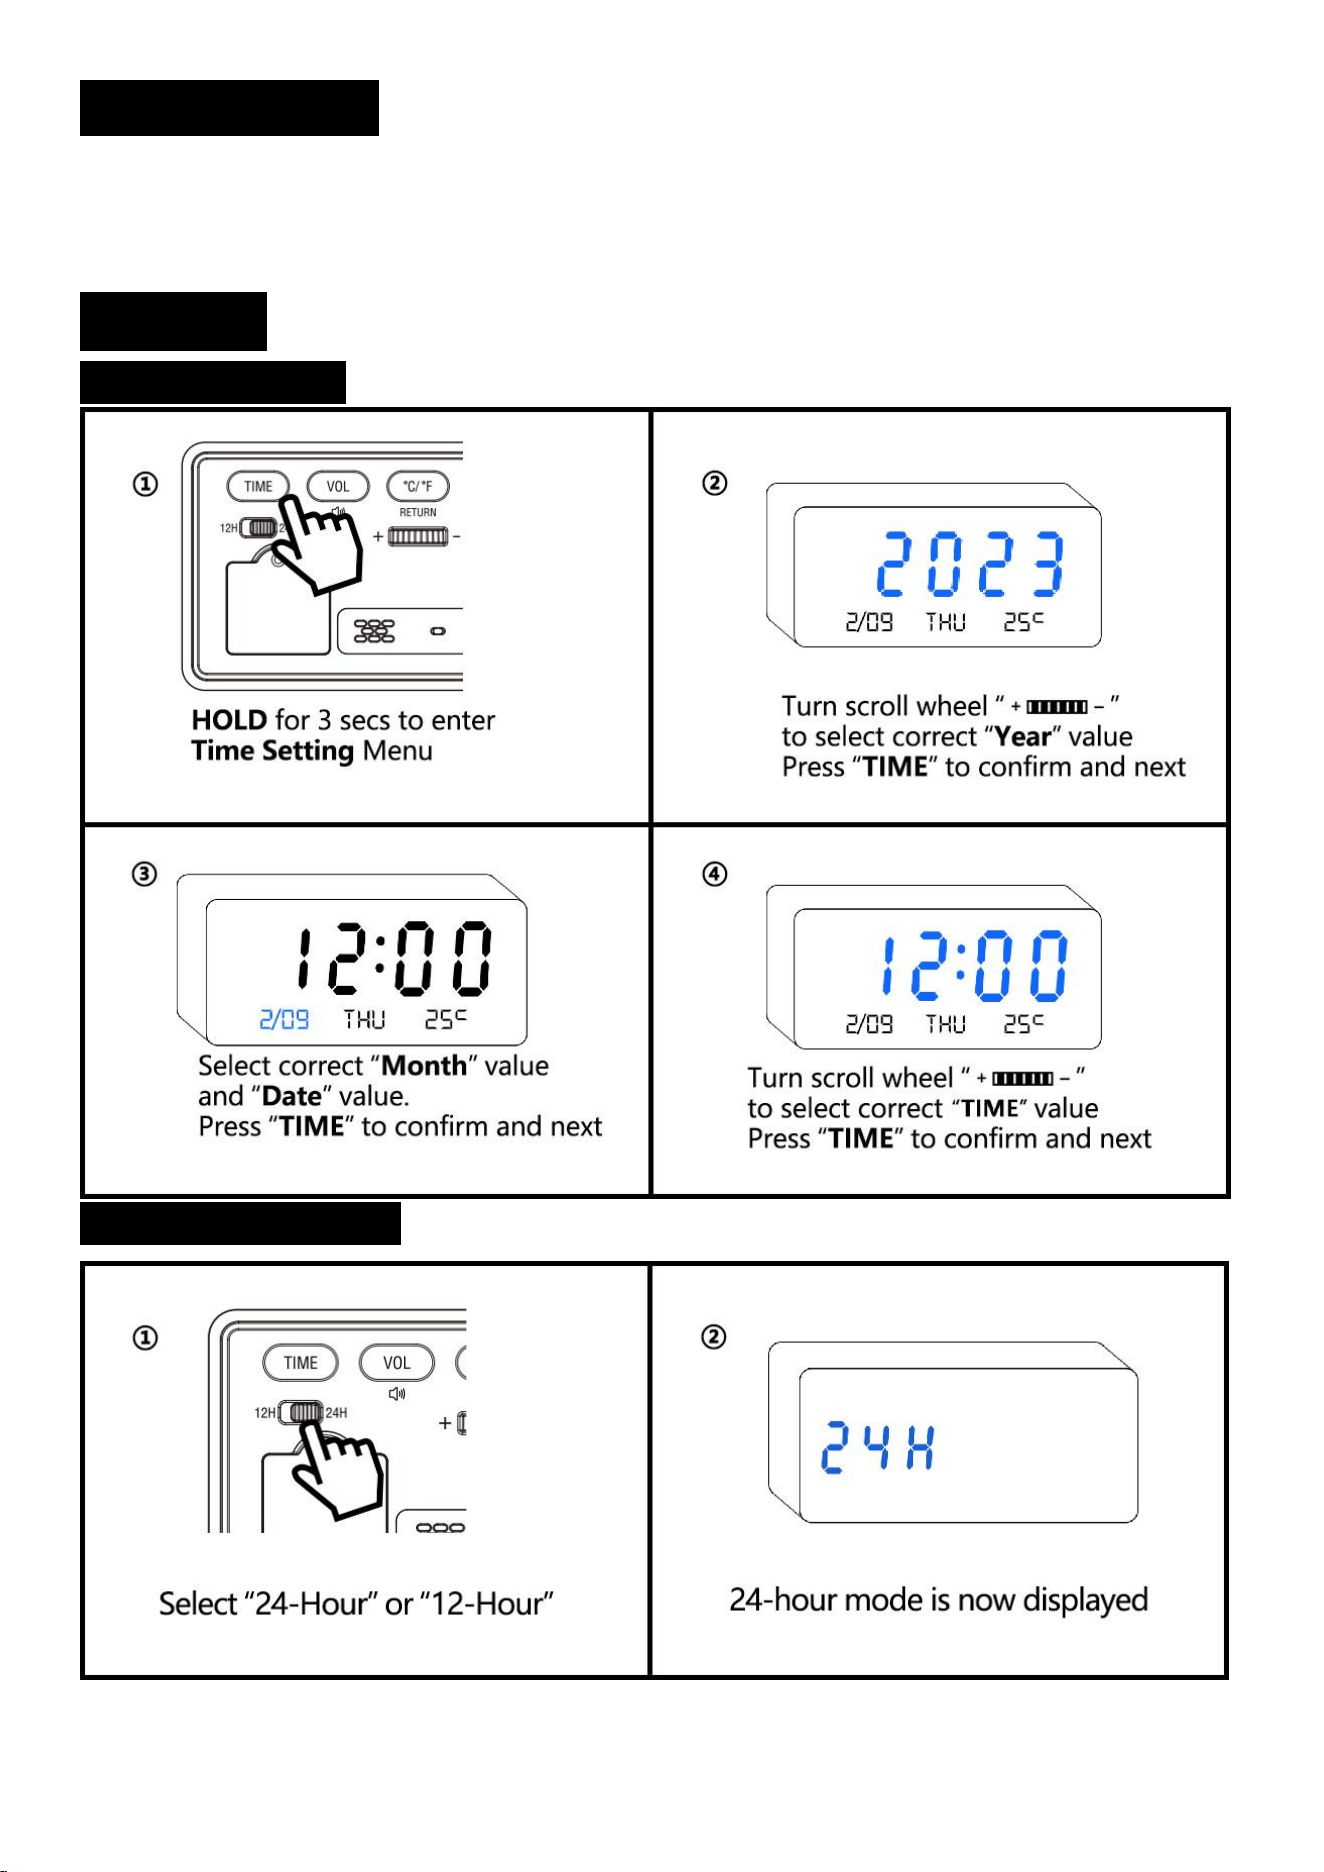
① Time Set – Press and hold the “TIME” button, then use the scroll wheel to set “Year”, “Date”, “Time”.
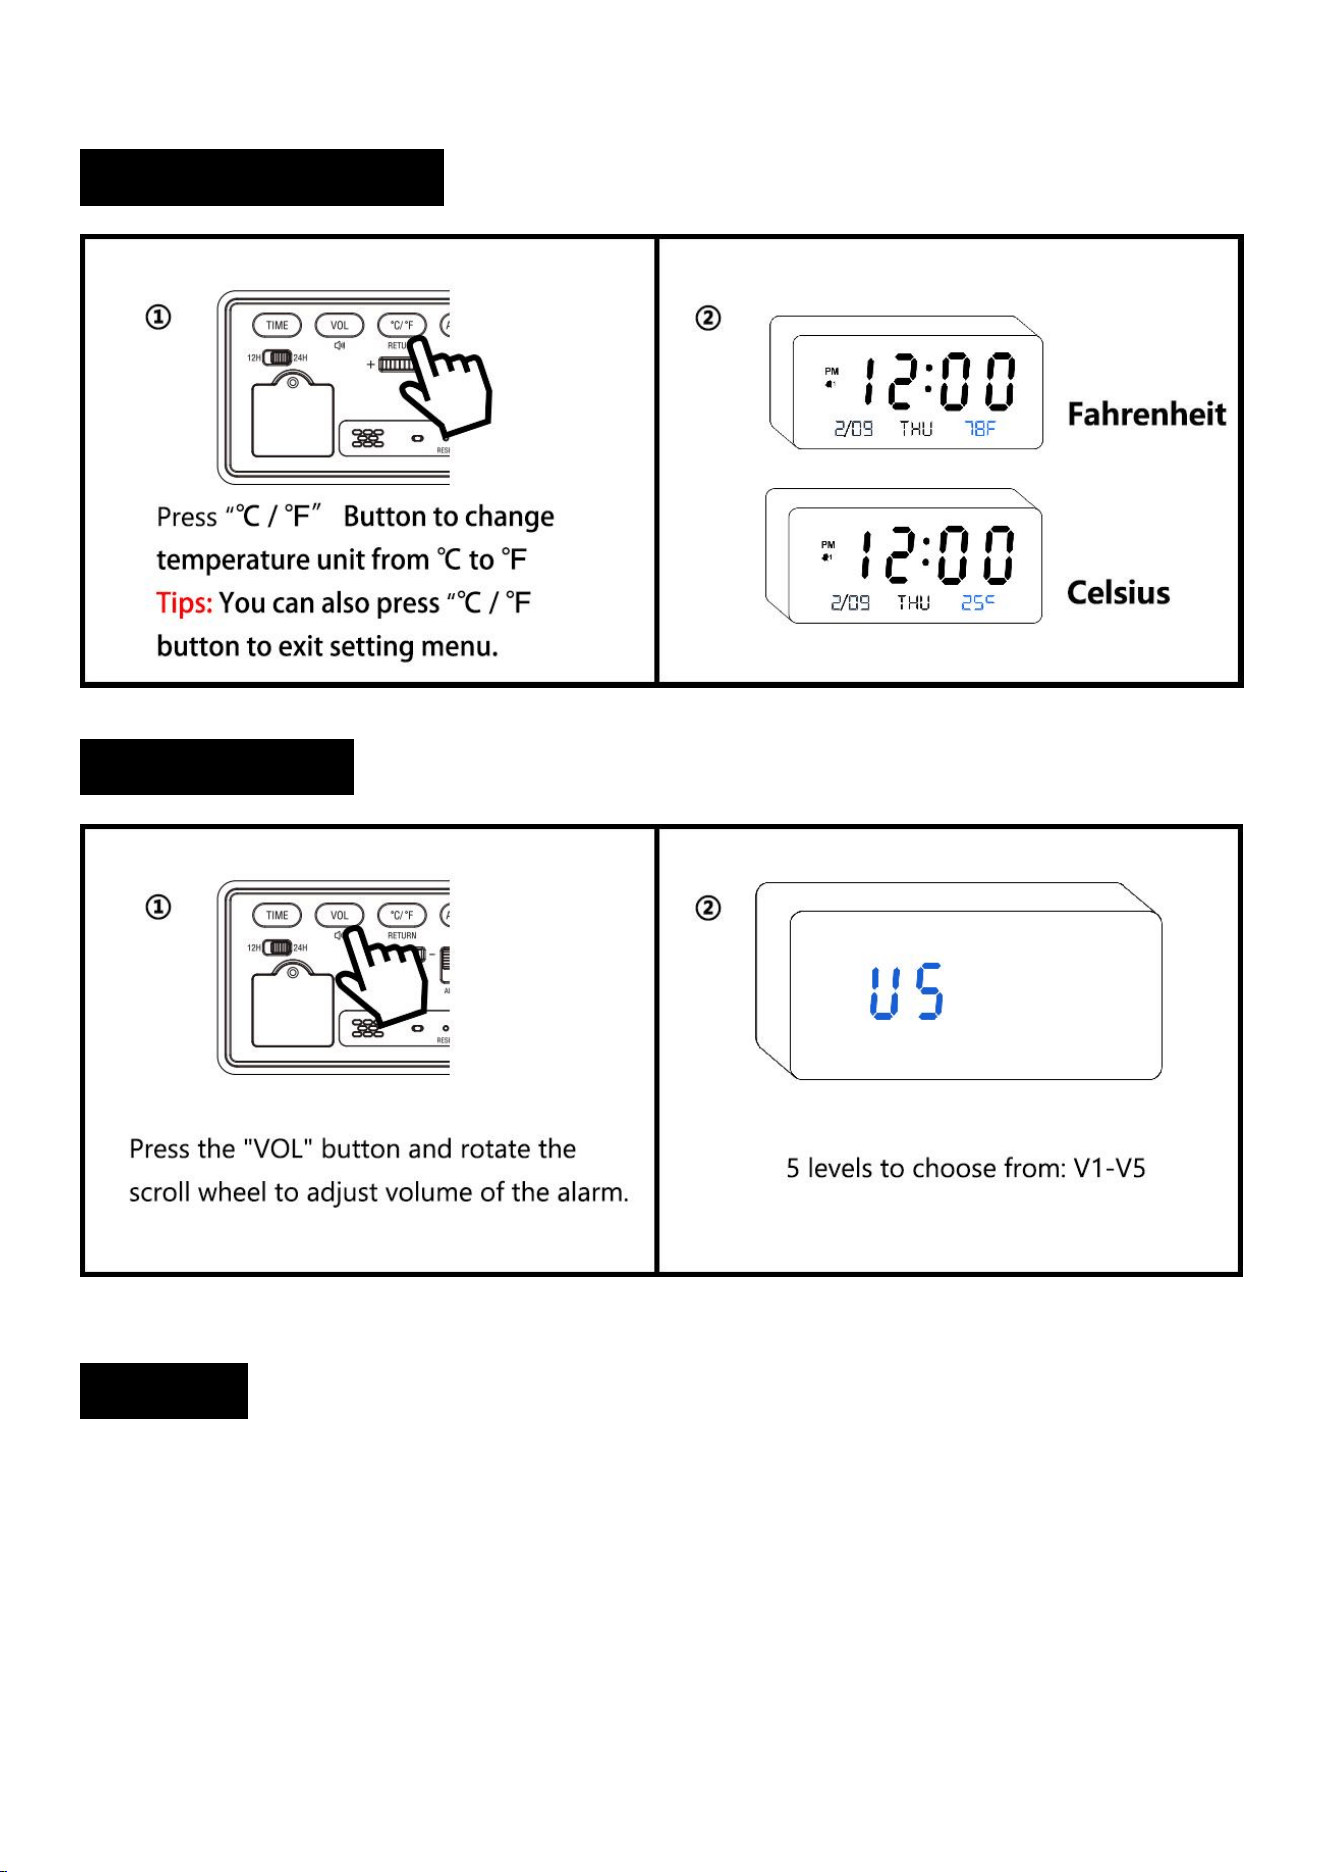
② Volume – Press the "Vol" button once to adjust the volume of the alarm. There are 5 levels to choose from: V1-V5.
③°C / °F Switch – Press the "°C / °F" button once to switch between Celsius and Fahrenheit on the display.
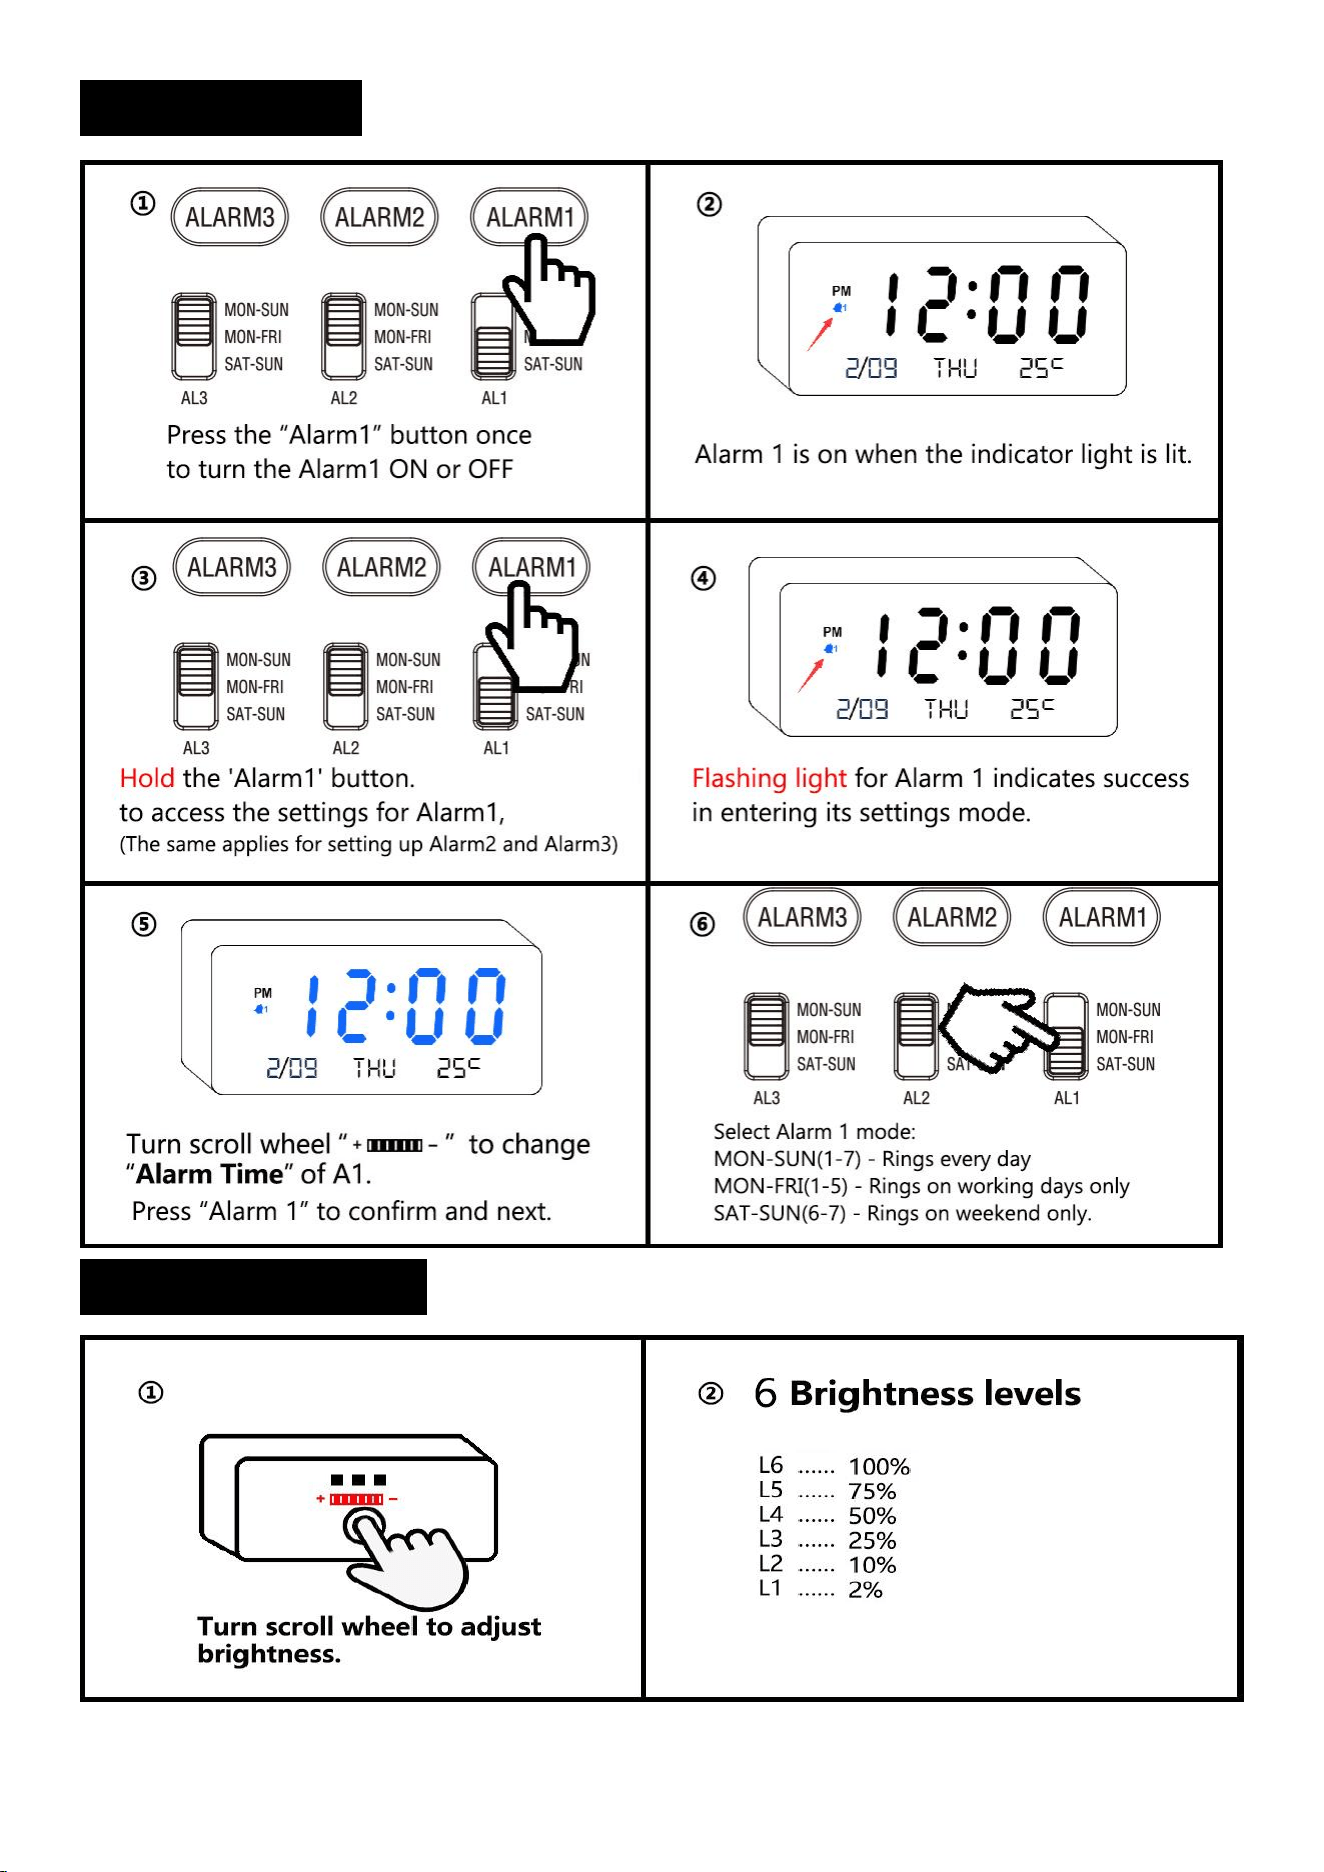
④ Alarm 3/2/1 Set – Pressing the "Alarm" button once will turn the alarm ON or OFF. Press and hold the "Alarm" button to
enter the alarm setting mode. The alarm will be turned ON by default after setting the alarm.
⑤ 12/24 H Switch – A convenient switch to toggle between 12-hour and 24-hour display modes.
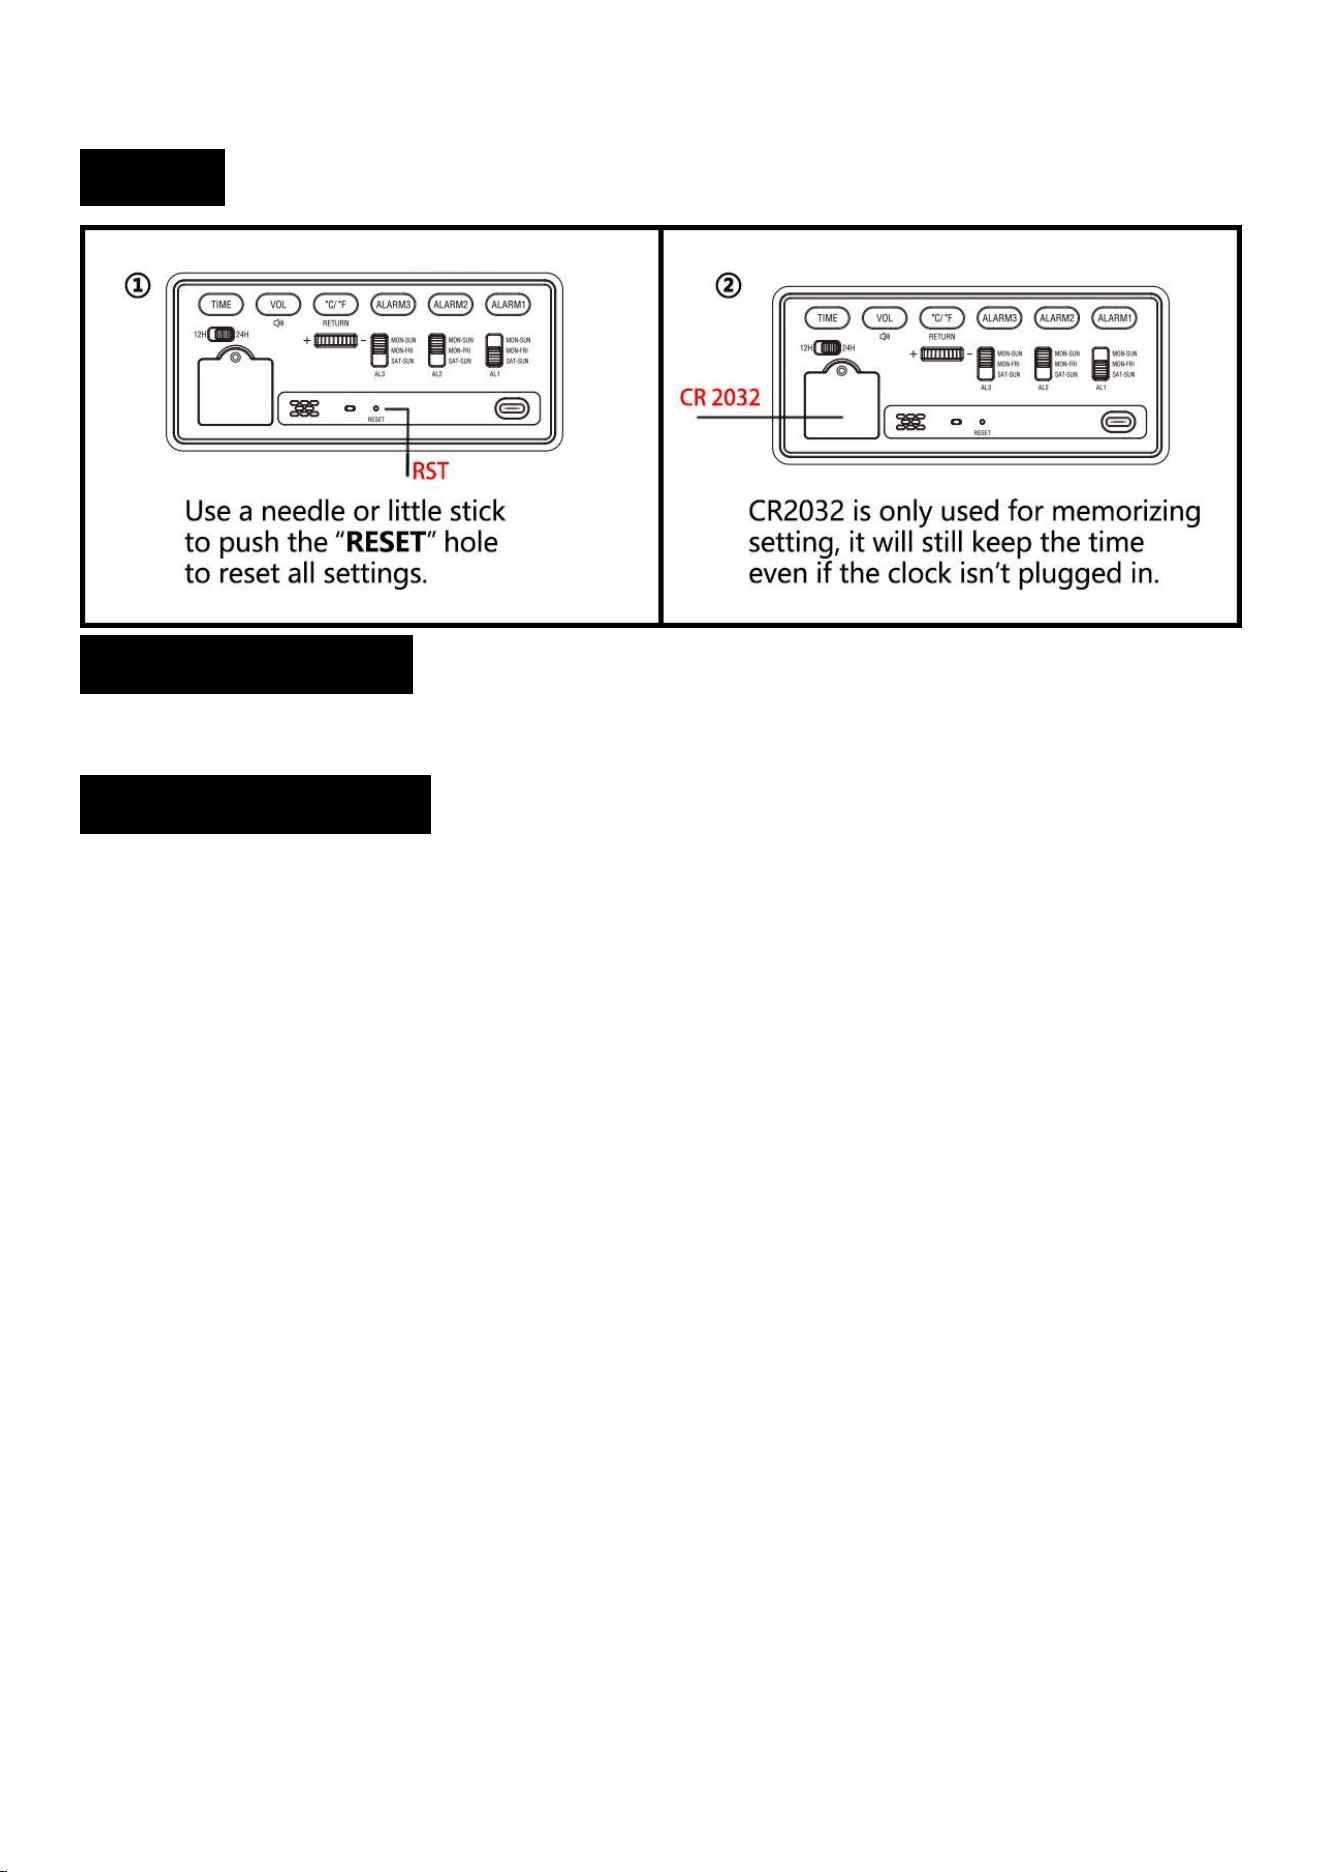
⑥ CR 2032 – The CR2032 battery is used to retain your alarm settings, allowing the clock to restore the current time without
re-setting after power is restored. It CANNOT work as power source.
Note: If the alarm fails to restore its settings after a power outage, it is possible that the CR2032 battery is drained and needs
to be replaced.
⑦ Scroll Wheel–Turn it to adjust brightness in normal status, or select value in setting menu.
⑧ Reset – If you find the clock works abnormally, you can use a small stick to push “RESET” button to initialize.
⑨ Alarm 3/2/1 Mode Switch – “MON-SUN” = Every day; "MON-FRI" = Weekday mode, only activates the alarm on Monday
through Friday. "SAT-SUN" = Weekend mode, only activates the alarm on Saturday and Sunday.
⑩ Power Supply– Please use the original power cord and adapter. If missing, please contact us.
Note: Using a non-original power cord and adapter may cause malfunction of the alarm clock. An excessive current may
damage the circuit board.( If your adapter is 5V 1A or 5V 2A, it can be used as a replacement)
3
/
6
1. Package Includes:
1 x Digital Alarm Clock
1 x User Manual
1 x USB Type C Cable
1 x 5V 1A Power Adapter
2. Setting:
2.1 Time Setting:
2.2 12 / 24 H Switch:
4
/
6
2.3 Alarm Setting:
2.4 Brightness Setting:
5
/
6
2.5 Temperature Setting:
2.6 Alarm Volume:
2.7 Snooze:
①When the alarm goes off, press any button once. The corresponding alarm indicator light will flash,
giving you an extra 9 minutes of snooze time.
Notice: The snooze function will automatically shut off after 4 consecutive uses.
②To turn off the snooze feature, simply press any button on the back twice. This will stop the flashing of
the alarm indicator light. Alarm will go off on the next day.
6
/
6
2.8 Reset:
3. Product Features:
Input Voltage: AC110v-240V, 50/60HZ.
Output Voltage: DC5V / 500MA-2100MA.
4. Trouble Shooting:
1) Missing power cord, or instructions, please contact us on Amazon or by email for a new
replacement.
2) Please understand the temperature sensor is pre-set inside the clock. As electronic
components may produce heat when working. So it’s normal that the temperature is not as
accurate as other professional thermometer. It’s normal there are 1-2 degrees difference.
The temperature cannot reset manually because it’s detected by sensor automatically. If
the difference is higher than 5 degrees, please contact us for a new replacement.
3) If some numbers are getting dimmer or flash constantly, please take a picture or a short
video and contact us for a new replacement.
4) Please use the original power cord and adapter to work. If it’s broken, please contact us
for a new power cord & adapter.
5) If you find the clock fails to remember settings. That’s because the CR2032 memory
battery has run out of its power. You have to take out the battery shelf on the back of the
clock to change CR2032 battery.
6) If you happen to find that the screen is not lit, please try unplugging and reconnecting the
power cord, and pressing the RESET button on the back of the alarm clock. If the issue
persists, please contact us for a new replacement.