NEX K2 Ultra
Brushless Cordless Drill
Please read this instruction manual carefully before use
and keep it for future reference.

Contents
1. Safety Warnings
2. Package Contents
3. Product Overview
4. Operation and Functions
5. Specifications
Warranty Card
02
03
04
05
11
13
- 01 -

Avoid moisture, dust, and drop.
Do not store the product in an extreme
temperature envirorment.
Stay alert, watch what you are doing and use
common sensewhen operating. Do not operate
while you are tired or under the influence of
drugs,alcohol or medication.
This product is not a toy and should not be used
by kids under 12 years old.
This product has built-in battery, do not throw it
into fire anid should be recycled by local laws and
regulations.
Do not dismantle the machine by yourself. Have
your power tool serviced by a qualified repair
person or contact us for advice.
1. Safety Warnings
•
•
•
•
•
•
- 02 -
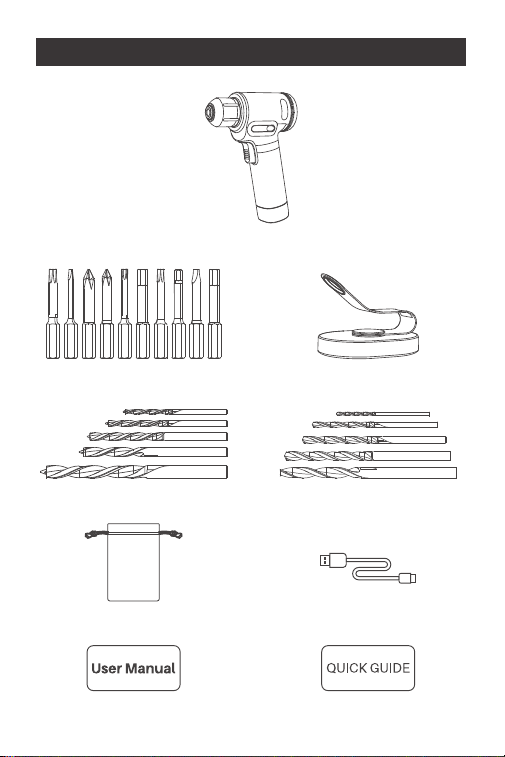
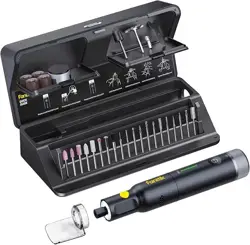
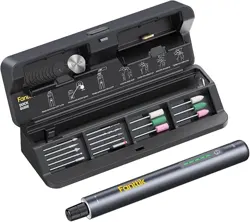
2. Package Content
- 03 -
Cordless drill x 1
Screwdriver bit x 10
Wood drill bit x 5
Storage bag x 1
User manualx1 Quick start guide x 1
All-in-One Storage stand x1
Metal drill bit x5
USB-C charging
cable x1
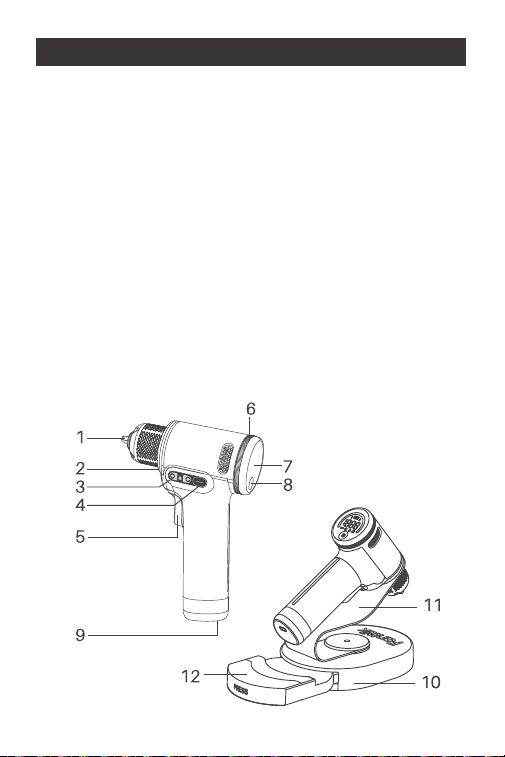
3. Product Overview
1. Keyless chuck
2. LED work light
3. Side display
4. Side button
5. Variable speed trigger
6. Torque/Speed control knob
7. Main display
8. Function button
9. Type-C charging port
10.All-in-One storage stand
11.360° swivel arm
12.Push-open bit storage compartment
- 04 -
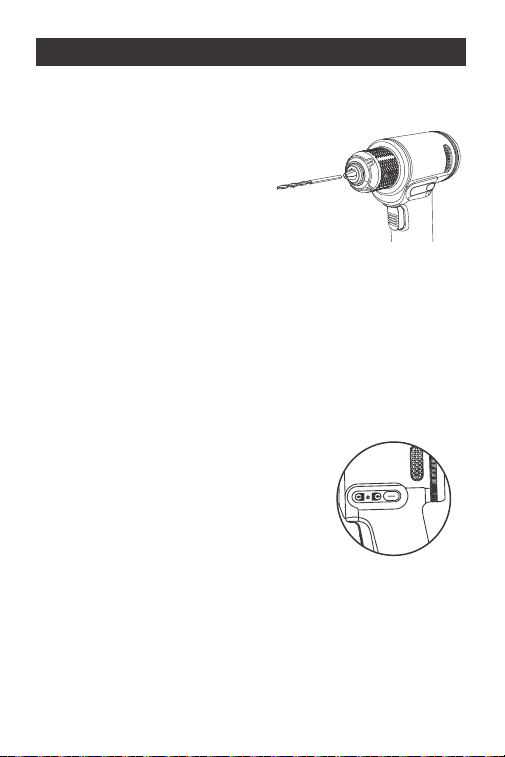
Install and Remove a Bit into the Keyless Chuck
Install: Rotate the chuck sleeve
counterclockwise far enough to
accept the desired screwdriver
bit or drill bit.
Then insert the bit deep into the
chuck and tighten securely by
grasping and rotating the chuck sleeve clockwise
until firmly in place.
Remove: hold the tool with one hand and rotate
thechuuck sleeve counterclockwise to loosen the
chuck, then remove the bit.
Variable Speed Trigger
Press the trigger to turn on the
device. The Variable Speed
Trigger controls the motor speed.
The farther the trigger is depressed,
the higher the working speed.
4. Operation and Functions
- 05 -
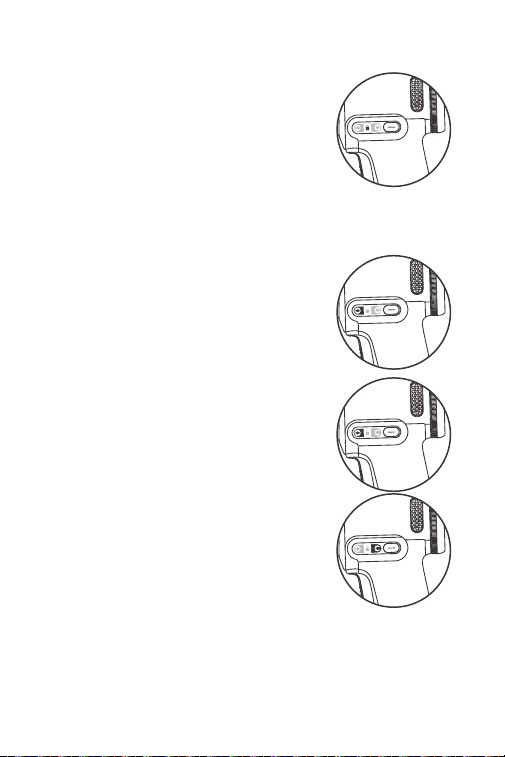
Press and hold the Side Button
for two seconds to lockthe tool
motor for child safety or
transportation safety. In this
moode, a lock symbol appears on the Side Display.
In motor lock mode, press and
hold the Side Button for twoo
de seconds to unlock the motor.
In unlock mode, briefly press
the Side Button to switch the
motor's rotate direction.
A corresponding forward or
reverse arrow symbol will
appear on the Side Display.
Side Button (Direction and Child/Transportation
Safety Button)
•
•
•
- 06 -

- 07 -
TapSwitchTH One Press Gear Shift
The tool has two regular modes:
screwdriver mode and dIrill mode.
Short press the function Button to
switch between them. When pressed,
the device will automatically shift gears, and you will
hear an ellectric gear-shifting sound. (Occasionally,
you may hear the gear shift two or three times, which
is normal.) Avoid pressing the bputtor repeatedly; wait
for the device to finish shifting gears beffore switching
modes.
Working Modes & UI
In screwdriver mode, a screw symbol and the current
torque setting appear on the display. You can adjust
the maximum toque from 1 to 30N-m(8.9 to 265 in-lb)
by rotating the Torque/Speed Control Knob. The
available torquesettings are 1, 2, 3... 18, 19, 20, and 30
(in total 21 torque settings). The speed is corhtrolled
by the Variable Speed Trigger, with a maximum
unloaded speed of 500RPM.
In drill mode, a drill bit symbol and the maximum
speed limit will appear on the display.
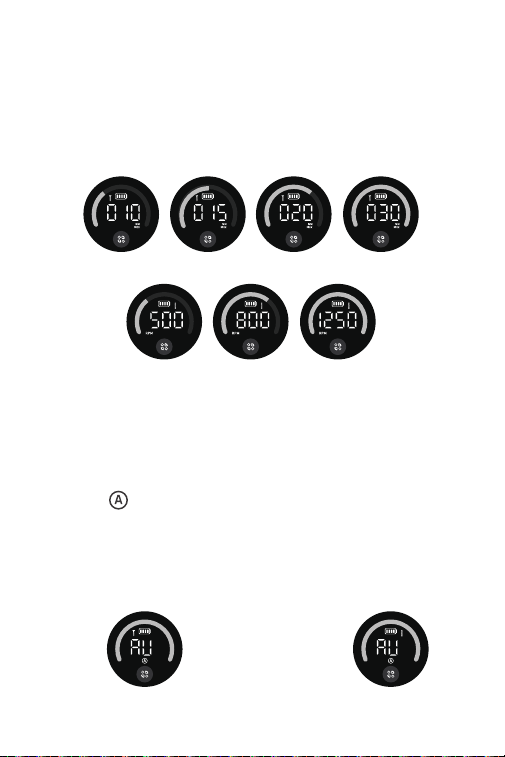
The knob adjusts the maximum speed limit, with
settings of 500, 800, and 1250RPM.
You can select a lower speed limit for drilling hard
materials orlarge holes, and a higher speed limit for
drilling soft materials or small holes.
In addition, the tool features AutoAssist. Long press
the funotion Button for 2s to activate this function, and
long press again to deactivate it. WIhen activated, an
'AU and ( ) symbols will appear on the display, along
with a screw cor drill bit symbol to indicate whether
you are in screwdriver Auto Assist mode and drill Auto
Assist mode. You can switch between the two Auto
Assist modes by short pressing the function Button.
- 08 -
Screwdriver Mode
Drill Mode
Screwdriver AutoAssist Drill AutoAssist

- 09 -
In screwdriver AutoAssist or drill AutoAssist mode,
torque ospeed settings are not applicable. In
screwdriver AutoAssist mode, the tool automatically
halts when the screw is fully tightened, this ensures
precise screw driving without over-tightening (The
final effect may be affected by different types of wood
andsizes of self-tapping screws. It is also possible that
the feature may be triggered during screw driving. A
recommended condition is driving M4 x 30mm
self-tapping screwinto pine wood). In drill AutoAssist
mode, the tool automatically adjusts the maximurm
power output.
Turn on/off the LED Work Light
The LED work light automatically
turns on when the Variable Speed
Trigger is pressed. The LED light
remains on for 10 sseconds after
the trigger is released.
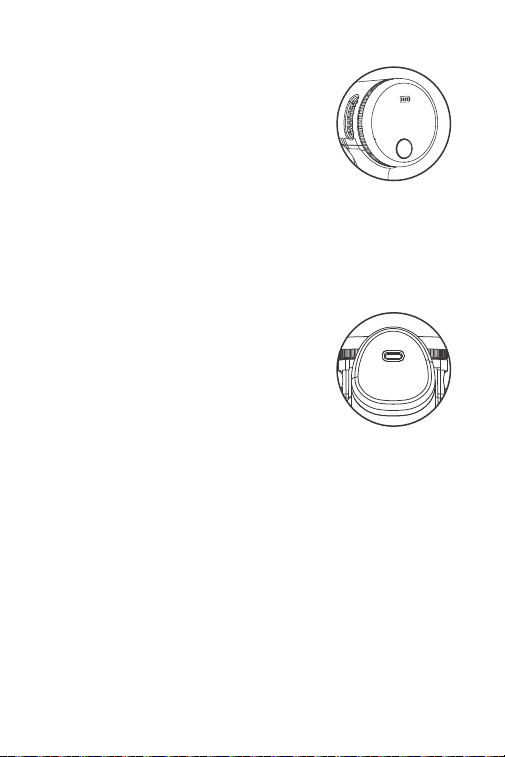
Power Indicator
The battery symbol on the display
shows the current battery leveel.
When it is empty, charge the tool
promptly. During charging, tthe
green arc bar and battery symbol
flashes. Once fully charged, the battery symbol and
green arc bar will remain solid.
Battery Charging
This tool is equipped with a
universal Type-C charging port
and includes a USB charging
cable. A charger is not included;
please use a 5V charger for
charging. The screwdriver supports a maximum
charging input of 10W(5V/2A).
- 10 -

- 11 -
5. Specifications
Product Name
Product Model
Product Dimension
Net Weight(Tool only)
Max. torque
(Screwdriver Mode)
Torque Control
(Screwdriver Mode)
Max. Unloaded Speed
(Drill Mode)
Speed Control
(Drill Mode)
Battery Capacity
Rated Voltage
Charging Input
Charging Time
Brushless Cordless Drill
NEX K2 Ultra
9.7x4.6x2.0 inches
(133x1185x57mm)
1.93 lb (875g)
30 Nrm(265 in-lbs)
1-30 Nm(8.9-265 in-lbs)
1250 RPM
500/800/1250 RPM
2500 mAh/18.5Wh
7.4V
5V/2A
120-180 minutes

- 12 -
Screwdriver bit specifications and type
Bit Shank: 1/4-inch (6.3mm) hex shank
Bit Length: 2"(50mm)
Phillips: PH1, PH2
Slotted: SL4.0, SL6.0
Hex: H4, H5, H6
Tamper-Resistant Torx: TR15, TR20, TR25
Drill bit type
Wood drill bit: 1/8", 5/32", 13/64", 15/64", 5/16"
Metal drill bit: 5/64", 1/8", 5/32", 13/64", 15/64"

Your Warranty Includes
Your product is covered for 12 months against
manufacturing defects.
How to Return Your Fanttik Product
Email us at [email protected] with your order
number.
We'll email you a prepaid return shipping label.
Tear off the 'Return Details' page, fill it out, and
include it inside your return package.
Use the provided label to ship your package back
to us.
Once shipped, please email us. We'll expedite your
replacement or solution.
- 13 -
WARRANTY CARD
•
•
•
•
•
•

- 14 -
Return Details
Complete this section and include it in your
package for faster processing
Purchase Name:
Order Number:
Date of Purchase:
Place of Purchase:

929-693-6066MON-FRI 9AM-5PM (ET)
www.fanttik.com
METASEE LLC
12 GREENWAY PLZ STE 1161A HOUSTON,
TX 77046-1203