PH04 - LCD Wall Clock User Manual
ThreeDucksDirect@outlook.com

1. Power on -------------------------------------------------- 1
2. Installation ------------------------------------------------------ 2
3. Overview ----------------------------------------------------- 3
4. Time Set ------------------------------------------------------ 4
5. Alarm Set ----------------------------------------------------- 5-6
6. Temperature --------------------------------------------------- 6
7. Daylight saving time ----------------------------------------- 7
8. FAQ ---------------------------------------------------------- 8-9
9. Warranty ---------------------------------------------------- 9
Contents
ThreeDucksDirect@outlook.com
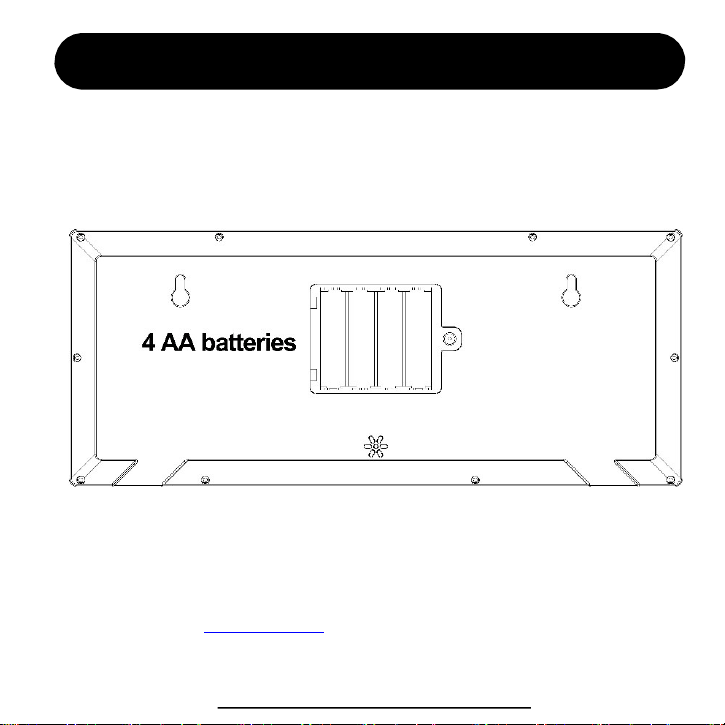
Power on for the first time
Use a screw driver to open the battery compartment, install 4 AA batteries. Make sure the
battery positive end and negative end is correctly installed. Now, the screen should show
digits, you need to set the time for the next step.
Start to power on
Normally, the clock can last 6-10 months with 4 brand new batteries. It will be
shorter if you use alarm function.
We provide lifetime warranty for every customer. We strongly recommend you to
contact us with your order ID to activate the warranty.
You can also visit www.jall-us.com to activate lifetime warranty. If missing any
accessories, please contact us for replacements.
ThreeDucksDirect@outlook.com
1
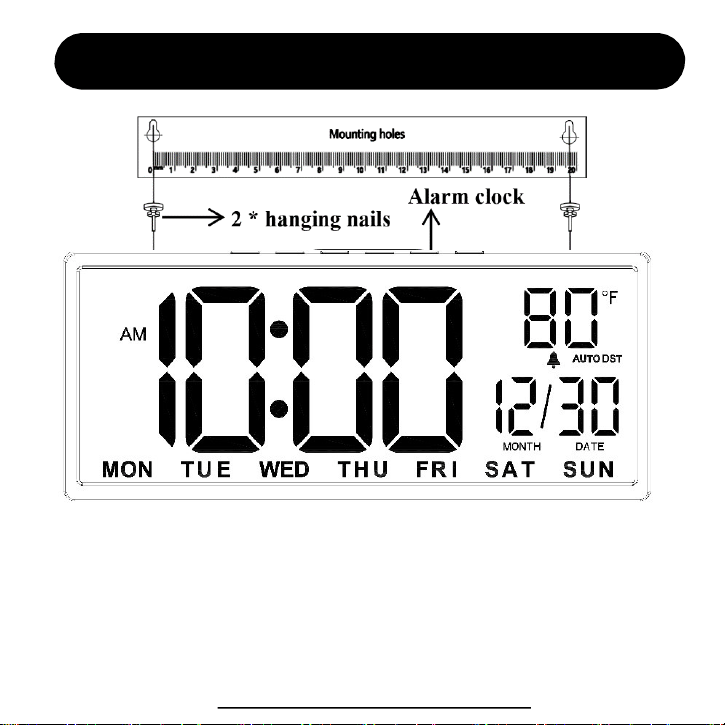
Installation (for wall hanging)
1. Align the positioning hole to nail the hanging nail to the wall.
2. Hang the alarm clock on the nail.
3. Installation completed
ThreeDucksDirect@outlook.com
2
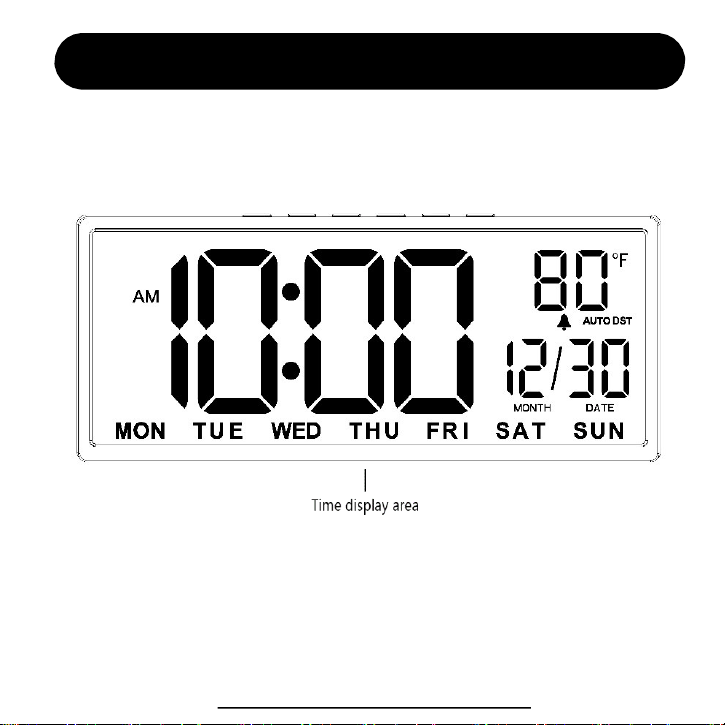
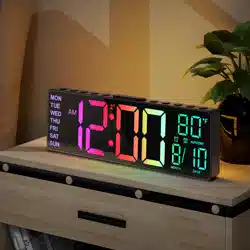
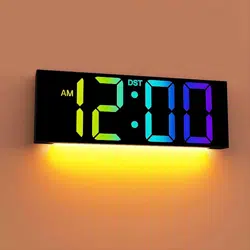
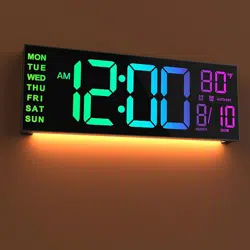
Device Overview
ThreeDucksDirect@outlook.com
3
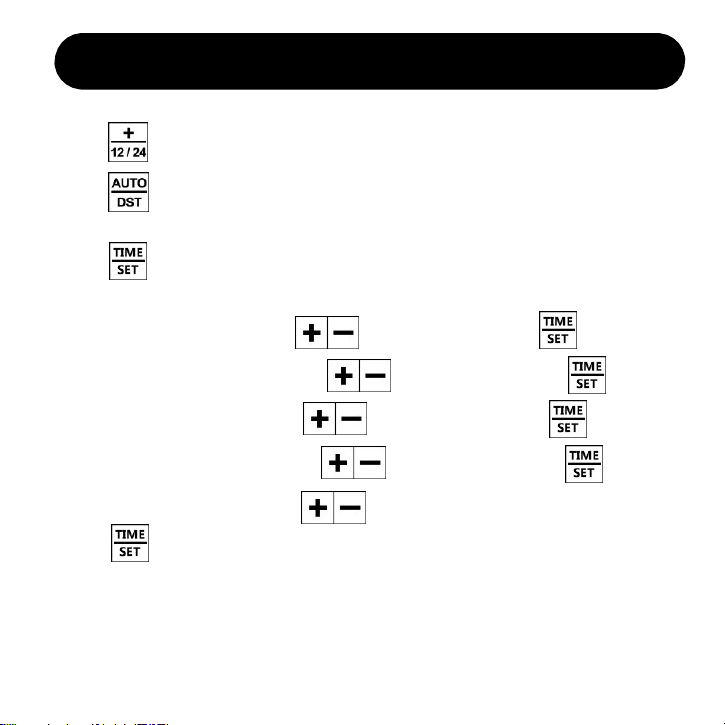
5. Then “Minute” is flashing, press to select value. Press and next.
3. Press to enter the time setting, you will set in sequence for
Hour > Minute > Year > Month > Date
Time Setting
1. Press to select 12-Hour or 24-Hour mode according to your habits.
2. Press to turn on AUTO DST, it’s for daylight saving time area.
If you don’t need it, just ignore this step.
4. The “Hour” is flashing, press to select value. Press and next.
6. Then “Year” is flashing, press to select value. Press and next.
7. Then “Month” is flashing, press to select value. Press and next.
8. Then “Date” is flashing, press to select value.
Press to finish time setting.
Note: You don’t have to set the day of the week. It’s calculated automatically.
If you find the day is wrong, it’s most likely you’ve set a wrong “YEAR”.
When you turn on Auto DST, time will auto adjust on March and November.
If you don’t need auto DST, please turn if off.
4

4. Then “Minute” is flashing, press to select value. Press and next.
2. Press to enter alarm setting, you will set in sequence for
Alarm Hour > Minute > Alarm Mode (MON-SUN, MON-FRI, SAT-SUN).
Alarm Setting
1. Press to activate / inactivate alarm. You will see the icon appears,
that means alarm is activated, while disappears means alarm is inactivated.
3. The “Hour” is flashing, press to select value. Press and next.
5. Then select your alarm mode. There’re 3 modes to choose from.
1-7 means alarm works for Monday to Sunday (every day).
1-5 means alarm only works for Monday to Friday.
6-7 means alarm only works for Saturday to Sunday.
Then press to finish alarm setting.
ThreeDucksDirect@outlook.com
5
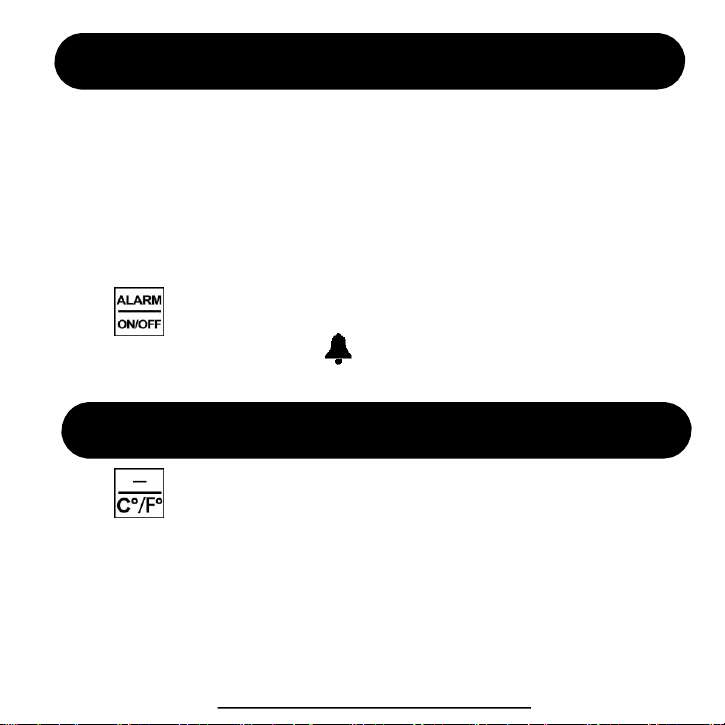
How to stop alarm?
1. When the alarm goes off, press any buttons to stop the alarm. It will
go off the next day.
2. Without any operation, the alarm will ring for 20 minutes and stop
automatically. It will still go off the next day.
Note: If you want to disable the alarm permanently,
press to turn it off so that it won’t go off the next day.
You will see the alarm icon disappear on the screen.
Temperature Unit
Press to change temperature from C° to F°.
Note: The temperature is detected by the sensor inside the clock. You
can’t set it manually.
ThreeDucksDirect@outlook.com
6
Daylight Saving Time
1. Press to turn ON / OFF AUTO DST, it’s for daylight saving time area.
It will automatically adjust displaying time on the 2
nd
Sunday of March and
1
st
Sunday of November. When it’s ON, the screen will show “AUTO DST”.
2. If your area doesn’t apply to daylight saving time, please turn DST OFF.
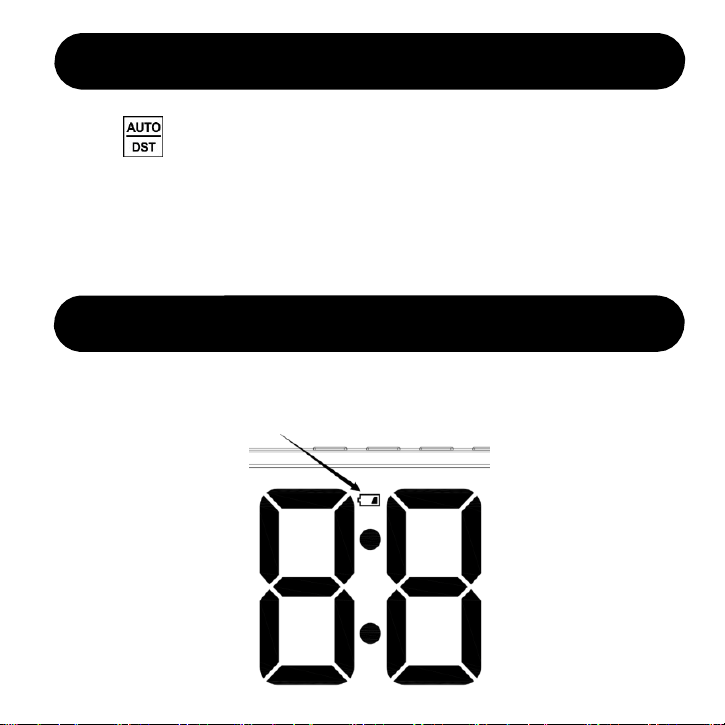
Low Battery Alarm
7
When the battery level falls below 5%, there is a low battery icon and the
battery icon keeps blinking, to remind it’s time to change battery.

FAQ
Q1: The day of the week is wrong.
This section summarizes the most common issues you may have. If you’re unable to
solve the issue, please feel free to contact ThreeDucksDirect@outlook.com.
The day of the week is calculated automatically. Please check if the “Year”,
“Month”, “Date” are set correctly. Many customers may have set a wrong “Year”.
Please press “Time Set” button to enter time setting, pay attention to something like
“2023” or “2024”. That’s the year value, you have to set a correct year so that the
day of the week will calculate correctly.
The temperature is detected by the inside sensor. The inside circuit may produce
heat, making it not so accurate as professional thermometer. It’s normal. We need
your understanding, after all, this is not a professional device as thermometer.
Q3: The temperature is inaccurate
For similar defective cases, please contact us via email. Provides pictures for us so
that we can better help you.
Q4: The clock goes blank accidently.
8
Press the “ALARM / ON – OFF” button to turn off the alarm permanently. Once
the alarm icon disappear, that means it’s already turn off permanently.
Q2: The alarm goes off unexpectedly. How can I turn it off permanently?
ThreeDucksDirect@outlook.com

We provide lifetime warranty to every customer.
Contact us to activate your lifetime warranty Now!
Don’t forget to include your order ID when contact.
FAQ
Email
Visit
ThreeDucksDirect@outlook.com
www.jall-us.com
Missing any accessories or any questions during usage, please contact us.
Q5: The remote control is not sensitive.Q5: The alarm doesn’t go off at preset time.
Please check if your alarm mode is set to 1-5 (Monday to Friday). In this mode, it
won’t go off on Saturday and Sunday.
Warranty
9