
Technical Support and E-Warranty Certificate
www.vevor.com/support
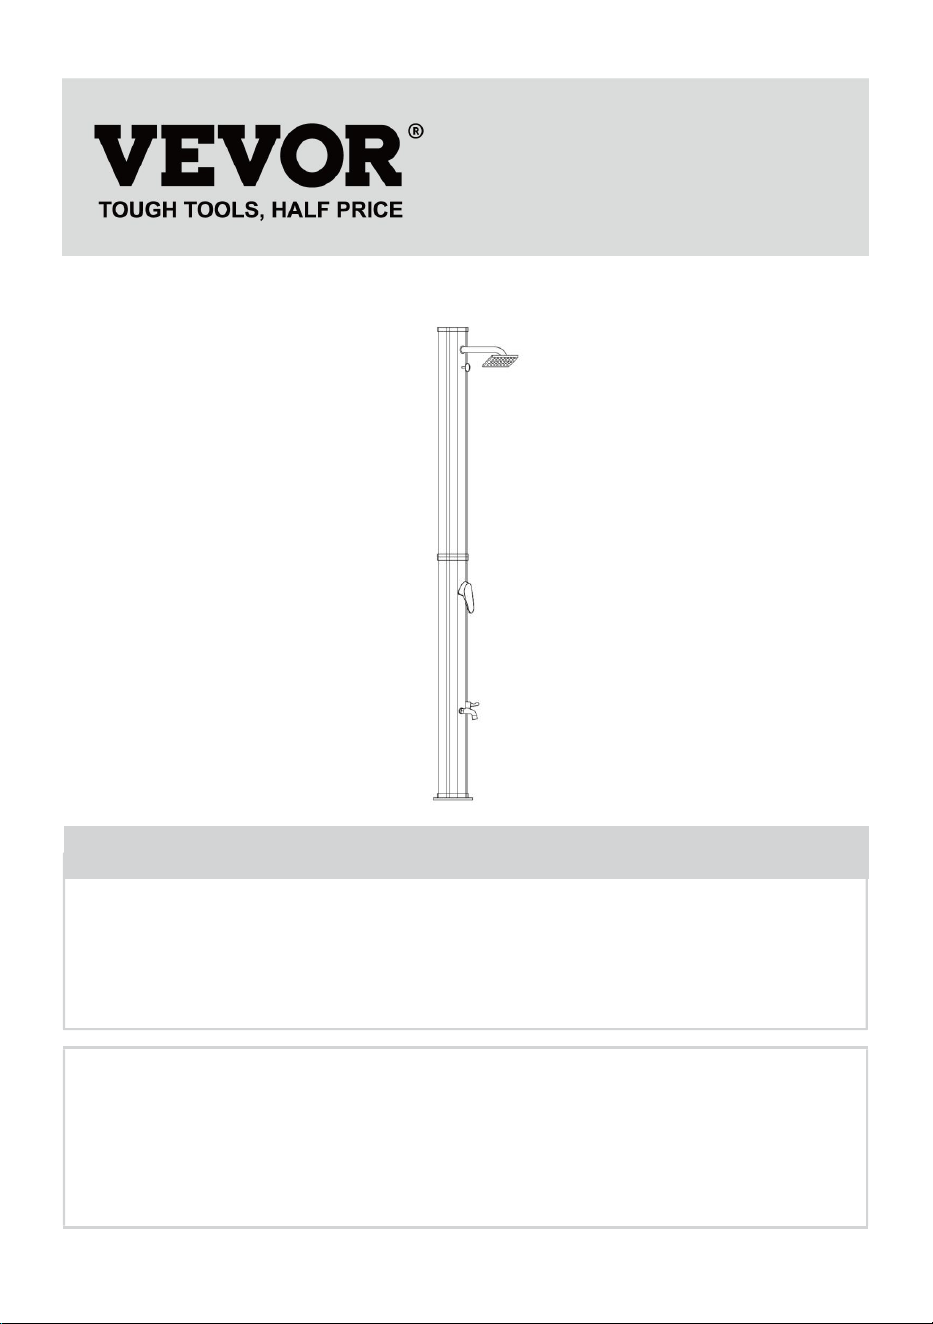
SOLAR HEATED SHOWER
MODEL:LY35L08
We continue to be committed to provide you tools with competitive price.
"Save Half", "Half Price" or any other similar expressions used by us only represents an
estimate of savings you might benefit from buying certain tools with us compared to the major
top brands and does not necessarily mean to cover all categories of tools offered by us. You
are kindly reminded to verify carefully when you are placing an order with us if you are
actually saving half in comparison with the top major brands.
- 1 -
MODEL:LY35L08
Have product questions? Need technical support? Please feel free to
contact us:
Technical Support and E-Warranty Certificate
www.vevor.com/support
NEED HELP? CONTACT US!
This is the original instruction, please read all manual instructions
carefully before operating. VEVOR reserves a clear interpretation of our
user manual. The appearance of the product shall be subject to the
product you received. Please forgive us that we won't inform you again if
there are any technology or software updates on our product.
SOLAR HEATED
SHOWER
- 2 -
Warning-To reduce the risk of injury, user must read
instructions manual carefully.
Keep small parts, plastic bags and other packaging out of
the reach of children.
Pay attention especially when unpacking your item. The danger of suffoca- tion!
Check the delivery for completeness. Later complaints cannot be accepted.
Check all elements and parts for damage. Despite careful control, products may
be damaged in transit. In this case, do not assemble your product. Defective parts
can endanger your health..
Never modify the product! Changes will cause the warranty
and the product may be unsafe or even dangerous.
Unpack all the parts and elements of the set and place the components on the top
of the carton or other clean surfaces. This protects your new product.
Please also pay attention not to scratch the floor while working with tools. Make
sure that this product is fully assembled before use, as shown in the illustration for
cleaning use a sponge and warm soapy water. Do not use solvent based-cleaners
or detergents - for example bleach. Those can damage the product..
Safety Instructions
Water from the shower is not suitable for drinking.
When not in use, the shower should be emptied and the tap turned
on to prevent the formation of germs.
- Make sure that no electrical appliances and/or power connections are in contact
with the shower or within reach of the shower's water jet.
- Avoid unintentional start-up.
- Do not use any additives such as cleaning agents or other liquids.
- 3 -
The shower water is not suitable for drinking. When not in use, the
shower should be emptied and the faucet kept quiet to prevent the
growth of bacteria. Wipe the shower clean after use.
- Make sure that no electrical devices and / or power connections are in contact
with shower or in the area of the shower sprinkler system.
- This is not an entertainment device. Do not climb, hang from the solar shower or
stand on the base. Use only as expected.
- Do not use the solar shower with a pedestal in strong winds. Wind can cause the
shower to become unstable and tip over, harming you, children, or property.
- Do not use additives such as detergents or other liquids.
- Keep small parts, hardware accessories and plastic bags out of the reach of
children.
- Reservation! In strong sunlight, the water temperature of the sun shower can
reach 60 ° C or 140 ° F.
Capacity
35 L
Max. water pressure
5 bar (72.5psi)
Shape
Octagon
Colour
Black
Intended Use
The solar shower is designed exclusively for outdoor showering. It is intended
exclusively for private use and not suitable for commercial use. The solar shower is
not a children's toy. Use the solar shower only as described in these operating
instructions. Any other use is considered improper and can lead to property
damage or even personal injury.
The manufacturer or dealer accepts no liability for damage caused by improper or
incorrect use.

- 4 -
Before Putting Into Service
1. Take the parts of the solar shower out of the packaging.
2. Check whether the delivery is complete.
3. The solar shower is equipped with a base and four ready-made drilling
arrangements for screw installation on firm ground. Make sure the screws are tight.
The filled solar shower is heavy and a fall could have dangerous consequences.
4. Please install the solar shower in the place where it has the most hours of
sunshine.
Important warning when drilling
Before drilling, make sure that there are no gas, water, or power lines at the drilling
site. Assembly only by competent persons. It is essential to pay attention to the
nature of the soil, as the attached fastening material is not suitable for all types of
soil. Inquire about the screws and dowels that are suitable for the respective
flooring. The manufacturer assumes no liability for an improper wall-dowel
connection and any resulting damage.
Cleaning and Maintenance
If the shower does not work properly after a while, the shower or inlet or outlet
openings could be blocked. Regular maintenance and cleaning are therefore
necessary to ensure that the shower functions properly. It is quite normal for a
sediment layer to form on the shower as the water evaporates. Environmental
influences also lead to dirt deposits. The shower should therefore be cleaned at
regular intervals. On the one hand, this increases the service life and, on the other
hand, also the effectiveness. To remove deposits and dirt from the shower, rub the
housing or fittings with a damp, soft cloth. Use only clear water and never cleaning
agents. Rinse the openings and the shower head with clean water to remove dirt.
Never use cleaning agents or other dirt-dissolving solutions to remove the dirt.
Maintain the device with care.
- 5 -
Check whether moving parts of the device work properly and do not jam, and
whether parts are broken or damaged so that the function of the device is impaired.
Have damaged parts repaired before using the device. Many accidents are
caused by poorly maintained equipment
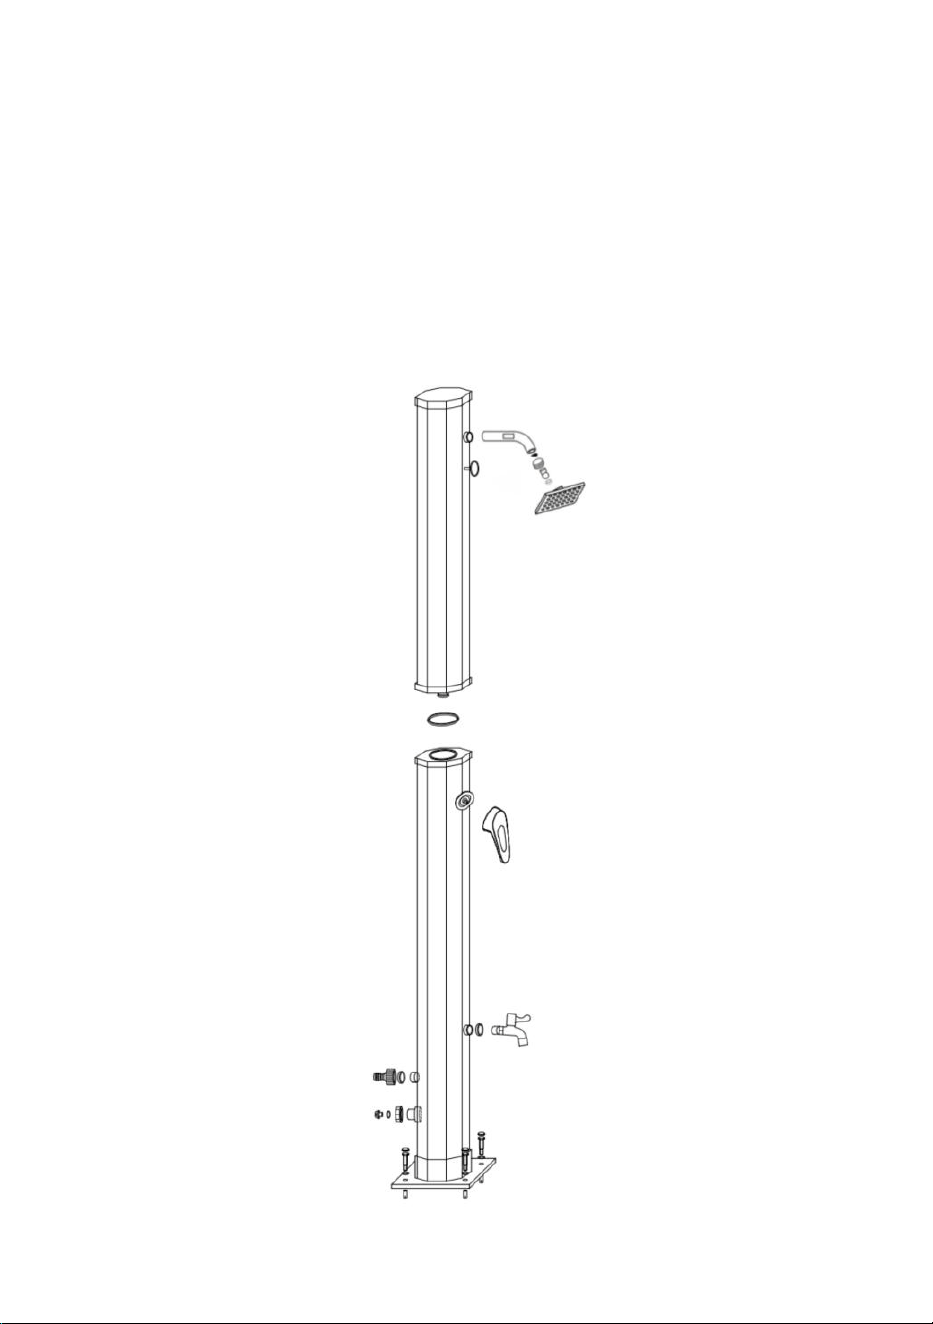
Assembly
Before you assembly, please make sure you have all parts, read all instructions.
- 6 -
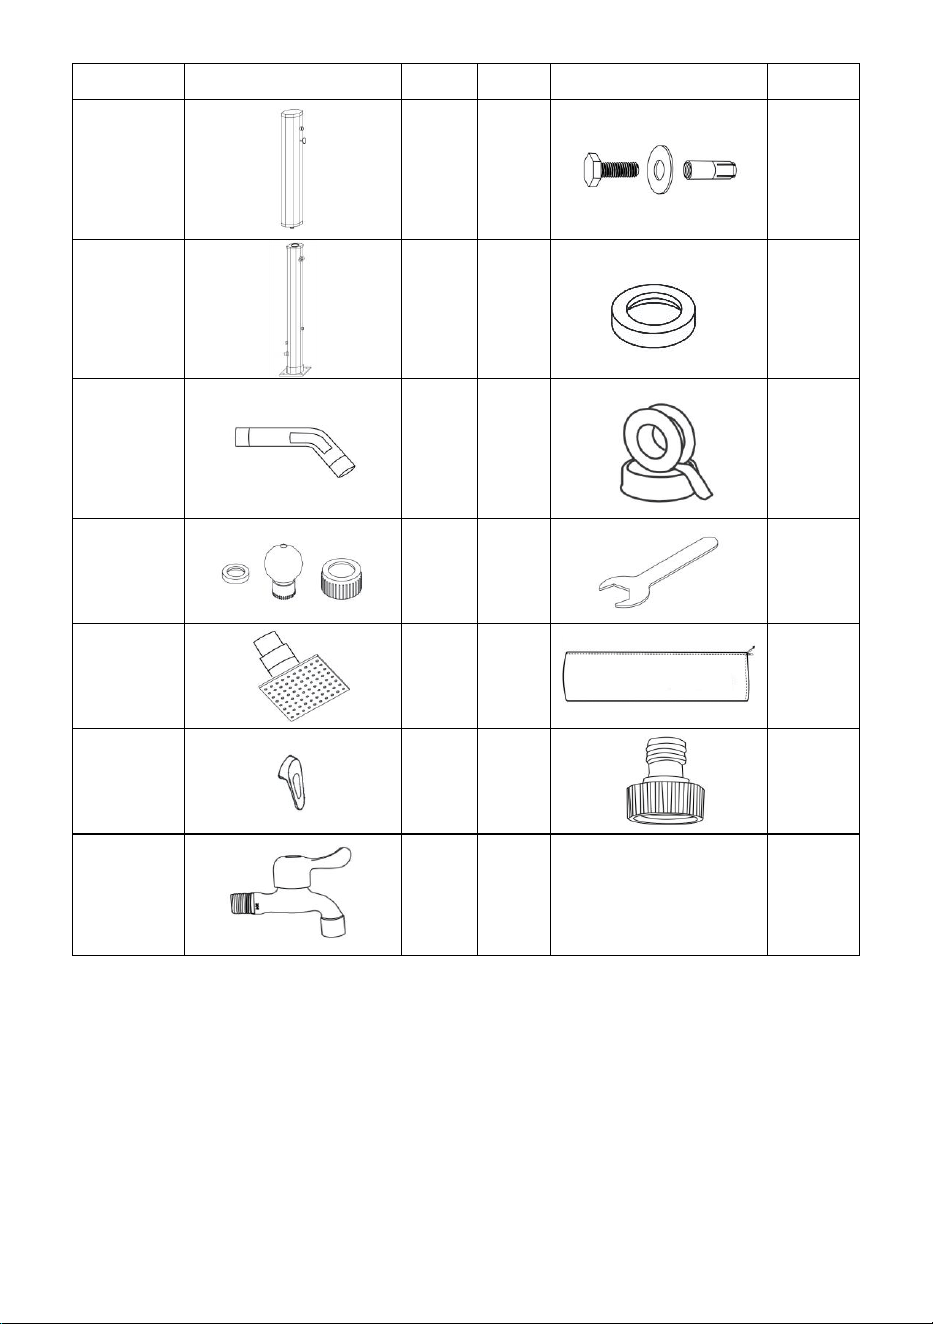
Item
Reference Image
QTY.
Item
Reference Image
QTY.
A
1
H
4
B
1
I
2
C
1
J
1
D
1
K
1
E
1
L
1
F
1
M
1
G
1
N
1
1. Screw both parts together with the connecting clamp. Pay attention to the
connection on the inside. These have to be put together exactly to avoid water
leaks.
2. Now check the shower for stability! Possibly. It may be necessary to retighten
the screws or place washers in between.
3. We recommend adding Teflon sealing tape to the assembly of the shower head

- 7 -
in order to achieve maximum tightness. Wrap 2 rounds (approx. 0.5 cm) of the
Teflon tape tightly around the rear part of the thread and then screw the shower
head with the tape into the shower body. Be careful not to damage the thread
when screwing it on. Too much force will damage the thread and unwanted water
leakage can occur. If the shower head is not yet completely sealed, unscrew it
again and wrap the thread again with Teflon tape.
If there are leaks in the head or foot piece please remove the respective parts,
wrap another 3-4 layers of Teflon tape around them and screw tight again.
The faucet is installed according to the same principle as the shower head. Wrap 2
rounds (approx. 0.5 cm) of Teflon tape around the thread of the tap. Then connect
the hexagon nut to the tap and screw the tap (as shown in the following illustration)
including the corresponding gaskets straight into the lower opening on the shower.
Ensure that the control valve points upwards and the tap opening points
downwards. Then tighten the hex nut using a wrench.
NOTE: when you turn off the shower,the water will stop leaking around 1 minute. It
is a normal phenomenon, not a quality defect.
- 8 -
DO NOT OVERTIGHTEN!
Please use some Teflon tape to ensure that the shower head and the foot shower
are screwed on watertight. Wrap a few layers (4-5 windings) of Teflon tape around
the thread and then screw it into the shower.
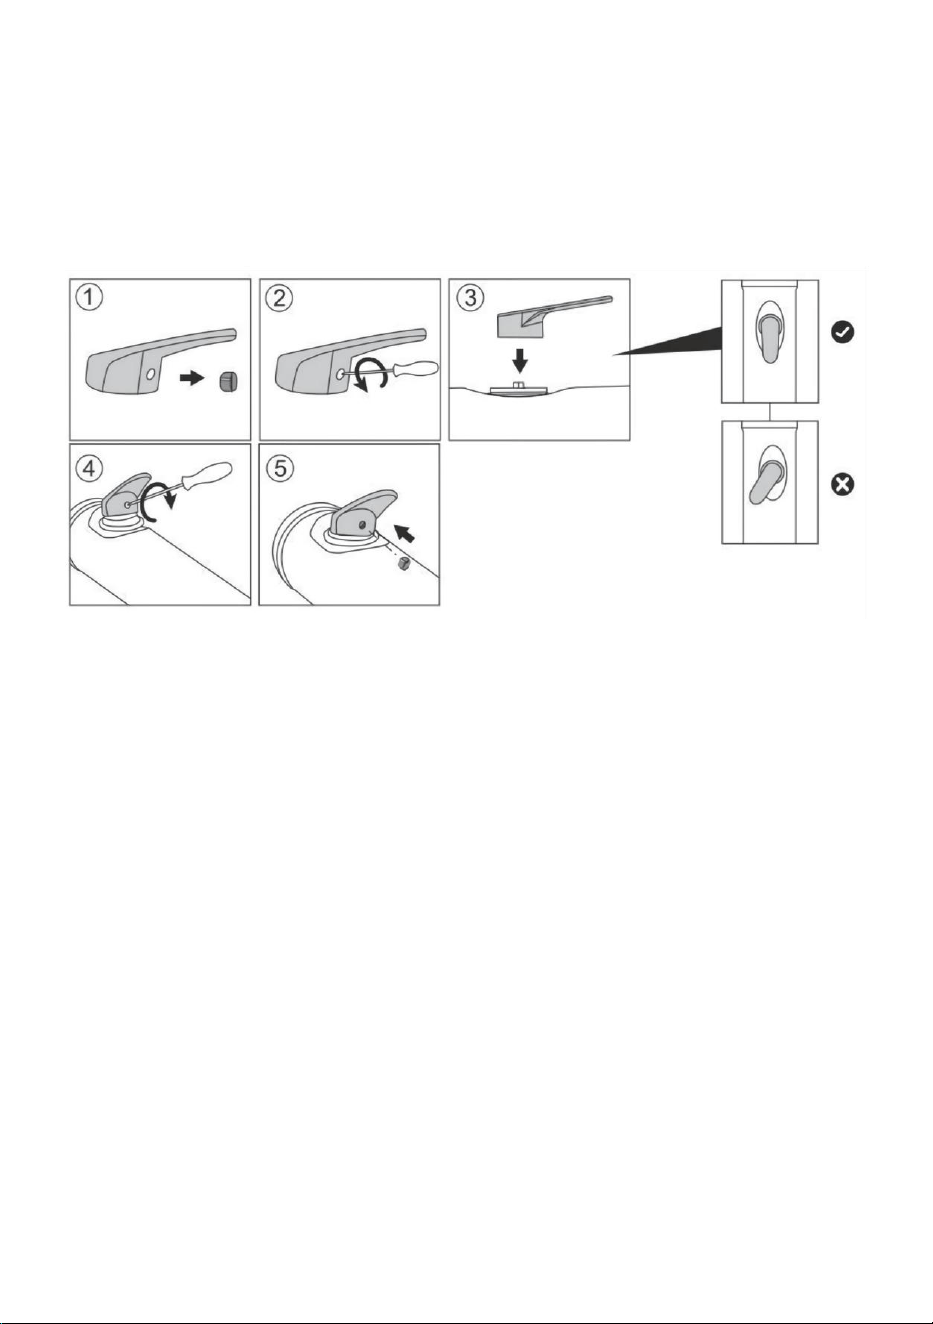
Note for the installation of the single-lever mixer:
1. Unscrew the grub screw slightly so that the handle can be fitted.
2. Put the handle on.
3. Tighten the grub screw.
4. Do not use too much force! Then put on the red cap.
5. Remove the cap.
6. Unscrew the grub screw slightly so that the handle can be fitted.
7. Put the handle on.
8. Tighten the grub screw.
Do not use too much force! Replace the cap! Replace the cap.

- 9 -
Storage and Maintenance
Make sure that there is no more water in the shower when you store it. Keep the
shower away from frost as it can damage the shower and its mechanism. At the
first sign of frost or as soon as it is foreseeable that frost may occur, the water in
the shower must at least be drained. If not done, the shower might be damaged.
However, we recommend that you dismantle the shower during the winter and
store it in a weather-protected place. Also, make sure you cover the boreholes as
they may be filled with dirt during the winter. To drain the water, first, remove the
water hose. Then open the warm water with the single-lever mixer (as if you
wanted to shower. This prevents the build-up of negative pressure) and then open
the shut-off valve at the foot of the shower.
Warning: Damage caused by mud, salt water or frost is not covered by our
warranty. Close the tap when you are not using the shower. Ideally, water should
flow out of the shower if a defect occurs.
In case of dripping water, please check the proper connection between the
shower head and the foot of the shower. In particular, check the temperature
regulator. If the temperature regulator is not closed, water will of course enter the
shower and exit the shower head. A slight leak at this point will also lead to a water
leak.
Made In China