
Loading ...
Loading ...
Loading ...
16
Install Door Handle (on some
models)
15. Install Door Handle
B
A
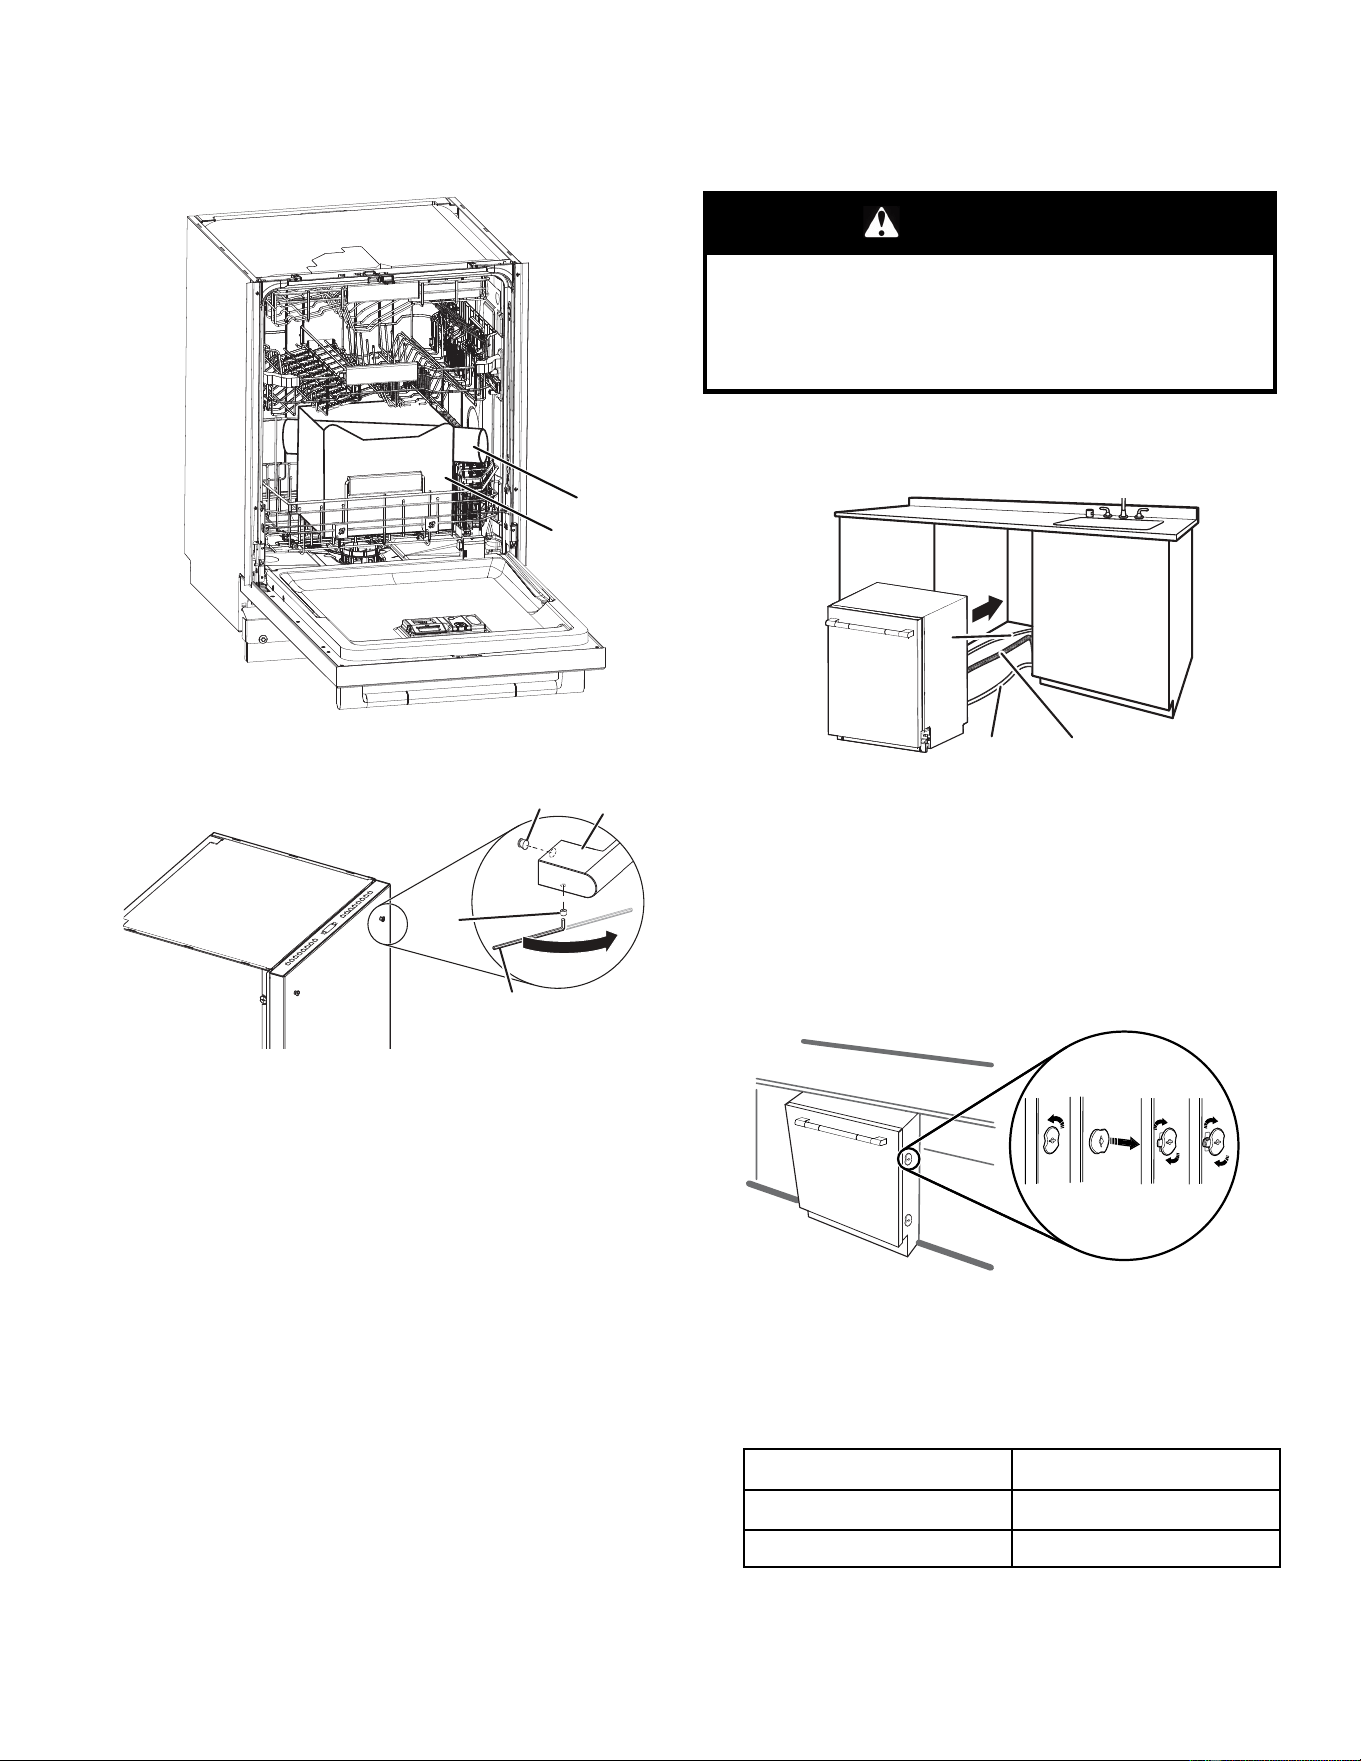
A. Cardboard box containing the Accessories
B. Cardboard tube containing the Door Handle (on some models)
A
D
B
C
A. Setscrew (in the bottom of the handle)
B. Hex key
C. Handle
D. Mounting stud
IMPORTANT: Do not scratch the front panel during this
procedure. If door panel has a protective film, peel film back
past the point of the handle studs before installing handle.
Handle is easiest to install while unit is on its back.
Remove the door handle and hex key from the packaging.
Setscrews are already installed in the handle. Place handle
on mounting studs with the setscrews facing towards the
bottom of dishwasher. Push the door handle tightly against
the door. Insert the short end of the hex key into the
setscrews. Tighten the setscrews 1/4 turn past snug.
Retain hex key with Owner’s Manual.
Place Dishwasher in Cabinet
Refer to the section “Electrical Connection” in this Owner’s
Manual for connecting to the power supply before placing the
dishwasher in the cabinet.
WARNING
Excessive Weight Hazard
Use two or more people to move and install or uninstall
appliance.
Failure to do so can result in back or other injury.
NOTE: Route water supply, drain hose, and power cord out the
rear of the dishwasher.
16. Move dishwasher close to cabinet opening
B
C
A
A. Water line
B. Junction box cable
C. Drain hose
Route the utilities through the holes in the cabinet and pull
the slack out at the same time as the dishwasher is pushed
into the cabinet.
NOTE: Route electrical lines only through the electrical
conduit hole that was previously sanded or protected by a
grommet.
17. Adjust side spacers
Measure the top and bottom width of opening of the frame
less cabinet. Remove and adjust the 4 included dishwasher
spacers, by turning 90 degrees, and removing with a slotted
screwdriver. Each spacer has 3 positions.
NOTE: If the cabinets are not frame less, additional spacers
will be required (included) and need to be applied by the
installer.
Types of Cabinets Types of Attachment
Frame less cabinets Plastic spacers
Face frame cabinets Metal brackets
See section “Secure Dishwasher in Cabinet Opening” in this
Owner’s Manual for Securing dishwasher with different types
of cabinets.
26-Jun-2023 08:47:55 EDT | RELEASED
In some European factories the letter "W" of the part code mentioned herein will be automatically
replaced by the number "4000" (e.g. "W12345678" becomes "400012345678")
Loading ...
Loading ...
Loading ...