Loading ...
Loading ...
Loading ...

K9-102+ & K9-204+ FlexShaft™ Drain Cleaning Machines
944-733-751.10_REV. B
15
17. Pull any remaining cable assembly from
the line by hand and push back into the
drum. Prepare the machine for transport.
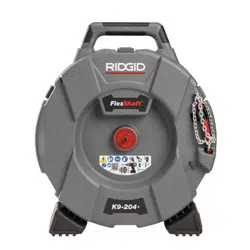
Draining the Drum
If needed, the drain cleaner can be turned to
allow any liquid in the housing to be drained
(see Figure 1 for drain hole location).
Transportation
Feed all of cable assembly into the drum
and secure the chain knocker in the hook.
Remove the drill from the drill shaft. Do not
leave the drill attached during transport to
prevent tipping and damage to the drain
cleaner. See Figure 1.
Storage
The Drain Cleaning Machine
must be kept dry and indoors or well cov-
ered if kept outdoors. Store the machine in
a locked area that is out of reach of children
and people unfamiliar with drain cleaning
machines. This machine can cause serious
injury in the hands of untrained users.
Maintenance
Instructions
WARNING
Drill should be removed from drain
cleaner before any maintenance is per-
formed.
Always wear safety glasses and other
appropriate protective equipment when
performing any maintenance.
Cleaning
It is good practice to use a towel to wipe dirt
and debris from the sheath as the cable as-
sembly is pulled from the drain and fed back
into the drum. This will help to keep the drum
clean and reduce the likelihood of the cable
assembly sticking in the drum. If needed,
cable assembly can be pulled from the ma-
chine and the housing opened for flushing/
cleaning.
Clean the machine as needed with hot soapy
water and/or mild disinfectants. Drain the ma-
chine as needed.
Lubrication
The FlexShaft Drain Cleaning Machines are
lubricated for life from the factory.
Cable Assembly Replacement
1. Pull entire cable assembly from housing.
2
. Using the provided hex wrench (or a sim-
ilar tool) open the latch under the carry
handle (Figure 14). Open other latches
holding housing closed.
Figure 14 – Open Latch Under Carry Handle
(Use Hex Wrench)
3. Open the housing (Figure 15).
Figure 15 – Drain Cleaner Housing Opened
4. Remove cable clamp fasteners, cable
clamp (Figure 15/16).
5
. Remove the ball detent pin from the cable
coupling.
6. R
emove the cable coupling from the a-
dapter coupling and remove the cable
assembly.
7
. Reverse process to assemble, securely
attaching all fasteners. Ensure sheath is
all the way to the end of the site window
in the cable clamp (see Figure 16).
WARNING
Gear Box
Detent Pin
Cable
Clamp
Adapter
Coupling
Loading ...
Loading ...
Loading ...