Loading ...
Loading ...
Loading ...
16
PRODUCT INSTALLATION
Step 7: Connecting the Tube
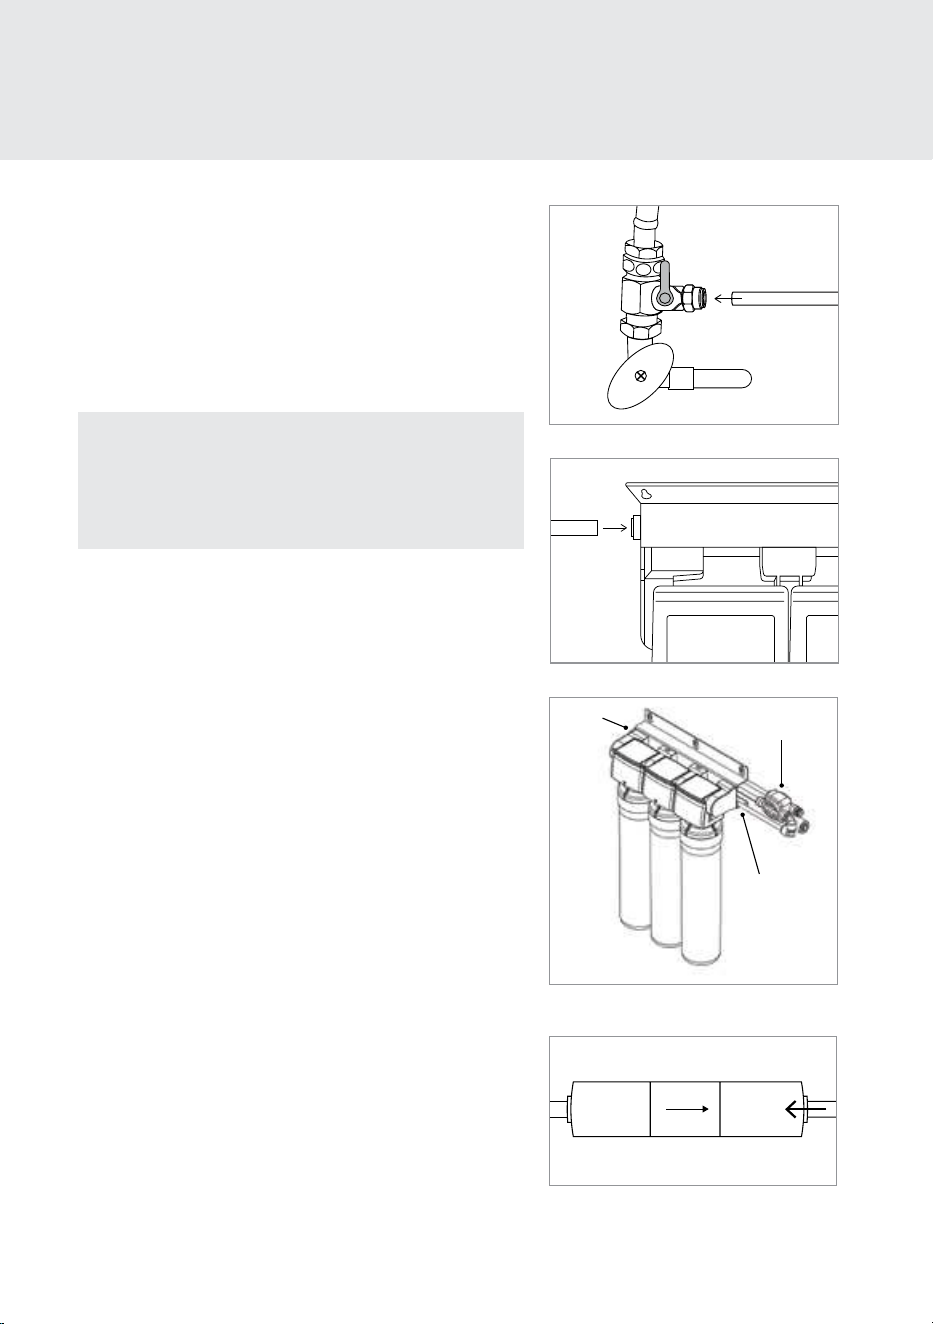
1. Water Supply Connection
a. Measure the distance from your T-valve to where
you have installed the filter head assembly, and cut
the white, Water Supply Tubing. Insert one end of
the tubing firmly into the Quick Connect fitting on
the open side of the T-valve. Be sure to push in all
the way, and ensure the tubing is not bent or kinked.
TIP: When cutting the Water Supply Tubing, use sharp
scissors or a cutting knife for a clean cut. The opening
edge of the tube should be even and clean. If the opening
is frayed or crimped, this may aect the flow of the water
running through the tube.
b. Connect the opposite end of the white Water Supply
Tubing into the 90° Quick Connect elbow labeled
“Inlet” located on the left side of the Filter Head
Connector Assembly.
2. Faucet Connection
Connect the open end of the Blue Tubing from the
Faucet to the Filter Head Connector Assembly “Outlet”
by inserting the Tube into the Quick Connect on the
right side. Be sure to push in all the way, and ensure
the tubing is not bent or kinked.
3. Brine Input to Flow Restrictor Connection
Take the opposite end of the 1/4" orange brine input
tube from the faucet, and firmly insert into the Quick
Connect on the Flow Restrictor. Be sure to push in all
the way and ensure the tubing is not bent or kinked.
Step 1a
Step 1b
FLOW
150
Step 3
Inlet
Outlet
Shut-o Valve
Assembly
Step 2
Inlet
Loading ...
Loading ...
Loading ...