Loading ...
Loading ...
Loading ...
17
BURNERS
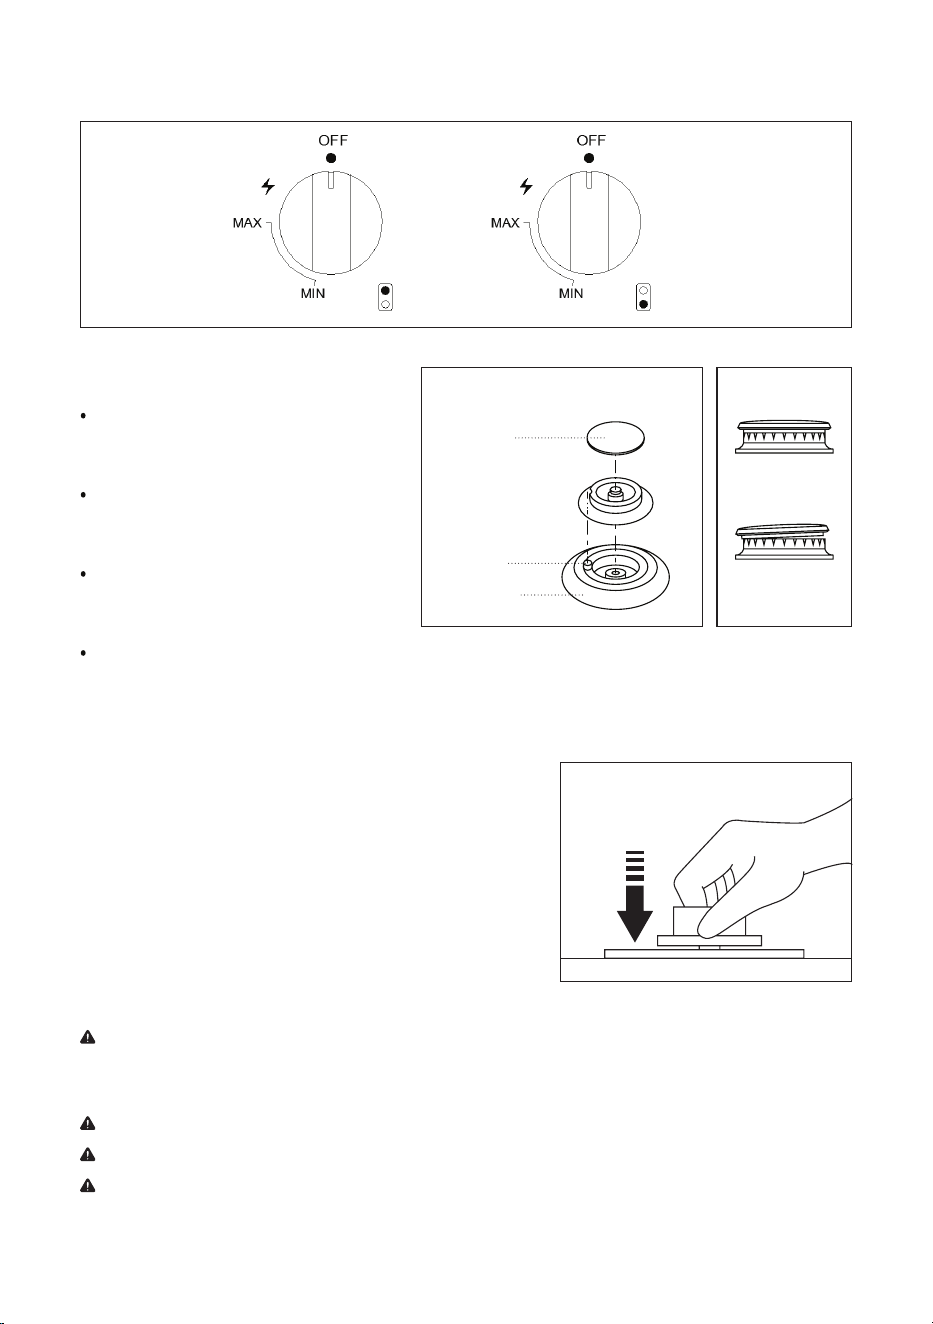
Place a burner cap on each burner head,
matching the cap size to the head size.
(Refer to Figure 22.)
The cap for each burner has an inner
locating ring which centers the cap
correctly on the burner head.
Be sure that all the burner caps and
burner heads are correctly placed BEFORE
using your appliance.
ELECTRIC GAS IGNITION
The gas burners utilize an electric ignition device located near each
burner. By the means of spark igniters ensure the surface cooktop to
light automatically.
1. Push in and turn the control knob counterclockwise to the LITE
position. All surface burners will click but only the burner with
control knob turned to LITE will produce a flame.
2. After the burner ignites, keep the knob pressed down for 10
seconds. (Refer to Figure 24.) This allows the thermocouple to
heat up and activate the safety valve.
Figure 23
Not Properly
Seated
Properly
Seated
Figure 22
Burner Cap
Burner Head Assembly
Electrode
Burner Base
CONTROL KNOBS
Figure 21
The color of the flame will reflect the proper burner adjustment. A good flame should be clear, blue and
steady. If the flame is yellow-orange in color then the burner needs to be adjusted or cleaned.
Figure 24
3. Check the flame to be even and then turn control knob to the desired flame size.
CAUTION: ALWAYS use caution when lighting burners manually.
4. In the instances of a power outage, carefully hold a lighted match to the burner ports and push and turn the
gas control knob to HI until it lights and then turn the knob to the desired setting.
NOTE: ALWAYS position cooking cookware on the burner grate BEFORE lighting the burner.
CAUTION: The flame SHOULD NOT extend beyond the sides or the pot or pan.
NOTE: If any burner flame g
oes out due to draft or other reasons, the gas valve will shut off the gas supply. To
re-ignite the burner, turn the gas valve to the ignition setting and push down the knob to ignite the burner.
Loading ...
Loading ...
Loading ...