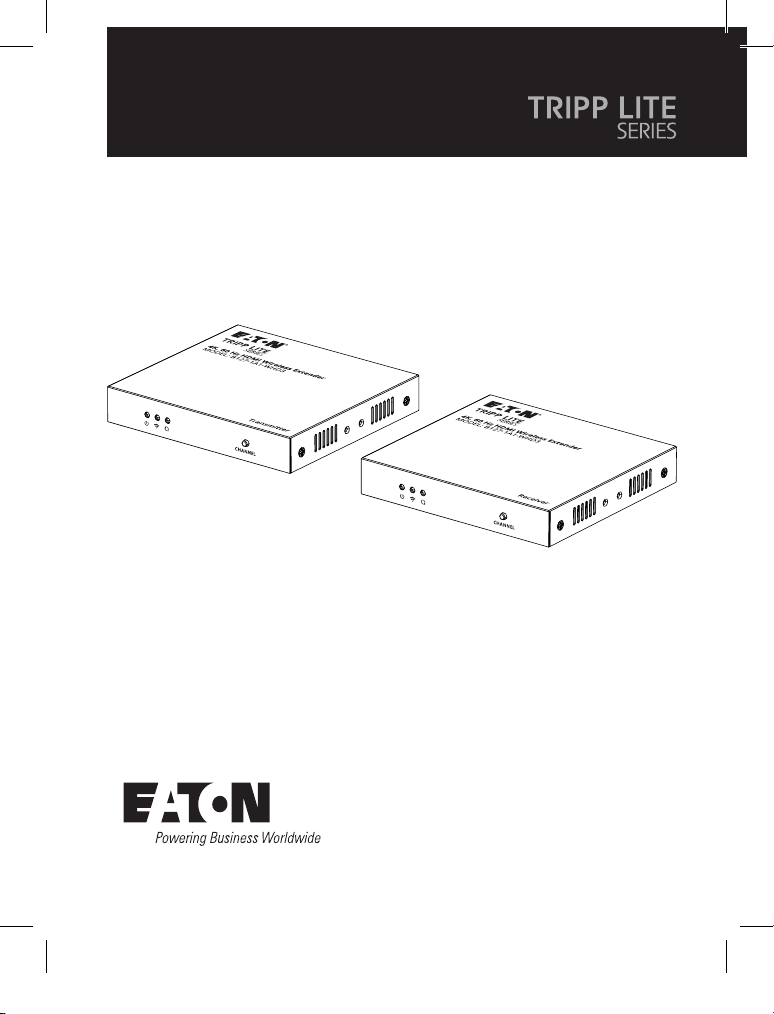
1
Owner’s Manual
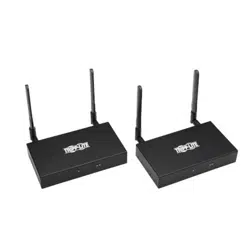
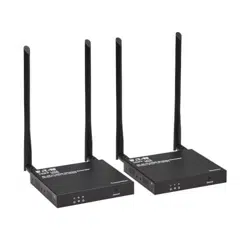
B127-1A1-WHD3
4K 60 Hz HDMI over Wireless
Extender Kit with IR
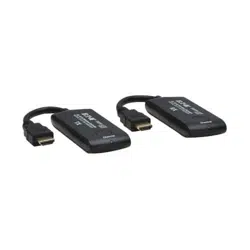
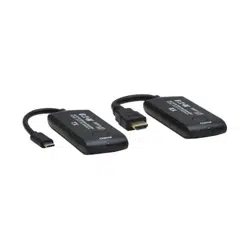
Purchased product
may differ from image.
Este manual está disponible en español en la
página de Eaton: Tripplite.Eaton.com/support
Ce manuel est disponible en français sur le site
Web de Eaton : Tripplite.Eaton.com/support
Dieses Handbuch ist in deutscher Sprache auf der
Eaton-Website verfügbar: Tripplite.Eaton.com/support
Questo manuale è disponibile in italiano sul sito
web di Eaton: Tripplite.Eaton.com/support
23-10-176-93-4991_revA.indd 123-10-176-93-4991_revA.indd 1 12/12/2023 2:26:17 PM12/12/2023 2:26:17 PM

2
Important Safety Instructions
Features
• Do not expose this device to rain or place it near water. Any liquid that goes
into the device may cause a failure, fire, or electric shock.
• Never insert anything metallic into the open parts of this device.
This may cause a danger of electric shock.
• Do not place this device near or over a radiator or heat register,
or where it is exposed to direct sunlight.
• The device should be repaired only by a qualified technician.
• If a third-party power supply is used, please ensure that the power supply
specifications meet the product requirements.
• Utilizes ipcolor STREAM technology to realize high definition and low-latency
transmission.
• Supports up to 3840x2160@60 Hz resolution, backward compatible.
• Supports wireless transmission up to 164 ft. / 50 m (line of sight).
• Transmitter supports HDMI loop out.
• Supports SSID pairing and channel switching to avoid interference.
• Supports IR passback.
• Supports 5G wireless frequency bands for strong anti-interference.
• Supports firmware upgrade via Micro USB port.
23-10-176-93-4991_revA.indd 223-10-176-93-4991_revA.indd 2 12/12/2023 2:26:18 PM12/12/2023 2:26:18 PM
3
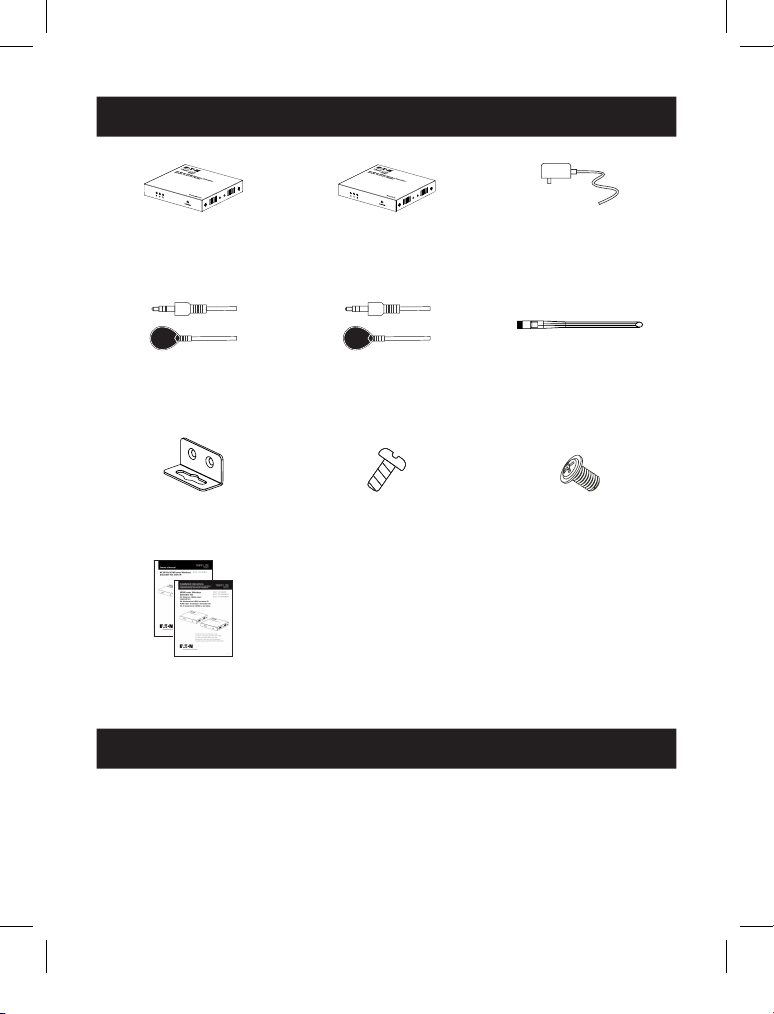
Package Contents
Transmitter x1
Receiver x1
5V 2A power
adapter x2
IR receiver extension
cable x1
IR blaster extension
cable x1
Antenna x4
Mounting ear x4
Screw x10
Grounding screw x2
User Documentation x1
Installation Requirements
• HDMI source device (DVD, game console, PC, etc.)
• HDMI display device (TV, projector, LED screen, etc.)
23-10-176-93-4991_revA.indd 323-10-176-93-4991_revA.indd 3 12/12/2023 2:26:18 PM12/12/2023 2:26:18 PM

4
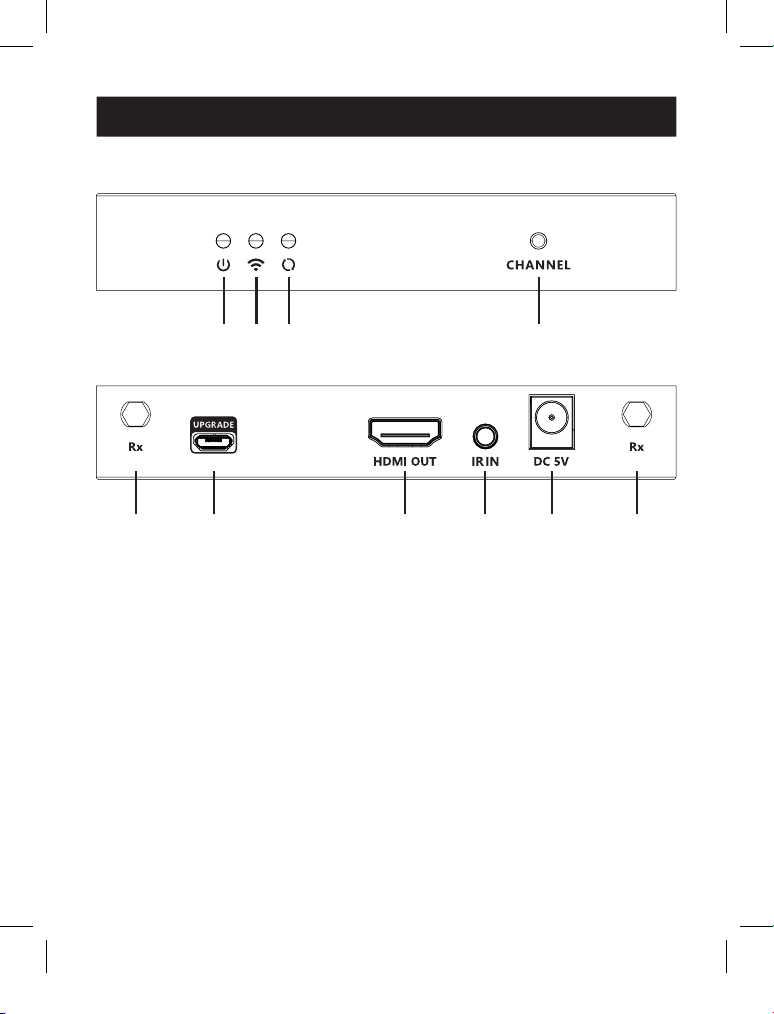
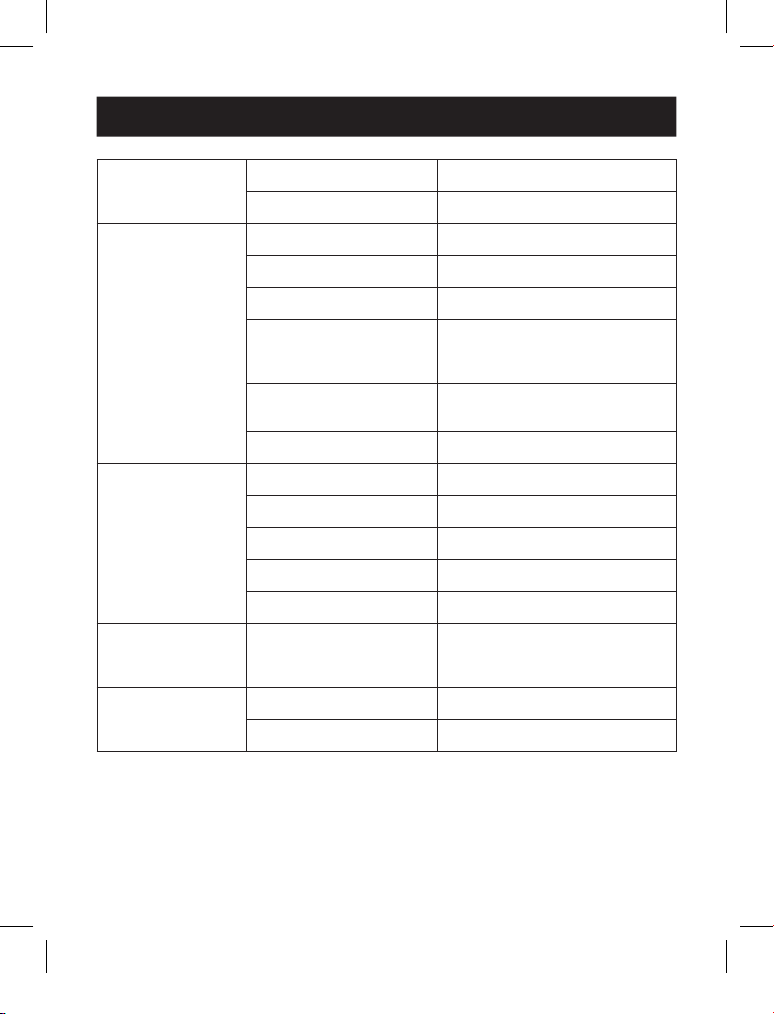
Product Description
Transmitter (TX)
1
1
2
2
3
3
4
4
5
5
6
6
7
7
8
8
9
9
5
5
0
0
10
23-10-176-93-4991_revA.indd 423-10-176-93-4991_revA.indd 4 12/12/2023 2:26:18 PM12/12/2023 2:26:18 PM

5
Product Description
1
Power indicator Turns blue when the power is turned on
2
WiFi indicator Slow flash: waiting for connection
Steady on: connection successful
Quick flash: SSID Pairing mode
3
Signal indicator Light off: no HDMI signal
Steady on: HDMI signal is transmitting
Quick flash: restore factory settings
4
Channel switch button Press to switch channels
Press and hold 5s for SSID pairing
Press and hold 10s to restore factory settings
5
Antenna connectors Connect with antennas
6
Micro USB port Used for firmware upgrade
7
HDMI input Connect with HDMI source device with
HDMI cable
8
HDMI output Connect with local HDMI display device
with HDMI cable
9
IR out Connect with IR blaster extension cable
J
Power input Connect with DC 5V/2A power adapter
23-10-176-93-4991_revA.indd 523-10-176-93-4991_revA.indd 5 12/12/2023 2:26:18 PM12/12/2023 2:26:18 PM
6
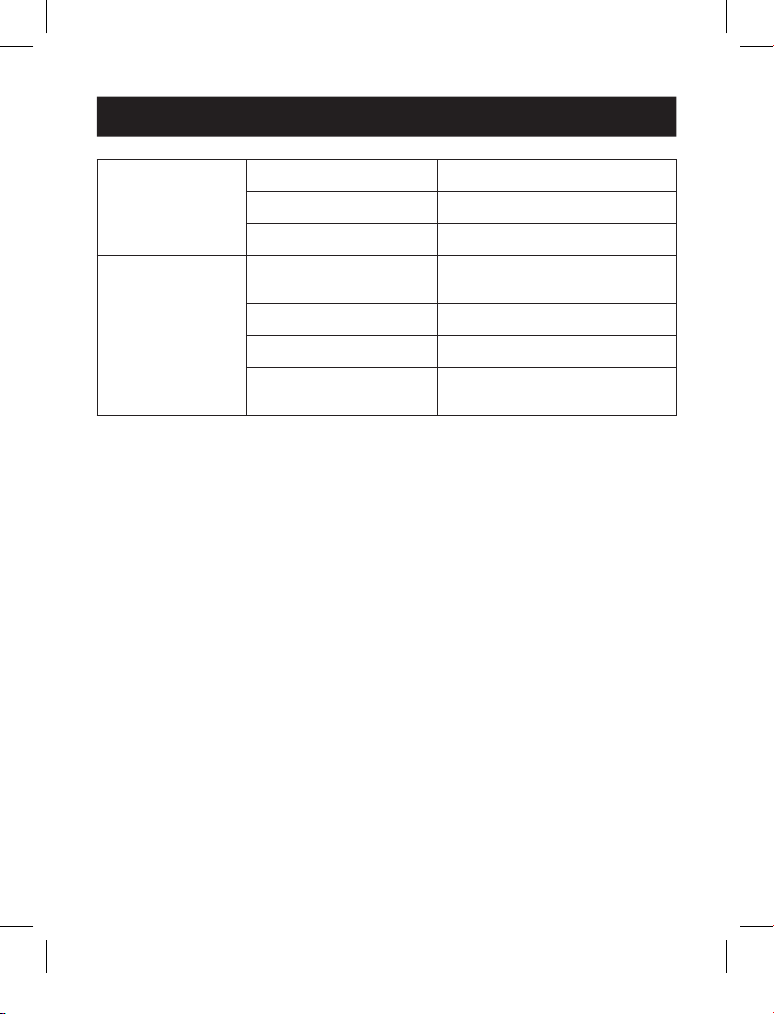
Product Description
Receiver (RX)
5
5
6
6
7
7
8
8
9
9
5
5
1
1
2
2
3
3
4
4
23-10-176-93-4991_revA.indd 623-10-176-93-4991_revA.indd 6 12/12/2023 2:26:18 PM12/12/2023 2:26:18 PM

7
Product Description
1
Power indicator Turns blue when the power is turned on
2
WiFi indicator Slow flash: waiting for connection
Steady on: connection successful
Quick flash: SSID Pairing mode
3
Signal indicator Light off: no HDMI signal
Steady on: HDMI signal is transmitting
Quick flash: restore factory settings
4
Channel switch button After connecting with TX, press to switch channels
Press and hold 5s for SSID pairing
Press and hold 10s to restore factory settings
5
Antenna connectors Connect with antennas
6
Micro USB port Used for firmware upgrade
7
HDMI output Connect with HDMI display device with
HDMI cable
8
IR in Connect with IR receiver extension cable
9
Power input Connect with DC 5V/2A power adapter
23-10-176-93-4991_revA.indd 723-10-176-93-4991_revA.indd 7 12/12/2023 2:26:18 PM12/12/2023 2:26:18 PM

8
Installation
1. Connection Diagram
One to one connection
Video Source
RX
HDMI Display
HDMI OUT
HDMI Display
TX
HDMI IN
2. Connection Instructions
1. Connect the source device to the HDMI IN port of the transmitter with an
HDMI cable, and connect the HDMI OUT port of the receiver to the display
device with another HDMI cable.
2. If using the IR passback function, connect the IR blaster extension cable into
the IR OUT port of the transmitter, and connect the IR receiver extension
cable into the IR IN port of the receiver.
a) The emitter of the IR blaster extension cable should be as close as
possible to the IR receiving window of the source device.
b) Point the remote control at the receiving head of the IR receiver
extension cable to operate.
3. Plug the power supply into the devices.
4. In the case of multiple sets being used at the same time in the same area.
In order to prevent mutual interference, switch each set of transmitters and
receivers to a different channel after they have been manually paired with
the SSID.
23-10-176-93-4991_revA.indd 823-10-176-93-4991_revA.indd 8 12/12/2023 2:26:18 PM12/12/2023 2:26:18 PM
9
Installation
3. SSID Pairing
1. Enter the SSID pairing mode by holding the transmitter and receiver's
channel switch buttons for five seconds. Both WiFi connection indicators
will flash quickly in yellow.
2. When the SSID pairing is successful, the WiFi indicators on the transmitter
and receiver will change from quick flashing to slow flashing or steady on.
NO. Frequency
Channel 1 5.180 GHz
Channel 2 5.200 GHz
Channel 3 5.220 GHz
Channel 4 5.240 GHz
23-10-176-93-4991_revA.indd 923-10-176-93-4991_revA.indd 9 12/12/2023 2:26:18 PM12/12/2023 2:26:18 PM

10
FAQ
Q: Why the receiver and transmitter cannot be connected, showing
"Search ipcolor Tx..." on the screen?
A: 1) Move transmitter and receiver closer.
2) Re-power the transmitter or receiver.
3) Re-pair the transmitter and receiver.
Q: Why is the Wi-Fi indicator steady on. but showing
"Please check the TX input signal"?
A: 1) Make sure the TX has HDMI input and that the resolution is within the
specified range.
2) Try to connect the signal source directly to the display device, or change the
signal source and HDMI cable and test again.
Q: Why is the display stuttering or unstable?
A: 1) Place the transmitter or receiver within the signal coverage and minimize
obstructions between the transmitter and receiver.
2) Switch to a different channel to avoid interference from other
wireless signals.
3) Re-power the receiver or transmitter.
23-10-176-93-4991_revA.indd 1023-10-176-93-4991_revA.indd 10 12/12/2023 2:26:18 PM12/12/2023 2:26:18 PM
11
Specifications
Power Supply Voltage/Current DC 5V/2A
Power consumption TX ≤ 6W, RX ≤ 4W
HDMI Performance
and Interface
HDMI version HDMI 2.0
HDCP version HDCP 1.4/HDCP 2.2
Maximum transfer rate 18 Gbps
Resolution supported 3840x2160@24/30/50/60 Hz,
1080p@50/60 Hz, 720P@50/60 Hz,
1920x1200, 2560x1440, 2560x1600
Input and output
TMDS signal
0.7~1.2Vp-p(TMDS)
Input and output DDC signal 5Vp-p(TTL)
Transmission Wi-Fi Frequency bands 5.18~5.24 GHz
Transmission distance ≤ 50m
Latency 130~180ms
Connection types One-to-one
SSID pairing Supported
Protection Level ESD protection 1a Contact discharge level 3
1b Air discharge level 3
Standard: IEC61000-4-2
IR Performance Infrared frequency 20~60 kHz
Receiving range ≤ 5m
23-10-176-93-4991_revA.indd 1123-10-176-93-4991_revA.indd 11 12/12/2023 2:26:18 PM12/12/2023 2:26:18 PM
12
Operating
Environment
Operating temperature -4~140°F (-20~60°C)
Storage temperature -22~158°F (-30~70°C)
Humidity (non-condensing) 0~90% RH
Physical Properties Dimensions [W x L x H] TX / RX: 4.5 x 5 x 0.8 in.
(115 x 125 x 20.6 mm)
Color Black
Material Iron
Net weight TX: 0.78 lb. (353 g)
RX: 0.76 lb. (346 g)
Specifications
23-10-176-93-4991_revA.indd 1223-10-176-93-4991_revA.indd 12 12/12/2023 2:26:18 PM12/12/2023 2:26:18 PM

13
1-Year Limited Warranty
We warrant our products to be free from defects in materials and workmanship
for a period of one (1) year from the date of initial purchase. Our obligation under
this warranty is limited to repairing or replacing (at its sole option) any such
defective products. Visit Tripplite.Eaton.com/support/product-returns before
sending any equipment back for repair. This warranty does not apply to
equipment which has been damaged by accident, negligence or misapplication
or has been altered or modified in any way.
EXCEPT AS PROVIDED HEREIN, WE MAKE NO WARRANTIES, EXPRESS OR IMPLIED,
INCLUDING WARRANTIES OF MERCHANTABILITY AND FITNESS FOR A PARTICULAR
PURPOSE. Some states do not permit limitation or exclusion of implied warranties;
therefore, the aforesaid limitation(s) or exclusion(s) may not apply to the purchaser.
EXCEPT AS PROVIDED ABOVE, IN NO EVENT WILL WE BE LIABLE FOR DIRECT,
INDIRECT, SPECIAL, INCIDENTAL OR CONSEQUENTIAL DAMAGES ARISING OUT OF
THE USE OF THIS PRODUCT, EVEN IF ADVISED OF THE POSSIBILITY OF SUCH
DAMAGE. Specifically, we are not liable for any costs, such as lost profits or
revenue, loss of equipment, loss of use of equipment, loss of software, loss of
data, costs of substitutes, claims by third parties, or otherwise.
Product Registration
Visit Tripplite.Eaton.com/warranty today to register your new product. You’ll be
automatically entered into a drawing for a chance to win a FREE Eaton Tripp Lite
series product!*
* No purchase necessary. Void where prohibited. Some restrictions apply.
See website for details.
Regulatory Compliance Identification Numbers
For the purpose of regulatory compliance certifications and identification, your
product has been assigned a unique series number. The series number can be
found on the product nameplate label, along with all required approval markings
and information. When requesting compliance information for this product, always
refer to the series number. The series number should not be confused with the
marking name or model number of the product.
Warranty and Product Registration
23-10-176-93-4991_revA.indd 1323-10-176-93-4991_revA.indd 13 12/12/2023 2:26:18 PM12/12/2023 2:26:18 PM

14
Warranty and Product Registration
WEEE Compliance Information for Customers and Recyclers (European Union)
Under the Waste Electrical and Electronic Equipment (WEEE) Directive and
implementing regulations, when customers buy new electrical and electronic
equipment from Eaton, they are entitled to:
• Send old equipment for recycling on a one-for-one, like-for-like basis
(this varies depending on the country)
• Send the new equipment back for recycling when this ultimately
becomes waste
Eaton has a policy of continuous improvement. Specifications are subject to
change without notice.
23-10-176-93-4991_revA.indd 1423-10-176-93-4991_revA.indd 14 12/12/2023 2:26:18 PM12/12/2023 2:26:18 PM

15
23-10-176-93-4991_revA.indd 1523-10-176-93-4991_revA.indd 15 12/12/2023 2:26:18 PM12/12/2023 2:26:18 PM

16
Eaton
1000 Eaton Boulevard
Cleveland, OH 44122
United States
Eaton.com
© 2023 Eaton
All Rights Reserved
Publication No. 23-10-176 /
93-4991_revA
December 2023
Eaton is a registered
trademark.
All trademarks are property
of their respective owners.
23-10-176-93-4991_revA.indd 1623-10-176-93-4991_revA.indd 16 12/12/2023 2:26:18 PM12/12/2023 2:26:18 PM