Loading ...
Loading ...
Loading ...
ENGLISH
7
The installation must conform with local codes or, in the absence of local codes, with either the national fuel gas code, ANS Z 223.1/
NFPA 54, Natural gas and propane installation code, CSA B149.1, or propane storage and handling code, B149.2.
1. Do not store a spare LP gas cylinder under or near this appliance.
2. Never fill the gas cylinder beyond 80 percent full.
3. If the information in 1) and 2) is not followed exactly a fire causing death or serious injury may occur.
4. Place dust cap on cylinder valve outlet whenever the cylinder is not in use. Only install the type of dust cap on the
cylinder valve outlet that is provided with the cylinder valve. Other types of caps or plugs may result in leakage of
propane.
5. The LP gas cylinder used must have a collar to protect the gas cylinder valve.
6. Always keep the LP cylinder at 90 degrees (upright) orientation to provide vapor withdrawl.
NOTE: The normal flow of gas through the regulator and hose assembly can create a humming noise. A low
volume of noise is perfectly normal and will not interfere with operation of the grill. If humming noise
is loud and excessive you may need to purge air from the gas line or reset the regulator excess gas flow
device. This purging procedure should be done every time a new LP gas tank is connected to your grill.
INSTALLING A GAS CYLINDER FOR TABLE-TOP USE
Your grill can quickly and easily be removed from the cart for table-top use and easy transportation.
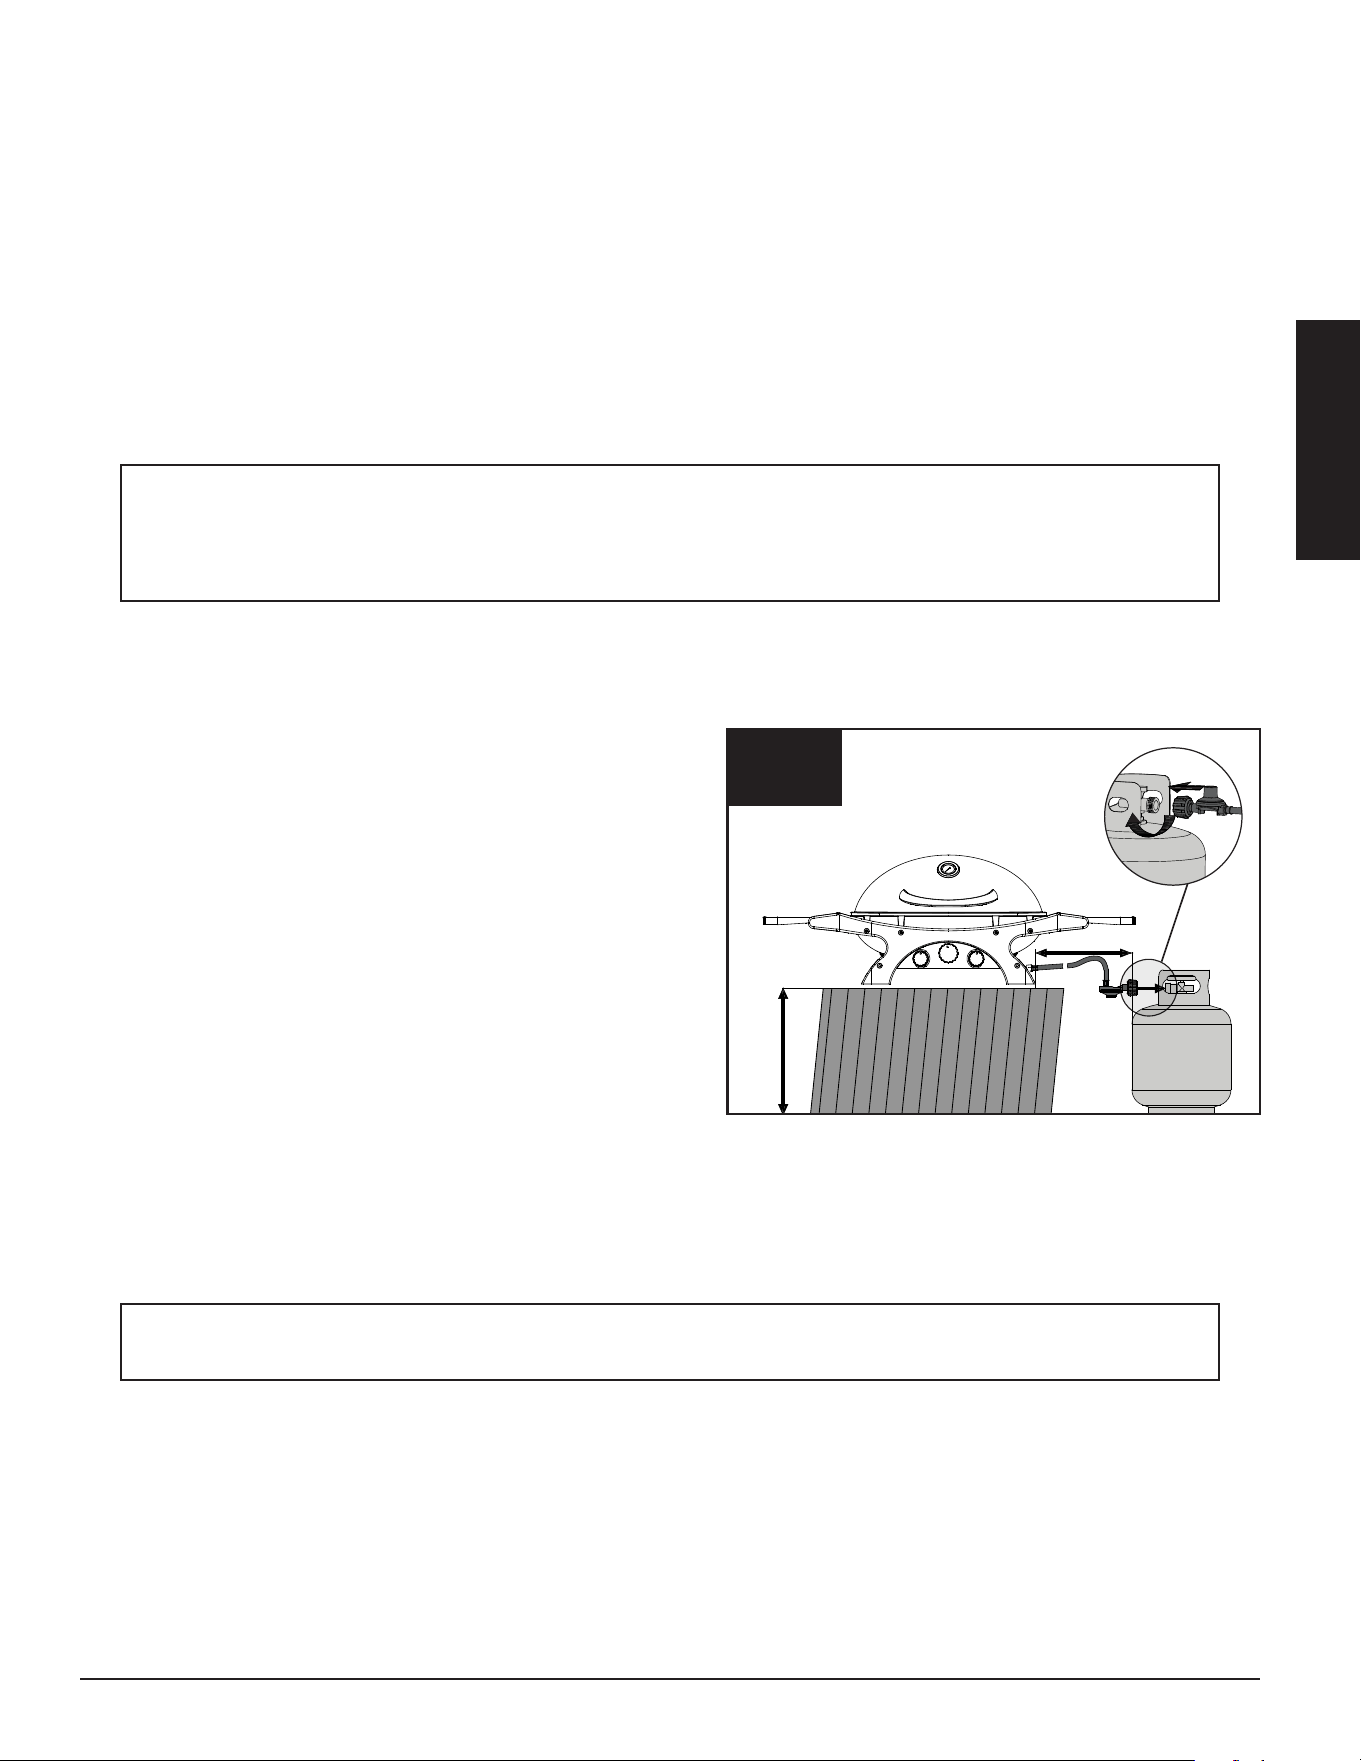
1. Before connecting, ensure there is no debris caught in the
head of the LP gas cylinder, head of the regulator valve, or in
the head of the burner and burner ports.
2. Place the grill on a non-combustible surface. Next, place a gas
cylinder next to the grill on the right side, keeping a clearance
of 30 cm / 12 inches between the grill and gas cylinder. Ensure
the regulator hosing is clear of any obstructions and does not
cause a tipping hazard. Make sure the gas cylinder valve is in
the CLOSED position. It is important to ensure the gas cylinder
is completely upright, as it is unsafe to operate the grill if the
gas cylinder is not properly level or on a stable surface.
3. Ensure the regulator valve on the grill is completely closed by
turning the knobs clockwise to the "OFF" position.
4. Remove the protective caps from the regulator valve opening and the top of the gas cylinder. Save the caps. Check the gas
cylinder to assure it has proper external male threads (type 1 connection per ANS Z21.81).
5. Insert the gas cylinder valve into the threaded opening of the regulator valve. Turn the quick coupling nut clockwise until
firm. Hand-tighten only.
6. Gas cylinder is now installed.
WARNING: Shut off the gas cylinder if you smell gas. Attempt to re-install gas cylinder to ensure that tube
is connected properly.
PB2BPGG
PB3BPGG
30 CM / 12 IN
40 CM
15 IN
Loading ...
Loading ...
Loading ...