Loading ...
Loading ...
Loading ...
12 13
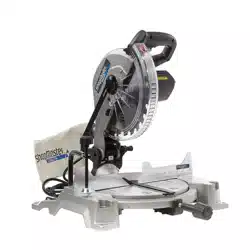
Refer to Figure 12.
1. Unplug the saw
2. Lower the saw arm all the way down to the transport
position and engage the lock pin to hold it in place.
3. Rotate the mitre lock handle (A). Position the table so
that the mitre scale indicator ( B) reads 0°.
4. Rotate the mitre lock handle to the locked position so
that the table will not move.
5. Loosen bevel lock knob (D) and adjust the angle of
saw arm so that the bevel scale indicator (C) reads
0°. This positions the blade at 90° to the table.
6. Securely tighten bevel lock knob.
7. Place a combination square (E) against the table and
the face of the saw blade (F).
NOTE: Make sure that the square contacts the flat part of
the saw blade, not the blade teeth.
8. Rotate the blade by hand and check the blade-to-
table alignment at several points.
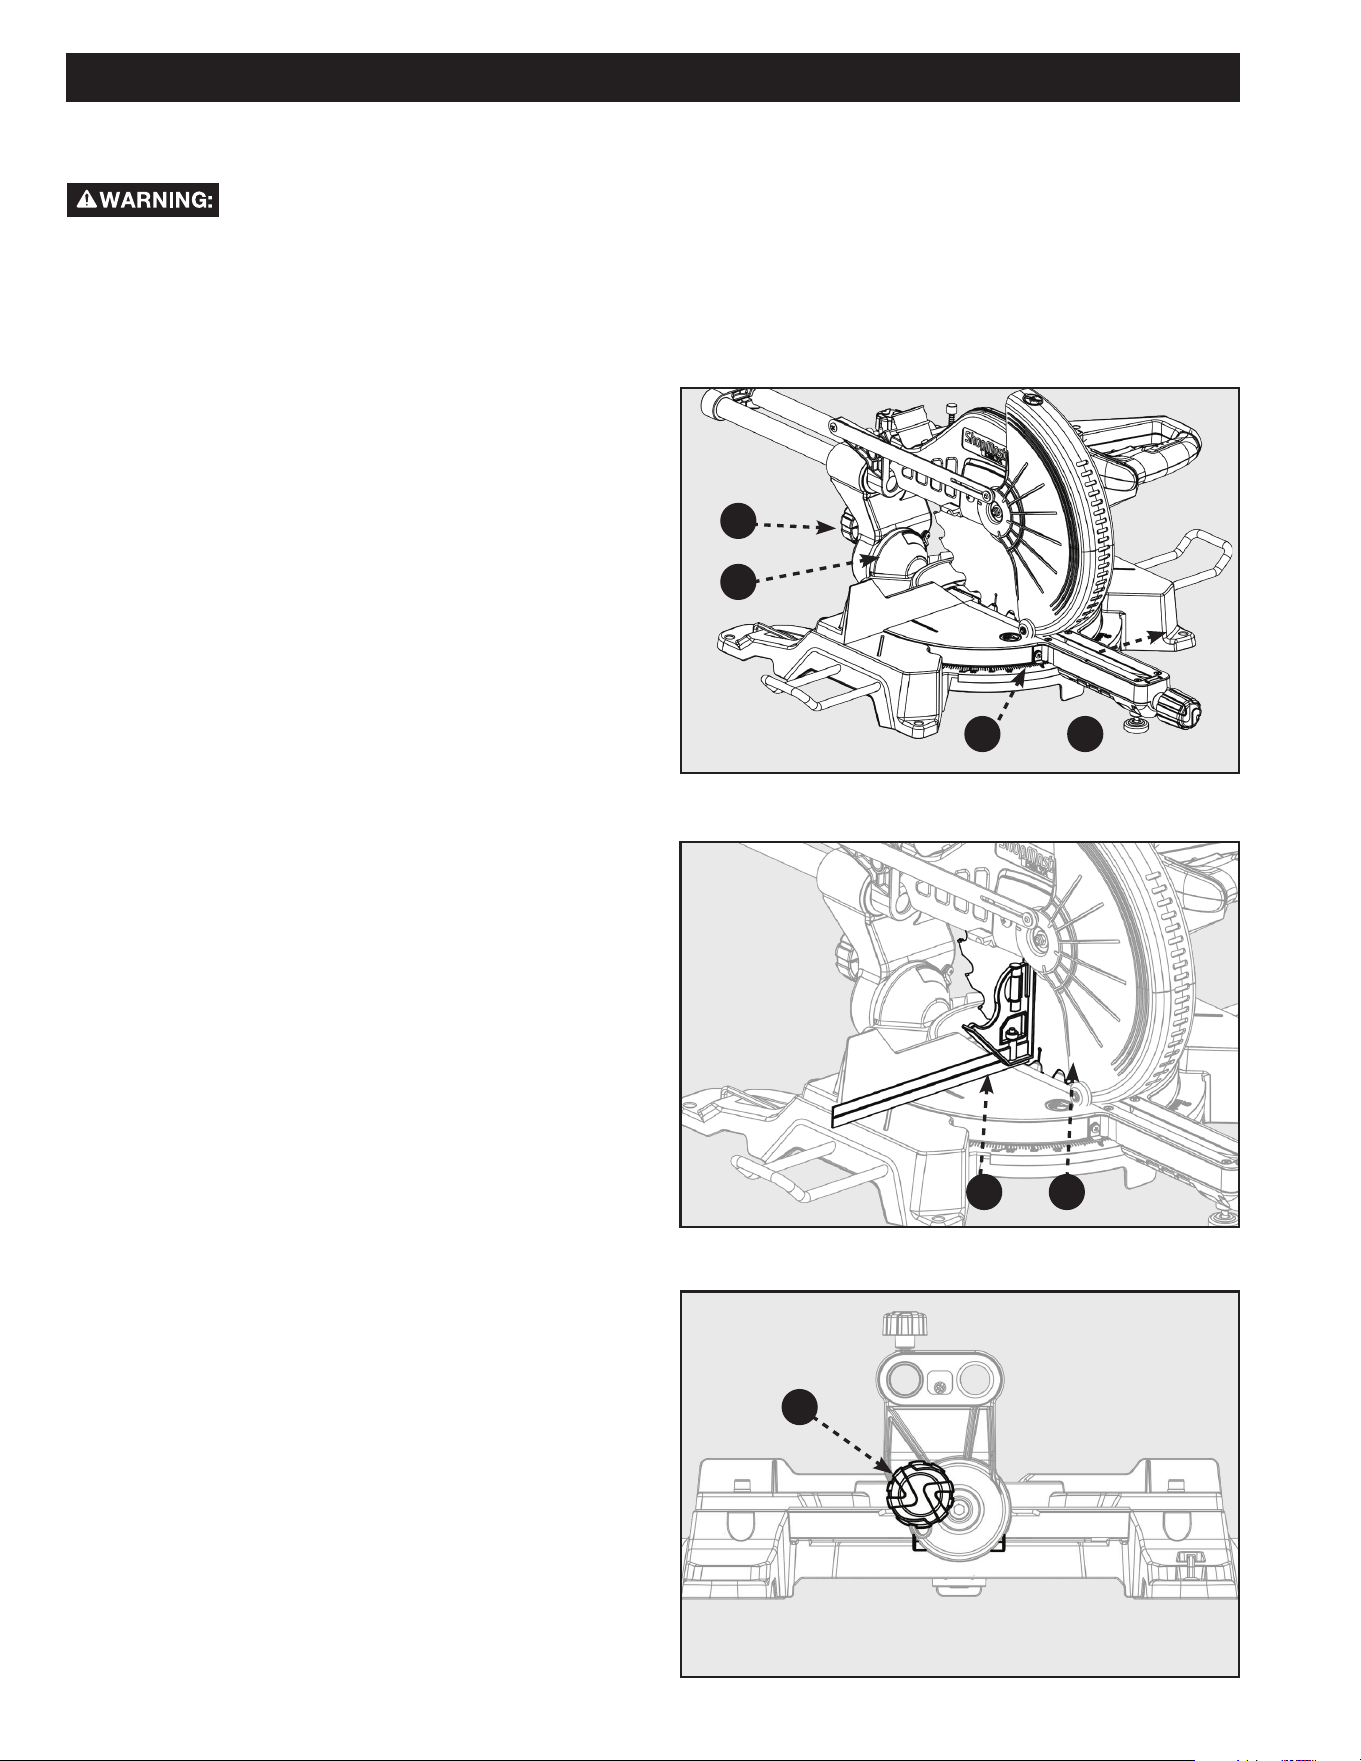
9. The edge of the square and the saw blade should be
parallel as shown in Figure 13.
10. If the top or bottom of the blade face is not flush with
the square, refer to Figure 14 below and perform the
following steps.
11. Loosen bevel lock knob (G).
12. Adjust positive stop adjustment screw (not shown) to
bring saw blade into alignment with the square. See
“Positive Stop Screw” in the Adjustment section.
13. Re-tighten bevel lock knob. Recheck blade-to-blade
alignment.
NOTE: The above procedure can be used to check
alignment of the blade to the mitre table at both 0° and
45° angles.
The saw has two scale indicators, one on the bevel scale
and one on the mitre scale. After squaring adjustments
have been made, it may be necessary to loosen the
indicator screws and reset them to zero.
PREPARING YOUR SAW FOR USE
FIGURE 12
FIGURE 13
FIGURE 14
ALIGN THE BLADE TO THE TABLE
E
A
B
C
D
G
F
11. Replace the blade bolt cover and tighten blade bolt cover screw securely. Lower blade guard.
12. Raise and lower the saw arm to ensure that the arm and blade guard move freely.
Make sure the spindle lock button is not engaged before reconnecting saw to power source. Never
engage spindle lock button when blade is rotating.
NOTE: Some illustrations in this manual indicate only portions of the saw. This is done in order to more clearly show key
areas and components of the saw. Never operate the saw without all guards securely in place and in good operating
condition.
Loading ...
Loading ...
Loading ...